Quick Answer
Interfacing is a stabilizing fabric layer sewn or fused between your main fabric and lining (or facing) to add structure, support, and body to specific areas of a garment or project. You need interfacing whenever a fabric area requires extra crispness, durability, or shape retention, such as collars, cuffs, buttonholes, waistbands, and bag straps. Skipping interfacing on projects that call for it results in floppy, unprofessional-looking finished pieces that lose their shape quickly.
Key Takeaways
- Interfacing adds structure and stability to fabric areas that need to hold their shape, such as collars, cuffs, buttonholes, and waistbands.
- Two main types exist: fusible (iron-on with heat-activated adhesive) and sew-in (stitched into seams), each suited to different fabrics and projects.
- Weight matters: lightweight interfacing for delicate fabrics like silk, medium weight for cotton shirts, heavyweight for structured bags and outerwear.
- Skipping interfacing leads to droopy collars, stretched-out buttonholes, and projects that look homemade rather than professional.
- Knit interfacing exists specifically for stretchy fabrics, maintaining the fabric’s natural give while adding support.
- Cost is minimal: most interfacing runs $3-8 per yard at fabric stores, making it an affordable upgrade to project quality.
- Common beginner mistakes include using the wrong weight, applying fusible interfacing to the wrong fabric side, or skipping pre-shrinking.

What Is Interfacing in Sewing?
Interfacing is a textile product designed to be hidden between layers of fabric to provide structure, stability, and shape retention. It comes in various weights, from sheer and barely-there to thick and rigid, and can be woven, non-woven, or knit depending on the application.
The material works by reinforcing areas of your project that experience stress or need to maintain a specific shape. When you apply interfacing to a shirt collar, for example, it prevents the collar from wilting and helps it stand crisp against your neck. When used in buttonholes, it stops the fabric from stretching and tearing with repeated use.
Key characteristics of interfacing:
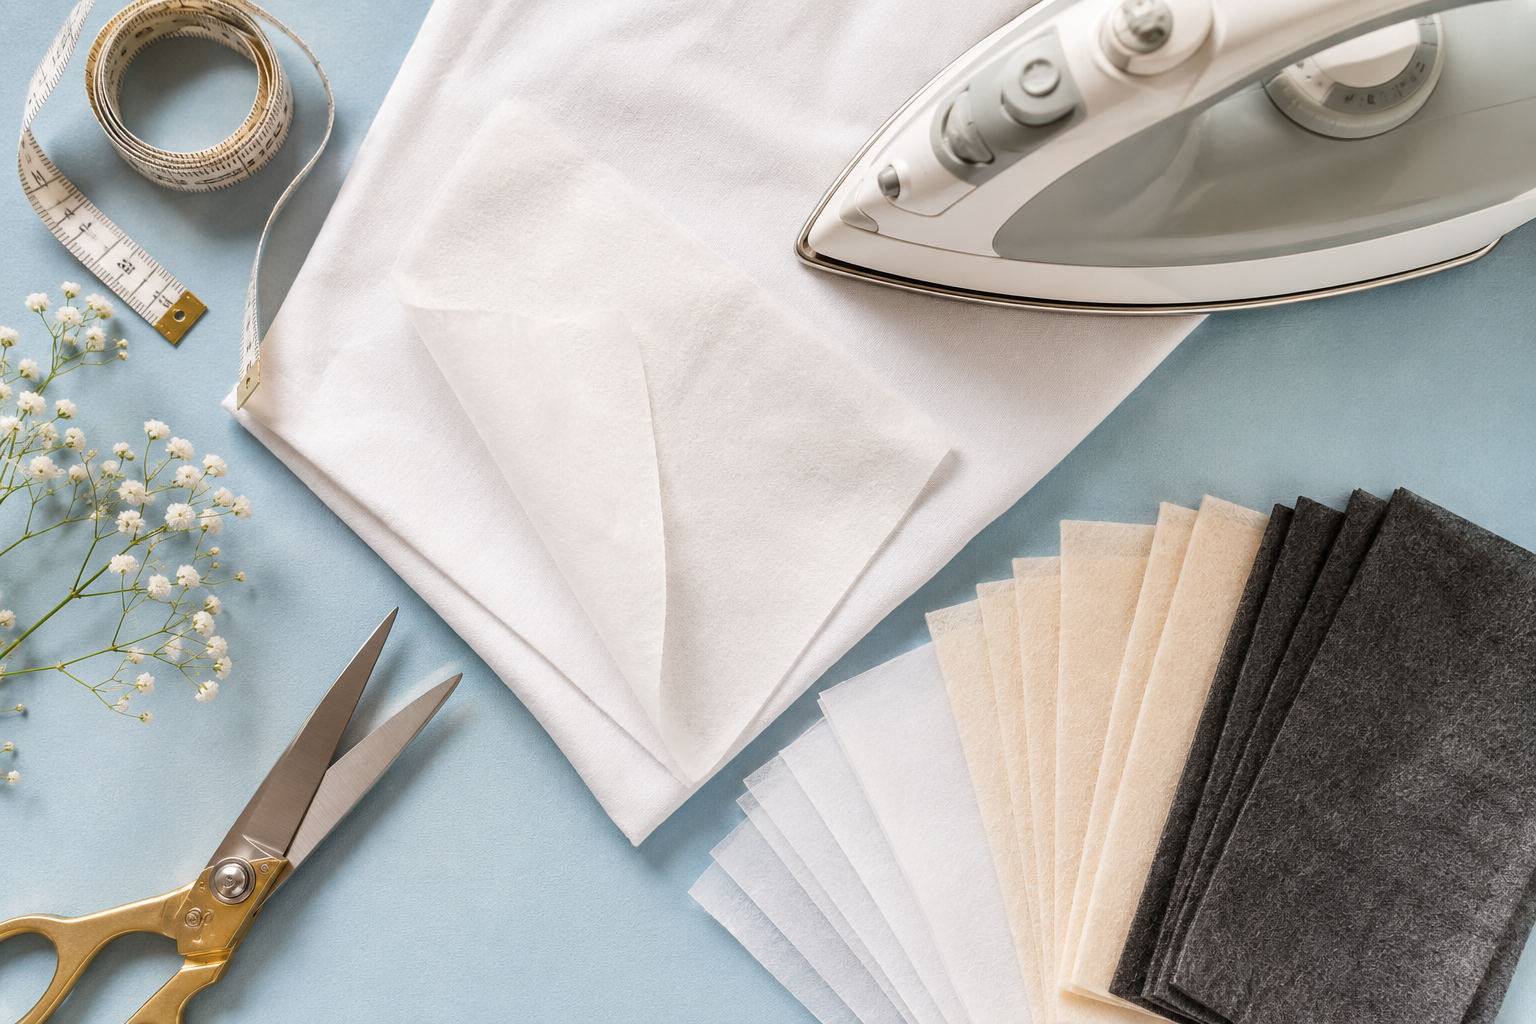
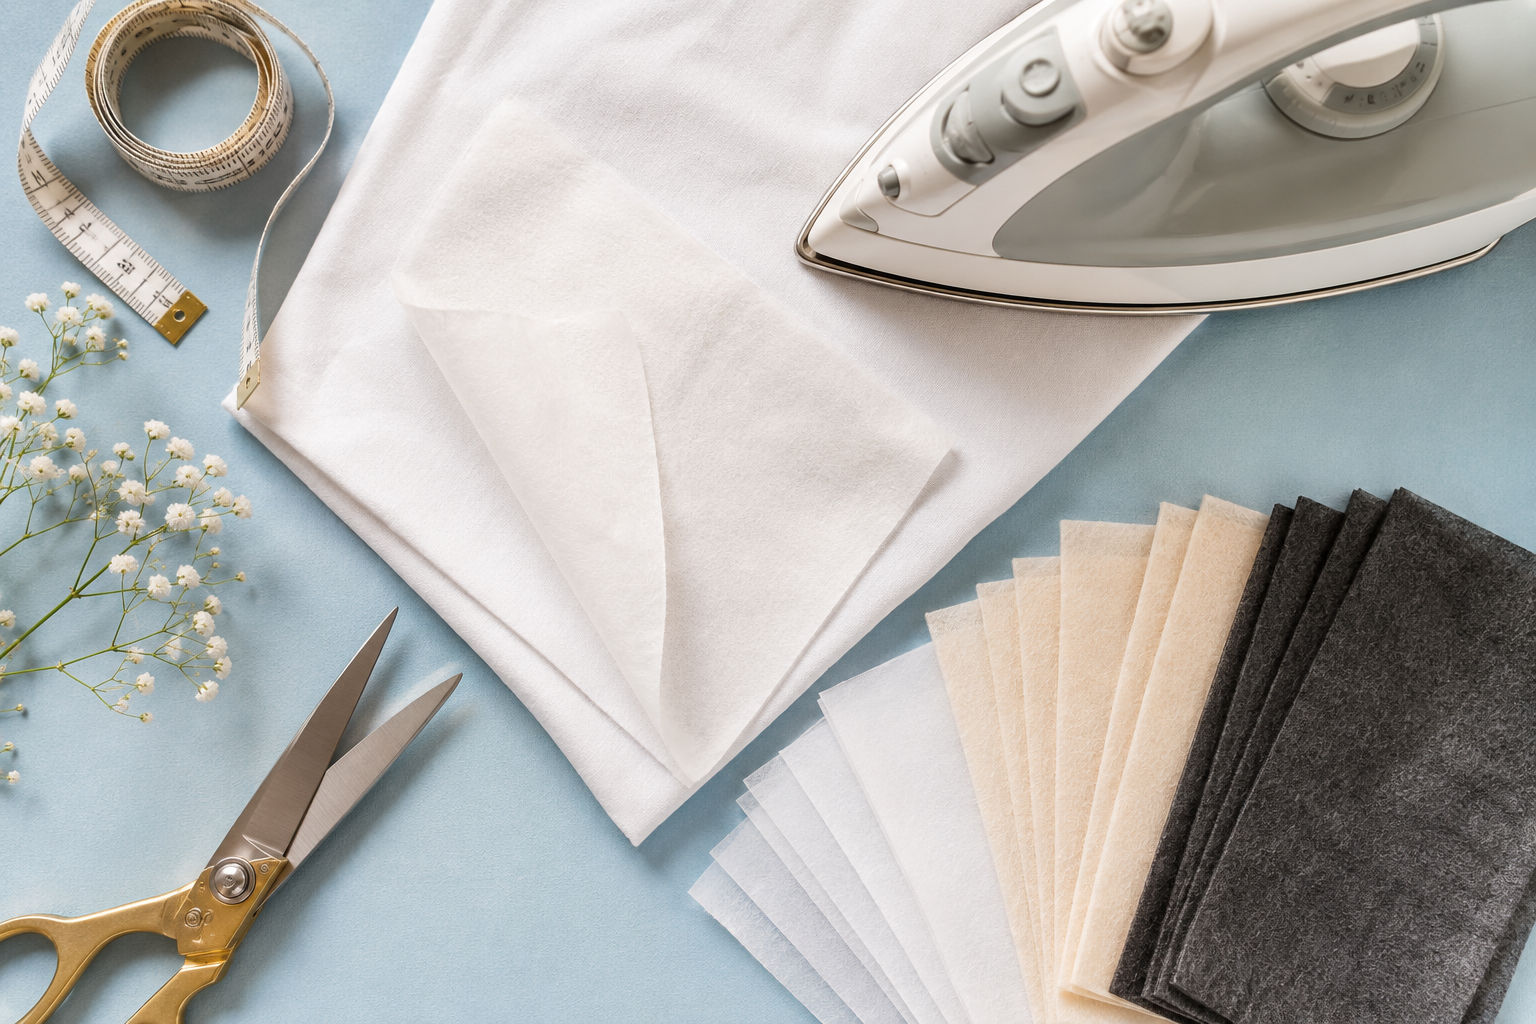
- Available in white, black, and sometimes gray to blend with different fabric colors
- Sold by the yard or in pre-cut packages at fabric stores
- Can be fusible (with adhesive backing) or sew-in (plain fabric)
- Ranges from ultra-lightweight (for sheers) to heavyweight (for bags and structured garments)
Most patterns specify when and where to use interfacing, typically marking these areas on pattern pieces with dotted lines or special symbols. If you’re working without a pattern, general rules apply: any area that buttons, zips, or needs to hold a shape probably needs interfacing.
What’s the Difference Between Interfacing and Stabilizer?
Interfacing and stabilizer serve different purposes, though beginners often confuse them. Interfacing becomes a permanent part of your finished project, adding structure that remains after construction. Stabilizer is temporary support used during embroidery or decorative stitching, then removed (torn away, washed out, or cut away) after completing the stitching.
Interfacing characteristics:
- Stays in the finished garment or project permanently
- Adds body, structure, and shape retention
- Applied to specific pattern pieces before construction
- Becomes invisible between fabric layers
Stabilizer characteristics:
- Temporary support during stitching or embroidery
- Prevents fabric puckering and distortion while sewing
- Removed after completing decorative work
- Comes in tear-away, wash-away, and cut-away varieties
Choose interfacing when building structure into collars, cuffs, waistbands, or bag panels. Choose stabilizer when machine embroidering, doing dense decorative stitching, or working with stretchy fabrics that need temporary support during construction. Some advanced sewers use both on the same project, stabilizer during embroidery, then interfacing for structural areas.
When Do You Need to Use Interfacing?
You need interfacing whenever a project area requires more body, stability, or durability than the fashion fabric alone can provide. Most garment patterns specify interfacing requirements, but understanding the logic helps you make decisions on pattern-free projects.
Always use interfacing for:
- Shirt and dress collars, keeps them crisp and prevents drooping
- Cuffs, maintains shape and prevents stretching at wrists
- Buttonholes and button plackets, reinforces fabric against stress and tearing
- Waistbands, provides structure and prevents rolling or folding
- Pocket openings, stabilizes edges and prevents stretching
- Zipper areas, keeps fabric from rippling and adds stability
- Necklines and armholes, prevents stretching in high-stress areas
- Bag straps and handles, adds strength and prevents sagging
- Tote bag bodies, provides structure so bags hold their shape
Consider interfacing for:
- Lightweight or loosely woven fabrics that need extra body
- Areas that will be topstitched (interfacing prevents puckering)
- Garment hems on structured pieces
- Appliqué backgrounds for added stability
The weight and type of interfacing should match your fabric and desired outcome. A silk blouse collar needs whisper-light interfacing, while a structured tote bag requires heavyweight support. When in doubt, test a scrap of your fashion fabric with the interfacing before committing to the full project.
For more guidance on achieving professional results, check out our guide on seam allowances, which work hand-in-hand with proper interfacing application.
What Happens If You Skip Interfacing?
Skipping interfacing when a pattern calls for it produces noticeably inferior results. The difference between interfaced and non-interfaced areas is immediately visible and affects both appearance and durability.
Visible consequences:
- Floppy collars that won’t hold their shape and look limp
- Stretched buttonholes that gape and tear with use
- Wavy, rippled necklines that won’t lie flat
- Sagging bag straps that stretch under weight
- Wrinkled, unprofessional appearance overall
- Cuffs that curl and won’t stay crisp
Durability issues:
- Buttonholes fail faster, requiring repair or reinforcement
- High-stress areas like pocket openings tear more easily
- Zippers cause fabric to ripple and pucker
- Projects lose their shape after washing or wearing
- Seams in unsupported areas may pull and distort
The “homemade” look that many sewers want to avoid often comes from skipping interfacing rather than poor stitching. Even perfectly executed seams and hems look amateurish when collars droop or buttonholes stretch.
Cost-benefit reality: Interfacing adds minimal expense (typically $3-8 per yard) and only 10-15 minutes to most projects, but the quality improvement is dramatic. Professional-looking results depend on this hidden layer more than most beginners realize.
Some sewers attempt substitutes like extra fabric layers or fusible fleece, but these don’t provide the same crisp support that proper interfacing delivers. The specialized construction of interfacing, whether the adhesive pattern on fusible types or the specific weave of sew-in varieties, is engineered for this exact purpose.
Fusible vs Sew-In Interfacing: Which Is Better?
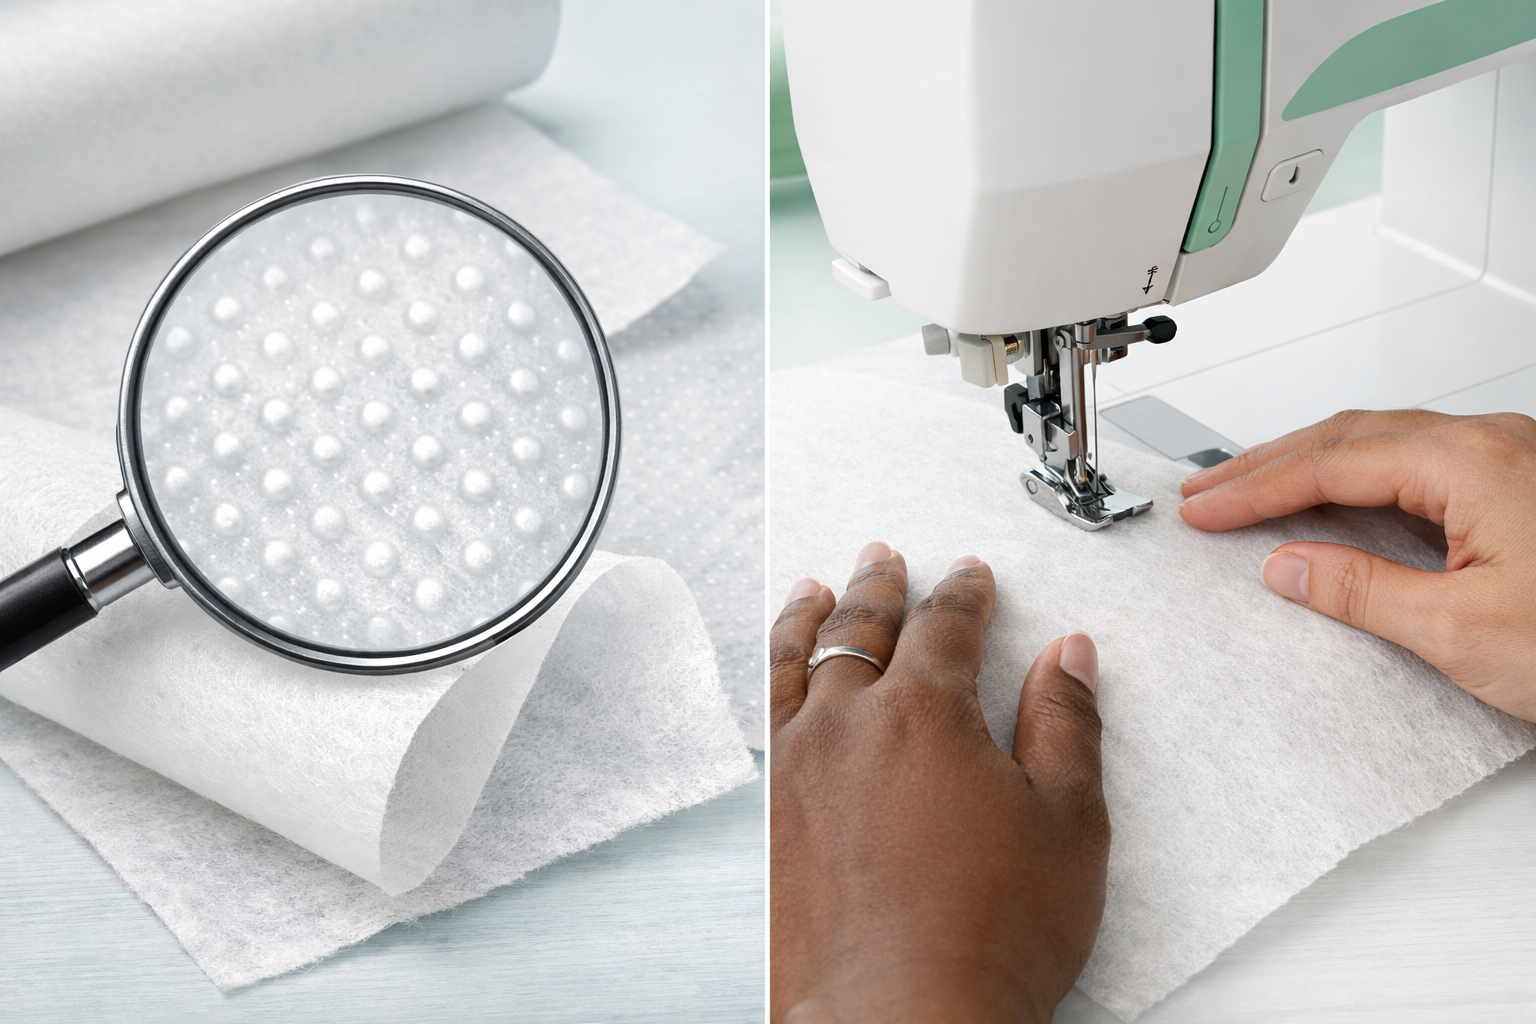
Fusible interfacing has heat-activated adhesive on one side and bonds to fabric when pressed with an iron. Sew-in interfacing has no adhesive and is stitched into seam allowances during construction. Neither is universally “better”, the right choice depends on your fabric, project, and personal preference.
Fusible interfacing advantages:
- Faster application, iron in place rather than basting and stitching
- Stays put during construction, no shifting while sewing
- Reduces bulk, no extra seam allowances from sew-in layers
- Ideal for most woven fabrics, cotton, linen, wool blends
- Beginner-friendly, easier to apply correctly
Fusible interfacing limitations:
- Can’t be used on fabrics sensitive to heat (some synthetics, velvet, sequined fabrics)
- May create stiffness or shine on delicate fabrics
- Adhesive can gum up needles during sewing
- Difficult to remove if applied incorrectly
- Not suitable for fabrics with texture that prevents good adhesion
Sew-in interfacing advantages:
- Works with heat-sensitive fabrics, no iron damage risk
- Better for tailored garments, traditional method for suits and coats
- Maintains fabric drape, doesn’t add stiffness from adhesive
- Easier to adjust, can be removed and repositioned
- No adhesive buildup on needles or iron
Sew-in interfacing limitations:
- Takes longer to apply, requires basting or careful pinning
- Can shift during construction if not secured well
- Adds bulk in seam allowances
- Requires more advanced sewing skills
Decision guide:
- Choose fusible for: cotton shirts, casual dresses, bags, most quilting projects, beginner projects
- Choose sew-in for: tailored wool garments, velvet, lamé, textured fabrics, heirloom sewing, when you want traditional tailoring methods
Many experienced sewers keep both types on hand and select based on the specific project. For everyday garment sewing, fusible interfacing dominates because of its speed and reliability. For special occasion garments or fabrics that can’t tolerate heat, sew-in remains essential.

【Natural Cotton Fabric】- Crafted from pure cotton, this interfacing offers a soft and reliable backing, enhancing the quality and durability of your fabric projects. It's perfect for a variety of garments and crafts.

【Premium Cotton Material】- Made from 100% high-quality cotton, this interfacing provides a smooth and stable foundation for various fabrics. It's ideal for t-shirts, quilts, blouses, and dress shirts, enhancing durability and shape.

Woven cotton fusible for light to medium weight fabrics
What Type of Interfacing for Shirt Collars?
Shirt collars require lightweight to medium-weight woven or non-woven fusible interfacing that provides crisp support without excessive stiffness. The exact weight depends on your fabric weight and desired collar style, a casual linen shirt needs lighter interfacing than a formal dress shirt.
For cotton dress shirts:
- Medium-weight woven fusible interfacing (like Pellon SF101 or similar)
- Provides crisp, professional collar stand
- Maintains shape through washing and wearing
- Allows collar to fold smoothly at the roll line
For lightweight fabrics (voile, lawn, chambray):
- Lightweight fusible interfacing (like Pellon 906F or featherweight varieties)
- Adds structure without overwhelming delicate fabric
- Prevents see-through appearance at collar
- Maintains soft drape while adding necessary body
For linen or heavier casual shirts:
- Medium-weight non-woven fusible
- Provides support while maintaining relaxed appearance
- Stands up to frequent washing
- Won’t create excessive stiffness in casual styles
Application tips for collar interfacing:
- Cut interfacing using the collar pattern piece, trimming away seam allowances
- Apply to the wrong side of the upper collar (the side that shows when worn)
- Use a press cloth to prevent shine on fashion fabric
- Press firmly for 10-15 seconds per section, allowing steam to escape
- Let cool completely before handling to ensure good adhesion
The collar stand (the band that wraps around your neck) also needs interfacing, typically the same weight as the collar itself. Some patterns call for slightly heavier interfacing in the stand for extra support.
Common mistake: Using interfacing that’s too heavy creates a stiff, uncomfortable collar that won’t fold naturally. When in doubt, test on fabric scraps first. The interfaced collar should feel firm but still bend easily along the intended fold line.
For more tips on achieving professional results in garment construction, explore our guide to presser feet, which can help with precise collar stitching.

Sewing Supplies Contents: Instructions and 11.6-inch wide, 30-yard long medium weight white single-sided adhesive, which can adapt to various fabric shapes and sizes. Simply trim the interfacing to the desired pattern and it can be easily used for fabrics of any size


【High-quality Polyester Material】The apparel interfacing, crafted from non-woven fabric and polyester amide environmental adhesive, features a comfortable feel, clear texture, and good air permeability. It is washable and ideal for protecting and strengthening fabric stitching, as well as providing structure to collars and facings.
Do You Need Interfacing for Knit Fabrics?
Knit fabrics generally need interfacing in the same areas as woven fabrics, buttonholes, necklines, and closures, but require special knit interfacing or tricot interfacing that stretches with the fabric. Standard woven interfacing will eliminate the stretch that makes knits comfortable and functional.
When knits need interfacing:
- Buttonholes and button bands, prevents stretching and tearing
- Neckbands and necklines, stops excessive stretching during wear
- Shoulder seams, adds stability to prevent drooping
- Zipper areas, keeps knit from rippling along the zipper
- Pocket openings, reinforces edges without restricting stretch
Knit interfacing types:
- Knit fusible interfacing, stretches in one or both directions, maintains fabric give
- Tricot interfacing, lightweight, stretchy, often used for swimwear and activewear
- Stretch woven interfacing, has some give but more structure than knit varieties
Application rules for knit interfacing:
- Always use interfacing with stretch in the same direction as your fabric stretch
- Test on scraps first, some fusible adhesives can make knits too stiff
- Use lower iron temperature than for wovens to avoid melting synthetic knits
- Consider sew-in interfacing for very stretchy fabrics like jersey
Projects that may skip interfacing:
- T-shirts without buttons (unless stabilizing shoulders)
- Casual knit dresses with no closures
- Stretchy leggings and activewear (unless adding pockets)
- Knit scarves and accessories
The key principle: interfacing should add stability without eliminating the stretch that makes knit garments comfortable. A knit cardigan with buttons needs interfacing on the button band, but that interfacing must stretch with the sweater or it will pucker and pull.
For working with different fabric types, understanding your machine’s feed dog function helps ensure smooth fabric feeding regardless of interfacing weight.
How to Choose the Right Weight Interfacing
Interfacing weight should match or be slightly lighter than your fashion fabric weight. The goal is to add structure without overwhelming the fabric’s natural drape or creating excessive stiffness.
Weight categories and uses:
Sheer/Featherweight:
- For chiffon, organza, voile, and other transparent fabrics
- Adds minimal structure while preventing see-through appearance
- Use in delicate blouse collars and facings
Lightweight:
- For cotton lawn, silk, rayon, and lightweight linens
- Provides gentle support without stiffness
- Ideal for summer shirts, dresses, and lightweight garments
Medium-weight:
- For quilting cotton, chambray, medium linen, and light wool
- Most versatile weight for everyday garment sewing
- Standard choice for shirt collars, cuffs, and waistbands
Heavyweight:
- For denim, canvas, upholstery fabric, and outerwear
- Provides substantial structure and support
- Essential for bags, structured jackets, and home décor projects
Crisp/Firm:
- For projects requiring maximum structure (bag bases, hat brims)
- Very stiff, almost board-like
- Not suitable for garments unless extreme structure is desired
Selection process:
- Hold your fashion fabric up, note its weight and drape
- Consider the project area, collars need more structure than facings
- Test combinations, fuse or baste interfacing to a scrap and evaluate the result
- Check the hand, the interfaced fabric should feel firm but not cardboard-like
- Assess drape, fabric should still move naturally, not stand stiffly
Common weight mistakes:
- Using heavyweight interfacing on lightweight fabric (creates stiff, unnatural appearance)
- Using lightweight interfacing on bags or structured projects (insufficient support)
- Matching interfacing weight exactly to very heavy fabrics (creates excessive bulk)
Most fabric stores display interfacing samples you can touch and compare. Bring a swatch of your fashion fabric when shopping to test combinations before purchasing. The few extra minutes spent selecting the right weight dramatically improves your finished project quality.
Can You Use Interfacing on Stretchy Fabric?
Yes, but you must use knit or stretch interfacing that moves with the fabric rather than standard woven interfacing that eliminates stretch. The interfacing should stretch in the same direction as your fashion fabric to maintain the garment’s comfort and fit.
Stretch interfacing options:
Knit fusible interfacing:
- Stretches in one or both directions
- Maintains fabric recovery (ability to return to original shape)
- Available in lightweight to medium weights
- Best for most knit garment applications
Tricot interfacing:
- Very lightweight and stretchy
- Often used for swimwear and lingerie
- Minimal structure, maximum stretch retention
- Can be fusible or sew-in
Stretch woven interfacing:
- Has mechanical stretch (slight give in the weave)
- More structure than knit interfacing
- Good for areas needing moderate support with some stretch
- Works well for ponte or scuba knits
Application guidelines:
- Test first, fuse a sample to scrap fabric and stretch it to ensure adequate give
- Match stretch direction, if fabric stretches horizontally, interfacing should too
- Use lower heat, many knits contain synthetics that can melt
- Press, don’t slide, sliding the iron can stretch the fabric
- Let cool completely, knits need time for adhesive to set properly
When to skip interfacing on stretch fabrics:
- Basic t-shirts without closures (unless stabilizing shoulders)
- Activewear that requires maximum stretch
- Garments where you want the fabric to remain very soft and drapey
When interfacing is essential on stretch fabrics:
- Button bands and buttonholes (prevents stretching out)
- Necklines (stops excessive stretching during wear)
- Zipper insertions (prevents rippling)
- Pockets (reinforces openings)
The most common mistake with stretch fabrics is using standard woven interfacing, which creates a stiff, uncomfortable area that doesn’t move with the rest of the garment. This looks and feels wrong, pulling and puckering during wear. Always invest in proper stretch interfacing for knit projects, the cost difference is minimal but the quality difference is substantial.
What Projects Require Interfacing?
Most structured garments and accessories require interfacing in specific areas, while loose, unstructured projects often skip it entirely. Understanding which projects need interfacing helps you plan material purchases and construction time.
Garments that always need interfacing:
- Button-up shirts, collars, cuffs, button plackets, and sometimes yokes
- Blazers and jackets, collars, lapels, front facings, pocket flaps, sometimes entire front panels
- Pants and skirts with waistbands, waistband pieces, sometimes fly facings
- Dresses with structured elements, collars, cuffs, button plackets, bodice areas
- Coats, collars, facings, pocket areas, sometimes hem areas
Accessories that need interfacing:
- Tote bags and purses, body panels, straps, handles, sometimes bottom panels
- Clutches and wallets, all main pieces for structure
- Belts, entire length for body and support
- Hats with structure, brims and crown pieces
Home décor projects:
- Placemats, provides body and helps them lie flat
- Curtain headers, adds structure to pleats or grommet areas
- Pillow covers with closures, zipper areas and sometimes button plackets
- Table runners, optional, adds body and helps maintain shape
Projects that typically skip interfacing:
- Simple pull-on skirts and pants without waistbands
- T-shirts and casual knit tops
- Loose, flowing dresses without closures
- Scarves and wraps
- Gathered or ruffled garments where structure isn’t desired
- Quilts (though quilters use stabilizer during piecing)
Special considerations:
Some patterns mark interfacing as “optional,” meaning the garment will function without it but look more professional with it. In these cases, consider your skill level and desired outcome. Beginners often benefit from using interfacing even when optional, as it makes construction easier and results look more polished.
For projects with multiple closure options, interfacing requirements change. A dress with an invisible zipper needs interfacing along the zipper seam, while the same dress with no closure might skip it entirely.
Interfacing for Beginners: Mistakes to Avoid
New sewers make predictable interfacing mistakes that compromise project quality. Learning these common errors helps you avoid them and achieve professional results from your first interfaced project.
Top beginner mistakes:
1. Applying fusible interfacing to the wrong side
- Fusible interfacing has a bumpy, adhesive side and a smooth side
- The adhesive side must face the wrong side of your fashion fabric
- Applying it backward means it won’t stick (or worse, sticks to your iron)
- Fix: Always check which side has the adhesive dots before pressing
2. Using the wrong weight
- Too heavy: creates stiff, cardboard-like results
- Too light: doesn’t provide adequate support
- Fix: Test on scraps before committing to the full project
3. Skipping the press cloth
- Direct iron contact can create shine on fashion fabric
- Adhesive can transfer to your iron plate
- Fix: Always use a press cloth or parchment paper between iron and fabric
4. Not pre-shrinking interfacing
- Some interfacing shrinks when washed, causing puckering
- This is especially true for woven interfacing
- Fix: Pre-wash sew-in interfacing; steam-press fusible interfacing before use
5. Sliding the iron instead of pressing
- Sliding stretches and distorts both fabric and interfacing
- Creates bubbles and poor adhesion
- Fix: Press firmly in one spot for 10-15 seconds, lift, move to next section
6. Not letting it cool before handling
- Adhesive needs time to set completely
- Handling too soon can cause interfacing to separate
- Fix: Let interfaced pieces cool flat for several minutes
7. Cutting interfacing with seam allowances included
- Creates bulk in seams and makes turning difficult
- Professional technique trims interfacing seam allowances
- Fix: Cut interfacing slightly smaller than pattern pieces, removing seam allowances
8. Using interfacing on both layers of a faced edge
- Doubles the bulk unnecessarily
- Makes turning and pressing difficult
- Fix: Interface only one layer (usually the garment piece, not the facing)
9. Insufficient heat or pressure
- Results in poor adhesion and interfacing that peels away
- Fix: Use cotton setting on iron, press firmly for full recommended time
10. Forgetting to interface before construction
- Much harder to apply interfacing after pieces are sewn together
- Fix: Interface all pieces immediately after cutting, before any sewing
Practice tip: Before starting your first interfaced project, practice on scraps. Cut small pieces of your fashion fabric and test different interfacing weights and application techniques. This builds confidence and helps you understand how interfacing changes fabric behavior.
For more beginner-friendly guidance, check out our article on why needles keep breaking, which often relates to sewing through interfaced layers.
Where to Buy Interfacing and How Much Does It Cost
Interfacing is widely available at fabric stores, craft retailers, and online shops, with prices ranging from $3 to $12 per yard depending on type and quality. Most projects require minimal yardage, making interfacing one of the most affordable ways to dramatically improve project quality.
Where to buy:
Local fabric stores:
- Widest selection of weights and types
- Can touch and compare before buying
- Staff can offer advice on selection
- Prices: $4-10 per yard typically
Chain craft stores (Joann, Hobby Lobby, Michaels):
- Good basic selection
- Frequent sales and coupons
- Convenient locations
- Prices: $3-8 per yard, often 40-50% off with coupons
Online retailers:
- Fabric.com, Mood Fabrics, Amazon
- Convenient for bulk purchases
- Can’t touch before buying
- Prices: $3-12 per yard plus shipping
Specialty interfacing brands:
- Pellon (most common in US)
- Vilene (common in Europe)
- HTC (high-quality fusibles)
- Fashion Sewing Supply (premium options)
Cost breakdown by type:
- Lightweight fusible: $4-6 per yard
- Medium-weight fusible: $5-8 per yard
- Heavyweight fusible: $7-10 per yard
- Knit/stretch interfacing: $6-10 per yard
- Sew-in interfacing: $4-8 per yard
- Pre-cut packages: $3-6 for small amounts
How much to buy:
Most patterns list interfacing requirements in the notions section. If working without a pattern, these guidelines help:
- Shirt collars and cuffs: 1/4 to 1/2 yard
- Full shirt front (button placket): 1/2 yard
- Dress with collar and facings: 3/4 to 1 yard
- Jacket with full interfacing: 2-3 yards
- Tote bag: 1/2 to 1 yard depending on size
- Waistband: 1/4 yard
Money-saving tips:
- Buy by the bolt, if you sew frequently, buying 10+ yards reduces per-yard cost
- Watch for sales, stock up during 40-50% off sales at craft stores
- Keep basic weights on hand, having lightweight, medium, and heavyweight fusible interfacing ready saves trips to the store
- Use coupons, chain craft stores offer regular 40-50% off single-item coupons
Quality considerations:
Cheap interfacing can bubble, peel, or create stiffness, while quality interfacing fuses smoothly and maintains fabric drape. For important projects, invest in name-brand interfacing from Pellon or HTC. For practice projects or items that won’t be washed frequently, budget options work fine.
Most sewers develop a collection of favorite interfacing types over time, keeping several weights and styles on hand for different projects. The initial investment is minimal,$20-30 buys enough variety to handle most common projects for months.
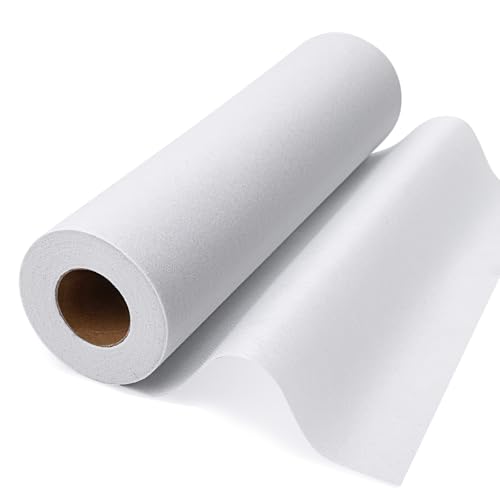
Sewing Supplies Contents: Instructions and 11.6-inch wide, 30-yard long lightweight white single-sided adhesive, which can adapt to various fabric shapes and sizes. Simply trim the interfacing to the desired pattern and it can be easily used for fabrics of any size

Lightweight Fusible Interfacing: Ideal for adding gentle structure to collars, facings, and craft projects.
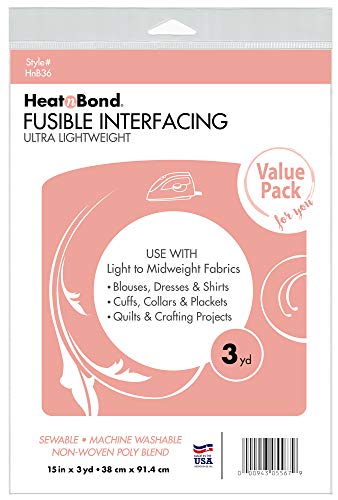
ADD STABILITY TO LIGHTWEIGHT FABRICS WITH EASE – This lightweight interfacing fusible helps you achieve smooth, structured results in delicate sewing projects like blouses, dresses, collars, or quilting, making your work feel more polished and professional.
Does Interfacing Make Fabric Stiff?
Interfacing adds body and structure to fabric, but properly selected interfacing should not make fabric feel stiff or cardboard-like. The degree of stiffness depends on the interfacing weight, type, and how well it matches your fashion fabric.
What causes unwanted stiffness:
- Using interfacing that’s too heavy for your fabric weight
- Applying interfacing to both layers of a faced edge (doubles the stiffness)
- Low-quality fusible interfacing with excessive adhesive
- Using woven interfacing on knits (eliminates natural stretch)
- Applying interfacing to entire garment pieces when only specific areas need it
How to avoid excessive stiffness:
- Match weight appropriately, interfacing should be equal to or lighter than fashion fabric
- Test first, always fuse a sample to scrap fabric and evaluate the hand
- Use quality interfacing, name brands like Pellon have better adhesive distribution
- Interface selectively, only apply to areas that need structure
- Consider sew-in interfacing, adds less stiffness than fusible for tailored garments
Desired stiffness levels by project:
Minimal stiffness (should barely feel it):
- Lightweight blouse collars
- Dress facings
- Delicate garment details
Moderate stiffness (firm but still flexible):
- Shirt collars and cuffs
- Waistbands
- Button plackets
- Jacket lapels
Maximum stiffness (very firm, holds shape independently):
- Bag bases and panels
- Hat brims
- Belt backing
- Structured accessories
The drape test:
After applying interfacing to a test swatch, hold it up and let it hang naturally. It should drape smoothly with slightly more body than the un-interfaced fabric. If it stands out stiffly or won’t bend easily, the interfacing is too heavy.
Recovery from too-stiff interfacing:
If you’ve already applied interfacing that’s too stiff, options are limited. Fusible interfacing is nearly impossible to remove completely. For future projects, always test first. The few minutes spent testing saves hours of frustration and wasted materials.
Quality interfacing from reputable brands is engineered to add structure without excessive stiffness. The adhesive is distributed in a pattern that allows fabric to maintain some drape while gaining support. Cheap interfacing often has too much adhesive, creating the stiff, unpleasant hand that gives interfacing a bad reputation among beginners.
Alternatives to Interfacing for Bag Making
While traditional interfacing works well for bags, several alternatives provide structure and support for bag-making projects. The best choice depends on your desired bag style, fabric weight, and construction method.
Fusible fleece:
- Soft, lofty batting with fusible backing
- Adds body and slight padding
- Creates softer bags than traditional interfacing
- Good for: casual totes, pouches, padded bags
- Thickness: 1/8 to 1/4 inch
- Cost: $8-12 per yard
Foam stabilizers (ByAnnie’s Soft and Stable):
- Dense foam that adds structure without stiffness
- Doesn’t require fusing (sandwiched between layers)
- Creates bags that stand upright
- Good for: structured totes, lunch bags, travel bags
- Thickness: 1/4 inch
- Cost: $10-15 per yard
Peltex (ultra-firm stabilizer):
- Very stiff, board-like stabilizer
- Can be fusible or sew-in
- Creates maximum structure
- Good for: bag bases, structured purses, laptop bags
- Provides shape similar to plastic canvas
- Cost: $8-12 per yard
Cork fabric:
- Natural material with built-in structure
- Doesn’t require additional interfacing
- Water-resistant and durable
- Good for: eco-friendly bags, wallets, accessories
- Cost: $15-25 per yard
Vinyl or laminated cotton:
- Fabric with plastic coating provides own structure
- Wipes clean easily
- No interfacing needed for casual bags
- Good for: market bags, beach totes, kids’ bags
- Cost: $10-18 per yard
Buckram:
- Very stiff woven fabric traditionally used in millinery
- Provides maximum structure
- Can be difficult to sew through
- Good for: bag frames, structured bases
- Cost: $6-10 per yard
Plastic canvas:
- Needlepoint canvas provides rigid structure
- Inserted into bag bases and sides
- Not sewn through (inserted into pockets or casings)
- Good for: bag bases that need to stay flat
- Cost: $3-6 per sheet
Selection guide for bag alternatives:
- Soft, casual tote: fusible fleece or lightweight fusible interfacing
- Structured tote that stands up: foam stabilizer or heavyweight fusible interfacing
- Rigid purse or handbag: Peltex or buckram
- Bag base only: plastic canvas or Peltex
- Eco-friendly option: cork fabric (no additional stabilizer needed)
Combining methods:
Many bag makers use multiple stabilizers in one project, foam stabilizer for the body, Peltex for the base, and traditional interfacing for straps. This creates bags with varied structure where needed while avoiding excessive bulk or weight.
The bag-making community has developed these alternatives because traditional interfacing often doesn’t provide enough structure for bags that need to hold shape and carry weight. While interfacing works fine for simple flat bags or pouches, structured bags benefit from these specialized products.
Frequently Asked Questions
Can you remove fusible interfacing once it’s applied?
Removing fusible interfacing is extremely difficult and rarely successful. The heat-activated adhesive bonds permanently to fabric fibers. You can try applying heat and peeling while warm, but this often damages the fashion fabric. Some sewers report success with rubbing alcohol or adhesive removers, but results vary. The best approach is to test interfacing on scraps before applying to your project.
Which side of fusible interfacing goes down?
The bumpy, rough side with visible adhesive dots goes face-down against the wrong side of your fashion fabric. The smooth side faces up toward your iron. If you’re unsure, touch a hot iron to a corner of the interfacing for a second, the adhesive side will feel slightly sticky when warm.
Do you wash interfacing before using it?
Sew-in interfacing should be pre-washed if your finished project will be washed, as it may shrink. Fusible interfacing doesn’t need washing but should be steam-pressed before use to pre-shrink it. This prevents puckering after the first wash of your finished garment.
Can you use interfacing on both sides of fabric?
Technically yes, but it’s rarely necessary and creates excessive stiffness and bulk. Standard practice interfaces only one layer of a faced edge, usually the garment piece rather than the facing. The only exception might be extremely structured projects like bag straps that need maximum support.
How do you apply fusible interfacing without bubbles?
Press firmly in one spot for 10-15 seconds without sliding the iron, using the cotton setting with steam. Let cool completely before handling. Bubbles usually result from insufficient heat, inadequate pressure, or moving the iron instead of pressing. If bubbles appear, re-press those areas with more pressure.
Does interfacing go on every pattern piece?
No, patterns specify which pieces need interfacing, usually marking them with dotted lines or listing them in the instructions. Typically only structural areas like collars, cuffs, facings, and closures need interfacing. The main body of garments usually doesn’t require it unless you’re working with very lightweight or unstable fabric.
Can you sew through fusible interfacing?
Yes, fusible interfacing is designed to be sewn through after application. The adhesive may cause slight needle buildup, so clean your needle occasionally with rubbing alcohol. Use a sharp needle appropriate for your fabric weight, and consider using a fresh needle for best results.
What’s the difference between woven and non-woven interfacing?
Woven interfacing has a grain line like fabric and can be cut on the bias for shaping. It’s more drapey and traditional, often used in tailoring. Non-woven interfacing has no grain, can be cut in any direction, and is more stable. Non-woven is easier for beginners and works well for most projects.
How long does fusible interfacing last?
Quality fusible interfacing should last the lifetime of the garment when properly applied. The adhesive bond is permanent and withstands normal washing and wearing. Low-quality interfacing may bubble or separate over time, especially with frequent washing or dry cleaning.
Can you use interfacing on leather or vinyl?
Sew-in interfacing works with leather and vinyl since these materials can’t tolerate the heat needed for fusible interfacing. Some specialty fusible interfacings designed for synthetics work at lower temperatures, but test carefully on scraps first. Many leather workers prefer using leather or fabric backing instead of traditional interfacing.
Do you need special interfacing for quilting?
Quilters typically use stabilizer during piecing rather than interfacing in the finished quilt. However, if making quilted bags or structured projects, regular fusible interfacing works fine. Some quilters use fusible fleece for added loft and structure in bag projects.
What happens if you don’t let interfacing cool before sewing?
The adhesive bond isn’t fully set when warm, so handling too soon can cause the interfacing to shift or separate from the fabric. This creates bubbles, poor adhesion, and potential problems during construction. Always let interfaced pieces cool flat for at least 5 minutes before handling.
Conclusion
Understanding what interfacing is and when you need it transforms your sewing from homemade-looking to professionally finished. This hidden layer adds structure, stability, and durability to collars, cuffs, buttonholes, waistbands, and countless other project areas that need to hold their shape. While it might seem like an optional extra when you’re starting out, interfacing is actually one of the most important factors in achieving polished, long-lasting results.
The key takeaways: match interfacing weight to your fabric, choose fusible for convenience and sew-in for special fabrics, always test on scraps first, and don’t skip it when patterns call for it. The minimal cost and time investment pay off dramatically in the quality and longevity of your finished projects.
Your next steps:
- Assess your current projects, review patterns to identify interfacing requirements
- Build a basic collection, purchase lightweight, medium, and heavyweight fusible interfacing to have on hand
- Practice on scraps, test different weights and application techniques before starting important projects
- Interface with confidence, apply what you’ve learned to create structured, professional-looking garments and accessories
For more guidance on achieving professional sewing results, explore our articles on tension settings and backstitch techniques, which work together with proper interfacing to create durable, beautiful projects.