


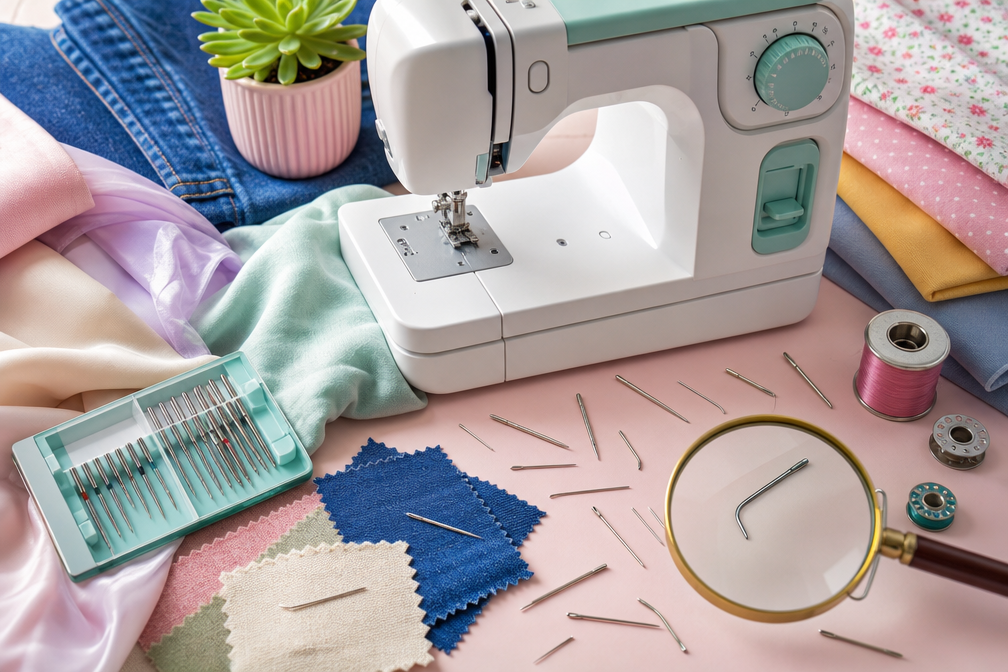
Quick Answer: Needles break primarily because of incorrect needle size for the fabric, poor needle quality, machine timing issues, sewing over pins, or pulling fabric while stitching. Most breaks happen when a size 70/10 universal needle tries to pierce heavy denim or when the needle strikes metal objects like pins or the bobbin case. Switching to the correct needle type and size for your fabric, plus proper sewing technique, eliminates 90% of needle breakage.
Key Takeaways
- Wrong needle size is the number one cause, thick fabrics need size 90/14 or larger, delicate fabrics need 70/10 or smaller
- Sewing over pins causes instant needle breakage and can damage your machine timing
- Pulling or pushing fabric while the machine is stitching bends needles and snaps them mid-stitch
- Dull or damaged needles from previous projects should be replaced every 6-8 hours of sewing time
- Machine timing problems make the needle hit the bobbin case or hook, breaking needles repeatedly in the same spot
- Universal needles work for woven cottons but fail on knits, denim, leather, and specialty fabrics
- Needle changes cost $0.50-$2.00 per needle, cheap insurance compared to a $150+ timing repair
- Zigzag and decorative stitches require more needle clearance and break more easily if the throat plate is damaged
- Bent needles from previous strikes should never be reused, they’ll break again and may damage your machine
- Beginner-friendly needles include Schmetz Universal 80/12 for general sewing and Schmetz Jeans 100/16 for heavier projects
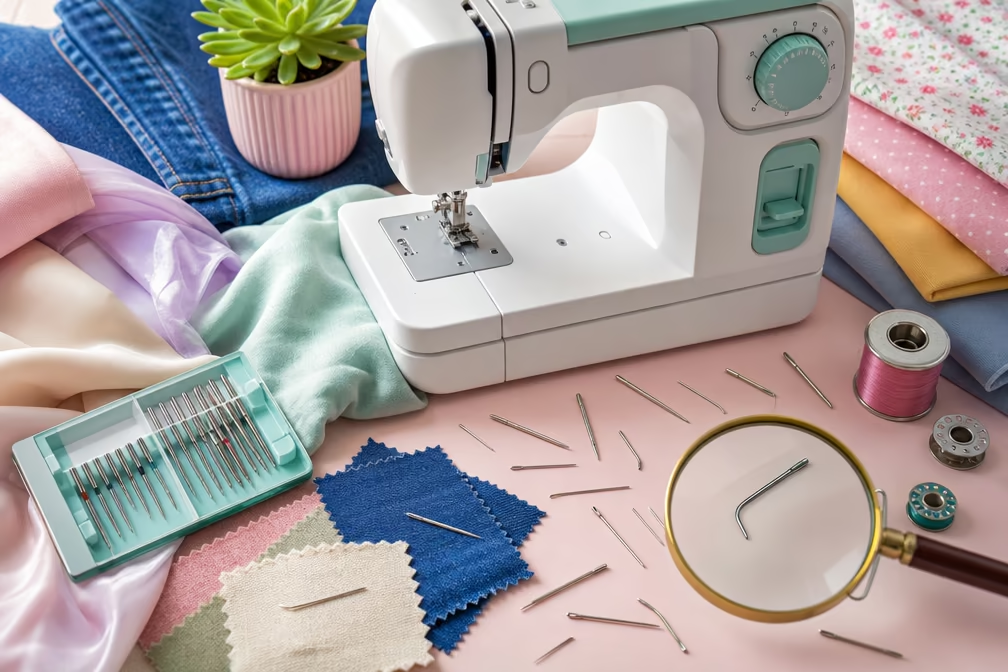
What Causes Sewing Machine Needles to Break?
Sewing machine needles break when they encounter more resistance than they’re designed to handle, strike a hard object, or bend from improper fabric handling. The needle shaft is thin metal that flexes slightly during normal sewing but snaps when stressed beyond its tolerance.
The most common causes include:
- Incorrect needle size or type for the fabric weight and weave
- Sewing over pins, zippers, or metal fasteners that deflect or strike the needle
- Pulling, pushing, or holding fabric while the feed dogs are moving it
- Dull or damaged needles that can’t penetrate fabric cleanly
- Machine timing issues causing the needle to hit the bobbin case, hook, or throat plate
- Improper needle installation where the needle isn’t fully seated or is inserted backward
- Thread tension problems that create excessive drag on the needle
- Presser foot pressure set too high or too low for the fabric
- Fabric thickness changes mid-seam (like sewing over multiple hem layers)
- Old, brittle needles that have been stored improperly or used beyond their lifespan
Each cause creates a specific break pattern. Needles that hit metal objects usually snap at the tip or bend sharply before breaking. Needles stressed by wrong sizing typically break at the shaft just above the eye. Understanding the break pattern helps identify the root cause.
How Do I Know If I’m Using the Wrong Needle Size?
You’re using the wrong needle size if your fabric puckers, skips stitches, or if the needle bends or breaks during sewing. The needle should penetrate fabric cleanly without forcing or leaving large holes.
Signs your needle is too small:
- Needle bends or breaks on medium to heavy fabrics
- Stitches skip frequently
- Thread shreds or breaks often
- Needle makes a “popping” sound when penetrating fabric
- Visible needle deflection (bending) while sewing
Signs your needle is too large:
- Large, permanent holes in delicate fabrics
- Fabric puckering along seam lines
- Runs or snags in knit fabrics
- Visible needle marks that don’t close up
Needle size guide by fabric weight:
| Fabric Type | Needle Size | Examples |
|---|---|---|
| Sheer/Delicate | 60/8 – 70/10 | Chiffon, organza, silk |
| Lightweight | 70/10 – 80/12 | Cotton lawn, voile, lining |
| Medium Weight | 80/12 – 90/14 | Quilting cotton, linen, chambray |
| Heavy Weight | 90/14 – 100/16 | Denim, canvas, upholstery |
| Very Heavy | 110/18 – 120/20 | Multiple denim layers, leather |
The first number is the European size (diameter in hundredths of a millimeter), and the second is the American size. A 90/14 needle is 0.90mm in diameter.
Choose the right size by testing: If you’re between sizes, start with the smaller needle. If it struggles, breaks, or skips stitches, move up one size. If it leaves visible holes, move down one size.
Why Does My Needle Break When Sewing Thick vs Thin Fabric?
Needles break on thick fabrics because the shaft can’t handle the penetration force required, while breaks on thin fabrics usually result from the needle being too large and catching on delicate fibers. The mechanics are completely different.
Breaking on thick fabrics (denim, canvas, multiple layers):
The needle must pierce through dense, tightly woven fibers. A thin needle (size 70/10 or 80/12) flexes too much under this pressure, bends, and snaps, usually at the shaft just above the eye where stress concentrates. The needle point may also dull quickly on thick fabrics, requiring even more force and increasing break risk.
Breaking on thin fabrics (silk, chiffon, lightweight knits):
A needle that’s too large for delicate fabric creates big holes and can catch on individual fibers. When the needle snags, it pulls the fabric down with it, creating tension that bends the needle. The break typically happens at the tip or just below it. Thin fabrics also shift more easily, and if you’re pulling or guiding the fabric, the needle bends and breaks.
The transition zone problem:
Needles break most often when fabric thickness changes mid-seam, like sewing over a hem fold that goes from two layers to six layers. The needle that worked fine on two layers can’t handle six layers and snaps. Solution: Use a needle sized for the thickest part of your project, slow down when approaching thick spots, and use the handwheel to manually advance the needle through very thick areas.
What Are the Best Needles for Denim That Won’t Break?
Schmetz Jeans/Denim needles in size 100/16 or 110/18 are specifically engineered for denim and heavy fabrics, with a reinforced shaft, acute point, and extra-strong construction that resists breaking. These needles cost $1.50-$2.50 each but last significantly longer than universal needles on heavy fabrics.
Why jeans needles work better:
- Reinforced shaft that’s 10-15% thicker than universal needles in the same size
- Acute (sharp) point that pierces tight weaves without deflecting
- Stiffer metal alloy that resists bending under pressure
- Modified eye design that reduces thread friction and heat buildup
Alternatives that also work well:
- Organ Jeans needles (Japanese brand, slightly sharper point than Schmetz)
- Klasse Denim needles (budget-friendly, good for lighter denim)
- Topstitch needles size 100/16 (larger eye accommodates thicker thread, very strong shaft)
Needle selection by denim weight:
- Lightweight denim (chambray, denim shirts): Size 90/14 jeans needle
- Medium denim (standard jeans): Size 100/16 jeans needle
- Heavy denim (raw denim, multiple layers): Size 110/18 jeans needle
- Multiple thick seams (hem intersections): Size 110/18 or 120/20 jeans needle
Common mistake: Using a universal needle on denim because “it’s just cotton.” Universal needles have a slightly rounded point designed for woven cottons like quilting fabric. Denim’s tight weave and thickness require the sharp, reinforced construction of a jeans needle. The $2 investment prevents broken needles, skipped stitches, and potential timing damage from repeated needle strikes.


Set of 5 heavy duty sewing machine needles, size 100/16

Medium Ball Point

2X STRONGER STEEL — Constructed with reinforced, thick shafts that withstand the resistance of dense, heavy fabrics without bending or breaking, staying sharp longer for consistent, skip-free stitching through any material from start to finish.
How Much Does It Cost to Replace Sewing Machine Needles Regularly?
Regular needle replacement costs $6-$30 per year for most sewers, depending on how often you sew and what fabrics you use. Individual needles cost $0.50-$2.50 each, while multi-packs of 5-10 needles cost $4-$12.
Cost breakdown by sewing frequency:
- Occasional sewer (1-2 hours/week): 6-8 needles per year = $6-$12 annually
- Regular sewer (5-10 hours/week): 15-20 needles per year = $15-$30 annually
- Heavy sewer (20+ hours/week): 30-40 needles per year = $30-$60 annually
Price by needle type:
- Universal needles: $0.50-$1.00 each, $4-$6 for a 10-pack
- Specialty needles (jeans, leather, stretch): $1.50-$2.50 each, $8-$12 for a 5-pack
- Premium brands (Schmetz, Organ): 20-30% more than generic brands
- Budget brands (Singer, generic): 30-40% less but may break more frequently
Cost comparison: prevention vs repair:
- Needle replacement: $0.50-$2.50 per needle
- Timing repair from needle strike: $150-$300 at a repair shop
- Bobbin case replacement: $15-$40
- Hook/race damage repair: $100-$200
Replacing needles every 6-8 hours of sewing time (or after each project) is cheap insurance. A $1 needle prevents a $200 repair bill if a broken needle damages your machine’s timing mechanism.
Money-saving tip: Buy multi-packs of the needle sizes you use most (typically 80/12 and 90/14 universal, plus 100/16 jeans if you sew denim). Per-needle cost drops 40-50% compared to buying singles.

Pack of 10 Genuine Singer Sewing Machine Needles

PREMIUM QUALITY MATERIAL: Made of top quality high-strength steel, sharp smooth, sturdy and durable, not easy to bend, and long service life.
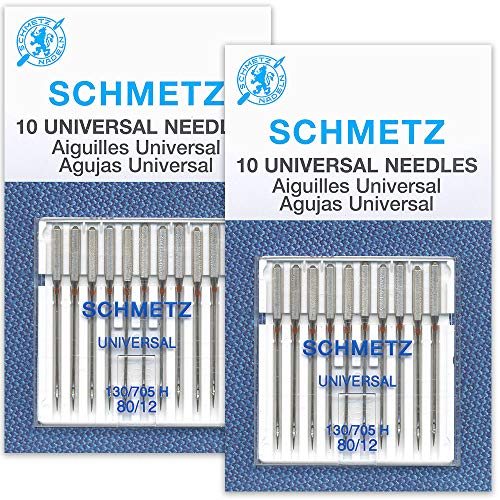
SEWING MADE SIMPLE: SCHMETZ Universal Needles work with all home sewing machines and handle everything from delicate silks to heavy denim, making them perfect for any quilting, embroidery, craft, or home décor project
Why Does My Needle Break When Sewing Over Pins?
Needles break when sewing over pins because the needle shaft strikes the hardened steel pin, which is much harder than the needle metal, causing instant deflection or fracture. Even a glancing blow bends the needle enough to make it strike the throat plate or bobbin case on the next stitch, breaking it completely.
What happens during a pin strike:
- The needle descends at high speed (500-1,000 stitches per minute on most machines)
- The needle tip or shaft hits the pin
- The needle deflects (bends) or the tip breaks off
- The bent needle strikes the throat plate, presser foot, or bobbin case
- The needle snaps at the shaft or breaks at the eye
Why some sewers “get away with it”:
Sewing over pins perpendicular to the seam line, with pin heads to the right, positions the pin shaft where the needle is least likely to hit it. But even experienced sewers who do this occasionally break needles, it only takes one pin positioned slightly wrong.
The real risks:
- Needle breakage (immediate)
- Bent needle that breaks on the next seam (delayed)
- Timing damage if the broken needle strikes the hook or bobbin case
- Throat plate damage from repeated strikes
- Flying needle fragments that can cause injury
Safe alternatives:
- Pin perpendicular and remove pins as you approach them (stop with needle up, remove pin, continue)
- Use clips (Wonder Clips, fabric clips) instead of pins
- Baste with glue stick or washable fabric glue for slippery fabrics
- Hand-baste with long running stitches for precision work
If you must sew over pins: Use the slowest speed, position pins perpendicular with heads to the right, and use a size 90/14 or larger needle (thicker shaft is slightly more resistant to deflection). But understand you’re still risking a $150+ repair bill to save 10 seconds of pin removal.
Am I Pulling the Fabric Too Hard While Sewing?
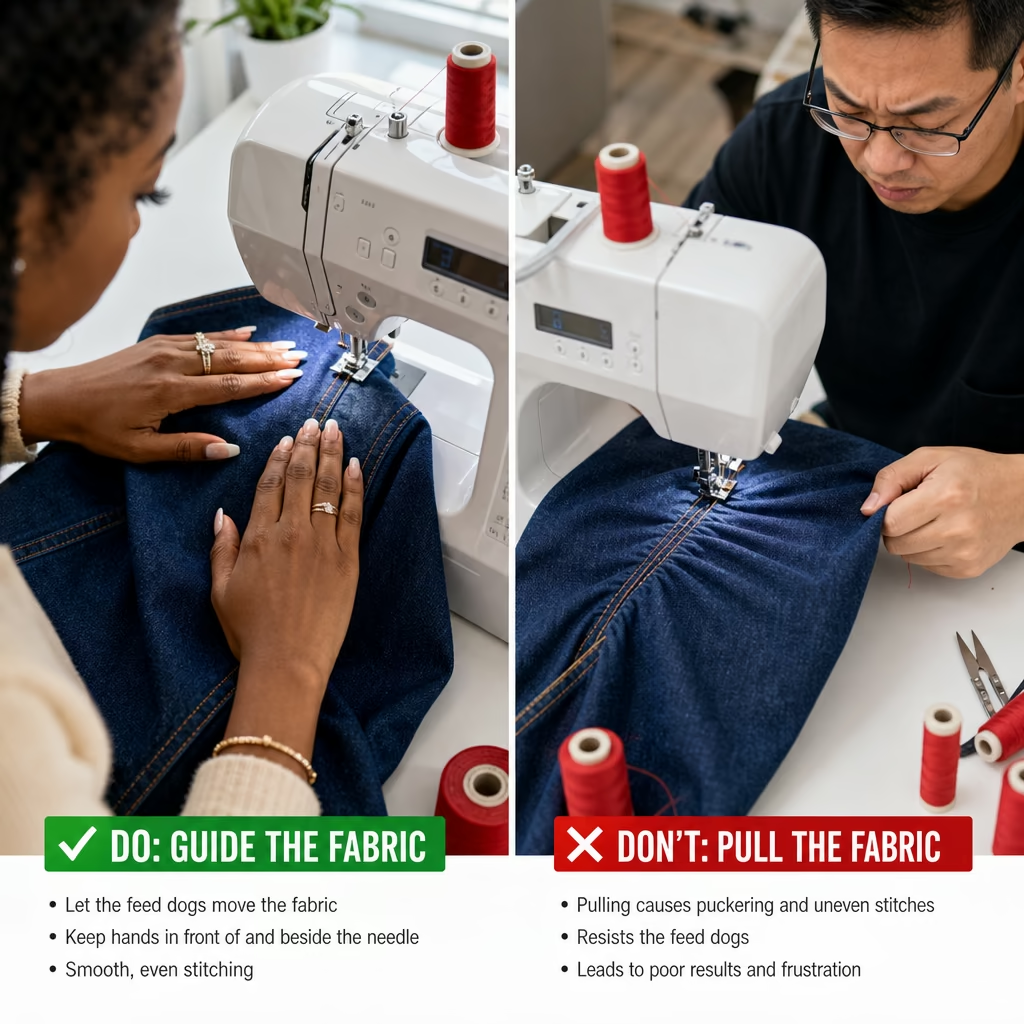
You’re pulling the fabric too hard if your needles bend or break mid-seam, stitches are uneven in length, or you hear the machine motor strain. The feed dogs should move the fabric, your hands should only guide direction, not pull or push.
Signs you’re pulling or pushing fabric:
- Needles break in the middle of seams (not at thick spots)
- Bent needles that haven’t hit any hard objects
- Uneven stitch length (some stitches stretched, others compressed)
- Thread breaks frequently
- Machine makes a laboring sound
- Fabric puckers or stretches out of shape
Why pulling breaks needles:
When you pull fabric forward faster than the feed dogs are moving it, you create tension that pulls the fabric down and forward. This changes the angle at which the needle enters the fabric. Instead of going straight down, the needle flexes backward. On the upstroke, the flexed needle strikes the throat plate edge or bobbin case and breaks.
Pushing fabric (trying to slow it down) creates the opposite problem, the needle flexes forward and can hit the presser foot or throat plate on the downstroke.
Correct fabric handling technique:
- Rest hands lightly on the fabric, fingertips only
- Guide direction (keep seam allowance aligned) but don’t pull or push
- Let the feed dogs do the work,they’re designed to move fabric at the exact speed the needle is stitching
- Support heavy fabric behind and in front of the presser foot so weight doesn’t pull the fabric
- Use both hands to guide, one in front of the presser foot, one behind
Special cases where you need more control:
- Thick fabrics: Use a walking foot or reduce presser foot pressure so feed dogs can grip better
- Slippery fabrics: Increase presser foot pressure slightly or use a Teflon foot
- Stretchy fabrics: Support the fabric but don’t stretch it, let it feed naturally
Test your technique: Sew a test seam on scrap fabric with your hands hovering 1-2 inches above the fabric, barely touching. If the seam looks perfect, you were pulling too hard. If the fabric veers off course, you need light guidance, not pulling.
Is My Sewing Machine Timing Off If Needles Keep Breaking?
Your machine timing is likely off if needles break repeatedly in the same spot (usually at the shaft just above the eye), you hear a clicking or scraping sound with each stitch, or the needle visibly strikes the bobbin case or hook. Timing issues cause the needle to be in the wrong position when the hook swings past, resulting in collisions.
What timing controls:
Sewing machine timing synchronizes the needle’s up-and-down movement with the hook’s rotation (the hook catches the upper thread to form a stitch). When timing is correct, the needle rises just as the hook swings behind it, with 1-2mm clearance. When timing is off, the needle and hook collide.
Symptoms of timing problems:
- Needles break at the same point on the shaft repeatedly
- Metallic clicking or scraping sound with each stitch
- Skipped stitches (hook misses the thread loop)
- Visible needle deflection or contact with the bobbin case
- Thread bunching under the fabric
- Needle strikes the throat plate even with correct needle installation
What causes timing to go off:
- Previous needle break where the broken needle struck the hook or bobbin case
- Sewing over thick seams that forced the needle to bend and strike components
- Machine dropped or jarred during transport
- Worn hook or bobbin case that’s shifted position
- Incorrect bobbin case installation after cleaning
Can you fix it yourself?
Timing adjustment requires specialized knowledge and tools. On most home machines, you need to:
- Remove the needle plate and bobbin case
- Locate the timing marks on the hook and needle bar
- Loosen the hook drive mechanism
- Rotate the hook to align timing marks
- Tighten and test
This is a job for a professional unless you have experience with machine repair. Incorrect timing adjustment can make the problem worse or damage the hook mechanism. Professional timing adjustment costs $80-$150 and usually includes cleaning and lubrication.
Temporary test: Install a new needle correctly (flat side to the back, pushed all the way up into the needle clamp). Hand-turn the wheel slowly and watch the needle as it descends and rises. If you see the needle touch or scrape the bobbin case or hook, stop immediately, your timing is off. Don’t sew until it’s repaired, or you’ll break more needles and potentially damage the hook.
What Needle Should Beginners Use to Avoid Breaking?
Beginners should start with Schmetz Universal needles in size 80/12 for general sewing and size 90/14 for medium-weight fabrics like denim and canvas. These sizes handle the widest range of common fabrics and are forgiving of minor technique issues.
Why 80/12 Universal is beginner-friendly:
- Works on most quilting cottons, lightweight linens, and basic wovens
- Strong enough to handle minor technique mistakes (slight pulling)
- Not so large that it damages delicate fabrics
- Readily available at any fabric store
- Inexpensive ($4-$6 for a 10-pack)
Beginner needle starter kit:
- Schmetz Universal 80/12 (10-pack) for general sewing
- Schmetz Jeans 100/16 (5-pack) for denim and heavy fabrics
- Schmetz Stretch 75/11 (5-pack) for knits and jersey
- Schmetz Microtex 70/10 (5-pack) for silky or delicate wovens
Total cost: $20-$25 for 30 needles that cover 95% of beginner projects.
Needles to avoid as a beginner:
- Size 60/8 or 70/10 on anything but delicate fabrics,too fragile, breaks easily with imperfect technique
- Leather needles,cutting point can damage regular fabrics if used incorrectly
- Topstitch needles,large eye requires specific thread types
- Twin needles,require perfect tension and timing, frustrating for beginners
Beginner technique tips to prevent breaks:
- Change needles every project or every 6-8 hours of sewing
- Never sew over pins,remove them as you approach
- Let the machine feed the fabric,don’t pull or push
- Slow down for thick seams,use the handwheel if needed
- Match needle size to fabric weight,when in doubt, go one size larger
- Install needles correctly,flat side to the back, pushed all the way up
When to size up: If your 80/12 needle bends, breaks, or struggles on a fabric, move up to 90/14. If 90/14 still breaks, you need a specialty needle (jeans, leather, or heavy-duty).

SEWING MADE SIMPLE: SCHMETZ Universal Needles work with all home sewing machines and handle everything from delicate silks to heavy denim, making them perfect for any quilting, embroidery, craft, or home décor project

Made in India

SEWING MADE SIMPLE: SCHMETZ Universal Needles work with all home sewing machines and handle everything from delicate silks to heavy denim, making them perfect for any quilting, embroidery, craft, or home décor project
Can a Bent Needle Cause More Needles to Break?
A bent needle doesn’t directly cause other needles to break, but the damage that bent the first needle (like hitting the bobbin case or throat plate) often damages machine components, which then break subsequent needles. Additionally, a bent needle that you continue using will break and may damage the hook or timing.
What happens when you use a bent needle:
- The needle doesn’t descend straight down, it angles toward the throat plate or bobbin case
- The bent needle strikes components it should clear
- The needle breaks, and the broken tip or shaft strikes the hook, bobbin case, or throat plate
- These components get nicked, scratched, or shifted out of position
- The next needle (even a new, straight one) now strikes the damaged component and breaks
Damage cascade:
- First needle bends (from hitting a pin, pulling fabric, or wrong size)
- Bent needle strikes bobbin case, creating a burr or nick
- You replace the needle with a new one
- New needle strikes the burr on the bobbin case and breaks
- You replace the needle again, same result
- You assume you have “bad needles” when the real problem is the damaged bobbin case
How to check for component damage:
- Remove the bobbin case and inspect for scratches, nicks, or burrs
- Run your fingernail along the edge, it should be perfectly smooth
- Check the throat plate for scratches or burrs around the needle hole
- Inspect the hook (the rotating part that catches thread) for damage
- Look at the presser foot underside for scratches
If you find damage:
- Bobbin case: Replace ($15-$40) or have it professionally smoothed
- Throat plate: Replace ($10-$30) or smooth burrs with fine emery cloth
- Hook: Professional repair required ($100-$200)
- Presser foot: Replace ($8-$25)
Prevention: Never reuse a needle that’s been bent, even if you straighten it. The metal has been stressed and will break more easily. Discard bent needles immediately and inspect your machine components before installing a new needle.
How Often Should I Change My Sewing Machine Needle?
Change your sewing machine needle every 6-8 hours of sewing time, after completing each major project, or immediately if you hear a popping sound, see skipped stitches, or notice the needle is bent or damaged. Professional sewers and quilters change needles even more frequently, every 4-6 hours or at the start of each new project.
Why needles wear out:
- Point dulls from repeated fabric penetration (especially on synthetic or tightly woven fabrics)
- Eye develops burrs from thread friction, which then shreds thread
- Shaft develops micro-bends from normal flexing during sewing
- Coating wears off (on coated needles), reducing lubricity
Change immediately if:
- You hear a popping or punching sound when the needle enters fabric
- Stitches skip frequently
- Thread breaks or shreds repeatedly
- The needle is visibly bent (even slightly)
- You hit a pin or hard object
- You’re starting a new project with different fabric (change size/type)
- The needle has been in the machine for more than 8 hours of sewing time
Needle lifespan by fabric type:
- Quilting cotton, linen, basic wovens: 6-8 hours
- Denim, canvas, heavy fabrics: 4-6 hours (dulls faster)
- Synthetic fabrics (polyester, microfiber): 4-6 hours (dulls faster)
- Silk, delicate fabrics: 6-8 hours (but inspect frequently, any burr will snag)
- Leather, vinyl: 2-4 hours (very abrasive)
Cost of not changing needles:
A dull needle forces you to sew slower, creates poor stitch quality, and increases the risk of breakage. The $0.50-$1.00 cost of a new needle is trivial compared to:
- Ripping out and re-sewing seams with skipped stitches
- Repairing snags or holes in expensive fabric
- Replacing a damaged bobbin case or hook ($50-$200)
Tracking needle changes:
- Write on masking tape and stick it on your machine: “Needle changed [date] – [fabric type]”
- Keep a sewing journal noting needle changes
- Change at the start of each project as a habit (simplest method)
Exception: If you’re sewing for 30 minutes on a small project, you don’t need to change the needle afterward. The 6-8 hour guideline is cumulative sewing time, not calendar time. But if you can’t remember when you last changed the needle, change it now.
Why Does My Needle Break Only When Doing Zigzag Stitch?
Needles break during zigzag stitching because the needle swings side-to-side and requires more clearance than straight stitching, making it more likely to strike the presser foot, throat plate edges, or a damaged throat plate hole. If your throat plate hole is worn, nicked, or the wrong type, the needle hits it during the side swing.
Why zigzag is harder on needles:
- Lateral movement means the needle must clear the throat plate hole at multiple angles
- Wider stitch width increases the distance the needle travels side-to-side
- Presser foot clearance becomes critical, the needle must clear the foot opening at both extremes
- Throat plate hole size matters, a straight-stitch throat plate (small round hole) will break needles during zigzag
Common causes of zigzag needle breakage:
1. Wrong throat plate:
- Straight-stitch plate (small round hole): Only for straight stitching
- Zigzag plate (wide oval hole): Required for zigzag and decorative stitches
- Solution: Swap to the correct throat plate for your stitch type
2. Damaged throat plate hole:
- Repeated needle strikes create burrs or enlarge the hole unevenly
- The needle catches on the burr during side swing
- Solution: Replace throat plate ($10-$30) or smooth burrs with fine emery cloth
3. Wrong presser foot:
- Some presser feet have narrow openings that don’t accommodate wide zigzag
- The needle strikes the foot during side swing
- Solution: Use a zigzag foot or open-toe foot with a wide needle opening
4. Stitch width too wide for needle position:
- If needle position is set to left or right (not center), a wide zigzag makes the needle swing beyond the throat plate hole
- Solution: Center the needle position when using wide zigzag stitches
5. Needle not fully seated:
- A needle that’s not pushed all the way up into the clamp sits lower and may strike the throat plate during side swing
- Solution: Remove and reinstall needle, ensuring it’s fully seated
Test procedure:
- Install a new needle correctly (flat side back, fully seated)
- Set machine to zigzag, width 3-4mm
- Remove fabric and hand-turn the wheel slowly
- Watch the needle as it swings left and right
- If the needle touches the throat plate, presser foot, or bobbin case, stop, you’ve found the problem
Quick fix: If you can’t replace the throat plate immediately, reduce zigzag width to 2-3mm and test. If the needle clears at narrower width, the throat plate hole is the problem.
Is My Needle Hitting the Bobbin Case or Presser Foot?
Your needle is hitting the bobbin case or presser foot if you hear a metallic clicking sound with each stitch, see scratches on the needle shaft, or needles break repeatedly at the same spot just above the eye. This indicates a timing problem, incorrect needle installation, or damaged components.
How to check if the needle is hitting components:
Visual inspection:
- Remove fabric and thread
- Install a new needle (flat side to back, fully seated)
- Raise the presser foot
- Slowly hand-turn the wheel toward you
- Watch the needle as it descends and rises
- Look for the needle touching or scraping the bobbin case, hook, or presser foot
What you should see (normal):
- Needle descends through the throat plate hole without touching edges
- Needle passes 1-2mm behind the bobbin case/hook (no contact)
- Needle rises without touching anything
- No metallic sounds
What indicates a problem:
- Needle visibly touches or scrapes the bobbin case
- Needle deflects (bends) as it passes the hook
- Metallic clicking or scraping sound
- Needle touches the presser foot shank or edges
Common causes:
1. Needle installed incorrectly:
- Flat side facing the wrong direction (should face back on most machines)
- Needle not pushed all the way up into the clamp
- Needle clamp screw not tightened
- Solution: Remove and reinstall needle correctly
2. Wrong needle type:
- Industrial needles in a home machine (different shank length)
- Bent or damaged needle
- Solution: Use correct household needle type (130/705 H system for most home machines)
3. Timing is off:
- Hook and needle are out of sync
- Needle is in the wrong position when hook swings past
- Solution: Professional timing adjustment ($80-$150)
4. Bobbin case shifted or damaged:
- Bobbin case not fully seated in the hook race
- Bobbin case damaged from previous needle strike
- Solution: Remove and reinstall bobbin case; replace if damaged ($15-$40)
5. Wrong presser foot:
- Presser foot opening too narrow for the needle
- Presser foot not snapped on correctly
- Solution: Use correct presser foot; ensure it’s fully attached
Immediate action if needle is hitting components:
- Stop sewing immediately,continued use will damage timing
- Check needle installation first (easiest fix)
- Inspect bobbin case for damage or improper seating
- If problem persists, take machine to a professional, timing adjustment required
Cost to ignore: A needle hitting the bobbin case or hook will eventually damage the hook mechanism, requiring a $150-$300 repair. Catching it early (when you first hear clicking) prevents expensive damage.
Frequently Asked Questions
Why do sewing machine needles break at the top?
Needles break at the top (near the shank) when they’re struck from the side, usually from pulling fabric or using a needle that’s too thin for the fabric weight. The top of the needle shaft is the weakest point when lateral force is applied.
Can I use a bent needle if I straighten it?
Never reuse a bent needle, even if straightened. The metal has been stressed and weakened at the bend point and will break more easily. Bent needles also indicate a problem (wrong size, hitting objects, pulling fabric) that you should address before continuing.
How do I know if my needle is dull?
A dull needle makes a popping or punching sound when entering fabric, creates skipped stitches, or leaves rough holes instead of clean punctures. Replace the needle immediately if you hear popping sounds.
Why does my needle break when sewing knits?
Needles break on knits when you use a sharp/universal needle instead of a ballpoint/stretch needle, or when the needle is too large and catches on the knit loops. Use a stretch needle (75/11 or 90/14) with a rounded point that slides between fibers instead of piercing them.
What’s the difference between cheap and expensive needles?
Expensive needles (Schmetz, Organ) use higher-quality steel, more precise manufacturing, and better coatings, resulting in sharper points, smoother shafts, and longer life. Cheap needles dull faster, break more easily, and may have burrs that damage thread. The price difference is $0.50-$1.00 per needle, worth it for better results.
Can a broken needle damage my sewing machine?
Yes. A broken needle can strike and damage the bobbin case, hook, throat plate, or timing mechanism. If the hook is damaged, repair costs $150-$300. Always stop immediately if a needle breaks and inspect for damage before installing a new needle.
Why do needles break more often on old sewing machines?
Older machines may have worn bobbin cases, damaged throat plates, or timing that’s drifted out of adjustment over decades of use. Additionally, older machines often require more frequent lubrication, and dry mechanisms create more vibration that stresses needles.
Should I use the same needle for an entire quilt?
No. Change needles every 6-8 hours of quilting or after each quilt section. Quilting dulls needles quickly because you’re sewing through multiple fabric layers plus batting. A dull needle creates poor stitch quality and increases the risk of breakage.
What does it mean if my needle breaks at the eye?
Needles that break at the eye are usually hitting a hard object (pin, zipper, bobbin case) or are under extreme stress from fabric that’s too thick for the needle size. The eye is a weak point because the metal is removed to create the thread hole.
Can thread cause needles to break?
Indirectly, yes. Very thick thread in a needle with a small eye creates friction and heat that weakens the needle. Old, brittle thread can also jam in the eye, creating resistance that bends the needle. Always match thread weight to needle size.
Why does my needle break only on certain fabrics?
Different fabrics require different needle types and sizes. A needle that works perfectly on quilting cotton will break on denim (too thin), leather (wrong point type), or knits (sharp point catches loops). Always match needle type and size to fabric characteristics.
How do I prevent needles from breaking when sewing thick seams?
Slow down or use the handwheel to manually advance through thick spots, use a needle sized for the thickest part of the seam (not the average), and consider a walking foot to help feed thick layers evenly. Never force thick fabric under the presser foot.
Conclusion
Needle breakage frustrates every sewer, but it’s almost always preventable. The three most common causes, wrong needle size, sewing over pins, and pulling fabric, account for 80% of breaks. Match your needle size and type to your fabric weight, remove pins before the needle reaches them, and let the feed dogs move the fabric without pulling or pushing.
Take action now:
- Inspect your current needle, if you can’t remember when you installed it, replace it
- Check your needle stash and make sure you have the right sizes for your projects (80/12 universal, 100/16 jeans, 75/11 stretch)
- Test your technique on scrap fabric, letting the machine feed without hand pressure
- If needles keep breaking after addressing these issues, have your machine’s timing checked professionally
Investing $20 in a variety pack of quality needles and learning proper technique will eliminate needle breakage and improve your stitch quality. The few seconds it takes to remove pins or change needles prevents hours of frustration and potential machine damage.


