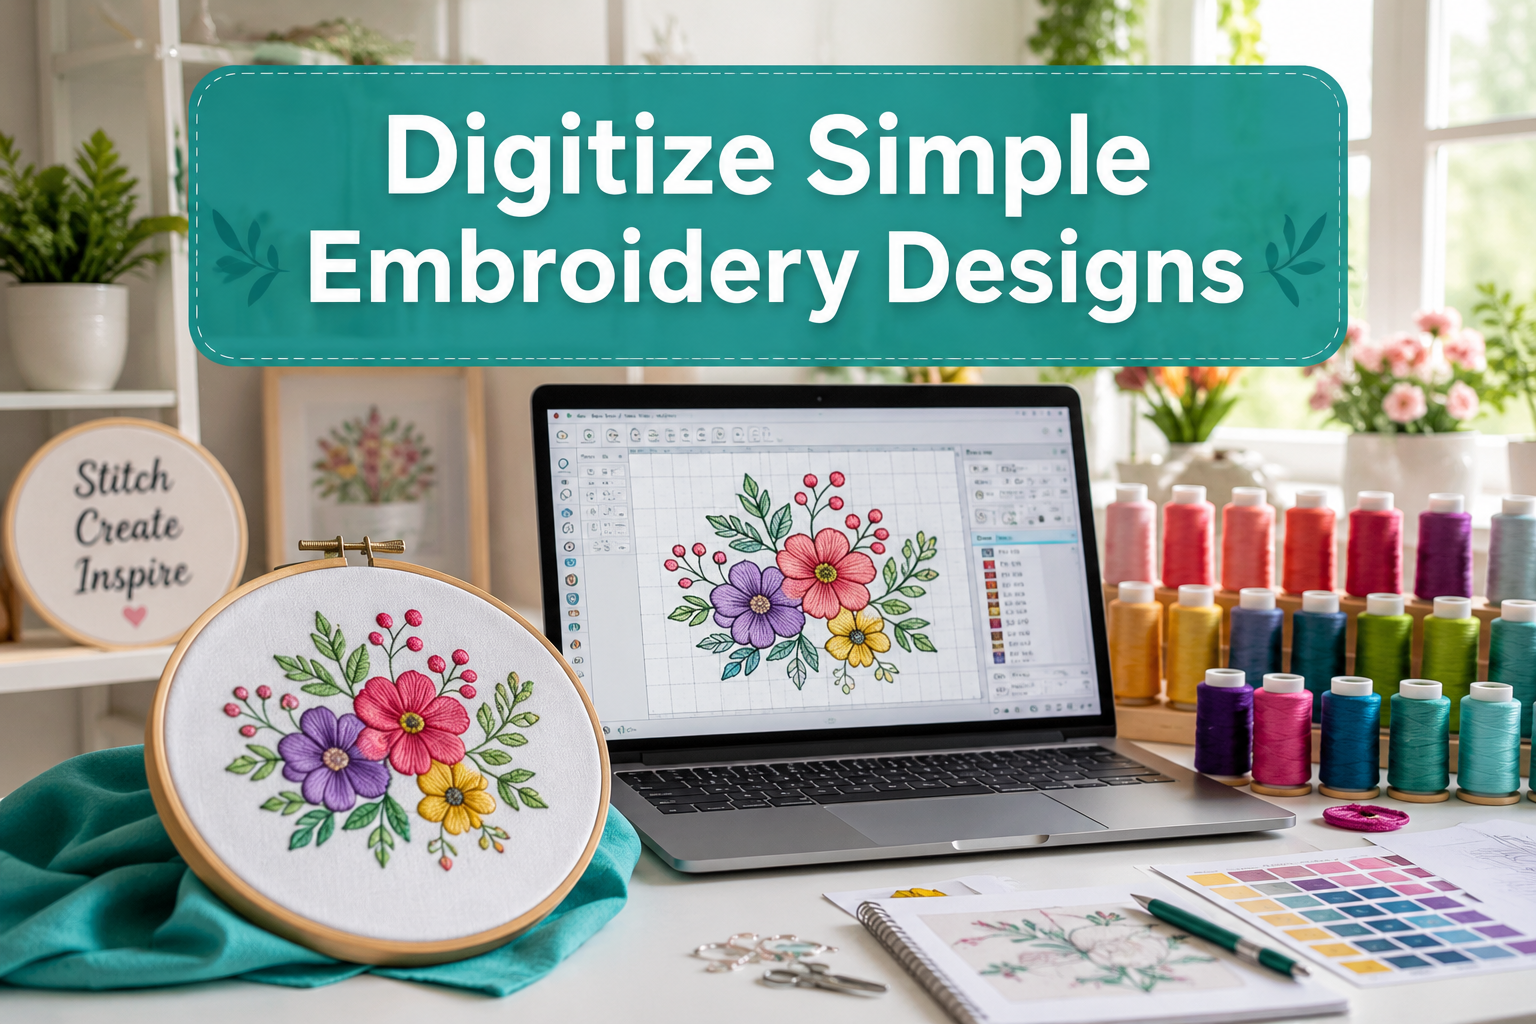
Quick Answer: Digitizing a simple embroidery design means converting artwork (like a logo or drawing) into a stitch file that embroidery machines can read. You’ll need digitizing software (free options start at $0, paid versions range from $200-$2,000), a clean image to work from, and basic knowledge of stitch types. Most beginners can digitize their first simple design in 2-4 hours using entry-level software like Ink/Stitch or SophieSew.
Key Takeaways
- Digitizing transforms images into machine-readable stitch files with specific instructions for needle movement, stitch types, and thread colors
- Free software options exist (Ink/Stitch, SophieSew) that work well for simple designs, while paid software ($200-$2,000) offers advanced features
- File format matters: Most home embroidery machines need PES, DST, JEF, or EXP formats depending on the brand
- Simple designs digitize easier: Start with designs that have 1-3 colors, clear outlines, and minimal detail before tackling complex artwork
- Underlay stitches prevent distortion by stabilizing fabric before decorative stitches are added
- Common mistakes include wrong stitch density (too many stitches cause puckering, too few create gaps), improper stitch direction, and skipping test stitches
- Professional digitizers charge $10-$50 per thousand stitches if you prefer outsourcing over learning the skill yourself
- Learning curve is moderate: Hobbyists typically need 10-20 practice designs to feel confident with basic digitizing
What Does Digitizing Embroidery Mean?
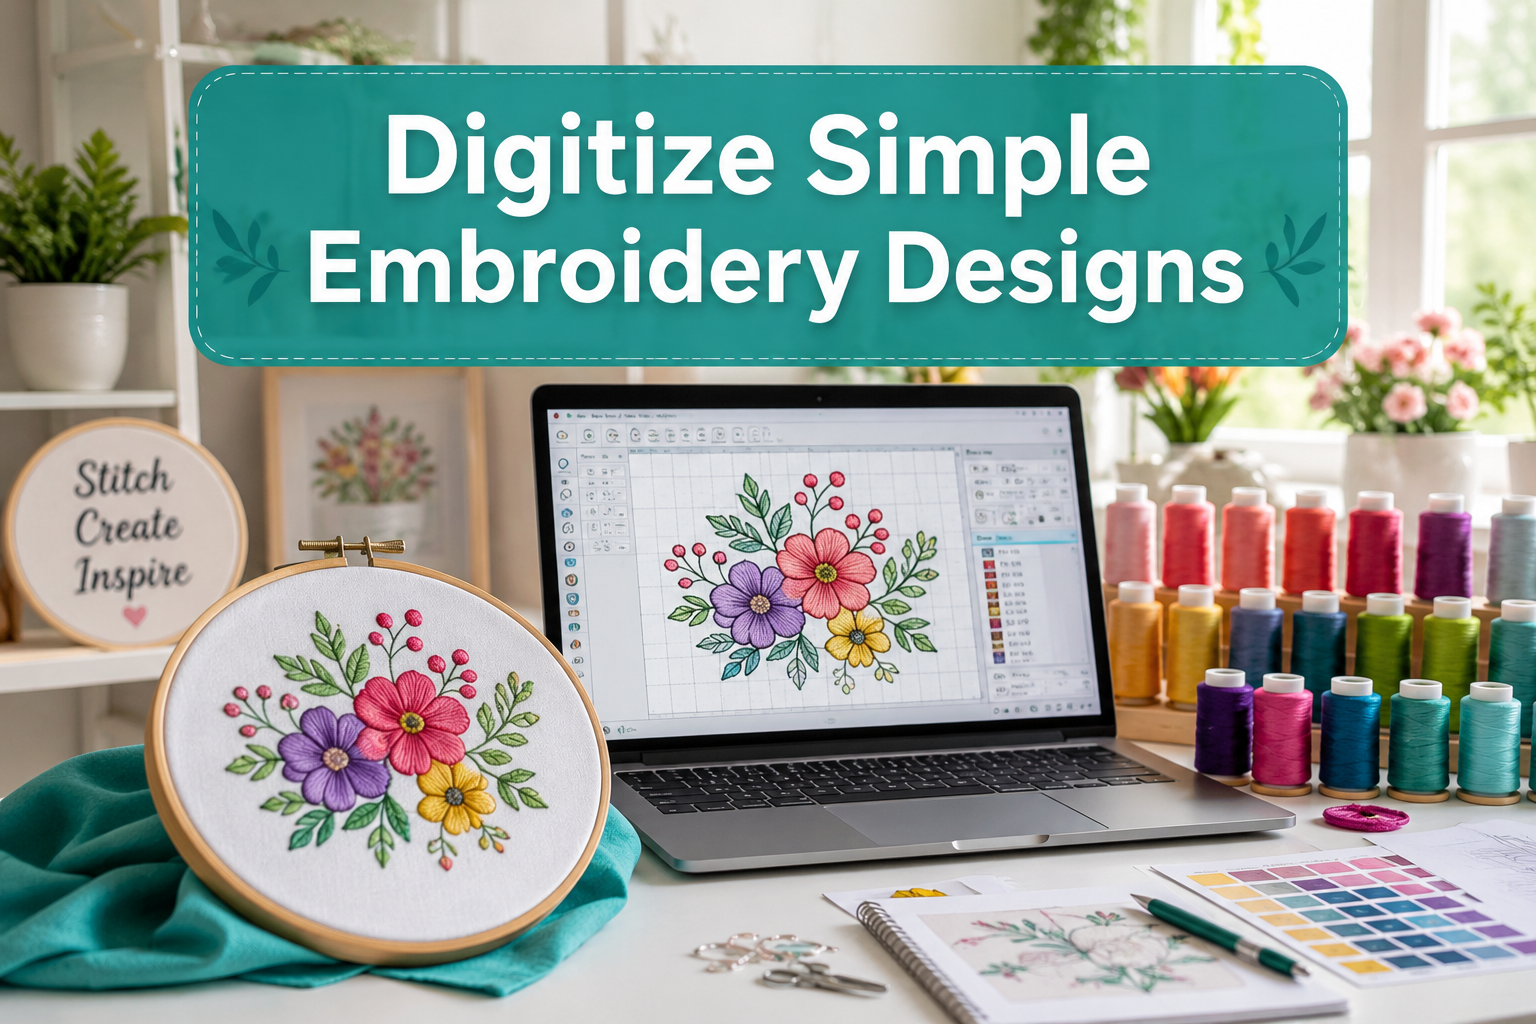
Digitizing embroidery means converting artwork, logos, or drawings into a digital stitch file that tells an embroidery machine exactly where to move the needle, what stitch type to use, and when to change thread colors. Unlike a regular image file (JPG or PNG), a digitized embroidery file contains mathematical coordinates and stitch commands.
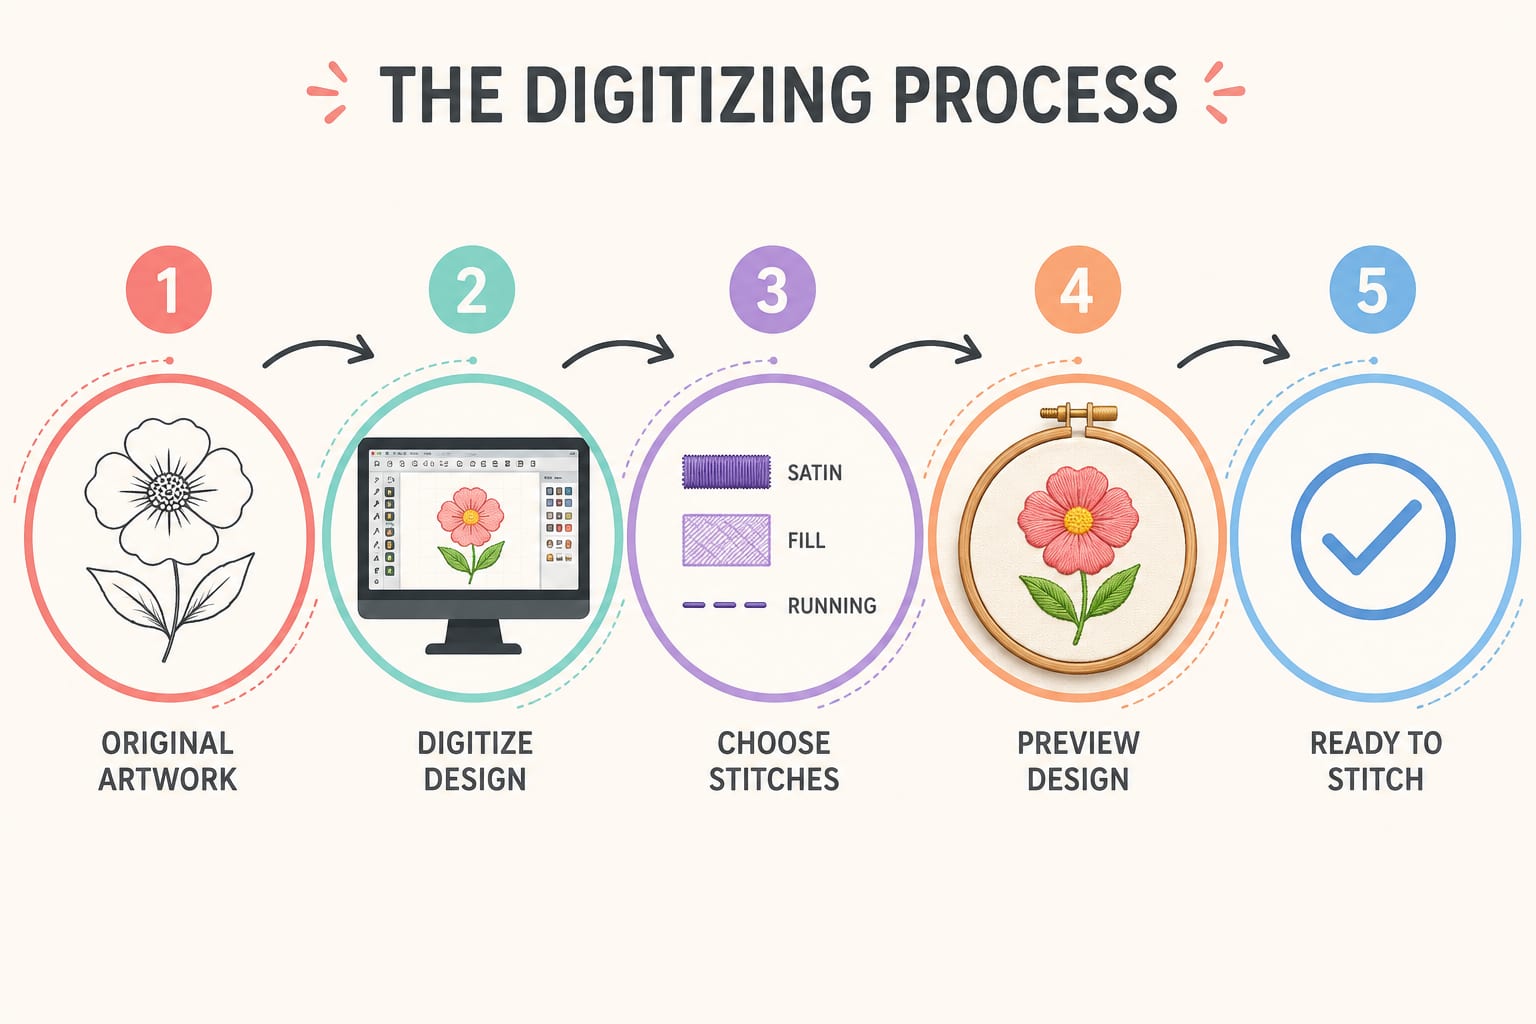
The process involves mapping out each element of your design and assigning specific stitch types:
- Running stitches for outlines and fine details
- Satin stitches for borders and lettering
- Fill stitches for larger solid areas
Think of it like creating a recipe for your embroidery machine. A photo of a cake won’t help you bake one, you need step-by-step instructions. Similarly, your machine can’t “see” a picture and stitch it. It needs precise commands telling it to move 2mm left, create a satin stitch 3mm wide, stop, change to red thread, then continue.
Common mistake: Many beginners assume they can just load a JPG into their embroidery machine. Standard image files don’t contain stitch information, so they won’t work. You must convert them through digitizing software first.
Why Learn How to Digitize a Simple Embroidery Design Yourself?
Learning to digitize your own embroidery designs gives you complete creative control and saves money long-term. Professional digitizing services charge $10-$50 per design (or per thousand stitches), which adds up quickly if you create custom projects regularly.
Key benefits of digitizing yourself:
- Unlimited design modifications without paying for revisions
- Instant turnaround instead of waiting days for a digitizer
- Custom sizing optimized for your specific projects
- Understanding of how designs stitch helps you troubleshoot problems
- One-time software investment versus ongoing service fees
For hobbyists who embroider 2-3 custom designs monthly, the break-even point typically comes within 6-12 months compared to outsourcing. If you only need occasional custom designs (1-2 per year), paying a professional digitizer makes more financial sense.
Choose to learn digitizing if: You create frequent custom designs, want full creative control, enjoy learning technical skills, or plan to sell embroidered products. Stick with professional services if: You rarely need custom designs, prefer focusing on the stitching process, or don’t have time to learn new software.
Best Software for Digitizing Embroidery Designs for Beginners
Beginner-friendly digitizing software should have an intuitive interface, auto-digitizing features, and clear tutorials. The best starter options balance ease of use with enough features to create quality designs.
Top beginner software options:
Ink/Stitch (Free)
- Open-source extension for Inkscape (also free)
- Best for hobbyists on a budget
- Requires learning Inkscape basics first
- Active community support and tutorials
- Exports to most common formats
SophieSew (Free)
- Windows-only, simple interface
- Limited features but easy to learn
- Good for very basic designs
- No longer actively developed
Embrilliance Essentials ($170)
- Mac and Windows compatible
- Excellent for editing existing designs
- Limited original digitizing without add-ons
- Great customer support
PE-Design 11 ($1,200-$1,500)
- Brother’s professional software
- Comprehensive features for all skill levels
- Includes auto-digitizing and manual tools
- Steep learning curve but powerful
Hatch Embroidery ($1,000-$2,000)
- Industry-standard professional software
- Subscription or perpetual license options
- Extensive training resources included
- Best for serious hobbyists planning to sell
Decision rule: Start with Ink/Stitch if you’re budget-conscious and willing to learn two programs. Choose Embrilliance Essentials if you want a polished beginner experience with room to grow through add-ons. Invest in Hatch or PE-Design only after you’ve confirmed digitizing is a long-term hobby.

StitchArtist Level 1 is designed for hobby embroiderers who need to create stitches without going into debt or spending endless hours learning complicated software. Level 1 curates a limited set of stitch types and properties so that the user can simply ‘create’ without learning uneccessary tools. Typical projects for Level 1 include simple applique designs, running stitch designs and simple filled shapes, backgrounds and additional decorative elements for design compositions.


Free Embroidery Digitizing Software vs Paid Options
Free embroidery digitizing software works well for simple designs but lacks advanced features like automatic underlay generation, complex stitch effects, and professional-grade editing tools. Paid software offers time-saving automation, better stitch quality, and comprehensive support.
Free software advantages:
- Zero financial risk while learning
- Sufficient for basic shapes and text
- Active user communities for troubleshooting
- Good for testing if digitizing suits you
Free software limitations:
- Steeper learning curve (less polished interfaces)
- Manual processes for features paid software automates
- Limited or no customer support
- Fewer export format options
- Basic stitch types only
Paid software advantages:
- Auto-digitizing converts images in seconds
- Advanced stitch types (3D foam, appliqué, specialty fills)
- Professional lettering engines
- Automatic underlay and pull compensation
- Direct customer support and structured training
Paid software drawbacks:
- Significant upfront investment ($200-$2,000)
- Subscription models create ongoing costs
- Feature overload can overwhelm beginners
- May include tools you’ll never use
Real-world comparison: A simple logo with text might take 45 minutes in Ink/Stitch (manually setting stitch angles, density, and underlay) versus 15 minutes in Hatch (using auto-digitizing with manual touch-ups). For hobbyists digitizing 1-2 designs monthly, the time savings may not justify the cost. For those creating 10+ designs monthly, paid software quickly pays for itself in time saved.

Over 60 built-in line art designs and over 14 fill patterns

Compatible with current Windows and MacOS operating systems with free, downloadable updates and disk-free installers available.

Comprehensive Digitizing Solution: Level 2 includes Level 1 functions without needing 2 programs. It is designed for production and skills training for those who would like to create more sophisticated designs and logos, as well as a more complete set of tools for all design creations. It allows the user to learn a wide cross-section of stitch types and properties, giving them the freedom to create virtually any design. If you are looking to use satin stitches to their fullest extent, Embrilliance StitchArtist Level 2 has the tools you need.
How Much Does Embroidery Digitizing Software Cost?
Embroidery digitizing software ranges from free (open-source options) to $2,000+ for professional packages, with most beginner-friendly paid options falling between $200-$500. Subscription models typically cost $15-$30 monthly, while perpetual licenses require a larger one-time payment.
Price tiers and what you get:
| Price Range | Software Examples | Best For |
|---|---|---|
| Free | Ink/Stitch, SophieSew | Budget-conscious beginners, simple designs |
| $100-$300 | Embrilliance Essentials, SewWhat-Pro | Hobbyists wanting editing tools |
| $500-$1,000 | PE-Design 11, Janome Digitizer MBX | Serious hobbyists, small business owners |
| $1,000-$2,000 | Hatch, Wilcom TrueSizer | Professional digitizers, production work |
| $2,000+ | Wilcom E4, Pulse | Commercial embroidery businesses |
Subscription vs. perpetual license:
Hatch offers both models,$30/month subscription or $1,000-$2,000 one-time purchase. The subscription includes automatic updates and support, while perpetual licenses may charge for major version upgrades. If you’ll use the software for 3+ years, perpetual licenses typically cost less overall.
Hidden costs to consider:
- Computer upgrades (some software requires Windows, specific RAM, or graphics cards)
- Training courses ($50-$200 for comprehensive tutorials)
- Font packages ($20-$100 for specialty lettering)
- Stabilizer and thread for test stitching
Budget recommendation: Start with free software for your first 5-10 designs. If you continue enjoying digitizing, invest in a $200-$500 package. Only upgrade to professional software ($1,000+) once you’re creating designs weekly or generating income from embroidery.

This product upgrades StitchArtist level 2 to StitchArtist Level 3. You must own level 2 to use this product. If you do not own any StitchArtist software, you must purchase Stitchartist level 3, not this upgrade, to have level 3 functions.

Level 3 includes Level 1 and Level 2 features; it is designed for someone who either loves to create designs or works commercially in the embroidery field. This level includes advanced items such as Styles, QuickStyles, an Eyelet tool, Carving lines, graphical operators such as Cut, AND, Union, Flatten, Inflate/Deflate, Re-construct and Break. It also allows for the content within the product to be expanded by publishing Motifs and Embossed effects. Additional controls are available to work how you like. Font makers and patch creators will find special tools exclusive to StitchArtist 3 for scaleable BX font publishing, faux-overlock edges, and full-stack patch digitizing.

View designs in your Explorer (PC) or Finder (Mac)
Step-by-Step Process to Digitize an Embroidery File
Digitizing an embroidery file involves preparing your artwork, setting stitch types and directions, adding underlay, and exporting to your machine’s format. The entire process for a simple design takes 30 minutes to 2 hours depending on complexity and your experience level.
Complete digitizing workflow:
Step 1: Prepare Your Artwork
- Start with a clean, high-contrast image (black lines on white background work best)
- Simplify complex details, embroidery can’t reproduce tiny elements under 3mm
- Save as PNG or JPG at 300 DPI minimum
- Measure your desired finished size
Step 2: Import and Scale
- Open your digitizing software and import the image
- Scale to your target dimensions (most software shows size in millimeters)
- Lock the aspect ratio to prevent distortion
- Position the design center at the hoop center
Step 3: Define Stitch Areas
- Trace outlines using the software’s drawing tools
- Assign stitch types to each element:
- Thin lines (under 2mm): running stitch
- Medium borders (2-6mm): satin stitch
- Large filled areas: fill stitch
- Set stitch direction (usually perpendicular to the longest dimension)
Step 4: Set Stitch Parameters
- Density: 4-6 lines per millimeter for most fabrics
- Underlay: Add running stitch underlay for stability
- Pull compensation: Slight enlargement to counteract thread tension
- Stitch length: 3-4mm for running stitches, auto for satin/fill
Step 5: Arrange Stitch Order
- Sequence elements to minimize thread trims and jump stitches
- Stitch underlay first, then fills, then outlines
- Group same-color elements together
- Add tie-off stitches at start and end
Step 6: Preview and Adjust
- Use 3D preview to check for gaps or overlaps
- Verify stitch count (simple designs: 2,000-8,000 stitches)
- Check that no single element exceeds your hoop size
- Simulate the stitch-out to spot problems
Step 7: Export
- Save in your machine’s native format (PES for Brother, JEF for Janome, etc.)
- Keep the original working file for future edits
- Transfer to USB drive or direct machine connection
Step 8: Test Stitch
- Use similar fabric and stabilizer to your final project
- Check for puckering, gaps, or distortion
- Make adjustments in software if needed
- Re-export and test again
Pro tip: Always test stitch before embroidering on your final project. Fabric type, stabilizer choice, and thread weight all affect how a design stitches, even if the digitizing is perfect. For more guidance on troubleshooting common issues, check out our sewing machine troubleshooting guide.
How to Convert a JPG Image to an Embroidery File
Converting a JPG to an embroidery file requires digitizing software with auto-digitizing features or manual tracing tools. Auto-digitizing analyzes the image and generates stitches automatically, while manual digitizing gives you precise control over every element.
Auto-digitizing method (faster, less control):
Clean up your JPG in photo editing software first
- Increase contrast between elements
- Remove backgrounds
- Simplify small details
- Ensure edges are crisp
Import into digitizing software
- Use the auto-digitize or “instant digitize” function
- Select photo or logo mode based on your image type
- Set your desired output size
Choose stitch types
- Most software auto-assigns fill, satin, or running stitches
- Review and adjust assignments as needed
- Simplify overly complex areas
Edit the result
- Auto-digitizing rarely produces perfect results
- Adjust stitch angles for better coverage
- Fix gaps or overlaps
- Reduce stitch count if too dense
Export and test
- Save in your machine format
- Always test stitch before assuming it’s ready
Manual digitizing method (slower, better quality):
- Import JPG as a background template
- Trace each element using drawing tools
- Assign stitch types manually
- Set all parameters (density, underlay, direction)
- Export and test
Which method to use: Auto-digitizing works for simple logos with clear shapes and limited colors. Manual digitizing produces better results for complex designs, photographs, or anything requiring precise stitch placement. Most professional digitizers use auto-digitizing as a starting point, then manually refine the result.
Common auto-digitizing problems:
- Too many stitches (causes puckering and slow stitch time)
- Poor stitch direction (creates gaps or rough texture)
- Unnecessary color changes
- Missing underlay stitches
Plan to spend 15-30 minutes editing auto-digitized designs to achieve professional quality.
What File Formats Do I Need for Embroidery Machines?
Embroidery machines require specific file formats based on their brand, with most home machines using PES (Brother), JEF (Janome), EXP (Bernina), HUS (Husqvarna Viking), or DST (universal but limited). Your digitizing software must export to your machine’s format, or you’ll need a conversion tool.
Common embroidery file formats by brand:
- PES – Brother, Baby Lock
- JEF – Janome, Elna
- EXP – Bernina
- HUS/VIP – Husqvarna Viking
- XXX – Singer, Pfaff
- DST – Industrial machines, universal format (no color info)
- VP3 – Pfaff, Husqvarna
- ART – Bernina (newer models)
Format capabilities:
Most modern formats store stitch coordinates, thread colors, and design information. DST is an older industrial format that only contains stitch coordinates, no color data, so you’ll need to manually set thread changes on your machine.
How to check your machine’s format:
- Look in your machine’s manual under “compatible file types”
- Check the USB stick that came with your machine, sample designs show the format
- Visit the manufacturer’s website and search your model number
If your software doesn’t export to your format:
Use a free conversion tool like SewWhat-Pro (Windows) or Embird (paid but has free trial). These programs convert between formats, though some stitch information may be lost in translation.
Best practice: Always save your working file in your software’s native format (the editable version) before exporting to your machine format. Machine formats are final output files, you can’t edit them easily. Keep the native file for future modifications.
Format quality note: Some formats preserve more information than others. PES, JEF, and EXP are robust formats that maintain design integrity. DST is basic and may lose some detail. When sharing designs with others who have different machine brands, provide multiple format options if possible.
What Is Underlay in Embroidery Digitizing and Do I Need It?
Underlay in embroidery digitizing is a foundation layer of stitches placed before decorative stitches to stabilize fabric, prevent distortion, and create a smooth surface for top stitches. Most designs need underlay for areas larger than 5mm wide, especially on stretchy or loosely woven fabrics.
Types of underlay stitches:
Running stitch underlay – Single lines of stitches that tack down fabric fibers. Best for small to medium fill areas and satin stitches. Uses minimal thread and adds little bulk.
Zigzag underlay – Back-and-forth stitches that provide more stability than running stitches. Ideal for wide satin stitches (over 6mm) and areas prone to distortion.
Double zigzag underlay – Two layers of zigzag stitches at different angles. Provides maximum stability for large fill areas, dense designs, or difficult fabrics like fleece or knits.
Edge walk underlay – Stitches that follow the outline of a shape. Secures edges before fill stitches and prevents fabric from pushing inward.
When you need underlay:
- Satin stitches wider than 4mm
- All fill stitch areas
- Designs on stretchy fabrics (t-shirts, athletic wear)
- Loosely woven fabrics (linen, canvas)
- Areas with high stitch density
When you can skip underlay:
- Very small details (under 5mm)
- Running stitch outlines
- Designs on stable, tightly woven fabrics
- Appliqué pieces (the fabric provides stability)
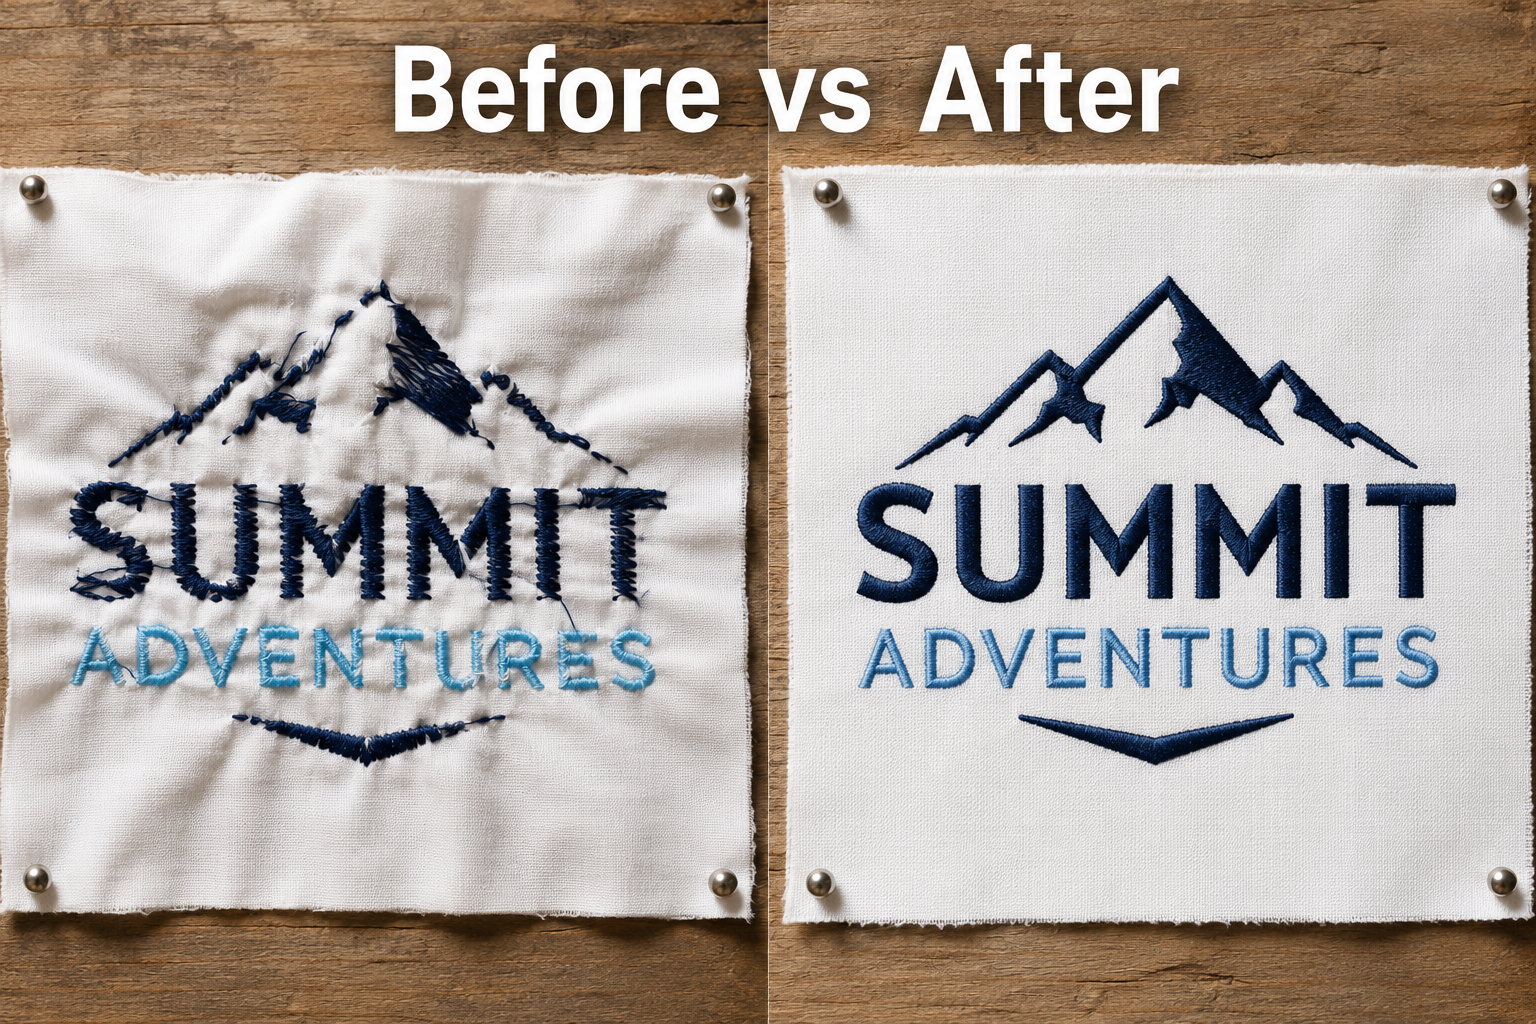
Common mistake: Adding too much underlay creates stiff, bulky embroidery that can pucker fabric or cause thread breaks. One layer of appropriate underlay is usually sufficient. Only use double underlay for problem fabrics or very large fill areas.
Underlay direction matters: Set underlay stitches perpendicular to your top stitches. If your satin stitch runs vertically, use horizontal underlay. This creates a stable grid that prevents gaps and distortion. Similar to how proper thread tension affects regular sewing, correct underlay prevents many embroidery problems.
Why Does My Digitized Embroidery Look Distorted When Stitched?
Digitized embroidery looks distorted when stitched due to inadequate stabilizer, incorrect stitch density, missing underlay, poor stitch direction, or fabric that’s too stretchy for the design. The digitizing may be technically correct, but the physical stitching process introduces tension that pulls fabric out of shape.
Most common causes and fixes:
Insufficient stabilizer
- Problem: Fabric puckers, waves, or tunnels around stitches
- Solution: Use tear-away stabilizer for wovens, cut-away for knits, or add a second layer for dense designs
- Rule: Stabilizer should extend 2-3 inches beyond your design on all sides
Wrong stitch density
- Problem: Too many stitches per area causes fabric to bunch; too few creates gaps
- Solution: Use 4-6 lines per millimeter for most fabrics; reduce density for thick fabrics like fleece
- Test: If you can’t see fabric between stitches, density is correct
Missing or inadequate underlay
- Problem: Stitches sink into fabric, creating an uneven surface
- Solution: Add running or zigzag underlay to all fill areas and wide satin stitches
- Check: Preview your design in software to verify underlay is present
Incorrect stitch direction
- Problem: Stitches pull fabric in one direction, creating distortion
- Solution: Set stitch direction perpendicular to the longest dimension of each element
- For text: Vertical letters need horizontal stitches
Fabric too stretchy
- Problem: Knits and stretchy fabrics distort even with proper digitizing
- Solution: Use cut-away stabilizer, reduce stitch density by 10-15%, add extra underlay, or choose a different fabric
Pull compensation not applied
- Problem: Designs stitch smaller than intended, especially text
- Solution: Add 5-10% pull compensation in your digitizing software to counteract thread tension
Hoop too loose
- Problem: Fabric shifts during stitching, causing misalignment
- Solution: Hoop fabric drum-tight with stabilizer; fabric should “ping” when tapped
Wrong needle or thread
- Problem: Heavy thread or wrong needle size causes fabric distortion
- Solution: Use 75/11 embroidery needles for most projects; match thread weight to design density
Troubleshooting process:
- Re-hoop with fresh stabilizer and ensure fabric is tight
- Test stitch on scrap fabric identical to your project
- If still distorted, check digitizing for proper underlay and density
- Adjust pull compensation if design stitches too small
- Consider re-digitizing with lower density for problem fabrics
If you’re experiencing similar issues with your regular sewing, our guide on why sewing machines jam covers related tension and fabric handling problems.
Common Mistakes When Digitizing Embroidery Designs
Common mistakes when digitizing embroidery designs include excessive stitch density, improper stitch direction, skipping underlay, creating designs too large for the hoop, and not testing before final production. These errors cause puckering, thread breaks, distortion, and poor stitch quality.
Top digitizing mistakes and how to avoid them:
1. Too many stitches (over-digitizing)
- Creates stiff, heavy embroidery that puckers fabric
- Causes excessive thread breaks and needle wear
- Increases stitch time and thread costs
- Fix: Aim for 4-6 lines per millimeter; reduce density for thick fabrics
2. Wrong stitch direction
- Creates gaps, rough texture, or visible fabric between stitches
- Makes designs look unprofessional
- Fix: Set stitches perpendicular to the longest dimension; follow natural contours
3. Skipping test stitches
- Wastes final project fabric when design has problems
- Misses opportunities to adjust before production
- Fix: Always test on similar fabric with same stabilizer and thread
4. Ignoring stitch order
- Creates excessive jump stitches and thread trims
- Causes misalignment when later elements shift earlier ones
- Fix: Stitch underlay first, then fills, then outlines; group same colors
5. No underlay on fill areas
- Stitches sink into fabric, creating uneven surface
- Increases distortion and puckering
- Fix: Add running or zigzag underlay to all areas over 5mm wide
6. Designs too complex for size
- Details under 3mm don’t stitch clearly
- Creates thread nests and breaks
- Fix: Simplify designs; remove tiny details; increase size if detail is essential
7. Not accounting for fabric type
- Same design stitches differently on knit vs. woven
- Causes distortion on stretchy fabrics
- Fix: Reduce density 10-15% for knits; add extra underlay; use cut-away stabilizer
8. Improper pull compensation
- Designs stitch smaller than intended, especially text
- Letters close up and become illegible
- Fix: Add 5-10% pull compensation to counteract thread tension
9. Too many small stitches
- Stitches under 1mm can cause thread breaks and nests
- Machine may skip stitches that are too small
- Fix: Set minimum stitch length to 1.5-2mm in software settings
10. Forgetting to save native files
- Can’t edit designs later without re-digitizing from scratch
- Lose all work if you need to make changes
- Fix: Always save in software’s native format before exporting to machine format
Beginner-specific mistake: Trying to digitize complex photographs or detailed artwork as a first project. Start with simple shapes, basic text, and 1-3 colors. Build skills gradually before attempting intricate designs.
Is Embroidery Digitizing Hard to Learn for Hobbyists?
Embroidery digitizing has a moderate learning curve for hobbyists, typically requiring 10-20 practice designs over 2-3 months to achieve consistent results with simple designs. The technical concepts are straightforward, but developing an eye for proper stitch placement, density, and direction takes hands-on practice.
What makes digitizing easier:
- Background in graphic design or vector illustration
- Understanding of embroidery machine operation
- Patience for trial-and-error learning
- Access to quality tutorials and training resources
- Starting with simple designs (shapes, basic text)
What makes digitizing harder:
- Expecting perfect results immediately
- Starting with complex photographs or detailed artwork
- Using software with poor documentation
- Not test stitching designs to learn from mistakes
- Trying to digitize for multiple fabric types simultaneously
Realistic learning timeline:
Week 1-2: Learn software interface, basic tools, and stitch types. Digitize simple shapes (circles, squares, basic logos). Expect frustration and imperfect results.
Month 1: Create basic text designs and simple 2-3 color logos. Understand underlay and density concepts. Still making common mistakes but recognizing them.
Month 2-3: Digitize more complex designs with multiple elements. Develop intuition for stitch direction and density. Results look increasingly professional.
Month 6+: Confidently digitize most designs. Understand how different fabrics affect stitch-out. Can troubleshoot problems efficiently.
Skill comparison: Digitizing is easier than learning Photoshop but harder than basic photo editing. It’s comparable to learning vector illustration in Adobe Illustrator, the tools are logical, but mastery requires practice.
Success factors:
- Dedicate 2-3 hours weekly to practice
- Join online communities for feedback and tips
- Invest in quality training (courses, books, video tutorials)
- Test stitch every design and analyze results
- Start simple and gradually increase complexity
When to consider professional digitizing instead: If you’ve practiced for 3+ months and still aren’t satisfied with results, or if you find the process frustrating rather than enjoyable, outsourcing to professional digitizers may be more cost-effective for your needs.
Can I Digitize Embroidery Without Expensive Software?
You can digitize embroidery without expensive software using free options like Ink/Stitch (an Inkscape extension) or SophieSew, though you’ll sacrifice some convenience and advanced features. Free software requires more manual work but produces quality results for simple to moderate designs.
Free digitizing options:
Ink/Stitch + Inkscape (completely free)
- Open-source and actively maintained
- Runs on Windows, Mac, and Linux
- Requires learning Inkscape (vector graphics software) first
- Exports to most common embroidery formats
- Active community with tutorials and support
- Best for: Budget-conscious hobbyists willing to invest learning time
SophieSew (free, Windows only)
- Simple interface, easy to learn
- Limited features compared to paid software
- No longer actively developed (last update 2015)
- Good for very basic designs only
- Best for: Testing if digitizing interests you before investing
Embird Basic (free trial, then $150)
- 30-day full-featured trial
- Excellent for editing existing designs
- Limited original digitizing capabilities
- Best for: Modifying purchased designs rather than creating from scratch
What you give up with free software:
- Auto-digitizing features (must trace manually)
- Advanced stitch types (3D foam, appliqué, specialty fills)
- Automatic underlay generation
- Professional lettering engines
- Direct customer support
- Polished, intuitive interfaces
What you still get:
- All basic stitch types (running, satin, fill)
- Manual control over every parameter
- Export to common machine formats
- Ability to create professional-quality simple designs
Realistic expectations: Free software takes 2-3 times longer per design compared to paid options because you’ll manually set parameters that paid software automates. A simple logo might take 45 minutes in Ink/Stitch versus 15 minutes in Hatch Embroidery.
Decision guide:
- Use free software if: You’re on a tight budget, digitize infrequently (1-2 designs monthly), enjoy learning technical tools, or want to test digitizing before investing
- Invest in paid software if: You digitize weekly, value time savings, need advanced features, or plan to sell embroidered products
Free alternative to digitizing: Purchase pre-digitized designs from marketplaces like Etsy, Creative Fabrica, or EmbroideryDesigns.com for $2-$10 each. If you only need occasional custom designs, buying is more cost-effective than learning to digitize.
Do Professional Embroiderers Digitize Their Own Designs?
Professional embroiderers are split on digitizing their own designs, approximately 40% digitize in-house, 30% outsource all digitizing, and 30% use a hybrid approach depending on design complexity and time constraints. The decision depends on business model, design volume, and whether digitizing or production is more profitable.
Professionals who digitize in-house:
- Custom embroidery businesses with unique design requests
- Those who enjoy the creative control digitizing provides
- Businesses with lower production volume but higher design variety
- Embroiderers who charge premium prices for custom work
- Those with staff dedicated to digitizing
Professionals who outsource digitizing:
- High-volume production shops focused on efficiency
- Businesses with repetitive designs (corporate logos, team uniforms)
- Those who find production more profitable than digitizing
- Embroiderers without time to learn digitizing skills
- Shops that prefer predictable per-design costs
Hybrid approach:
- Digitize simple designs in-house (text, basic logos)
- Outsource complex designs (photographs, intricate artwork)
- Use professional digitizers for rush orders
- Maintain digitizing skills for quick edits and adjustments
Cost-benefit analysis:
In-house digitizing costs:
- Software: $1,000-$2,000 initial investment
- Training: 100-200 hours to reach professional quality
- Time per design: 30 minutes to 3 hours depending on complexity
- Opportunity cost: Time spent digitizing versus producing embroidery
Outsourcing costs:
- $10-$50 per design (or per thousand stitches)
- 24-48 hour turnaround typically
- Revision fees if changes needed
- No software or training investment required
Break-even calculation: If you need 30+ custom designs monthly, in-house digitizing typically becomes cost-effective within 12-18 months. For fewer designs, outsourcing makes more financial sense.
Quality consideration: Professional digitizers who specialize in digitizing often produce better results than embroiderers who digitize occasionally. Digitizing is a distinct skill from embroidery, being excellent at one doesn’t guarantee excellence at the other.
Industry trend: Many successful embroidery businesses focus on their core strength (production or digitizing) and partner with specialists for the other. This allows each business to maximize efficiency and quality in their area of expertise.
Alternatives to Digitizing Embroidery Yourself
Alternatives to digitizing embroidery yourself include hiring professional digitizing services ($10-$50 per design), purchasing pre-digitized designs from marketplaces ($2-$15 each), using auto-digitizing apps with limited customization, or partnering with a digitizer for ongoing work. Each option trades time and learning investment for convenience and cost.
Professional digitizing services:
Custom digitizing ($10-$50 per design)
- Send your artwork to a professional digitizer
- Receive finished embroidery file in 24-48 hours
- Includes one round of revisions typically
- Best for: One-off custom projects, complex designs, rush orders
- Popular services: Absolute Digitizing, DigitEMB, Embroidery Designs
Subscription digitizing ($50-$200/month)
- Unlimited or high-volume digitizing for flat monthly fee
- Faster turnaround (12-24 hours)
- Best for: Businesses with consistent design needs
- Services: Digitizing Buddy, Embroidery Digitizing Service
Pre-digitized design marketplaces:
Individual designs ($2-$15 each)
- Thousands of ready-to-stitch designs available
- Instant download, no waiting
- Limited customization (size changes only)
- Best for: Hobbyists, standard designs, quick projects
- Marketplaces: Etsy, Creative Fabrica, EmbroideryDesigns.com, Urban Threads
Membership sites ($10-$30/month)
- Access to large design libraries
- Download unlimited designs during membership
- Best for: High-volume hobbyists who use many designs
- Sites: Embroidery Library, Designs by JuJu
Auto-digitizing apps:
Mobile apps (free to $20)
- Limited functionality compared to desktop software
- Quick conversions for very simple designs
- Quality varies significantly
- Best for: Emergency situations, testing concepts
- Apps: Embrilliance Express, PE-Design Mobile
Hybrid approach:
Many embroiderers use a combination:
- Purchase common designs (florals, borders, standard text)
- Digitize simple custom elements (names, basic logos)
- Outsource complex custom work (photographs, intricate designs)
Cost comparison for 20 designs annually:
- DIY digitizing: $200-$1,000 software + learning time
- Professional service: $200-$1,000 ($10-$50 per design)
- Pre-digitized purchases: $40-$300 (if suitable designs exist)
- Hybrid approach: $100-$500 (mix of purchased and outsourced)
Decision factors:
- Choose professional digitizing if: You need custom designs but don’t want to learn software, have budget for outsourcing, or value time over cost
- Choose pre-digitized designs if: Existing designs meet your needs, you’re a hobbyist, or you need designs immediately
- Choose DIY digitizing if: You need frequent custom designs, enjoy learning technical skills, or want complete creative control
For hobbyists just starting with embroidery, purchasing pre-digitized designs is the most cost-effective approach while you develop your embroidery skills. Once you’re confident with your machine and understand how designs stitch, you can decide whether learning to digitize is worth the investment.
Frequently Asked Questions
How long does it take to digitize a simple embroidery design?
A simple embroidery design (basic logo or text with 1-3 colors) takes 30 minutes to 2 hours to digitize depending on your experience level and software. Beginners typically need 1-2 hours, while experienced digitizers complete simple designs in 20-30 minutes. Complex designs with many colors or intricate details can take 3-8 hours.
Can I use Photoshop or Illustrator to digitize embroidery?
You cannot use Photoshop or Illustrator alone to digitize embroidery because they don’t create stitch files with embroidery-specific commands. However, you can use them to prepare and clean up artwork before importing into digitizing software. Some digitizers create vector paths in Illustrator, then import those paths into embroidery software to assign stitch types.
What’s the difference between embroidery digitizing and graphic design?
Embroidery digitizing converts artwork into stitch instructions for machines, while graphic design creates visual artwork for screens or print. Digitizing requires understanding fabric behavior, stitch types, and physical limitations of thread and needles. A beautiful graphic design may not translate well to embroidery without significant modification for stitch constraints.
Do I need a special computer to run embroidery digitizing software?
Most embroidery digitizing software runs on standard computers with Windows 10/11, 8GB RAM, and basic graphics cards. Mac users have fewer software options but can run Embrilliance, Hatch, or use Windows emulation. Professional software like Wilcom may require more powerful systems with 16GB RAM and dedicated graphics cards for complex designs.
Can I digitize embroidery on an iPad or tablet?
Limited embroidery digitizing is possible on iPad using apps like Embrilliance Express or PE-Design Mobile, but functionality is significantly reduced compared to desktop software. Tablets work for simple edits and basic designs but lack the precision and features needed for professional-quality digitizing. Serious digitizers use desktop computers with mouse or digitizing tablet for accuracy.
How do I know if my digitized design will stitch well?
Preview your design in 3D simulation mode within your software, check that stitch count is appropriate for size (typically 1,000-1,500 stitches per square inch), verify underlay is present, and confirm stitch density is 4-6 lines per millimeter. The only definitive test is stitching on actual fabric with proper stabilizer, always test before final production.
What’s the best way to learn embroidery digitizing?
Start with free YouTube tutorials and software documentation, practice 2-3 hours weekly on progressively complex designs, join online communities like Facebook groups or Reddit’s r/Machine_Embroidery for feedback, and consider investing in a structured course like Hatch Academy or Digitizing Made Easy once you’ve mastered basics. Hands-on practice with test stitching is more valuable than passive learning.
Can I sell designs I digitize myself?
You can sell embroidery designs you digitize from your own original artwork or properly licensed images. Never digitize and sell copyrighted characters, logos, or artwork without permission, this violates intellectual property law. If you digitize for clients, clarify in contracts whether they own exclusive rights or if you retain rights to sell the design to others.
Why do some embroidery designs cost $50+ while others are $2?
Expensive designs typically feature complex digitizing with thousands of stitches, multiple layers, specialty techniques, or come from established designers with quality reputations. Cheap designs may be auto-digitized with minimal editing, simpler construction, or sold in high volume. Price doesn’t always indicate quality, evaluate based on stitch count, reviews, and preview images.
What’s the minimum size for embroidery text to be readable?
Embroidery text should be at least 4-5mm tall (approximately 0.16-0.20 inches) for simple block fonts to remain readable. Script fonts and fonts with thin details need 6-8mm minimum. Text smaller than 4mm often becomes illegible as stitches blur together. For small text, choose bold sans-serif fonts and increase letter spacing.
Do I need different digitizing for different fabric types?
Yes, fabric type significantly affects digitizing parameters. Stretchy knits need reduced stitch density (10-15% less), extra underlay, and cut-away stabilizer. Thick fabrics like fleece require lower density and longer stitches. Delicate fabrics need minimal underlay and lighter density. Always test designs on actual project fabric before production.
Can I edit embroidery designs I purchase online?
You can edit purchased embroidery designs only if you have the original working file (native software format) or use editing software to modify the machine file. Most purchased designs come only in machine formats (PES, JEF, etc.), which have limited editing capabilities. Some sellers offer working files for an additional fee. Always check seller’s terms regarding modifications and resale.
Conclusion
Learning how to digitize a simple embroidery design opens creative possibilities and saves money for hobbyists who frequently need custom designs. While the learning curve is moderate, typically requiring 10-20 practice designs over 2-3 months, the investment pays off through unlimited design modifications, instant turnaround, and complete creative control.
Start with free software like Ink/Stitch to test whether digitizing suits your interests and workflow. Focus on simple designs with 1-3 colors, clear outlines, and minimal detail while you build foundational skills. Always test stitch your designs on scrap fabric before final production to catch problems early.
Your next steps:
- Identify your machine’s file format by checking your manual or sample designs
- Download free digitizing software (Ink/Stitch + Inkscape) or trial versions of paid options
- Find a simple design to practice (basic logo, text, or geometric shape)
- Follow the step-by-step digitizing process outlined in this guide
- Test stitch on scrap fabric with appropriate stabilizer
- Join online communities for feedback, troubleshooting, and continued learning
Remember that professional-quality digitizing takes practice. Don’t get discouraged if your first designs aren’t perfect, each project teaches valuable lessons about stitch types, density, and fabric behavior. If you find digitizing frustrating after several attempts, purchasing pre-digitized designs or outsourcing to professional services are perfectly valid alternatives that let you focus on the embroidery itself.
Whether you choose to digitize yourself or use alternatives, understanding the digitizing process makes you a better embroiderer. You’ll select better purchased designs, communicate more effectively with professional digitizers, and troubleshoot stitch-out problems more efficiently.
For more guidance on maintaining your embroidery machine and troubleshooting common issues, explore our sewing machine care resources and troubleshooting guides.