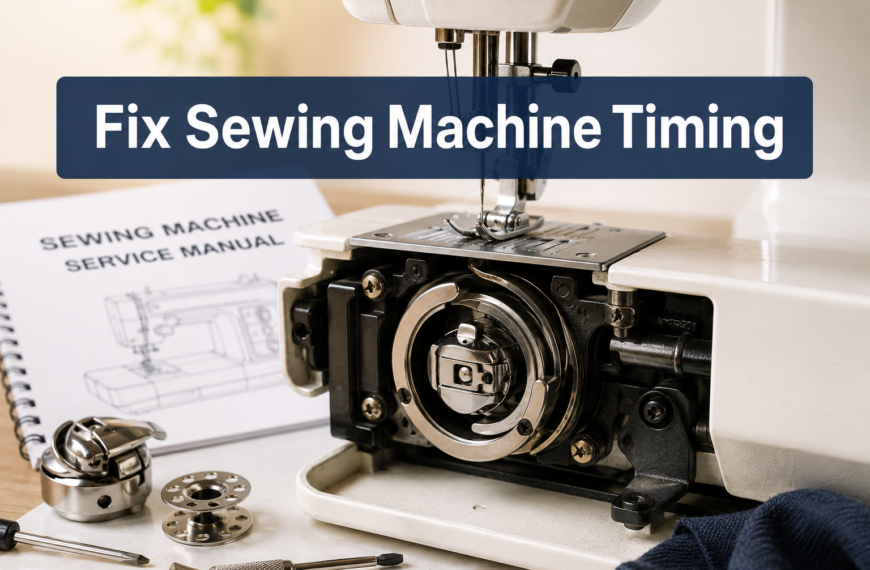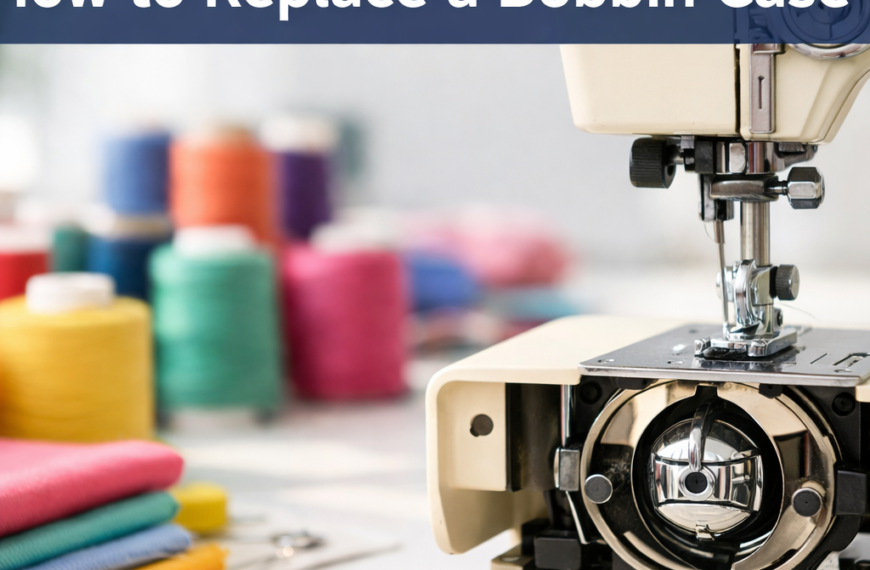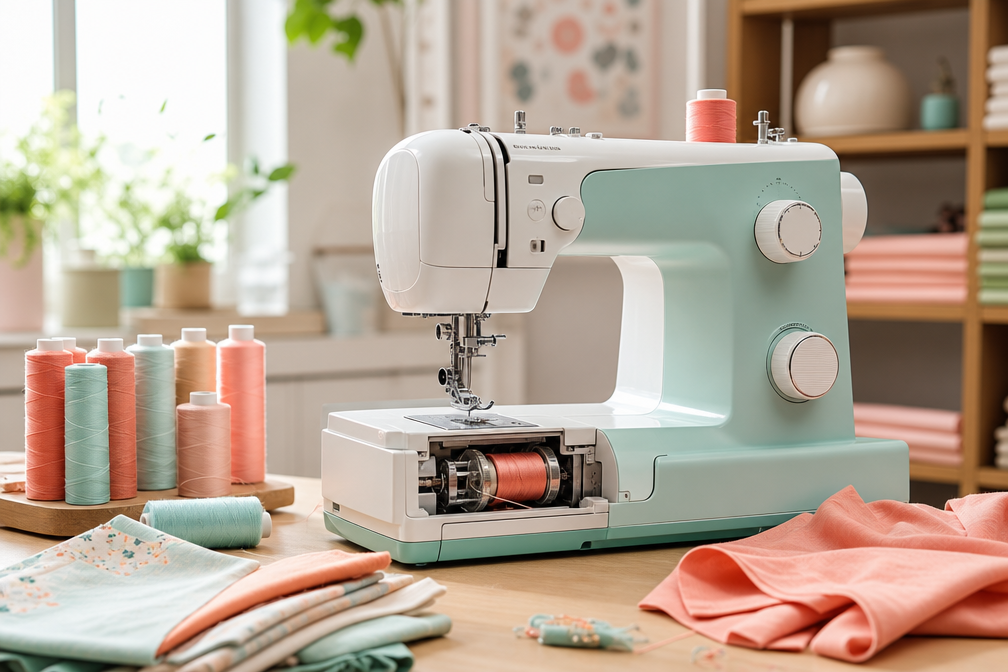
Quick Answer: Your sewing machine is jamming because of incorrect threading, poor-quality thread, a damaged or wrong-sized needle, improper tension settings, lint buildup in the bobbin area, or using fabric that’s too thick for your machine. Most jamming issues can be fixed in under 10 minutes by rethreading, cleaning the bobbin case, replacing the needle, or adjusting tension.
Key Takeaways
- Thread quality matters: Cheap, old, or low-quality thread is the leading cause of jamming and thread bunching under fabric
- Clean regularly: Lint and dust in the bobbin area cause 60-70% of jamming problems and should be cleaned after every 8-10 hours of sewing
- Needle replacement: A bent, dull, or wrong-sized needle will jam your machine, replace needles every 8 hours of sewing time
- Proper threading: Incorrect threading (especially missing the take-up lever) causes immediate jamming and bird’s nesting
- Tension balance: Upper and lower thread tension must be balanced, if one is too tight or loose, thread will bunch
- Bobbin installation: The bobbin must be inserted correctly with thread unwinding in the right direction for your machine
- Fabric thickness: Forcing thick fabrics through without the right needle and settings will jam the machine
- Oil maintenance: Most home machines need oiling every 8-10 hours of use to prevent mechanical jamming
- First-stitch jams: Starting without securing threads or beginning too close to fabric edge causes immediate jamming
- Know when to seek help: If jamming persists after cleaning, rethreading, and needle replacement, the timing or tension mechanism may need professional repair
What Causes a Sewing Machine to Keep Jamming?
A sewing machine jams when the upper and lower threads fail to form proper stitches, causing thread to tangle, bunch, or lock up the needle mechanism. The most common culprits are threading errors, lint buildup, damaged needles, tension imbalances, and poor-quality thread.
Primary causes of repeated jamming:
- Incorrect threading path: Missing the take-up lever or threading guides prevents proper thread tension and causes instant jamming
- Dirty bobbin case: Lint, dust, and thread fragments accumulate in the bobbin area and interfere with thread movement
- Wrong or damaged needle: Bent, dull, or incorrectly sized needles can’t pierce fabric cleanly and cause thread to bunch
- Thread quality issues: Old, cheap, or fuzzy thread breaks easily and sheds fibers that clog the machine
- Tension problems: When upper or lower tension is too tight or loose, threads don’t lock properly between fabric layers
- Bobbin insertion errors: Bobbins inserted backward or wound unevenly create inconsistent thread feed
- Fabric mismatch: Using the wrong needle size or stitch length for thick or delicate fabrics causes jamming
Common mistake: Many sewers assume their machine is broken when it jams repeatedly, but 90% of jamming issues are user-error related and can be fixed with basic maintenance and correct setup.
How to Fix Thread Bunching Under Fabric
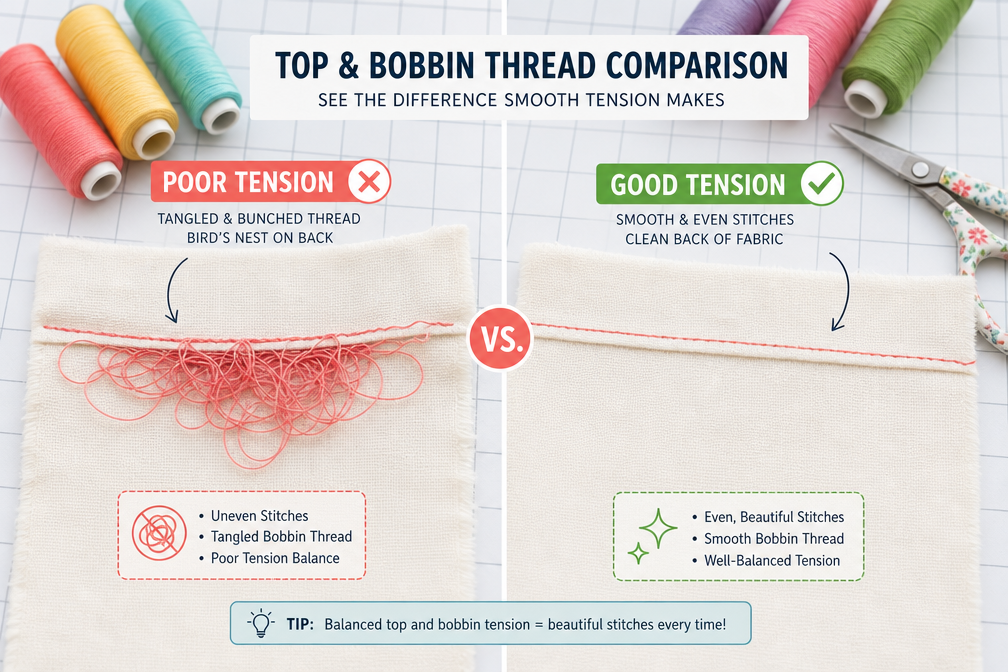
Thread bunching under fabric (also called bird’s nesting) happens when the upper thread isn’t properly tensioned or threaded, causing loops of thread to pile up on the fabric’s underside. This is almost always an upper threading problem, not a bobbin issue.
Step-by-step fix:
- Raise the presser foot before rethreading, this opens the tension discs so thread can seat properly
- Remove the upper thread completely and check for any caught or tangled sections
- Rethread from the beginning, making sure the thread passes through every guide and the take-up lever
- Pull both threads to the back before starting to sew, holding them for the first few stitches
- Test on scrap fabric with the same weight as your project
Why it works: The presser foot controls whether the tension discs engage. Threading with the foot down means the thread sits on top of closed discs instead of between them, resulting in zero upper tension and massive bunching underneath.
Choose this fix if: You see loops or nests of thread on the bottom of your fabric but the top looks fine. If both top and bottom look messy, check your bobbin installation and needle condition instead.

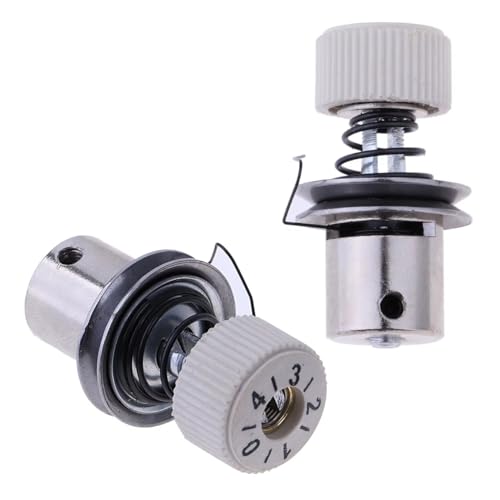
2SET thread tension check spring and beehive spring.

Complete Sewing Essentials in One Pack: This sewing thread set contains 30 assorted spools of high-quality polyester sewing thread, each offering 50 yards (45m) of vibrant color, along with five easy-to-thread large-eye needles and a needle threader for your convenience.
Sewing Machine Jamming in Bobbin Area
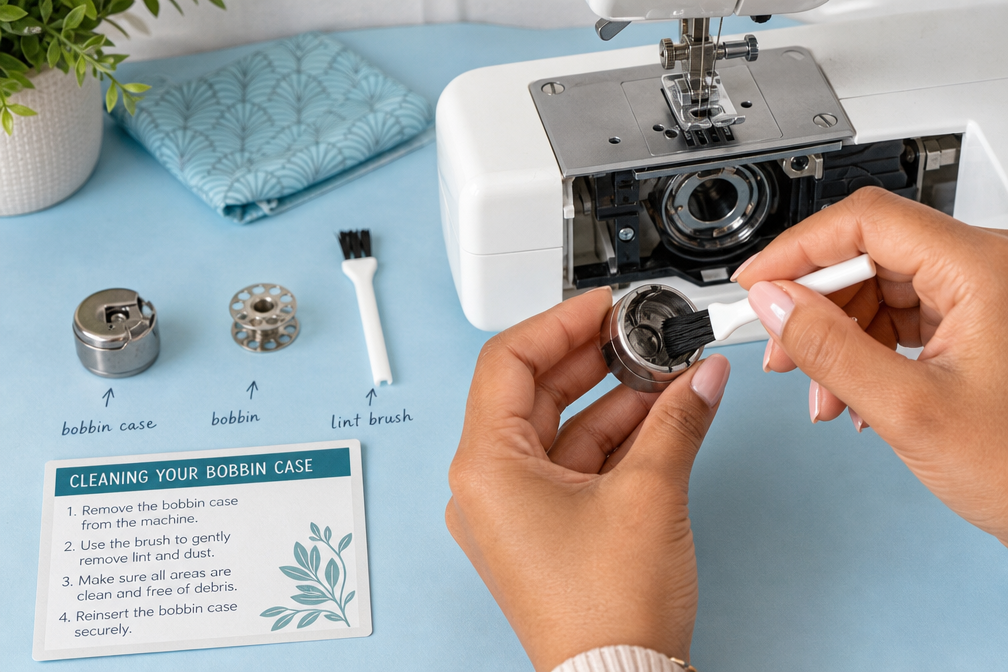
Bobbin area jams occur when lint, incorrectly wound bobbins, or damaged bobbin cases prevent smooth thread delivery from below. This is the most common jam location because the bobbin area collects debris and is often neglected during routine maintenance.
Immediate troubleshooting steps:
- Remove the bobbin and bobbin case (if your machine has a removable case)
- Use a small brush to clean all lint from the bobbin case, race, and feed dog area
- Check the bobbin for even winding, lumpy or loose winding causes jams
- Inspect the bobbin case for burrs, scratches, or damage that can catch thread
- Reinsert the bobbin in the correct direction (check your manual, some machines require clockwise, others counterclockwise)
- Hold both threads when you start sewing to prevent them from being pulled down into the bobbin area
Red flags that indicate bobbin problems:
- Thread tangles around the bobbin case
- Bobbin thread breaks frequently
- Clicking or grinding sounds from below
- Needle hits the bobbin case (indicates timing issues, needs professional repair)
Edge case: If you’ve cleaned thoroughly and the bobbin area still jams, the bobbin case spring may be bent or the tension screw loosened. Most bobbin cases have a small screw that controls lower tension, if it’s been bumped, even slightly, it will cause jamming.

Product Includes: The sewing machine tool kit includes 1 black curved nose tweezers, 1 double headed lint brush, 1 needle board screwdrivers, 4 flat head cross head screwdrivers, 2 seam rippers, 5 silicone brushes and 1 storage bag, 15 pieces in total. Different styles of screwdrivers and brushes, a sufficient number of tools are enough to meet your daily needs for cleaning and repairing your sewing machine, and the storage bag allows you to better store this set

ULTIMATE SEWING MACHINE CLEANING BRUSH: Specifically designed to effortlessly sweep away dust and debris from tight spaces, bobbin cases, and feed dogs to maintain peak sewing machine performance.

Material: nylon+stainless steel
Do I Need to Clean My Sewing Machine If It Jams?
Yes, cleaning your sewing machine is essential when it jams, and regular cleaning prevents most jamming issues. Lint and thread fragments build up in the bobbin area, feed dogs, and tension discs, creating friction that stops smooth thread movement and causes jams.
Cleaning schedule to prevent jamming:
- After every project: Remove visible lint from bobbin area and feed dogs
- Every 8-10 hours of sewing: Deep clean bobbin case, race, and tension discs
- Monthly (for regular users): Remove throat plate and clean underneath, oil if needed
- Before long storage: Clean completely and cover to prevent dust accumulation
What to clean and how:
| Area | Tool | Frequency | Why It Matters |
|---|---|---|---|
| Bobbin case & race | Small brush or compressed air | Every 8-10 hours | Lint here causes 70% of jams |
| Feed dogs | Brush or tweezers | After each project | Fabric fibers block fabric movement |
| Tension discs | Dental floss threaded through | Monthly | Dust prevents proper tension |
| Needle area | Brush | Weekly | Thread fragments cause skipped stitches |
| Throat plate underside | Brush after removing plate | Monthly | Hidden lint affects timing |
Pro tip: Use a dedicated small paintbrush or makeup brush for cleaning, never blow into your machine with your mouth, as moisture can cause rust. Canned air works but use short bursts to avoid pushing lint deeper into the machine.
Wrong Needle Causing Sewing Machine to Jam
Using the wrong needle type or size for your fabric is a major cause of jamming because the needle can’t penetrate the material cleanly, causing thread to bunch, skip stitches, or break. A damaged needle (bent, dull, or burr-tipped) will jam your machine even on appropriate fabric.
Needle problems that cause jamming:
- Dull needle: Can’t pierce fabric, pushes it down into the throat plate instead
- Bent needle: Hits the bobbin case or throat plate, causing grinding and jamming
- Wrong size: Too small for thick fabric (can’t make a hole) or too large for delicate fabric (damages material)
- Wrong point type: Universal needles on knits cause skipped stitches; ballpoint needles on wovens create large holes
- Old needle: Even if it looks fine, needles dull after 8 hours of sewing and should be replaced
Needle selection guide:
- Lightweight fabrics (silk, chiffon, voile): Size 60/8 or 70/10, sharp or microtex point
- Medium-weight fabrics (cotton, linen, light denim): Size 80/12 or 90/14, universal point
- Heavy fabrics (canvas, upholstery, heavy denim): Size 100/16 or 110/18, jeans or sharp point
- Knits and stretch fabrics: Size 75/11 or 90/14, ballpoint or stretch point
- Leather and vinyl: Size 90/14 or 100/16, leather or wedge point
Replace your needle if: You hear a popping sound when sewing, see skipped stitches, notice the thread shredding, or have sewn for more than 8 hours. When in doubt, put in a fresh needle, they’re inexpensive and solve many jamming problems instantly.

Set of 10 regular point machine needles in assorted sizes

PREMIUM QUALITY MATERIAL: Made of top quality high-strength steel, sharp smooth, sturdy and durable, not easy to bend, and long service life.
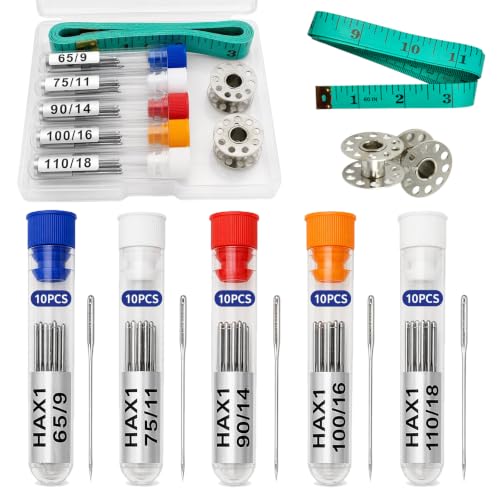
Comprehensive Set: Includes HAx1 needles in 65/9, 75/11, 90/14, 100/16 and heavy duty 110/18, with 10 needles per size. The set comes with 5 labeled storage tubes, 2 wire bobbins and a 60-inch measuring tape, all items are placed in a transparent plastic box for dust-free storage
How Often Should I Oil My Sewing Machine to Prevent Jamming?
Most home sewing machines need oiling every 8-10 hours of actual sewing time to prevent mechanical jamming, though some modern machines are self-lubricating and should never be oiled. Check your manual before oiling, as adding oil to a self-lubricating machine can damage it.
Oiling schedule for machines that require it:
- Regular users (sewing multiple times per week): Oil every 2-3 weeks
- Occasional users (sewing monthly): Oil every 3-4 months
- Heavy users (daily sewing or quilting): Oil weekly
- After long storage: Oil before first use if the machine has sat unused for 3+ months
Where to oil (for machines that require oiling):
- Bobbin race and hook: 1-2 drops where the bobbin case sits
- Needle bar: 1 drop where it moves up and down
- Moving parts visible when throat plate is removed: 1 drop on each pivot point
- Any point specified in your manual: Follow manufacturer instructions exactly
Use only sewing machine oil,never use WD-40, 3-in-1 oil, or cooking oil, as these attract lint, gum up mechanisms, and can permanently damage your machine. Sewing machine oil is clear, odorless, and specifically formulated not to stain fabric.
Signs your machine needs oiling:
- Increased noise or grinding sounds
- Sluggish or jerky needle movement
- Difficulty turning the handwheel
- Frequent thread breakage
- Jamming even after cleaning and rethreading
Important: Computerized and modern machines often have sealed mechanisms that never need oiling. Brands like Brother, Janome, and Singer have many models marked “no oiling required.” Always check your manual first.
Cheap Thread vs Good Thread Jamming Problems
Low-quality thread is one of the top causes of sewing machine jamming because it sheds lint, breaks easily, has inconsistent thickness, and contains weak fibers that tangle in the tension discs and bobbin area. The difference between cheap and quality thread can mean the difference between smooth sewing and constant frustration.
Why cheap thread causes jamming:
- Excessive lint: Fuzzy, loosely twisted fibers shed constantly and clog the machine
- Inconsistent diameter: Thick and thin spots cause tension fluctuations and thread breakage
- Weak tensile strength: Breaks under normal sewing tension, leaving fragments in the machine
- Poor dye quality: Color bleeds and creates sticky residue in thread guides
- Old or degraded: Thread deteriorates over time, becoming brittle and prone to snapping
Quality thread characteristics:
- Smooth, tightly twisted fibers with minimal fuzz
- Consistent diameter throughout the spool
- Strong enough to withstand normal sewing tension
- Colorfast dyes that don’t bleed or create residue
- Fresh stock (thread has a shelf life of about 5 years)
Recommended thread types for jam-free sewing:
- All-purpose polyester: Gutermann, Coats & Clark Dual Duty, Mettler Metrosene (best for most projects)
- Cotton thread: Aurifil, Gutermann Cotton (ideal for quilting and natural fabrics)
- Serger thread: Maxi-Lock, Gutermann Bulky Lock (for overlock machines only)
Avoid: Dollar store thread, very old thread (even quality brands degrade), decorative threads in the bobbin (use regular thread in bobbin, decorative on top only), and thread that feels rough or fuzzy when you run it through your fingers.
Cost comparison: A quality spool costs $3-6 and prevents hours of frustration, while a cheap spool at $1 often results in broken needles, jammed machines, and ruined projects that cost far more to fix.
Sewing Machine Tension Settings to Stop Jamming
Proper tension balance between upper and lower threads is critical for preventing jamming, when tension is too tight, thread breaks; when too loose, it bunches and tangles. Most jamming from tension issues comes from incorrect upper tension, not bobbin tension.
How tension affects jamming:
- Upper tension too tight: Thread breaks frequently, pulls bobbin thread to fabric top, creates puckering
- Upper tension too loose: Creates loops and bird’s nests on fabric underside
- Lower tension too tight: Bobbin thread breaks, upper thread lies flat on fabric surface
- Lower tension too loose: Bobbin thread shows on fabric top, creates loose stitches
Correct tension test: Sew a straight stitch on two layers of scrap fabric. The stitch should lock between the layers, invisible from both sides. If you see bobbin thread on top or upper thread on bottom, tension needs adjustment.
Adjusting upper tension (start here):
- Normal setting: Usually 4-5 on a dial of 0-9
- If thread bunches underneath: Increase upper tension by 0.5-1 increment
- If upper thread breaks: Decrease upper tension by 0.5-1 increment
- Test after each adjustment on scrap fabric before sewing your project
When to adjust lower (bobbin) tension:
Only adjust bobbin tension if you’ve confirmed upper tension is correct and the problem persists. Most sewers never need to touch bobbin tension.
- Test bobbin tension: Hold the bobbin case by the thread, it should drop 2-3 inches and stop
- Too tight: Doesn’t drop at all (turn the small screw on the bobbin case 1/4 turn counterclockwise)
- Too loose: Drops quickly to the floor (turn screw 1/4 turn clockwise)
Common mistake: Adjusting bobbin tension first instead of upper tension. Always start with upper tension adjustments, as 95% of tension-related jamming is caused by incorrect upper tension settings.
Is My Sewing Machine Broken or Just Jammed?
Most sewing machines that appear broken are actually just jammed or incorrectly set up, true mechanical failure is rare in well-maintained machines. You can diagnose whether your machine needs professional repair or just basic troubleshooting in about 10 minutes.
Signs your machine is jammed (not broken):
- Handwheel is hard to turn or stuck
- Thread is tangled in the bobbin area
- Needle won’t move up and down
- Fabric won’t feed through
- Thread bunches on top or bottom of fabric
Signs your machine may need professional repair:
- Needle hits the bobbin case or throat plate (timing issue)
- Grinding or clicking sounds from inside the machine body
- Handwheel turns but needle doesn’t move (belt or gear problem)
- Stitches are uneven after trying all tension adjustments (tension mechanism failure)
- Smoke, burning smell, or electrical issues (motor or wiring problem)
Troubleshooting sequence before assuming it’s broken:
- Turn off and unplug the machine
- Remove all thread from top and bobbin
- Take out the bobbin case and clean thoroughly
- Turn the handwheel manually to see if it moves freely
- Check for thread caught in the bobbin race or around the hook
- Remove the throat plate and check for broken needles or thread underneath
- Rethread completely with the presser foot up
- Install a new needle in case the current one is damaged
- Test on scrap fabric with simple straight stitches
If the machine still jams after this sequence, and you’ve confirmed you’re using the correct needle, quality thread, and proper threading, it’s time to consult a professional repair technician.
How to Remove Jammed Thread from Bobbin Case
Removing jammed thread from the bobbin case requires patience and the right approach to avoid damaging the delicate timing mechanism. Forcing or pulling hard can bend the hook or knock the timing out of alignment, creating expensive repair needs.
Safe removal steps:
- Turn off and unplug the machine for safety
- Raise the needle to its highest position using the handwheel
- Remove the presser foot if it’s in the way
- Take out the bobbin and bobbin case (if removable)
- Gently pull visible thread in the direction it naturally wants to go, never force it
- Use tweezers or small scissors to carefully snip thread that’s wound around the hook
- Turn the handwheel slowly to see if more thread appears that you can remove
- Remove the throat plate if thread is jammed underneath
- Clean the entire bobbin area with a brush once thread is removed
If thread won’t budge:
- Don’t force it: Pulling hard can bend the hook or timing mechanism
- Try turning the handwheel in both directions slightly to release tension
- Remove the needle to access the area better
- Use a seam ripper to carefully cut thread in tight spaces
- Take to a repair shop if you can’t remove it without excessive force
Prevention tips:
- Always hold both threads when starting to sew
- Don’t start sewing with threads shorter than 4 inches
- Never pull fabric through the machine, let the feed dogs do the work
- Raise the presser foot before removing fabric to release thread tension
After removing jammed thread: Clean the bobbin area thoroughly, rethread the entire machine, install a fresh needle, and test on scrap fabric before returning to your project.
Can Thick Fabric Cause Sewing Machine to Jam?
Yes, thick fabric can absolutely cause jamming if you’re using the wrong needle size, incorrect stitch length, or forcing the fabric through faster than the machine can handle. Most home sewing machines have limits on fabric thickness, and exceeding those limits will jam or damage the machine.
Why thick fabric jams machines:
- Needle too small: Can’t penetrate multiple layers, bends or breaks
- Insufficient presser foot pressure: Fabric doesn’t feed evenly, causing bunching
- Wrong stitch length: Short stitches on thick fabric create too many perforations and weaken seams
- Feed dog struggle: Thick layers are too heavy for feed dogs to move smoothly
- Tension imbalance: Thick fabric requires different tension than thin fabric
Solutions for sewing thick fabric without jamming:
- Use a larger needle: Size 100/16 or 110/18 for denim, canvas, upholstery
- Increase stitch length: 3.0-4.0mm for thick fabrics (longer stitches = less resistance)
- Reduce sewing speed: Sew slowly to give the machine time to penetrate layers
- Use a walking foot: Helps feed thick layers evenly from top and bottom
- Adjust presser foot pressure: Increase if your machine has this feature
- Avoid bulk: Don’t sew through more than 4-6 layers of thick fabric at once
Fabric thickness limits by machine type:
- Basic home machines: Up to 4 layers of denim or 6mm total thickness
- Heavy-duty home machines: Up to 6 layers of denim or 10mm total thickness
- Industrial machines: 12+ layers of denim or 15mm+ total thickness
When sewing over bulky seams (like where four layers of denim meet at a jeans hem):
- Use a hump jumper or folded fabric scrap behind the presser foot to keep it level
- Hand-walk the machine over the bulk by turning the handwheel manually
- Don’t force it,if the machine struggles, the fabric is too thick for that machine
Choose a different approach if: Your machine consistently jams on thick fabric even with the right needle and settings. Consider hand-basting thick seams first, using fabric glue to reduce bulk, or taking thick projects to a professional with an industrial machine.
Sewing Machine Jams on First Stitch What to Do
First-stitch jamming happens when threads aren’t properly secured before you begin sewing, causing them to be pulled down into the bobbin area and tangled. This is one of the most common beginner mistakes and is easily prevented.
Why first-stitch jams occur:
- Threads not held: Upper and bobbin threads pulled down into the machine
- Starting too close to edge: No fabric to anchor the first stitch
- Presser foot not down: Thread isn’t tensioned properly
- Threads too short: Less than 4 inches of tail doesn’t provide enough control
- Needle not raised: Starting with needle down can catch threads incorrectly
Prevention steps (do this before every seam):
- Pull both threads to the back of the presser foot, leaving 4-6 inch tails
- Hold threads gently for the first 2-3 stitches
- Start sewing 1/4 inch from fabric edge, not right at the edge
- Lower the presser foot before pressing the pedal
- Raise the needle to its highest position before beginning
If it jams on the first stitch:
- Stop immediately,don’t keep sewing
- Raise the presser foot and needle
- Gently pull the fabric back (don’t force it)
- Cut the threads close to the fabric
- Remove the bobbin and clean out any tangled thread
- Rethread completely and try again with proper thread holding
Alternative starting technique (for slippery or delicate fabrics):
- Use a thread anchor: Sew the first few stitches on a scrap of fabric, then continue onto your project fabric without cutting threads
- Backstitch immediately: Start 1/4 inch from the edge, backstitch to the edge, then sew forward
- Use a longer stitch: Start with a 3.0mm stitch for the first inch, then switch to your desired length
This technique is especially important when: Sewing with slippery threads (like rayon or metallic), working with very thin fabrics (chiffon, organza), or using a new machine you’re not familiar with.
When to Take Sewing Machine to Repair Shop for Jamming
Take your sewing machine to a professional repair shop when jamming persists after you’ve cleaned, rethreaded, replaced the needle, and checked all basic settings. Certain jamming issues indicate mechanical problems that require specialized tools and expertise to fix.
Signs you need professional repair:
- Timing is off: Needle hits the bobbin case, hook, or throat plate
- Persistent jamming: Continues after thorough cleaning, new needle, and correct threading
- Mechanical sounds: Grinding, clicking, or clunking from inside the machine body
- Uneven stitches: Tension adjustments don’t fix loose or tight stitches
- Handwheel resistance: Hard to turn even with no thread or fabric
- Broken parts: Cracked bobbin case, bent hook, damaged feed dogs
- Electrical issues: Motor runs but needle doesn’t move, or motor doesn’t run at all
What professional repair includes:
- Timing adjustment: Realigning the needle and hook mechanism (requires specialized knowledge)
- Deep cleaning: Disassembling and cleaning internal mechanisms you can’t reach
- Lubrication: Oiling internal parts that aren’t user-accessible
- Parts replacement: Installing new bobbin case, hook, gears, or belts
- Tension mechanism repair: Fixing or replacing damaged tension assemblies
- Electrical diagnosis: Testing and repairing motor, foot pedal, or wiring issues
Repair costs to expect (2026 estimates):
- Basic service/cleaning: $75-125
- Timing adjustment: $100-175
- Parts replacement: $50-200+ depending on part
- Major overhaul: $200-400+
When repair isn’t worth it: If your machine is a basic model that cost under $150 new and needs repairs over $100, it’s often more economical to buy a new machine. However, vintage machines and quality brands (Bernina, Pfaff, Janome) are usually worth repairing.
Finding a good repair shop:
- Look for certified technicians trained by major brands
- Ask for estimates before work begins
- Check reviews and recommendations from local sewing groups
- Verify they service your machine brand
- Ask about warranty on repairs (most offer 30-90 days)
Before taking it in: Write down exactly what the machine is doing, what you’ve already tried, and when the problem started. This helps the technician diagnose faster and saves you money on labor.
FAQ
Why does my sewing machine keep jamming even after cleaning?
If jamming continues after thorough cleaning, you likely have incorrect threading, a damaged needle, wrong tension settings, or poor-quality thread. Rethread completely with the presser foot up, install a fresh size-appropriate needle, and use quality thread. If jamming persists, the timing mechanism may be off and needs professional adjustment.
How do I know if my bobbin is in correctly?
The bobbin is inserted correctly when thread unwinds in the direction specified by your manual (usually counterclockwise for drop-in bobbins) and you hear a click when it seats. Pull the thread, it should pull smoothly with slight resistance. If it doesn’t pull at all or spins freely, it’s inserted wrong.
Can I use any thread in my sewing machine?
No, use only thread designed for sewing machines, avoid hand-quilting thread, embroidery floss, or craft thread, as these are too thick or weak. Stick with quality all-purpose polyester or cotton thread from brands like Gutermann, Coats & Clark, or Aurifil. Cheap thread causes most jamming problems.
What tension should my sewing machine be set at?
Most machines work best at 4-5 on a 0-9 dial for medium-weight cotton fabric. Adjust up for lightweight fabrics or if thread bunches underneath, adjust down for heavy fabrics or if thread breaks. Always test on scrap fabric and make small adjustments (0.5 increments) until stitches look balanced.
How often should I change my sewing machine needle?
Replace your needle every 8 hours of sewing time, after completing each major project, or immediately if you hit a pin or hear popping sounds. Dull or damaged needles cause jamming, skipped stitches, and thread breakage even if they look fine to the naked eye.
Why does my thread keep breaking?
Thread breaks because of a dull or wrong-sized needle, tension set too tight, poor-quality or old thread, incorrect threading path, or a burr on the needle plate or bobbin case. Check and replace the needle first, then rethread with the presser foot up, and verify you’re using fresh, quality thread.
Can I oil my sewing machine with regular oil?
No, use only sewing machine oil, never WD-40, 3-in-1 oil, vegetable oil, or other lubricants. These attract lint, gum up mechanisms, and can permanently damage your machine. Many modern machines are self-lubricating and should never be oiled; check your manual first.
What does it mean when thread bunches under fabric?
Thread bunching underneath (bird’s nesting) means your upper thread isn’t properly tensioned, almost always because you threaded with the presser foot down. Raise the presser foot, remove all thread, and rethread completely, making sure thread passes through the take-up lever and all guides.
How do I clean lint from my sewing machine?
Remove the bobbin and bobbin case, then use a small brush (not canned air, which can push lint deeper) to clean the bobbin race, feed dogs, and throat plate area. For deep cleaning, remove the throat plate and brush underneath. Clean every 8-10 hours of sewing to prevent jamming.
Why won’t my fabric feed through the machine?
Fabric won’t feed if the feed dogs are lowered, presser foot pressure is too light, you’re pulling the fabric instead of guiding it, or the feed dogs are clogged with lint. Raise feed dogs, increase pressure if adjustable, let the machine do the work, and clean the feed dog area thoroughly.
Can thick fabric damage my sewing machine?
Yes, forcing fabric thicker than your machine’s capacity can bend the needle, damage the feed dogs, strip gears, or knock the timing out of alignment. Use the appropriate needle size (100/16 or larger), sew slowly, and don’t force fabric through. If the machine struggles, the fabric is too thick for that machine.
When should I take my sewing machine to a repair shop?
Take your machine for professional repair if the needle hits the bobbin case or throat plate, jamming continues after cleaning and rethreading, you hear grinding sounds from inside the machine, the handwheel is hard to turn with no thread, or tension adjustments don’t fix stitch problems. These indicate timing or mechanical issues requiring specialized tools.
Conclusion
Understanding why your sewing machine is jamming empowers you to fix most problems quickly and get back to creating. The vast majority of jams stem from simple, fixable issues: incorrect threading, lint buildup, worn needles, poor thread quality, or tension imbalances. By following a systematic troubleshooting approach, cleaning the bobbin area, rethreading with the presser foot up, installing a fresh appropriate needle, and using quality thread, you’ll solve 90% of jamming problems in under 10 minutes.
Take action now:
- Clean your machine if you haven’t in the last 8-10 hours of sewing
- Replace your needle with the correct size for your current fabric
- Check your thread quality and switch to a reputable brand if needed
- Rethread completely with the presser foot raised
- Test on scrap fabric before returning to your project
Regular maintenance prevents most jamming issues. Make it a habit to clean the bobbin area after every project, replace needles every 8 hours of sewing, and use quality thread from the start. Your machine will run smoothly, your stitches will be beautiful, and you’ll spend more time sewing and less time troubleshooting.
If jamming persists after trying all these solutions, don’t hesitate to consult a professional repair technician. Some issues, like timing problems or damaged internal mechanisms, require specialized expertise and tools. A well-maintained sewing machine should provide years of jam-free sewing, so invest in proper care and professional service when needed.