

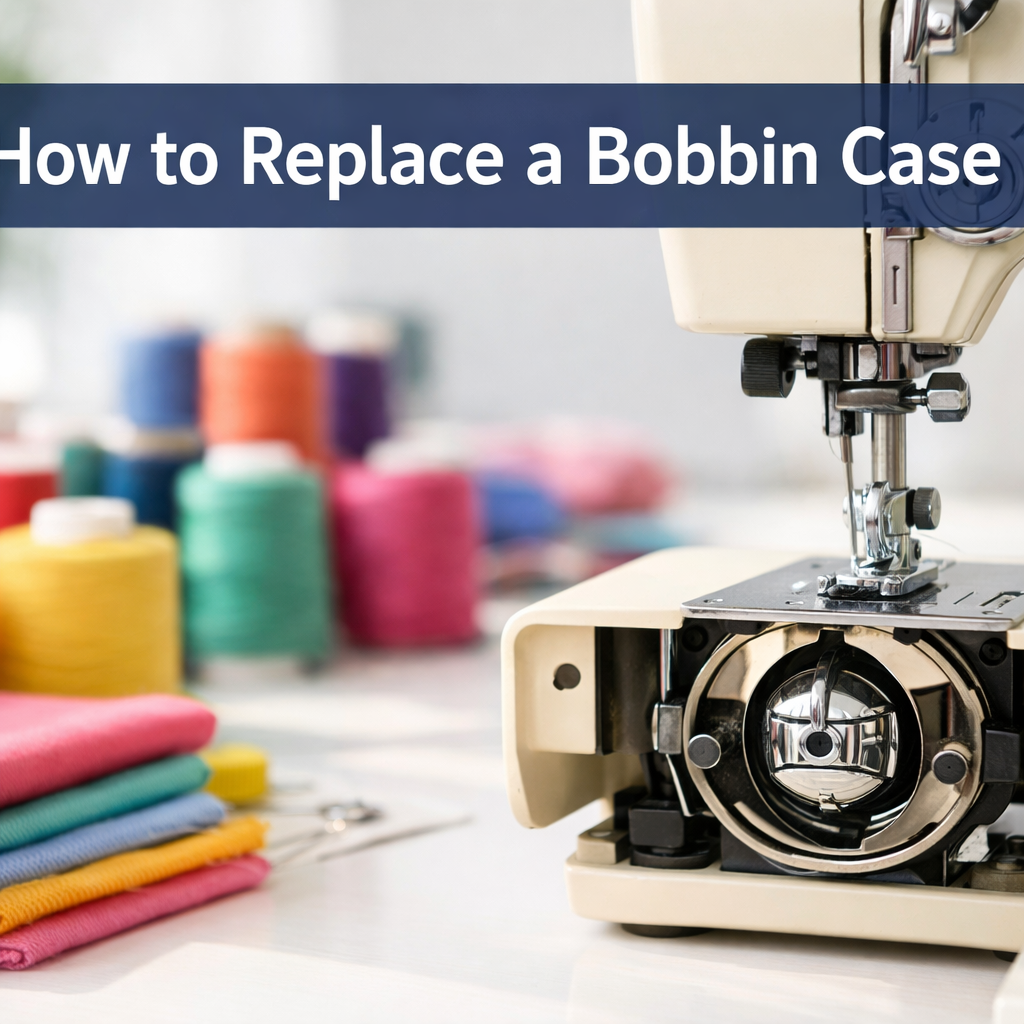
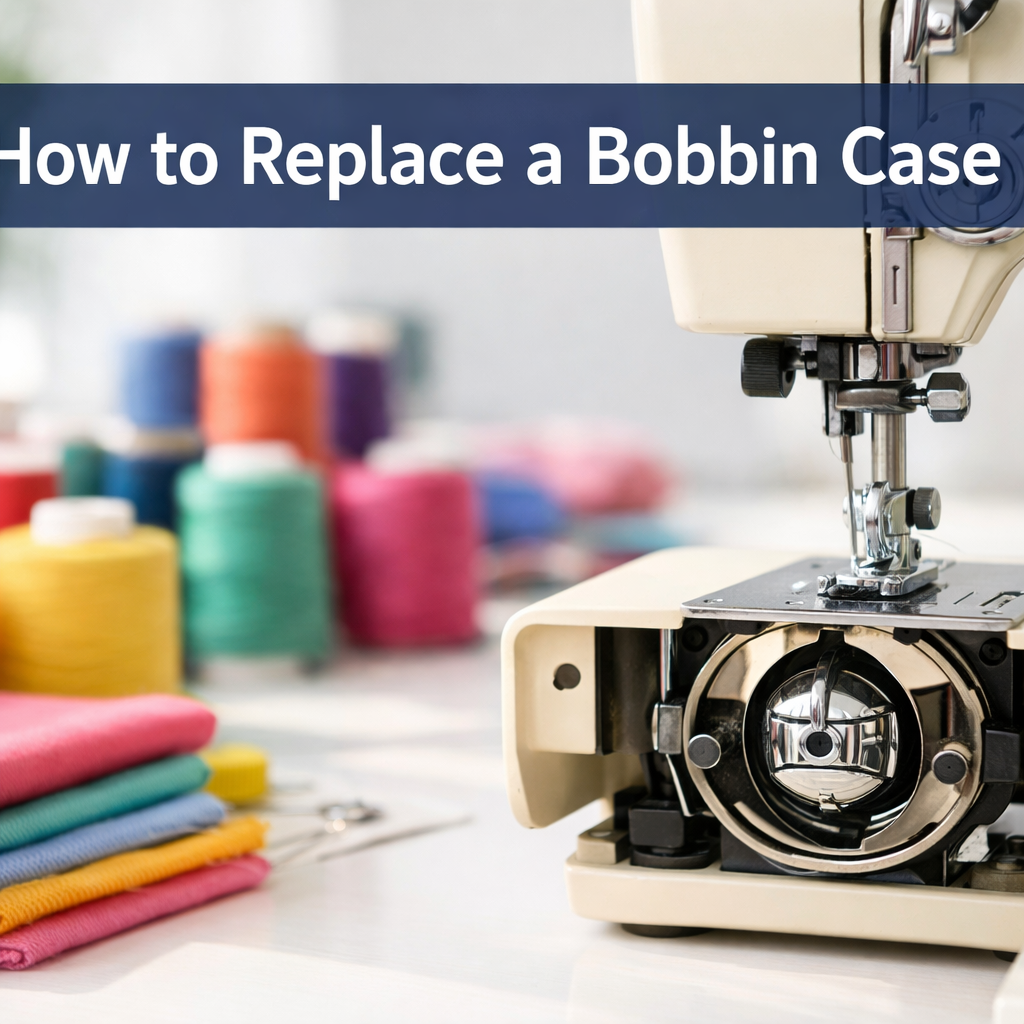
Quick Answer: Replacing a bobbin case takes 2-5 minutes and requires no special tools. Remove the old case by releasing the latch or lifting it from the drop-in compartment, clean the bobbin area thoroughly, and install the new case by aligning it with the machine’s hook race until it clicks or seats firmly. Always match the replacement to your machine’s brand and model for proper fit and tension.
Key Takeaways
- Bobbin cases wear out from friction, lint buildup, and tension spring fatigue, typically after 3-5 years of regular use
- Two main types exist: front-loading (removable metal cases) and drop-in (plastic cases built into the machine)
- Brand-specific parts matter: generic bobbin cases often cause tension problems and poor stitch quality
- Replacement costs $8-$35 depending on machine type, with vintage and industrial models at the higher end
- Common mistakes include forcing the case in backward, skipping the cleaning step, and using the wrong bobbin size
- Installation is beginner-friendly but requires attention to alignment marks and proper seating
- Cleaning before replacement extends the life of your new bobbin case and prevents immediate problems
What Is a Bobbin Case and What Does It Do in a Sewing Machine?
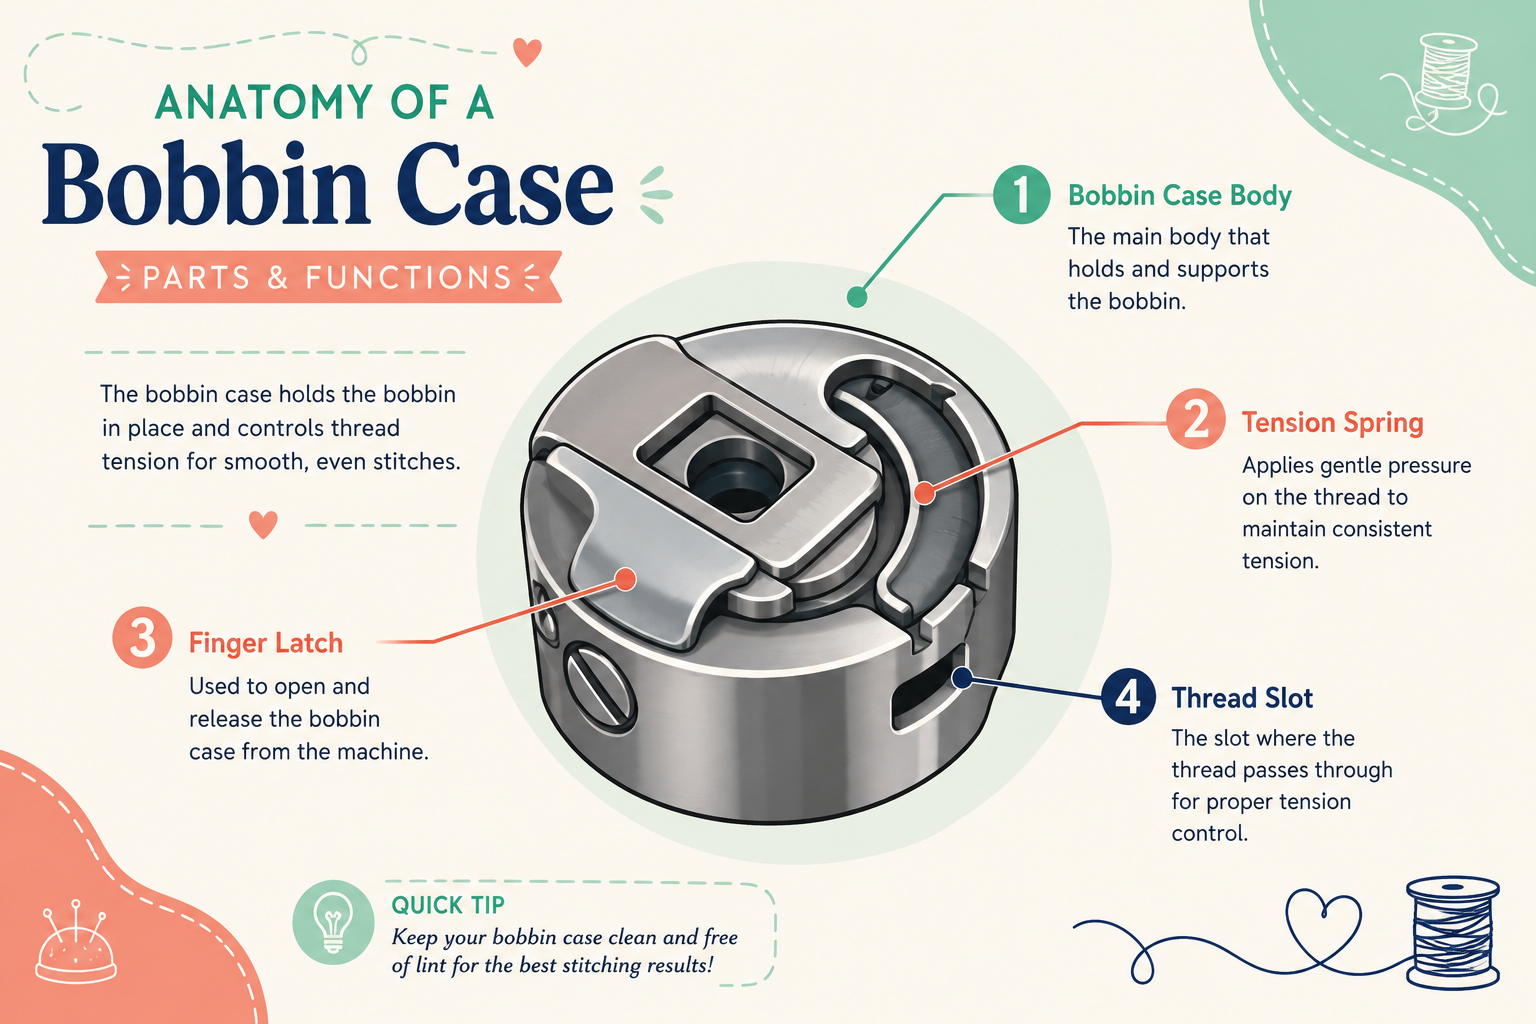
A bobbin case is the metal or plastic housing that holds your bobbin in place beneath the needle plate and controls the tension of the lower thread. It works with the upper thread to create balanced lock stitches by maintaining consistent tension as the bobbin rotates and releases thread during sewing.
The bobbin case serves three critical functions:
- Thread tension control: A small spring on the case applies pressure to the bobbin thread, balancing it against the upper thread tension
- Bobbin positioning: Keeps the bobbin centered in the hook race so the needle can catch the lower thread loop consistently
- Thread delivery: Guides thread from the bobbin through a slot or hole at a controlled rate
Without a properly functioning bobbin case, you’ll experience skipped stitches, thread nests on the fabric underside, and uneven seam quality. The case must fit precisely in your machine’s hook assembly because even a 0.5mm gap can disrupt timing and tension.
Modern machines use two designs: front-loading bobbin cases (removable metal cylinders with a finger latch) found in mechanical and vintage machines, and drop-in bobbin cases (built-in plastic housings with a clear cover plate) common in computerized models. Each type requires different replacement procedures.
How Do I Know If My Bobbin Case Needs to Be Replaced?
Your bobbin case needs replacement when you notice persistent thread tension problems that don’t resolve after cleaning, visible damage to the case body or tension spring, or when the case no longer seats firmly in the machine. These symptoms indicate the case has worn beyond adjustment.
Clear warning signs include:
- Scratches or burrs on the interior surface where the bobbin sits (causes thread shredding)
- Bent or broken tension spring that won’t hold adjustment or has lost its springiness
- Loose fit in the hook race, allowing the case to rattle or shift during sewing
- Persistent bird’s nests on fabric underside even after adjusting tension and cleaning the bobbin area
- Visible cracks in plastic drop-in cases or dents in metal front-loading cases
- Thread catching on rough spots inside the case
A simple test: Remove the bobbin case and run your finger gently around the interior. You should feel perfectly smooth metal or plastic. Any rough patches, grooves, or sharp edges mean the case has worn out and will damage thread.
For drop-in cases, check whether the tension spring still provides resistance when you pull thread through. If thread slides through with no resistance or the spring looks bent, replacement is necessary. Metal front-loading cases typically last longer but still wear out from the constant friction of thread passing through at high speed.
If your machine is more than 5 years old and you’ve never replaced the bobbin case, consider doing so as preventive maintenance, especially if you sew frequently or work with heavy threads that accelerate wear.
Drop-In Bobbin vs Front-Loading Bobbin Case Replacement
Drop-in bobbin cases are built into the machine and accessed from the top by removing a clear plastic cover, while front-loading bobbin cases are removable metal cylinders that slide into the machine from the front or side and must be taken out completely for bobbin changes. Replacement procedures differ significantly between these two designs.
Drop-in bobbin systems:
- Found in most modern computerized and mechanical machines made after 2000
- The “case” is actually a fixed plastic housing molded into the machine body
- You replace only the bobbin holder assembly, not individual components
- Access by removing the needle plate or opening the front panel
- Easier for beginners because there’s less risk of incorrect installation
- Typically cost $15-$25 for the entire assembly
Front-loading bobbin cases:
- Standard in vintage machines, industrial models, and many mechanical machines
- Removable metal cylinder with a finger latch on one side
- You can replace just the case while keeping the same hook assembly
- Must be inserted with correct orientation (latch position matters)
- Require more precision during installation but allow finer tension adjustment
- Cost $8-$35 depending on machine brand and model
Choose your replacement based on your machine type. If you’re unsure which system you have, check your manual or look at how you currently insert your bobbin. If you drop the bobbin into a compartment from above and close a clear cover, you have a drop-in system. If you load a bobbin into a separate metal case and then insert that case into the machine from the front or side, you have a front-loading system.
Many sewers prefer front-loading cases for precision work because the tension spring is more accessible for fine-tuning, but drop-in systems are more convenient for quick bobbin changes and less prone to user error during installation.

1PCS plastic bobbin case.

4PCS No Back Lash Bobbin Cases with PIGTAIL Thread Guides .Embroidery Industrial Sewing Machine Bobbin Cases .These are "L" size bobbin cases.,WITH Back Latch Spring. Adapted bobbins are 7/8" Diameter. These are small bobbin cases, NOT "M" Style Large bobbin cases.
Step-by-Step Instructions to Remove and Install a Bobbin Case
Replacing a bobbin case requires removing the old case, cleaning the hook area thoroughly, and installing the new case with proper alignment. The entire process takes 2-5 minutes once you know your machine’s specific access method.

✅ WIDE COMPATIBILITY: Fits most low-shank SINGER machines – Heavy Duty, Talent, Tradition, Simple, Promise, Brilliance, Quantum, Stylist, Confidence, Curvy, One, Athena & Futura. Not for C7250, C7220, C7200, 6600C, 6800C, HD6600/HD6800.

COMPLETE SET: Package includes 4 stainless steel bobbin cases for front-loading 15 class sewing machines, providing replacements and spares for uninterrupted sewing projects

What you get: the package includes 4 pieces sewing machine bobbin case, you can change and replace according to your own interest, or share with others
For Front-Loading Bobbin Cases:
Removal:
- Turn off and unplug your sewing machine
- Remove the needle and presser foot to prevent accidents
- Open the front or side panel that covers the bobbin area (consult your manual for location)
- Grasp the finger latch on the bobbin case and pull straight out, don’t twist or force it
- Note the position of the latch before removal (usually at 10 o’clock or 2 o’clock position)
Installation:
- Hold the new bobbin case with the finger latch in the same position as the old case
- Align the case with the hook race opening, you’ll see a notch or groove that matches the case
- Slide the case straight in until you feel or hear a click
- Gently tug the latch to confirm the case is seated securely
- The case should sit flush with no gaps or wobbling
For Drop-In Bobbin Cases:
Removal:
- Unplug the machine and remove the needle plate (usually held by 1-2 screws)
- Lift out the plastic bobbin holder assembly, it may snap out or require gentle prying
- Note any alignment marks or tabs on the holder before removal
- Some models require removing the entire hook assembly (consult your manual)
Installation:
- Clean the hook race area thoroughly (see cleaning section below)
- Position the new bobbin holder with alignment tabs matching the machine’s slots
- Press down firmly until the holder clicks into place
- Replace the needle plate and tighten screws evenly
- Test by manually turning the handwheel to ensure smooth rotation
Common alignment mistake: Installing the case backward or rotated 180 degrees. Most cases have a small notch, pin, or marking that must align with a corresponding feature in the hook race. If the case won’t seat fully or feels loose, remove it and try rotating it slightly.
After installation, thread both upper and lower threads and test on scrap fabric. The stitches should be balanced with no loops on either side. If you notice tension problems, recheck that the case is fully seated and the bobbin thread is correctly threaded through the tension spring.
Where Can I Buy a Replacement Bobbin Case for My Sewing Machine?
You can purchase replacement bobbin cases from authorized dealer websites, sewing machine retailers, Amazon, and specialty parts suppliers, with prices ranging from $8 to $35 depending on your machine brand and model. Always verify compatibility with your specific machine model number before ordering.
Best sources for replacement bobbin cases:
Authorized brand dealers (most reliable):
- Singer, Brother, Janome, Bernina, and other manufacturers sell OEM parts through their websites
- Guarantees exact fit and proper tension calibration
- Typically $15-$35 but worth the premium for precision machines
Online retailers:
- Amazon carries both OEM and aftermarket cases with customer reviews
- eBay offers vintage and discontinued parts for older machines
- Sewing Parts Online specializes in hard-to-find components
Local sewing machine shops:
- Can verify compatibility in person and often install the case for you
- May cost slightly more but includes expert advice
- Good option if you’re unsure about your machine model
What information you need before ordering:
- Machine brand and full model number (usually on a plate on the machine body)
- Bobbin case type (front-loading or drop-in)
- Bobbin size (Class 15, Class 66, M-style, etc.)
- Whether you need a standard or high-speed industrial case
For vintage machines like the Singer Featherweight, check specialty vintage parts suppliers who stock original or reproduction components. Generic “universal” bobbin cases rarely work well with vintage machines because tolerances were tighter in older models.
If you’re replacing a bobbin case on an industrial machine, contact industrial sewing equipment suppliers rather than consumer retailers, industrial cases are built to different specifications and require higher-grade materials.

Wide Compatibility for Brother & Babylock Machines:This bobbin case is designed to directly replace part #XC3152221 and fits a wide range of popular Brother models—including CE1100PRW, CS6000I, CE2000, CE5000, PE770, SE400, SE700,SE600,SQ9185, and many more—as well as Babylock models such as BL80B Jubilant, Sofia BL137A, Grace BL40A, Rachel BL50A, and Ellure Plus BLR2. Refer to the full list in the description for additional compatible machines.

Guaranteed to fit EverSewn Sewing Machine Models: Charlotte, Sparrow 20, Sparrow 25

Package comes with 2 pieces sewing machine bobbin cases, 20 pieces metal sewing machine bobbins, enough quantity to meet your long time use and replacements, you can take them as backup or share with others
How Much Does a New Bobbin Case Cost?
A replacement bobbin case typically costs between $8 and $35, with basic front-loading cases for domestic machines at the lower end and specialized industrial or computerized machine assemblies at the higher end. Vintage machine cases and brand-specific OEM parts usually fall in the $18-$28 range.
Price breakdown by machine type:
| Machine Type | Typical Cost | Notes |
|---|---|---|
| Basic mechanical (Brother, Singer) | $8-$15 | Generic aftermarket widely available |
| Mid-range domestic (Janome, Pfaff) | $15-$25 | OEM recommended for best fit |
| Computerized/embroidery | $20-$35 | Often includes full bobbin assembly |
| Vintage (pre-1980) | $18-$30 | Limited availability, check specialty suppliers |
| Industrial machines | $25-$45 | Heavy-duty construction, higher precision |
Factors affecting price:
- OEM vs. aftermarket: Original manufacturer parts cost 30-50% more but guarantee proper fit
- Material quality: Hardened steel cases last longer than standard metal or plastic
- Included components: Some packages include the bobbin, tension spring, and installation tools
- Machine complexity: Computerized machines with electronic tension sensors require more expensive assemblies
Budget for the higher end of the range if you own a precision machine or sew professionally. A $25 OEM bobbin case that maintains perfect tension is worth more than a $10 generic case that causes constant bobbin problems and ruins projects.
For machines still under warranty, check whether bobbin case replacement is covered, some manufacturers include wear parts in extended warranties. If you’re considering when to replace your entire sewing machine, a worn bobbin case alone doesn’t justify buying a new machine unless other components are also failing.
My Bobbin Case Won’t Stay in Place After Replacing It
A bobbin case that won’t stay seated is usually installed backward, misaligned with the hook race, or incompatible with your machine model. Remove the case completely, verify you have the correct replacement part, and reinstall with careful attention to alignment marks and the latch position.
Troubleshooting steps:
Check orientation: Front-loading cases have a specific latch position (usually 10 o’clock or 2 o’clock). Try rotating the case 180 degrees and reinserting.
Verify the alignment notch: Most cases have a small pin, tab, or notch that must match a groove in the hook race. Look closely at both the case and the machine opening.
Confirm you have the right part: Compare the new case side-by-side with the old one. Even slight differences in diameter or latch position mean it’s the wrong model.
Clean the hook race: Lint buildup in the race can prevent the case from seating fully. Use a small brush and compressed air to remove all debris.
Check for damage: Inspect the hook race for burrs, dents, or bent metal that could block proper insertion. This may require professional repair.
Test the latch mechanism: The finger latch should snap into a small groove or notch inside the machine. If the latch is bent or the groove is worn, the case won’t lock in place.
If the case still won’t stay:
- You may have ordered the wrong model number, double-check your machine’s exact model
- The hook assembly itself may be damaged and need replacement
- Some machines require the bobbin to be in the case during installation to hold it in place
- Vintage machines sometimes need the case inserted at a specific angle, then rotated once inside
For drop-in bobbin systems, a loose fit usually means the plastic holder tabs are broken or the needle plate isn’t tightening down properly. Check that the plate screws are snug and the holder has no cracks.
If you’ve tried all troubleshooting steps and the case still won’t seat, take the machine to a professional technician. Forcing an incompatible or misaligned case can damage the hook timing, which is expensive to repair.

Can I Use a Generic Bobbin Case or Does It Need to Be Brand-Specific?
Generic bobbin cases work for some basic mechanical machines but brand-specific OEM parts are strongly recommended for computerized machines, vintage models, and any machine where stitch quality matters. Even small dimensional differences of 0.5mm can cause tension problems, timing issues, and poor stitch formation.
When generic cases might work:
- Basic mechanical machines from major brands (Singer, Brother) with standard Class 15 bobbins
- Backup or emergency replacement when OEM parts aren’t immediately available
- Machines used for utility sewing where perfect tension isn’t critical
- Models that explicitly state “universal bobbin case compatible” in the manual
When you must use brand-specific parts:
- Computerized or embroidery machines with electronic tension systems
- Vintage machines with proprietary bobbin sizes (Class 66, Class 221, etc.)
- Industrial machines requiring high-speed precision
- Any machine where you do professional sewing, quilting, or garment construction
- Models with built-in bobbin sensors or thread detection
Risks of generic bobbin cases:
- Tension inconsistency: Aftermarket tension springs may be calibrated differently, causing loops or puckering
- Poor fit: Even 0.3mm difference in diameter creates wobble and timing problems
- Material quality: Cheaper metal may have rough surfaces that shred thread
- Warranty issues: Using non-OEM parts can void your machine warranty
A real-world test: If you install a generic case and notice any change in stitch quality, thread breakage, or unusual noise, remove it immediately and order the OEM part. The $10-15 you save isn’t worth ruined projects or potential damage to your machine’s hook assembly.
For vintage sewing machine repair, always use original or high-quality reproduction parts. Vintage machines were built to tighter tolerances than modern machines, and generic parts rarely fit properly.
What Happens If You Install the Bobbin Case Wrong?
Installing a bobbin case incorrectly causes immediate problems including jammed thread, skipped stitches, broken needles, and potential damage to the hook timing mechanism. The machine may not sew at all, or it may create thread nests and unbalanced stitches that ruin your fabric.
Immediate symptoms of incorrect installation:
- Machine won’t turn: The handwheel feels stuck or requires excessive force
- Grinding or clicking sounds: The needle or hook is hitting the misaligned case
- Thread jams instantly: Upper and lower threads tangle before completing one stitch
- Bobbin thread won’t catch: The needle can’t form a loop with the bobbin thread
- Needle breaks: Misalignment causes the needle to strike the case directly
Long-term damage from continued use:
If you force the machine to sew with an incorrectly installed bobbin case, you risk:
- Hook timing problems: The hook and needle lose synchronization, requiring professional recalibration
- Worn hook race: Metal-on-metal contact from misalignment creates grooves and burrs
- Bent needle bar: Repeated needle strikes can bend the bar that holds the needle
- Damaged bobbin case: The new case itself can be scratched or dented, ruining it immediately
How to tell if installation is correct:
- Turn the handwheel slowly by hand through several complete rotations
- Watch the needle descend and rise, it should never touch the bobbin case
- Listen for smooth, quiet operation with no clicking or scraping
- The bobbin case should sit completely flush with no gaps or wobbling
- Thread should pull smoothly from the bobbin through the tension spring
If anything feels wrong, stop immediately, unplug the machine, and remove the bobbin case to start over. Never force the handwheel or use the foot pedal if you suspect incorrect installation.
For beginners, the most common mistake is inserting a front-loading case with the latch in the wrong position. Take a photo of the old case before removal so you can match the exact orientation when installing the new one.
Do All Sewing Machines Have Removable Bobbin Cases?
Not all sewing machines have removable bobbin cases, drop-in bobbin systems have a fixed plastic housing built into the machine body, while front-loading systems use a removable metal case that slides out for bobbin changes. The type of system determines whether you can replace just the case or must replace the entire bobbin assembly.
Machines with removable bobbin cases:
- Most mechanical sewing machines made before 2000
- Vintage machines (Singer Featherweight, Singer 201, etc.)
- Industrial straight-stitch and zigzag machines
- Many mid-range and high-end mechanical models still produced today
- Machines designed for precision work where tension adjustment is critical
Machines with fixed (non-removable) bobbin cases:
- Most computerized and electronic machines
- Budget-friendly mechanical machines with simplified designs
- Portable and compact models prioritizing ease of use
- Machines marketed to beginners with “easy bobbin loading”
Hybrid systems:
Some modern machines have a removable bobbin holder assembly that includes the case, hook, and tension mechanism as one unit. You replace the entire assembly rather than just the case, and these typically cost $25-45.
To identify your system, check how you load the bobbin:
- Removable case: You take out a metal cylinder, insert the bobbin, and put the whole thing back in the machine
- Drop-in: You place the bobbin directly into a compartment and close a clear plastic cover
- Hybrid: You remove a plastic assembly that includes the bobbin holder and surrounding components
If you’re unsure, consult your machine manual or take a photo of your bobbin area and ask at a sewing machine shop. Knowing your system type is essential before ordering replacement parts.
For sewing machine maintenance purposes, removable cases are easier to clean thoroughly but require more precision during installation. Fixed systems are more convenient but may require replacing the entire assembly when worn.
Common Mistakes When Replacing a Bobbin Case
The most frequent mistakes when replacing a bobbin case include skipping the cleaning step, forcing the case in backward, using the wrong bobbin size, and failing to test tension before starting a project. These errors lead to immediate sewing problems and can damage both the new case and your machine.
Top mistakes to avoid:
1. Not cleaning the hook race first
- Lint and thread debris prevent proper seating and cause immediate tension problems
- Always use a brush, compressed air, and lint-free cloth before installing the new case
- Check our guide on bobbin case cleaning for detailed steps
2. Installing the case backward or rotated
- Front-loading cases have a specific latch position that must match the machine’s design
- Take a photo of the old case orientation before removal
- Look for alignment marks, notches, or pins that indicate correct positioning
3. Using the wrong bobbin size
- A Class 15 bobbin in a Class 66 case (or vice versa) causes wobbling and tension problems
- Verify your bobbin size matches the case specifications
- When in doubt, bring your old bobbin to the store for comparison
4. Forcing installation
- If the case doesn’t slide in smoothly, it’s either the wrong part or incorrectly oriented
- Never force or hammer a bobbin case, you’ll damage both the case and the hook race
- Remove and try again with different alignment
5. Skipping the test sew
- Always test on scrap fabric before starting your project
- Check both sides of the fabric for balanced tension
- Adjust tension settings if needed, new cases may require slight calibration
6. Ordering the wrong model
- “Universal” or “fits most” cases rarely work well
- Always order by your exact machine model number, not just the brand
- Compare the new case to the old one before installation
7. Not checking for damage during installation
- Inspect the new case for manufacturing defects before installing
- Run your finger inside to check for rough spots or burrs
- Return defective cases immediately rather than trying to make them work
8. Ignoring the manual
- Each machine has specific installation steps and alignment requirements
- Download a PDF manual if you’ve lost the original
- Watch brand-specific video tutorials for your exact model
If you make any of these mistakes, stop immediately and correct the problem. Continuing to sew with an incorrectly installed or incompatible bobbin case will damage your machine and ruin your projects. When in doubt, take the machine to a professional for installation, most shops charge $10-20 for this service and will verify you have the correct part.
How to Clean the Bobbin Case Area Before Installing a New One
Clean the bobbin case area by removing all lint, thread fragments, and oil residue from the hook race, feed dogs, and surrounding metal surfaces using a small brush, compressed air, and lint-free cloth. This critical step prevents the new case from jamming and extends its lifespan by eliminating abrasive particles.
Cleaning supplies you need:
- Small stiff brush (old toothbrush or specialized machine brush)
- Compressed air can (available at office supply stores)
- Lint-free cloth or microfiber towel
- Sewing machine oil (only if your manual recommends oiling the hook)
- Tweezers for removing stubborn thread bits
- Good lighting (headlamp or desk lamp)
Step-by-step cleaning process:
Unplug the machine and remove the needle, presser foot, and needle plate for full access
Remove loose debris: Use the brush to sweep out visible lint and thread from the hook race, feed dogs, and bobbin area
Blast with compressed air: Hold the can upright and use short bursts to blow out embedded lint from crevices, work from back to front to push debris out of the machine
Wipe metal surfaces: Use the lint-free cloth to wipe the hook race, removing any oil residue or sticky buildup
Check for thread fragments: Use tweezers to remove any thread pieces wrapped around the hook or caught in the tension spring area
Inspect for damage: Look closely at the hook race for scratches, burrs, or rough spots that could damage your new bobbin case
Oil if recommended: Some machines require a drop of oil on the hook race after cleaning, check your manual (computerized machines usually don’t need oiling)
Reassemble carefully: Replace the needle plate, ensuring screws are tight and the plate sits flush
How often to clean:
- After every 8-10 hours of sewing for regular maintenance
- Before installing a new bobbin case to ensure proper seating
- Whenever you notice lint buildup visible through the bobbin area
- After sewing with fuzzy fabrics like fleece, flannel, or terry cloth
A clean bobbin area makes a dramatic difference in stitch quality and machine performance. Many sewers blame their machine for tension problems when the real issue is simply accumulated lint interfering with the bobbin case.
For machines that see heavy use, consider a professional sewing machine tune-up annually. Technicians can access areas you can’t reach and perform deep cleaning that extends your machine’s life.
Is Replacing a Bobbin Case Difficult for Beginners?
Replacing a bobbin case is not difficult for beginners and requires no special skills or tools, just careful attention to alignment and orientation. Most sewers complete the task in 2-5 minutes once they understand their machine’s specific bobbin system and follow the correct installation steps.
Why it’s beginner-friendly:
- No tools required for most machines (some need a screwdriver for the needle plate)
- Reversible process: If you make a mistake, simply remove the case and try again
- Clear feedback: You’ll immediately know if installation is correct by how the machine sounds and sews
- Low risk: Unlike needle replacement or timing adjustments, incorrect bobbin case installation rarely causes permanent damage if you stop when something feels wrong
What makes it easier:
- Good lighting: Use a desk lamp or headlamp to see the bobbin area clearly
- Reference photos: Take pictures of the old case before removal to guide installation
- Manual nearby: Keep your machine manual open to the bobbin case section
- No rush: Work slowly and methodically, this isn’t a timed task
Potential challenges for beginners:
- Identifying the correct replacement part: Ordering the right model number requires careful research
- Understanding alignment marks: Some machines have subtle notches or pins that aren’t obvious
- Building confidence: First-time installation feels intimidating but becomes routine after one success
Tips for first-time replacement:
- Watch a video tutorial for your specific machine brand before starting
- Work in good light with the machine unplugged
- Don’t force anything, if it doesn’t slide in smoothly, try a different orientation
- Test on scrap fabric before returning to your project
- Keep the old case as a reference even if it’s worn out
If you can thread your machine and change a needle, you can replace a bobbin case. The key is taking your time and following the correct procedure for your machine type. Many beginners find it easier than they expected and feel more confident tackling other sewing machine maintenance tasks afterward.
For absolute beginners who feel uncertain, ask a more experienced sewer to walk you through the process once, or take the machine to a shop for the first replacement and watch the technician do it. Once you’ve seen it done correctly, you’ll be able to handle all future replacements yourself.
Conclusion
Replacing a bobbin case is a straightforward maintenance task that dramatically improves stitch quality and prevents frustrating sewing problems. Whether you have a front-loading or drop-in system, the process takes just a few minutes and requires no special tools, only attention to proper alignment and orientation.
Key points to remember:
- Clean the bobbin area thoroughly before installing the new case
- Always use brand-specific OEM parts for best results, especially on computerized and vintage machines
- Take photos of the old case orientation before removal to guide installation
- Never force a bobbin case, if it doesn’t slide in smoothly, check alignment and try again
- Test on scrap fabric after installation to verify proper tension and stitch formation
Your next steps:
- Identify your machine’s exact model number and bobbin system type
- Order the correct replacement bobbin case from an authorized dealer or reliable supplier
- Gather your cleaning supplies (brush, compressed air, lint-free cloth)
- Set aside 15-20 minutes to work carefully through the replacement process
- Keep your machine manual handy for reference during installation
Regular bobbin case replacement every 3-5 years (or sooner if you notice wear) is an investment in your sewing quality and machine longevity. Combined with routine sewing machine cleaning and proper maintenance, a new bobbin case can make your machine feel like new again.
Don’t let a worn bobbin case hold back your sewing projects. With the right part and a few minutes of careful work, you’ll be back to creating beautiful, professional-quality stitches in no time.
FAQ
How long does a bobbin case typically last? A bobbin case typically lasts 3-5 years with regular use, though heavy sewers may need replacement sooner. Signs of wear include scratches on the interior, a bent tension spring, or persistent tension problems that don’t resolve with cleaning and adjustment.
Can I repair a damaged bobbin case instead of replacing it? Minor issues like a loose tension screw can sometimes be tightened, but scratches, burrs, bent springs, or cracks require full replacement. Attempting to file or sand a damaged case usually makes the problem worse and can damage your thread.
Do I need to adjust tension after installing a new bobbin case? Most new bobbin cases come pre-calibrated, but you may need minor tension adjustment to match your specific machine and thread. Test on scrap fabric and adjust the bobbin tension screw in tiny increments (1/8 turn at a time) if needed.
What’s the difference between a standard and high-speed bobbin case? High-speed bobbin cases are designed for industrial machines that sew faster than 3,000 stitches per minute. They use harder metal and tighter tolerances to withstand the heat and friction of high-speed operation. Domestic machines use standard cases.
Can a worn bobbin case damage my sewing machine? Yes, a severely worn bobbin case with burrs or rough spots can shred thread, create lint buildup that clogs the hook race, and in extreme cases, throw off hook timing if it wobbles excessively. Replace worn cases promptly to prevent secondary damage.
Should I replace the bobbin when I replace the bobbin case? It’s a good idea to inspect your bobbins when replacing the case. If they’re scratched, bent, or don’t spin smoothly in the new case, replace them too. Using worn bobbins in a new case defeats the purpose of the replacement.
Why does my new bobbin case rattle in the machine? A rattling bobbin case is either the wrong model for your machine, installed incorrectly, or defective. Remove it, verify the model number matches your machine exactly, check for proper alignment, and inspect for manufacturing defects. Contact the supplier if the correct case still rattles.
Can I use a bobbin case from a different brand if it looks the same? Even if two bobbin cases look identical, small differences in diameter, tension spring calibration, or material can cause problems. Always use the case specified for your exact machine model to ensure proper fit and tension.
How do I know if I have a Class 15 or Class 66 bobbin case? Check your machine manual or measure your bobbin. Class 15 bobbins are 20.5mm diameter and 11.5mm high; Class 66 bobbins are 20.5mm diameter and 9mm high. The case must match your bobbin size exactly.
What should I do if the new bobbin case doesn’t improve my stitch quality? If a new bobbin case doesn’t solve tension or stitch problems, the issue may be elsewhere: check upper thread tension, replace the needle, clean the entire thread path, or have a technician check hook timing. Not all sewing problems originate with the bobbin case.
Is it worth replacing the bobbin case on an old machine? If the machine otherwise works well and you enjoy using it, a $15-30 bobbin case replacement is worthwhile. However, if multiple components are failing, consider whether repair costs justify keeping the machine versus buying a new one.
Can I clean and reuse an old bobbin case? You can clean an old case for temporary use, but if it’s worn enough to need replacement, cleaning won’t restore the smooth interior surface or fix a weakened tension spring. Keep the old case as a backup but install the new one for regular sewing.


