
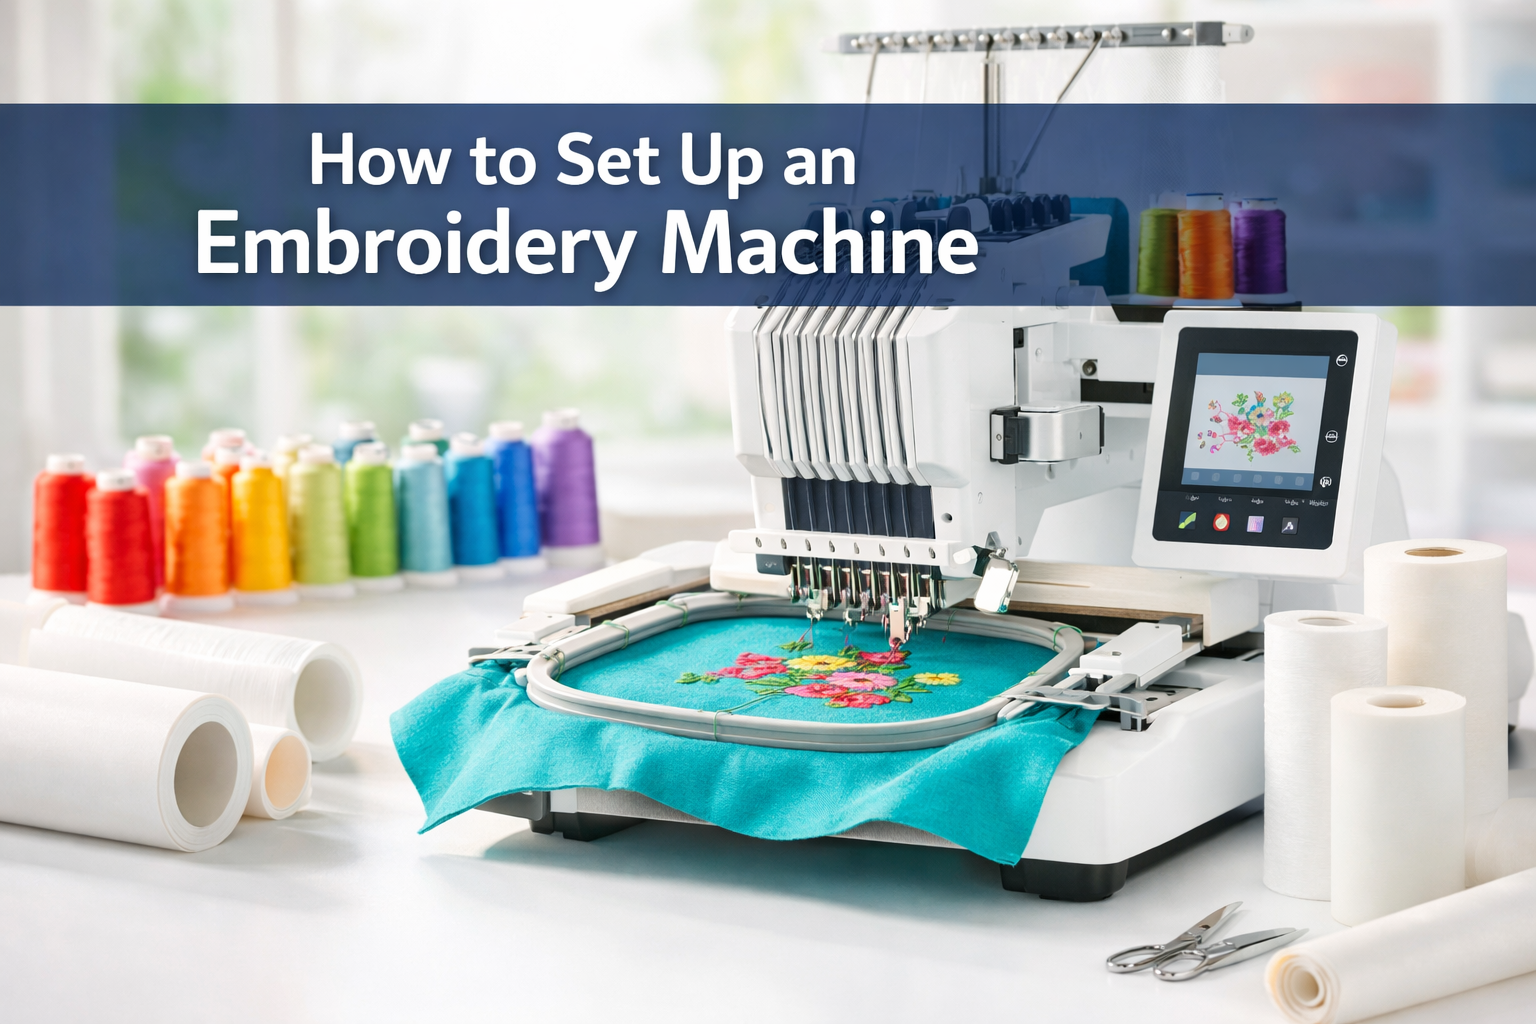
Quick Answer: Setting up an embroidery machine involves threading both the upper thread and bobbin correctly, installing the proper needle, hooping your fabric with stabilizer, loading or creating your embroidery design, and adjusting tension settings. Most beginners can complete basic setup in 15-30 minutes once familiar with their specific machine model, though the learning curve varies by machine complexity.
Key Takeaways
- Threading is critical: Both upper thread and bobbin must follow the exact path shown in your manual to prevent thread breaks and skipped stitches
- Stabilizer matters: Every embroidery project needs the right stabilizer type (tear-away, cut-away, or wash-away) matched to your fabric weight
- Hooping technique affects results: Fabric should be drum-tight in the hoop without distortion or puckering
- Software may be optional: Many beginner machines have built-in designs; you only need software for custom designs or editing
- Setup differs from regular sewing: Embroidery machines require specialized needles, multiple thread colors, and design file loading
- Common mistakes are fixable: Thread breaking, bird’s nesting, and design misalignment usually stem from incorrect threading or tension
- Startup costs range widely: Entry-level machines start around $500-800, while professional models exceed $5,000
- Practice builds confidence: Most sewers become comfortable with basic setup within 2-4 weeks of regular use
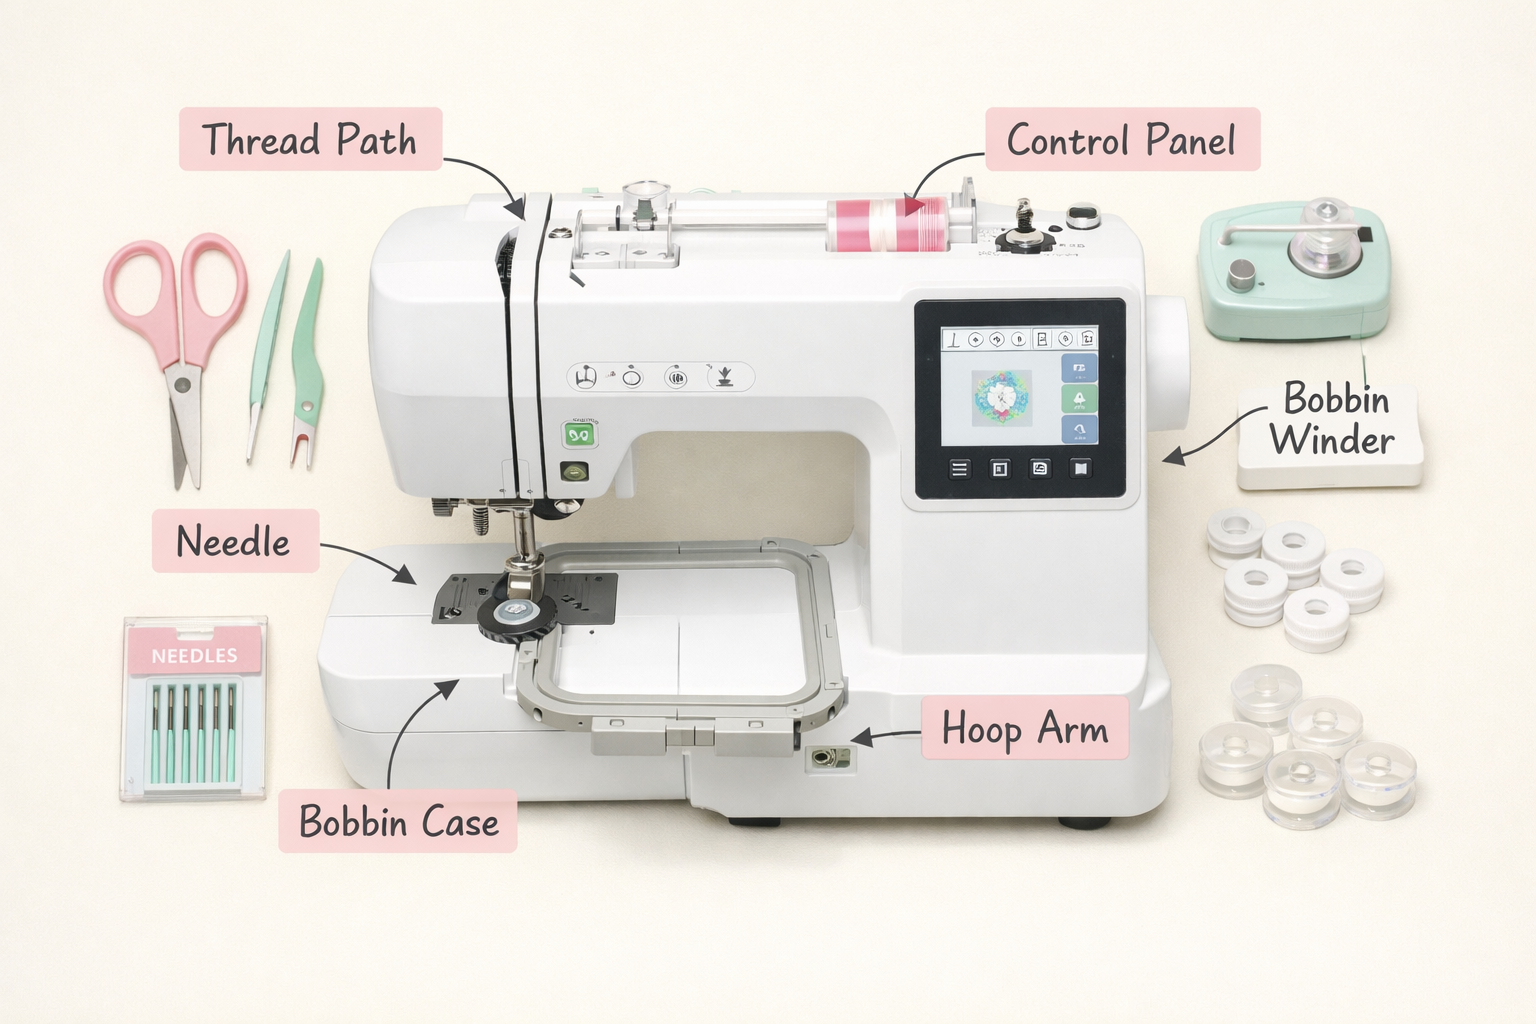
What Tools Do I Need to Set Up an Embroidery Machine?
You’ll need embroidery-specific thread (polyester or rayon), embroidery needles (size 75/11 or 90/14), stabilizer appropriate for your fabric, embroidery hoops that fit your machine, small scissors for trimming jump stitches, and tweezers for removing backing. Most machines also require a USB drive or cable for transferring designs.
Essential supplies for every embroidery setup:
- Embroidery thread: Use polyester or rayon thread designed for machine embroidery, not regular sewing thread. Polyester offers better durability, while rayon provides more sheen.
- Embroidery needles: These have larger eyes and special scarf designs to prevent thread shredding. Stock sizes 75/11 for lightweight fabrics and 90/14 for heavier materials.
- Stabilizer: Choose tear-away for stable woven fabrics, cut-away for knits and stretchy materials, or water-soluble for delicate items like lace.
- Embroidery hoops: Your machine comes with at least one hoop size. Larger hoops allow bigger designs but require more workspace.
- Small sharp scissors: For trimming thread tails and jump stitches between color changes.
- Tweezers: Essential for removing small bits of tear-away stabilizer from detailed designs.
- Seam ripper: For those inevitable mistakes when you need to remove stitches.
- USB drive or connection cable: Most modern machines load designs via USB; some connect directly to computers.
Optional but helpful tools:
- Temporary adhesive spray for securing slippery fabrics to stabilizer
- Marking pens or chalk for design placement
- Extra bobbins pre-wound with white thread
- Lint brush for regular cleaning between projects
Choose X if: If you’re just starting out, buy a starter kit from your machine manufacturer. These bundles typically include the right thread weights, appropriate stabilizers, and compatible needles, saving you from compatibility guesswork.
Common mistake: Beginners often try using regular sewing thread for embroidery. This causes excessive thread breaks because sewing thread isn’t designed for the high-speed, repetitive needle penetrations of embroidery work.
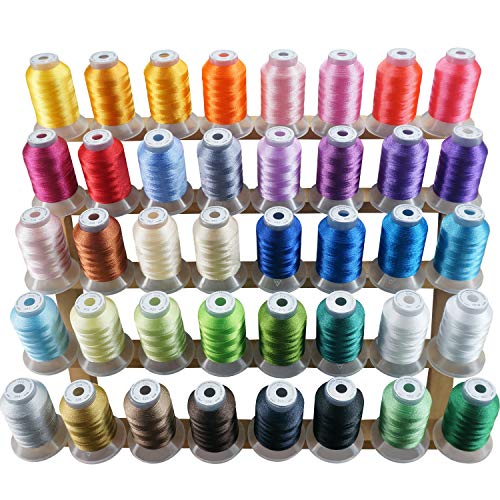
★ 40 SPOOLS PER KIT + COLOR CHART - 40 spools great assorted bright and beautiful colors Polyester Embroidery Machine Thread to brighten and beautify all sort of your embroidery projects. Using Color Chart to find compatible with Brother Color No. and name, Conversion Chart of Madeira is also available.

★★ Many Popular Colors in Single Spool for Your Choice: As one of the largest manufacturers producing embroidery machine thread in the world, we have more than 1500 colors in stock. Now New brothread chose the most popular colors and sold in single huge spool 5000M each, to satisfy the demands of our clients who can purchase different colors in different quantities as their will.

[The Simthread Advantage]: Join the 2 million+ global Rayon Embroidery Thread users powered by our leading technology.Rayon is the natural environmentally friendly material, ultra softer than polyester.
How to Thread an Embroidery Machine for Beginners
Threading an embroidery machine follows a specific path from the spool pin through tension discs, take-up lever, and down to the needle. Always thread with the presser foot up (tension discs open) and refer to your manual’s threading diagram, as the path varies by brand. The bobbin threads separately through the bobbin case, which may be top-loading or front-loading depending on your model.
Step-by-step upper threading:
- Place your thread spool on the spool pin with the thread feeding off in the direction shown in your manual (usually from the back or side of the spool).
- Guide thread through the first thread guide at the top of the machine.
- Thread down and around the tension assembly, making sure the thread seats between the tension discs. This only happens when the presser foot is raised.
- Bring thread up through the take-up lever, that small hook or eye that moves up and down when sewing.
- Thread down through remaining thread guides along the needle bar.
- Thread the needle from front to back (or side to side, depending on your machine). Leave a 4-6 inch tail.
If you’re familiar with threading a regular sewing machine, embroidery threading follows similar principles but often includes additional thread guides for better tension control.
Bobbin threading:
- Top-loading bobbins: Drop the bobbin into the bobbin case so it rotates counterclockwise when you pull the thread. Thread through the slot and under the tension spring, leaving a 4-inch tail.
- Front-loading bobbins: Insert the bobbin into the removable bobbin case so thread feeds counterclockwise. Pull thread through the slot and under the tension spring until it clicks. Insert the entire case into the machine.
Threading checklist:
✓ Presser foot was raised during threading
✓ Thread passed through ALL guides (missing one causes tension problems)
✓ Thread seated properly in tension discs
✓ Take-up lever threaded
✓ Needle threaded in correct direction
✓ Bobbin rotating the right direction
✓ Thread tails at least 4 inches long
Edge case: Some machines have automatic needle threaders. These work best with thread sizes 40-60 weight. Heavier decorative threads may need manual threading.
Embroidery Machine vs Regular Sewing Machine Setup Differences
Embroidery machines require design file loading, specialized embroidery needles with larger eyes, hooping fabric with stabilizer, and managing multiple thread color changes. Regular sewing machines focus on seam construction with continuous stitching, while embroidery machines create decorative designs with frequent starts, stops, and direction changes that demand different tension settings and stabilization.
Key setup differences:
| Setup Aspect | Regular Sewing Machine | Embroidery Machine |
|---|---|---|
| Needle type | Universal, ballpoint, or sharp | Embroidery needles with larger eyes and special scarf |
| Thread | All-purpose polyester or cotton | Embroidery-specific polyester or rayon |
| Fabric preparation | Pin or guide fabric through | Hoop fabric tightly with stabilizer |
| Tension | Balanced for seam strength | Adjusted for decorative appearance |
| Design input | Follow pattern lines manually | Load digital design file |
| Presser foot | Various feet for different seams | Embroidery foot or removed entirely |
Why these differences matter:
Embroidery stitches penetrate the same area repeatedly from multiple angles, creating much more stress on thread and fabric than straight seam sewing. The stabilizer prevents fabric from puckering or stretching under this stress. The hoop holds everything perfectly still while the machine moves the fabric automatically to create the design.
Regular sewing machines move fabric past a stationary needle using feed dogs. Embroidery machines move the hooped fabric in X-Y directions while the needle stitches in place. This fundamental difference explains why you can’t simply “do embroidery” on a regular sewing machine without an embroidery attachment.
Choose embroidery setup if: You want to add decorative designs, monograms, or complex patterns to finished items. Choose regular sewing if you’re constructing garments or projects from separate fabric pieces.
Understanding these differences helps prevent common mistakes like using the wrong stabilizer or expecting regular sewing thread to work for embroidery. For more on basic machine parts and their functions, check our comprehensive guide.

▶TEMPORARY STABILIZER: It provides temporary support for embroidery projects. They are best used on firmly woven fabrics and fabrics made from natural fibers. Our tear away embroidery stabilizer can be torn away easily yet provides adequate stability.

▶ Sticky Tear Away Embroidery Stabilizer: It is a self-adhesive tear away embroidery stabilizer which is very ideal to use on fabrics that can’t be hooped or too small to fit in a hoop. Our sticky tear away embroidery stabilizer can be torn away easily yet provides adequate stability, leaving no tears and residue.

QUILTING BOOK AND PROJECTS
How Much Does It Cost to Get Started with Embroidery Machines?
Getting started with embroidery costs $600-1,200 for most beginners, including a basic single-needle machine ($500-800), starter thread set ($40-60), stabilizer variety pack ($25-40), extra needles ($10-15), and basic hoops (usually included). Professional multi-needle machines start around $5,000-8,000, while high-end commercial models exceed $15,000.
Typical startup budget breakdown:
Entry-level setup ($600-800):
- Single-needle embroidery machine: $500-700
- Thread starter pack (20-40 colors): $40-60
- Stabilizer sampler (tear-away, cut-away, water-soluble): $25-35
- Extra embroidery needles (assorted sizes): $10-15
- Small scissors and tweezers: $10-20
- USB drive for designs: $10-15
Intermediate setup ($1,500-3,000):
- Better single-needle or entry multi-needle machine: $1,200-2,500
- Expanded thread collection (100+ colors): $150-250
- Professional stabilizer variety: $50-100
- Additional hoop sizes: $50-150
- Embroidery software (basic): $100-300
- Design collections: $50-200
Professional setup ($5,000+):
- Multi-needle commercial machine: $5,000-15,000+
- Complete thread inventory: $500-1,000
- Commercial stabilizer stock: $200-400
- Full hoop set: $200-500
- Professional digitizing software: $1,000-2,500
- Design library and subscriptions: $300-1,000/year
Ongoing costs to consider:
- Thread replenishment: $20-100/month depending on volume
- Stabilizer: $15-50/month
- Needles: $10-20/month (replace frequently for best results)
- Machine maintenance: $75-150/year for professional servicing
- Design purchases or subscriptions: $10-50/month
Money-saving tips:
Buy thread in larger spools (1,000m or 5,000m) if you embroider frequently. Purchase stabilizer by the roll rather than pre-cut sheets. Join embroidery forums where members share free designs. Start with your machine’s built-in designs before investing in software.
Choose X if: If you’re testing whether embroidery is right for you, start with a $500-700 machine and minimal supplies. You can always upgrade later. If you’re starting a business, budget for at least the intermediate setup to handle client variety.

[ INCLUDES EVERYTHINGS YOU NEED ] Exquisite gift box contains 4 embroidered fabrics with patterns, 20 color threads, 4 instructions, 9 needles, 1 pair of scissors, 1 embroidery thread board, 1 embroidery hoop, 1 needle threader, 1 seam ripper,meeting all your needs in the process of advancing your embroidery skills!

ALL-IN-ONE EMBROIDERY STARTER KIT - Embroidex starter kit provides you a cost-effective way to start from scratch with your new embroidery machine. The kit is has a thoughtful selection of all the essential embroidery paraphernalia that you would need to start with your first project - the kit ensures that you need to look no further to start with.

Easy Embroidery Kit for Beginners:Designed with a pre-printed floral pattern, this beginner embroidery kit makes it easy to start without drawing or tracing. The clear pattern and step-by-step instructions help new crafters enjoy hand embroidery with confidence.
Why Is My Embroidery Machine Thread Breaking During Setup?
Thread breaks during setup typically result from incorrect threading (especially missing the take-up lever or tension discs), using the wrong needle size or type, threading with the presser foot down, or using old or low-quality thread. Check that your upper thread path is correct, your needle is sharp and properly inserted, and your bobbin is wound evenly without loose spots.
Most common causes and fixes:
Threading errors (60% of breaks):
- Missed take-up lever: Re-thread completely with presser foot UP
- Thread not seated in tension discs: Raise presser foot, pull thread firmly into tension assembly
- Skipped thread guide: Follow manual’s threading diagram exactly
- Wrong threading direction through guides: Some guides require specific entry angles
Needle problems (25% of breaks):
- Dull or damaged needle: Replace needle after every 8-10 hours of stitching
- Wrong needle type: Use embroidery needles, not universal sewing needles
- Needle too small for thread: Use 90/14 for 40-weight thread, 75/11 for 60-weight
- Needle inserted incorrectly: Flat side must face the correct direction (usually back)
Thread quality issues (10% of breaks):
- Old thread: Thread degrades over time; replace thread older than 2-3 years
- Cheap thread: Bargain thread often has thick/thin spots that catch in the needle eye
- Wrong thread type: Use embroidery-specific thread, not quilting or all-purpose sewing thread
Tension and mechanical issues (5% of breaks):
- Upper tension too tight: Reduce tension by 1-2 numbers
- Rough spots on needle plate or hook: Check for burrs; have machine serviced if found
- Bobbin wound unevenly: Rewind bobbin at moderate speed
Troubleshooting sequence:
- Re-thread the entire machine with presser foot raised
- Replace the needle with a fresh embroidery needle
- Check that thread is feeding smoothly from the spool
- Test with a different thread brand or color
- Reduce upper tension slightly
- Clean the bobbin area of lint and debris
If thread still breaks after these steps, your machine may need professional service. Timing issues or hook damage require a qualified technician. Learn more about common thread problems and solutions.
Edge case: Metallic and specialty decorative threads break more easily than standard polyester. These require slower stitching speeds, larger needles (90/14), and sometimes a thread stand to reduce friction.
Best Embroidery Machines for Beginners with Easy Setup
The Brother PE800, Brother SE1900, and Janome Memory Craft 500E offer the easiest setup for beginners, featuring clear LCD touchscreens, automatic needle threading, built-in design libraries, and straightforward hooping systems. These machines include detailed quick-start guides, color-coded threading paths, and USB connectivity for simple design loading without requiring separate software.
Top beginner-friendly models (2026):
Brother PE800 ($700-800):
- Large 5″ x 7″ embroidery area
- 138 built-in designs
- Automatic needle threader
- Color LCD touchscreen with design preview
- USB port for importing designs
- Simple top-loading bobbin
- Lightweight and portable
Brother SE1900 ($600-750):
- Combination sewing and embroidery machine
- 5″ x 7″ embroidery field
- 138 embroidery designs built-in
- Automatic needle threading
- Good for sewers wanting both functions
- Slightly smaller workspace than dedicated embroidery machines
Janome Memory Craft 500E ($1,800-2,000):
- Extra-large 7.9″ x 11″ embroidery area
- 160 built-in designs
- Advanced editing features on machine
- Automatic thread trimming
- More expensive but includes professional features
- Excellent for growing into advanced projects
What makes setup easy:
- Automatic needle threading: Eliminates the most frustrating part of setup
- Color-coded threading paths: Visual guides printed on the machine body
- Top-loading bobbins: Easier to see and insert correctly than front-loading
- Touchscreen interfaces: Intuitive design selection and editing
- Built-in tutorials: Some machines include video guides on the screen
- Quick-start guides: Laminated cards showing threading and basic setup
Features to prioritize as a beginner:
✓ Built-in design library (at least 100 designs)
✓ USB connectivity (easier than WiFi for most beginners)
✓ Automatic needle threader
✓ Hoop size at least 4″ x 4″ (5″ x 7″ preferred)
✓ Clear LCD screen with design preview
✓ Automatic thread cutter (saves time between colors)
✓ Good lighting around the needle area
Choose X if: If you only want to embroider (not sew seams), get a dedicated embroidery machine like the PE800. If you want one machine for both sewing and embroidery, choose a combination model like the SE1900, but expect a smaller embroidery area.
Common mistake: Beginners often buy machines with tiny embroidery fields (4″ x 4″ or smaller) to save money, then quickly outgrow them. A 5″ x 7″ field offers much more design flexibility for only slightly more cost.
Do I Need Special Software to Set Up an Embroidery Machine?
Most beginner embroidery machines don’t require software for basic setup and stitching because they include 50-200 built-in designs accessible through the machine’s touchscreen. You only need embroidery software if you want to create custom designs from artwork, edit existing designs significantly, or combine multiple designs into one layout.
When built-in designs are enough:
- You’re satisfied with pre-made designs, fonts, and monograms
- You purchase ready-to-stitch designs from online marketplaces
- You only need basic resizing and color changes (most machines handle this)
- You’re embroidering simple text and names
- You’re starting out and learning the basics
When you need software:
- You want to convert your own artwork or photos into embroidery designs (digitizing)
- You need to combine multiple designs into complex layouts
- You want advanced editing like adding/removing stitches or changing stitch types
- You’re creating designs to sell
- You need precise control over stitch density and underlay
Software options by skill level:
Free/Basic ($0-50):
- Embrilliance Essentials (free basic version, $150 for full features)
- Ink/Stitch (free, open-source, requires Inkscape)
- SewWhat-Pro ($75, viewing and basic editing only)
- Good for: Viewing designs, basic resizing, format conversion
Intermediate ($150-500):
- Embrilliance Enthusiast ($250)
- PE-Design 11 ($900, often bundled with Brother machines)
- Bernina Toolbox ($400)
- Good for: Lettering, combining designs, moderate editing
Professional ($1,000-2,500+):
- Wilcom Hatch ($1,500)
- Embrilliance Suite (all modules, $600-800)
- Floriani Total Control U ($1,500)
- Good for: Full digitizing, creating designs from scratch, commercial work
File formats to know:
Most machines read multiple formats, but each brand has a native format:
- Brother: .PES
- Janome: .JEF
- Bernina: .EXP
- Singer: .XXX
- Generic: .DST (most universal)
Getting designs without software:
- Purchase from sites like Etsy, EmbroideryDesigns.com, or Designs by JuJu
- Download free designs from manufacturer websites
- Join embroidery forums with free design sections
- Use your machine’s built-in designs and fonts
Choose X if: If you’re just starting, skip software for the first 3-6 months. Learn your machine thoroughly using built-in designs and purchased files. Add software later if you find yourself limited by pre-made designs.
For more on maintaining computerized machines, including software updates and file management, see our detailed guide.
Common Mistakes When Setting Up an Embroidery Machine for the First Time
First-time users commonly hoop fabric too loosely (causing puckering), forget to attach stabilizer, thread the machine with the presser foot down (preventing proper tension), use regular sewing needles instead of embroidery needles, and start with complex designs before mastering basics. These mistakes lead to poor stitch quality, thread breaks, and frustration that’s easily avoided.
Top 10 beginner setup mistakes:
1. Hooping fabric loosely
- Problem: Loose fabric shifts during stitching, causing misalignment and puckering
- Fix: Fabric should be drum-tight in the hoop, making a tapping sound when you flick it
- Test: If you can pinch and lift the fabric in the hoop, it’s too loose
2. Skipping stabilizer
- Problem: Fabric stretches, puckers, or tunnels under dense stitching
- Fix: Always use appropriate stabilizer for your fabric type
- Rule: When in doubt, use cut-away stabilizer (it’s the most forgiving)
3. Threading with presser foot down
- Problem: Thread doesn’t seat between tension discs, causing loops and breaks
- Fix: Always raise presser foot before threading
- Why: Raising the foot opens the tension discs to accept thread
4. Using wrong needle type
- Problem: Regular sewing needles have smaller eyes that shred embroidery thread
- Fix: Use embroidery needles (marked with “E” or “Embroidery”)
- Sizes: 75/11 for lightweight fabrics, 90/14 for medium-heavy
5. Starting with complex designs
- Problem: Intricate designs magnify setup errors and take hours to complete
- Fix: Start with simple shapes and text to learn your machine
- Progression: Simple fill shapes → basic appliqué → detailed designs
6. Ignoring thread quality
- Problem: Cheap thread breaks constantly and produces fuzzy results
- Fix: Invest in quality embroidery thread (Sulky, Madeira, Isacord)
- Cost: Good thread costs $4-8 per spool but saves hours of frustration
7. Not testing first
- Problem: Discovering tension or placement issues after stitching for 30 minutes
- Fix: Always stitch a test design on scrap fabric with the same stabilizer
- Time saved: 5-minute test prevents 30-minute do-overs
8. Incorrect hoop attachment
- Problem: Hoop not fully clicked into machine causes misalignment
- Fix: Listen for the click and gently tug to confirm hoop is locked
- Check: Hoop shouldn’t wiggle or lift when touched
9. Forgetting to lower presser foot
- Problem: No tension on upper thread causes bird’s nesting underneath
- Fix: Lower presser foot before starting to stitch
- Habit: Make it part of your pre-stitch checklist
10. Rushing through setup
- Problem: Skipped steps lead to poor results and wasted materials
- Fix: Follow a setup checklist every time until it becomes automatic
- Reality: Proper setup takes 10-15 minutes but ensures success
Setup checklist to avoid mistakes:
□ Correct needle installed (embroidery type, right size)
□ Fresh needle (not dull or bent)
□ Quality embroidery thread on spool pin
□ Machine threaded with presser foot UP
□ Thread through ALL guides including take-up lever
□ Bobbin wound evenly and inserted correctly
□ Fabric and stabilizer hooped drum-tight
□ Hoop clicked securely into machine
□ Design loaded and positioned correctly
□ Presser foot lowered before starting
□ Test stitched on scrap first
For more troubleshooting help, see our guide on common sewing machine problems.
How to Hoop Fabric Correctly for Embroidery Machine
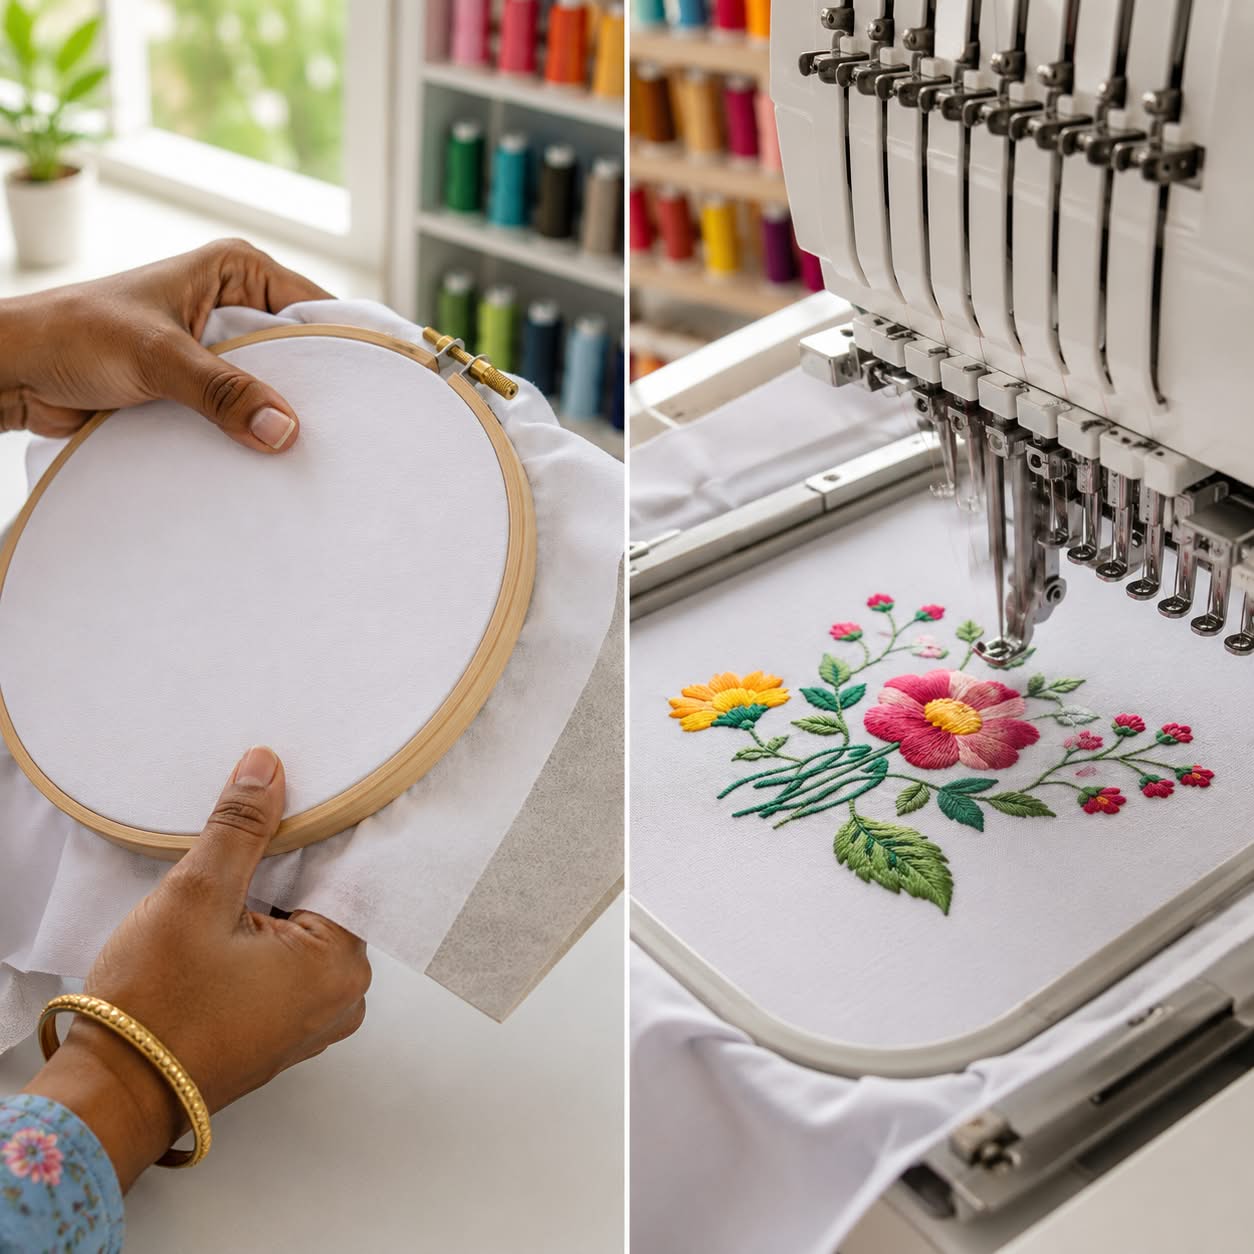
Proper hooping requires placing stabilizer in the hoop first, laying fabric on top right-side up, pressing the inner hoop down firmly to sandwich both layers, and tightening the screw until fabric is drum-tight without distortion. The fabric should be smooth and taut enough to make a tapping sound when flicked, with no wrinkles or loose areas.
Step-by-step hooping process:
1. Prepare your materials
- Cut stabilizer 1-2 inches larger than your hoop on all sides
- Press fabric to remove wrinkles (wrinkles become permanent after stitching)
- Mark design placement with water-soluble pen if needed
2. Separate hoop rings
- Loosen the screw on the outer hoop
- Remove the inner hoop completely
- Place outer hoop on a flat surface
3. Layer stabilizer and fabric
- Lay stabilizer over outer hoop (rough side up for tear-away)
- Place fabric right-side up on top of stabilizer
- Align fabric grain with hoop edges (prevents distortion)
4. Insert inner hoop
- Center inner hoop over fabric and stabilizer
- Press down firmly with both hands, applying even pressure
- Push until inner hoop sits below the outer hoop’s edge
5. Tighten and adjust
- Tighten screw until fabric is taut but not stretched
- Gently tug fabric edges to remove any slack or wrinkles
- Continue tightening and adjusting until drum-tight
- Test by tapping fabric (should sound like a drum)
6. Final check
- Look for wrinkles or puckers (remove and re-hoop if found)
- Ensure fabric grain is straight
- Verify design area is centered in hoop
- Check that stabilizer extends beyond fabric edges
Hooping techniques for different fabrics:
Lightweight fabrics (silk, batiste, lawn):
- Use two layers of tear-away or one cut-away stabilizer
- Consider spray adhesive to prevent shifting
- Hoop slightly less tight to avoid stretching
Medium-weight fabrics (cotton, linen, denim):
- One layer of appropriate stabilizer usually sufficient
- Hoop drum-tight for best results
- Standard hooping technique works well
Stretchy fabrics (knits, jersey, fleece):
- Always use cut-away stabilizer
- Don’t stretch fabric while hooping
- May need to float fabric (hoop stabilizer only, adhere fabric with spray)
Thick fabrics (canvas, upholstery, leather):
- Use cut-away stabilizer
- May need to hoop less tightly to avoid hoop marks
- Consider using a larger needle (90/14 or 100/16)
Items that can’t be hooped (collars, cuffs, finished items):
- Hoop stabilizer only
- Use temporary spray adhesive to attach item to hooped stabilizer
- Called “floating” the fabric
Common hooping mistakes:
❌ Hooping fabric off-grain (causes distortion)
❌ Hooping too loosely (causes puckering and misalignment)
❌ Hooping too tightly (stretches fabric, creates permanent distortion)
❌ Not using enough stabilizer (causes fabric to tunnel)
❌ Hooping wrinkled fabric (wrinkles become permanent)
❌ Forgetting to tighten screw fully (hoop loosens during stitching)
Pro tip: Mark the center of your hoop with a small dot of permanent marker on both inner and outer rings. This helps you center designs quickly and consistently.
Is an Embroidery Machine Hard to Set Up for Small Business?
Setting up an embroidery machine for small business use isn’t technically harder than home use, but requires additional considerations including faster production workflow, consistent quality control, design library organization, and customer file management. Most sewers comfortable with basic embroidery setup can transition to business use within 2-4 weeks of focused practice.
Business setup considerations beyond basic operation:
Production efficiency:
- Learn to pre-wind multiple bobbins in advance
- Organize thread by color family for quick changes
- Create templates for common product types (hats, shirts, bags)
- Develop a consistent workflow from order to finished product
- Time yourself to calculate accurate pricing
Quality control:
- Establish testing procedures for new designs
- Create sample books showing thread colors on different fabrics
- Document successful stabilizer/fabric/design combinations
- Develop a checklist for every project to ensure consistency
Design management:
- Organize design files in clear folder structures
- Back up all designs to cloud storage
- Track which designs are licensed for commercial use
- Create a catalog with photos of stitched samples
Equipment considerations:
- Single-needle machines work for low-volume businesses but require frequent thread changes
- Multi-needle machines ($5,000+) dramatically increase production speed
- Budget for backup supplies (extra needles, bobbins, common thread colors)
- Consider a second machine for backup if embroidery becomes primary income
Business-specific skills to develop:
- Design placement and sizing for different garment types
- Working with customer-supplied items (varying fabric types and conditions)
- Handling rush orders and time management
- Troubleshooting quickly to minimize downtime
- Pricing that covers materials, time, and machine wear
Realistic timeline for business readiness:
- Weeks 1-2: Master basic setup, threading, and hooping on practice fabric
- Weeks 3-4: Practice on actual products (t-shirts, towels, bags)
- Weeks 5-8: Develop workflow efficiency, test various fabric types
- Weeks 9-12: Build design library, create samples, establish pricing
- Month 4+: Start taking small orders, refine processes
Choose X if: Start with a single-needle machine if you’re testing business viability or expect fewer than 10 orders per week. Upgrade to multi-needle when you’re consistently booked and thread changes become your biggest time drain.
Common business mistakes:
- Underpricing because you don’t track actual time per project
- Accepting orders beyond your skill level before practicing
- Not testing customer-supplied items before stitching
- Failing to communicate realistic turnaround times
- Skipping written agreements about design ownership and revisions
Regular machine maintenance becomes even more critical for business use. Commercial embroidery creates more lint and thread debris, requiring cleaning after every 4-8 hours of stitching.
Embroidery Machine Setup for Thick Fabrics Like Denim
Thick fabrics like denim, canvas, and upholstery material require larger needles (90/14 or 100/16 embroidery needles), cut-away stabilizer, reduced stitching speed, and sometimes loosened hoop tension to prevent permanent hoop marks. You may also need to decrease stitch density in your design and use 40-weight thread instead of finer 60-weight for better coverage.
Setup adjustments for heavy fabrics:
Needle selection:
- Use 90/14 embroidery needles as standard
- Switch to 100/16 for very heavy canvas or multiple layers
- Replace needles more frequently (heavy fabrics dull needles faster)
- Sharp point needles work better than ballpoint for woven heavy fabrics
Stabilizer choice:
- Always use cut-away stabilizer (tear-away won’t provide enough support)
- May need two layers for very dense designs
- Medium-weight cut-away is usually sufficient
- Avoid water-soluble stabilizer (doesn’t provide enough support)
Thread considerations:
- 40-weight thread provides better coverage on thick fabrics than 60-weight
- Polyester thread is more durable than rayon for items that will be washed frequently
- Consider using the same thread in the bobbin as the top for better coverage
Machine settings:
- Reduce stitching speed by 25-50% (slower stitching prevents needle deflection)
- Loosen upper tension slightly if stitches look too tight
- May need to adjust bobbin tension (consult manual or technician)
Hooping adjustments:
- Don’t hoop as tightly as you would for lightweight fabrics
- Over-tightening thick fabrics can leave permanent hoop marks
- Fabric should be secure but not stretched
- Consider using a larger hoop to distribute pressure
Design considerations:
- Choose designs with lower stitch density
- Avoid tiny details (they get lost in thick fabric texture)
- Reduce stitch count by 10-20% if editing designs
- Increase underlay stitching for better stability
- Test designs on scrap fabric first
Specific fabric tips:
Denim:
- Pre-wash to remove sizing and prevent shrinkage
- Use 90/14 needle and 40-weight polyester thread
- Reduce speed to 60-70% of maximum
- Cut-away stabilizer is essential
Canvas:
- Very heavy canvas may need 100/16 needle
- Slow speed significantly (50-60% of maximum)
- Two layers of cut-away stabilizer for dense designs
- Consider using a walking foot if your machine allows
Upholstery fabric:
- Test on scrap first (some upholstery fabrics are difficult to embroider)
- May need to float fabric rather than hooping (use spray adhesive)
- Reduce stitch density to prevent fabric distortion
- Use cut-away stabilizer
Fleece and thick knits:
- Use ballpoint embroidery needles
- Cut-away stabilizer is mandatory
- May need water-soluble topper to prevent stitches from sinking into pile
- Reduce density significantly
Troubleshooting thick fabric issues:
- Needle breaks: Switch to larger needle, reduce speed, check needle insertion
- Skipped stitches: Use fresh needle, slow down, check needle type
- Puckering: Add more stabilizer, reduce tension, decrease stitch density
- Thread breaks: Use 40-weight thread, slow speed, check threading path
- Hoop marks: Loosen hoop tension, use larger hoop, or float fabric
Edge case: Some thick fabrics like leather or vinyl can’t be hooped at all because hoop marks are permanent. For these materials, hoop stabilizer only and use temporary spray adhesive to attach the material to the hooped stabilizer.
Understanding tension adjustments becomes especially important when working with thick fabrics, as standard tension settings rarely work without modification.
How Long Does It Take to Learn Embroidery Machine Setup?
Most beginners become comfortable with basic embroidery machine setup within 2-4 weeks of regular practice, typically requiring 10-15 practice sessions to master threading, hooping, and running simple designs. Complete proficiency including troubleshooting, working with various fabrics, and handling complex designs usually develops over 2-3 months of consistent use.
Learning timeline by skill level:
Week 1: Basic operation
- Understanding machine parts and their functions
- Threading upper thread and bobbin correctly
- Loading and positioning simple designs
- Basic hooping technique
- Running first test designs
- Time investment: 3-5 hours
Weeks 2-3: Building confidence
- Consistent threading without referring to manual
- Hooping various fabric types
- Managing thread changes
- Basic troubleshooting (re-threading, adjusting tension)
- Completing small projects successfully
- Time investment: 5-8 hours
Weeks 4-6: Developing efficiency
- Quick setup (under 10 minutes)
- Working with different stabilizers
- Adjusting for fabric types
- Recognizing and fixing common problems
- Managing multiple-color designs
- Time investment: 8-12 hours
Months 2-3: Gaining proficiency
- Troubleshooting most issues independently
- Working with challenging fabrics
- Editing designs on machine
- Efficient workflow for multiple projects
- Consistent professional-quality results
- Time investment: 15-25 hours
Factors that speed up learning:
- Previous sewing experience: Sewers familiar with threading and tension concepts learn 30-50% faster
- Quality instruction: Taking a class or watching comprehensive tutorials prevents bad habits
- Regular practice: Daily or every-other-day practice builds muscle memory faster than weekly sessions
- Good equipment: Machines with automatic features (needle threader, thread cutter) reduce frustration
- Starting simple: Beginning with basic designs and fabrics builds confidence
Factors that slow down learning:
- Skipping the manual: Trying to figure everything out independently wastes time
- Using poor materials: Cheap thread and wrong stabilizers cause problems that seem like operator error
- Jumping to complex projects: Attempting detailed designs before mastering basics leads to frustration
- Inconsistent practice: Long gaps between sessions require re-learning basics
- No troubleshooting resources: Not knowing where to find help when problems arise
Realistic expectations by project type:
- Simple text/monogram: Comfortable after 3-5 practice sessions
- Basic fill designs: Comfortable after 1-2 weeks
- Multi-color designs: Comfortable after 2-3 weeks
- Appliqué: Comfortable after 3-4 weeks
- Dense detailed designs: Comfortable after 4-6 weeks
- Challenging fabrics: Comfortable after 6-8 weeks
- Custom digitizing: 3-6 months of additional learning
Practice schedule for fastest learning:
- Days 1-7: 30-60 minutes daily practicing threading and hooping
- Days 8-21: 45-90 minutes every other day stitching simple designs
- Days 22-60: 1-2 hours twice weekly on progressively complex projects
- Days 61+: Regular project work with occasional skill-building challenges
Signs you’re ready to move beyond basics:
✓ Can thread machine in under 5 minutes without manual
✓ Hoop fabric drum-tight consistently
✓ Complete simple designs without thread breaks
✓ Recognize and fix common tension issues
✓ Successfully work with 3-4 different fabric types
✓ Manage multi-color designs confidently
✓ Troubleshoot most problems without external help
Choose X if: If you learn best by doing, plan for 2-3 practice sessions per week for a month. If you prefer structured learning, take a class or follow a comprehensive video course that builds skills progressively.
Remember that learning embroidery setup is like learning to thread any sewing machine, it seems complicated at first but becomes automatic with practice.
What Stabilizer Do I Use When Setting Up Embroidery Projects?
Choose tear-away stabilizer for stable woven fabrics like cotton and linen, cut-away stabilizer for knits and stretchy materials that need permanent support, and water-soluble stabilizer for delicate items like lace or when you can’t have stabilizer showing. The stabilizer weight (light, medium, heavy) should match your fabric weight and design density.
Stabilizer types and when to use them:
Tear-away stabilizer:
- Best for: Woven fabrics (cotton, linen, denim), non-stretch materials
- How it works: Provides temporary support during stitching, then tears away
- Weights: Light (1.5 oz) for simple designs, medium (2.5 oz) for standard designs, heavy (3.5 oz) for dense designs
- Pros: Completely removable, no bulk left behind
- Cons: Can’t be used on knits or stretchy fabrics
- Cost: Most economical option
Cut-away stabilizer:
- Best for: Knits, stretchy fabrics, fleece, sweatshirts, polo shirts
- How it works: Provides permanent support that stays in the garment
- Weights: Light, medium, heavy (choose based on fabric and design)
- Pros: Prevents stretching and distortion over time, most versatile
- Cons: Adds slight bulk, remains in garment permanently
- Cost: Mid-range pricing
Water-soluble (wash-away) stabilizer:
- Best for: Lace, organza, towels, or as a topper on textured fabrics
- How it works: Dissolves completely in water after stitching
- Types: Film (Solvy) or mesh (Vilene)
- Pros: Completely disappears, no residue
- Cons: Most expensive, requires washing, can’t get wet before use
- Cost: Highest per-project cost
Heat-away stabilizer:
- Best for: Items that can’t be washed, delicate fabrics
- How it works: Disappears when heat is applied with iron
- Pros: No washing required
- Cons: Expensive, limited availability, can’t use on heat-sensitive fabrics
- Cost: Premium pricing
Stabilizer selection guide by fabric:
| Fabric Type | Recommended Stabilizer | Weight |
|---|---|---|
| Cotton quilting fabric | Tear-away | Light to medium |
| Denim | Tear-away or cut-away | Medium to heavy |
| T-shirt knit | Cut-away | Medium |
| Sweatshirt fleece | Cut-away | Medium to heavy |
| Polo shirt | Cut-away | Medium |
| Linen | Tear-away | Medium |
| Canvas | Cut-away | Heavy |
| Terry cloth towel | Cut-away + water-soluble topper | Medium |
| Fleece | Cut-away | Medium |
| Silk | Tear-away | Light |
Using stabilizer as a topper:
Some fabrics need stabilizer on top as well as underneath:
- Textured fabrics (terry cloth, fleece, corduroy): Use water-soluble topper to prevent stitches from sinking into texture
- Napped fabrics (velvet, minky): Topper keeps pile from poking through stitches
- Slippery fabrics (satin, silk): Topper prevents fabric from shifting
How much stabilizer to use:
- Cut stabilizer 1-2 inches larger than your hoop on all sides
- Use one layer for most projects
- Use two layers for very dense designs or problematic fabrics
- Stack layers rather than using one very heavy piece for better results
Stabilizer mistakes to avoid:
❌ Using tear-away on knits (causes puckering and distortion)
❌ Skipping stabilizer entirely (always causes problems)
❌ Using stabilizer that’s too light for design density
❌ Cutting stabilizer too small (should extend beyond hoop edges)
❌ Reusing torn stabilizer pieces (weakens support)
❌ Storing water-soluble stabilizer in humid areas (it dissolves)
Budget-friendly stabilizer tips:
- Buy stabilizer by the roll or bolt (much cheaper than pre-cut sheets)
- Save large scraps for small designs
- Tear-away is most economical for practice projects
- Join embroidery groups for bulk-buying opportunities
When to use multiple stabilizer types:
Some projects benefit from combining stabilizers:
- Cut-away underneath + water-soluble on top for terry cloth
- Two layers of tear-away for very dense designs on stable fabric
- Cut-away underneath + tear-away on top (tear away the top layer for less bulk)
Edge case: Some fabrics like leather, vinyl, or laminated materials can’t have needle holes from hooping. For these, hoop stabilizer only and use temporary spray adhesive to attach the material to the hooped stabilizer.
Proper stabilizer selection prevents most embroidery problems. When designs pucker, tunnel, or distort, the issue is usually wrong stabilizer choice rather than machine settings.
Frequently Asked Questions
Can I use regular sewing thread for embroidery?
No, regular sewing thread isn’t designed for embroidery and will break frequently. Embroidery thread (polyester or rayon) is specifically engineered for the high-speed, repetitive needle penetrations of embroidery work. Use 40-weight embroidery thread for most projects.
How often should I change my embroidery needle?
Change your embroidery needle after every 8-10 hours of stitching or whenever you start a new project type. Dull needles cause thread breaks, skipped stitches, and poor stitch quality. Needles are inexpensive insurance against frustrating problems.
Why does my embroidery pucker even with stabilizer?
Puckering with stabilizer usually means you’re using the wrong stabilizer type (tear-away on knits), too little stabilizer for design density, hooping too loosely, or your tension is too tight. Try cut-away stabilizer, hoop drum-tight, and slightly reduce upper tension.
Can I embroider on items that are already sewn (like finished shirts)?
Yes, but you’ll need to hoop stabilizer only and use temporary spray adhesive to attach the garment area to the hooped stabilizer. This technique is called “floating” the fabric. Make sure you can access the area without stitching through multiple layers.
Do I need to use the same brand thread in bobbin and top?
No, but bobbin thread should be lightweight embroidery bobbin thread (60-weight or 90-weight). Some embroiderers use white or black bobbin thread for everything, while others match the bobbin to the top thread color. Both approaches work fine.
How do I know if my tension is correct?
Correct tension shows the top thread on top of the fabric and bobbin thread on the bottom, with no loops or gaps. If you see bobbin thread on top, upper tension is too tight. If you see loops of top thread underneath, upper tension is too loose or presser foot wasn’t lowered.
Can I wash embroidered items immediately after stitching?
Yes, but wait until you’ve removed all stabilizer first. Tear away tear-away stabilizer, trim cut-away stabilizer close to stitching, or wash out water-soluble stabilizer. Turn items inside out before washing to protect the embroidery.
Why does my machine keep saying “hoop not detected”?
This error means the hoop isn’t fully clicked into the machine’s hoop arm. Remove the hoop and reattach it, listening for a distinct click. The hoop should not wiggle when gently tugged. Clean the hoop connection points if the problem persists.
How do I center my design on the fabric?
Most machines show design placement on the screen. Mark the center of your fabric with water-soluble pen, align it with the center of your hoop, then use the machine’s positioning feature to center the design. Always test on scrap fabric first for important projects.
Can I leave my embroidery machine threaded between projects?
Yes, but raise the presser foot to release tension on the thread and tension discs. Cover the machine to protect it from dust. Some embroiderers prefer to remove thread to prevent dust accumulation in the tension assembly, especially for long storage periods.
What’s the difference between embroidery and sewing machine needles?
Embroidery needles have larger eyes to accommodate thicker embroidery thread and a special scarf (groove) that prevents thread shredding during high-speed stitching. Using regular sewing needles for embroidery causes excessive thread breaks.
Do I need to clean my embroidery machine after every project?
Remove lint from the bobbin area after every 4-8 hours of stitching or whenever you change thread colors. Embroidery creates significant lint buildup that can affect stitch quality and cause timing issues if not removed regularly. For comprehensive machine cleaning guidance, see our detailed maintenance guide.
Conclusion
Setting up an embroidery machine becomes straightforward once you understand the essential steps: proper threading with the presser foot raised, correct needle selection, drum-tight hooping with appropriate stabilizer, and design loading. While the process seems complex at first, most beginners gain confidence within 2-4 weeks of regular practice.
Your next steps:
- Read your manual thoroughly, Every machine has unique threading paths and features
- Gather quality supplies, Invest in good embroidery thread, appropriate stabilizers, and embroidery needles
- Practice on scrap fabric, Master threading, hooping, and basic designs before working on actual projects
- Start simple, Begin with built-in designs and basic fabrics before attempting complex projects
- Join embroidery communities, Online forums and local groups provide invaluable troubleshooting help and inspiration
- Keep a project journal, Document successful thread/stabilizer/fabric combinations for future reference
- Schedule regular maintenance, Clean your machine after every 4-8 hours of use and service it professionally annually
Remember that every embroiderer started exactly where you are now. The frustrations you encounter during setup are normal and temporary. Each project teaches you something new about your machine, fabrics, and techniques. Within a few months, setup will become automatic, allowing you to focus on the creative aspects of embroidery.
The key to success is patience with yourself and consistency in practice. Don’t let initial challenges discourage you, embroidery is a rewarding skill that opens up endless creative possibilities for personalizing gifts, starting a business, or simply enjoying a satisfying hobby.
Start with one simple project today. Thread your machine carefully, hoop your fabric drum-tight, and watch your first design come to life. You’ve got this!