


Quick Answer
Organizing a sewing room on a budget requires repurposing household items, shopping strategically at dollar stores and thrift shops, and prioritizing vertical storage solutions like pegboards and tension rods. Most sewers can create a functional, organized space for under $100 by using clear containers for visibility, labeling everything, and investing selectively in only the storage items that solve their biggest pain points.
Key Takeaways
- Repurpose first, buy second: Mason jars, shoe boxes, and food containers work perfectly for storing notions, buttons, and thread at zero cost
- Vertical storage maximizes small spaces: Pegboards, tension rods, and over-door organizers triple your storage capacity without taking up floor space
- Dollar stores beat specialty retailers: Basic clear containers, hooks, and bins cost 75-90% less at dollar stores than craft retailers
- IKEA offers the best budget-to-quality ratio: The SKÅDIS pegboard system and KALLAX shelving provide professional organization at fraction of specialty furniture costs
- Fabric scrap organization needs no money: Fold and file scraps by color in repurposed boxes, or use the “burrito roll” method in drawer dividers you already own
- Thread and bobbin storage works best with free solutions: Cardboard bobbin holders from new thread packages, empty ribbon spools, or DIY foam board organizers cost nothing
- Renters should prioritize damage-free solutions: Command hooks, tension rods, and freestanding furniture preserve security deposits while providing full functionality
- The only items worth spending money on: Good lighting, a comfortable chair, and one quality cutting mat, everything else can be DIY or secondhand
- Long-term organization requires habit systems, not more containers: Designate homes for every item and follow the “one in, one out” rule to prevent re-cluttering
What Is the Best Way to Organize a Small Sewing Room Cheaply
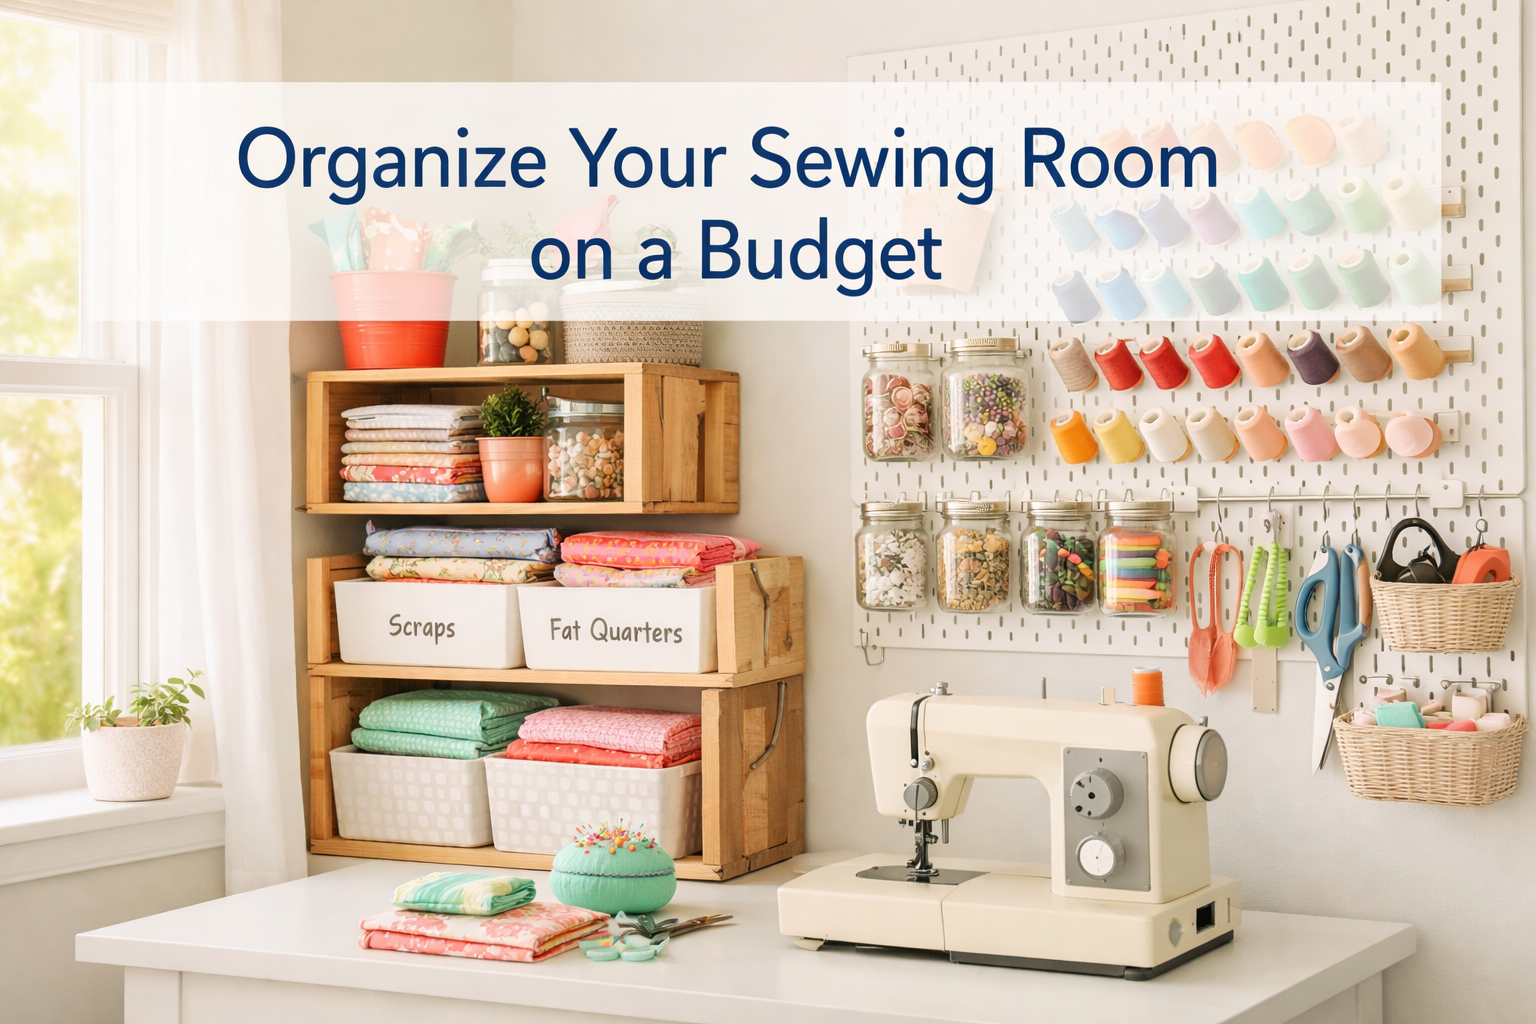
The best way to organize a small sewing room cheaply is to maximize vertical wall space with pegboards or tension rods, use clear repurposed containers for visibility, and create dedicated zones for cutting, sewing, and storage using furniture you already own. This approach costs $20-50 and works in spaces as small as a closet corner.
Start with a zone-based layout even in tiny spaces. Designate one area for your machine and active projects, another for cutting and pressing, and a third for storage. This doesn’t require separate rooms, just different sections of one table or different shelves.
Vertical storage is your biggest space multiplier:
- Mount a pegboard above your sewing table for scissors, rulers, and frequently-used tools
- Install tension curtain rods between shelves or in closets to hang fabric bolts
- Use over-door shoe organizers for thread spools, pattern pieces, or notion packets
- Hang clear plastic bags on Command hooks for work-in-progress projects
Repurpose containers you already have before buying anything new. Clean pasta sauce jars hold buttons perfectly. Shoe boxes store patterns. Ice cube trays organize bobbins. Cereal boxes cut at an angle become fabric bolt holders.
Common mistake: Buying matching container sets before knowing what you need to store. Measure your supplies first, then find free containers that fit those dimensions. You can always upgrade to prettier storage later once you know the system works.
Choose this approach if you’re working with under 50 square feet, renting your space, or want to test different organization systems before committing money to permanent solutions.
How Much Does It Cost to Organize a Sewing Room on a Budget
Organizing a sewing room on a budget typically costs $30-150 depending on your space size and what you already own, with most sewers spending around $75 for a complete transformation. The bulk of costs go toward pegboards ($15-25), clear storage containers ($20-40), and basic shelving ($25-50), while creative repurposing can reduce expenses to nearly zero.
Budget breakdown by spending level:
Minimal budget ($0-30):
- Repurpose all containers from household items
- Use cardboard boxes covered in fabric scraps
- Create DIY pegboard from cardboard or foam board
- Shop your own home for baskets, jars, and organizers
- Total investment: mostly time and creativity
Standard budget ($50-100):
- One 24×36″ pegboard with hooks: $15-25
- 10-15 clear plastic containers (dollar store): $10-15
- Tension curtain rods (2-3): $10-15
- Basic labels and markers: $5-10
- Small rolling cart or cube storage: $20-35
Comfortable budget ($100-150):
- IKEA SKÅDIS pegboard system with accessories: $40-60
- IKEA KALLAX 2×2 cube unit: $35-45
- Quality clear storage containers: $25-35
- Proper lighting upgrade: $15-25
- Drawer organizers and dividers: $10-15
Hidden costs to avoid: Don’t buy storage solutions before decluttering. Many sewers discover they need 30-40% less storage once they purge unused supplies, saving significant money on unnecessary containers.
Best money-saving timing: Shop dollar stores right after back-to-school season (late September) when storage items go on clearance. IKEA has annual sales in January and August. Thrift stores restock heavily after New Year’s when people declutter.
DIY Sewing Room Storage Ideas Under 50 Dollars
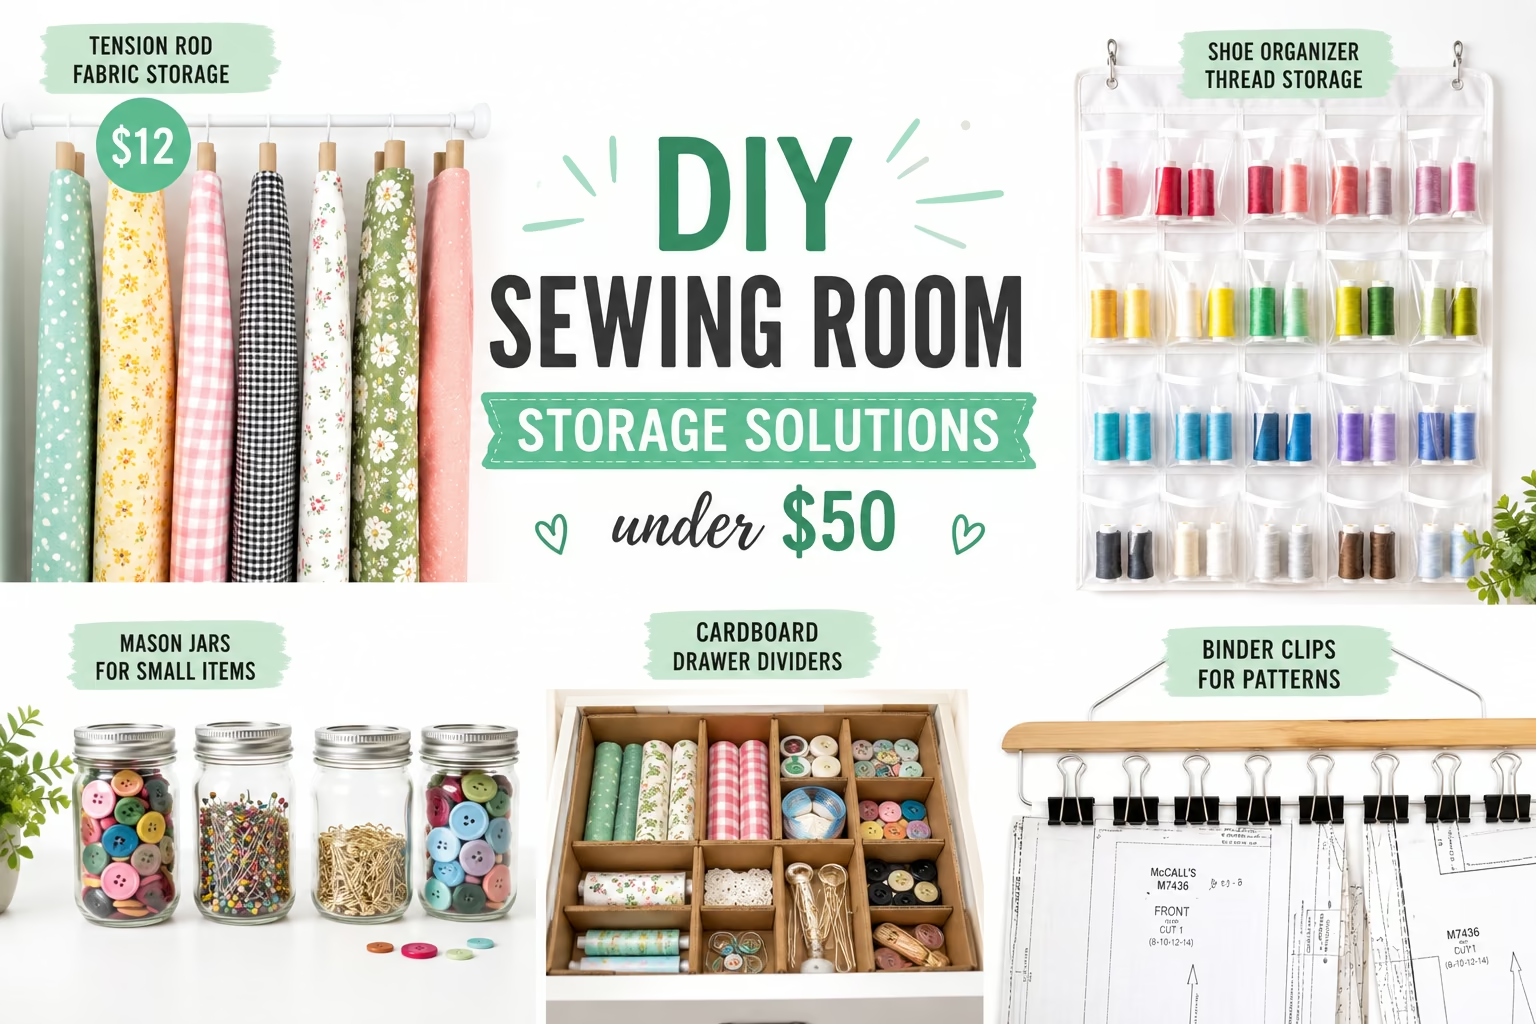
DIY sewing room storage under $50 focuses on repurposing everyday items and simple construction projects that require minimal tools. A tension rod fabric storage system, pegboard tool wall, and mason jar notion organizers can transform a chaotic space for under $30 in materials.
Tension rod fabric bolt storage ($12-18):
- Install spring-loaded tension rods vertically between shelves or horizontally in closets
- Slide fabric bolts onto rods organized by color or project
- Holds 15-20 fabric pieces per rod depending on thickness
- No drilling required, perfect for renters
DIY pegboard organization wall ($15-25):
- Purchase a 2×4 foot pegboard from hardware store
- Mount with Command strips (renters) or simple brackets (homeowners)
- Use dollar store hooks, small baskets, and clips
- Arrange scissors, rotary cutters, rulers, and marking tools for easy access
- Paint the pegboard a fun color with leftover house paint for free
Mason jar and tin can storage ($0-5):
- Save glass jars from pasta sauce, pickles, and jam
- Remove labels with hot water and dish soap
- Store buttons, pins, elastic, bias tape, and small notions
- Mount jar lids under shelves with screws for hanging storage
- Use different jar sizes for different supply types
Cardboard drawer dividers ($0):
- Cut cereal boxes or shipping boxes to fit drawer dimensions
- Create compartments for thread, bobbins, needles, and tools
- Cover with fabric scraps or wrapping paper for a finished look
- Adjust sizes as your storage needs change
Binder clip pattern storage ($3-8):
- Clip large binder clips to pants hangers
- Fold patterns and clip to hangers
- Hang in closet organized by garment type
- Label clips with pattern numbers using masking tape
Common mistake: Building elaborate DIY projects that take more time than they save. If a project takes more than 2 hours and costs over $20, compare it to ready-made alternatives first. Sometimes the $25 IKEA solution beats the $15 DIY version when you factor in your time.
For more organization tips that complement your sewing space setup, check out our sewing tips collection.

No-Drill Installation: Forget about screws or nails. This adjustable closet rod installs in seconds with a simple twist. The pressure-fit design securely holds the rod in place, providing a damage-free, no-mess solution that won't harm walls or furniture. Perfect for easy, hassle-free setup in closets or laundry rooms.

【Removable panel design】Removable panel design. Easy to assemble panel, full-lay and half-lay use functions are different, kitchen towel storage, enlarge table space. Extra-long panel assembly. Extended design, detachable, home organization is more convenient.
IKEA vs Dollar Store for Sewing Room Organization
IKEA offers better quality and longevity for structural pieces like shelving and pegboards ($35-60 per unit), while dollar stores excel at consumable storage like clear bins, hooks, and small containers ($1-3 each). The smartest budget approach combines both: IKEA for furniture framework and dollar stores for the organizing accessories that fill it.
When IKEA wins:
- SKÅDIS pegboard system ($15-40): Modular, expandable, comes in multiple colors with purpose-built accessories
- KALLAX cube storage ($35-80): Sturdy enough to hold heavy fabric stash, fits standard storage bins perfectly
- RÅSKOG rolling cart ($30): Three tiers, mobile, holds significant weight without wobbling
- ALEX drawer units ($80-120): Smooth-gliding drawers that last years, perfect under cutting tables
When dollar stores win:
- Clear plastic bins and containers ($1-3): Identical functionality to $8-12 craft store versions
- Hooks, clips, and hangers ($1): Work just as well as expensive specialty versions
- Small baskets and trays ($1-3): Perfect for corralling notions and tools
- Labels and markers ($1-2): Same quality as office supply stores at fraction of cost
Quality comparison: IKEA pegboards have pre-drilled holes spaced for their accessory system and come in white, black, and colors. Dollar store pegboards ($5-8) have standard hole spacing but thinner material that may bow under heavy tools. For light-duty use (thread, scissors, small rulers), dollar store works fine. For heavy tools (large cutting mats, multiple rotary cutters, iron), IKEA’s sturdier construction justifies the cost.
The hybrid strategy most budget-conscious sewers use: Buy one IKEA KALLAX unit ($35) and one SKÅDIS pegboard ($15) as your foundation, then fill them with dollar store bins ($10-15 total). Total investment: $60-65 for a professional-looking system that lasts years.
Edge case: If you move frequently or your sewing space changes often, favor dollar store solutions. They’re cheap enough to abandon or replace without guilt. IKEA furniture requires more commitment to transport and reassemble.

Value Pack: these pegboard hooks come in a set of four, each hook built with five spots for thread spools, measuring 17.5 cm in total length with 4 cm spacing between each spot; These peg board accessories can hold not just sewing threads, but also tapes and small craft supplies, adding extra storage capacity for craft room setups without extra hassle

Made in the USA: Designed and manufactured in the United States with durable materials and thoughtful craftsmanship.

YARN SPOOL ORGANIZATION MADE SIMPLE — Keep your thread, yarn, and bobbin collection tidy and visible with dedicated spool pegs designed to fit standard slotted pegboard wall panels. Each peg holds spools securely upright for easy access while you craft.
How to Organize Fabric Scraps Without Spending Money
Organize fabric scraps without spending money by folding them into uniform rectangles and filing them vertically by color in repurposed cardboard boxes, or by rolling them “burrito style” and storing them in drawer dividers made from cereal boxes. Both methods provide visibility and accessibility while costing nothing.
The vertical filing method works best for larger scraps (bigger than 6×6 inches):
- Cut cardboard boxes to drawer or shelf height (shoe boxes work perfectly)
- Fold each scrap into a rectangle approximately 4×6 inches
- Stand scraps on edge like files, organized by color
- Label box sections with scrap paper: “Blues,” “Reds,” “Neutrals,” etc.
- See every fabric at a glance without digging through piles
The burrito roll method suits smaller scraps and odd shapes:
- Roll each scrap tightly from one end
- Tuck the end under to secure (like a burrito)
- Store rolls in repurposed containers: ice cream tubs, tissue boxes, or drawer dividers
- Organize by color or fabric type
- Rolls stay compact and don’t unfold
Size-based sorting strategy: Separate scraps into three categories using free containers:
- Large scraps (bigger than fat quarters): Fold and stack in repurposed shopping bags hung on Command hooks
- Medium scraps (6×6″ to fat quarter size): Use the vertical filing method in shoe boxes
- Tiny scraps (smaller than 6×6″): Collect in one container for stuffing projects, or be honest about whether you’ll actually use them
Common mistake: Saving every single scrap “just in case.” If you haven’t used scraps smaller than 3×3 inches in the past year, you probably never will. Donate them to schools, animal shelters (for bedding), or compost natural fibers. This immediately cuts your storage needs by 40-50%.
Alternative free method: String small to medium scraps on a piece of yarn or ribbon through one corner, organized by color. Hang these “scrap garlands” on wall hooks or the back of your sewing room door. Decorative and functional.
Is Pegboard or Shelving Better for Budget Sewing Room Storage
Pegboard is better for frequently-used tools and notions that need immediate visibility and access ($15-25 for a 2×4 foot board), while shelving works better for fabric storage, books, and boxed supplies ($25-50 for basic units). Most budget sewing rooms benefit from combining both: pegboard above the work surface for active tools and shelving for bulk storage.
Pegboard advantages:
- Maximizes vertical wall space without depth
- Infinitely reconfigurable as needs change
- Keeps tools visible and within arm’s reach
- Costs less than equivalent shelving per square foot
- Works in narrow spaces where shelves would protrude too far
- Can be mounted with Command strips for renters
Pegboard limitations:
- Holds only lightweight items (scissors, rulers, thread)
- Requires wall space, doesn’t work freestanding
- Can look cluttered if overloaded
- Accessories (hooks, baskets) add to cost
Shelving advantages:
- Supports heavy items like fabric bolts, books, and machines
- Freestanding options work for renters
- Provides enclosed storage with bins or boxes
- Can double as room dividers in shared spaces
- More storage volume per square foot
Shelving limitations:
- Takes up floor space
- Items in back become invisible and forgotten
- More expensive than pegboard for equivalent wall coverage
- Less flexible once installed
The budget-optimal combination: Install one 2×4 foot pegboard ($15-20) above your sewing table for daily-use tools. Add one cube storage unit or basic bookshelf ($25-40) for fabric and supplies. Total cost: $40-60 for a complete storage system.
Choose pegboard alone if you have limited floor space, mostly small tools and notions, and need maximum flexibility. Choose shelving alone if you have more floor space than wall space, store primarily fabric and patterns, or need to hide supplies behind closed doors.
Renter-friendly tip: Tension-mounted shelving units (like those designed for closets) and Command-strip-mounted pegboards both work without damaging walls. If your lease prohibits even Command strips, lean a large pegboard against the wall behind your table, gravity holds it in place.

Metal Pegboard Construction:Stop worrying about sagging plastic. Our metal pegboard is crafted from durable metal , offering a superior 300-lb capacity — 50% stronger than common sets. This rust-free, lifelong foundation provides secure storage, making it the ideal wall organizer for your garage, craft room, or workshop.

PEGBOARD WITH HOOKS KIT: The pegboard wall organizer comes with 6pcs metal pegboard panels and 84pcs pegboard accessories in 9 different types, including 6pcs pegboard bins, 3pcs pegboard cups, paper towel holder, steel tray, curved hooks, straight hooks, and peg lock to double fit the hooks
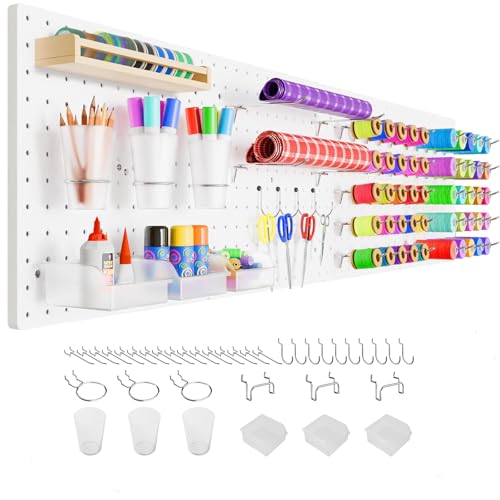
High quality material, Strong construction- Our peg board are upgraded with high quality ABS material, which is designed to be thicker and sturdier and not easy to break. The back of each white pegboard features a sturdy skeleton strip to support the panel for better weight bearing. They hold a total of 200 lbs. when 4 are installed correctly. You can rest assured that your tools will be safe, reliable and rust-free for decades to come
Best Free Ways to Organize Thread and Bobbins
The best free ways to organize thread and bobbins use the cardboard thread holders that come with new thread spools, empty ribbon spools threaded on a dowel or tension rod, or a DIY foam board organizer with slits cut for each spool. These methods keep thread visible, prevent tangling, and cost nothing.
Cardboard thread holder method (completely free):
- Save the cardboard cross-pieces that come with new thread
- Stack multiple holders together
- Store in a drawer or small box
- Holds 20-30 spools in minimal space
- Prevents thread from unwinding
Tension rod thread storage ($0 if you have an old shower rod):
- Mount a tension rod inside a cabinet or between shelf supports
- Slide thread spools directly onto the rod
- Organize by color for easy selection
- Works for both thread and ribbon
- Holds 40-60 spools depending on rod length
Bobbin organization in ice cube trays (free if you have extras):
- Place one bobbin per compartment
- Stack multiple trays in a drawer
- See all colors at once
- Prevents bobbins from tangling
- Label tray edges with thread colors if needed
DIY foam board thread rack (free from packaging materials):
- Save foam board from product packaging
- Cut slits every inch across the board
- Slide thread spools into slits
- Lean against wall or inside cabinet
- Holds 30-50 spools depending on board size
Egg carton bobbin storage (free):
- Use cardboard egg cartons (not Styrofoam)
- One bobbin per egg cup
- Label the lid with corresponding thread colors
- Stack multiple cartons
- Completely portable for classes
Common mistake: Buying specialty thread racks before trying free methods. Most sewers discover that simple solutions work just as well as $30-50 thread organizers. Test free methods for a month before spending money.
Pro tip: Wind bobbins as you finish a project while that thread is already loaded. Store each bobbin with its matching thread spool using a small rubber band or by tucking the bobbin inside the spool’s center hole. This eliminates searching for matching thread later.
For more help with your sewing machine setup and maintenance, visit our guide on how to thread a sewing machine.
Common Mistakes When Organizing a Sewing Room on a Tight Budget
The most common mistakes when organizing a sewing room on a tight budget are buying storage containers before decluttering, choosing aesthetics over function, and creating systems too complex to maintain. These errors waste money on unnecessary items and create organization systems that fail within weeks.
Mistake #1: Buying storage before sorting
Many sewers purchase matching containers, then realize they don’t fit their supplies or they need fewer than expected. Always declutter first, measure what remains, then shop for storage. This typically saves $30-50 in unnecessary purchases.
Mistake #2: Prioritizing pretty over practical
Instagram-worthy matching jars and color-coordinated bins cost 3-5 times more than functional alternatives. If you’re on a budget, function beats aesthetics every time. You can upgrade to prettier storage later once you know the system works.
Mistake #3: Over-organizing
Creating 47 categories for fabric scraps or labeling every single button by size creates maintenance burden. Busy sewers abandon complex systems within a month. Stick to broad categories: “thread,” “notions,” “fabric,” “patterns.” You can always subdivide later if needed.
Mistake #4: Ignoring your actual workflow
Organizing based on how you think you should work instead of how you actually work guarantees failure. If you always leave projects on your cutting table overnight, create a designated “in progress” bin instead of fighting your natural habits.
Mistake #5: Buying specialized storage for rarely-used items
Don’t spend $25 on a rotary cutter organizer if you only own two cutters. Specialized storage makes sense only for items you use weekly. Everything else can live in a general “tools” bin.
Mistake #6: Forgetting about accessibility
Storing frequently-used items in hard-to-reach places (top shelves, back of deep cabinets) means you won’t maintain the system. Keep daily-use items at eye level and arm’s reach. Store seasonal or rarely-used supplies in less convenient spots.
Mistake #7: Skipping the declutter step
Organization cannot fix overcrowding. If you’re storing fabric you’ll never use, patterns that don’t fit, or broken tools you’ll never repair, no amount of clever storage will help. Donate or discard first, organize second.
How to avoid these mistakes: Start with a one-week observation period. Notice which supplies you actually use, where you naturally set things down, and what frustrates you most. Design your organization system around those observations, not Pinterest ideals.
How to Organize a Sewing Room in a Closet or Corner

Organizing a sewing room in a closet or corner requires maximizing vertical space with wall-mounted storage, using multi-functional furniture like fold-down tables, and keeping only active projects and frequently-used supplies in the immediate area. A functional sewing corner can fit in as little as 15-20 square feet with smart planning.
Closet sewing room setup (works in standard 4-6 foot closets):
- Remove closet doors if possible for easier access and more working room
- Install a fold-down table or wall-mounted desk at comfortable sewing height (28-30 inches)
- Mount pegboard on back wall for tools and notions
- Use tension rods across the width for hanging fabric bolts
- Add rolling cart underneath table for machine storage when not in use
- Install battery-operated LED strip lights under top shelf for task lighting
Corner sewing station setup (15-25 square feet):
- Corner desk or table (can be two small tables in L-shape)
- Vertical shelving unit on one wall for fabric and supplies
- Pegboard or wall grid above desk for tools
- Rolling cart for machine if you need to clear the space between sessions
- Over-door organizer on nearest door for patterns and notions
Space-saving furniture choices:
- Fold-down wall tables: Mount at 28-30 inches high, fold up when not in use
- Nesting tables: Pull out for cutting, tuck away when done
- Rolling carts: IKEA RÅSKOG or similar can hold machine, move to storage when needed
- Cube storage: Doubles as table base and storage
Lighting solutions for small spaces (critical but often overlooked):
- Clip-on LED desk lamps ($12-20)
- Battery-operated LED strips under shelves ($8-15)
- Daylight-spectrum bulbs in existing fixtures (better color accuracy)
What to keep vs. store elsewhere:
Keep in your sewing corner:
- Current machine and 2-3 most-used presser feet
- One project’s worth of fabric and supplies
- Basic tools: scissors, seam ripper, pins, marking tools
- Thread in colors you use most (10-15 spools)
Store elsewhere in your home:
- Bulk fabric stash (under bed, hall closet, storage ottoman)
- Seasonal supplies (Halloween costume materials in October only)
- Rarely-used specialty feet and attachments
- Completed projects waiting for gifting
Common mistake: Trying to fit your entire sewing stash into a tiny space. Accept that some supplies will live elsewhere and create a simple system to rotate them in as needed. This prevents the cramped, overwhelming feeling that makes you avoid sewing.
Edge case for renters: If you can’t mount anything on walls, use a freestanding room divider or bookshelf as your “wall” for hanging pegboard and storage. This creates a defined sewing zone without damage to rental walls.
What Storage Solutions Work for Renters Who Sew
Storage solutions for renters who sew must avoid wall damage while remaining functional and affordable, making Command hooks, tension rods, freestanding furniture, and over-door organizers the best choices. These options cost $30-80 total and can be removed without losing your security deposit.
Damage-free wall storage:
- Command hooks and strips (rated for appropriate weight): Hang pegboards, small shelves, and tool organizers
- 3M Command Picture Hanging Strips: Support up to 16 pounds for heavier items
- Tension-mounted shelving: Fits between floor and ceiling with pressure, no drilling
- Adhesive cable clips: Organize cords and hang small tools
Freestanding storage options:
- IKEA KALLAX or similar cube units: Provide significant storage, move with you
- Rolling carts: Mobile, versatile, no installation required
- Bookshelf room dividers: Create dedicated sewing zone in shared spaces
- Garment racks: Hold fabric bolts on hangers, completely portable
Over-door solutions:
- Over-door shoe organizers: Perfect for thread, notions, small tools
- Over-door hooks: Hang bags of fabric, works-in-progress, or tool caddies
- Over-door towel bars: Mount tension rods for fabric bolt storage
Furniture that doubles as storage:
- Storage ottomans: Hide fabric stash, provide seating
- Bed risers: Create under-bed storage for plastic bins of supplies
- Folding tables with storage: Some models include shelves or drawers
Lighting without hardwiring:
- Clip-on LED lamps: Attach to shelves or table edges
- Battery-operated LED strips: Stick under shelves, remove cleanly
- Floor lamps: Provide task lighting without ceiling fixture changes
What to avoid as a renter:
- Permanent shelving that requires drilling into studs
- Built-in cabinets or closet systems
- Painted pegboard mounted directly to walls (paint transfer risk)
- Heavy-duty wall anchors that leave large holes
Lease-friendly tip: Take photos of your space before installing anything, even Command hooks. Document that walls were undamaged. When you move out, use a hairdryer to warm Command strips before removing, they’ll release cleanly without pulling paint.
Cost comparison: A complete renter-friendly sewing room organization system costs $50-80: one KALLAX unit ($35), Command hooks and strips ($10-15), over-door organizer ($8-12), and rolling cart ($20-30). All items move with you to your next home.
Cheap Alternatives to Expensive Sewing Room Furniture
Cheap alternatives to expensive sewing room furniture include using folding banquet tables instead of cutting tables ($30 vs. $200+), repurposing bookcases as fabric storage ($25 vs. $150), and creating DIY cutting mats from cardboard instead of buying large professional mats ($0 vs. $40-80). These substitutions save $300-500 while providing equivalent functionality.
Cutting table alternatives:
- Folding banquet table ($30-50): Same height and surface area as specialty cutting tables
- Kitchen island or counter: If you have one at correct height (36-40 inches)
- Two small desks or tables arranged in L-shape: Creates large work surface
- Hollow-core door on sawhorses: DIY cutting table for under $40
Fabric storage alternatives:
- Basic bookshelf ($25-40) instead of specialty fabric organizers ($100-200)
- Plastic storage bins ($3-5 each) instead of fabric cubbies ($15-25 each)
- Tension rods in closet ($8-12) instead of fabric bolt racks ($60-100)
- Repurposed wine racks (free/thrifted) for storing rolled fabric
Sewing table alternatives:
- Any desk or table at comfortable height (28-30 inches)
- Folding TV tray for ultra-small spaces
- Adjustable-height laptop desk ($30-50) for ergonomic positioning
- Kitchen table if you can leave your machine set up
Thread and notion storage alternatives:
- Spice racks (thrifted, $5-10) instead of thread racks ($30-50)
- Tackle boxes ($8-15) instead of notion organizers ($25-40)
- Silverware trays ($3-5) instead of drawer dividers ($12-20)
- Muffin tins (thrifted, $2-3) for button and bobbin storage
Seating alternatives:
- Adjustable office chair (thrifted, $20-40) instead of specialty sewing chair ($150-300)
- Kitchen chair with cushion if you already own one
- Yoga ball ($15-25) for active sitting and better posture
Lighting alternatives:
- Clip-on desk lamps ($12-20) instead of specialty sewing lamps ($50-100)
- LED shop lights ($20-30) instead of professional task lighting ($80-150)
- Daylight bulbs in existing fixtures ($8-12 for pack) instead of new fixtures
What’s actually worth buying new: A comfortable, adjustable chair and good lighting are the only items worth investing in. Poor seating causes back pain that makes sewing unpleasant. Bad lighting causes eye strain and color-matching errors. Everything else can be cheap or secondhand.
Thrift store shopping strategy: Check Goodwill, Habitat for Humanity ReStores, and estate sales for furniture. Look for solid wood pieces you can repaint or refinish. Avoid particle board furniture that won’t survive a move. Best finds: vintage sewing cabinets ($20-50), solid wood bookcases ($15-30), and office chairs ($10-25).
If you’re working with vintage or older machines, our guide on whether old sewing machines are better than new ones can help you make the most of your equipment.
How Do I Keep My Sewing Room Organized Long-Term Without Buying More Stuff
Keep your sewing room organized long-term by following the “one in, one out” rule for new supplies, designating a specific home for every item, and spending 5-10 minutes tidying after each sewing session. Long-term organization depends on habits and systems, not additional storage purchases.
The “one in, one out” rule: When you buy new fabric, donate or use an equal amount of old fabric. When you acquire a new tool, remove one you don’t use. This prevents accumulation and keeps your space from outgrowing your storage.
Designate homes for everything: Every item needs a specific location. Thread lives on the pegboard. Fabric scraps go in the blue bin. Patterns hang in the closet. When everything has a home, putting things away takes seconds instead of minutes.
The 5-minute tidy routine (do this after every sewing session):
- Return all tools to their designated spots (2 minutes)
- Put fabric scraps in the scrap bin or trash (1 minute)
- Wind and store bobbins with matching thread (1 minute)
- Clear cutting table of everything except current project (1 minute)
Weekly maintenance (15 minutes every Sunday):
- Return any migrated items to sewing room
- Vacuum or sweep floor (thread and fabric bits accumulate fast)
- Wipe down cutting table and machine
- Review in-progress projects and either work on them or put them away
Quarterly declutter (30 minutes every 3 months):
- Assess fabric stash: Will you actually use this? If not, donate it
- Check notion inventory: Discard dried-up markers, rusty pins, broken tools
- Review patterns: Donate styles you’ll never make
- Evaluate storage systems: What’s working? What’s not?
Prevent re-cluttering habits:
- Finish projects before starting new ones (or limit yourself to 3 active projects maximum)
- Don’t buy fabric without a specific project in mind
- Unsubscribe from craft store emails that tempt you with sales
- Use a project planning list instead of buying supplies “just in case”
The “touch it once” rule: When you finish using something, put it away immediately instead of setting it down “temporarily.” Temporary piles become permanent clutter.
What to do when you’re tempted to buy more storage: First, declutter what you have. Second, evaluate whether you’re trying to organize too much stuff. Third, consider whether a habit change would solve the problem better than a new container.
Common mistake: Believing that perfect organization is the goal. Real-life sewing spaces have some mess during active projects. The goal is “organized enough” that you can find what you need in under 30 seconds and clean up in under 10 minutes.
Edge case: If you sew professionally or run a business, you’ll accumulate supplies faster than hobby sewers. In this case, schedule monthly inventory reviews and be ruthless about donating or selling supplies you haven’t touched in 6 months.
What Items Are Worth Spending Money On for Sewing Room Organization
The only items worth spending money on for sewing room organization are quality task lighting ($20-40), a comfortable adjustable chair ($50-100 used), and one large self-healing cutting mat ($25-40). Everything else can be DIY, repurposed, or purchased cheaply without sacrificing functionality.
Worth the investment:
Good lighting ($20-40):
- Prevents eye strain and headaches
- Improves color accuracy for fabric matching
- Makes detail work easier and more enjoyable
- Look for daylight-spectrum LED lamps (5000-6500K)
- Clip-on or adjustable arm styles provide flexibility
Comfortable seating ($50-100 used, $150-300 new):
- Prevents back, neck, and shoulder pain
- Adjustable height ensures proper ergonomics
- Good lumbar support lets you sew longer without discomfort
- Buy used office chairs from liquidation sales or Craigslist
Large cutting mat ($25-40 for 24×36″):
- Protects tables and ensures accurate cuts
- Self-healing surface lasts years
- Grid lines improve cutting accuracy
- Worth buying new for quality and longevity
Not worth spending money on:
Specialty thread racks ($30-50): Free tension rod or DIY solutions work equally well
Matching storage containers ($50-100 for sets): Dollar store containers provide same functionality at 10% of the cost
Expensive fabric storage systems ($100-300): Basic bookcases and bins work just as well
Specialty sewing tables ($200-500): Regular desks or folding tables serve the same purpose
Designer organizers ($40-80): Repurposed household items organize just as effectively
The cost-benefit test: Before buying any organization item, ask: “Will this save me time or prevent pain?” If the answer is yes, it might be worth buying. If it just looks pretty or seems like it “should” help, skip it.
When to upgrade from free to paid: Start with free and DIY solutions. After 3-6 months, you’ll know exactly what frustrates you and what works. Then spend money only on solving your specific pain points.
Budget allocation strategy for a $100 total budget:
- $40: Good lighting
- $30: Cutting mat
- $20: Basic pegboard with hooks
- $10: Dollar store containers and labels
This combination provides maximum functionality for minimum cost. Save the comfortable chair fund separately, it’s worth buying used and taking time to find the right one.
For more guidance on maintaining your sewing equipment, check out our article on how often you should service a sewing machine.
How to Organize Sewing Patterns and Notions Without a Lot of Space
Organize sewing patterns and notions without a lot of space by storing patterns in large ziplock bags hung on pants hangers in a closet, and corralling notions in a small rolling cart or tackle box that slides under your sewing table. Both solutions take up less than 2 square feet while keeping everything accessible.
Pattern storage solutions for small spaces:
Hanging method (uses vertical closet space):
- Place each pattern in a gallon-size ziplock bag with all pieces and instructions
- Label the outside with pattern number and garment type using permanent marker
- Clip 2-3 bags to each pants hanger using the clips
- Hang in closet organized by garment type (tops, bottoms, dresses)
- Holds 30-50 patterns in the space of 10-15 hangers
Vertical filing method (uses drawer or small box):
- Store patterns in their original envelopes or large manila envelopes
- File vertically in a cardboard box or drawer
- Use cardboard dividers to separate categories
- Label tabs with garment types
- Takes up approximately 12x12x6 inches for 40-50 patterns
Digital backup method (zero physical space):
- Photograph or scan pattern pieces and instructions
- Store digitally on phone, computer, or cloud storage
- Keep only the paper pieces you’re currently using
- Reprint from digital files if needed
- Eliminates pattern storage entirely
Notion storage for minimal space:
Rolling cart method ($20-30):
- Three-tier cart slides under table or into closet
- Top tier: thread and bobbins
- Middle tier: scissors, rulers, marking tools
- Bottom tier: pins, needles, elastic, bias tape in small containers
- Rolls out when needed, stores away when not in use
Tackle box method ($8-15):
- Compartments perfect for small notions
- Portable for classes or sewing at different locations
- Stackable if you need more than one
- Clear lid lets you see contents
- Fits in closet or under table
Over-door organizer method ($8-12):
- Hang on back of door or inside closet
- Clear pockets hold notions visibly
- Each pocket designated for specific item type
- Takes zero floor or shelf space
- Holds surprising amount in small footprint
Drawer divider method (free using cardboard):
- Create compartments in one drawer using cereal box dividers
- Separate notions by type: pins, needles, elastic, buttons, zippers
- Everything in one location
- Drawer can be in any room, doesn’t need to be in sewing space
What to keep vs. donate: If you haven’t used a pattern in 2+ years or it’s a size that no longer fits anyone you sew for, donate it. Notions you’ll never use (wrong colors, broken zippers, rusty pins) should be discarded. This typically reduces storage needs by 30-40%.
Common mistake: Keeping every pattern “just in case.” Patterns are widely available and often free online. If you need that style again in 5 years, you can find it. Don’t let pattern hoarding consume your limited space.
Space-saving tip: Store patterns for seasonal items (Halloween costumes, holiday decorations) with your seasonal decorations, not in your sewing space. Rotate them in only when needed.
Frequently Asked Questions
How much does it cost to organize a sewing room on a budget?
Organizing a sewing room on a budget typically costs $30-150, with most sewers spending around $75 for pegboards, clear containers, and basic shelving. Using repurposed household items can reduce costs to nearly zero.
What’s the cheapest way to store fabric?
The cheapest way to store fabric is folding it into uniform rectangles and filing vertically in repurposed cardboard boxes, or using tension rods in closets to hang fabric bolts. Both methods cost nothing and provide good visibility.
Can I organize a sewing room without drilling holes?
Yes, use Command hooks, tension rods, freestanding furniture, and over-door organizers to create a complete organization system without drilling. This approach works perfectly for renters and costs $50-80 total.
What’s better for small spaces: pegboard or shelving?
Pegboard is better for small spaces because it maximizes vertical wall space without taking up floor area. It costs less ($15-25) than shelving and keeps frequently-used tools visible and accessible.
How do I organize thread without buying a thread rack?
Organize thread by sliding spools onto a tension rod, using the cardboard holders that come with new thread, or creating a DIY foam board rack with slits. All three methods are free and work effectively.
Where should I buy storage containers for sewing supplies?
Buy storage containers at dollar stores where clear bins cost $1-3 each instead of $8-12 at craft stores. IKEA offers good quality-to-price ratio for larger organizational furniture like shelving units.
How can I organize a sewing room in a closet?
Organize a sewing room in a closet by installing a fold-down table, mounting pegboard on the back wall, using tension rods for fabric storage, and adding a rolling cart for your machine. This setup fits in a standard 4-6 foot closet.
What sewing room furniture is worth spending money on?
Only three items are worth spending money on: quality task lighting ($20-40), a comfortable adjustable chair ($50-100 used), and a large cutting mat ($25-40). Everything else can be DIY or purchased cheaply.
How do I keep my sewing room organized long-term?
Keep your sewing room organized long-term by following the “one in, one out” rule, designating a specific home for every item, and spending 5-10 minutes tidying after each sewing session. Habits matter more than containers.
What’s the best way to organize fabric scraps?
The best way to organize fabric scraps is folding them into rectangles and filing vertically by color in repurposed boxes, or rolling them burrito-style and storing in drawer dividers. Both methods are free and provide visibility.
How much space do I need for a sewing room?
You need as little as 15-20 square feet for a functional sewing corner with smart vertical storage. A closet or room corner can accommodate a sewing machine, cutting surface, and organized supplies.
Should I organize by color or by project?
Organize by color for fabric and thread (easier to find what you need), but organize by project for works-in-progress and patterns (keeps everything together). Use both systems in different areas of your sewing room.
Conclusion
Organizing a sewing room on a budget is entirely achievable with strategic planning, creative repurposing, and smart shopping. The key is starting with what you already own, maximizing vertical space with pegboards and tension rods, and investing selectively in only the items that genuinely improve your sewing experience, quality lighting, comfortable seating, and a good cutting mat.
Remember that successful organization depends more on sustainable habits than expensive storage solutions. The “one in, one out” rule, designated homes for every item, and a quick 5-minute tidy after each sewing session will keep your space functional long-term without requiring additional purchases.
Your next steps:
- Declutter first: Spend one hour sorting through your supplies and donating or discarding items you haven’t used in a year
- Assess your space: Measure your available area and identify vertical storage opportunities
- Start with free solutions: Implement repurposed container storage and DIY organizers before buying anything
- Shop strategically: If you need to purchase items, start with dollar stores for containers and IKEA for furniture
- Build habits: Commit to the 5-minute tidy routine after every sewing session
A well-organized sewing room doesn’t require a large budget or dedicated space, just thoughtful planning and consistent maintenance. Start with one small area today, and you’ll be amazed at how much more enjoyable your sewing becomes when everything has its place.
For more helpful sewing guidance, explore our beginner sewing resources and sewing techniques to make the most of your newly organized space.


