




Quick Answer: Threading a sewing machine involves guiding thread from the spool through a series of guides, tension discs, and the take-up lever before finally threading the needle, while the bobbin thread is wound and inserted separately into the bobbin case below. The exact path varies slightly by brand, but all machines follow the same basic principle: upper thread and lower thread must work together to create stitches. Most machines have numbered guides or threading diagrams printed directly on the body to help you follow the correct sequence.
Key Takeaways
- Threading a sewing machine means setting up both the upper thread (through the needle) and lower thread (bobbin) so they can interlock to form stitches
- All sewing machines follow a similar threading pattern: spool → tension discs → take-up lever → needle, though the exact path differs by brand
- The most common threading mistakes include skipping the take-up lever, incorrect tension settings, and threading with the presser foot down
- Thread breakage usually signals threading errors, wrong needle size, or tension problems rather than machine defects
- You can thread any sewing machine without a manual by following the numbered guides on the machine body or finding your model’s diagram online
- Brother machines typically thread from left to right, while Singer models often use a more vertical path, but both follow the same basic principles
- Professional threading services cost $10-25 if needed, though learning to thread your own machine takes only 10-15 minutes of practice
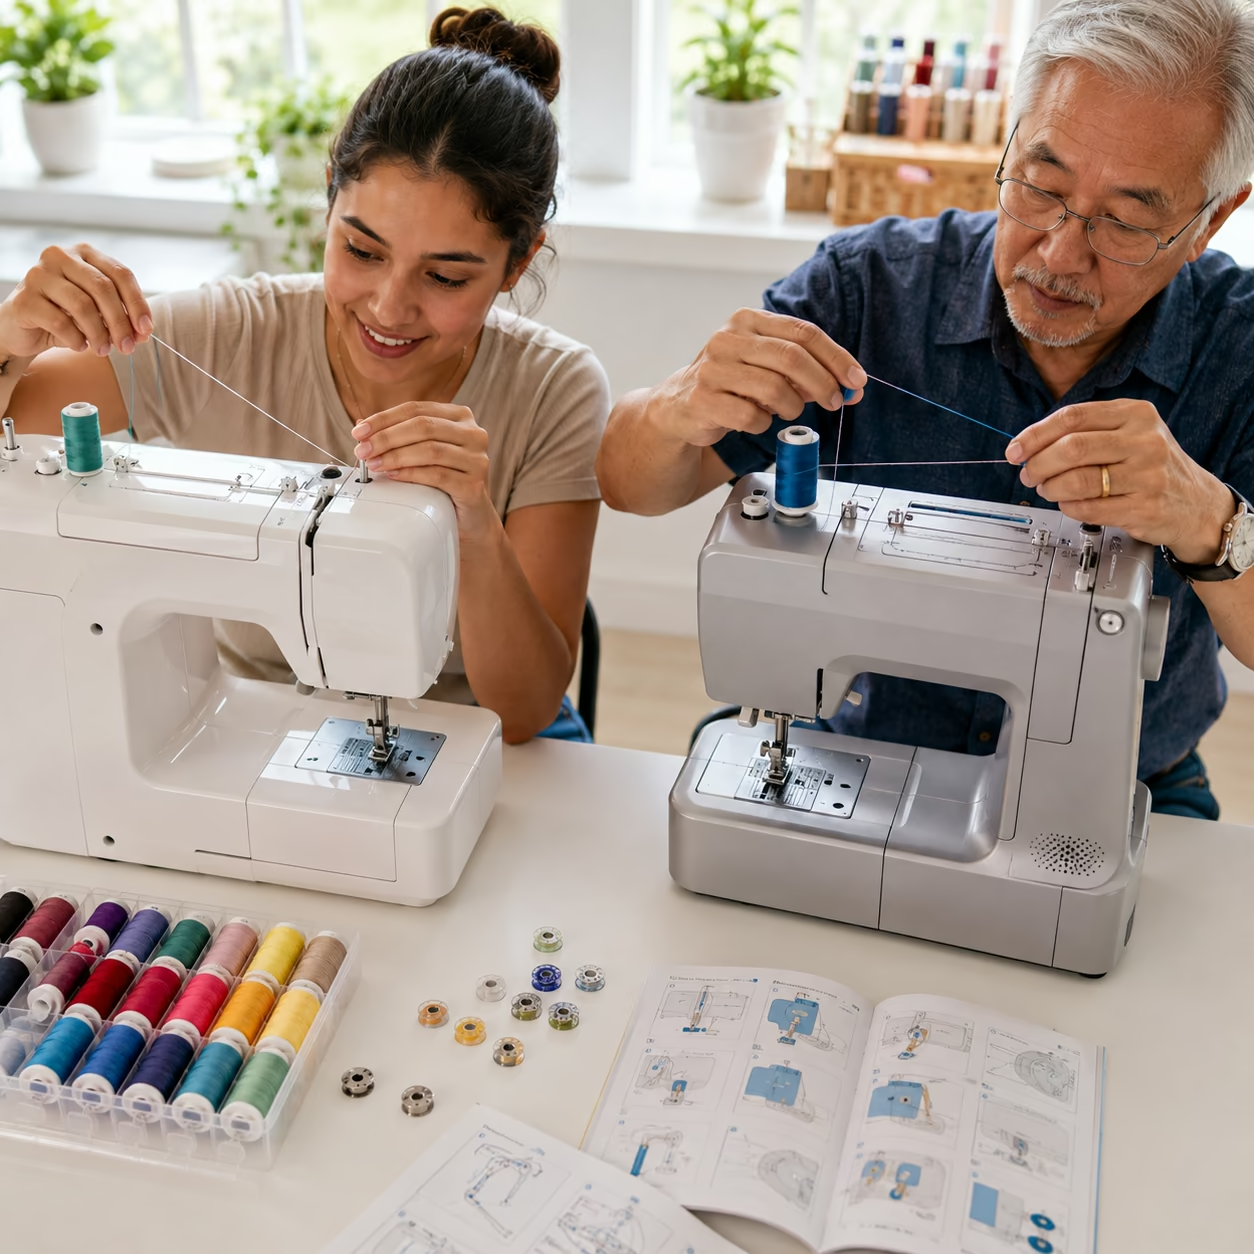
What Does Threading a Sewing Machine Mean?
Threading a sewing machine means setting up two separate thread paths that work together to create stitches: the upper thread that runs from a spool through the machine’s tension system and into the needle, and the lower thread (bobbin) that sits in a case beneath the needle plate. When you sew, these two threads interlock with each movement of the needle to form a lockstitch, which is the standard stitch type for most sewing projects.
The upper threading path typically includes 6-8 key points: the spool pin (where thread sits), thread guides (small hooks or loops), tension discs (two metal discs that control thread tightness), the take-up lever (a moving arm that feeds thread), additional guides near the needle, and finally the needle eye itself. Missing even one of these points can prevent your machine from sewing properly.
The bobbin threading is separate but equally important. You wind thread onto a small spool called a bobbin, then insert it into a bobbin case (either drop-in from the top or front-loading, depending on your machine model). The bobbin thread must be pulled up through the needle plate to meet the upper thread before you start sewing.
Why both threads matter: If only the upper thread is threaded, your machine will make needle movements but won’t form stitches. The lockstitch requires both threads to catch and loop around each other with each stitch cycle.
How to Thread a Sewing Machine Step by Step for Beginners
Threading a sewing machine follows a consistent sequence across all brands, though the exact guide positions vary. Start with the machine turned off and the presser foot raised (this releases the tension discs so thread can slip between them properly).
Step 1: Place your thread spool
Put your thread spool on the spool pin at the top of the machine. If your spool has a notch or groove, position it so the thread pulls smoothly. Some machines include a spool cap to hold the thread in place.
Step 2: Guide thread to the first thread guide
Pull thread from the spool to the first thread guide, usually located at the top left or top right of the machine. This guide is often a small metal hook or loop.
Step 3: Thread down through the tension assembly
Guide the thread down and between the tension discs. On most machines, you’ll see a clear channel or slot. The thread should slip between two metal discs that look like flat circles pressed together.
Step 4: Catch the take-up lever
This is the most commonly skipped step. Pull thread up and through the take-up lever, a metal arm with a hole or hook that moves up and down when you sew. It’s usually located at the top of the machine and is the highest point in your threading path.
Step 5: Thread down to the needle
Follow any remaining thread guides down toward the needle. Most machines have 1-2 guides near the needle bar.
Step 6: Thread the needle
Thread from front to back (or left to right, depending on your machine). Many modern machines include an automatic needle threader, a small hook device that pulls thread through the needle eye when you press a lever.
Step 7: Pull thread under the presser foot
Pull about 6 inches of thread through the needle and tuck it under the presser foot toward the back of the machine.
Common beginner mistake: Threading with the presser foot down. Always raise the presser foot before threading, this opens the tension discs so thread can seat properly between them.

Material: This needle piercer is made of sturdy plastic and metal, which can safely secure your needle for smooth insertion and removal.

【Fish Type Sewing Machine Needle Threader】This machine needle inserter is made of quality plastic and metal,sturdy,wear-resistant,and durable,not easy to break,and ensures long-term use.It holds the needle steadily for easy insertion and removal from the machine and works well for needle threading.
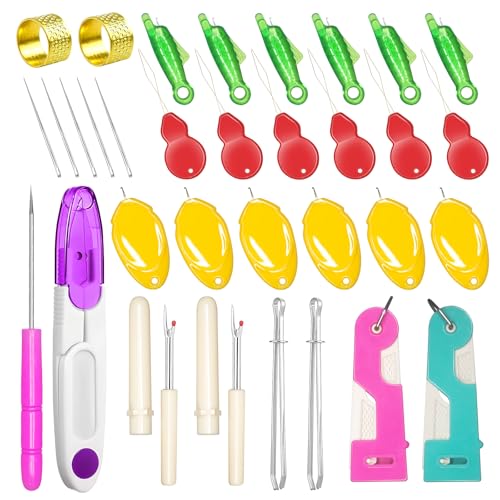
【Complete Sewing Tools Kit】 The sewing accessories includes 2 automatic needle threaders, 6 fish mouth sewing machine needle threaders, 6 gourd shaped sewing needle threaders, 6 thumb shaped simple needle threaders, 2 stitch remover tools, 1 thread snips, 2 drawstring threader tools, 1 awl tool, 2 thimbles, 5 sewing needles. Enough quantity and tool types to meet your long-term sewing and crafting work needs
What’s the Difference Between Threading the Bobbin and Threading the Needle?
Threading the needle refers to the upper thread path that runs through the machine’s tension system and into the needle eye, while threading the bobbin means winding thread onto a small spool and inserting it into the lower bobbin case beneath the needle plate. These are two completely separate processes that must both be completed before you can sew.
Upper thread (needle) process:
- Takes 1-2 minutes once you know the path
- Involves 6-8 threading points including tension discs and take-up lever
- Thread remains on the main spool throughout sewing
- Controls the top side of your stitches
Bobbin thread process:
- Requires winding thread onto a bobbin first (30-60 seconds)
- Bobbin is then inserted into a case below the needle plate
- Thread must be pulled up through the plate to meet the upper thread
- Controls the underside of your stitches
How to wind and insert a bobbin:
- Place thread on the spool pin
- Guide thread to the bobbin winding tension disc (usually a small disc separate from the main tension assembly)
- Thread through the hole in the bobbin from inside to outside
- Place bobbin on the bobbin winder spindle
- Push spindle to the right (on most machines) to engage winding mode
- Hold the thread tail and press the foot pedal; the bobbin will spin and wind
- Stop when the bobbin is full (many machines stop automatically)
- Trim the thread tail and remove the bobbin
For drop-in bobbins (top-loading), place the wound bobbin in the bobbin case with thread feeding in the direction indicated by arrows, usually counterclockwise. Pull thread through the slot and under the tension spring.
For front-loading bobbins, place the bobbin in a separate bobbin case, pull thread through the case’s tension slot, then insert the entire case into the machine’s bobbin area until it clicks.
Why Does My Sewing Machine Thread Keep Breaking?
Thread breaks during sewing because of incorrect threading (especially missing the take-up lever), wrong tension settings, a damaged or incorrectly sized needle, poor-quality thread, or thread snagging on a rough spot in the machine. The take-up lever is the most common culprit, if thread isn’t properly seated in this moving arm, it can’t feed smoothly and will snap under tension.
Top causes and fixes:
Missed take-up lever
- The thread must loop through the take-up lever at the top of the machine
- Re-thread completely, raising the presser foot first
- Watch the take-up lever move up and down when you turn the handwheel; thread should move with it
Tension too tight
- Upper tension set too high pulls thread until it breaks
- Start with tension dial at 4 (middle setting) and adjust from there
- Test on scrap fabric before assuming you need to change tension
Wrong needle for fabric
- Heavy fabrics need larger needles (size 16 or 18); delicate fabrics need smaller needles (size 9 or 11)
- Universal needles work for most woven fabrics; use ballpoint for knits, sharp for tightly woven materials
- Replace needles every 8-10 hours of sewing or after hitting a pin
Old or cheap thread
- Thread older than 2-3 years becomes brittle and breaks easily
- Bargain thread often has weak spots and inconsistent thickness
- Invest in quality polyester or cotton thread from known brands
Burrs or rough spots
- Check the needle eye, throat plate, and bobbin case for rough edges that can catch thread
- Run a cotton ball along the thread path; if it snags, you’ve found the problem spot
- Smooth minor burrs with fine emery cloth or replace the damaged part
Choose this fix if: Your thread breaks within the first few stitches, it’s almost always a threading error. If it breaks after sewing for a while, check your needle and thread quality first.
How to Thread a Brother Sewing Machine vs Singer
Brother and Singer machines both follow the standard threading sequence (spool → tension → take-up lever → needle), but Brother models typically route thread from left to right across the machine face, while Singer models often use a more vertical path with the tension assembly positioned differently. The functional result is identical; only the visual path differs.
Brother threading pattern:
- Spool pin usually on top left or top right
- Thread guides across the top of the machine
- Tension discs accessed by pulling thread down on the left side, then up through the take-up lever
- Take-up lever clearly visible at the top center
- Final guides lead down the right side to the needle
- Most Brother machines have numbered threading guides (1, 2, 3, etc.) printed on the machine body
Singer threading pattern:
- Spool pin typically on top
- Thread pulls down through a more vertical channel
- Tension assembly often integrated into a front-facing panel
- Take-up lever in the same general position (top of machine) but accessed through a different path
- Guides may be color-coded or numbered
- Older Singer machines (pre-2000) often have a more exposed, mechanical look; newer models are more enclosed
Key similarity: Both brands require you to raise the presser foot before threading, catch the take-up lever, and thread the needle from the same direction (usually front to back). If you can thread one brand, you can thread the other by following the numbered guides or printed arrows.
Model-specific variations: Within each brand, computerized models may have slightly different paths than mechanical models, but the basic sequence never changes. Brother CS6000i and Singer Heavy Duty 4452 are among the most popular models in 2026, and both have clear threading diagrams printed on the machine body.

Hand and machine sewing needle threaders

1.Versatile Threader Kit for Various Sewing Needs: The FIVEIZERO Threader Kit includes 24 high-quality threaders with an assortment of 6 gourd-shaped, 6 thumb-shaped, 6 aluminum sewing machine threaders, and 6 petal-shaped threaders. Designed for hand sewing, embroidery, and sewing machine tasks, this kit makes threading easier and more efficient in a variety of scenarios
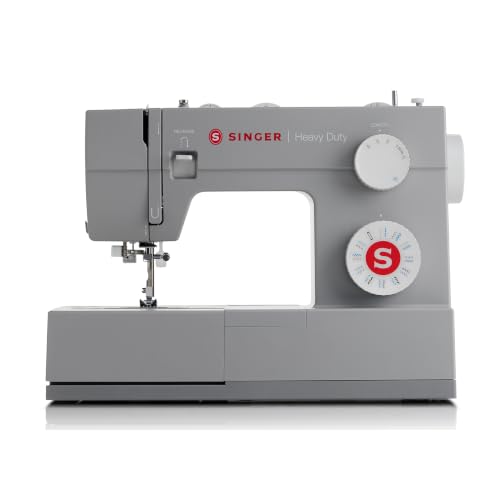
VERSATILE STITCHING WITH 97 APPLICATIONS: Get versatile performance with 23 built-in stitches that deliver 97 stitch applications. Easily handle basic, decorative, and functional sewing techniques, giving you flexibility for everyday projects and creative designs.
What Happens If You Thread a Sewing Machine Wrong?
Incorrect threading prevents the machine from forming stitches properly, causes thread to bunch or break, creates uneven tension, or results in skipped stitches. The machine won’t break or suffer damage from wrong threading, but it simply won’t sew correctly until you fix the thread path.
Specific problems from threading errors:
Skipped take-up lever:
- Thread breaks immediately or after a few stitches
- Stitches don’t form at all
- Thread bunches on the underside of fabric
Presser foot down during threading:
- Thread doesn’t seat between tension discs
- Tension appears loose no matter how you adjust the dial
- Upper thread pulls through too easily
Threading needle backward:
- Some machines are directional; threading the wrong way prevents proper stitch formation
- Stitches may form but look irregular
- Check your manual, most machines thread front to back, but some thread left to right
Missing a thread guide:
- Thread doesn’t follow the intended path
- Can cause uneven tension or thread tangling
- Machine may sew but stitches look messy
Wrong bobbin direction:
- Bobbin thread doesn’t catch properly
- Thread nests on the underside of fabric
- Stitches skip or don’t form
The good news: Threading mistakes are completely reversible. Simply remove all thread and start over, following the numbered guides or your machine’s threading diagram. Take your time on the first few attempts, most sewers can thread their machine in under a minute once they’ve practiced the path a few times.
Do All Sewing Machines Thread the Same Way?
All modern domestic sewing machines follow the same basic threading principle, thread travels from spool through tension discs and a take-up lever before reaching the needle, but the exact path, guide positions, and tension assembly design vary by brand and model. Industrial machines, vintage machines, and specialty machines (sergers, coverstitch) use different threading systems entirely.
What’s universal across domestic machines:
- Thread starts at a spool pin
- Thread passes through tension discs (must be done with presser foot raised)
- Thread loops through a take-up lever at the top of the machine
- Thread follows guides down to the needle
- Bobbin thread is wound separately and inserted below the needle plate
What varies by machine:
- Number and position of thread guides (some machines have 3, others have 6+)
- Tension assembly location (side-mounted vs. front-facing)
- Take-up lever access (some are more visible than others)
- Bobbin type (drop-in top-loading vs. front-loading case)
- Needle threading direction (most are front-to-back, but some vintage machines differ)
- Automatic features (built-in needle threaders, thread cutters, tension sensors)
Machines that thread differently:
Sergers (overlock machines): Use 3-5 separate thread paths that all feed into loopers and needles simultaneously. Threading a serger is more complex and takes 5-10 minutes even for experienced sewers.
Vintage machines (pre-1960): May have exposed tension assemblies, different take-up lever designs, or unique threading sequences. Always consult the original manual or find a threading diagram specific to your model.
Industrial machines: Often have larger, more robust tension systems and may thread differently than home machines. Built for speed and heavy materials.
Choose this approach: If you’re switching between brands or models, look for the numbered guides or printed arrows on the machine body. Follow those markers and you’ll thread correctly even without a manual.
How Much Does It Cost to Have Someone Thread My Sewing Machine?
Professional sewing machine threading services typically cost $10-25 if offered as a standalone service, though many sewing machine shops include free threading instruction when you purchase a machine or bring it in for maintenance. Most sewing classes and fabric stores also offer free threading help to customers.
Where to get threading help:
Sewing machine dealers: Free threading assistance with purchase or service; $10-15 as a standalone visit
Fabric store classes: Jo-Ann Fabric, Hobby Lobby, and independent fabric shops often host free “basics” classes that cover threading
YouTube and online resources: Completely free; search for your specific machine model + “threading” to find video tutorials
Local sewing groups: Many communities have sewing circles or maker spaces where experienced sewers help beginners for free
Private lessons: $25-50/hour for one-on-one instruction that covers threading plus other basics
Reality check: Threading a sewing machine is one of the easiest skills to learn on your own. With a threading diagram (printed on most machines or available online) and 10-15 minutes of practice, you’ll master it without needing to pay for help. The first time takes patience, but by the third or fourth time you’ll thread your machine in under a minute.
When professional help makes sense: If you have a vintage machine without a manual, a complex serger, or a machine with damaged threading guides, a professional can diagnose issues you might miss. Otherwise, save your money and learn this foundational skill yourself.
How to Fix Thread Tension After Threading
Thread tension problems after threading usually mean the thread isn’t properly seated in the tension discs, the tension dial is set incorrectly for your fabric and thread combination, or the bobbin is inserted wrong. Start by re-threading the upper thread with the presser foot raised, then test-sew on scrap fabric before adjusting the tension dial.
Diagnosing tension issues:
Loose upper thread (loops on bottom of fabric):
- Upper tension too loose or thread not in tension discs
- Re-thread with presser foot raised
- Increase upper tension dial by 1-2 numbers
Tight upper thread (bottom thread visible on top of fabric):
- Upper tension too tight
- Decrease tension dial by 1-2 numbers
- Check that you’re using the right needle size for your thread
Balanced tension (ideal):
- Threads lock in the middle of the fabric layers
- Stitches look identical on top and bottom
- No loops, puckers, or visible bobbin thread on the fabric surface
Step-by-step tension fix:
- Re-thread the upper thread completely with the presser foot raised (this is the fix 80% of the time)
- Check bobbin insertion and make sure thread is pulled through the tension spring in the bobbin case
- Set tension dial to 4 (middle setting) as your starting point
- Test on scrap fabric that matches your project (same fabric type and thickness)
- Adjust in small increments,change tension by one number at a time and test again
- Check needle size,a needle too small for your thread can cause tension issues even when threading is correct
Common mistake: Adjusting tension before re-threading. Always re-thread first, because improper threading mimics tension problems. If re-threading doesn’t fix it, then adjust the dial.
When to adjust bobbin tension: Rarely. Bobbin tension is factory-set and should only be adjusted if you’ve re-threaded multiple times, tested different tension settings, and still have problems. Bobbin tension adjustment requires a small screwdriver and should be done carefully (or by a professional) because over-tightening can damage the bobbin case.

This listing is for 4 PCS TENSION PLATE DISC GUARD

Supplied by DESK DAVE'S Featherweight Factory ~ Your Premier Site for the Finest Supply of Antique and Collectible Sewing Machines. For further Featherweight splendor, please contact us at any time.

This listing Brand New High Quality 10PCS #TDS-10 Universal Small Tension Disc.
Can You Thread a Sewing Machine Without a Manual?
Yes, you can thread any sewing machine without a manual by following the numbered guides or arrows printed directly on the machine body, watching a video tutorial for your specific model online, or following the universal threading sequence (spool → tension discs → take-up lever → needle guides → needle). Most machines manufactured after 2000 have clear threading paths marked on the machine itself.
How to thread without a manual:
Look for printed guides on the machine:
- Numbers (1, 2, 3, etc.) showing the threading order
- Arrows indicating thread direction
- Diagrams on the machine’s front panel or side
- Color-coded paths (some machines use red or yellow lines)
Search online for your model:
- Google “[brand] [model number] threading diagram”
- YouTube has video tutorials for most popular models
- Manufacturer websites often have PDF manuals available for free download
- Sewing forums and Facebook groups can provide model-specific help
Follow the universal path:
- Start at the spool pin
- Look for the tension discs (two flat metal circles, usually on the left or front)
- Find the take-up lever (the highest point, a moving arm with a hole or hook)
- Follow any remaining guides down to the needle
- Thread the needle (usually front to back)
Model number location: Check the front, side, or bottom of your machine for a model number. It’s usually on a metal plate or sticker. With this number, you can find exact threading instructions online in minutes.
Bobbin without a manual: Look inside the bobbin area for arrows showing which direction the thread should feed. Drop-in bobbins almost always feed counterclockwise. Front-loading bobbins have a tension slot, pull thread through that slot before inserting the case.
Is Threading a Sewing Machine Hard for Kids?
Threading a sewing machine is not inherently hard for kids, but it requires fine motor skills, patience, and the ability to follow a multi-step sequence, making it appropriate for most children ages 8 and up with adult guidance. Younger children (ages 5-7) can learn with help, but may need an adult to handle the actual threading while they practice other sewing basics.
Age-appropriate expectations:
Ages 5-7:
- Can learn to identify parts (spool pin, needle, presser foot)
- May struggle with fine motor skills needed for threading the needle eye
- Benefit from pre-threaded machines or adult assistance with threading
- Can practice guiding fabric and pressing the foot pedal
Ages 8-10:
- Can follow threading steps with supervision
- May need help with the take-up lever (hardest step to see and reach)
- Automatic needle threaders are very helpful for this age group
- Can master threading with 2-3 practice sessions
Ages 11+:
- Can thread independently after instruction
- Understand the logic of the threading path
- Can troubleshoot basic threading mistakes
- Ready to learn tension adjustment and bobbin winding
Tips for teaching kids to thread:
- Use contrasting thread (bright color against a light machine) so the path is easy to see
- Break it into chunks,teach spool to tension discs one day, tension discs to needle the next
- Let them watch first,demonstrate the full sequence before asking them to try
- Praise the process,threading takes practice; celebrate effort, not just success
- Choose a simple machine,mechanical machines with visible threading paths are easier to learn on than computerized models with enclosed mechanisms
Safety note: Always supervise children around sewing machines. Teach them to keep fingers away from the needle and to turn off the machine when threading.
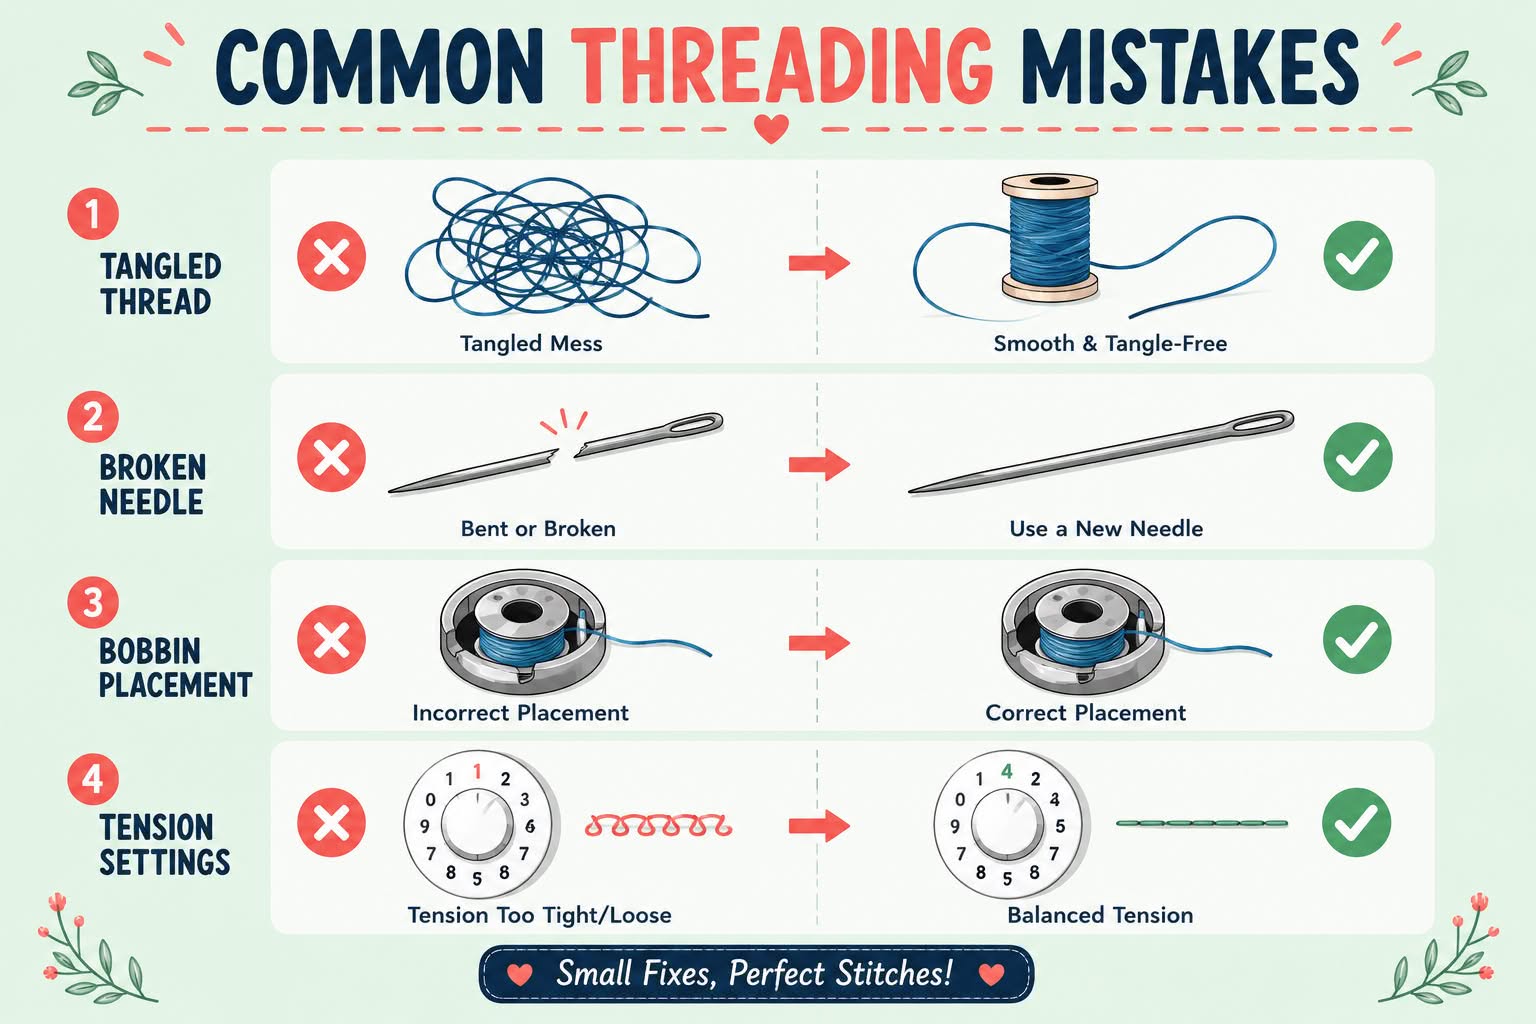
Common Mistakes When Threading a Sewing Machine
The most common threading mistakes are skipping the take-up lever, threading with the presser foot down, missing a thread guide, using the wrong bobbin direction, and threading the needle backward. These errors prevent proper stitch formation but don’t damage the machine, simply re-thread correctly and the problem resolves.
Mistake #1: Skipping the take-up lever
- Why it happens: The take-up lever is at the top of the machine and easy to miss
- Result: Thread breaks, stitches don’t form, or thread bunches
- Fix: Always look for the highest point in your threading path and make sure thread loops through it
Mistake #2: Threading with presser foot down
- Why it happens: Beginners don’t realize the presser foot position matters
- Result: Thread doesn’t seat between tension discs; tension feels loose no matter the setting
- Fix: Raise the presser foot before threading; lower it only after threading is complete
Mistake #3: Missing a thread guide
- Why it happens: Small guides are easy to overlook, especially on the first few attempts
- Result: Thread doesn’t follow the intended path; tension is uneven
- Fix: Follow numbered guides or arrows carefully; double-check each point
Mistake #4: Wrong bobbin thread direction
- Why it happens: Bobbins can be inserted either way, but only one direction works
- Result: Bobbin thread doesn’t catch; thread nests on fabric underside
- Fix: Look for arrows in the bobbin case showing correct thread direction (usually counterclockwise for drop-in bobbins)
Mistake #5: Threading needle backward
- Why it happens: Not all machines thread front-to-back; some are directional
- Result: Stitches don’t form or look irregular
- Fix: Check your manual or machine diagram for correct needle threading direction
Mistake #6: Not pulling up bobbin thread
- Why it happens: Beginners forget this step or don’t know it’s necessary
- Result: Machine sews but stitches are loose or don’t form properly
- Fix: After inserting the bobbin, hold the upper thread and turn the handwheel to bring the bobbin thread up through the needle plate; pull both threads under the presser foot
Mistake #7: Using old or tangled thread
- Why it happens: Thread sits in storage for years or gets wound incorrectly
- Result: Thread breaks, feeds unevenly, or creates tension problems
- Fix: Use fresh thread (less than 2-3 years old) and make sure it unwinds smoothly from the spool
How to Thread a Sewing Machine If the Needle Threader Is Broken
If your automatic needle threader is broken, thread the needle manually by cutting the thread at a sharp angle, moistening the tip slightly, and pushing it through the needle eye from front to back (or in the direction specified for your machine). Good lighting and a needle threader tool (a small handheld device sold at fabric stores for $2-5) make manual threading much easier.
Manual needle threading technique:
- Cut thread cleanly with sharp scissors at a 45-degree angle to create a point
- Moisten the tip slightly (touch it to your lips or a damp sponge), this helps fibers stick together
- Hold the needle steady by gripping the needle bar or using your non-dominant hand
- Push thread through the eye from front to back (for most machines)
- Pull 4-6 inches through so thread doesn’t slip out when you start sewing
Tools that help:
Handheld needle threader ($2-5):
- Small wire loop that fits through the needle eye
- Push the wire through, place thread in the loop, pull back through
- Works for any needle size
- Available at any fabric or craft store
Magnifying glass or lamp:
- Better lighting makes the needle eye much easier to see
- Clip-on magnifying lamps are popular with sewers who thread manually
Larger needle:
- Size 16 or 18 needles have bigger eyes than size 9 or 11
- Use the largest needle appropriate for your fabric
Needle insertion tool:
- Some machines have a groove or slot that helps position the needle for threading
- Check your machine’s design for built-in threading aids
When to repair the automatic threader: If your machine is under warranty, contact the manufacturer. Out-of-warranty repairs for a broken needle threader typically cost $50-100, which may not be worth it if you can thread manually in 10-15 seconds. Many experienced sewers prefer manual threading because it’s faster than using the automatic feature once you’ve practiced.
Where to Find Threading Diagram for My Sewing Machine Model
Threading diagrams for your specific sewing machine model are available on the manufacturer’s website (usually in the support or downloads section), in YouTube video tutorials, in online PDF manuals from sites like ManualsLib or Sewing Parts Online, or printed directly on your machine’s body. Most machines manufactured after 2000 have the threading path marked with numbers or arrows on the machine itself.
Best sources for threading diagrams:
Manufacturer websites:
- Brother: support.brother.com (search by model number)
- Singer: singer.com/support
- Janome: janome.com/support
- Bernina: bernina.com/support
- All major brands offer free PDF manual downloads
YouTube:
- Search “[brand] [model] threading”
- Many dealers and sewing enthusiasts post detailed video tutorials
- Video is often clearer than printed diagrams because you can see the thread path in motion
Manual archive sites:
- ManualsLib.com
- Sewing.org
- SewingPartsOnline.com
- These sites host thousands of vintage and modern machine manuals
Facebook groups and forums:
- “Sewing Machine Help” and brand-specific groups
- Post your model number and ask for threading help
- Experienced sewers often respond within hours
On the machine itself:
- Check the front panel, side, and top of the machine
- Many machines have a diagram under a flip-up cover or on a pull-out card
- Numbers and arrows show the threading sequence
Finding your model number: Look for a metal plate or sticker on the front, back, or bottom of your machine. The model number is usually a combination of letters and numbers (e.g., Brother CS6000i, Singer 4452, Janome 2212). With this number, you can find exact instructions in minutes.
Vintage machines: If you have a machine from the 1960s-1990s without a model number, try posting clear photos in sewing forums. Experienced collectors can often identify the model and point you to the correct manual.
FAQ
How long does it take to thread a sewing machine?
Threading a sewing machine takes 1-2 minutes once you know the path, but beginners should expect 5-10 minutes while learning. With practice, most sewers can thread their machine in under 60 seconds.
Do I need to re-thread every time I change thread color?
Yes, you need to remove the old thread and follow the full threading path with the new color. Simply cutting the old thread and tying on new thread doesn’t work because the knot will jam in the tension discs or needle eye.
Can I sew without threading the bobbin?
No, you need both upper thread (through the needle) and lower thread (bobbin) to form stitches. The machine will move without a bobbin, but no stitches will form.
Why won’t my bobbin thread pull up?
The bobbin thread won’t pull up if the bobbin is inserted backward, the upper thread isn’t threaded correctly, or you’re not holding the upper thread while turning the handwheel. Hold the upper thread, turn the handwheel one full rotation, and the needle will catch the bobbin thread and pull it up.
Should I thread my machine with the power on or off?
Always thread with the machine turned off for safety. You don’t need power to thread; you only need to raise the presser foot and position the take-up lever at its highest point (turn the handwheel manually if needed).
What’s the difference between a drop-in bobbin and a front-loading bobbin?
A drop-in bobbin sits in a clear case on top of the machine bed (you access it by removing the flat plate around the needle), while a front-loading bobbin goes into a separate case that slides into the front or side of the machine. Both work the same way; the loading method is just different.
Can I use any thread on any sewing machine?
Most sewing machines work with standard polyester or cotton thread in weight 40-50. Avoid very thick or very thin specialty threads unless your machine is designed for them, and always match your needle size to your thread weight.
How do I know if my tension is correct?
Correct tension means the upper and lower threads lock in the middle of the fabric layers, and stitches look identical on both sides. If you see loops on the bottom, upper tension is too loose. If you see bobbin thread on top, upper tension is too tight.
Why does my thread keep coming out of the needle?
Thread slips out of the needle if you didn’t leave a long enough tail (pull 4-6 inches through), you’re pulling fabric backward while sewing, or your tension is too loose. Always hold both thread tails under the presser foot when you start sewing.
Do sergers thread the same way as regular sewing machines?
No, sergers use 3-5 separate thread paths that feed into loopers and needles simultaneously. Threading a serger is more complex and follows a different sequence than a standard sewing machine.
Can wrong threading damage my machine?
No, incorrect threading won’t damage your machine. It will simply prevent proper stitch formation. Re-thread correctly and the machine will work fine.
How often should I clean the threading path?
Clean the tension discs, take-up lever area, and thread guides every 3-6 months or whenever you notice lint buildup. Use a small brush or compressed air to remove dust and thread fragments that can affect thread movement.


