Quick Answer
The seam allowance you should use depends on your project type: quilting typically requires 1/4 inch, garment sewing uses 5/8 inch as standard, and knit fabrics work best with 3/8 to 1/2 inch. Your choice affects how your seams lie, how much fabric you need, and whether your finished project matches the pattern’s intended fit. Beginners should stick with the pattern’s recommended seam allowance until they understand how changes affect the final result.
Key Takeaways
- Standard garment sewing uses 5/8 inch seam allowance, while quilting relies on 1/4 inch for precision piecing
- Knit fabrics need narrower seam allowances (3/8 to 1/2 inch) than woven fabrics to maintain stretch and reduce bulk
- French seams require 3/8 inch total (1/4 inch for the first seam, 1/8 inch for enclosing)
- Changing seam allowance mid-project will alter fit and alignment, plan changes carefully or stick with the original
- Commercial patterns typically use 5/8 inch, while indie patterns may vary from 1/4 to 1/2 inch (always check)
- Professional seamstresses often use 1 inch seam allowances on expensive fabrics to allow for alterations
- Curved seams benefit from slightly wider allowances (5/8 to 3/4 inch) to prevent fraying after clipping
- Cutting seam allowances too small eliminates room for adjustments and increases the risk of seams pulling apart
What Is Seam Allowance in Sewing?
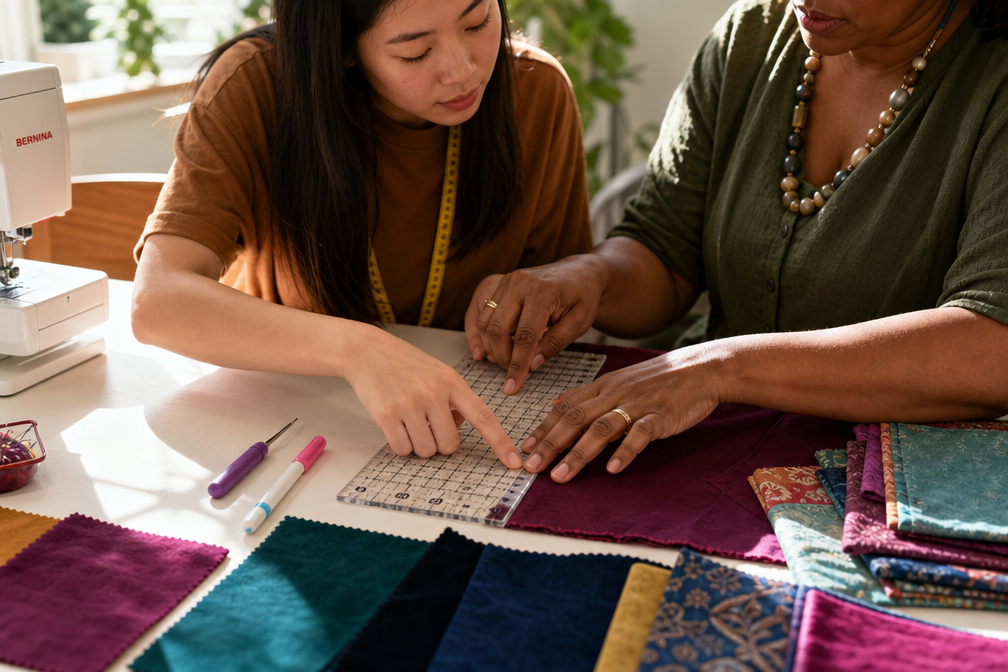
Seam allowance is the area between the fabric edge and the stitching line. This extra fabric serves multiple purposes: it prevents fraying, provides room for adjustments, and gives the seam structural integrity. Without adequate seam allowance, seams can pull apart under stress or unravel after washing.
When you look at a sewing pattern, the cutting line includes the seam allowance, while the stitching line (often marked with dots or notches) shows where your needle should actually sew. The space between these two lines is your seam allowance.
Why seam allowance matters:
- Structural strength, More fabric in the seam means it can withstand more stress and wear
- Alteration flexibility, Wider allowances let you let out seams if fit adjustments are needed
- Finishing options, Different seam finishes (French seams, flat-felled seams) require specific allowances
- Pattern accuracy, Using the wrong allowance changes the finished size of your project
Most patterns assume you’ll use a consistent seam allowance throughout the project. Changing it without adjusting the pattern pieces will result in a garment that’s too large or too small.
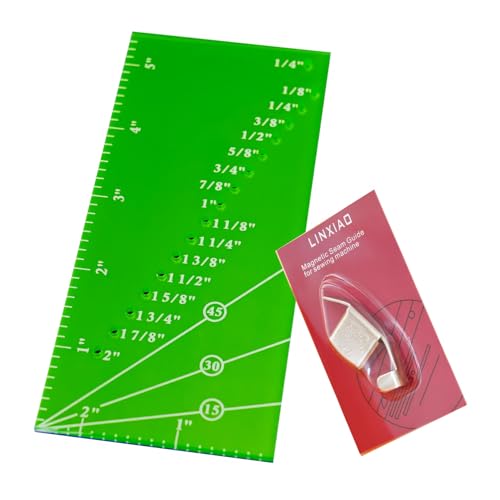
Transparent acrylic perforated seam allowance ruler covers full 1/8" to 2" incremental markings with exclusive 1/4" pivot point for bias binding. Pre-drilled holes transfer precise seam sizes onto thick fabrics, high-contrast etched lines deliver consistent uniform hems for quilting, patchwork & dressmaking.

Transparent acrylic perforated seam allowance ruler covers full 1/8" to 2" incremental markings with exclusive 1/4" pivot point for bias binding. Pre-drilled holes transfer precise seam sizes onto thick fabrics, high-contrast etched lines deliver consistent uniform hems for quilting, patchwork & dressmaking.
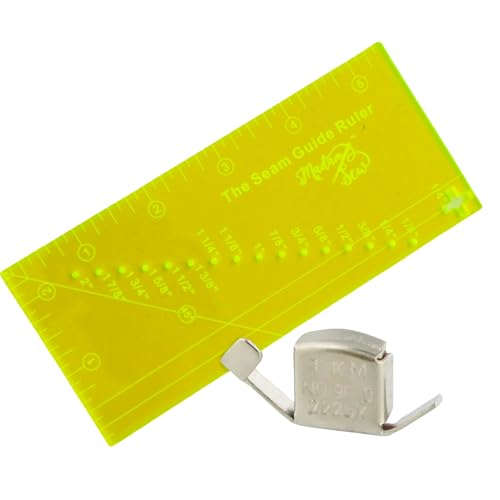
SET STITCHES ACCURATELY - Use any sewing machine with the Madam Sew Sewing and Quilting Seam Guide Ruler. Performing the duties of several sewing rulers and guides, it helps you measure seam allowances from 1/8” up to 2”. A wonderful sewing accessory to any sewing machine.
What Is the Standard Seam Allowance for Clothing?
The standard seam allowance for clothing in the United States is 5/8 inch (approximately 1.5 cm). This measurement has been the industry standard for commercial patterns since the mid-20th century and provides enough fabric for most finishing techniques while allowing room for alterations.
European patterns often use 1.5 cm (slightly less than 5/8 inch), and some international patterns use 1 cm. Always check your pattern instructions before cutting, the seam allowance should be clearly stated on the pattern envelope or instruction sheet.
Common seam allowances by garment type:
- Dresses and blouses, 5/8 inch
- Pants and skirts, 5/8 inch on side seams, sometimes 1 inch on waistbands for adjustments
- Jackets and coats, 5/8 inch, occasionally 3/4 inch for heavier fabrics
- Lingerie and swimwear, 1/4 to 3/8 inch to reduce bulk
- Children’s clothing, 3/8 to 1/2 inch (smaller seam allowances for smaller garments)
Professional seamstresses working with expensive fabrics or custom garments often use 1-inch seam allowances. This extra fabric provides maximum flexibility for fitting adjustments during construction and future alterations.

Perfect for Diagonal Seams: Washi-style tape with printed alignment guides helps you sew diagonal seams with ease, eliminating the need for marking half-square triangles.
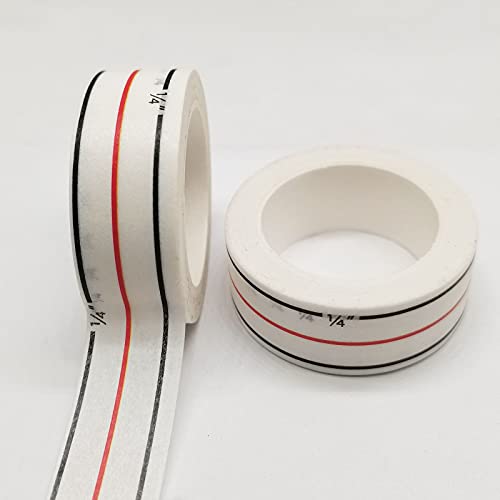
HONEYSEW diagonal seam tape is simply washi tape that is placed on the front plate of your sewing machine to act as a guide while you are sewing diagonal seams

Made of: Paper & Adhesive
What’s the Difference Between 1/4 Inch and 5/8 Inch Seam Allowance?
A 1/4 inch seam allowance is primarily used in quilting and requires precision stitching, while 5/8 inch is the garment sewing standard that provides more room for error and alterations. The difference of 3/8 inch may seem small, but it significantly impacts your finished project’s size and structure.
1/4 inch seam allowance characteristics:
- Used almost exclusively in quilting and patchwork
- Requires accurate cutting and stitching, even 1/16 inch variation multiplies across blocks
- Creates less bulk when multiple seams intersect
- Leaves minimal room for adjustments or mistakes
- Often sewn with a special 1/4 inch presser foot for consistency
5/8 inch seam allowance characteristics:
- Standard for garment construction and commercial patterns
- Provides fabric for fitting adjustments and letting out seams
- Accommodates various seam finishing techniques (serging, French seams, flat-felled)
- More forgiving for beginners, small stitching variations have less impact
- Stronger seams that withstand stress better in clothing
If you accidentally use 1/4 inch seam allowance on a garment pattern designed for 5/8 inch, your finished garment will be approximately 3/4 inch larger in every direction (3/8 inch on each side of each seam). On a dress with four main seams, that’s 3 inches added to the bust, waist, and hip measurements, a full size or more.
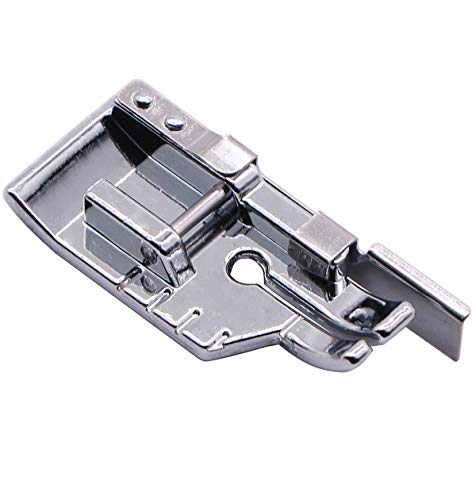
High Quality 1/4" Quilting / Patchwork Sewing Foot, Attached to the Quilting Foot is an Edge Guide to Help You Make a Perfect 1/4" Seam

Use this foot when pivoting, topstitching, or for 1/4" seams.

【Workmanship Aspect】: 1/4 inch presser foot made of high-quality plastic, own bright color, can be applied for a long tim
What Seam Allowance Should You Use for Quilting vs Garments?
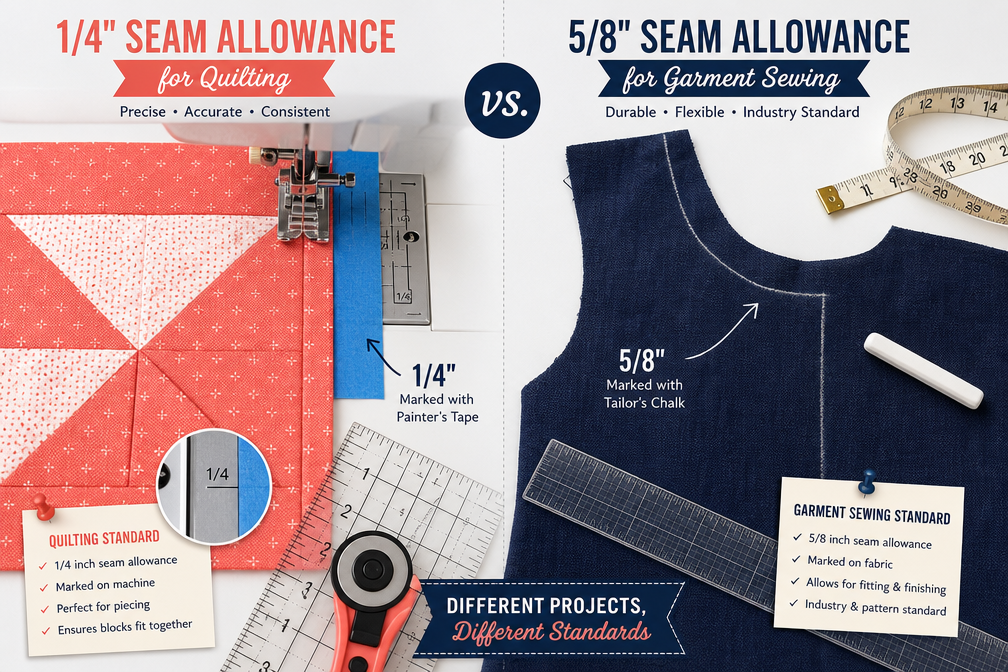
Quilting requires a 1/4 inch seam allowance for precision piecing, while garments need 5/8 inch for structural integrity and fitting flexibility. These different standards evolved because quilting prioritizes accuracy in matching geometric pieces, whereas garment sewing prioritizes fit adjustments and durability.
Quilting seam allowance (1/4 inch):
Quilters use 1/4 inch because quilt blocks are mathematical. When you sew a 6-inch square with 1/4 inch seams on all sides, you get a 5.5-inch finished block. This precision allows quilters to calculate fabric requirements accurately and ensures blocks fit together perfectly. Even a 1/16 inch error per seam compounds across a quilt, a 10-block row with inconsistent seam allowances won’t lie flat.
Garment seam allowance (5/8 inch):
Garment sewing uses 5/8 inch because clothing needs to fit three-dimensional bodies that vary in size and shape. The extra fabric allows you to take in or let out seams during fitting. It also provides enough fabric for seam finishing techniques that prevent fraying and add strength to areas under stress (like armholes and crotch seams).
Choose quilting allowance (1/4 inch) if:
- You’re piecing quilt blocks, table runners, or patchwork projects
- Precision and matching points are critical
- You’re working with a pattern specifically designed for quilting
Choose garment allowance (5/8 inch) if:
- You’re making clothing, bags, or home décor items
- You might need to adjust fit during or after construction
- Your pattern specifies 5/8 inch (most commercial patterns do)
Some modern quilters use scant 1/4 inch (slightly less than 1/4 inch) to compensate for the thickness of thread and the fold of fabric when seams are pressed. This technique ensures finished blocks measure exactly as intended.
How Do You Measure Seam Allowance Without a Special Foot?
You can measure seam allowance without a special foot by using the markings on your sewing machine’s throat plate, placing tape as a guide, or measuring from the needle to the fabric edge with a ruler. Most sewing machines have lines etched or printed on the throat plate showing common seam allowance measurements.
Using throat plate markings:
Look at the metal plate around your needle. You’ll typically see lines marked 1/8, 1/4, 3/8, 1/2, 5/8, and 3/4 inch from the needle. To sew a 5/8 inch seam, align your fabric edge with the 5/8 inch line and keep it there as you sew. The needle will automatically stitch 5/8 inch from the edge.
Creating a tape guide:
If your machine lacks clear markings or you need a seam allowance not marked on your plate, use painter’s tape or washi tape:
- Measure from your needle to the right (the distance of your desired seam allowance)
- Place a strip of tape at that measurement, perpendicular to the needle
- Use the tape edge as your guide, keeping your fabric edge aligned with it
- Replace tape when it gets fuzzy or loses adhesion
Using a seam gauge:
A seam gauge (a small ruler with a sliding marker) helps you mark seam allowances on fabric before sewing. Mark several points along your seam line, then connect them with chalk or a fabric pen. This method works well for curved seams where maintaining a consistent distance is challenging.
Common mistake: Measuring from the presser foot edge instead of the needle. Presser foot width varies by model and doesn’t reliably indicate seam allowance. Always measure from the needle position.
Why Does My Seam Allowance Keep Changing While Sewing?
Your seam allowance changes while sewing because you’re not maintaining consistent fabric edge alignment with your guide, the fabric is shifting under the presser foot, or you’re not watching the fabric edge instead of the needle. This inconsistency creates wavy seams and affects your project’s finished size.
Main causes and solutions:
Watching the needle instead of the guide, The most common beginner mistake. Your eyes should focus on where the fabric edge meets your guide (throat plate line or tape), not on the needle. The needle will sew in the right place if the fabric edge stays aligned with your guide.
Insufficient presser foot pressure, If your fabric shifts or bunches while sewing, your presser foot may not be holding it firmly enough. Increase presser foot pressure (if your machine has this adjustment) or use a walking foot for slippery or multiple layers.
Sewing too fast, Speed makes it harder to maintain consistent alignment. Slow down, especially on curves or when you’re learning. Consistent seam allowances matter more than sewing speed.
Fabric stretching or pulling, Don’t pull fabric through the machine. Let the feed dogs move it naturally. Pulling distorts the fabric and changes where the edge aligns with your guide.
No clear guide, If you can’t see your throat plate markings clearly, add tape or use a magnetic seam guide. A physical barrier makes it easier to maintain consistent alignment.
Practice exercise: Sew on paper (no thread) following a printed line. This builds muscle memory for keeping your eyes on the guide and maintaining consistent alignment without the distraction of watching your project come together.
What Seam Allowance Should You Use for Knit Fabric vs Woven Fabric?
Knit fabrics work best with 3/8 to 1/2 inch seam allowances, while woven fabrics typically use 5/8 inch. Knits need narrower seam allowances because they stretch, and wider allowances create unnecessary bulk that can show through on the right side or restrict the fabric’s natural give.
Knit fabric seam allowances (3/8 to 1/2 inch):
Knit fabrics stretch, so they need seams that stretch with them. Most knit patterns specify 3/8 or 1/2 inch seam allowances and assume you’ll use a serger or stretch stitch. The narrower allowance reduces bulk, especially important in fitted knit garments where seam allowances can create visible ridges on the outside.
When sewing knits on a regular sewing machine, use a stretch stitch or narrow zigzag with a 3/8 inch seam allowance. If you’re using a serger, it automatically trims to approximately 1/4 to 3/8 inch while creating a stretchy, finished edge.
Woven fabric seam allowances (5/8 inch):
Woven fabrics don’t stretch, so seams don’t need to give. The standard 5/8 inch allowance provides enough fabric for various finishing techniques (French seams, flat-felled seams, or serging) and leaves room for alterations. Woven fabrics also fray more than knits, so the extra fabric provides a buffer.
Key differences:
- Bulk, Knits show bulk more readily, so narrower allowances look better
- Stretch, Knit seams must stretch; narrower allowances with stretch stitches accomplish this
- Fraying, Wovens fray and need wider allowances; most knits don’t fray
- Finishing, Knits are usually serged or use stretch stitches; wovens use various finishing techniques that require more fabric
Exception: Some stable knits (like ponte or double knit) can use 5/8 inch seam allowances if the pattern specifies it. Always check your pattern instructions, as the designer has accounted for the fabric type.
What Seam Allowance Do Professional Seamstresses Use?
Professional seamstresses typically use 1 inch seam allowances on custom garments and expensive fabrics to maximize alteration flexibility, though they follow pattern specifications (usually 5/8 inch) for standard construction. The wider allowance provides insurance for fitting adjustments during construction and future alterations as the client’s body changes.
Why professionals use wider allowances:
Fitting flexibility, A 1-inch seam allowance can be let out up to 3/4 inch if needed, while a 5/8 inch allowance offers minimal adjustment room. On a custom garment, this flexibility is valuable during fittings.
Future alterations, Bodies change over time. A garment with 1-inch seam allowances can be altered years later, extending its useful life. This is especially important for expensive garments like wedding dresses or tailored suits.
Fabric cost vs. labor cost, In professional sewing, labor costs far exceed fabric costs. Adding an extra 1/2 inch to seam allowances uses minimal additional fabric but provides significant value in alteration potential.
Quality signaling, Generous seam allowances are a mark of quality construction. They indicate the garment was made to last and can be altered rather than discarded when fit needs change.
When professionals use standard allowances:
- Production sewing (where patterns are graded and tested)
- Working with patterns that have been fitted to the client
- Sewing with limited fabric where wider allowances aren’t feasible
- Constructing garments in stable, non-stretch fabrics where fit is predictable
Home sewing application: If you’re sewing with expensive fabric or making a special-occasion garment, consider adding 1/4 to 3/8 inch to your seam allowances (beyond the pattern’s specification) on major seams like side seams, center back, and shoulders. This gives you alteration room without significantly increasing fabric requirements.
What Seam Allowance Should Beginners Use?
Beginners should use exactly the seam allowance specified in their pattern, typically 5/8 inch for garments or 1/4 inch for quilting, and focus on maintaining consistency rather than experimenting with different measurements. Changing seam allowances requires understanding how that change affects fit, fabric requirements, and construction techniques, knowledge that comes with experience.
Why beginners should stick with pattern specifications:
Patterns are designed as a system, The seam allowance, pattern pieces, and instructions work together. Changing one element without adjusting others creates problems. A pattern designed for 5/8 inch seams will produce a garment that’s too large if you use 1/4 inch seams.
Consistency matters more than the specific measurement, A garment sewn with consistent 1/2 inch seams (even if the pattern calls for 5/8 inch) will look better than one with seam allowances that vary from 3/8 to 3/4 inch. As a beginner, focus on keeping your seam allowance the same throughout the project.
Learning curve, You’re already learning to read patterns, operate your machine, and construct garments. Adding seam allowance calculations to that list increases the chance of mistakes.
Tips for maintaining consistent seam allowances as a beginner:
- Mark your machine, Use painter’s tape to create a clear guide at your seam allowance measurement
- Practice on scrap fabric, Sew straight lines on fabric scraps, checking that your seam allowance is consistent
- Sew slowly, Speed comes with practice; accuracy comes first
- Watch the fabric edge, not the needle, Keep your eyes on where the fabric edge meets your guide
- Use a 1/4 inch foot for quilting, This specialized foot makes maintaining 1/4 inch seams much easier
When you can experiment: Once you’ve completed several projects and understand how seam allowances affect fit and construction, you can start adjusting them intentionally. Until then, following the pattern exactly gives you the best chance of success.
What Are Common Mistakes When Cutting Seam Allowance Too Small?
Cutting seam allowance too small eliminates room for adjustments, increases the risk of seams pulling apart under stress, and makes seam finishing difficult or impossible. A seam allowance that’s too narrow (less than 1/4 inch) can unravel after a few washes, especially on woven fabrics that fray.
Specific problems with inadequate seam allowance:
No alteration room, If your garment is too tight, you can’t let out seams that have only 1/4 inch allowance. You’re stuck with a garment that doesn’t fit, and the only solution is adding fabric panels or starting over.
Seam failure, Narrow seam allowances pull out more easily, especially at stress points like armholes, crotch seams, and shoulder seams. The stitching line sits too close to the fabric edge, and normal wear causes the fabric to tear away from the stitches.
Fraying problems, Woven fabrics fray. A 1/4 inch seam allowance on woven fabric may fray back to the stitching line after washing, causing the seam to fail. You need at least 3/8 inch (preferably 5/8 inch) to provide a buffer against fraying.
Finishing limitations, Many seam finishing techniques require adequate seam allowance:
- French seams need 3/8 inch total (1/4 inch + 1/8 inch)
- Flat-felled seams need 5/8 inch or more
- Hong Kong finish requires enough allowance to wrap with bias tape
Difficulty sewing, Very narrow seam allowances are harder to sew accurately. There’s no room for error, and the fabric edge may get caught in the feed dogs or pulled into the bobbin area.
How to fix seam allowances that are too small:
If you’ve already cut your fabric with inadequate seam allowance, you have limited options:
- Add fabric strips, Sew narrow strips of fabric to the edges to increase seam allowance (works for straight seams)
- Use seam sealant, Apply Fray Check or similar product to prevent fraying (doesn’t add alteration room)
- Interface the seam, Iron lightweight fusible interfacing to the seam allowance to stabilize it
- Accept the limitation, Sew carefully and finish seams immediately to prevent fraying
Prevention: Always double-check the seam allowance specified in your pattern before cutting. If you’re unsure, err on the side of wider allowances, you can always trim them down, but you can’t add fabric back.
Can You Change Seam Allowance in the Middle of a Project?
You can change seam allowance mid-project, but doing so will alter the fit and size of your finished item, potentially creating alignment problems where different allowances meet. If you must change seam allowance, do it at a logical break point (like between the bodice and skirt) and adjust your pattern pieces to compensate.
What happens when you change seam allowance:
Switching from 5/8 inch to 1/2 inch seam allowance adds 1/8 inch to each side of each seam. On a garment with four main seams (two side seams, center front, center back), that’s 1 inch added to the circumference. If you make this change partway through construction, the top and bottom sections won’t match in size.
When changing seam allowance might be necessary:
- Running out of fabric, Narrower seam allowances use less fabric
- Fit issues discovered during construction, Adjusting seam allowance can fix minor fit problems
- Switching techniques, Some construction methods require specific seam allowances (French seams need 3/8 inch total)
How to change seam allowance successfully:
- Calculate the impact, Determine how much the change will affect your finished measurements
- Adjust remaining pattern pieces, If you’re making the remaining pieces larger or smaller, adjust the pattern accordingly
- Change at a seam, Make the transition at a horizontal seam (waistline, yoke seam) where you can ease or gather to accommodate size differences
- Grade the seam allowance, Gradually transition from one allowance to another over several inches rather than changing abruptly
- Test on scrap fabric, Before committing to your project, test the transition on scraps to ensure it works
Better alternatives to mid-project changes:
- Add or remove fabric at seams, Instead of changing seam allowance, take in or let out seams as needed for fit
- Use design features, Add a belt, elastic, or drawstring to accommodate fit issues
- Accept the original allowance, If the project is wearable, finish it as planned and apply lessons learned to your next project
Prevention: Sew a muslin (test garment) before cutting into your fashion fabric. This reveals fit issues when you can still adjust the pattern rather than making changes mid-construction.
What Seam Allowance Should You Use for French Seams?
French seams require a total seam allowance of 3/8 inch: 1/4 inch for the first seam (sewn wrong sides together) and 1/8 inch for the second seam (which encloses the raw edges). This narrow finished seam is ideal for sheer fabrics, lightweight garments, and any project where seam allowances will be visible or need a clean finish.
How French seams work:
A French seam encloses raw edges inside a narrow seam, creating a clean finish on both the right and wrong sides of the fabric. You sew the seam twice:
- First seam (1/4 inch), Place fabric wrong sides together and sew 1/4 inch from the edge
- Press and trim, Press the seam open, then trim to 1/8 inch
- Second seam (1/8 inch), Fold fabric right sides together along the seam line and sew 1/8 inch from the fold, enclosing the raw edges
The finished seam is approximately 3/8 inch wide and shows no raw edges on either side.
Pattern adjustments for French seams:
Most patterns assume 5/8 inch seam allowances. If you want to use French seams, you need to adjust:
- Reduce seam allowance to 3/8 inch when cutting pattern pieces
- Mark the new seam line 3/8 inch from the edge (instead of 5/8 inch)
- Account for the size change, Reducing seam allowance from 5/8 to 3/8 inch adds 1/4 inch to each seam, making your garment larger
Alternatively, cut the pattern as written (with 5/8 inch allowance) and sew your first French seam at 3/8 inch instead of 1/4 inch. This maintains the original garment size but creates a wider finished seam (1/2 inch instead of 3/8 inch).
Best uses for French seams:
- Sheer fabrics (chiffon, organza, voile) where seam allowances show through
- Lightweight blouses and dresses
- Baby clothes and children’s garments (no raw edges to irritate skin)
- Unlined garments where the inside will be visible
Limitations:
- Difficult on curves (the enclosed seam allowance doesn’t curve smoothly)
- Not suitable for thick fabrics (creates too much bulk)
- Requires precise sewing (both seam lines must align perfectly)
What Seam Allowance Do Commercial Patterns Use vs Indie Patterns?
Commercial patterns (Big Four brands like Simplicity, McCall’s, Butterick, and Vogue) consistently use 5/8 inch seam allowances, while indie patterns vary from 1/4 inch to 1/2 inch depending on the designer’s preference and the garment type. Always check the pattern instructions before cutting, as assuming the wrong seam allowance can ruin your project.
Commercial pattern standards (5/8 inch):
The Big Four pattern companies have used 5/8 inch as their standard since the 1950s. This consistency means experienced sewers can work with any commercial pattern and know what to expect. The 5/8 inch allowance is printed on the pattern tissue, and instructions assume you’ll use this measurement unless otherwise noted.
Indie pattern variations (1/4 to 1/2 inch):
Independent pattern designers often use narrower seam allowances to reduce bulk and create a more modern fit. Common indie pattern seam allowances include:
- 1/2 inch, Popular compromise that reduces bulk while providing some alteration room
- 3/8 inch, Common for knit patterns and fitted garments
- 1/4 inch, Occasionally used for lingerie or very fitted garments
Some indie designers use different seam allowances for different parts of the same garment (1/2 inch on main seams, 1/4 inch on facings or small details). The pattern instructions will specify which allowance to use where.
Why indie designers use narrower allowances:
- Modern fit, Contemporary patterns often have less ease (closer fit), and narrower seam allowances reduce bulk in fitted areas
- Fabric efficiency, Narrower allowances use less fabric, reducing cost for sewers
- PDF printing, Many indie patterns are PDF downloads printed at home on letter or A4 paper; narrower allowances allow pattern pieces to fit on fewer pages
How to avoid mistakes:
- Read the instructions first, Before cutting, check what seam allowance the pattern uses
- Mark your machine, Set up a tape guide at the correct measurement before you start sewing
- Note it on the pattern, Write the seam allowance on each pattern piece to avoid confusion
- Don’t mix patterns, If you’re combining pieces from different patterns, adjust seam allowances so they match
Converting between seam allowances:
If you want to use a different seam allowance than the pattern specifies, adjust the cutting line:
- To increase seam allowance, Add the difference to all edges (adding 1/8 inch to change from 1/2 to 5/8 inch)
- To decrease seam allowance, Subtract the difference from all edges
- Recalculate fit, Remember that changing seam allowance changes the finished size
Do You Need Different Seam Allowance for Curved Seams?
Curved seams benefit from slightly wider seam allowances (5/8 to 3/4 inch) compared to straight seams because curves require clipping or notching, and the extra fabric prevents fraying and provides stability after clipping. However, you should maintain the same seam allowance specified in your pattern and simply be more careful with finishing and clipping techniques.
Why curves are different:
Curved seams (armholes, necklines, princess seams) need to be clipped or notched so they’ll lie flat when turned right side out. Each clip is a potential weak point where the fabric can fray back to the stitching line. Wider seam allowances provide a buffer between the clips and the stitching.
Clipping vs. notching:
- Clipping, Small cuts perpendicular to the stitching line on inward curves (necklines), allowing the seam allowance to spread and lie flat
- Notching, Small triangular cuts on outward curves (armholes), removing excess fabric so the seam allowance doesn’t bunch
Both techniques remove fabric from the seam allowance, so you need enough allowance to remain stable after clipping.
Best practices for curved seams:
- Use the pattern’s specified allowance, Don’t reduce it to save fabric
- Clip carefully, Cut only to within 1/8 inch of the stitching line, not closer
- Clip frequently, More shallow clips are better than fewer deep clips
- Finish before clipping, Serge, zigzag, or pink the edge before clipping to prevent fraying
- Use pinking shears, The zigzag edge is less likely to fray than a straight cut
When to use wider allowances on curves:
- Sheer or loosely woven fabrics, These fray aggressively; use 3/4 inch if possible
- Deep curves, Necklines and armholes with tight curves need more clips, so more allowance helps
- Unlined garments, If the seam allowance will be visible, wider allowances look more professional
When narrower allowances work:
- Stable knits, These don’t fray, so clipping doesn’t weaken the seam
- Interfaced curves, Fusible interfacing stabilizes the seam allowance, allowing narrower allowances
- Enclosed seams, If the curve will be enclosed (like a collar), you can use narrower allowances since the seam won’t be under stress
Common mistake: Clipping too close to the stitching line. Always leave at least 1/8 inch between your clips and the stitches. If you clip through the stitching, the seam will fail.
Frequently Asked Questions
What happens if I use the wrong seam allowance?
Using the wrong seam allowance changes your finished project’s size. If you use a narrower allowance than specified, your garment will be larger; a wider allowance makes it smaller. The difference multiplies across all seams, using 1/4 inch instead of 5/8 inch on a dress with four main seams adds 3 inches to the bust, waist, and hip measurements.
Can I use a 1/2 inch seam allowance instead of 5/8 inch?
Yes, but your finished garment will be 1/4 inch larger at each seam (1/8 inch on each side). On a garment with multiple seams, this can add up to a full size. If you intentionally want a looser fit, using 1/2 inch instead of 5/8 inch is an easy adjustment. Just be consistent throughout the project.
How do I know what seam allowance my pattern uses?
Check the pattern instructions, the seam allowance should be stated clearly on the first page or pattern envelope. Commercial patterns (Simplicity, McCall’s, Butterick, Vogue) use 5/8 inch unless otherwise noted. Indie patterns vary, so always read the instructions before cutting.
Should I use the same seam allowance for all fabrics?
Not necessarily. Knit fabrics typically use narrower seam allowances (3/8 to 1/2 inch) than woven fabrics (5/8 inch) because knits don’t fray and narrower allowances reduce bulk. However, always start with what your pattern specifies, as the designer has accounted for the fabric type.
What seam allowance should I use for bags and home décor?
Most bag and home décor patterns use 1/2 inch seam allowances, though some use 5/8 inch. These projects don’t require fitting adjustments like garments do, so narrower allowances are practical. Always check your specific pattern instructions.
How do I fix seams that are too wide or too narrow?
If your seam allowance is too wide, you can trim it down after sewing. If it’s too narrow, you can’t add fabric back, but you can stabilize the seam with interfacing or seam sealant to prevent fraying. For fit issues, adjust the seam line on remaining pieces to compensate.
Do I need a special presser foot for different seam allowances?
No, but specialty feet make certain seam allowances easier. A 1/4 inch foot is helpful for quilting, and some machines offer adjustable guide feet. Most sewing can be done with a standard presser foot and throat plate markings or tape guides.
What seam allowance do sergers use?
Sergers typically trim fabric to approximately 1/4 to 3/8 inch while sewing, depending on your settings. When using a serger, you can cut fabric with wider seam allowances (like 5/8 inch) and let the serger trim to its preferred width. Check your serger manual for specific settings.
Should I increase seam allowance on expensive fabric?
Yes, professional seamstresses often use 1-inch seam allowances on expensive fabrics to allow for future alterations. The extra fabric cost is minimal compared to the value of being able to adjust fit later. This is especially wise for special-occasion garments.
Can I use different seam allowances on the same garment?
Patterns sometimes specify different seam allowances for different areas (5/8 inch on main seams, 1/4 inch on facings). This is fine as long as you follow the pattern instructions. Changing seam allowances arbitrarily without adjusting the pattern will cause fit and alignment problems.
What seam allowance should I use for stretchy fabrics?
Stretchy knit fabrics work best with 3/8 to 1/2 inch seam allowances. The narrower allowance reduces bulk and allows the seam to stretch with the fabric. Use a stretch stitch or serger to maintain the fabric’s stretch in the seam.
How do I maintain consistent seam allowance on curves?
Sew slowly and keep your eyes on where the fabric edge meets your guide (not on the needle). On tight curves, you may need to stop with the needle down, lift the presser foot, pivot slightly, and continue. Practice on scrap fabric to build muscle memory for smooth curves.
Conclusion
Choosing the right seam allowance isn’t complicated once you understand the basic standards: 5/8 inch for garment sewing, 1/4 inch for quilting, and 3/8 to 1/2 inch for knits. The key to success is using the seam allowance specified in your pattern and maintaining consistency throughout your project. Changing seam allowances without adjusting your pattern pieces will alter the fit and size of your finished item, potentially ruining hours of work.
As you gain experience, you’ll develop preferences and understand when to deviate from standard measurements. Professional seamstresses often use wider allowances on expensive fabrics to allow for alterations, while modern indie patterns may use narrower allowances for a contemporary fit. But as a foundation, master the standard measurements first.
Your next steps:
- Check your current project’s pattern instructions to confirm the specified seam allowance before cutting
- Mark your sewing machine with tape or use throat plate markings to create a clear guide
- Practice on scrap fabric to build muscle memory for maintaining consistent alignment
- Start a project notebook where you record which seam allowances you used and how they worked for different fabrics and project types
The difference between a garment that fits beautifully and one that’s unwearable often comes down to consistent seam allowances. Take the time to set up proper guides, sew slowly until consistency becomes automatic, and always read pattern instructions before cutting. Your finished projects will show the difference.