Quick Answer
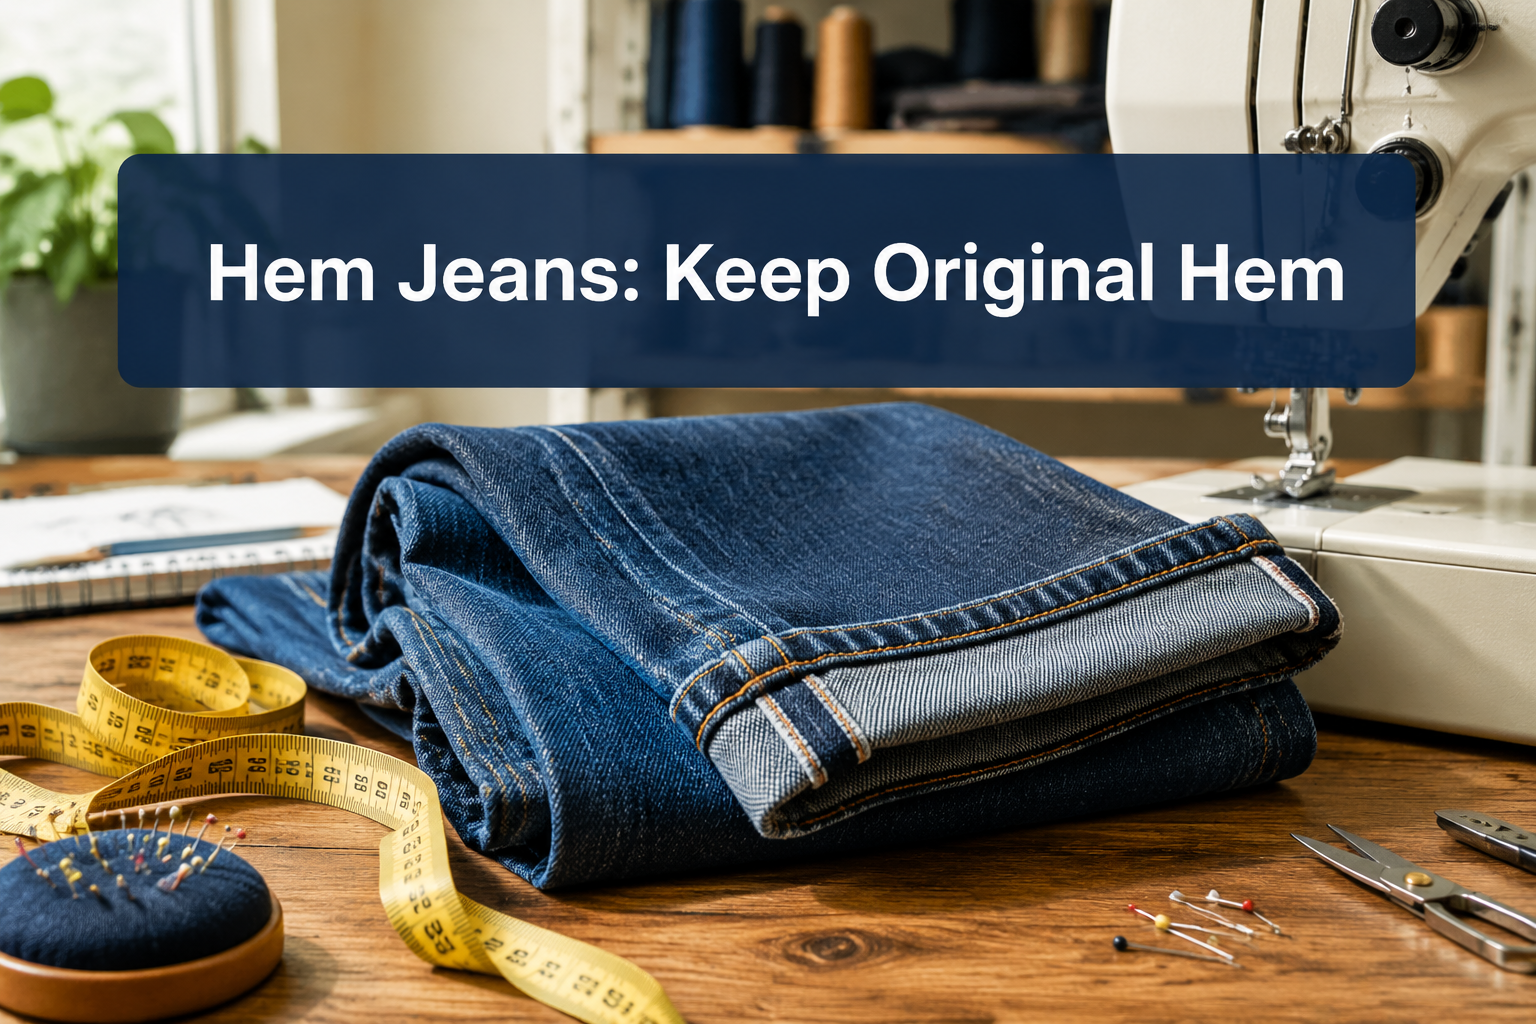
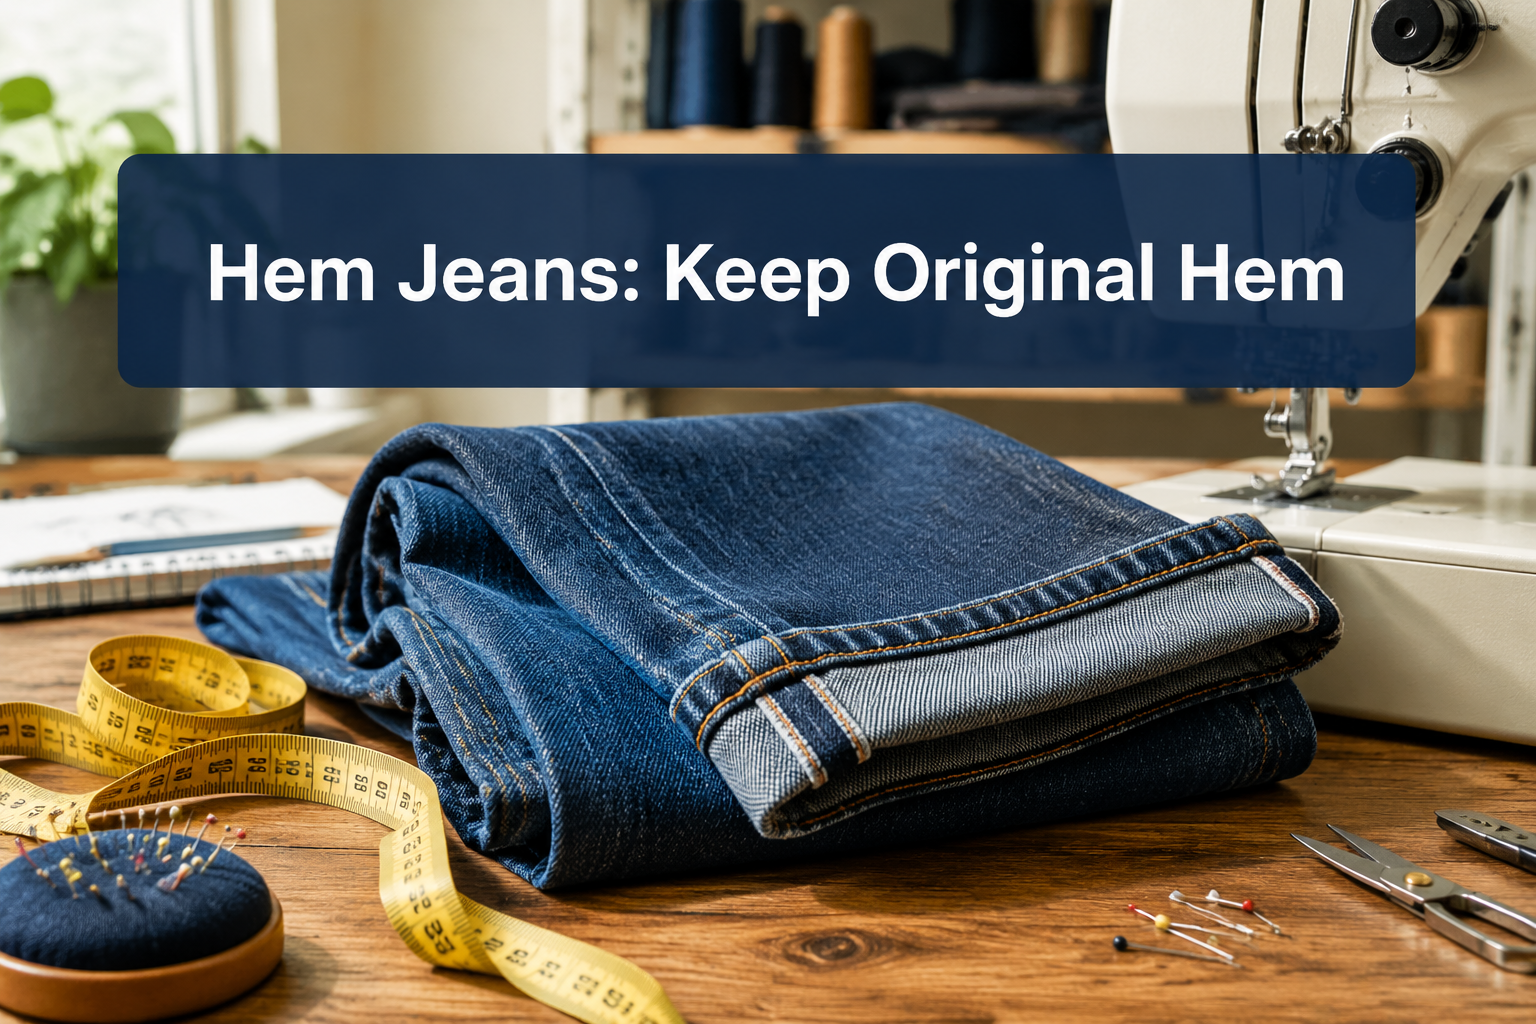
How to hem jeans keeping the original hem is a technique that shortens jeans while preserving the factory-finished bottom edge by folding the excess fabric up inside the leg and stitching it in place. This method maintains the authentic worn appearance, factory distressing, and professional chain-stitched hem that gives jeans their signature look. The technique works for most denim styles and can be done at home with a sewing machine or by a professional tailor.
Key Takeaways
- Original hem preservation keeps the factory-finished edge intact while shortening jeans from the inside, maintaining authentic distressing and chain-stitch details
- The technique creates a fold inside the jean leg where excess fabric is tucked up and secured with hidden stitches
- Works best on jeans that need 1-3 inches shortened; more than that creates excessive bulk at the fold
- Professional tailors typically charge $15-25 for original hem alterations, while DIY requires only basic sewing skills and a machine
- Raw denim and selvedge jeans are ideal candidates because preserving the original edge maintains their premium value and aesthetic
- The method is reversible if you need to let the hem back down later, unlike traditional hemming that cuts away fabric
- Bulkiness can be minimized by trimming the seam allowance inside the fold or choosing thinner denim weights
- Not suitable for jeans already too short or styles where you want a fresh, clean hem appearance
What Is Original Hem Jeans Shortening?
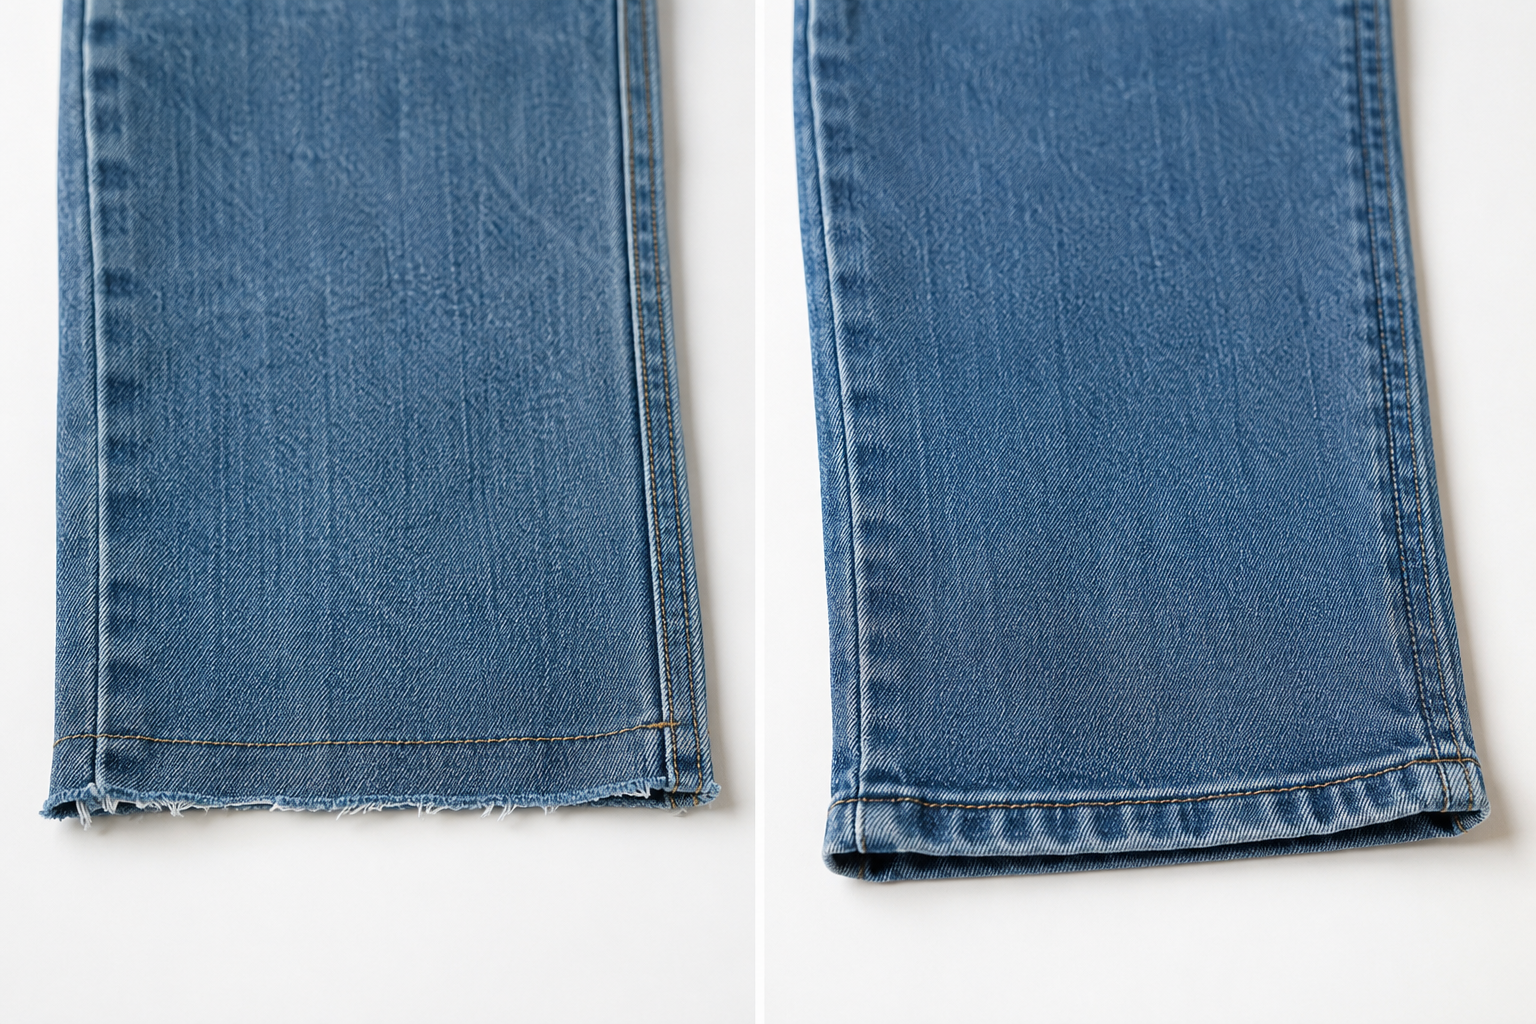
Original hem jeans shortening is an alteration method that preserves the factory-finished bottom edge of jeans while reducing their length. Instead of cutting off the excess fabric and creating a new hem, this technique folds the extra length up inside the pant leg and secures it with stitches that remain hidden from view.
The method maintains three important features that make jeans look authentic:
- Factory chain stitching, The distinctive two-needle stitch pattern that most manufacturers use
- Original distressing, Worn edges, fading, or fraying that develops naturally or is added during production
- Authentic finish, The specific thread color, stitch density, and edge treatment unique to each brand
This approach became popular among denim enthusiasts who wanted to shorten premium jeans without losing the signature details that make each pair unique. When you buy raw denim or selvedge jeans with specific hem finishes, cutting them off means losing part of what you paid for.
The technique works particularly well for garment sewing projects where maintaining original details matters more than creating the slimmest possible hem.
How Does Keeping the Original Hem Work on Jeans?
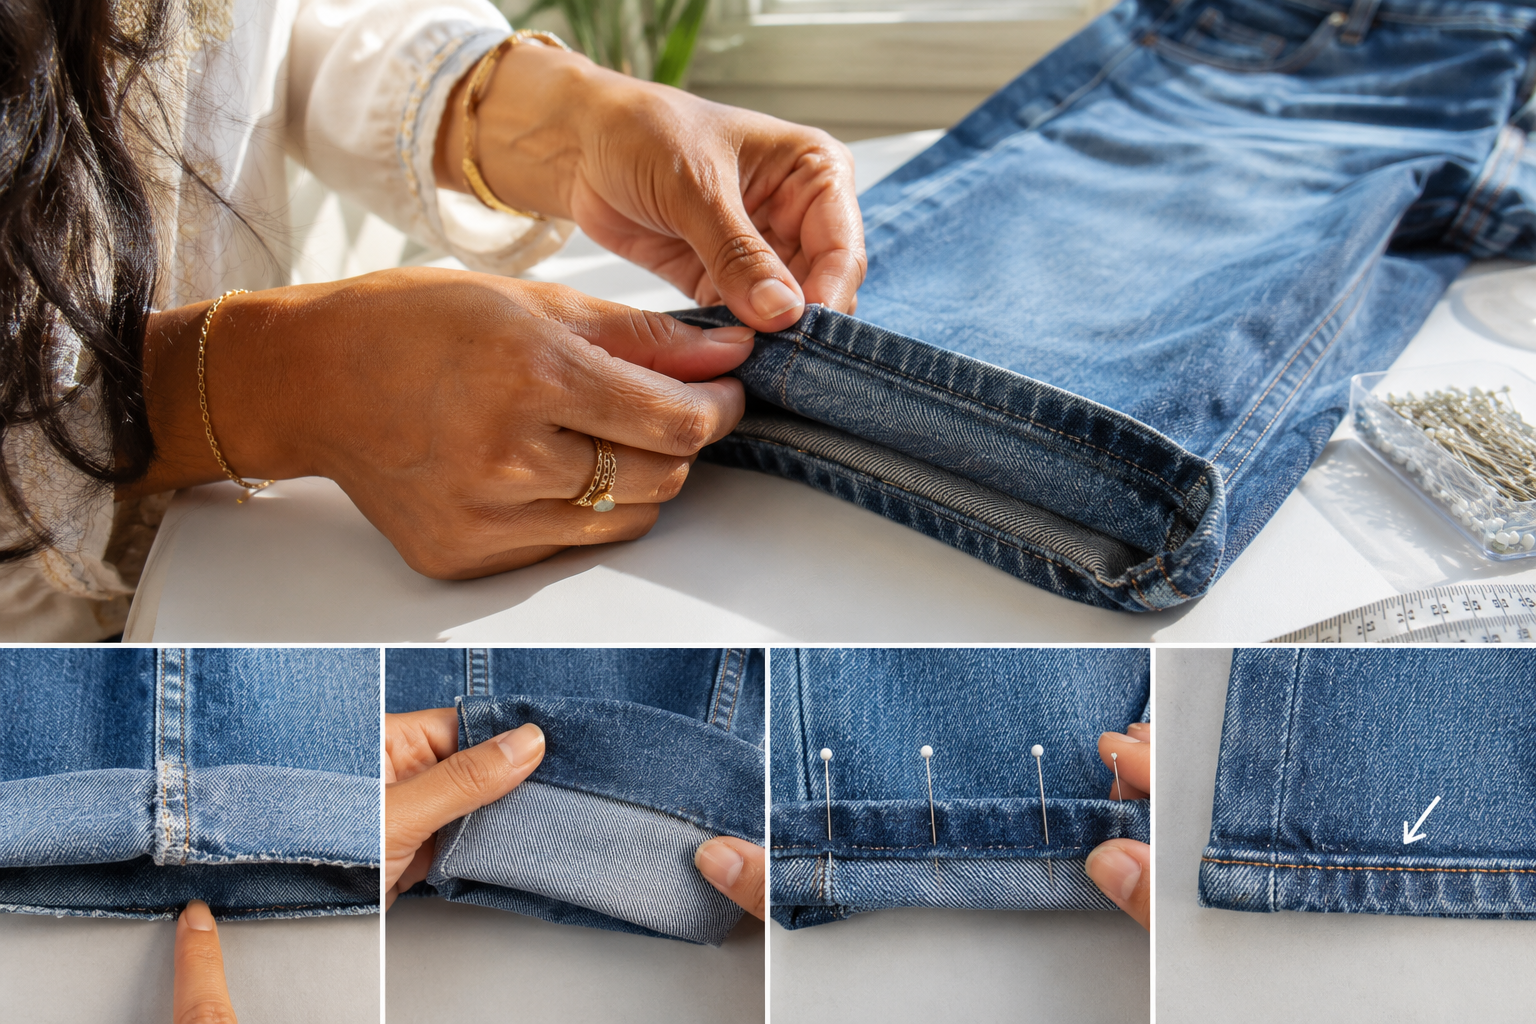
Keeping the original hem works by creating an internal fold that hides excess length while leaving the factory edge visible at the bottom. The process involves measuring the desired finished length, marking where the new “hem” should sit, folding the fabric up to that point, and stitching through all layers to secure the fold in place.
Here’s the step-by-step process:
- Try on the jeans and mark the desired finished length with pins or chalk while wearing the shoes you’ll typically pair with them
- Turn the jeans inside out and measure from the original hem up to your marked line
- Fold the excess fabric up so the original hem sits at your desired length when the jeans are right-side out
- Pin the fold in place all around the leg, keeping the fabric smooth and even
- Stitch along the fold line using a straight stitch or zigzag, catching all layers but keeping stitches hidden inside
- Press the hem flat with an iron to set the fold and create a crisp finish
The key difference from regular hemming is that you never cut the original edge. The factory hem remains intact at the bottom of the jean leg, while your new stitching line sits higher up inside the leg where it won’t be visible when worn.
When working with thick denim, you may need to adjust your machine settings. Check out tips on why needles keep breaking when working with heavy fabrics, and consider using jeans needles designed for denim’s density.
Original Hem vs Regular Hem: Which Looks Better?
Original hem alterations look better when you want to maintain the authentic, worn-in appearance of your jeans, while regular hems create a cleaner, more tailored look with less bulk. The choice depends on your jeans’ style, the fabric weight, and whether preserving factory details matters to you.
Original hem advantages:
- Preserves factory distressing, fading, and chain-stitch details
- Maintains brand authenticity on premium or vintage denim
- Reversible if you need to let the hem down later
- No risk of cutting too short
Regular hem advantages:
- Creates less bulk, especially important for thick denim
- Allows for custom finishes like raw edges or cuffs
- Better for dramatic length changes (more than 3 inches)
- Cleaner appearance on dress jeans or tailored styles
For raw denim and selvedge jeans, original hem is almost always the better choice because these styles are valued for their specific construction details. Cutting off a selvedge edge or chain-stitched hem reduces the garment’s authenticity and resale value.
For stretch denim, casual jeans, or situations where you’re shortening by more than 3 inches, a regular hem often works better because the bulk from folding thick fabric becomes uncomfortable and visible.
How Much Does It Cost to Hem Jeans Keeping Original Hem at a Tailor?
Professional tailors typically charge $15-25 for original hem alterations on jeans, with prices varying based on location, denim weight, and turnaround time. This is usually $5-10 more than a standard hem because the technique requires more precision and time to fold and secure the fabric without cutting.
Price factors that affect cost:
| Factor | Price Impact | Why It Matters |
|---|---|---|
| Denim weight | +$5-10 for heavyweight | Thicker fabric requires stronger needles and more careful stitching |
| Rush service | +$10-15 | Same-day or next-day alterations cost more |
| Geographic location | $15 (small towns) to $35 (major cities) | Urban tailors have higher overhead costs |
| Chain stitch finish | +$10-20 | Requires specialized machine to match factory stitching |
Most neighborhood tailors can perform basic original hem alterations using a standard sewing machine. If you want the internal stitching to match the factory chain stitch exactly, you’ll need to find a denim specialist or alterations shop with a chain-stitch machine, which increases the cost.
For comparison, doing it yourself costs only the thread and your time, making it an excellent project for building sewing techniques skills.
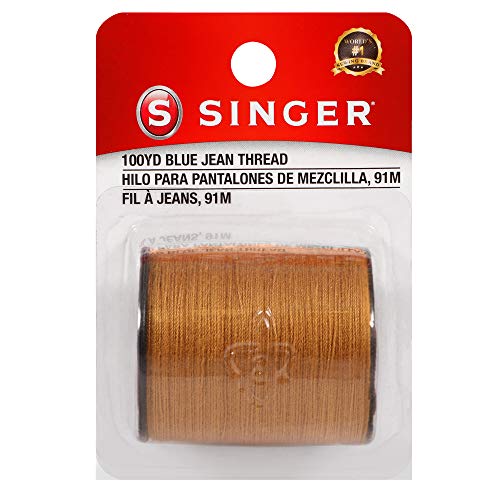
Singer Heavy-Duty Blue Jean Thread Spool is 100% polyester and comes in a bold shade of Old Gold
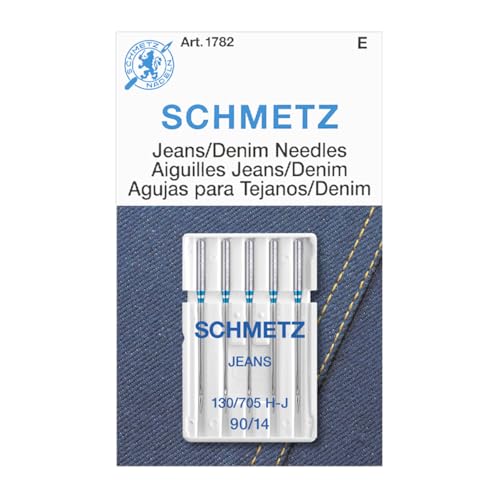
MASTER EVERY STITCH: Compatible with all home sewing machines, SCHMETZ Jean & Denim Needles handle thick fabric like denim, twill, and quilts for smooth, precise stitching that keeps your projects on track
Wide Use: The keychain mini sewing machine can be hung on bags, car keys, or used as a zipper slider
Can I Do Original Hem Myself Without a Sewing Machine?
You can perform an original hem alteration by hand without a sewing machine, though it takes significantly longer and requires strong hand-sewing skills to create durable stitches through multiple layers of denim. Hand-sewn hems work best on lightweight to medium-weight denim; heavyweight or raw denim is extremely difficult to stitch by hand.
Hand-sewing approach:
- Use a curved needle designed for upholstery or heavy fabrics, it penetrates thick layers more easily than straight needles
- Choose strong thread like polyester or buttonhole thread that won’t break under stress
- Create a backstitch or running backstitch for maximum strength (simple running stitches will pull apart)
- Work in good light and take breaks to avoid hand fatigue
- Expect 45-90 minutes per leg depending on your skill level
The main challenge is pushing the needle through 4-6 layers of denim where the side seams overlap with your fold. A thimble is essential to protect your finger, and you may need pliers to pull the needle through at thick spots.
For most sewers, using a machine makes more sense. Even a basic model can handle this project if you use the right needle size and adjust tension properly. If you’re experiencing issues, troubleshooting guides like why thread keeps breaking can help solve common problems when working with denim.
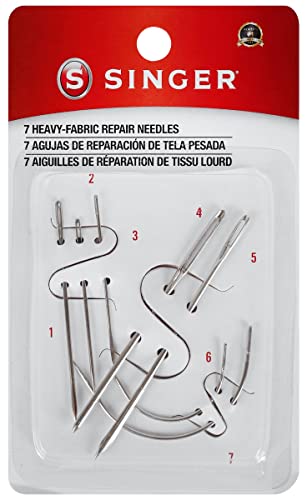
7 assorted heavy-fabric repair needles

2X STRONGER STEEL — Constructed with reinforced, thick shafts that withstand the resistance of dense, heavy fabrics without bending or breaking, staying sharp longer for consistent, skip-free stitching through any material from start to finish.

[Leather Needles for Hand Sewing]: The leather sewing needle set includes 9pcs needles of various sizes and shapes. Each type needle has a unique purpose, which are suitable for various sewing or maintenance projects to meet your different sewing and repair needs.
Why Is My Original Hem Coming Undone After Washing?
Original hems come undone after washing when the stitches aren’t secure enough to hold multiple layers of denim through the agitation and stress of laundering. The most common causes are inadequate stitch length, wrong thread type, insufficient backstitching at the beginning and end, or using a stitch that’s too loose.
Common problems and fixes:
Stitch length too long, Stitches longer than 3mm create gaps that allow fabric to shift. Use a 2-2.5mm stitch length for denim to create tight, secure seams.
Wrong thread, All-purpose cotton thread breaks down faster than polyester when exposed to repeated washing and drying. Switch to polyester or poly-cotton blend thread for durability.
No backstitching, Starting and ending your stitch line without backstitching (reverse stitching) leaves loose thread ends that unravel. Always backstitch 3-4 stitches at both ends.
Loose tension, If your bobbin or top tension is too loose, stitches won’t grip the fabric layers tightly. Test on scrap denim and adjust until stitches sit firmly in the fabric without puckering.
Single row of stitching, One line of stitches may not be enough for heavy-wear areas. Add a second parallel row of stitching 1/8 inch away from the first for extra security.
If you’re consistently having tension issues, the guide on why stitches are loose on one side can help diagnose whether the problem is in your bobbin tension or top threading.
What Types of Jeans Can You Keep the Original Hem On?
You can keep the original hem on virtually any style of jeans including straight leg, bootcut, skinny, boyfriend, and wide-leg styles, as long as they need shortening by 3 inches or less and the fabric isn’t excessively thick. The technique works across all denim weights from lightweight stretch to heavyweight raw denim, though adjustments may be needed for extreme thicknesses.
Best candidates for original hem:
- Raw and selvedge denim, Preserving the selvedge line and chain-stitched hem maintains the premium aesthetic
- Vintage jeans, Original hems with authentic wear patterns and fading are irreplaceable
- Designer denim, Brand-specific hem details and stitching are part of what you paid for
- Medium-weight denim (10-13 oz), Easiest to fold and stitch without excessive bulk
Styles that may need modifications:
- Heavyweight denim (14+ oz), May require trimming the seam allowance inside the fold to reduce bulk
- Pre-distressed jeans, Holes or fraying near the hem may make folding difficult
- Jeans with decorative hems, Embroidery, studs, or appliqués may create lumps when folded
Not recommended for:
- Jeans that need more than 3 inches shortened, The fold becomes too bulky and uncomfortable
- Flared jeans being converted to straight, This requires reshaping the leg, not just shortening
- Jeans with damaged original hems, If the factory edge is already torn or poorly finished, a new hem may look better
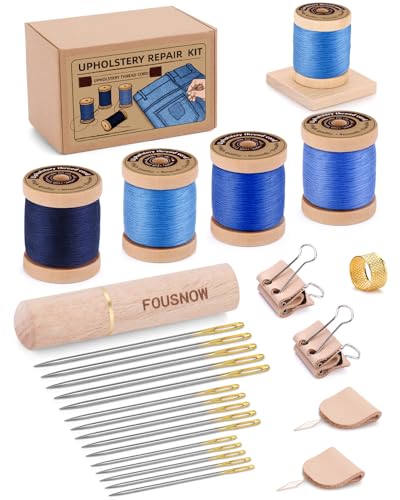
Upholstery Repair Kit: This sewing kit includes 4 rolls of blue series sewing threads (50 meters/roll), 15 upholstery sewing needles, a thread rack, 2 leather needle...
Is Original Hem Method Good for Raw Denim?
The original hem method is excellent for raw denim because it preserves the unwashed, untreated fabric edge and allows the natural fading and wear patterns to develop authentically over time. Raw denim enthusiasts specifically seek this technique to maintain the integrity of their investment pieces, which can cost $200-400 or more.
Raw denim requires special consideration because:
Shrinkage happens after first wash, Raw denim typically shrinks 1-2 inches in length during the first hot wash or soak. Many denim experts recommend wearing raw jeans for 6 months before hemming, or washing them first and then hemming to the desired length.
Fading patterns matter, The original hem develops distinctive wear patterns (honeycombs, whiskers, stacks) that look authentic only when the factory edge is preserved. Cutting and re-hemming creates an obviously altered appearance.
Chain-stitch runoff is valuable, Premium raw denim often features chain-stitched hems with characteristic “roping” (twisted ridges) that develop as the hem wears. This detail is impossible to replicate with a regular sewing machine.
Resale value stays higher, Collectors and enthusiasts pay more for raw denim with original construction details intact. Altered hems reduce resale value significantly.
If you’re working with raw denim for the first time, use a heavy-duty needle rated for denim (size 100/16 or 110/18) and reduce your machine speed to maintain control through the thick, stiff fabric.
Who Should Not Use Original Hem Technique?
People who need to shorten jeans by more than 3 inches, those with very thick or heavyweight denim that creates uncomfortable bulk, and anyone wanting a completely fresh, tailored appearance should not use the original hem technique. Additionally, if your jeans are already too short and you’re trying to add length, this method won’t work.
Skip original hem if:
You’re shortening by more than 3 inches, The fold creates a thick ridge inside the leg that’s visible from the outside and uncomfortable against your ankle. For dramatic length changes, a regular hem with the excess fabric cut away is more practical.
You have thick or stiff denim, Heavyweight raw denim (14+ oz) or stiff, unwashed denim creates excessive bulk when folded. The ridge can rub against your ankle and create visible lumps under boots or shoes.
You want a clean, tailored look, Original hem has a slightly more casual, authentic appearance. If you’re hemming dress jeans or want a crisp, precise finish, a regular hem looks more polished.
Your jeans have damaged original hems, If the factory edge is frayed, torn, or poorly finished, preserving it doesn’t make sense. A new hem will look better.
You’re altering the leg shape, If you’re tapering the leg width or changing the silhouette, you’ll need to open the side seams anyway, making original hem preservation impractical.
You prefer cuffed jeans, If you always wear your jeans cuffed, the original hem will be hidden inside the cuff, making the technique pointless.
For tailored alterations or situations where you’re reshaping the entire leg, traditional hemming methods work better and create less bulk.
Do I Need Special Thread for Original Hem Jeans?
You don’t need special thread for original hem alterations, but using polyester or poly-cotton blend thread in a weight appropriate for denim (typically all-purpose or heavy-duty) will create more durable seams than standard cotton thread. Match the thread color to the existing stitching on your jeans for the most invisible results.
Thread selection guide:
| Thread Type | Best For | Why |
|---|---|---|
| Polyester all-purpose | Most denim weights | Strong, doesn’t shrink, resists breaking |
| Poly-cotton blend | Medium-weight denim | Combines strength with natural appearance |
| Heavy-duty polyester | Heavyweight/raw denim | Extra strength for thick layers |
| Cotton (avoid) | Not recommended | Breaks down faster, shrinks with washing |
Color matching tips:
- For medium and dark denim, navy or dark gray thread blends with most stitching
- For light-wash jeans, tan or light gray works well
- For black jeans, use black thread
- When in doubt, go slightly darker rather than lighter, dark thread is less visible than light thread on most denim
The thread you use for the internal stitching doesn’t need to match the factory hem thread since it won’t be visible from the outside. Focus on strength and durability rather than exact color matching for the hidden stitches.
If you’re experiencing thread issues while sewing, the troubleshooting guide on thread breaking problems covers common causes and solutions.
How to Fix Bulky Original Hem on Thick Denim
Fix bulky original hems on thick denim by trimming the seam allowance inside the fold, grading the layers to different widths, or using a technique called “wedging” that removes fabric from the side seams only. These modifications reduce the thickness at the fold point while still preserving the original hem edge.
Step-by-step bulk reduction:
- Turn jeans inside out and locate the fold line where you stitched the hem
- Trim the seam allowance, Cut the fabric inside the fold to about 1/2 inch from your stitch line (don’t cut through your stitches)
- Grade the layers, If there are multiple fabric layers, trim each one to a slightly different width so they don’t all stack at the same point
- Press firmly, Use a hot iron with steam to compress the remaining layers as flat as possible
- Add a second row of stitching, Stitch 1/8 inch away from your first line to further flatten the fold
Advanced technique for very thick denim:
Wedge method, This removes small triangular sections of fabric from the side seams only:
- Open the side seam stitching for about 2 inches above and below the fold line
- Cut a small wedge (triangle) of fabric from the seam allowance in the folded section
- Re-stitch the side seam, which now has less bulk at the fold point
- The original hem remains intact, but the fold is less bulky
This technique requires more advanced sewing skills but creates the flattest possible result on heavyweight denim.
For very thick denim, make sure your machine is properly maintained and can handle the fabric weight. The guide on fabric not feeding through can help if your machine struggles with thick layers.
Can You Original Hem Jeans That Are Too Short Already?
You cannot use the original hem technique to lengthen jeans that are already too short because the method only works by folding excess fabric up inside the leg. If your jeans are too short, your options are limited to letting down an existing folded hem (if one exists), adding a contrasting fabric band at the bottom, or accepting the current length.
Options for too-short jeans:
If they have a folded hem, Check inside the leg to see if there’s a fold with extra fabric. If a previous alteration used the original hem method, you can carefully remove the stitches and let the fold down to regain up to 2-3 inches of length.
Add a fabric band, Sew a coordinating or contrasting fabric strip to the bottom to add length. This works best with casual jeans where the added band becomes a design feature rather than looking like an obvious fix.
Create a decorative cuff, If you only need 1/2 to 1 inch more length, letting down the existing hem and creating a wider cuff can work.
Accept the length, Style too-short jeans as cropped or ankle-length pants, which are currently fashionable. Pair them with boots or high-top sneakers that cover the gap.
Prevention tip: When buying jeans, always choose a length that’s slightly too long rather than too short. You can always shorten jeans, but adding length is nearly impossible without visible alterations.
What’s the Difference Between Euro Hem and Original Hem?
Euro hem and original hem are the same technique with different names, both preserve the factory-finished edge by folding excess fabric up inside the jean leg rather than cutting it off. The term “Euro hem” became popular in alterations shops as a marketing name for this European tailoring technique, while “original hem” more clearly describes what the method preserves.
Some tailors use slightly different terminology:
- Original hem, General term for any method that keeps the factory edge
- Euro hem, Same technique, sometimes implies a more refined finish
- Blind hem, Uses invisible stitches on the outside (different technique)
- Cuffed hem, Folds fabric to the outside as a visible cuff (different look)
The core process remains identical regardless of what it’s called: measure, fold, stitch, and press while keeping the factory hem intact at the bottom edge.
When talking to a tailor, use whichever term they’re familiar with, but clarify that you want to keep the original bottom edge of your jeans intact. Show them an example or explain that you don’t want the fabric cut if there’s any confusion.
How Long Does Original Hem Alteration Take?
Original hem alterations take 30-60 minutes per pair of jeans when done at home by someone with basic sewing skills, or 3-7 days at a professional tailor depending on their workload and whether you request rush service. The actual sewing time is only 10-15 minutes per leg, but measuring, pinning, and pressing add to the total time.
Time breakdown for DIY:
- Measuring and marking: 10 minutes
- Pinning the fold: 10 minutes
- Stitching both legs: 15-20 minutes
- Pressing and finishing: 10 minutes
- Total: 45-60 minutes for your first pair
As you gain experience, you can reduce this to 30 minutes per pair.
Professional tailor timeline:
- Standard service: 5-7 business days
- Rush service: 1-3 days (additional fee)
- While-you-wait: Some shops offer same-day service for an extra charge
The alteration itself is quick, but tailors batch similar jobs together for efficiency, which is why turnaround takes several days.
Tips to speed up the process:
- Pre-wash jeans before hemming to account for shrinkage
- Mark your desired length clearly with pins or chalk
- Have all measurements ready before you start
- Use a walking foot or denim foot to help fabric feed evenly through thick layers
Understanding presser feet options can help you choose the right foot for denim and speed up your sewing.
Step-by-Step: How to Hem Jeans Keeping the Original Hem
Here’s the complete process for hemming jeans while preserving the factory edge, broken down into clear, manageable steps that work whether you’re a beginner or experienced sewer.
Materials needed:
- Jeans to be hemmed
- Sewing machine with denim needle (size 90/14 or 100/16)
- Polyester thread matching your jeans
- Measuring tape
- Fabric pins or clips
- Fabric chalk or washable marker
- Iron and ironing board
- Scissors
Step 1: Determine finished length
- Put on the jeans with the shoes you’ll typically wear with them
- Fold the hem up to where you want the finished length to be
- Stand naturally and check the length in a mirror
- Mark this point with a pin on both legs
- Remove the jeans and measure from the original hem to your pin
Step 2: Mark the fold line
- Turn jeans inside out
- Measure up from the original hem to your desired finished length
- Mark this measurement all around the leg with chalk or marker
- This line is where you’ll fold the fabric
Step 3: Create the fold
- Fold the excess fabric up along your marked line
- The original hem should now sit at your desired finished length
- Pin the fold in place every 2-3 inches around the entire leg
- Make sure the fold is even and the original hem hangs straight
Step 4: Stitch the hem
- Thread your machine with polyester thread
- Set stitch length to 2.5mm
- Starting at the inseam, stitch along the fold line, catching all layers
- Backstitch at the beginning and end
- Remove pins as you sew
- Optional: Add a second parallel row 1/8 inch away for extra security
Step 5: Finish and press
- Trim any loose threads
- Turn jeans right-side out
- Press the hem with a hot iron to set the fold
- Try on jeans to verify length
- Repeat for the second leg
Common mistakes to avoid:
- Not accounting for shrinkage, wash jeans first if they’re new
- Folding unevenly, take time to pin carefully all around
- Using cotton thread, it breaks down faster than polyester
- Skipping backstitching, your hem will come undone
- Not pressing, the fold won’t stay crisp without heat
This technique is reversible, so if you make a mistake or need to adjust the length later, you can simply remove the stitches and re-fold at a different point.
FAQ
How much length can I take up with original hem method?
You can comfortably take up 1-3 inches using the original hem method. More than 3 inches creates excessive bulk inside the leg that’s visible from the outside and uncomfortable to wear.
Will the fold show through on the outside?
A properly executed original hem should not show through on lightweight to medium-weight denim. On heavyweight denim (14+ oz), you may see a slight ridge, which can be minimized by trimming the seam allowance inside the fold.
Can I use a regular sewing machine for this?
Yes, any regular sewing machine can handle original hem alterations if you use a denim needle (size 90/14 or larger) and adjust your tension appropriately. Reduce speed when sewing through thick areas like side seams.
Do I need to wash jeans before hemming?
Yes, wash new jeans before hemming to account for shrinkage, especially with raw denim that can shrink 1-2 inches in length. Pre-washing ensures your finished length will be accurate after future washes.
What if my jeans have distressing near the hem?
Distressing like holes or fraying near the hem can be preserved with the original hem method, but may create lumps when folded. Position the fold line above any major distressing if possible, or consider a regular hem if the damage is extensive.
Can I original hem stretchy jeans?
Yes, original hem works on stretch denim, but use a slight zigzag stitch (very narrow) instead of a straight stitch to allow the stitches to stretch with the fabric and prevent breaking.
How do I match the thread color exactly?
Bring your jeans to a fabric store and hold thread spools against the existing stitching in good light. When in doubt, go slightly darker, it’s less visible than thread that’s too light.
Will this work on jeans with a raw hem?
If your jeans already have an intentional raw (unfinished) hem, the original hem method doesn’t apply since there’s no factory finish to preserve. You can simply cut to length and leave the edge raw, or fold and stitch for a cleaner look.
Can I remove the stitches later if I need more length?
Yes, original hem is completely reversible. Carefully remove the stitches with a seam ripper, press out the fold line, and you’ll regain the full original length.
What’s the best stitch for thick denim?
Use a straight stitch with 2.5mm length for most denim. For very thick or heavyweight denim, increase to 3mm and reduce your machine speed for better control.
Do professional tailors use the same method?
Yes, professional tailors use this same technique, though some have specialized chain-stitch machines that can replicate factory stitching more precisely. The basic process of folding and stitching remains the same.
Can I original hem jeans with a decorative hem?
Jeans with embroidery, studs, or other decorations at the hem can be preserved with this method, but the decorations may create bulk or lumps when folded. Test the fold before stitching to ensure it lies flat enough to be comfortable.
Conclusion
Learning how to hem jeans keeping the original hem opens up a valuable skill that preserves the authentic character of your favorite denim while achieving the perfect length. This technique is especially worthwhile for premium jeans, raw denim, and vintage pieces where the factory finish is part of the garment’s value and aesthetic appeal.
The method requires only basic sewing skills, a standard machine with the right needle, and about an hour of your time per pair. By folding excess fabric up inside the leg rather than cutting it away, you maintain the distinctive chain stitching, distressing, and edge finish that make your jeans unique. The technique is also reversible, giving you flexibility if your length preferences change.
Your next steps:
- Gather your materials, denim needle, polyester thread, measuring tape, and pins
- Practice on an old pair of jeans before working on your favorites
- Take accurate measurements while wearing the shoes you’ll pair with the jeans
- Work slowly through thick areas like side seams to avoid breaking needles
- Press thoroughly after stitching to set the fold and create a professional finish
Whether you’re shortening expensive raw denim, adjusting vintage finds, or simply want to maintain the authentic look of your everyday jeans, the original hem technique delivers professional results at home. Start with one pair, master the process, and you’ll have a skill that saves money and keeps your denim collection looking its best.
For more sewing techniques and troubleshooting help, explore additional guides on working with challenging fabrics and maintaining your machine for optimal performance.