


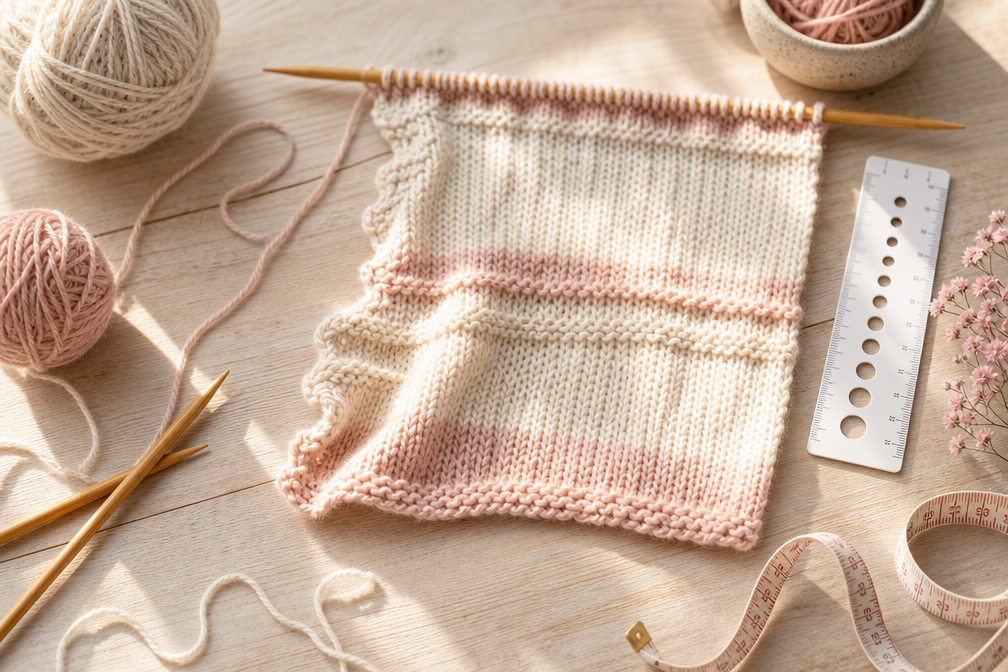
Quick Answer: Loose stitches on one side of your knitting or crochet project typically result from uneven tension, inconsistent edge stitch technique, or differences in how you hold your yarn and needles when working at the beginning versus the end of each row. The most common culprit is pulling the working yarn too loosely when turning your work or starting a new row, which creates slack that shows up as loose edge stitches on one side.
Key Takeaways
- Uneven tension is the primary cause of loose stitches on one side, often stemming from how you hold yarn when turning your work
- Edge stitches (selvedge) naturally tend to be looser than center stitches and require deliberate tension control
- Beginner knitters commonly experience this issue as muscle memory develops, it’s a normal part of learning
- Fixing loose edges doesn’t always require frogging; blocking, seaming, or adding borders can disguise minor issues
- Consistent yarn tension comes from practice, proper hand positioning, and sometimes using tension tools like rings or guides
- Needle size matters,using needles too large for your yarn weight can exacerbate tension problems
- Selvedge stitches are specialized edge techniques that create neater, more uniform edges on both sides
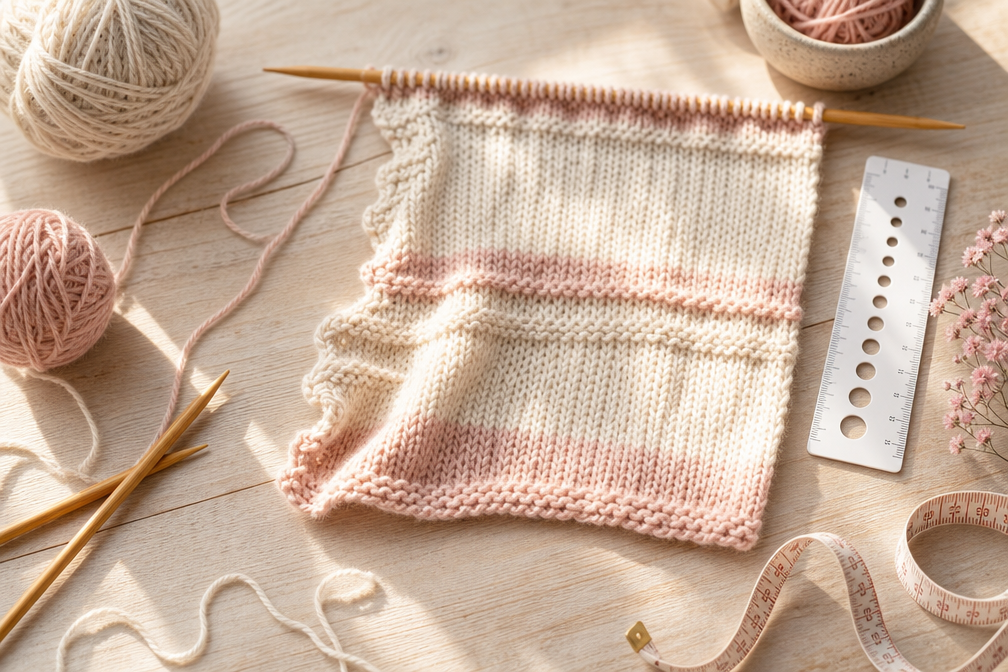
What Causes Uneven Tension in Knitting or Crochet?
Uneven tension happens when you apply inconsistent pressure to your working yarn as you form stitches, creating some stitches that are tighter and others that are looser. This inconsistency often shows up most noticeably at the edges of your work because edge stitches have less structural support from neighboring stitches.
Several factors contribute to uneven tension:
- Hand dominance and positioning: Right-handed knitters often pull tighter on the right side, while left-handed knitters do the opposite
- Turning mechanics: The physical act of flipping your work can cause you to loosen your grip on the yarn momentarily
- Fatigue: As you tire during a long knitting session, your hands may relax and create looser stitches
- Yarn characteristics: Slippery yarns like silk or bamboo are harder to control than sticky fibers like wool
- Needle material: Metal needles allow stitches to slide more freely than wood or bamboo, which can affect tension
- Distraction level: Watching TV or talking while knitting often leads to inconsistent tension
The key insight is that most knitters naturally apply different tension when working from right to left versus left to right. This directional difference is why one side of your project looks perfect while the other side has loose, sloppy stitches.
Common mistake: Many knitters try to fix tension issues by switching needle sizes mid-project, which actually creates more visible inconsistencies. The solution is adjusting your hand position and yarn control, not your tools.
Why Are My Stitches Tight on Right Side But Loose on Left Side?
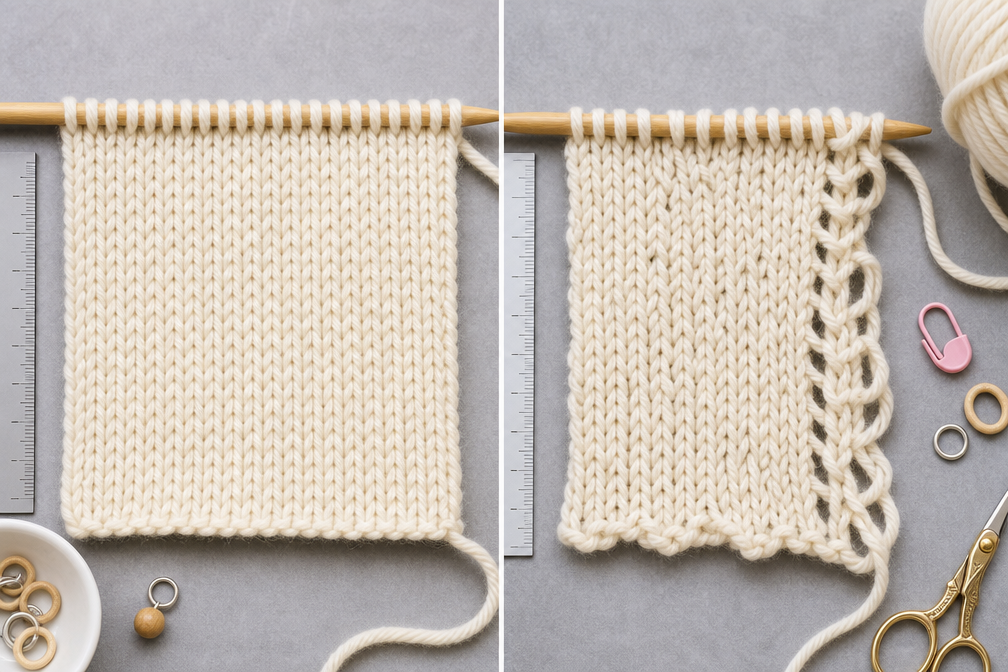
This specific pattern, tight stitches on the right edge and loose stitches on the left edge, is extremely common among right-handed knitters and reveals exactly where your tension control breaks down. When you finish a row and turn your work, you’re essentially switching which hand does the primary tension work.
For right-handed knitters working in stockinette or garter stitch, the right edge is where you finish each row, and the left edge is where you begin each row. Most knitters maintain good tension as they work across a row but lose control during the turn and first few stitches of the new row.
What’s happening mechanically:
- At the right edge, you’ve just completed a full row with consistent rhythm and tension
- You turn the work and transfer it to your other hand
- Your left hand (holding the working yarn) hasn’t yet established the proper tension for the new row
- The first stitch of the new row gets pulled too loosely because your yarn isn’t properly tensioned yet
- By the time you reach the middle of the row, your hands have found their rhythm again
Decision rule: If your loose edge is always on the same side regardless of whether you’re working a knit or purl row, the problem is your turning technique. If the loose edge switches sides depending on the stitch type, you have different tension for knit versus purl stitches.
Quick fix: Before working the first stitch of each new row, give your working yarn a gentle tug to take up any slack, then consciously pull that first stitch snugly onto your right needle. This deliberate action compensates for the natural loosening that happens during the turn.
How to Fix Loose Stitches on One Edge of Knitting
Fixing loose edge stitches requires a combination of technique adjustment and sometimes strategic design choices. The good news is that you have multiple options depending on how severe the problem is and how far along you are in your project.
Quantity: Comes in 15 pcs Small Point Protectors and 15 pcs Large Point Protectors;Totally 30 PCS needles point protectors; Color: Contains 4 colors of orange, green,light red, blue;choose as you like.

This Practical Sewing Tool Includes: 12 large-eye blunt needles in 3 sizes (7cm/2.76in, 6cm/2.36in,5.3cm/2.08in), gold or silver darning needles for yarn, all made of steel, sturdy and durable. 1pcs needle threader to help you easily pass the thread through the needle eye. 1pcs storage bottle: for safe storage of needles. A variety of sewing needle sizes to meet your various needs for daily sewing and handicrafts.
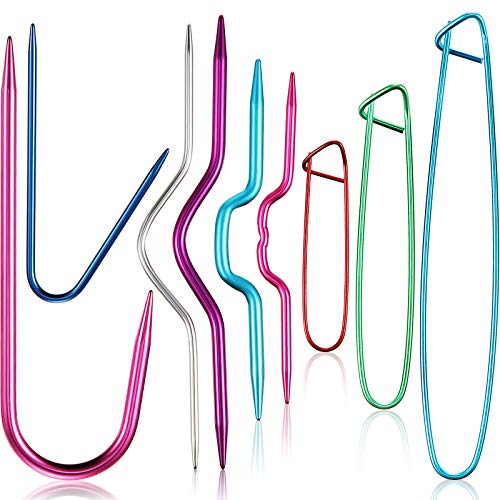
9 Pieces mixed color aluminum cable needles: the crochet tool set includes cable knitting needles, crooked needles and stitch holders, different type of knitting tools, very convenient to use, particularly suitable for beginners
Immediate Technique Fixes
Tighten your first stitch: After turning your work, pull the working yarn firmly before inserting your needle into the first stitch. This takes up the slack that accumulated during the turn.
Slip the first stitch: Instead of knitting or purling the first stitch of every row, slip it purlwise with yarn in back (for knit rows) or yarn in front (for purl rows). This creates a chain-like edge that’s naturally tighter and more uniform.
Work edge stitches through the back loop: This twists the stitch slightly and tightens it, though it creates a different texture than your main fabric.
Use a smaller needle for edge stitches only: Keep your regular needle in your right hand but use a needle one or two sizes smaller to work just the first and last stitch of each row.
After-the-Fact Solutions
If you’ve already knitted several inches or completed your project:
- Blocking: Aggressive wet blocking can even out minor tension differences by redistributing the yarn within each stitch
- Add a border: Knit or crochet a border around your project that covers the loose edges entirely
- Seaming: If the loose edge will be sewn into a seam, the seam allowance will hide the problem completely
- Duplicate stitch: For small sections, you can weave yarn through loose stitches to tighten them visually
Edge case: If your loose stitches extend more than two stitches in from the edge, or if the tension difference is so severe that stitches are visibly different sizes, blocking won’t fix it. You’ll need to decide whether to frog (rip out) that section or embrace it as a design element.
Is It Normal for Beginner Knitters to Have Loose Edges?
Yes, absolutely, loose edges are one of the most common beginner knitting issues, right alongside accidentally adding or dropping stitches. Nearly every knitter goes through a phase where their edges look messy while their center stitches are perfect.
This happens because edge stitches require deliberate attention that beginners haven’t yet trained into muscle memory. When you’re focused on remembering whether to knit or purl, how to hold your needles, and where your working yarn should be, it’s easy to overlook the subtle tension adjustment needed at the edges.
Typical progression for beginners:
- Weeks 1-2: All stitches are inconsistent; you can’t yet tell edges are worse than the middle
- Weeks 3-6: Center stitches become more even, making loose edges suddenly obvious
- Weeks 7-12: You start consciously tightening edges but forget frequently
- Months 4-6: Edge control becomes automatic for simple projects
- Months 6-12: You can maintain even edges even while watching TV or talking
Encouragement: If you’re a beginner struggling with loose edges, you’re right on track. This is a sign that your core knitting technique is improving and your eye is developing. The edges will catch up with practice.
When to worry: If you’ve been knitting consistently for more than a year and still have severe edge problems, it’s worth having an experienced knitter watch you work. You may have developed a habit that needs conscious correction, such as wrapping your yarn the wrong direction or holding your needles in a way that makes tension control difficult.

How to Maintain Even Tension While Knitting
Consistent tension is the holy grail of knitting, it’s what separates projects that look handmade-charming from those that look professionally finished. Achieving even tension requires attention to how you hold your yarn, how you move your hands, and how you position your body.
Hand Position and Yarn Control
For English (throwing) knitters:
- Wrap the working yarn around your right pinky finger, then over your index finger
- Keep your index finger close to your work so the yarn travels a short, consistent distance
- Use your middle finger to help control yarn release
For Continental (picking) knitters:
- Tension the yarn around your left pinky and over your index finger
- Keep your left index finger raised and close to the needle tips
- Use small, controlled movements to feed yarn onto the needle
For Portuguese knitters:
- Pin the yarn behind your neck or use a tension pin on your shoulder
- The yarn feeds from above, creating natural, consistent tension
- This method is particularly good for people with hand pain or arthritis
Physical Setup
Your body position affects tension more than most knitters realize:
- Sit with support: Use a chair with armrests so your elbows have stable support
- Keep needles close: Work with your needle tips 6-8 inches from your body, not extended far out
- Maintain consistent posture: Slouching or leaning changes the angle of your hands and affects tension
- Take breaks: Fatigue leads to loose stitches; rest every 30-45 minutes
Practice Techniques
Swatch with awareness: Knit practice swatches where you focus entirely on tension, not on following a pattern. This builds muscle memory without the distraction of counting or shaping.
Count your wraps: Make sure you’re wrapping the yarn around the needle the same number of times for every stitch (usually once). Extra wraps create loose stitches.
Check your gauge frequently: Every few rows, hold up your work and look at it from arm’s length. Catch tension changes early before they become ingrained.
Decision rule: Choose Continental knitting if you tend to knit too loosely, as it naturally creates tighter tension. Choose English knitting if you tend to knit too tightly, as the throwing motion encourages slightly looser stitches.
Do I Need to Frog My Project If One Side Is Loose?
Frogging (ripping out your knitting) is not always necessary for loose edges, and the decision depends on the project type, the severity of the problem, and what you plan to do with the finished item.
You probably don’t need to frog if:
- The loose edge will be hidden in a seam (sweater side seams, pillow backs)
- You’re planning to add a border that will cover the edges (blankets, scarves with edging)
- The looseness is minor and will even out with blocking
- The project is for personal use and the imperfection doesn’t bother you
- You’re a beginner and this is a learning project
You should consider frogging if:
- The loose stitches are visible in the finished design (scarf edges, blanket borders)
- The tension difference is so severe that the fabric width varies noticeably
- Loose stitches extend several stitches in from the edge, affecting the main fabric
- You’re making a gift or selling the item and want professional results
- The loose section is recent (only a few rows back) and easy to redo
Alternative to full frogging: If the loose section is in the middle of your project, you can “ladder down” just the affected stitches. Drop the loose stitches intentionally, let them ladder down to where the problem started, then use a crochet hook to re-knit them with proper tension. This technique requires confidence but saves you from redoing entire rows.
Common mistake: Frogging in frustration without identifying what caused the problem. Before you rip out your work, figure out exactly what you were doing differently during those loose rows. Otherwise, you’ll just recreate the same problem.
What’s the Difference Between Loose Selvedge Stitches and Tension Problems?
Selvedge stitches are the edge stitches on both sides of your knitting, and they naturally behave differently from the stitches in the middle of your fabric. Understanding whether you have a selvedge issue or a general tension problem helps you choose the right fix.
Selvedge characteristics:
- Edge stitches have yarn pulling from only one direction (toward the center), while middle stitches have yarn pulling from both sides
- This structural difference makes edges naturally looser and more prone to distortion
- Even experienced knitters with perfect tension often use special selvedge techniques
True tension problems:
- Inconsistent stitch size throughout the fabric, not just at edges
- Stitches that vary in size from row to row or within a single row
- Visible “laddering” between needles in circular knitting
- Gauge that doesn’t match the pattern despite using the correct needle size
How to tell which you have:
Lay your knitting flat and examine it closely. If only the first and last stitch of each row look loose but the rest of the fabric is even, you have a selvedge issue. If you see size variations throughout the fabric, or if some rows are noticeably tighter or looser than others, you have a general tension problem.
Decision rule: Fix selvedge issues with edge-specific techniques (slip stitches, chain edges, garter borders). Fix general tension problems by adjusting how you hold your yarn and needles throughout every row.
When to Add a Selvedge Stitch to Fix Loose Edges
A selvedge stitch is a dedicated edge stitch that you work differently from the rest of your pattern specifically to create a neat, stable edge. Adding selvedge stitches is a design decision that changes your stitch count, so it’s best done at the start of a project, but it can also rescue a project with problematic edges.
Add selvedge stitches when:
- You’re knitting a piece that will have exposed edges (scarves, blankets, shawls)
- Your pattern doesn’t include seam allowances and edges will be visible
- You plan to pick up stitches along the edge later (for button bands or borders)
- You’re working with slippery yarn that creates loose edges despite good tension
- You want a professional, polished look on a gift or sale item
Don’t bother with selvedge stitches when:
- Edges will be hidden in seams (sweater pieces, bag linings)
- You’re adding a separate border that will cover the edges completely
- You’re a beginner still learning basic tension (master the basics first)
- Your pattern already includes edge stitches in the stitch count
Common Selvedge Techniques
Chain edge (slip stitch edge):
- Slip the first stitch of every row purlwise with yarn in front
- Knit the last stitch of every row
- Creates a neat chain along the edge, perfect for seaming
Garter edge:
- Knit the first and last stitch of every row, regardless of the main pattern
- Creates a stable, non-curling edge
- Works well for stockinette fabric that tends to curl
Double stitch edge:
- Work the first and last two stitches in garter stitch (knit every row)
- Provides extra stability for heavy fabrics or large projects
- Prevents curling more effectively than a single-stitch edge
How to add selvedge stitches mid-project: Cast on one additional stitch at each edge using the backward loop method, then work these new stitches in your chosen selvedge pattern. This increases your total stitch count by two but can save a project with severely loose edges.
Can Using the Wrong Needle Size Cause Uneven Stitches?
Yes, needle size has a significant impact on stitch evenness, though it’s usually not the sole cause of one-sided looseness. Using needles that are too large for your yarn weight makes tension problems worse because stitches have more room to vary in size.
How needle size affects tension:
- Too large: Stitches slide around easily, making it hard to maintain consistent tension; loose stitches become even looser
- Too small: Forces stitches to be tight, which can mask minor tension inconsistencies but makes knitting slow and uncomfortable
- Just right: Stitches move smoothly but stay in place, allowing your natural tension to show clearly
The gauge swatch test: Knit a 4×4 inch swatch in your pattern stitch. If your stitch count matches the pattern but your row count is off, needle size isn’t your problem, tension is. If both stitch and row counts are off proportionally, try a different needle size.
Needle material matters too:
- Metal needles: Slippery; stitches slide easily, which can exacerbate loose edges
- Wood or bamboo: Grippy; stitches stay in place better, helping maintain tension
- Plastic: Medium grip; good for beginners learning tension control
Decision rule: If you’re between needle sizes (your gauge is close but not exact), size down if you tend to knit loosely, especially at edges. Size up if you knit tightly and your fabric feels stiff.
Edge case: If you’re using circular needles for flat knitting, the cable can create tension issues at the turn. The stitches bunch up on the cable, then spread out when you start the new row, creating loose first stitches. Try using shorter circular needles or switching to straight needles for flat projects.

12-Needle sizes (3, 4, 5, 6, 7, 8, 9, 10, 10.5, 11, 13, 15) 5-cord sizes (16, 24, 29, 36 and 48-inch ) 60 combinations

SMOOTH & MARKED SIZE: Our knitting needles are made of bamboo which has been bleached and carbonized for a smooth finish to avoid any rough edges and not easy to break. Sizes are marked on the top side of each needle for ease of reference

Complete Knitting Needles Set: This knitting needles set includes 9 pairs (18 needles) of bamboo knitting needles in sizes 2mm, 3mm, 4mm, 5mm, 6mm, 7mm, 8mm, 9mm, and 10mm. You also receive 6 stitch holders. All needles are 9.8 inches (25 cm) long, providing a wide range for your knitting projects
How Tight Should My Yarn Tension Be When Knitting?
Proper yarn tension is firm enough that stitches don’t slide around loosely on the needle but relaxed enough that you can move stitches smoothly without forcing them. There’s no universal “correct” tension, it varies based on your yarn, needles, and the fabric you want to create.
Signs your tension is too loose:
- Stitches slide around on the needles when you tilt your work
- You can see through your fabric when you hold it up to light (unless it’s meant to be lacy)
- Your gauge swatch is larger than the pattern specifies
- Stitches look uneven and sloppy even in the middle of rows
Signs your tension is too tight:
- Your hands hurt after 15-20 minutes of knitting
- It’s difficult to insert your needle into stitches
- Your fabric feels stiff and doesn’t drape naturally
- Your gauge swatch is smaller than the pattern specifies
The “just right” test:
Hold your knitting with the needles horizontal. Gently shake it. The stitches should stay in place but not look strangled. Pick up your work and let it hang from the needles, it should drape softly, not stick out stiffly.
Adjusting your tension:
- To loosen: Hold your yarn with fewer fingers, or wrap it around your pinky only (not around multiple fingers)
- To tighten: Add an extra wrap around your pinky, or weave the yarn through more fingers
- For consistency: Keep your tensioning hand in the same position relative to your work; don’t let it drift farther away or closer as you knit
Project-specific tension:
- Lace: Requires looser tension so the yarn-overs and decreases can open up during blocking
- Cables: Benefits from slightly tighter tension so the cable twists stand out crisply
- Colorwork: Needs relaxed tension so the fabric doesn’t pucker where colors change
- Ribbing: Works best with firm tension so the ribs stay defined and elastic
Common Mistakes That Cause Loose Stitches on Edges
Even experienced knitters can develop habits that create loose edges. Identifying these common mistakes helps you troubleshoot your specific issue.
Mistake #1: Not tensioning the yarn before the first stitch
After turning your work, the yarn hangs loose between the needles. If you don’t take up this slack before working the first stitch, it becomes part of that stitch, making it loose.
Fix: Give the working yarn a firm tug toward you before inserting your needle into the first stitch.
Mistake #2: Pulling the working yarn in the wrong direction
When you complete the last stitch of a row, pulling the yarn away from your work (instead of toward it) creates slack that shows up as a loose first stitch on the next row.
Fix: After completing the last stitch, pull the working yarn gently toward the center of your work before turning.
Mistake #3: Holding needles too far apart during the turn
Spreading your needles wide as you turn your work stretches the yarn and creates loose stitches.
Fix: Keep your needle tips close together (almost touching) as you turn your work.
Mistake #4: Inconsistent edge stitch technique
Working edge stitches differently from row to row, sometimes slipping, sometimes knitting, sometimes pulling tight, sometimes not, creates uneven edges.
Fix: Choose one edge technique and use it consistently on every single row.
Mistake #5: Changing hand position mid-row
Starting a row with your hands close to your work, then gradually letting them drift farther away, changes your tension progressively across the row.
Fix: Check your hand position every few stitches and consciously maintain the same distance from your work.
Mistake #6: Using the wrong cast-on for your project
Some cast-on methods (like the backward loop) create loose, stretchy edges that never match the tension of your knitted fabric.
Fix: Use a cast-on that matches your project, long-tail for most projects, cable cast-on for firm edges, or provisional cast-on if you’ll add a border later.
Mistake #7: Ignoring the problem and hoping it will fix itself
Loose edges don’t magically improve without intervention. If you notice the problem and keep knitting the same way, you’ll have loose edges throughout your entire project.
Fix: Stop as soon as you notice loose edges, identify what you’re doing differently at the edges versus the middle, and consciously correct it going forward.
Best Way to Fix Already Knitted Rows with Loose Edges
If you’ve already knitted several inches or even completed a project with loose edges, you have several options that don’t require frogging everything.
Blocking (First Line of Defense)
Wet blocking can work miracles on minor to moderate edge looseness:
- Soak your finished piece in cool water with wool wash for 15-20 minutes
- Squeeze out excess water (don’t wring) and roll in a towel to remove more moisture
- Pin your piece to blocking mats, gently stretching the loose edges to match the width of the tighter sections
- Use lots of pins along the loose edge, placing them every half-inch to distribute the stretch evenly
- Let dry completely (24-48 hours) before unpinning
What blocking can fix: Minor tension variations, slightly loose edges that are still the same stitch size as the rest of the fabric, edges that look messy but aren’t structurally different.
What blocking can’t fix: Stitches that are visibly larger than surrounding stitches, edges that are 1-2 stitches wider than the rest of the fabric, or severe looseness where you can see through the edge stitches.
Adding a Border or Edging
A knitted or crocheted border can completely hide problematic edges:
- Garter stitch border: Pick up stitches along the loose edge and knit 5-10 rows in garter stitch
- Ribbed border: Pick up stitches and work in K1, P1 or K2, P2 ribbing for a stretchy, professional edge
- Crochet border: Single crochet around the entire edge creates a neat, firm finish
- I-cord edging: Creates a rounded, decorative edge that disguises looseness
Pro tip: When picking up stitches along a loose edge, skip the loosest stitches entirely and pick up from the second stitch in. This automatically tightens the edge.
Duplicate Stitch Reinforcement
For small sections of loose stitches, you can weave yarn through them to tighten them visually:
- Thread a tapestry needle with yarn that matches your project
- Follow the path of each loose stitch with your needle, essentially tracing over it
- Pull gently to snug up the stitch without distorting the fabric
- Weave in ends securely on the wrong side
This technique works best for 3-5 loose stitches, not for entire edges.
Seaming Solutions
If your loose edge will be sewn into a seam:
- Use a mattress stitch seam, which hides the edge stitches entirely inside the seam
- Take your seam one full stitch in from the edge instead of the usual half-stitch, eliminating the loose stitches from the visible fabric
- Steam the seam after sewing to flatten it and further disguise any looseness
When to Accept It
Sometimes the best fix is embracing the handmade quality of your work. If the loose edges don’t affect the function of the item and you’re the only one who notices them, consider it a reminder that a human made this with their own hands, which is actually a selling point for handmade items.
Tension Ring vs Regular Knitting: Which Is Better for Even Stitches?
Tension rings (also called knitting thimbles or yarn guides) are small tools that you wear on your finger to control yarn tension mechanically rather than relying solely on how you wrap yarn around your fingers. Whether they help with even stitches depends on what’s causing your tension problems.
What tension rings do:
- Hold the working yarn at a consistent height and angle relative to your needles
- Reduce hand fatigue by eliminating the need to grip yarn tightly with your fingers
- Create uniform tension automatically as you pull yarn through the ring
- Free up your fingers to focus on needle manipulation rather than yarn control
When tension rings help:
- You have arthritis or hand pain that makes it hard to maintain consistent finger tension
- You’re a beginner still developing muscle memory for yarn control
- You knit for long sessions and your hands fatigue, leading to looser stitches over time
- You switch between different yarn weights frequently and struggle to adjust tension
When tension rings don’t help:
- Your loose edges come from how you turn your work, not from general tension issues
- You already have good tension in the middle of rows but lose control at edges
- You knit in an unconventional style that doesn’t work well with ring placement
- You prefer the tactile feedback of feeling yarn slide through your fingers
Types of tension tools:
| Tool | How It Works | Best For |
|---|---|---|
| Tension ring | Worn on index finger; yarn threads through a guide | Continental knitters, consistent tension |
| Portuguese pin | Pins to shirt; yarn feeds from above | People with hand pain, even tension |
| Yarn bowl | Yarn sits in bowl with a spiral guide | Preventing yarn tangles, not tension |
| Knitting thimble | Worn on finger with multiple yarn guides | Colorwork, managing multiple yarns |
Decision rule: Try a tension ring if you have general tension inconsistency throughout your fabric. If your only problem is loose edges, focus on edge-specific techniques instead, a tension ring won’t fix turning mechanics.
Cost consideration: Tension rings cost $5-15, making them a low-risk experiment. Buy one and try it for a few practice swatches before committing to using it on a project.

Practical Tools: you will receive 4 pieces yarn guide ring for crocheting in our package; Plastic crochet tension ring for knitting are in green, blue, yellow, pink colors, and 1 piece in each color, meet your need of crochet knitting yarn

Reliable Material: Our yarn guide finger holder is made of high-quality plastic, which is durable and has a smooth appearance. It is safe and will not hurt your fingers, not easy to fade, wear-resistant and light weight. The bottom features an open design, with a diameter of 1.6 cm (0.63 inches) in the normal position, great elasticity, and is suitable for most finger sizes, making it easy to use.

Great Crochet RingsTension Ring: Note: The storage box comes in two random shapes: square and round. We provide you with 11 different styles of crochet rings, enough to meet your daily needs and diversified crochet, yarn ring set include 11 styles knitting ring, 10 pcs stitch markers, 2 pcs needle threader, 6 pcs sewing needles (3 size), exquisite storage box
Frequently Asked Questions
Why is only my left edge loose but my right edge is fine?
This happens because you’re losing tension control at the beginning of each row (the left edge for right-handed knitters) but maintaining good tension by the time you reach the end of the row. Tighten your working yarn before working the first stitch of each row, and consider slipping the first stitch instead of knitting it.
Can I fix loose edges without starting over?
Yes, in most cases. Try aggressive blocking first, then consider adding a border or edging that covers the loose edges. If the loose edge will be hidden in a seam, you don’t need to fix it at all.
Do professional knitters ever have loose edges?
Even experienced knitters deal with edge issues, which is why most professional patterns include specific edge stitch instructions (slip first stitch, knit first and last stitch, etc.). The difference is that professionals use deliberate techniques to prevent loose edges rather than relying on tension alone.
How long does it take to develop consistent tension?
Most knitters develop reasonably consistent tension within 3-6 months of regular practice (knitting at least a few times per week). Edge control specifically often takes 6-12 months to become automatic.
Should I use a different needle size for edge stitches?
You can, but it’s usually not necessary if you use proper edge techniques. If you do choose this approach, use a needle 1-2 sizes smaller for just the first and last stitch of each row.
Will blocking permanently fix loose edges?
Blocking redistributes yarn within stitches and can make edges look more even, but it’s not permanent. The edges may relax again after washing. For permanent improvement, you need to correct your technique or add a structural border.
Is it normal for edges to be looser in stockinette than garter stitch?
Yes, stockinette naturally has looser edges because the fabric curls, which pulls on edge stitches. Garter stitch lies flat and provides more structural support to edges. This is why many patterns include garter stitch borders on stockinette fabric.
Can I ladder down just the edge stitches to fix them?
Yes, but it’s tricky. You can drop the edge stitch, let it ladder down several rows, then use a crochet hook to re-knit it with proper tension. This works best if you’re comfortable with fixing dropped stitches and have good tension control.
Do circular needles cause looser edges than straight needles?
Circular needles can create loose first stitches when knitting flat because stitches bunch up on the cable, then spread out when you start a new row. Using shorter circulars or switching to straight needles for flat projects can help.
Should I knit tighter overall to fix loose edges?
No, knitting tighter everywhere will make your fabric stiff and uncomfortable to work with, and it won’t specifically fix edge issues. Instead, focus on tightening just the first stitch of each row while maintaining your normal tension for the rest of the row.
What’s the fastest way to improve edge tension?
Practice knitting swatches where you focus entirely on edges: slip the first stitch of every row, pull the yarn snug before working it, and check your edges every few rows. Deliberate practice with immediate feedback builds muscle memory faster than just knitting projects and hoping for improvement.
Can yarn type affect edge looseness?
Absolutely. Slippery yarns (silk, bamboo, mercerized cotton) are harder to control and more prone to loose edges. Sticky yarns (wool, alpaca) naturally grip needles better and create more even edges. If you’re struggling with edges, practice with wool before moving to slippery fibers.
Conclusion
Loose stitches on one side of your knitting project are frustrating but completely fixable. The issue almost always comes down to tension control during the turn and at the beginning of each row, not a fundamental flaw in your knitting ability. By understanding what causes uneven edges, inconsistent yarn tension, turning mechanics, hand positioning, and edge stitch technique, you can target your practice and see improvement quickly.
Your action plan:
- Diagnose your specific issue: Determine whether you have general tension problems or edge-specific looseness by examining your fabric closely
- Choose an edge technique: Start slipping the first stitch of every row or working edge stitches in garter stitch for immediate improvement
- Practice deliberately: Knit swatches focusing only on edge control until the technique becomes automatic
- Adjust your tools if needed: Consider trying different needle materials or a tension ring if hand fatigue contributes to your problem
- Fix existing projects strategically: Use blocking, borders, or seaming to disguise loose edges without frogging your work
Remember that even professional knitters use specific edge techniques because edges naturally behave differently from the rest of the fabric. You’re not fighting against your own incompetence, you’re learning to work with the structural reality of knitted fabric. With consistent practice and the right techniques, your edges will soon be as neat and even as the rest of your beautiful knitting.


