Quick Answer
Pattern sizes are based on standardized body measurements (bust, waist, hip, and back waist length) established by pattern companies, not the vanity-sized numbers found in retail clothing. A person who wears a size 8 dress in stores might need a size 14 or 16 in sewing patterns because pattern sizing reflects actual body dimensions without the marketing adjustments that ready-to-wear brands use. Understanding what do pattern sizes mean (they’re not store sizes) is essential before cutting into your fabric, because choosing the wrong size based on your mall shopping habits will result in garments that don’t fit.
Key Takeaways
- Pattern sizes use body measurements, not vanity sizing, they’re typically 2-4 sizes larger than your store-bought clothing size
- Measure yourself accurately, you need bust, waist, hip, and back waist length measurements to find your correct pattern size
- Different companies use different standards, Big 4 pattern companies (Simplicity, McCall’s, Butterick, Vogue) share similar sizing, but indie designers often use their own charts
- Choose size by the largest measurement, then grade between sizes or adjust the pattern to fit your unique proportions
- Vintage patterns run even smaller, a 1950s size 12 equals roughly a modern size 4-6
- Cutting the wrong size wastes fabric and time, always check the finished garment measurements on the pattern envelope
- Being “between sizes” is normal, most sewists need to blend sizes or make adjustments for a custom fit
- Pattern sizing hasn’t changed much since the 1960s, but ready-to-wear sizes have inflated dramatically due to vanity sizing
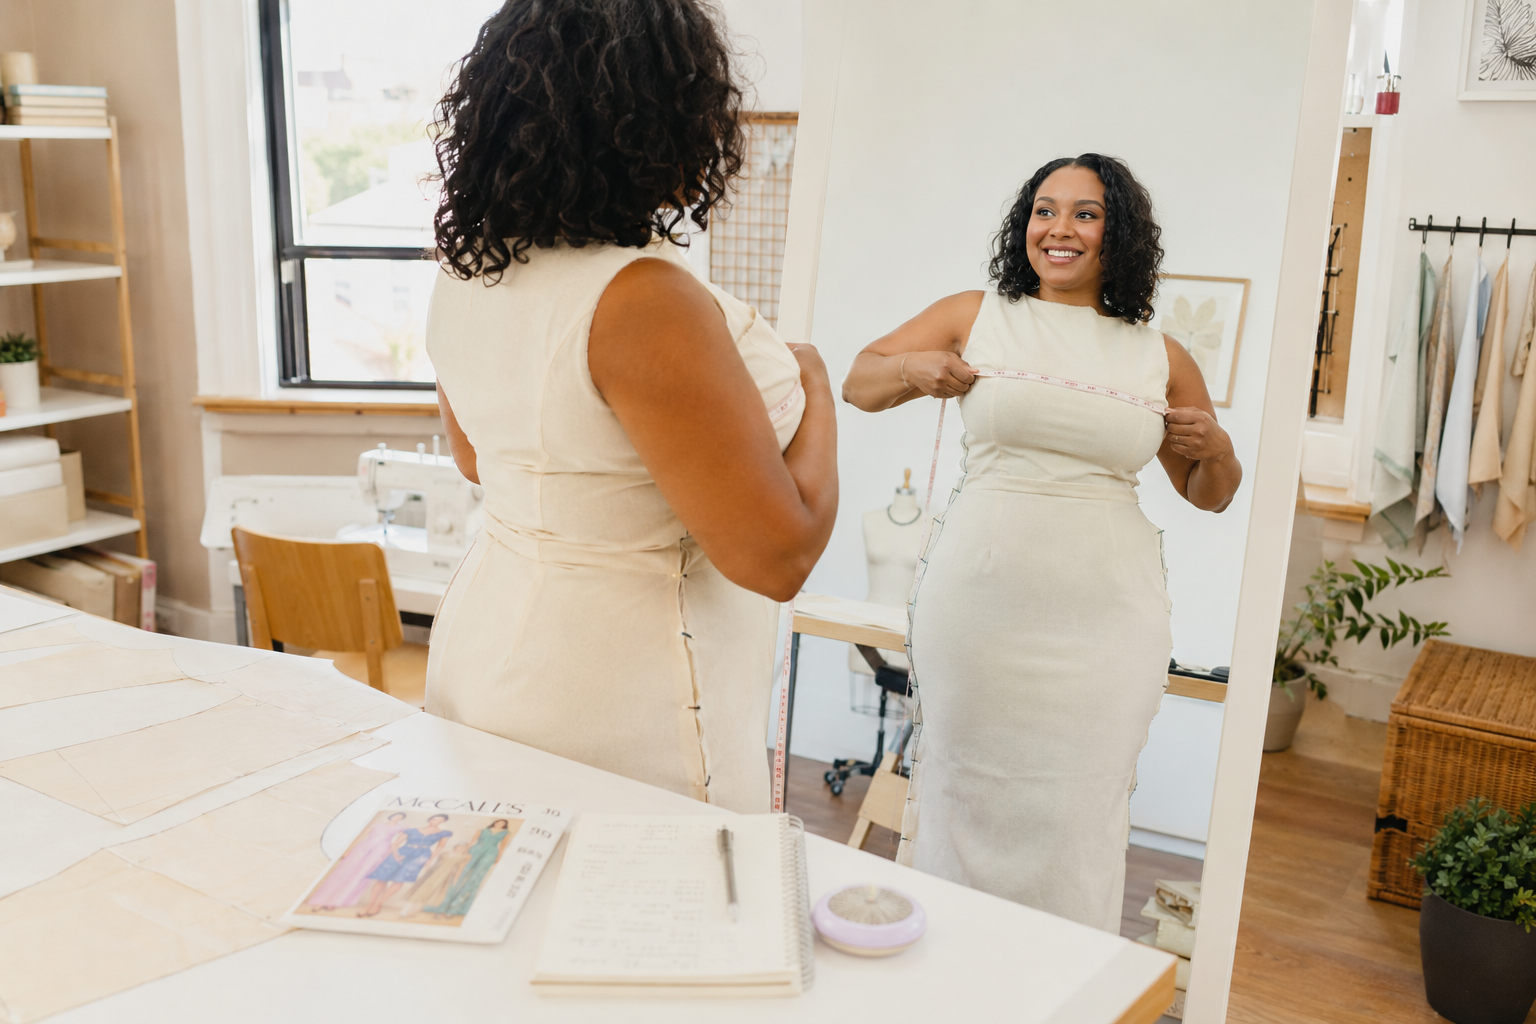
What Are Pattern Sizes in Sewing?
Pattern sizes in sewing are standardized measurements that correspond to specific body dimensions, not the arbitrary numbers printed on clothing tags in stores. Each pattern size represents a set of measurements for bust, waist, hip, and back waist length that the pattern company used to draft the garment. For example, a Simplicity size 14 typically fits a 36-inch bust, 28-inch waist, and 38-inch hip, regardless of what size 14 means at Target or Nordstrom.
Pattern companies use these measurement standards because they need consistency across all their designs. When you sew a size 14 dress and a size 14 jacket from the same company, both should fit the same body. This system has remained relatively stable since the 1960s, while retail sizing has shifted dramatically toward vanity sizing (labeling larger garments with smaller numbers to make customers feel good about their purchases).
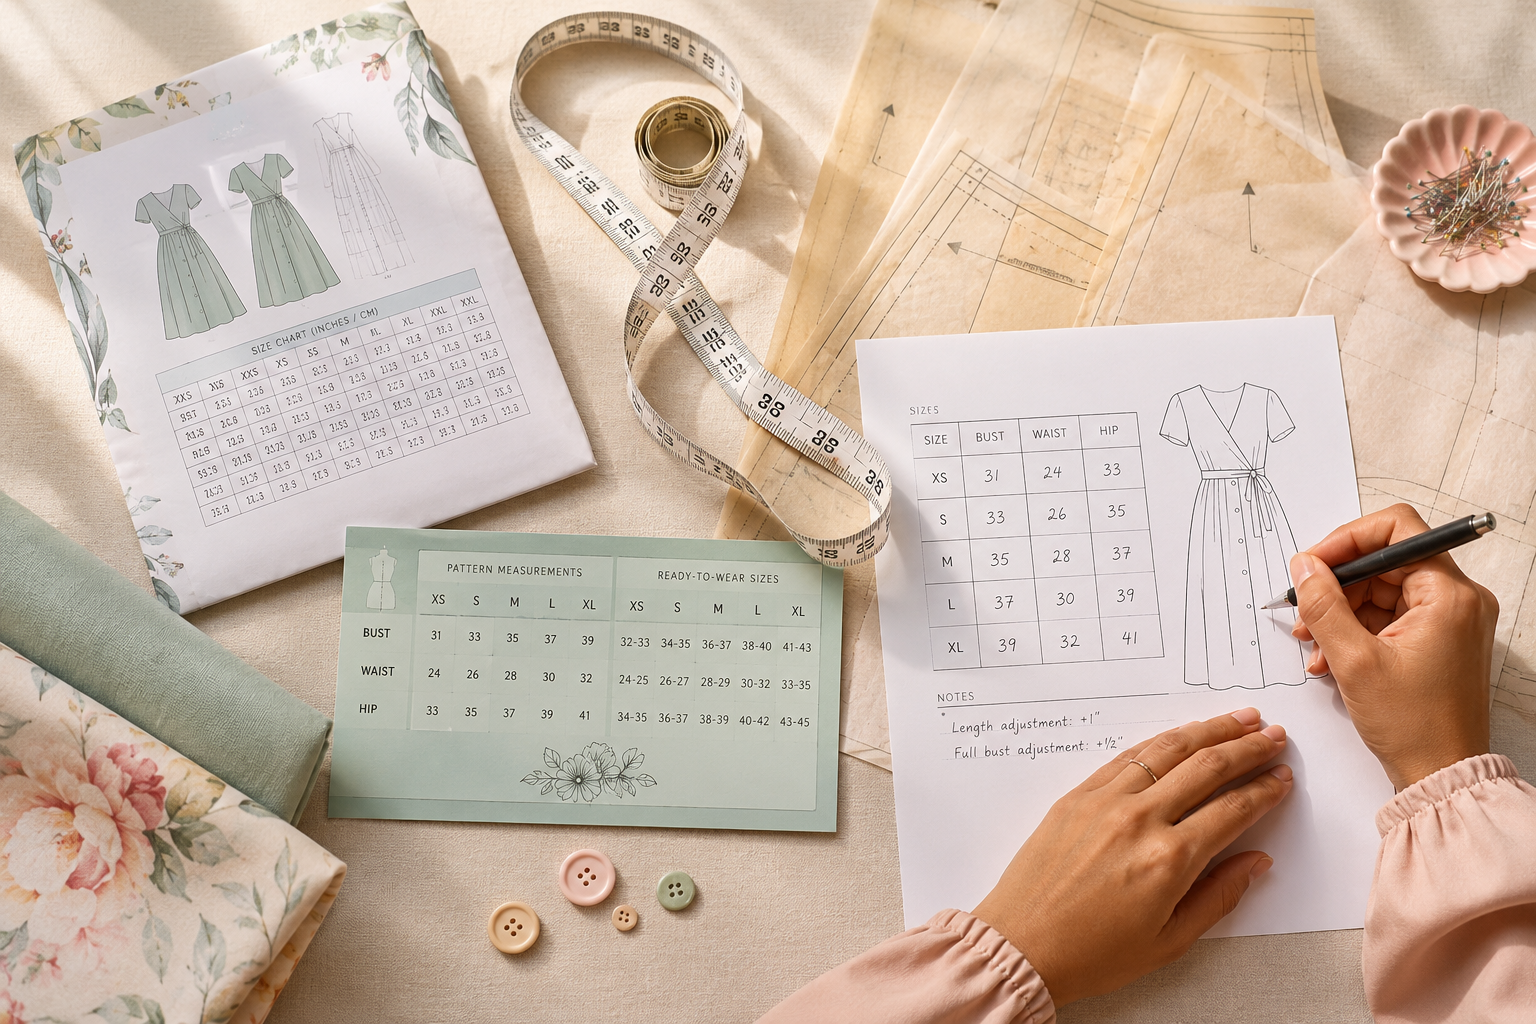
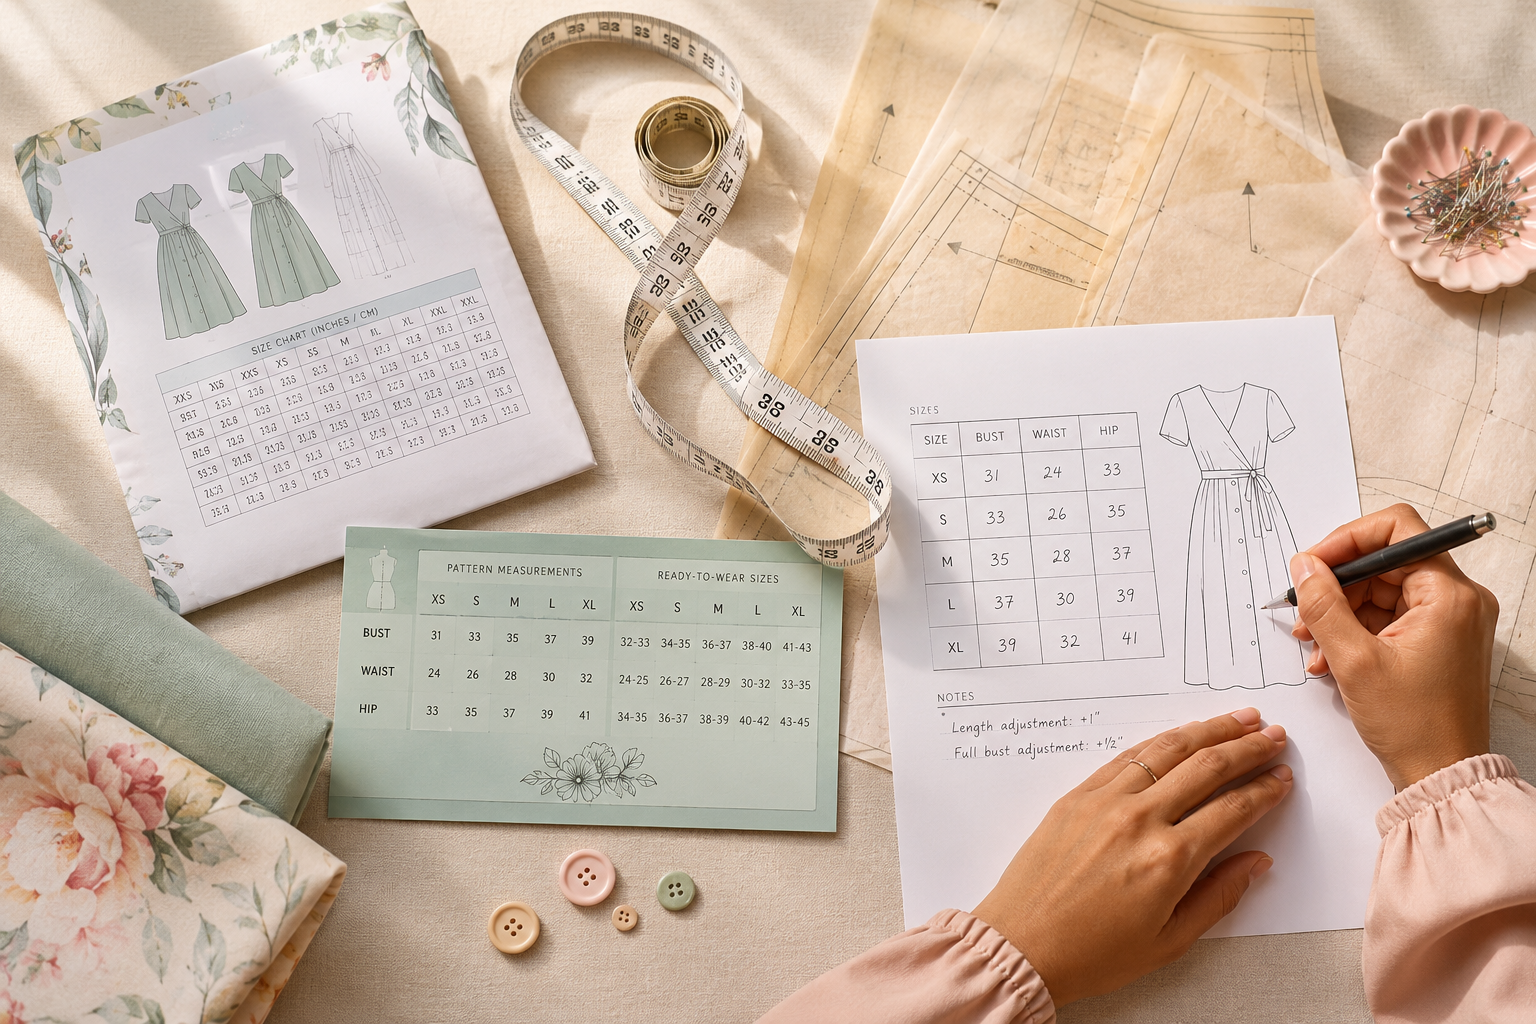
The pattern envelope always includes a measurement chart on the back. This chart shows the body measurements for each size, not the finished garment measurements. The finished garment will be larger than these numbers because it includes ease (extra room for movement and comfort).
Common mistake: Beginners often buy patterns in their “usual size” without measuring, then wonder why the finished garment is too large. Always measure first and compare to the chart.

PATTERN S1563 SIZING: Simplicity pattern includes women's, men's, and teens' sizes XS-XL so you can sew your ideal fit. Pattern sizing runs differently from ready-to-wear clothing, so measure and check the body size chart before cutting.

Removable and repositionable; won’t damage paper pattern

PATTERN N6762 SIZING: New Look pattern includes women's sizes XS-XL so you can sew your ideal fit. Pattern sizing runs differently from ready-to-wear clothing, so measure and check the body size chart before cutting.
How Do Pattern Sizes Differ from Ready-to-Wear Clothing Sizes?
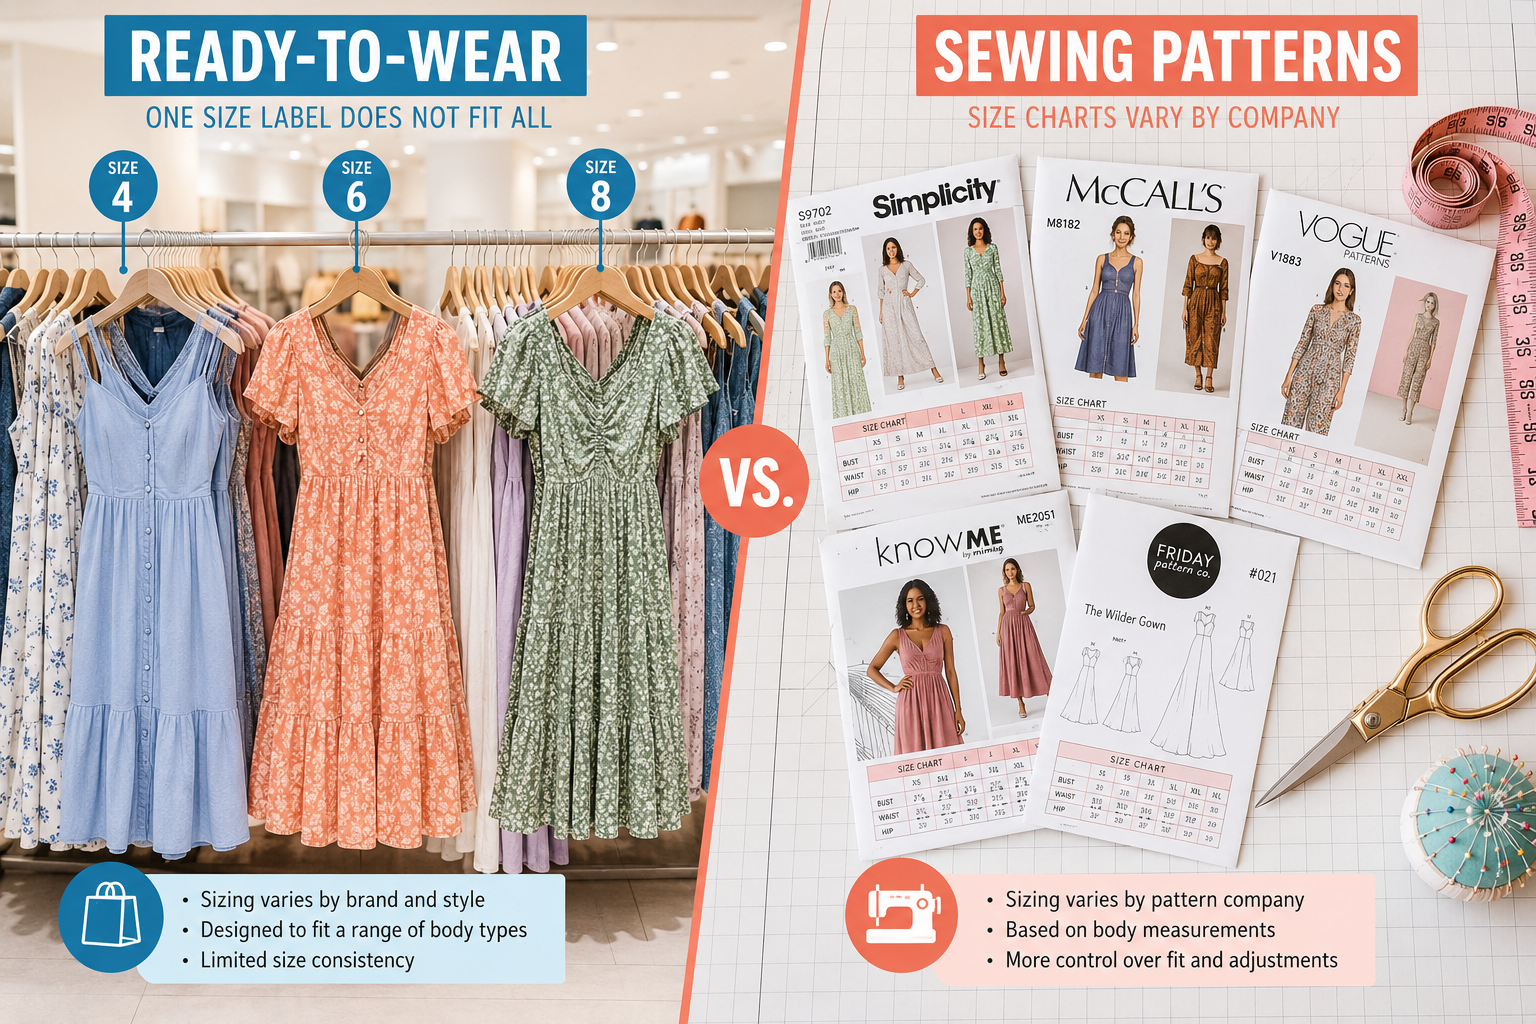
Pattern sizes differ from ready-to-wear clothing sizes because they’re based on actual body measurements rather than marketing strategies. A size 10 in a sewing pattern represents specific, consistent measurements (typically 32.5-inch bust, 25-inch waist, 34.5-inch hip for most pattern companies), while a size 10 in stores can vary wildly between brands and has generally gotten larger over the decades.
Ready-to-wear brands use vanity sizing to make customers feel better about their purchases. A size 8 dress today might fit the same person who wore a size 12 or 14 in the 1980s. Pattern companies haven’t followed this trend because their customers need reliable, measurement-based sizing to create garments that fit properly.
Here’s a typical comparison:
| Your Store Size | Likely Pattern Size | Why the Difference |
|---|---|---|
| 4-6 | 10-12 | Retail vanity sizing runs 2-4 sizes smaller |
| 8-10 | 14-16 | Pattern sizing reflects actual body measurements |
| 12-14 | 18-20 | No marketing inflation in pattern standards |
| 16-18 | 22-24 | Consistent sizing since the 1960s |
Choose pattern size if: You want a garment that fits your actual body measurements and can be customized. Choose ready-to-wear if: You need something immediately and don’t mind inconsistent sizing between brands.

PATTERN N6142 SIZING: New Look pattern includes women's and men's sizes ALL SIZES so you can sew your ideal fit. Pattern sizing runs differently from ready-to-wear clothing, so measure and check the body size chart before cutting.


PATTERN N6889 SIZING: New Look pattern includes women's sizes 8-18 so you can sew your ideal fit. Pattern sizing runs differently from ready-to-wear clothing, so measure and check the body size chart before cutting.
Why Is My Pattern Size Different from My Dress Size?
Your pattern size is different from your dress size because pattern companies use standardized body measurements that haven’t been adjusted for vanity sizing. If you wear a size 8 in most stores, your actual body measurements probably align with a pattern size 12, 14, or even 16, depending on your proportions and the brand’s fit model.
This difference shocks many new sewists, but it’s completely normal and doesn’t reflect anything about your body. Pattern sizing is simply honest about measurements. A 36-inch bust is a size 14 in most pattern lines, period. Meanwhile, that same 36-inch bust might fit into anything from a size 6 to a size 12 in retail stores, depending on the brand and how much ease they’ve built into their designs.
The gap between pattern and retail sizing has widened over time. Studies of vintage clothing show that a 1950s size 12 dress fits roughly the same as a modern size 4-6. Pattern companies have expanded their size ranges to accommodate larger bodies, but they haven’t renumbered their existing sizes to match retail’s vanity sizing trend.
Remember: The number on the pattern envelope is just a label. What matters is whether the garment fits your body measurements and looks good when you wear it.
How to Measure Yourself for Sewing Patterns
Measuring yourself for sewing patterns requires four key measurements: bust, waist, hip, and back waist length. Take these measurements while wearing the undergarments you’ll wear with the finished garment, and use a flexible measuring tape that doesn’t stretch. For the most accurate results, have someone else measure you, or take measurements in front of a mirror to ensure the tape stays level.
Step-by-step measuring process:
- Bust: Measure around the fullest part of your bust, keeping the tape parallel to the floor and comfortably snug but not tight
- Waist: Tie a string or elastic around your natural waist (where you bend side to side), then measure at that point
- Hip: Measure around the fullest part of your hips and bottom, usually 7-9 inches below your waist
- Back waist length: Measure from the prominent bone at the base of your neck down to your natural waist (where the string is tied)
Write down these measurements and compare them to the size chart on your pattern envelope. Don’t round down or try to “fit into” a smaller size. Patterns are designed to be cut at the size that matches your measurements, then adjusted if needed.
Common mistake: Measuring over bulky clothing or pulling the tape too tight. Both will give you inaccurate measurements that lead to poor fit.
For more precision in your sewing projects, understanding what seam allowance you should use will help you adjust patterns accurately.
What Measurements Do I Need to Find My Pattern Size?
You need bust, waist, and hip measurements to find your pattern size for most garments, plus back waist length for fitted tops, dresses, and jackets. Some patterns also require additional measurements like shoulder width, arm length, or inseam, which will be listed on the pattern envelope if needed.
Essential measurements:
- Bust: Required for all tops, dresses, jackets, and coats
- Waist: Required for fitted garments, pants, and skirts
- Hip: Required for pants, skirts, and fitted dresses
- Back waist length: Required for fitted bodices to ensure proper waist placement
Optional but helpful measurements:
- High bust (above the bust, under the arms), useful if you have a large bust
- Shoulder width, for jacket and coat fitting
- Arm length, for long-sleeved garments
- Inseam and outseam, for pants
- Neck circumference, for collared shirts
Most pattern envelopes show which measurements you need for that specific design. If you’re between sizes in different areas (common for most people), you’ll need all the relevant measurements to decide which size to cut and where to grade between sizes.
Pro tip: Keep a measurement card in your sewing space and update it every six months. Bodies change, and using outdated measurements is a common cause of fit issues.
Pattern Size vs Store Size Chart Comparison
Pattern sizes typically run 2-4 sizes larger than contemporary ready-to-wear sizes, though this varies by brand and body type. A woman who wears a size 8 in most retail stores will likely need a size 12 or 14 in Big 4 patterns (Simplicity, McCall’s, Butterick, Vogue), while indie pattern companies may have different standards altogether.
Here’s a general comparison based on bust measurements:
| Bust Measurement | Typical Store Size | Big 4 Pattern Size | Many Indie Patterns |
|---|---|---|---|
| 32-33 inches | 2-4 | 8-10 | XS-S |
| 34-35 inches | 6-8 | 12-14 | S-M |
| 36-37 inches | 8-10 | 14-16 | M-L |
| 38-39 inches | 10-12 | 16-18 | L-XL |
| 40-42 inches | 14-16 | 20-22 | XL-XXL |
This chart is approximate because retail sizing varies so much between brands. Some contemporary brands run small (making you size up), while others run large (making you size down). Pattern sizing is more consistent within each company’s line.
Edge case: If you have a large bust relative to your frame, your high bust measurement (measured above the bust, under the arms) may be a better guide for choosing pattern size. Then you can do a full bust adjustment to add room where needed.

Sewing pattern for girls includes instructions for a total of (6) different styles.

PATTERN N6287 SIZING: New Look pattern includes women's sizes 10-22 so you can sew your ideal fit. Pattern sizing runs differently from ready-to-wear clothing, so measure and check the body size chart before cutting.

PATTERN N6202 SIZING: New Look pattern includes children's sizes 3-8 so you can sew your ideal fit. Pattern sizing runs differently from ready-to-wear clothing, so measure and check the body size chart before cutting.
Do All Pattern Companies Use the Same Sizing?
No, pattern companies do not all use the same sizing standards. The Big 4 pattern companies (Simplicity, McCall’s, Butterick, and Vogue) use similar sizing because they’re all owned by the same parent company, but indie pattern designers often create their own size charts based on different fit models and philosophies.
Big 4 patterns (Simplicity, McCall’s, Butterick, Vogue) share nearly identical sizing standards. A size 14 in one Big 4 brand will fit almost the same as a size 14 in another. These companies use sizing standards developed decades ago and have expanded their ranges to include plus sizes, but the core measurements remain consistent.
Indie pattern companies like Closet Core Patterns, Helen’s Closet, Sew Liberated, and Seamwork each develop their own size charts. Many indie designers use letter sizing (XS, S, M, L, XL) or numbered sizing that doesn’t match the Big 4. Some indie companies design for curvier fit models, while others cater to petite or tall bodies. Always check the specific size chart for each indie pattern you buy.
Vintage patterns use sizing that’s completely different from modern standards. A 1950s size 12 typically fits a modern size 4-6. If you’re working with vintage patterns, you must measure the pattern pieces themselves or compare the envelope measurements to your body.
Decision rule: Never assume your size is consistent across pattern brands. Always measure yourself and compare to that specific pattern’s size chart before cutting.
What Happens If I Cut the Wrong Pattern Size?
If you cut the wrong pattern size, you’ll end up with a garment that doesn’t fit properly and may require extensive alterations or even be unwearable. Cutting too small means the garment will be tight, pull across stress points, and may not close properly. Cutting too large results in excess fabric, poor drape, and a sloppy appearance that’s difficult to fix without essentially re-cutting the garment.
If you cut too small:
- Seams may not meet or close
- Fabric pulls and creates stress lines across the bust, hips, or shoulders
- Limited movement and discomfort
- Possible fix: Add fabric panels, gussets, or contrasting side panels (works for casual garments only)
If you cut too large:
- Excess fabric bags and droops
- Poor fit through shoulders, armholes, and waist
- Garment looks sloppy and unflattering
- Possible fix: Take in seams throughout (time-consuming and may affect design lines)
The best prevention is to make a muslin (test garment) in cheap fabric first, especially for fitted garments or expensive fabric. A muslin lets you test the fit and make adjustments before cutting into your good fabric.
Common mistake: Assuming you can “just take it in” if you cut too large. While taking in seams is possible, it’s time-consuming and can throw off design details like pockets, darts, and buttonholes.
When you’re working on your pattern, having your feed dogs working properly ensures even seams during construction.
Should I Buy Pattern Based on Bust, Waist, or Hip Measurement?
You should buy pattern size based on your largest measurement, then grade between sizes or adjust the pattern to fit your other measurements. For most tops, dresses, and jackets, choose by bust measurement. For pants and skirts, choose by hip measurement. For fitted dresses that emphasize the waist, you may need to blend sizes throughout the garment.
General guidelines:
- Tops, blouses, jackets: Choose by bust measurement (it’s harder to add width across the shoulders and bust than to take in the waist)
- Pants and skirts: Choose by hip measurement (easier to take in the waist than to add to the hips)
- Fitted dresses: Choose by bust, then grade to smaller sizes at waist and hip if needed
- Loose, oversized styles: Choose by bust or high bust for best shoulder fit
Grading between sizes means cutting one size at the bust, transitioning smoothly to a different size at the waist, and possibly another size at the hip. This technique accommodates different body proportions and is a standard skill for intermediate sewists.
Edge case: If you have a full bust (D cup or larger), consider using your high bust measurement to choose size, then doing a full bust adjustment (FBA) to add room across the bust. This prevents the shoulders and armholes from being too large while giving you enough room where you need it.
Pro tip: Check the finished garment measurements on the pattern envelope, not just the body measurements. This tells you how much ease (extra room) is built into the design and helps you decide if you want to size up or down for your preferred fit.
How to Adjust a Pattern If I’m Between Sizes
If you’re between sizes, you can grade between sizes by cutting one size in one area and smoothly transitioning to another size in a different area. Most people need to blend sizes because few bodies match the standard proportions used to draft patterns. This is normal and expected in garment sewing.
Grading technique:
- Identify which measurements fall into which sizes (example: size 12 bust, size 10 waist, size 14 hip)
- Cut the size for your largest measurement in that area
- Draw smooth transition lines between sizes at logical points (between bust and waist, between waist and hip)
- Blend the cutting lines gradually over 3-4 inches to avoid creating bumps or angles
- Cut along your new blended line
Common blending points:
- Between bust and waist on bodices
- Between waist and hip on skirts and pants
- Between shoulder and bust on fitted tops
- Between hip and thigh on pants
Alternative approach: Cut the larger size throughout and take in seams during fitting. This is safer for beginners because you can always remove fabric, but you can’t add it back once it’s cut.
Tools that help: A French curve or hip curve ruler makes it easier to draw smooth transition lines between sizes. Clear gridded rulers also help maintain proper grainlines when adjusting patterns.
Understanding pattern instructions thoroughly will help you make these adjustments with confidence.
Are Vintage Pattern Sizes Smaller Than Modern Patterns?
Yes, vintage pattern sizes are significantly smaller than modern patterns. A 1950s or 1960s size 12 typically fits the same body as a modern size 4, 6, or 8, depending on the specific measurements. Vintage sizing used different standards, and bodies were generally smaller before the obesity epidemic of the late 20th century.
Vintage sizing by era:
- 1930s-1940s: Very small by modern standards; size 14 bust approximately 32 inches
- 1950s-1960s: Size 12 bust approximately 32 inches, waist 25 inches, hip 34 inches (modern size 4-6)
- 1970s: Sizing begins to shift larger; size 12 bust approximately 34 inches
- 1980s-present: Modern sizing standards established; size 12 bust approximately 34-35 inches (Big 4 patterns)
When working with vintage patterns, ignore the size number completely. Instead, measure the pattern pieces themselves or compare the envelope measurements to your body. Many vintage patterns also have very different ease standards (less ease in the 1950s, more ease in the 1970s), so the finished garment measurements matter more than the body measurements.
Bonus consideration: Vintage patterns often assume you’ll make extensive fitting adjustments. Home sewing was more common, and sewists routinely altered patterns to fit their bodies. Modern patterns include more ease and are drafted to fit a wider range of bodies with fewer adjustments.
Pro tip: Vintage patterns are often drafted for shorter heights than modern patterns. If you’re over 5’6″, you’ll likely need to lengthen the bodice and skirt/pants.
Why Do Pattern Sizes Run Larger Than Store-Bought Clothes?
Pattern sizes don’t actually “run larger”, they reflect honest body measurements, while store-bought clothes use vanity sizing that labels garments with smaller numbers than their actual measurements. A size 12 pattern fits a 34-35 inch bust because that’s what the measurements are, while a size 12 dress in stores might fit a 36-38 inch bust or larger, depending on the brand’s target customer and marketing strategy.
Vanity sizing emerged in retail as a marketing tool. Studies show that customers feel better about purchases and are more likely to buy when they can fit into a smaller size number. Over decades, retail brands have gradually increased the actual measurements of each size while keeping the numbers the same (or even making them smaller). This is why your grandmother’s size 12 dress from 1960 would be labeled a size 4 or 6 today.
Pattern companies haven’t followed this trend because:
- Their customers need consistent, measurement-based sizing to create garments that fit
- Sewists measure themselves and compare to charts, so vanity sizing doesn’t work
- Pattern sizing standards were established decades ago and changing them would create confusion
- The sewing community values honest, reliable measurements over marketing psychology
The result: A disconnect between pattern sizes and retail sizes that confuses beginners but makes perfect sense once you understand the different purposes of each system.
Can I Use My Regular Size When Buying Sewing Patterns?
No, you cannot use your regular retail clothing size when buying sewing patterns. You must measure your body and compare those measurements to the pattern company’s size chart. Using your “regular size” will almost certainly result in cutting a pattern that’s too large, wasting fabric and time.
This is one of the most common mistakes new sewists make, and it’s completely understandable given how we’re trained to shop for clothing. In stores, you grab your usual size, try it on, and adjust up or down if needed. With patterns, you must measure first because you can’t “try on” the pattern, and once you cut the fabric, there’s no going back.
The process should be:
- Measure your bust, waist, hip, and back waist length
- Compare these measurements to the size chart on the pattern envelope
- Choose the size that matches your measurements (not your retail size)
- Consider making a muslin if the garment is fitted or the fabric is expensive
- Cut and sew with confidence, knowing you’ve chosen the right size
Exception: If you’ve been sewing for years and know your size in a specific pattern company’s line, you can buy that size consistently. But even experienced sewists measure themselves periodically because bodies change.
Before you start cutting, make sure you understand how to use different presser feet for various pattern techniques.
Do Indie Pattern Companies Size Differently Than Big 4?
Yes, indie pattern companies often size differently than Big 4 patterns (Simplicity, McCall’s, Butterick, Vogue). Many indie designers create their own size charts based on different fit models, include more sizes in their range, and use letter sizing (XS-XXL) rather than numbered sizing. Some indie companies specifically design for curvier bodies, petite frames, or plus sizes, with fit standards that differ significantly from Big 4 patterns.
Key differences:
- Size range: Many indie companies offer sizes from XXS to 6XL or beyond, while Big 4 patterns traditionally topped out at size 24 (though they’ve expanded in recent years)
- Fit model: Indie designers may use curvier fit models with more difference between bust and waist, or straighter fit models with less difference
- Ease standards: Some indie patterns include more ease for a relaxed fit, while others are drafted closer to the body
- Grading: The way sizes scale up and down may differ, affecting how well the pattern fits different body types
Popular indie companies and their sizing approaches:
- Closet Core Patterns: Curvy fit with significant waist definition; sizes XXS-6XL
- Helen’s Closet: Moderate curves; sizes 0-30
- Seamwork: Varies by designer; generally sizes XXS-6XL with detailed measurement charts
- Cashmerette: Specifically designed for curves and plus sizes; sizes 12-32 (bust 38-64 inches)
Always check the specific size chart for each indie pattern you buy. Don’t assume your size is consistent even within the same company, as different designers may draft patterns for that company.
Frequently Asked Questions
How do I know what size pattern to buy?
Measure your bust, waist, and hip, then compare these measurements to the size chart on the pattern envelope. Choose the size that matches your largest measurement, then adjust or grade between sizes as needed. Never use your retail clothing size to choose a pattern size.
Why am I a size 14 in patterns but a size 8 in stores?
Pattern sizes are based on actual body measurements without vanity sizing. Retail brands have gradually increased the measurements of each size over decades while keeping the numbers the same or smaller. Your body hasn’t changed, the labeling systems are just different.
Can I make a pattern smaller after I’ve cut it?
Yes, you can take in seams to make a garment smaller, but it’s time-consuming and may affect design details like pockets, darts, and buttonholes. It’s much better to cut the correct size from the start or make a muslin to test fit before cutting your fashion fabric.
What if my bust, waist, and hip are all different sizes?
This is normal and expected. Choose the pattern size based on your largest measurement (usually bust for tops, hip for bottoms), then grade between sizes or adjust the pattern to fit your other measurements. Most sewists need to blend sizes for a good fit.
Do I need to buy a different size for different pattern brands?
Yes, especially when switching between Big 4 patterns and indie designers. Always check the specific size chart for each pattern you buy and measure yourself against that chart. Your size may vary by several sizes between different companies.
How much bigger should a pattern be than my measurements?
Patterns include ease (extra room beyond your body measurements) for movement and comfort. The amount varies by design, fitted garments have 1-2 inches of ease, while loose styles may have 4-6 inches or more. Check the finished garment measurements on the pattern envelope to see how much ease is included.
Should I size up if I’m between measurements?
Generally, choose the larger size if you’re between measurements, especially for fitted garments. It’s easier to take in seams than to add fabric. However, check the finished garment measurements to see if the design already includes a lot of ease.
Can I use the same pattern size for all garment types?
Not necessarily. You might be one size in tops (based on bust) and a different size in pants (based on hip). Always check which measurement is most important for each garment type and choose accordingly.
Why do vintage patterns have such small sizes?
Vintage patterns use older sizing standards from when bodies were generally smaller and before vanity sizing existed. A 1950s size 12 fits roughly the same as a modern size 4-6. Always measure vintage pattern pieces or compare envelope measurements to your body.
Do pattern sizes account for different heights?
Most patterns are drafted for a height of 5’5″ to 5’6″. If you’re significantly taller or shorter, you’ll need to lengthen or shorten the pattern at the adjustment lines marked on the pattern pieces. Height adjustments are separate from size selection.
What’s the difference between misses, women’s, and plus sizes in patterns?
Misses patterns are drafted for a B-cup bust and moderate curves. Women’s or plus patterns are drafted for larger sizes with different proportions. Some companies also offer petite (for shorter heights) and tall options. Check the pattern envelope for which category the pattern uses.
How do I adjust a pattern for a large bust?
If you have a D-cup or larger bust, choose your pattern size based on your high bust measurement (above the bust, under the arms), then do a full bust adjustment (FBA) to add room across the bust. This prevents the shoulders and armholes from being too large while giving you enough room where you need it.
Conclusion
Understanding what do pattern sizes mean (they’re not store sizes) is fundamental to successful garment sewing. Pattern sizes are based on standardized body measurements that have remained relatively consistent since the 1960s, while retail clothing has shifted toward vanity sizing that labels garments with smaller numbers than their actual measurements. This means your pattern size will typically be 2-4 sizes larger than your store-bought clothing size, and that’s completely normal.
The key to choosing the right pattern size is simple: measure your bust, waist, hip, and back waist length, then compare these measurements to the specific size chart on your pattern envelope. Never assume your retail size will work, and never assume your size is consistent across different pattern companies. Big 4 patterns (Simplicity, McCall’s, Butterick, Vogue) share similar sizing, but indie pattern companies each use their own standards.
Your action steps:
- Take accurate body measurements and write them down
- Compare your measurements to the pattern’s size chart (not your retail size)
- Choose the size that matches your largest measurement
- Learn to grade between sizes or adjust patterns for your unique proportions
- Consider making a muslin for fitted garments or expensive fabric
- Remember that the number on the pattern is just a label, what matters is the fit
Once you accept that pattern sizes are measurement-based rather than ego-based, you’ll find that sewing patterns actually fit better and more consistently than store-bought clothes. You’re creating garments sized exactly for your body, without the guesswork and inconsistency of retail sizing. That’s the real power of sewing your own clothes.
Ready to start your next project with confidence? Measure yourself today, choose your pattern size based on those measurements, and enjoy the process of creating garments that actually fit your body. And don’t forget to check your sewing machine’s basic functions before you begin to ensure professional results.