


Quick Answer
Sewing a baby blanket takes 1-3 hours depending on your method and typically requires 1-1.5 yards of fabric cut to 30×40 inches (a standard receiving blanket size). The simplest approach uses two fabric layers sewn right-sides together with a 3/8-inch seam allowance, leaving a 4-inch opening for turning, then topstitching around the edge. Most beginners can complete their first baby blanket in an afternoon using basic straight stitches on any home sewing machine.
Key Takeaways
- Standard baby blanket dimensions range from 30×40 inches (receiving) to 42×52 inches (crib size), with 36×36 inches being ideal for beginners
- Fabric requirements are typically 1-1.5 yards for single-layer blankets or 2-3 yards total for double-sided designs
- Best fabrics include cotton flannel, minky, fleece, and double gauze, all soft, washable, and safe for babies
- No sewing machine required,hand-sewing a baby blanket takes 3-5 hours using a simple running stitch or blanket stitch
- Prewashing fabric is essential to prevent shrinkage and remove chemical finishes before the blanket touches baby’s skin
- Edge finishing options include self-binding (folded edges), satin binding, or no-sew fleece tie methods
- Thread safety matters, use 100% cotton or polyester all-purpose thread; avoid decorative metallic threads that can irritate skin
- Common mistakes include skipping prewashing, using unsafe embellishments, and choosing fabrics that pill or shed
- Cost comparison: DIY baby blankets cost $8-25 in materials versus $20-60 for store-bought equivalents
- Beginner-friendly project,baby blankets require only straight seams and basic skills, making them perfect first projects
What Is the Best Fabric for a Baby Blanket?
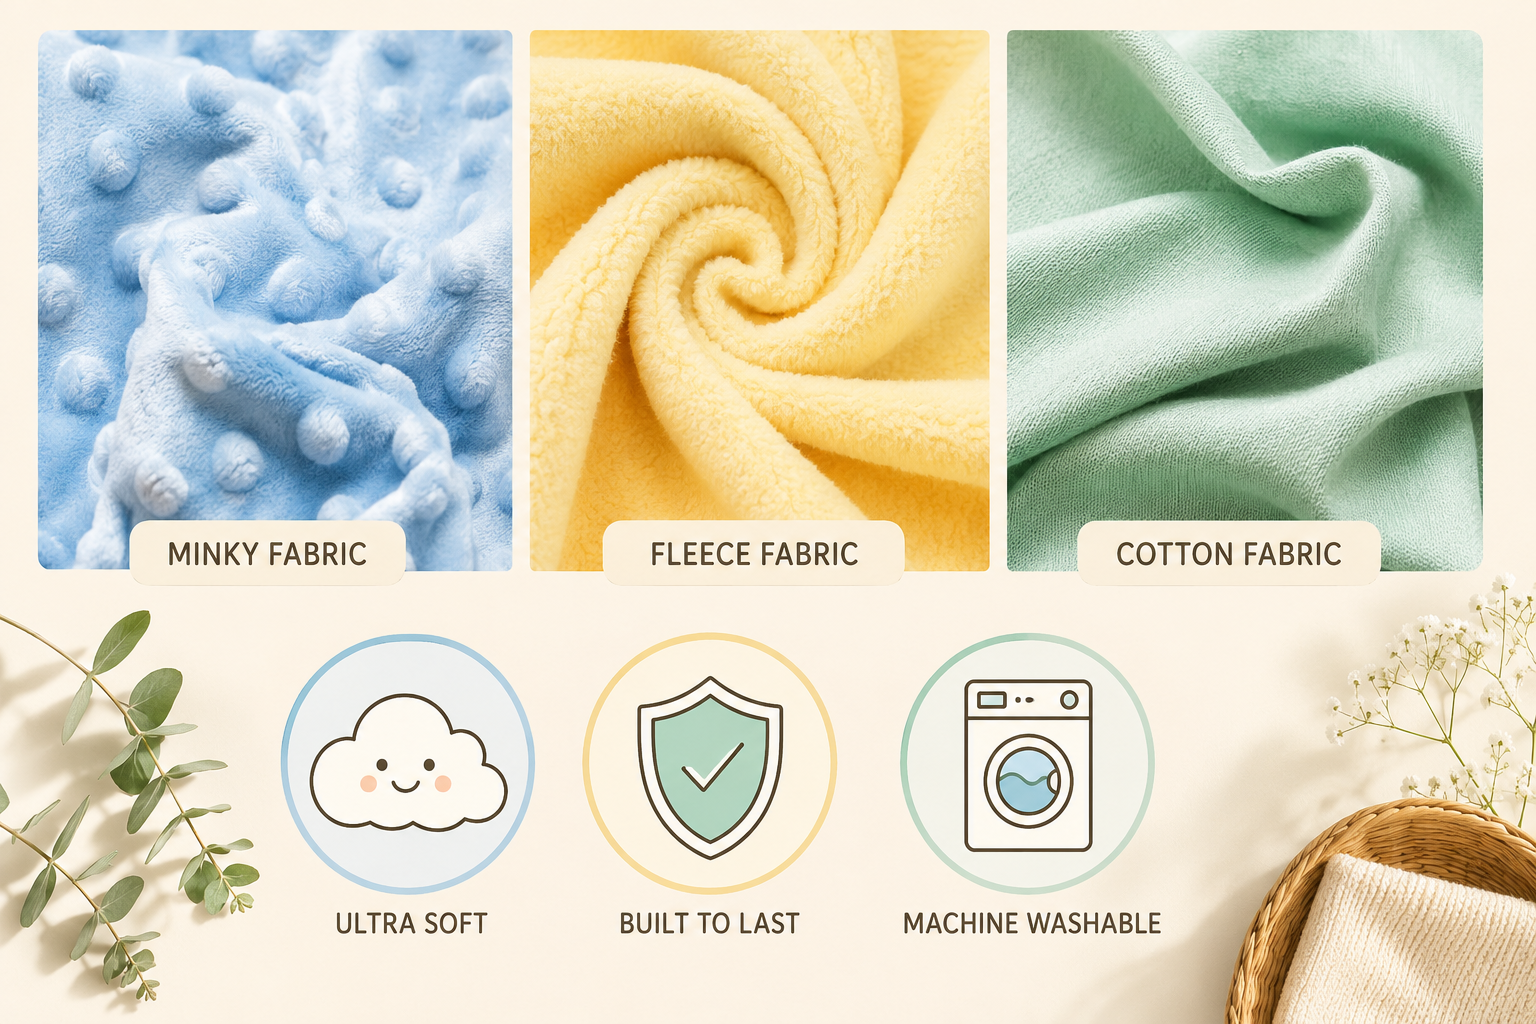
The best fabric for a baby blanket is 100% cotton flannel because it’s soft, breathable, machine-washable, and becomes softer with each wash. Cotton flannel is safe for newborns, regulates temperature well, and doesn’t pill or shed fibers that could irritate delicate skin.
Other excellent fabric choices include:
- Minky (polyester plush): Ultra-soft with a luxurious feel, but can be slippery to sew and may be too warm for summer babies
- Cotton double gauze: Lightweight and breathable, perfect for warmer climates, with a beautiful crinkled texture
- Fleece: Warm and cozy, no-fray edges make it beginner-friendly, but less breathable than natural fibers
- Muslin: Lightweight cotton that’s breathable and gets softer over time, ideal for swaddling blankets
Choose cotton flannel if you want an all-season blanket that’s easy to sew and care for. Choose minky if you’re making a special-occasion blanket and don’t mind the extra sewing challenge. Choose fleece if you’re a complete beginner or want a no-sew option with tie edges.
Common mistake: Avoid fabrics with loose weaves, excessive stretch, or decorative elements like sequins that could pose choking hazards. Also skip fabrics labeled “dry clean only”, baby blankets need frequent washing.

SNUGGLY COTTON: Made with 100% cotton | Soft, lightweight cotton flannel is soft and gentle on your baby’s skin | Breathable construction helps reduce the risk of overheating


Set includes seven flannel blankets. Measures 30x30 inches.
How Much Fabric Do I Need for a Baby Blanket?
For a standard 36×36-inch baby blanket, you need 1.25 yards of fabric (assuming 44-inch wide fabric, which is standard). For a double-sided blanket with two different fabrics, purchase 1.25 yards of each fabric, totaling 2.5 yards.
Here’s a fabric requirement chart based on common baby blanket sizes:
| Blanket Size | Dimensions | Single Layer | Double Layer (total) |
|---|---|---|---|
| Receiving blanket | 30×40 inches | 1 yard | 2 yards |
| Square baby blanket | 36×36 inches | 1.25 yards | 2.5 yards |
| Stroller blanket | 30×35 inches | 1 yard | 2 yards |
| Crib blanket | 42×52 inches | 1.5 yards | 3 yards |
| Oversized/toddler | 40×60 inches | 2 yards | 4 yards |
Pro tip: Always add 4-6 inches to your desired finished dimensions to account for seam allowances and any shrinkage during prewashing. If you’re working with directional prints (patterns that have a clear up and down), you may need extra fabric to ensure the pattern runs correctly.
Budget consideration: Quilting cotton and flannel typically cost $8-12 per yard, while minky ranges from $12-20 per yard. A basic baby blanket project will cost $10-25 in fabric alone.


Pure Cotton Comfort: Made entirely from 100% cotton, providing a soft and gentle touch for your little one's comfort.

Baby Blanket Size Chart: Standard Dimensions
Standard baby blanket dimensions vary by intended use, but the most versatile size is 36×36 inches square,large enough to cover a baby in a car seat or stroller yet small enough to fold easily in a diaper bag.
Common baby blanket sizes and their uses:
- Lovey/Security blanket: 12×12 to 18×18 inches (small comfort blanket)
- Receiving blanket: 30×30 to 30×40 inches (hospital-style swaddling blanket)
- Stroller blanket: 30×35 inches (compact for on-the-go)
- Square baby blanket: 36×36 inches (most versatile all-purpose size)
- Crib blanket: 40×60 or 42×52 inches (fits standard crib mattress)
- Toddler blanket: 40×60 to 50×60 inches (grows with the child)
Choose 30×40 inches if you’re making a traditional receiving blanket for swaddling newborns. Choose 36×36 inches if you want one blanket that works for multiple purposes. Choose 42×52 inches if the blanket will primarily stay in the crib.
Safety note: The American Academy of Pediatrics recommends keeping blankets out of cribs for babies under 12 months to reduce SIDS risk. Baby blankets are safest for supervised tummy time, stroller use, and cuddles with caregivers.
Is Sewing a Baby Blanket Better Than Buying One? Cost Comparison
Sewing a baby blanket costs $10-25 in materials and takes 1-3 hours, while comparable store-bought blankets range from $20-60. You save money on basic designs but invest time, making DIY worthwhile if you value customization, quality control, or enjoy the sewing process.
Cost breakdown for DIY:
- Fabric (1.25 yards each of two fabrics): $15-30
- Thread: $2-4
- Optional binding or trim: $3-8
- Total material cost: $17-42
- Time investment: 1-3 hours
Store-bought comparison:
- Basic receiving blanket: $8-15
- Quality flannel or minky blanket: $20-35
- Designer/boutique baby blanket: $40-80
Sew your own if you want specific fabric patterns, need multiple blankets (baby showers, gifts), or enjoy crafting. Buy instead if you need a blanket immediately, don’t have sewing equipment, or value time over cost savings.
Hidden value: Handmade baby blankets become keepsakes with sentimental value that far exceeds their material cost. Many families preserve them as heirlooms or memory items long after the baby years.
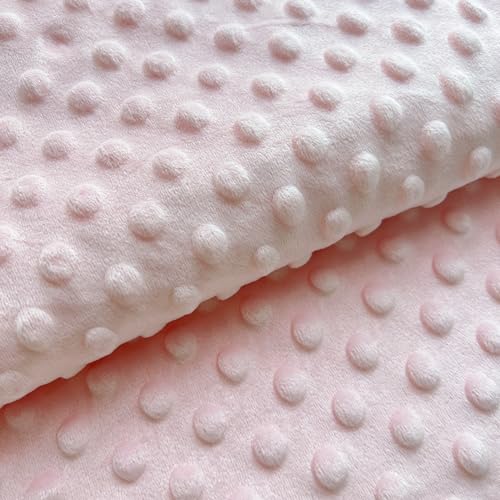
We have added 3D dots to the minky plush fabric for a more aesthetic look. The concave-convex design brings you a softer and wonderful touch, which is very relaxing. Minky wool fabric is suitable for various blankets and daily necessities

Fabric panel measuring: width 31 inches (approx 80cm) by length 36 inches (approx. 91 cm). The panel contains 42 squares, measuring 5x5 inches. The squares feature different Grey elements, such as cute animals and baby phrases, with a neutral design to combine pastel or bright colours to complete your project.

WIDELY USED SCENE - By upgrading the production process, we added 3D polka dot process on the mink plush fabric, more beautiful, the bump design can give you a softer and more marvelous touch, very decompression. Minky fleece fabric is suitable for blankets, pillow covers and so on.
How to Finish the Edges of a Baby Blanket Without Binding
The easiest way to finish baby blanket edges without binding is the self-binding method: sew two fabric layers right-sides together, leave a 4-inch turning gap, turn right-side out, and topstitch around the perimeter. This creates clean, professional edges in minutes without cutting separate binding strips.
Step-by-step self-binding technique:
- Cut two fabric pieces to identical dimensions (add 1/2 inch to your desired finished size)
- Place fabrics right-sides together, pin around all edges
- Sew around the perimeter with a 3/8-inch seam allowance, leaving a 4-inch gap on one side
- Clip corners diagonally (1/8 inch from stitching) to reduce bulk
- Turn the blanket right-side out through the gap
- Press flat with an iron, tucking in the gap edges
- Topstitch 1/4 inch from the edge around the entire blanket, closing the gap
Alternative no-binding methods:
- Serged edges: Use a serger to finish raw edges with decorative thread (requires serger machine)
- Zigzag stitch: Fold edges under 1/4 inch twice, press, and zigzag stitch for a clean hem
- Fleece tie method: Cut 1-inch slits every 2 inches around the perimeter of two fleece layers and tie knots (no sewing required)
If you’re experiencing loose stitches on one side during your topstitching, check your thread tension settings before continuing.
Common mistake: Leaving too small a turning gap (under 3 inches) makes it difficult to turn thick fabrics like minky right-side out without stressing the seams.

Can I Sew a Baby Blanket Without a Sewing Machine?
Yes, you can hand-sew a baby blanket in 3-5 hours using a simple running stitch or blanket stitch. The process is identical to machine sewing but requires more time, expect to spend 4-6 hours for a 36×36-inch blanket using a basic running stitch with 1/4-inch stitches.
Hand-sewing method for baby blankets:
- Cut two fabric layers to size and pin right-sides together
- Thread a hand-sewing needle with 18-24 inches of doubled thread, knot the end
- Use a running stitch (in-and-out) with stitches 1/4 inch long and 1/4 inch apart
- Maintain a 3/8-inch seam allowance, leaving a 4-inch turning gap
- Backstitch at the beginning and end of each thread length for strength
- Turn right-side out and hand-stitch the gap closed with a ladder stitch
- Optional: hand-quilt through both layers every 4-6 inches to prevent shifting
Best hand-sewing stitches for baby blankets:
- Running stitch: Fastest hand-sewing method, adequate for low-stress seams
- Backstitch: Stronger than running stitch, takes twice as long but more durable
- Blanket stitch: Decorative edge stitch perfect for fleece or felt blankets
- Whipstitch: Quick edge-joining stitch for fleece tie blankets
Choose hand-sewing if you don’t own a sewing machine, enjoy meditative handwork, or want a portable project. The finished blanket will be just as functional as a machine-sewn version if you use small, consistent stitches.
Time-saving tip: Use a thimble to protect your finger and maintain consistent pressure, which speeds up hand-sewing significantly.
What Is the Best Stitch for Baby Blanket Durability?
The straight stitch with backstitching at stress points provides the best durability for baby blankets. Use a 2.5-3.0mm stitch length (10-12 stitches per inch) for the perimeter seam, and backstitch 1/2 inch at the beginning and end of every seam to prevent unraveling through repeated washing.
Stitch settings for maximum durability:
- Perimeter seams: Straight stitch, 2.5mm length, backstitch at corners and ends
- Topstitching: Straight stitch, 3.0mm length, 1/4 inch from edge
- Quilting (optional): Straight stitch, 3.5mm length, stitched in a grid or pattern through both layers
If your machine is skipping stitches during your project, replace your needle and check that you’re using the correct needle type for your fabric weight.
Stitch types to avoid: Decorative stitches and very long basting stitches (over 4mm) are too loose for items that will be washed frequently. Zigzag stitches are fine for edge finishing but shouldn’t be used for structural seams.
Durability factors beyond stitch type:
- Thread quality: Use polyester or poly-cotton blend thread for strength
- Seam allowance: 3/8 to 1/2 inch provides enough fabric for seams to withstand stress
- Reinforcement: Double-stitch high-stress areas like corners
- Fabric choice: Tightly woven fabrics hold stitches better than loose weaves
Learn more about how backstitching strengthens seams to prevent unraveling.
Is Minky or Fleece Better for Baby Blankets?
Minky is better for special-occasion blankets because it’s incredibly soft and luxurious, while fleece is better for everyday use because it’s more durable, easier to sew, and less expensive. For beginners learning how to sew a baby blanket, fleece is the more forgiving choice.
Minky advantages:
- Ultra-soft, plush texture babies love
- Comes in beautiful colors and patterns
- Feels more premium and gift-worthy
- Hypoallergenic polyester fiber
Minky disadvantages:
- Slippery and challenging to sew (pins leave holes)
- Sheds fibers during cutting and sewing
- More expensive ($12-20 per yard)
- Can be too warm for summer use
- Requires special care (low heat drying)
Fleece advantages:
- No-fray edges (can skip hemming)
- Easy to cut and sew for beginners
- Machine-washable and durable
- Less expensive ($6-12 per yard)
- Lightweight and breathable
Fleece disadvantages:
- Can pill with repeated washing
- Less luxurious feel than minky
- Limited pattern selection compared to cotton
- May develop static cling
Choose minky if you’re making a keepsake blanket, have intermediate sewing skills, and don’t mind the extra effort. Choose fleece if you’re a beginner, need a quick project, or want a practical everyday blanket.
Compromise option: Make a double-sided blanket with minky on one side and cotton flannel on the other, you get the softness of minky with the stability of cotton for easier sewing.
Common Mistakes When Sewing Baby Blankets
The most common mistake when sewing baby blankets is skipping the prewash step, which leads to uneven shrinkage after the first wash and puckered seams. Always prewash and dry all fabrics using the same settings you’ll use for the finished blanket before cutting any pieces.
Top 10 baby blanket sewing mistakes:
- Not prewashing fabric: Causes shrinkage and puckering after first wash
- Using unsafe embellishments: Buttons, beads, and ribbons pose choking hazards
- Choosing fabrics with different stretch: Creates wavy, uneven edges
- Inadequate seam allowance: Less than 3/8 inch may fray open with washing
- Forgetting to backstitch: Seams unravel at stress points
- Leaving too-small turning gap: Makes it difficult to turn thick fabrics right-side out
- Not clipping corners: Creates bulky, poorly shaped corners
- Skipping the press step: Results in unprofessional-looking edges
- Using decorative thread: Metallic or novelty threads can irritate baby’s skin
- Ignoring fabric grain: Cutting off-grain causes edges to stretch and distort
How to avoid these mistakes:
- Prewash all fabric in hot water and dry on high heat before cutting
- Press seams flat after every step for crisp, professional results
- Use wonder clips instead of pins on slippery fabrics like minky to avoid holes
- Test your tension settings on scrap fabric before sewing the actual blanket
- Keep embellishments to embroidered or appliquéd designs (no loose parts)
If you notice thread bunching under your fabric while sewing, stop and fix the issue before continuing, birdnesting weakens seams significantly.
Do I Need to Prewash Fabric Before Making a Baby Blanket?
Yes, you must prewash fabric before making a baby blanket to remove chemical finishes, prevent shrinkage, and ensure the blanket is safe for baby’s sensitive skin. Wash fabric in hot water with baby-safe detergent and dry on high heat, the same way you’ll care for the finished blanket.
Why prewashing is essential:
- Removes sizing and chemicals: Manufacturing residues can irritate baby’s skin
- Prevents shrinkage: Cotton and flannel can shrink 3-5% in the first wash
- Tests colorfastness: Identifies fabrics that bleed dye before they ruin your project
- Softens fabric: Makes cotton flannel and gauze softer and easier to sew
- Reveals fabric flaws: Allows you to spot and avoid defects before cutting
Prewashing steps:
- Unfold fabric completely and check for loose threads
- Serge or zigzag raw edges to prevent excessive fraying (optional but helpful)
- Wash in hot water with fragrance-free detergent
- Dry on high heat (or air-dry if fabric label recommends)
- Press with an iron to remove wrinkles before cutting
Fabrics that don’t require prewashing: Fleece and minky (polyester) don’t shrink, but you should still wash them once to remove manufacturing residue and soften the fibers.
Common question: “What if I’m in a hurry?” If you absolutely cannot prewash, cut your pieces 2 inches larger than needed to account for potential shrinkage, but this is a compromise that may result in an ill-fitting blanket after washing.
How to Make a Baby Blanket With Satin Binding
To make a baby blanket with satin binding, cut 2-inch wide satin bias tape (or purchase pre-made binding), fold it over the raw edges of your blanket, and stitch it in place using a 1/4-inch seam allowance. Satin binding adds a decorative, silky edge that many babies enjoy rubbing between their fingers.
Step-by-step satin binding method:
- Prepare the blanket: Cut your fabric to size, layer if making double-sided, and baste around the perimeter 1/4 inch from the edge
- Cut binding strips: Cut 2-inch wide strips on the bias (45-degree angle to the grain) or purchase pre-made satin blanket binding
- Join binding strips: If using multiple strips, join them at 45-degree angles and press seams open
- Attach binding to front: Starting in the middle of one side (not a corner), align raw edges and stitch binding to the blanket front with a 1/4-inch seam allowance
- Miter corners: Stop 1/4 inch from each corner, fold binding at a 45-degree angle, and continue sewing
- Join binding ends: Overlap ends by 1/2 inch, fold under raw edge, and stitch closed
- Fold to back: Fold binding over the raw edge to the back, pin in place
- Stitch in the ditch: From the front, stitch exactly in the seam line (the “ditch”) to catch the binding on the back, or hand-stitch the binding down for an invisible finish
Satin binding tips:
- Pre-made satin blanket binding (available at fabric stores) saves time and ensures consistent width
- Use a walking foot to prevent the slippery satin from shifting while sewing
- Choose polyester satin over acetate, it’s more durable and machine-washable
- Pin generously (every 2-3 inches) to keep binding aligned
Safety consideration: Ensure satin binding is securely stitched with no loose edges that could unravel and pose a choking hazard. Double-check all corners and joins.
If your fabric isn’t feeding through smoothly while attaching binding, clean your feed dogs and check your presser foot pressure.
Is a Baby Blanket a Good Project for Beginner Sewers?
Yes, a baby blanket is one of the best projects for beginner sewers because it requires only straight seams, uses simple construction techniques, and is forgiving of minor mistakes. Most beginners can complete their first baby blanket in 2-4 hours and gain confidence in essential sewing skills.
Why baby blankets are beginner-friendly:
- Simple construction: Mostly straight lines with minimal curves or complex shaping
- Forgiving size: Small enough to manage easily but large enough to see progress quickly
- Minimal pattern reading: Most baby blankets follow straightforward instructions or need no pattern at all
- Useful end product: Creates a functional item (not just a practice piece)
- Low material cost: Mistakes aren’t expensive to fix or redo
- Builds core skills: Teaches seam allowances, corner techniques, and edge finishing
Skills you’ll learn:
- Cutting fabric accurately with a rotary cutter or scissors
- Sewing straight seams with consistent seam allowances
- Pivoting at corners while keeping the needle down
- Turning projects right-side out and pressing seams
- Topstitching evenly around a perimeter
- Understanding how different fabrics behave
Best first baby blanket approach: Start with a simple double-sided flannel blanket using the self-binding method (no separate binding strips). Choose two coordinating cotton flannel prints, cut them to 37×37 inches (for a finished 36×36-inch blanket), and follow the basic construction steps.
Next-level projects after your first blanket: Try adding satin binding, working with minky fabric, or creating a patchwork top from multiple fabric squares.
For more beginner-friendly sewing tips, explore our collection of tutorials designed specifically for new sewers.
What Thread Is Safe for Baby Blankets?
100% polyester all-purpose thread or poly-cotton blend thread is safest for baby blankets because it’s strong, colorfast, hypoallergenic, and withstands repeated hot-water washing without breaking down. Use a neutral color that blends with your fabric or matches the dominant color in your pattern.
Safe thread characteristics:
- Fiber content: 100% polyester or 50/50 poly-cotton blend
- Weight: All-purpose thread (50-weight) for most fabrics; 40-weight for heavier materials
- Quality: Name-brand thread (Gutermann, Coats & Clark, Mettler) that doesn’t shed lint
- Color: Colorfast dyes that won’t bleed onto fabric when washed
Threads to avoid for baby items:
- Metallic thread: Can irritate sensitive skin and breaks easily
- Embroidery thread: Too decorative and not strong enough for structural seams
- Cheap bargain thread: Sheds lint, breaks frequently, and may contain inconsistent dye
- 100% cotton thread: Breaks down faster than polyester with repeated washing (though acceptable if you prefer natural fibers)
Thread color selection: For most baby blankets, use thread that matches the lighter fabric if making a double-sided blanket, or choose a neutral (white, cream, or gray) that blends with both sides.
Special consideration: If you’re adding decorative topstitching or quilting, you can use a contrasting thread color for visual interest, just ensure it’s still a quality all-purpose thread, not a specialty thread.
If you’re experiencing thread breaking frequently, check your needle size and thread quality before continuing your project.
How Long Does It Take to Sew a Baby Blanket by Hand?
Hand-sewing a baby blanket takes 3-5 hours for a simple 36×36-inch blanket using a running stitch, or 6-8 hours using a more durable backstitch. The time varies based on your stitch length, hand-sewing experience, and whether you’re adding decorative elements like quilting or embroidery.
Time breakdown by method:
| Method | Stitch Type | Time for 36×36″ Blanket |
|---|---|---|
| Running stitch | Basic in-and-out | 3-4 hours |
| Backstitch | Stronger, doubled stitch | 5-6 hours |
| Blanket stitch (edges) | Decorative edge finish | 4-5 hours |
| Hand quilting (added) | Through-both-layers stitching | +2-4 hours |
Factors that affect hand-sewing time:
- Stitch length: Smaller stitches (1/8 inch) take twice as long as larger stitches (1/4 inch)
- Fabric thickness: Thick fabrics like fleece or layered minky require more effort per stitch
- Experience level: Experienced hand-sewers work 30-50% faster than beginners
- Breaks and interruptions: Most people can’t hand-sew for more than 60-90 minutes without a break
Speed-up strategies:
- Use a thimble to push the needle through fabric faster without finger fatigue
- Thread multiple needles at the start so you don’t stop to rethread frequently
- Work in good lighting to reduce eye strain and maintain speed
- Use longer thread lengths (20-24 inches) to reduce the number of knots and restarts
Comparison to machine sewing: A sewing machine completes the same 36×36-inch blanket in 1-2 hours, making it 3-4 times faster than hand-sewing. However, hand-sewing requires no equipment investment and can be done anywhere.
Best scenario for hand-sewing: Choose hand-sewing if you enjoy the meditative process, want a portable project, or are making a special heirloom blanket where the hand-stitched quality adds sentimental value.
Frequently Asked Questions
What is the easiest baby blanket to sew for beginners?
A simple double-sided flannel blanket with self-binding edges is the easiest for beginners. Cut two 37×37-inch flannel squares, sew right-sides together with a 3/8-inch seam allowance, leave a 4-inch gap, turn right-side out, and topstitch around the edge. No binding strips or complex techniques required.
Can I use regular cotton fabric for a baby blanket?
Yes, quilting cotton works well for baby blankets, especially when paired with a soft backing like flannel or minky. Quilting cotton is breathable, comes in thousands of patterns, and is machine-washable. Prewash it first since cotton shrinks 3-5% in the first wash.
How do I keep my baby blanket layers from shifting while sewing?
Pin every 3-4 inches around the perimeter, or use fabric clips on thick or slippery fabrics. For extra security, baste the layers together with long stitches 1/4 inch from the edge before sewing the final seam. A walking foot attachment also helps feed layers evenly.
Should I use batting in a baby blanket?
Batting is optional. Most baby blankets use two fabric layers without batting for a lightweight, easily washable blanket. Add thin cotton or bamboo batting (not thick polyester quilt batting) only if you want extra warmth or a quilted look. Secure batting by quilting through all layers every 4-6 inches.
What size needle should I use for sewing baby blankets?
Use a universal 80/12 needle for cotton and flannel, a 90/14 ballpoint needle for knit fabrics and fleece, or a 90/14 stretch needle for minky. Replace your needle after every 8 hours of sewing or when you notice skipped stitches or snagging.
Can I add ribbons or tags to a baby blanket?
Yes, but sew them securely into seams (not as loose loops) to prevent choking hazards. Ribbon tags should be no longer than 2 inches and stitched through multiple times. Avoid buttons, beads, or any embellishments that could detach. Embroidered or appliquéd designs are safer alternatives.
How do I wash a handmade baby blanket?
Wash in warm or hot water with fragrance-free, dye-free baby detergent. Tumble dry on medium heat or air-dry. Avoid fabric softener, which can reduce absorbency and leave residue. Wash new blankets 2-3 times before giving them to baby to ensure all manufacturing residue is removed.
What’s the difference between a receiving blanket and a baby blanket?
Receiving blankets are thin, lightweight blankets (usually 30×40 inches) designed for swaddling newborns in the hospital. Baby blankets are generally thicker, larger (36×36 to 42×52 inches), and used for warmth, tummy time, and stroller coverage. Both terms are often used interchangeably.
Can I make a baby blanket without a serger?
Yes, a serger is completely optional for baby blankets. Use the self-binding method (sewing two layers right-sides together) to enclose all raw edges, or finish single-layer edges with a zigzag stitch or turned hem. Sergers are convenient but not necessary for this project.
How do I fix puckered seams on my baby blanket?
Puckered seams usually result from too-tight thread tension or stretching fabric while sewing. Adjust your upper thread tension slightly looser, ensure you’re not pulling fabric through the machine (let the feed dogs do the work), and press seams flat immediately after sewing. If puckering persists, check your tension settings.
Is it cheaper to make or buy a baby blanket?
Making a basic baby blanket costs $10-25 in materials, while store-bought equivalents cost $20-60. You save money on simple designs but invest 1-3 hours of time. DIY becomes more cost-effective when making multiple blankets (for gifts or siblings) or when you want premium fabrics that would be expensive retail.
What’s the best way to personalize a baby blanket?
Embroider the baby’s name or initials using a sewing machine embroidery function or hand embroidery before assembling the blanket. Alternatively, use fabric markers designed for textiles (heat-set after writing), appliqué fabric letters, or choose personalized printed fabric. Avoid iron-on transfers, which can crack and peel with washing.
Conclusion
Learning how to sew a baby blanket opens the door to creating personalized, meaningful gifts that families will treasure for years. Whether you choose a simple double-sided flannel design for your first project or advance to minky blankets with satin binding, the core techniques remain accessible to sewers at any skill level.
Your next steps:
- Choose your fabric: Start with cotton flannel for an easy first project, or select minky if you’re ready for a challenge
- Gather supplies: You’ll need 1.25 yards each of two fabrics, matching thread, scissors or rotary cutter, pins, and access to a sewing machine (or 3-5 hours for hand-sewing)
- Prewash everything: Wash and dry all fabric before cutting to prevent shrinkage and remove chemicals
- Cut accurately: Measure and cut two identical fabric pieces 1/2 inch larger than your desired finished size
- Sew with confidence: Follow the self-binding method for foolproof results, remembering to backstitch at the beginning and end of seams
- Press for perfection: Iron your finished blanket flat for a professional appearance
Remember that your first baby blanket doesn’t need to be perfect, it just needs to be soft, safe, and made with care. Each blanket you create will improve your skills and give you more confidence to tackle increasingly complex sewing projects.
Ready to start your baby blanket project? Gather your materials, set aside an afternoon, and enjoy the satisfying process of creating something beautiful and functional with your own hands. The baby who receives your handmade blanket will benefit from your effort for years to come.


