Quick Answer
The first 10 sewing projects for complete beginners should focus on straight seams, minimal pattern pieces, and forgiving fabrics like cotton. Start with items like pillowcases, tote bags, and simple drawstring pouches that teach fundamental skills without overwhelming complexity. These projects typically take 1-3 hours each and require only basic supplies: fabric, thread, scissors, pins, and either a sewing machine or hand-sewing needle.
Key Takeaways
- Pillowcases and tote bags are the easiest starter projects because they use only straight seams and rectangles of fabric
- Hand sewing works fine for small projects like coasters and simple pouches, but a machine speeds up larger items significantly
- Most beginner projects need 1-2 yards of fabric, making them affordable and low-risk for learning
- Free patterns are widely available on sites like Craftsy, So Sew Easy, and Mood Fabrics for every skill level
- Basic supplies cost $30-50 to start: fabric scissors, pins, measuring tape, thread, and needles
- Thread tangling usually means incorrect threading, old thread, or tension problems that are easily fixed
- Avoid zippers and buttonholes in your first 2-3 projects until you master straight seams and turning corners
- Common beginner mistakes include skipping fabric pre-washing, using dull needles, and not backstitching seam ends
- Kids can start with the same projects as adults but benefit from larger stitches and thicker fabrics for easier handling
- Wearable garments should wait until you’ve completed 3-5 practice projects and understand seam allowances
What Are the Easiest Sewing Projects to Start With as a Complete Beginner?
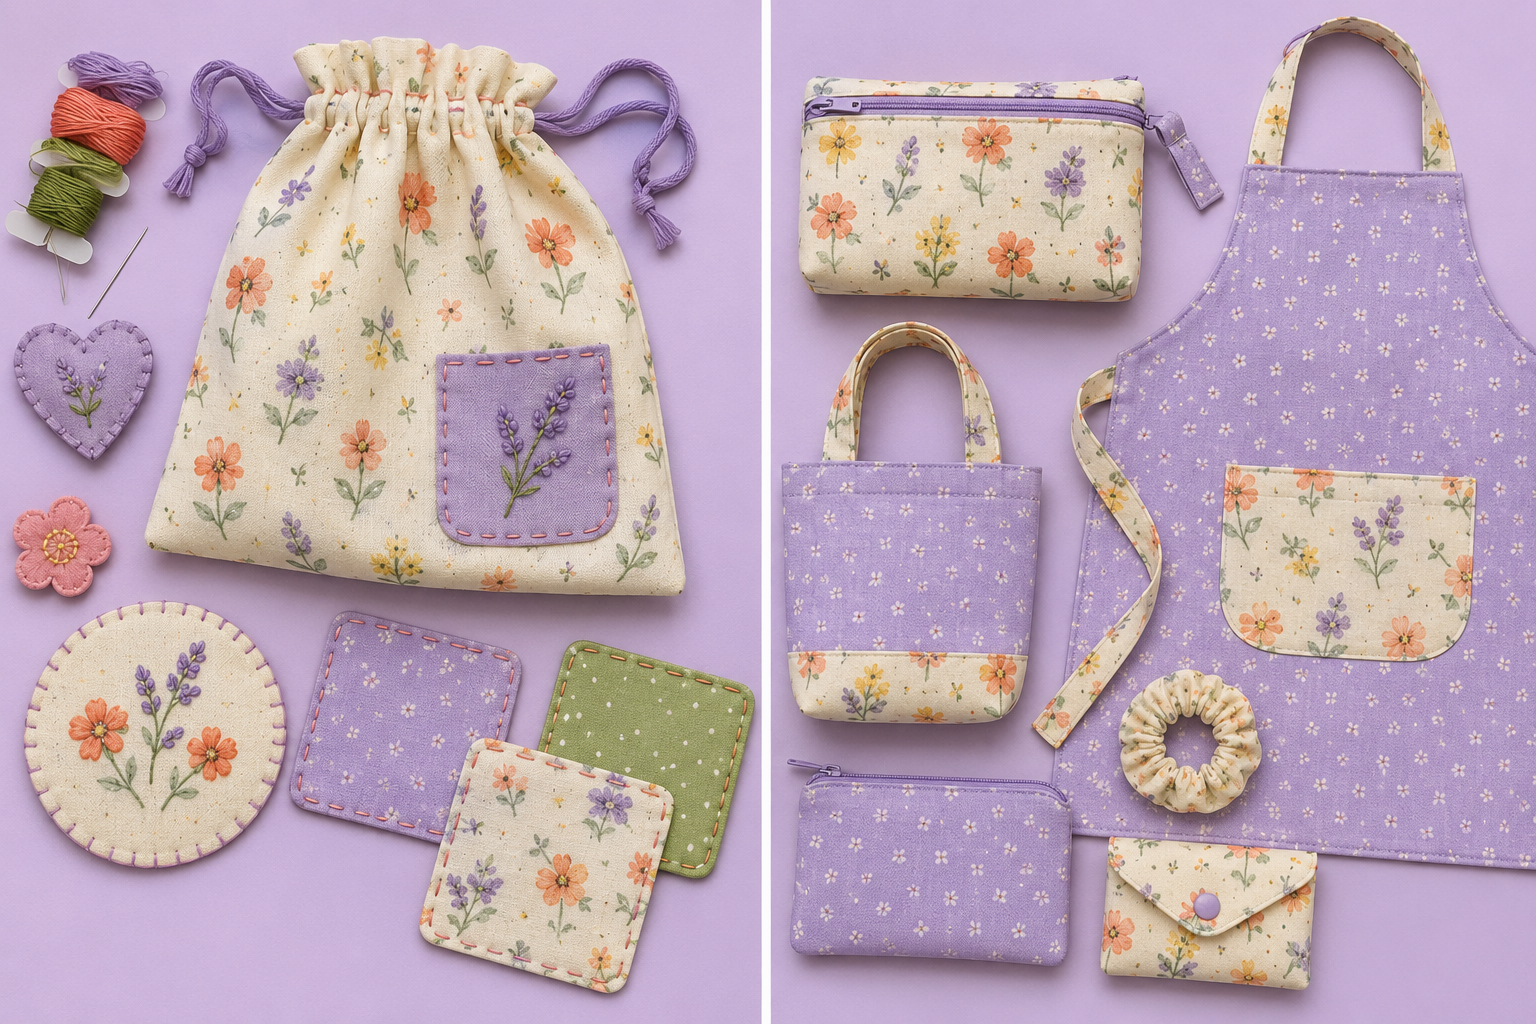
The easiest sewing projects for complete beginners are pillowcases, simple tote bags, and fabric napkins because they require only straight seams and use basic rectangular shapes. These projects teach essential skills like measuring, cutting, sewing straight lines, and finishing edges without introducing complex techniques like curves, zippers, or fitted shapes.
Here are the 10 best starter projects ranked by difficulty:
- Fabric napkins or handkerchiefs – Just four straight seams with hemmed edges
- Pillowcase with French seams – Two rectangles sewn together, introduces seam finishing
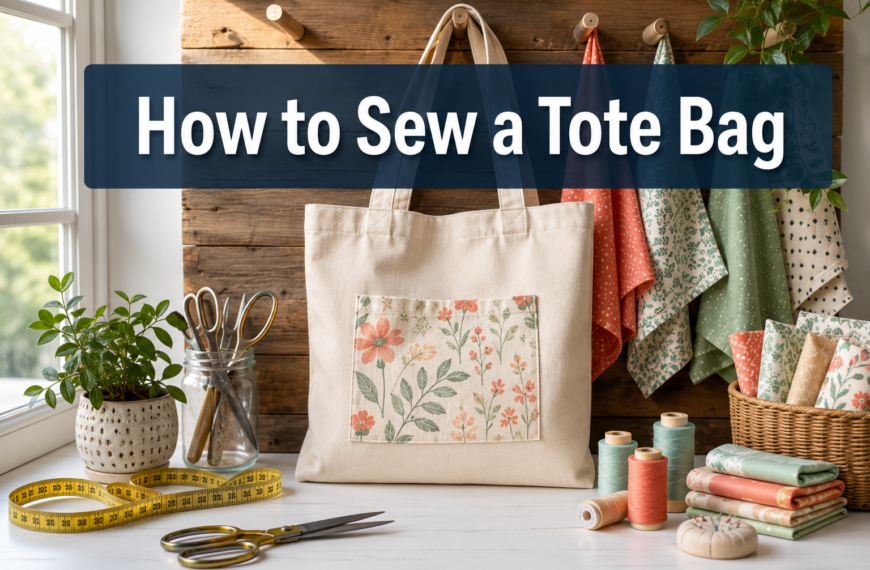
- Basic tote bag – Rectangles with handles, teaches bag construction basics
- Drawstring bag – Adds a simple casing and drawstring channel
- Fabric coasters – Small squares, perfect for practicing corners and turning
- Simple apron – Introduces waist ties and basic garment construction
- Table runner – Longer straight seams, good for practicing consistent seam allowances
- Zipper pouch (after mastering basics) – First zipper project with flat construction
- Elastic-waist skirt – First garment, uses only straight seams and elastic casing
- Pajama pants – Simple pattern with straight legs, introduces inseams
Choose projects based on what you’ll actually use. If you need kitchen items, start with napkins and aprons. If you want accessories, begin with tote bags and pouches. The motivation to finish something useful keeps beginners engaged better than making practice samples.
Common mistake: Beginners often jump to complex projects like fitted clothing or quilts. These require pattern reading, precise seam matching, and advanced techniques that lead to frustration. Stick with rectangles and straight seams for your first five projects.
Do I Need a Sewing Machine for Beginner Projects or Can I Hand Sew?
You can hand sew any beginner project, but a sewing machine makes projects 5-10 times faster and creates more durable seams for items that need washing. Hand sewing works best for small projects under 12 inches (coasters, simple pouches, decorative items), while machine sewing is more practical for larger items like tote bags, pillowcases, and aprons.

27 Unique Built-in Stitches: The Brother XM2701 sewing machine includes 27 built-in stitches including decorative, blind hem, zigzag, and stretch stitches and an auto-size buttonhole
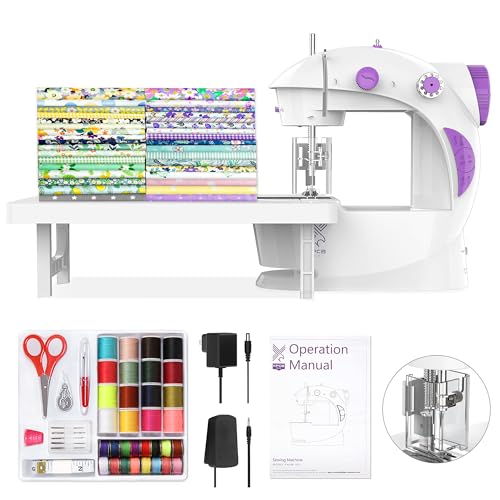
【Fabric Bundles】Equipped with 20pcs 8” x8”in and 100% cotton fabrics square with different patterns, it helps to create your unique sewing project, do the patch work or school projects. And it is also the great practice tool for sewing.

37 UNIQUE BUILT-IN STITCHES: The XM3700 lightweight sewing machine features 37 unique built-in stitches, and a one-step auto-size buttonhole
When to Choose Hand Sewing
Hand sewing is ideal if you:
- Want to start immediately without investing in equipment
- Prefer portable projects you can work on anywhere
- Are making small decorative items or repairs
- Enjoy the meditative, slower pace of hand stitching
- Are teaching children who aren’t ready for machine safety
Basic hand-sewing stitches for beginners include the running stitch, backstitch (strongest for seams), and whipstitch (for edges). A backstitch creates seams nearly as strong as machine stitching when done with small, consistent stitches.
When to Choose Machine Sewing
A sewing machine becomes essential for:
- Projects larger than 18 inches in any dimension
- Items that need frequent washing (napkins, aprons, bags)
- Multiple projects or regular sewing practice
- Learning skills that transfer to garment construction
- Creating professional-looking finished items
If you’re serious about sewing for beginners, a basic mechanical machine costs $100-200 and opens up significantly more project possibilities. Look for models with adjustable stitch length, reverse function, and a free arm for circular sewing.
Decision rule: Start with hand sewing for your first 1-2 small projects to learn basic concepts without equipment investment. If you enjoy it and want to continue, invest in a machine before your third project.
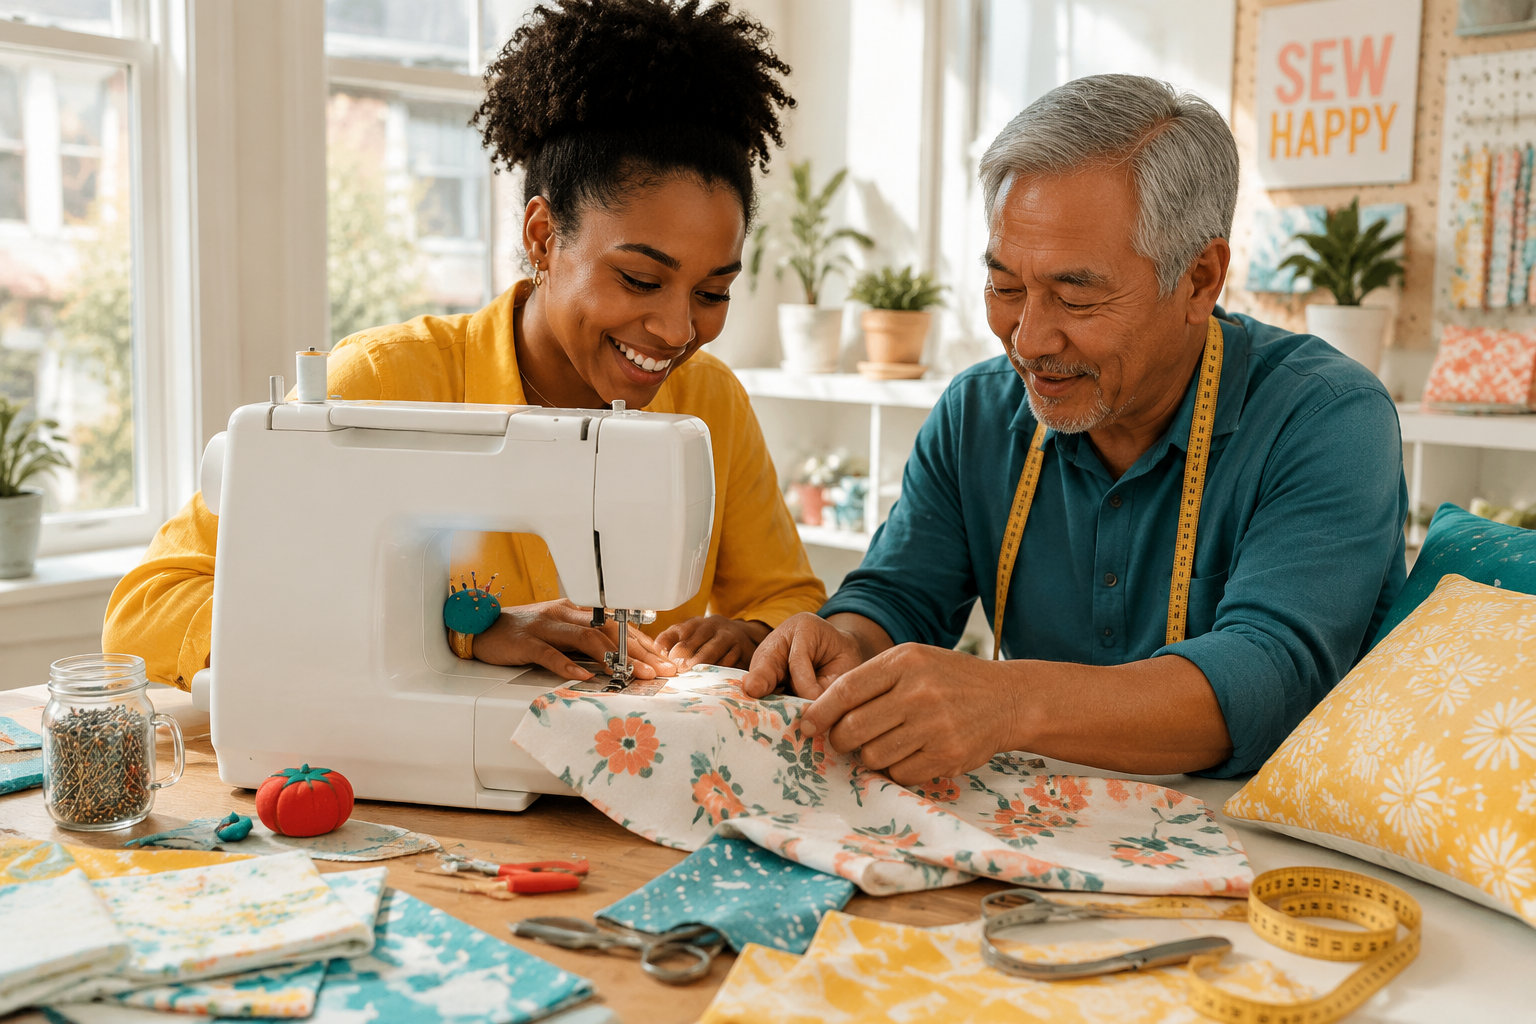
How Much Fabric Do I Need for Simple Beginner Sewing Projects?
Most beginner sewing projects require 1/2 to 2 yards of fabric, depending on the item size and your fabric width (typically 44-45 inches for quilting cotton or 54-60 inches for home décor fabrics). A standard pillowcase needs 3/4 yard, a basic tote bag needs 1 yard, and simple napkins need just 1/4 yard for a set of four.
Fabric Requirements by Project
| Project | Fabric Amount | Fabric Width | Notes |
|---|---|---|---|
| Set of 4 napkins (18″×18″) | 1/2 yard | 44″ | Allows for hemming |
| Standard pillowcase | 3/4 yard | 44″ | One pillowcase |
| Basic tote bag | 1 yard | 44″ | Includes handles |
| Drawstring bag (medium) | 1/2 yard | 44″ | 12″×15″ finished |
| Set of 4 coasters | 1/4 yard | 44″ | Plus backing fabric |
| Simple apron | 1-1/2 yards | 44″ | Adult size |
| Table runner (72″) | 2 yards | 44″ | Includes backing |
| Zipper pouch (8″×10″) | 1/2 yard | 44″ | Exterior and lining |
Buying Tips for Beginners
Always buy 1/4 yard extra beyond pattern requirements to account for cutting mistakes, fabric shrinkage after pre-washing, and pattern matching if using prints. Fabric costs $8-15 per yard for quality quilting cotton, so this safety margin adds only $2-4 to your project cost.
Choose 100% cotton quilting fabric for your first projects because it:
- Doesn’t slip or stretch during cutting and sewing
- Holds creases well when pressed
- Forgives minor tension issues better than synthetic fabrics
- Comes in endless patterns at affordable prices
Common mistake: Buying exactly the amount listed in a pattern without accounting for pre-washing shrinkage (typically 2-3% for cotton). Always pre-wash fabric before cutting to prevent your finished project from shrinking after the first wash.
What Basic Supplies Do I Need Before Starting My First Sewing Project?
You need seven essential supplies to start sewing: fabric scissors (or rotary cutter), pins, measuring tape, fabric marking tool, thread, hand-sewing needles or machine needles, and an iron. This basic kit costs $30-50 and handles all beginner projects. Additional helpful items include a seam ripper, pincushion, and ruler, but these aren’t mandatory for your first project.

A set of 4 scissors, can meet most cutting needs in sewing. It is the best choice for collection of sewing fans and gifts giving your friends and family.
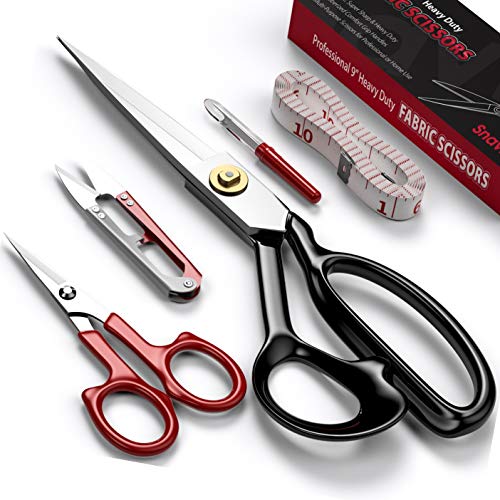
【Premium Tailor Scissors】The sewing scissors for fabric are made from high-carbon steel construction with anti-rust titanium coated very sharp blades, which are tempered and ground on both sides for increased sharpness and longer life, high-density steel makes 5 times harder and sharper than any other so-called "high quality" normal stainless steel sewing shears.

RAZOREDGE FABRIC SCISSORS: Ultra-sharp, premium-grade stainless steel blades with a precisely honed edge for clean cuts to the tip
Essential Supplies Checklist
Cutting tools:
- Fabric scissors (8-inch) dedicated only to fabric, never paper – $15-25
- OR rotary cutter with self-healing mat and ruler – $35-50
Measuring and marking:
- Measuring tape (60 inches) – $3-5
- Fabric marking pen or chalk – $4-8
- Clear quilting ruler (6″×24″) for straight cuts – $12-18
Fastening:
- Straight pins (50-100 count) – $5-8
- Pincushion or magnetic pin holder – $6-10
Sewing:
- All-purpose polyester thread in neutral colors – $3-4 per spool
- Hand-sewing needles (assorted pack) OR machine needles (size 80/12 universal) – $4-6
- Seam ripper for fixing mistakes – $4-6
Pressing:
- Iron with steam function – $20-40 (you likely already own one)
- Ironing board or padded surface
What You Don’t Need Yet
Skip these items until you’ve completed 3-5 projects and know you’ll continue sewing:
- Specialized presser feet beyond the basic foot
- Expensive thread in every color (buy as needed per project)
- Pattern weights (use cans or books)
- Bias tape maker or other specialty tools
- Fabric stash beyond your current project
Money-saving tip: Buy a beginner sewing kit that bundles scissors, pins, measuring tape, seam ripper, and needles for $25-35 instead of purchasing items separately. Add fabric and thread for your specific project.
For more guidance on selecting the right equipment, check out our beginner sewing resources.
What’s the Difference Between a Pillowcase and a Tote Bag for Learning to Sew?
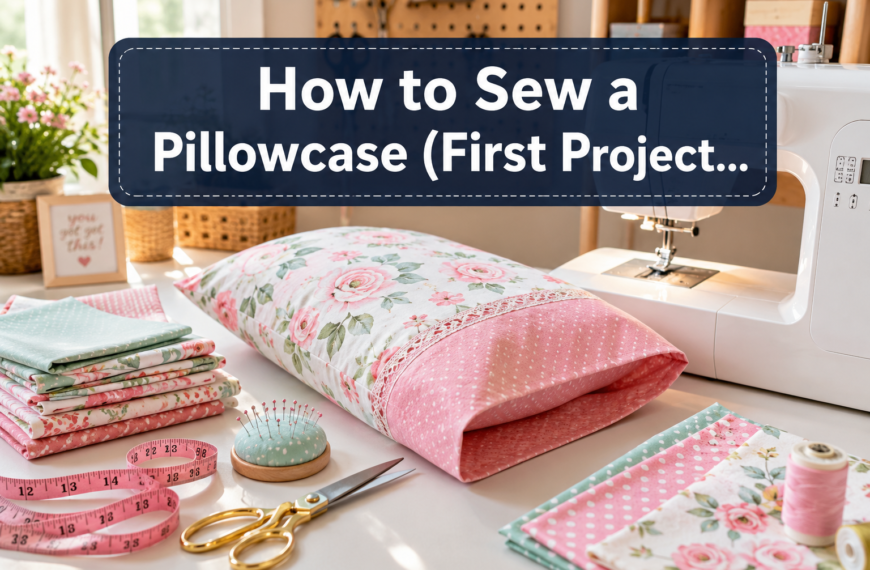
A pillowcase teaches enclosed seams and fabric turning, while a tote bag introduces handles, bag construction, and reinforced stress points. Both use rectangular pieces and straight seams, but a pillowcase is slightly easier because it has fewer components (two rectangles versus four pieces plus handles) and doesn’t require reinforcement stitching.
Pillowcase as a First Project
Pillowcases work well as a first project because:
- Only two pieces of fabric (front and back)
- All seams are straight with no curves
- Teaches French seams or basic seam finishing
- Introduces the concept of turning fabric right-side-out
- Finished product is immediately useful
- Mistakes are hidden inside when complete
A standard pillowcase takes 45-60 minutes for a beginner and uses simple construction: sew three sides, hem the opening, turn right-side-out, and press.
Tote Bag as a Second Project
Tote bags build on pillowcase skills by adding:
- Four main pieces (front, back, two side gussets OR two rectangles)
- Handle attachment requiring reinforcement stitching
- Topstitching for a professional finish
- Optional pockets or lining (skip these on your first bag)
- Understanding of stress points and durability
A basic tote takes 1.5-2 hours for a beginner and introduces the concept of sewing pieces in a specific order for proper construction.
Progression tip: Make a pillowcase first to master straight seams and turning. Then make a simple flat tote bag (two rectangles with handles) before attempting a tote with side gussets or a boxed bottom. Each project adds one new skill without overwhelming you.
Where Can I Find Free Sewing Patterns for Beginners?
Free beginner sewing patterns are available on Craftsy, So Sew Easy, Mood Fabrics, and Sew Can She, which collectively offer hundreds of downloadable PDF patterns for simple projects. These sites provide step-by-step instructions with photos, fabric requirements, and cutting diagrams specifically designed for people learning to sew.

PATTERN S1563 SIZING: Simplicity pattern includes women's, men's, and teens' sizes XS-XL so you can sew your ideal fit. Pattern sizing runs differently from ready-to-wear clothing, so measure and check the body size chart before cutting.


PATTERN S1575 SIZING: Simplicity pattern includes children's sizes 7-14 so you can sew your ideal fit. Pattern sizing runs differently from ready-to-wear clothing, so measure and check the body size chart before cutting.
Best Free Pattern Sources
Craftsy (craftsy.com/sewing)
- Extensive library of free patterns with video tutorials
- Skill level clearly marked on each pattern
- Includes both printable PDFs and online instructions
- Strong community forum for asking questions
So Sew Easy (so-sew-easy.com)
- Beginner-focused tutorials with detailed photos
- Patterns organized by project type and difficulty
- No account required for most free patterns
- Excellent written instructions for visual learners
Mood Fabrics (moodfabrics.com/blog)
- Professional-quality free patterns
- Detailed sewing glossary for unfamiliar terms
- Patterns designed by experienced sewists
- Includes fabric recommendations for each project
Sew Can She (sewcanshe.com)
- Beginner-friendly project focus
- Weekly free pattern releases
- Active Facebook community for support
- Patterns tested by beginners before publication
How to Choose a Pattern
Look for patterns marked “beginner,” “easy,” or “quick” that include:
- Clear skill level designation (avoid “intermediate” for your first 3-5 projects)
- Photo tutorials showing each step, not just line drawings
- Fabric recommendations specifying type and amount
- Finished dimensions so you know the final size
- Seam allowance information (usually 1/2 inch or 5/8 inch)
Red flag: Avoid patterns that assume knowledge of terms like “ease,” “bias,” “grainline,” or “notches” without explaining them. True beginner patterns define every term and show every step visually.
For additional sewing tips and techniques, explore our comprehensive guides.
Why Does My Thread Keep Tangling on Beginner Sewing Projects?
Thread tangling (also called bird’s nesting) happens when the upper thread isn’t properly threaded, the bobbin is inserted incorrectly, or the thread tension is too loose. For beginners, the most common cause is missing one of the threading points on the machine or not having the presser foot up while threading, which prevents the thread from seating properly in the tension discs.
Quick Fixes for Thread Tangling
Re-thread completely:
- Remove all thread from the machine (top and bobbin)
- Raise the presser foot (this opens the tension discs)
- Follow your machine’s threading diagram exactly, checking each guide
- Lower the presser foot before sewing
- Hold both thread tails behind the needle when starting
Check your bobbin:
- Ensure the bobbin is inserted in the correct direction (check your manual)
- Verify the thread unwinds in the right direction from the bobbin
- Make sure the bobbin case clicks fully into place
- Use bobbins designed for your specific machine brand
Adjust tension:
- Start with tension set to the middle number (usually 4-5)
- If loops appear on the bottom, upper tension is too loose (increase the number)
- If loops appear on top, upper tension is too tight (decrease the number)
Prevention Tips
- Use quality thread (cheap thread shreds and tangles more easily)
- Match thread weight to your needle size (all-purpose thread with 80/12 needle)
- Clean lint from the bobbin area every 2-3 projects
- Don’t pull fabric through the machine (let the feed dogs do the work)
Most common beginner error: Threading the machine with the presser foot down. This single mistake causes 60-70% of tension and tangling problems because the thread never enters the tension discs properly.
For more troubleshooting help, visit our sewing troubleshooting guide or learn why your sewing machine might be jamming.
Is a Zipper Pouch Too Hard for Someone Who Has Never Sewn Before?
A zipper pouch is too advanced for your very first project but becomes manageable as your third or fourth project after you’ve mastered straight seams and turning corners. The zipper installation requires precise alignment and introduces the zipper foot, making it more complex than projects using only straight seams and the standard presser foot.
Why Zippers Are Intermediate Skills
Zipper installation challenges beginners because it requires:
- Switching to a specialized zipper foot
- Sewing very close to the zipper teeth without hitting them
- Aligning fabric edges precisely on both sides
- Understanding zipper positioning (centered, lapped, or exposed)
- Managing three layers (fabric, zipper tape, and lining)
However, a flat zipper pouch (not a boxed or curved pouch) is an excellent third or fourth project because:
- It uses a simple centered zipper application
- The flat construction is more forgiving than curved bags
- You can practice on a small 6″×8″ size with minimal fabric investment
- The skills transfer directly to garment sewing later
Recommended Learning Progression
- First project: Pillowcase (straight seams, turning)
- Second project: Simple tote bag (handles, reinforcement)
- Third project: Drawstring bag (casing, channels)
- Fourth project: Flat zipper pouch (zipper installation)
This progression adds one new skill per project without overwhelming you.
Alternative: If you want a pouch project sooner, make a fold-over pouch with a snap or button closure instead. This gives you the satisfaction of making a functional pouch while postponing zipper skills until you’re ready.
What Mistakes Do Beginners Make on Their First Sewing Projects?
The most common beginner mistakes are skipping fabric pre-washing, using dull or wrong-size needles, not backstitching at seam ends, and failing to press seams as they sew. These errors lead to projects that shrink after washing, skipped stitches, seams that come apart, and puckered or twisted results.
Top 10 Beginner Mistakes and How to Avoid Them
1. Not pre-washing fabric
- Cotton shrinks 2-3% in the first wash
- Pre-wash all fabric before cutting to prevent finished project shrinkage
- Dry and press fabric before measuring and cutting
2. Using dull or incorrect needles
- Change needles every 6-8 hours of sewing or per project
- Use universal 80/12 needles for cotton quilting fabric
- Dull needles cause skipped stitches and fabric damage
3. Skipping backstitching
- Always backstitch 3-4 stitches at the start and end of every seam
- This locks the stitches and prevents seams from unraveling
- Use your machine’s reverse button or lever
4. Not pressing seams
- Press seams open or to one side after sewing each seam
- Pressing creates crisp, professional results and makes next steps easier
- “Press” means lift and lower the iron; don’t slide it
5. Cutting inaccurately
- Measure twice, cut once
- Use a rotary cutter and ruler for straight, accurate cuts
- Add 1/4 yard extra fabric to account for cutting errors
6. Ignoring seam allowance
- Most patterns use 5/8-inch seam allowance (distance from fabric edge to stitching line)
- Use your machine’s seam guide markings or place tape as a guide
- Consistent seam allowance ensures pieces fit together properly
7. Sewing too fast
- Slow, consistent speed produces straighter seams
- You control the machine; it doesn’t control you
- Speed comes naturally with practice
8. Not reading instructions completely
- Read through the entire pattern before starting
- Understand the order of construction steps
- Gather all supplies before beginning
9. Using pins perpendicular to seams
- Place pins parallel to the seam line, not across it
- Remove pins as you approach them (don’t sew over pins)
- Hitting pins with the needle can break both
10. Choosing difficult fabrics
- Start with 100% cotton quilting fabric
- Avoid slippery (satin, silk), stretchy (knit, jersey), or thick (denim, canvas) fabrics
- These require specialized techniques and needles
Mindset tip: Expect your first project to have imperfections. Every experienced sewist started with crooked seams and mistakes. The goal is learning, not perfection.
Should Kids Start With the Same Beginner Projects as Adults?
Kids can start with the same basic projects as adults (pillowcases, simple bags, napkins) but benefit from modifications like larger seam allowances, thicker fabrics, and hand-sewing instead of machine work for children under age 8-10. The key difference is supervision level and project size, not the fundamental skills being taught.
Age-Appropriate Modifications
Ages 5-7 (hand sewing only):
- Simple felt projects (no fraying edges)
- Large plastic needles with embroidery floss
- Running stitch and whipstitch only
- Projects under 6 inches (ornaments, bookmarks, small pouches)
- Constant adult supervision
Ages 8-10 (supervised machine sewing):
- Same projects as adult beginners but smaller sizes
- Straight seams only, no curves or corners initially
- Mechanical machines only (no computerized features to confuse)
- Adult controls foot pedal speed initially
- Projects: small pillows, simple drawstring bags, fabric bookmarks
Ages 11+ (independent machine sewing):
- Full range of beginner projects
- Can learn machine threading and bobbin winding
- Introduce corners, curves, and simple zippers
- Emphasize safety rules (fingers away from needle, no rushing)
- Projects: standard pillowcases, tote bags, simple clothing
Safety Considerations
Machine safety rules for kids:
- Always keep fingers at least 3 inches from the needle
- Never lean face close to the machine while sewing
- Turn off machine when threading or changing settings
- No loose clothing or long hair near moving parts
- Adult present for all machine sewing until age 12+
Motivation tip: Let kids choose their own fabric patterns featuring characters or colors they love. Personal investment in the project keeps young sewists engaged through the learning curve.
For guidance on selecting appropriate equipment, see our guide on the best sewing machine for beginners.
How Long Does It Take to Finish a Simple Beginner Sewing Project?
Most beginner sewing projects take 1-3 hours to complete, including cutting, sewing, and pressing time. A simple pillowcase takes 45-60 minutes, a basic tote bag takes 1.5-2 hours, and fabric napkins take about 15 minutes each once you establish a rhythm. These times assume you’re working at a learning pace with frequent reference to instructions.
Time Estimates by Project
Quick projects (under 1 hour):
- Set of 4 fabric napkins: 45-60 minutes total
- Single pillowcase: 45-60 minutes
- Set of 4 coasters: 30-45 minutes
- Simple drawstring bag (small): 45 minutes
Medium projects (1-2 hours):
- Basic tote bag: 1.5-2 hours
- Table runner: 1.5 hours
- Simple apron: 2 hours
- Medium drawstring bag with lining: 1.5 hours
Longer projects (2-3 hours):
- Zipper pouch with lining: 2-2.5 hours
- Elastic-waist skirt: 2.5-3 hours
- Pajama pants: 3-4 hours
- Lined tote bag with pockets: 2.5-3 hours
Factors That Affect Project Time
Your speed increases with:
- Practice (your third pillowcase takes half the time of your first)
- Familiarity with your machine
- Better cutting accuracy (less ripping and re-sewing)
- Understanding instructions before starting
- Having all supplies ready before beginning
Projects take longer when:
- Learning a new technique (first zipper, first buttonhole)
- Using unfamiliar patterns or instructions
- Making mistakes that require seam ripping
- Stopping frequently to check instructions
- Working with difficult fabrics
Realistic expectation: Double the time estimate for your first attempt at any project. If a pattern says “1 hour,” plan for 2 hours as a beginner. Your speed will naturally increase with each project.
Can I Make Wearable Clothes as My First Sewing Project or Should I Start With Something Else?
Start with non-clothing projects for your first 3-5 items before attempting wearable garments. Clothing requires accurate measurements, proper fit, understanding of seam allowances, and often includes techniques like darts, curves, and closures that are too complex for absolute beginners. Simple home décor and accessory projects teach the same fundamental skills with more forgiving results.
Why Clothing Is Too Advanced for First Projects
Garment sewing challenges beginners because it requires:
- Precise measurements and fit (too small or large makes the item unwearable)
- Pattern reading skills (understanding symbols, notches, grainlines)
- Curved seams (armholes, necklines, crotch curves)
- Finishing techniques (facings, hems, closures)
- Fabric behavior knowledge (drape, stretch, recovery)
A poorly sewn pillowcase still functions as a pillowcase. A poorly sewn shirt is unwearable and demoralizing.
Recommended Progression to Garments
Projects 1-3: Home décor and accessories
- Pillowcases, napkins, tote bags
- Master straight seams, turning, and pressing
Projects 4-6: Simple structured items
- Drawstring bags, zipper pouches, simple aprons
- Add casings, zippers, and waist ties
Projects 7-8: First garments (easiest options)
- Elastic-waist skirt (just rectangles with elastic casing)
- Pajama pants (straight legs, elastic waist, simple inseam)
- Both use straight seams and forgiving fit
Projects 9+: Intermediate garments
- Simple tops with facings
- A-line dresses
- Fitted pants or skirts
Exception: Ultra-Simple Garments
An elastic-waist skirt can work as a 4th or 5th project if you:
- Use a beginner-specific pattern with detailed instructions
- Choose a forgiving fabric like cotton quilting fabric
- Accept that fit may not be perfect
- Understand it’s a learning project, not a wardrobe staple
Decision rule: If you’ve successfully completed a pillowcase, tote bag, and drawstring bag with results you’re proud of, you’re ready for an elastic-waist skirt or pajama pants. If those projects felt frustrating or your seams are very crooked, complete 2-3 more non-clothing projects first.
What’s Easier to Sew First: A Drawstring Bag or an Apron?
A drawstring bag is easier than an apron as a beginner project because it requires fewer pieces (one or two rectangles versus three or more for an apron), has no waist ties to attach, and uses a simple casing technique. An apron introduces curved edges (neck and armholes), multiple tie attachments, and often includes pockets, making it better as a 5th or 6th project.
Drawstring Bag Advantages
Simpler construction:
- One or two fabric rectangles
- Straight seams only
- Single new skill: creating a casing for the drawstring
- No curves or shaped edges
- Finished in 45-60 minutes
Forgiving results:
- Doesn’t need to fit a body
- Slight size variations don’t affect function
- Mistakes are less visible in a gathered bag
- Multiple uses (storage, gift bags, laundry bags)
Apron Complexity
More components:
- Main apron body (often with curves)
- Waist ties (two pieces)
- Neck strap (one piece)
- Optional pocket (additional piece)
- Bias tape or hem finishing for curved edges
Additional skills required:
- Attaching ties securely at stress points
- Finishing curved edges neatly
- Topstitching for professional appearance
- Understanding body measurements and fit
Recommended Order
- Pillowcase (straight seams, turning)
- Tote bag (handles, reinforcement)
- Drawstring bag (casing technique)
- Simple apron (ties, curves, pockets)
This progression adds one new skill per project, building confidence without overwhelming you.
Alternative: If you want to make an apron sooner, choose a pattern with straight edges (no curves), no pockets, and simple tie attachment. This reduces complexity while still teaching garment construction basics.
For more detailed guidance on sewing techniques, explore our comprehensive tutorials.
Frequently Asked Questions
What is the absolute easiest thing to sew for a complete beginner? Fabric napkins or handkerchiefs are the easiest first project because they’re just squares with hemmed edges, requiring only straight seams and basic corner turning. A set of four 18-inch napkins takes about 45 minutes and teaches measuring, cutting, and sewing straight lines.
Do I need to know how to thread a sewing machine before starting? Yes, proper threading is essential before your first machine project. Spend 15-20 minutes practicing threading and winding bobbins following your machine’s manual before cutting any fabric. For step-by-step help, see our guide on how to thread a sewing machine.
Can I use old sheets or clothing to practice sewing? Old sheets work well for practice projects, but avoid used clothing because seams, zippers, and worn fabric complicate learning. Washed cotton sheets are similar to quilting fabric and cost nothing, making them perfect for test projects before using new fabric.
How do I know what size seam allowance to use? Most beginner patterns specify 1/2-inch or 5/8-inch seam allowance in the instructions. If not specified, use 5/8 inch (the standard for garment sewing). Your machine’s throat plate has measurement markings to guide you.
What’s the best fabric for learning to sew? 100% cotton quilting fabric is ideal for beginners because it doesn’t slip, stretch, or fray excessively, holds creases well when pressed, and costs $8-12 per yard. Avoid satin, knit, fleece, or denim for your first 5-10 projects.
Should I buy a pattern or find free instructions online? Free online tutorials with photos work well for simple projects like pillowcases and tote bags. Buy patterns once you progress to garments or complex items that need precise sizing and professional instructions.
How do I fix a seam that came out crooked? Use a seam ripper to carefully remove the stitches, press the fabric flat, and re-sew the seam more slowly while watching your seam guide. Crooked seams are normal for beginners and improve quickly with practice.
What does “right sides together” mean in sewing instructions? “Right sides together” means place the two fabric pieces with the printed or “good” sides facing each other before sewing. This hides the seam inside when you turn the project right-side-out after sewing.
Can I sew without an iron? An iron is essential for quality results because pressing seams flat as you sew prevents puckering and makes the next steps easier. Skipping pressing is the fastest way to create amateur-looking projects. A basic iron costs $20-30.
How do I prevent fabric from shifting while I sew? Pin fabric pieces together every 3-4 inches perpendicular to the seam, removing pins as you approach them. Don’t pull or push fabric through the machine; let the feed dogs move it at their own pace.
What’s the difference between sewing and serging? Sewing creates seams that join fabric pieces together using a regular sewing machine. Serging trims, encloses, and finishes raw edges using a specialized serger machine. Beginners only need a regular sewing machine; sergers are optional advanced equipment.
How much should I spend on my first sewing machine? A quality beginner mechanical sewing machine costs $100-200 and includes all necessary features (adjustable stitch length, reverse, free arm, basic stitches). Avoid machines under $80 (poor quality) or over $400 (unnecessary features for beginners).
Conclusion
Starting your sewing journey with the first 10 sewing projects for complete beginners builds a strong foundation of essential skills while creating useful items for your home. Begin with simple projects like pillowcases and fabric napkins that teach straight seams and basic construction, then gradually progress to tote bags, drawstring pouches, and eventually simple garments like elastic-waist skirts.
Remember that every experienced sewist started exactly where you are now, with crooked seams and mistakes. The key to success is choosing projects that match your current skill level, pre-washing your fabric, using quality supplies, and pressing seams as you work. Each project you complete builds confidence and muscle memory that makes the next one easier and faster.
Your next steps:
- Choose your first project based on what you’ll actually use (pillowcase, napkins, or small tote bag)
- Gather basic supplies: fabric scissors, pins, measuring tape, thread, and needles
- Find a free beginner pattern with photo instructions
- Pre-wash and press your fabric before cutting
- Work slowly and refer to instructions frequently
- Press seams after each step for professional results
The first 10 sewing projects for complete beginners aren’t about perfection; they’re about learning fundamental techniques that unlock a lifetime of creative possibilities. Start with your first project today, embrace the learning process, and enjoy the satisfaction of creating something useful with your own hands.
For ongoing support and troubleshooting, bookmark our sewing for beginners resources and join online sewing communities where experienced sewists happily answer questions and celebrate your progress.