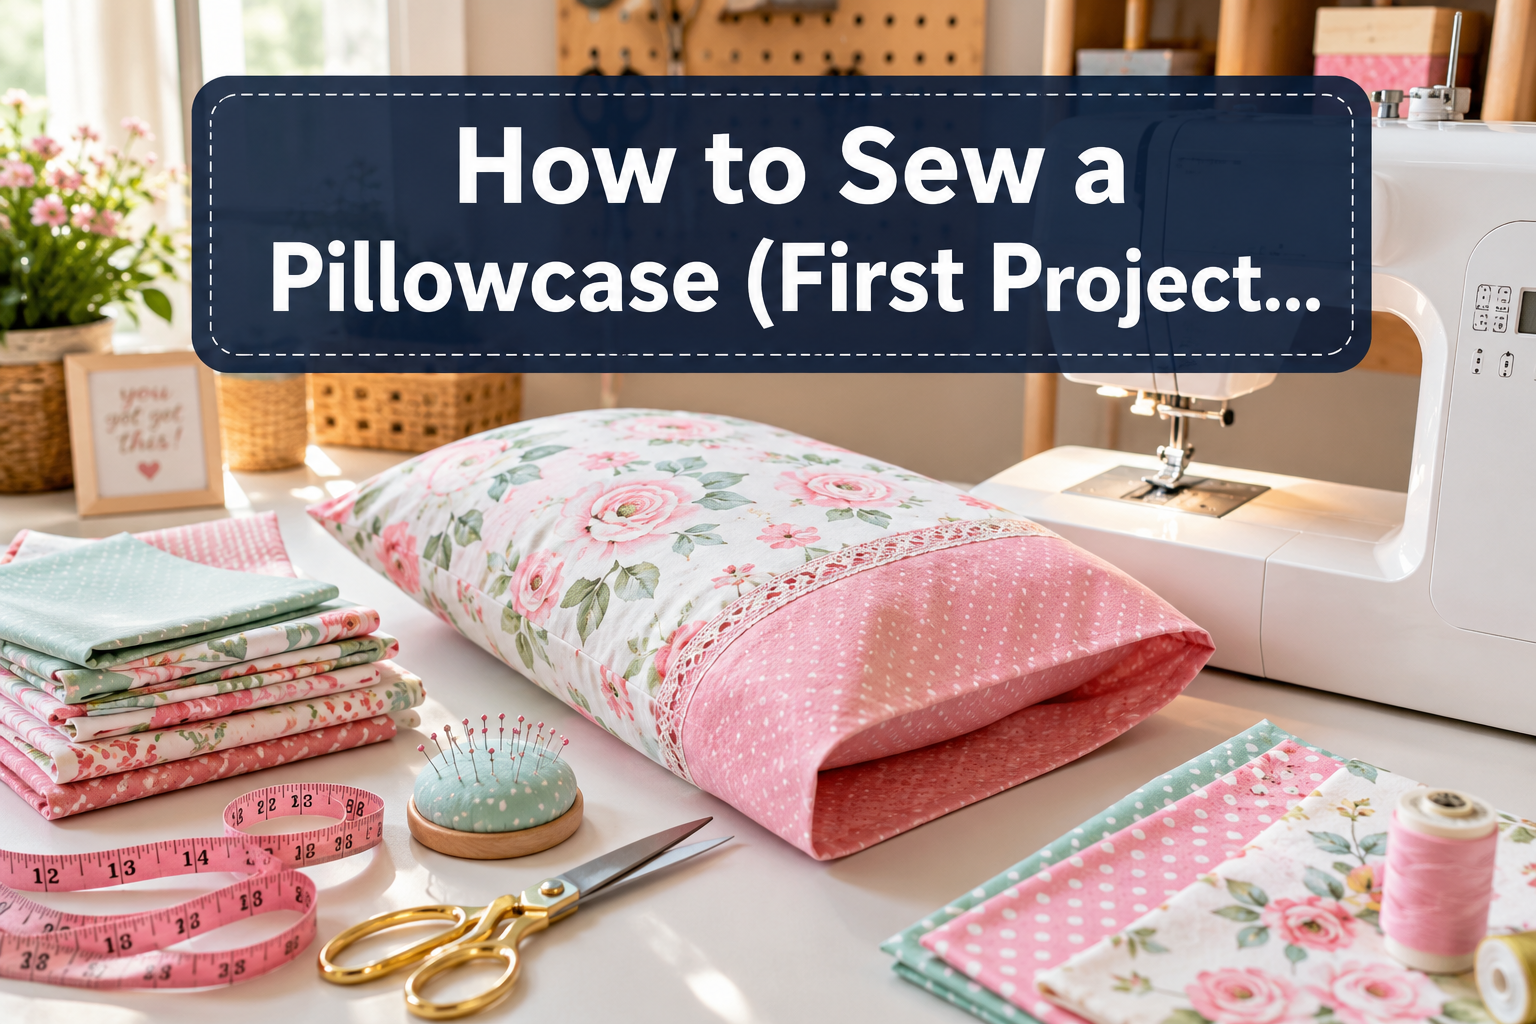
Sewing a pillowcase is the perfect first project for beginners because it requires only straight seams, minimal fabric, and basic sewing machine skills. This walkthrough will guide you through every step, from choosing fabric to finishing your first pillowcase in about 1-2 hours. Whether you’re using a regular sewing machine or sewing by hand, a pillowcase teaches fundamental techniques you’ll use in every future project.
Key Takeaways
- A standard pillowcase requires 1 yard of fabric (44-45″ wide) for a 20″ x 26″ pillow
- Cotton and cotton blends are the best beginner fabrics because they’re forgiving and easy to handle
- You don’t need a serger, a regular sewing machine or even hand sewing works perfectly
- French seams create professional, enclosed edges but regular seams with a zigzag finish are easier for first-timers
- Always prewash your fabric to prevent shrinkage and color bleeding after your pillowcase is complete
- Common mistakes include puckered seams and openings that are too small, both easily fixed with proper technique
- Most beginners complete their first pillowcase in 1-2 hours, making it an ideal afternoon project
- Envelope-style pillowcases are easier than zippered versions and require no special hardware
What Is the Easiest Way to Sew a Pillowcase for Beginners?
The easiest method for beginners is the basic envelope-style pillowcase with a simple hem and straight seams. This approach requires only three main seams and avoids complicated closures, zippers, or decorative elements that can frustrate first-time sewers.
Here’s the simplified process:
- Cut your fabric to the correct dimensions (27″ x 41″ for a standard pillow)
- Hem one short edge (this becomes your opening)
- Fold the fabric in half with right sides together
- Sew the two remaining sides with a straight stitch
- Turn right-side out and press
This method teaches you essential skills like measuring, cutting, hemming, and sewing straight seams without overwhelming you with complex techniques. The forgiving nature of cotton fabric means small mistakes won’t ruin your project, and you’ll have a functional, usable pillowcase when you’re done.
Choose this method if: You’re touching a sewing machine for the first time, you want quick results, or you’re teaching a child to sew.
How Much Fabric Do I Need for a Standard Pillowcase?
For a standard 20″ x 26″ bed pillow, you need 1 yard (36 inches) of fabric that’s 44-45 inches wide, which is the standard width for quilting cotton. This single yard gives you enough material for one pillowcase with a bit of extra for squaring up your cuts.
Here’s the fabric breakdown by pillow size:
| Pillow Size | Fabric Needed (44-45″ wide) | Cut Dimensions |
|---|---|---|
| Standard (20″ x 26″) | 1 yard | 27″ x 41″ |
| Queen (20″ x 30″) | 1.25 yards | 27″ x 45″ |
| King (20″ x 36″) | 1.5 yards | 27″ x 51″ |
| Euro (26″ x 26″) | 1.25 yards | 33″ x 41″ |
Important calculation note: The cut dimensions include a 1/2-inch seam allowance on all sides and a 1-inch hem allowance for the opening. If you’re using a French seam (which requires two rounds of stitching), add an extra inch to your length measurement.
Common mistake: Buying fabric that’s too narrow. Always check the fabric width before purchasing. Some specialty fabrics come in 36″ widths, which won’t work for standard pillowcases without piecing.
Do I Need to Prewash Fabric Before Sewing a Pillowcase?
Yes, always prewash your fabric before cutting and sewing a pillowcase. Cotton and cotton-blend fabrics typically shrink 3-5% in the first wash, and some fabrics (especially darker colors) may bleed dye that could stain your pillow or other bedding.
Prewashing prevents these problems:
- Shrinkage after completion, Your finished pillowcase will fit properly even after multiple washes
- Dye bleeding, Excess dye is removed before it can transfer to your white pillows
- Chemical removal, Manufacturing chemicals and sizing are washed away
- Fabric softening, Prewashed fabric is easier to handle and feeds more smoothly through your machine
How to prewash correctly:
- Wash fabric in warm water with mild detergent
- Dry on medium heat or line dry
- Press with an iron to remove wrinkles before cutting
- Trim any frayed edges that developed during washing
Skip prewashing only if: You’re using pre-shrunk quilting cotton specifically labeled as such, or you’re making a decorative pillowcase that will never be washed. For any pillowcase that will go on a bed, prewashing is non-negotiable.
What Type of Fabric Is Best for Beginner Pillowcase Sewing?
100% quilting cotton or cotton/polyester blends (80/20 or 70/30 ratio) are the best fabrics for beginners because they’re stable, forgiving, and easy to sew with minimal puckering or stretching. These fabrics feed smoothly through your machine and hold a crease when pressed, making them ideal for learning.
Top beginner-friendly fabric choices:
- Quilting cotton, Medium weight, crisp finish, holds shape well, available in thousands of prints
- Cotton/poly blend, More wrinkle-resistant than pure cotton, slightly more durable
- Flannel, Soft and cozy, slightly thicker, good for winter pillowcases
- Linen/cotton blend, Breathable and luxurious, but pure linen can be tricky for beginners
Avoid these fabrics for your first project:
- Silk or satin, Too slippery, shifts during sewing, requires special needles
- Jersey knit, Stretches and distorts, difficult to keep aligned
- Velvet or corduroy, Directional nap requires special handling
- Sheer fabrics, Too delicate, shows every mistake
Fabric weight matters: Look for fabrics labeled as “medium weight” or “quilting weight” (typically 4-6 oz per square yard). Lightweight fabrics pucker easily, while heavyweight fabrics are hard to maneuver under your presser foot.
Pro tip: Start with a small-scale print or solid color. Large-scale prints require pattern matching, which adds complexity to your first project.
Do I Need a Serger to Make a Pillowcase or Can I Use a Regular Sewing Machine?
You absolutely do not need a serger to make a pillowcase, a regular sewing machine works perfectly. In fact, most beginners find regular sewing machines easier to control for straight seams, and the finished pillowcase will be just as durable and professional-looking.
A basic sewing machine with a straight stitch and zigzag stitch is all you need. Here’s how to finish seams without a serger:
Option 1: Zigzag finish (easiest)
- Sew your seam with a straight stitch
- Trim seam allowance to 1/4 inch
- Run a zigzag stitch along the raw edge to prevent fraying
Option 2: French seam (most professional)
- Sew with wrong sides together first
- Trim, flip, and sew again with right sides together
- Completely encloses raw edges inside the seam
Option 3: Pinking shears
- Cut your seam allowance with pinking shears (zigzag-edged scissors)
- The zigzag edge minimizes fraying without additional stitching
When a serger helps (but isn’t necessary): If you plan to make dozens of pillowcases or want to sew very quickly, a serger trims and finishes edges in one pass. But for learning and occasional projects, your regular machine is more than adequate.
If you’re experiencing issues with your fabric not feeding properly, check out our guide on why fabric doesn’t feed through correctly for troubleshooting tips.

27 Unique Built-in Stitches: The Brother XM2701 sewing machine includes 27 built-in stitches including decorative, blind hem, zigzag, and stretch stitches and an auto-size buttonhole

37 UNIQUE BUILT-IN STITCHES: The XM3700 lightweight sewing machine features 37 unique built-in stitches, and a one-step auto-size buttonhole

Feed Dog Adjustments: With visible 4 color-coded levels of feed dog adjustment and presser foot pressure, the PQ1600S will give you maximum fabric control.
French Seam vs Regular Seam for Pillowcase: Which Is Better?
For your first pillowcase, use a regular seam with a zigzag finish, it’s faster, more forgiving, and perfectly durable. French seams create a more polished, professional look with fully enclosed raw edges, but they require precise sewing and two passes, which can be frustrating when you’re still learning machine control.
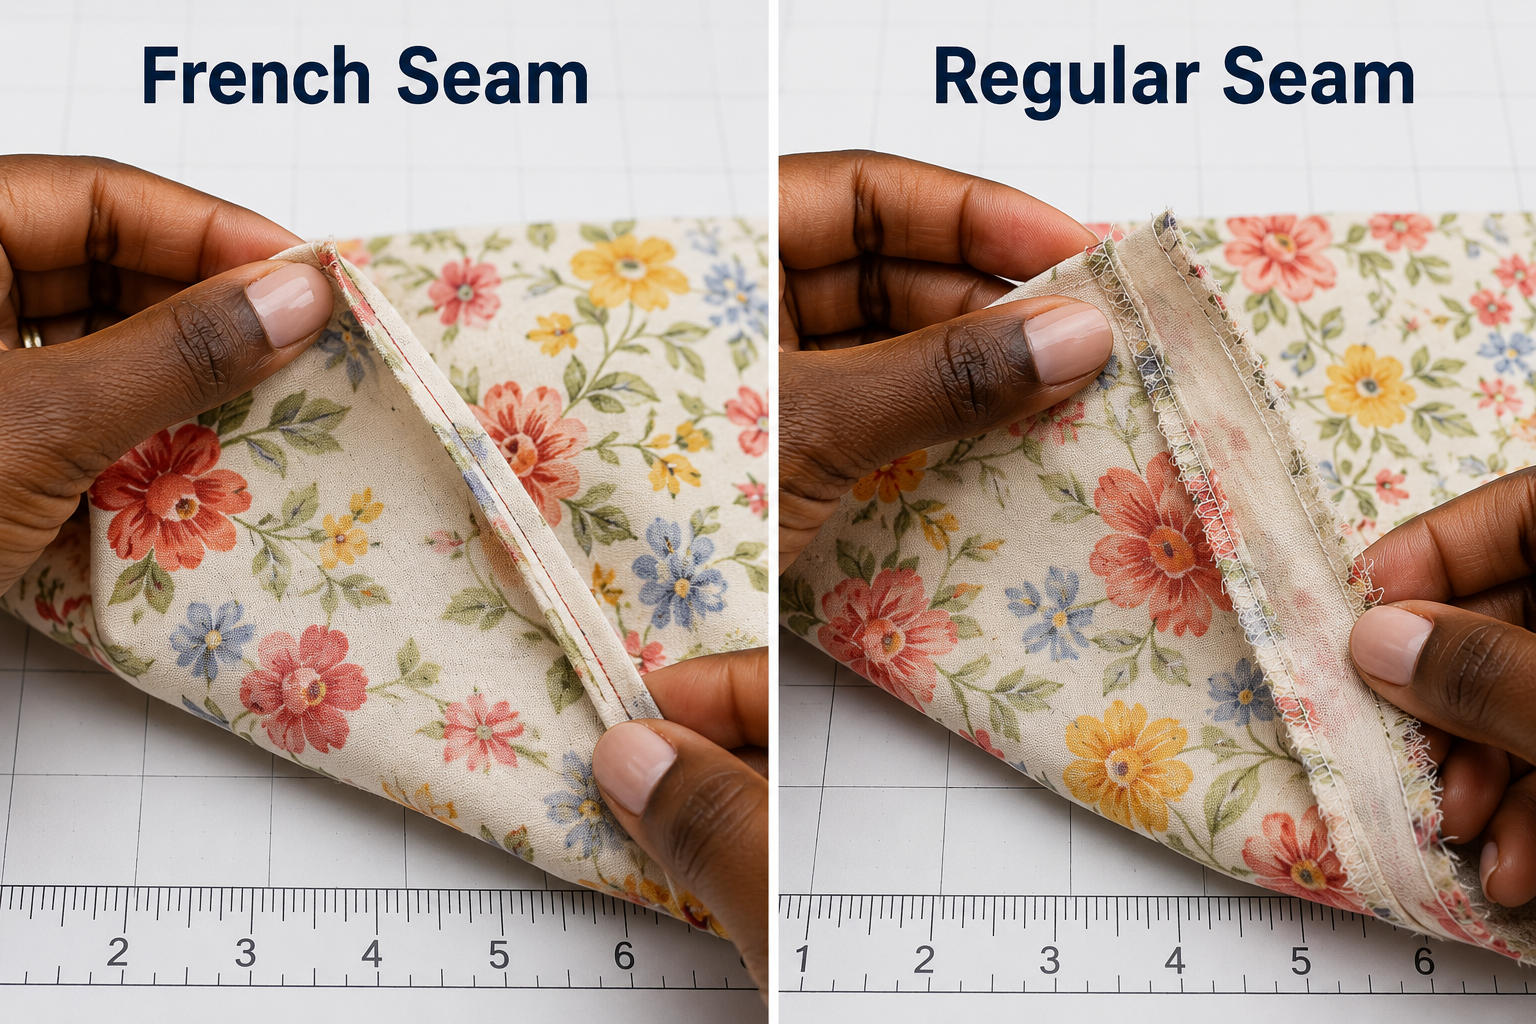
Regular seam advantages:
- Faster to complete (one pass instead of two)
- More forgiving if your seam line wavers slightly
- Easier to adjust if you make a mistake
- Works with any seam allowance width
French seam advantages:
- Completely encloses raw edges (no fraying ever)
- Looks professional from inside and outside
- No visible stitching on the right side
- Ideal for sheer or lightweight fabrics
How to decide:
- Choose regular seams if: This is your first or second sewing project, you want quick results, or you’re using medium-weight cotton
- Choose French seams if: You’ve completed a few projects already, you’re making pillowcases as gifts, or you’re using lightweight fabric that frays easily
Common French seam mistake: Sewing the first pass with right sides together instead of wrong sides together. This puts the raw edges on the outside instead of enclosing them. Always start with wrong sides together for the first narrow seam.
For more guidance on seam allowances and precision, see our seam allowance guide.

TISEKER High Quality General Purpose Presser Foot.

Made in Taiwan High Quality Premium Sewing Presser Feet From ZIGZAGSTORM.Part No.SA191, Xf2339-001, F065.Designed for quilting and other projects that require stitching over an existing seam, this foot rides smoothly over the seam, helping to ensure your stitching remains more perfectly aligned while you ‘stitch in the ditch’. The long guide and wide opening on this foot allow for more accurate sewing and stitch placement
Can I Sew a Pillowcase Without a Sewing Machine by Hand?
Yes, you can absolutely sew a pillowcase entirely by hand using a backstitch or running stitch, though it will take 3-4 hours instead of 1-2 hours with a machine. Hand-sewn pillowcases are just as durable as machine-sewn ones when you use the proper stitches and technique.
Best hand-sewing stitches for pillowcases:
- Backstitch, The strongest hand stitch, mimics a machine straight stitch, ideal for seams that will bear stress
- Running stitch, Faster but less strong, works for low-stress areas like hems
- Whipstitch, Good for finishing raw edges to prevent fraying
Hand-sewing supplies you’ll need:
- Sharp hand-sewing needles (size 7-9 for medium-weight cotton)
- Strong thread (cotton or polyester, not cheap craft thread)
- Thimble to protect your finger
- Fabric clips or pins to hold seams aligned
- Patience and good lighting
Hand-sewing tips for beginners:
- Use thread no longer than 18 inches to prevent tangling
- Knot your thread securely at the beginning and end
- Keep your stitches small and even (about 1/8 inch apart for backstitch)
- Press seams with an iron as you go to keep everything flat
Choose hand sewing if: You don’t have access to a machine, you enjoy the meditative quality of hand work, or you’re working on a project with a child who isn’t ready for machine sewing.
Learn more about hand sewing techniques for beginners.
Pillowcase Sewing Kit for Beginners: What Should I Buy?
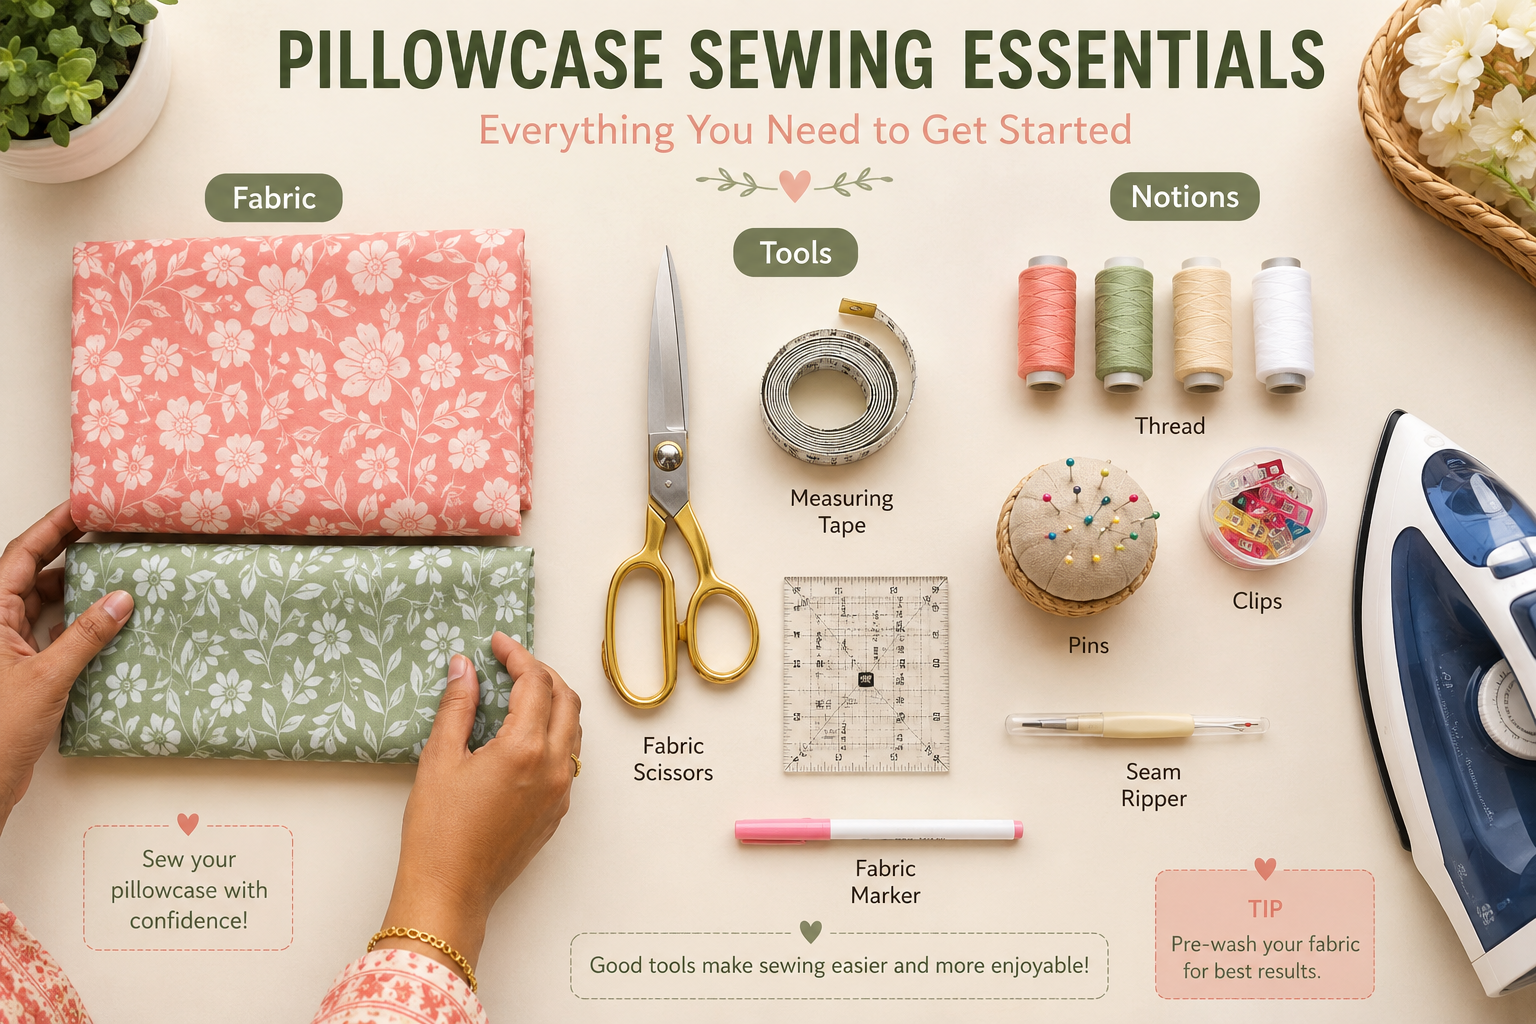
A complete beginner pillowcase sewing kit costs $40-60 and includes fabric, thread, scissors, pins, measuring tools, and basic notions. You don’t need expensive specialty tools for your first project, focus on quality basics that you’ll use for many future projects.
Essential supplies (must-have):
- Fabric, 1 yard quilting cotton ($8-12)
- Thread, All-purpose polyester thread in coordinating color ($3-4)
- Fabric scissors, 8-inch shears, fabric-only ($15-25)
- Measuring tape, Flexible 60-inch tape ($3-5)
- Straight pins, Glass or plastic heads, box of 50-100 ($4-6)
- Seam ripper, For fixing mistakes ($3-5)
- Iron and ironing board, Essential for pressing seams (if you don’t already own)
Helpful but not essential:
- Rotary cutter and mat, Makes cutting faster and more accurate ($25-35 for set)
- Fabric clips, Alternative to pins, easier for thick seams ($8-12)
- Pinking shears, For finishing raw edges without sewing ($12-18)
- Fabric marker or chalk, For marking cutting lines ($3-5)
Skip these for now:
- Specialty presser feet
- Expensive thread sets
- Decorative trims or piping
- Pattern weights (use household items instead)
Money-saving tip: Many fabric stores sell “fat quarters” (18″ x 22″ cuts) in coordinated bundles. Two fat quarters sewn together can make one pillowcase, and bundles often cost less than buying yardage.
Variety of Easy Sewing Projects: Create 6 beginner-friendly sewing projects, including mini pillow, accessories organizer, keychain ,card holders, cup sleeves, and string bags. Our embroidery kit includes all the tools and step-by-step instructions needed for stress-free learning, ensuring a delightful crafting experience.

The most XL spools of thread in sewing kit: This sewing kit contains 38 high quality XL thread spools. The beautiful vibrant colors are ideal for your daily needs. 43 inches excellent assorted threads of more longer threads,thick threads, not easy to break, reliable for it!

𝑩𝒊𝒓𝒕𝒉𝒅𝒂𝒚 𝑮𝒊𝒇𝒕𝒔 𝑰𝒅𝒆𝒂𝒔: This sewing kit is terrific gifts for people who travel frequently, mother, grandmother, backpacker, adults, kids and teen girls! The emergency kit is also suitable for both men and women, beginners and professionals alike, and it is definitely something that everyone needs in their life
How to Fix Puckered Seams on My First Pillowcase
Puckered seams happen when the fabric layers shift or when thread tension is too tight. To fix puckering, you’ll need to identify the cause, adjust your machine settings, and potentially re-sew the affected seam.
Immediate fixes for puckered seams:
Check your thread tension, Upper tension that’s too tight pulls the fabric and creates puckers. Reduce tension by 1-2 numbers and test on scrap fabric.
Slow down your sewing speed, Sewing too fast prevents the feed dogs from moving fabric evenly. Aim for a steady, moderate pace.
Use a longer stitch length, Short stitches (below 2.0mm) can cause puckering in lightweight fabrics. Try 2.5-3.0mm for cotton.
Press as you sew, Iron each seam flat immediately after sewing, before crossing it with another seam.
Prevention strategies:
- Pin or clip fabric layers every 2-3 inches to prevent shifting
- Hold fabric taut (but don’t pull) as it feeds through the machine
- Use a walking foot if your machine has one
- Ensure your needle is sharp and the correct size (80/12 or 90/14 for cotton)
When to re-sew: If puckering is severe (more than 1/4 inch of fabric bunching), use your seam ripper to remove the stitches and re-sew with corrected settings. Minor puckering often relaxes after washing.
For more troubleshooting help, visit our sewing machine troubleshooting guide.
Why Is My Pillowcase Opening Too Small After Sewing?
Your pillowcase opening is too small because you either cut the fabric too short or your seam allowances were too wide, reducing the interior dimensions. A standard 20″ x 26″ pillow needs an opening of at least 20.5″ to slide in comfortably.
Common causes and fixes:
Problem 1: Seam allowances too wide
- Standard seam allowance is 1/2 inch
- If you sewed 3/4 inch or 1 inch seams, you’ve lost 1-2 inches of interior space
- Fix: Use a seam ripper to remove the seams and re-sew with accurate 1/2-inch allowances
Problem 2: Fabric cut too small
- Measure your pillow before cutting fabric
- Add 1 inch to length and width for seam allowances, plus 1 inch for hem
- Fix: If the opening is only slightly tight, press the seams open (instead of to one side) to gain 1/4 inch
Problem 3: Hem too deep
- A 1-inch hem is standard; deeper hems reduce the opening
- Fix: Unpick the hem and re-sew with a narrower fold
Prevention tip: Always measure your actual pillow before cutting fabric. Pillows labeled “standard” can vary by 1-2 inches between brands. Add 1.5-2 inches to your pillow’s dimensions for a comfortable fit.
Quick test: Before sewing the final seam, insert your pillow into the partially completed case to verify the fit. It’s easier to adjust before all seams are closed.
Envelope Pillowcase vs Zippered: Which Is Easier for First Project?
Envelope-style pillowcases are significantly easier for beginners and require no special hardware, making them the best choice for your first project. Zippered pillowcases require installing a zipper (a skill that takes practice) and precise alignment to avoid puckering around the closure.
Envelope pillowcase advantages:
- No zipper to install (saves 30-45 minutes and eliminates frustration)
- Requires only basic straight seams
- Pillow stays in place through an overlapping fabric flap
- Easy to wash and iron
- No hardware to break or replace
- Perfect for learning fundamental sewing skills
Zippered pillowcase advantages:
- Completely encloses the pillow (cleaner look)
- Pillow can’t slip out during use
- Better for decorative pillows that get moved frequently
Difficulty comparison:
| Feature | Envelope | Zippered |
|---|---|---|
| Skill level | Beginner | Intermediate |
| Time to complete | 1-2 hours | 2-3 hours |
| Special tools needed | None | Zipper foot |
| Mistake tolerance | High | Low |
Choose envelope style if: This is your first sewing project, you want quick results, or you’re making bed pillowcases that stay in place.
Choose zippered style if: You’ve completed several projects, you’re making decorative throw pillows, or you want to learn zipper installation.
Compromise option: Make your first 2-3 pillowcases envelope-style to build confidence, then try a zippered version as your fourth or fifth project.
Common Mistakes When Sewing Your First Pillowcase
The most common beginner mistakes are cutting fabric off-grain, forgetting to backstitch, and sewing with wrong sides together instead of right sides together. These errors are easy to make when you’re learning but equally easy to prevent with a simple checklist.
Top 10 beginner pillowcase mistakes:
- Not prewashing fabric, Results in shrinkage and poor fit after first wash
- Cutting off-grain, Creates twisted, misshapen pillowcases that don’t hang straight
- Forgetting to backstitch, Seams unravel at stress points
- Wrong sides together, Seams show on the outside instead of inside
- Inconsistent seam allowances, Creates puckering and uneven edges
- Skipping the iron, Unpressed seams look sloppy and are harder to sew accurately
- Using dull needles, Causes skipped stitches and fabric damage
- Sewing too fast, Leads to crooked seams and loss of control
- Not testing tension, Results in puckered or loose stitches
- Measuring once, “Measure twice, cut once” prevents costly fabric waste
How to avoid these mistakes:
- Create a pre-flight checklist and review it before each step
- Practice on scrap fabric before sewing your actual pillowcase
- Work slowly and deliberately, speed comes with experience
- Press every seam immediately after sewing
- Learn what backstitching is and why it matters
Mistake recovery: Most mistakes can be fixed with a seam ripper and patience. Don’t throw away a project because of one error, unpicking and re-sewing is how you learn.
Is a Pillowcase a Good First Sewing Project for Kids?
Yes, a pillowcase is an excellent first sewing project for kids ages 8 and up because it teaches essential skills, produces a useful item, and can be completed in one sitting without overwhelming a young learner. The straight seams and simple construction build confidence without requiring complex techniques.
Why pillowcases work well for kids:
- Quick results, Finished in 1-2 hours maintains interest and motivation
- Practical outcome, Kids can use their creation immediately
- Forgiving fabric, Cotton hides small mistakes
- Straight seams only, No curves or complicated shapes
- Customizable, Kids can choose their own fabric designs
- Builds core skills, Measuring, cutting, pinning, and sewing straight lines
Age-appropriate modifications:
Ages 8-10:
- Pre-cut fabric for them
- Use fabric clips instead of pins (safer)
- Supervise all machine operation closely
- Consider hand-sewing instead of machine
Ages 11-13:
- Let them measure and cut with supervision
- Teach proper pin placement
- Allow independent machine sewing with periodic check-ins
- Introduce the seam ripper for fixing mistakes
Ages 14+:
- Full independence with occasional guidance
- Can handle more complex variations (French seams, decorative elements)
Safety considerations:
- Always supervise machine sewing until the child demonstrates consistent control
- Teach proper finger placement (away from the needle)
- Use a machine with a speed control or foot pedal sensitivity adjustment
- Keep the iron out of reach and handle all pressing yourself for younger children
Motivation tip: Let kids choose fabric featuring their favorite characters, colors, or hobbies. Personal investment in the design increases engagement and pride in the finished project.
How Long Does It Take to Sew a Pillowcase as a Beginner?
Most beginners complete their first pillowcase in 1.5 to 2 hours, including cutting fabric, pinning, sewing, and pressing. This timeframe assumes you’re using a sewing machine, working at a comfortable pace, and making minor corrections as you go.
Time breakdown by step:
- Prewashing and pressing fabric, 45-60 minutes (done ahead of time)
- Measuring and cutting, 15-20 minutes
- Pinning seams, 10-15 minutes
- Sewing seams, 20-30 minutes
- Pressing seams, 10-15 minutes
- Finishing and final press, 10 minutes
Factors that affect completion time:
Faster (1-1.5 hours):
- Using a rotary cutter instead of scissors
- Choosing a simple regular seam instead of French seam
- Having all supplies organized before starting
- Working without interruptions
Slower (2.5-3 hours):
- First time threading a machine or winding a bobbin
- Making and fixing mistakes
- Using French seams or decorative elements
- Hand-sewing instead of machine-sewing
Second pillowcase advantage: Your second pillowcase will take 30-40% less time because you’ve already learned the process. By your fifth pillowcase, you’ll complete one in 45-60 minutes.
Time-saving tips:
- Cut multiple pillowcases at once (assembly-line style)
- Set up your workspace with everything within reach
- Press seams in batches rather than one at a time
- Use fabric clips instead of pins (faster to place and remove)
Don’t rush: Taking extra time on your first project to understand each step will make all future projects faster and more enjoyable.
Step-by-Step: How to Sew a Pillowcase (First Project Walkthrough)
This complete walkthrough takes you from fabric selection to finished pillowcase using the easiest beginner method. Follow these steps in order for the best results.
Materials needed:
- 1 yard quilting cotton (44-45″ wide)
- Matching thread
- Fabric scissors or rotary cutter
- Measuring tape or ruler
- Straight pins or fabric clips
- Iron and ironing board
- Sewing machine (or hand-sewing needle)
Step 1: Prewash and press your fabric
Wash and dry your fabric according to the care label. Press with a hot iron to remove all wrinkles. Trim any frayed edges.
Step 2: Cut your fabric
Measure and cut one piece 27″ x 41″ for a standard pillowcase. Use a ruler to ensure straight, square cuts. Cut along the fabric grain (parallel to the selvage edge).
Step 3: Hem the opening edge
Fold one short edge (27″ side) over 1/4 inch toward the wrong side and press. Fold over another 3/4 inch and press again. Pin in place. Sew close to the inner folded edge with a straight stitch. This creates your pillowcase opening.
Step 4: Fold and pin the sides
Fold the fabric in half lengthwise with right sides together (the hemmed edge should align with the raw edge). Pin along both long sides, leaving the hemmed end open.
Step 5: Sew the side seams
Using a 1/2-inch seam allowance, sew down one long side, across the bottom (the end opposite the hem), and up the other long side. Backstitch at the beginning and end of your seam to lock the stitches.
Step 6: Finish the raw edges
Trim seam allowances to 1/4 inch. Run a zigzag stitch along the raw edges to prevent fraying, or use pinking shears to trim with a zigzag edge.
Step 7: Turn and press
Turn the pillowcase right-side out through the hemmed opening. Use a chopstick or point turner to push out the corners fully. Press the entire pillowcase with an iron, paying special attention to the seams.
Step 8: Final touches
Insert your pillow and admire your work. If the fit is too tight, press the seams open instead of to one side to gain a bit more room.
Troubleshooting during the process:
- If your machine is skipping stitches, check your needle and thread tension
- If you notice thread bunching underneath, rethread your machine and check bobbin tension
- If seams pucker, reduce thread tension and slow your sewing speed
Congratulations! You’ve completed your first sewing project. The skills you learned, measuring, cutting, sewing straight seams, and finishing edges, form the foundation for countless future projects.
FAQ
What’s the best stitch length for sewing a pillowcase?
Use a stitch length of 2.5 to 3.0mm for cotton pillowcases. This length is strong enough to hold seams securely while being easy to remove if you need to fix a mistake. Shorter stitches can cause puckering, while longer stitches may not be durable enough for items that get washed frequently.
Can I use old bed sheets to make pillowcases?
Yes, repurposing old sheets is an excellent way to practice sewing without buying new fabric. Choose sheets that are still soft and not worn thin. Flat sheets work better than fitted sheets because they’re already rectangular. Prewashing isn’t necessary since sheets have been washed many times already.
Do I need to use the same color thread as my fabric?
No, your thread doesn’t need to match exactly. Choose a thread color that’s one or two shades darker than your fabric, it will blend in better than an exact match. For patterned fabrics, match the dominant color or use a neutral like gray or tan that blends with multiple colors.
How do I keep my fabric from shifting while I sew?
Pin or clip your fabric layers together every 2-3 inches along the seam line. Place pins perpendicular to the seam so you can sew over them (or remove them just before the needle reaches them). Sewing slowly and holding the fabric gently taut (without pulling) also prevents shifting.
What do I do if my sewing machine jams while making a pillowcase?
Stop sewing immediately and turn off your machine. Raise the presser foot and needle, then gently pull the fabric free. Remove the bobbin case and clear any tangled thread. Rethread both the upper thread and bobbin, then test on scrap fabric before continuing. Check out our guide on machine jamming issues for detailed troubleshooting.
Should I wash my finished pillowcase before using it?
Yes, wash your completed pillowcase before putting it on your pillow. This removes any fabric dust, thread fragments, or markings from construction. It also softens the fabric and allows any remaining shrinkage to occur. Wash in warm water and tumble dry on medium heat.
Can I add decorative elements to my first pillowcase?
It’s better to complete your first pillowcase using the basic method before adding decorations. Once you’re comfortable with the fundamental process, try adding piping, contrasting cuffs, or decorative stitching on your second or third pillowcase. Master the basics first, then experiment with embellishments.
How do I make a pillowcase for a pillow that’s not standard size?
Measure your pillow’s length and width. Add 1 inch to the width and 7 inches to the length (for seam allowances and hem). Cut your fabric to these dimensions. For example, a 16″ x 16″ throw pillow needs fabric cut to 17″ x 23″. Follow the same construction steps as a standard pillowcase.
Why are my corners not sharp after turning the pillowcase right-side out?
Fabric bunches in the corners when you turn the pillowcase. Before turning, trim the corner seam allowances at a 45-degree angle (being careful not to cut through your stitching). After turning, use a chopstick, knitting needle, or dedicated point turner to gently push the corners out fully from the inside.
Is it normal for my first pillowcase to look imperfect?
Absolutely. Every sewist’s first project has wobbly seams, uneven hems, or small mistakes. These imperfections don’t affect function and will be less noticeable after washing. Each project you complete will show improvement. Keep your first pillowcase as a reminder of how far you’ve progressed.
Can I make a pillowcase without an iron?
While possible, it’s much harder to achieve professional results without pressing. An iron sets seams flat, creates crisp folds for hems, and makes fabric easier to sew accurately. If you don’t have an iron, use your fingers to press seams as flat as possible and pin generously to keep everything aligned.
What’s the difference between quilting cotton and regular cotton fabric?
Quilting cotton is a specific weight (medium) and weave (tight, plain weave) designed for piecing and sewing. It’s typically 44-45 inches wide and has a thread count of 60-80. Regular cotton fabric is a broader category that includes everything from lightweight voile to heavyweight canvas. For pillowcases, quilting cotton is ideal because it’s the perfect weight and easy to handle.
Conclusion
Sewing your first pillowcase is more than just creating a functional bedroom item, it’s building the foundation for a lifelong skill. This project teaches you essential techniques like measuring accurately, sewing straight seams, finishing edges, and pressing for professional results. Every pillowcase you make will be faster and more polished than the last.
Your next steps:
- Make a second pillowcase using the same method to reinforce what you’ve learned
- Try a French seam on your third pillowcase to level up your skills
- Experiment with fabric combinations like contrasting cuffs or patterned backs
- Gift your pillowcases to friends and family, handmade items are always treasured
- Move on to slightly more complex projects like tote bags, simple aprons, or zippered pouches
Remember that every expert sewist started exactly where you are now, with a simple project and a willingness to learn. The puckered seams, crooked hems, and small mistakes you make today are teaching you what works and what doesn’t. Keep your first pillowcase as a benchmark, you’ll be amazed at your progress when you look back in six months.
The sewing community is welcoming and supportive. When you encounter challenges, don’t hesitate to ask questions, watch tutorial videos, or consult beginner sewing resources. Your sewing journey has just begun, and each project will bring new skills and confidence.
Now grab your fabric, thread your machine, and start sewing. Your first completed pillowcase is waiting.