


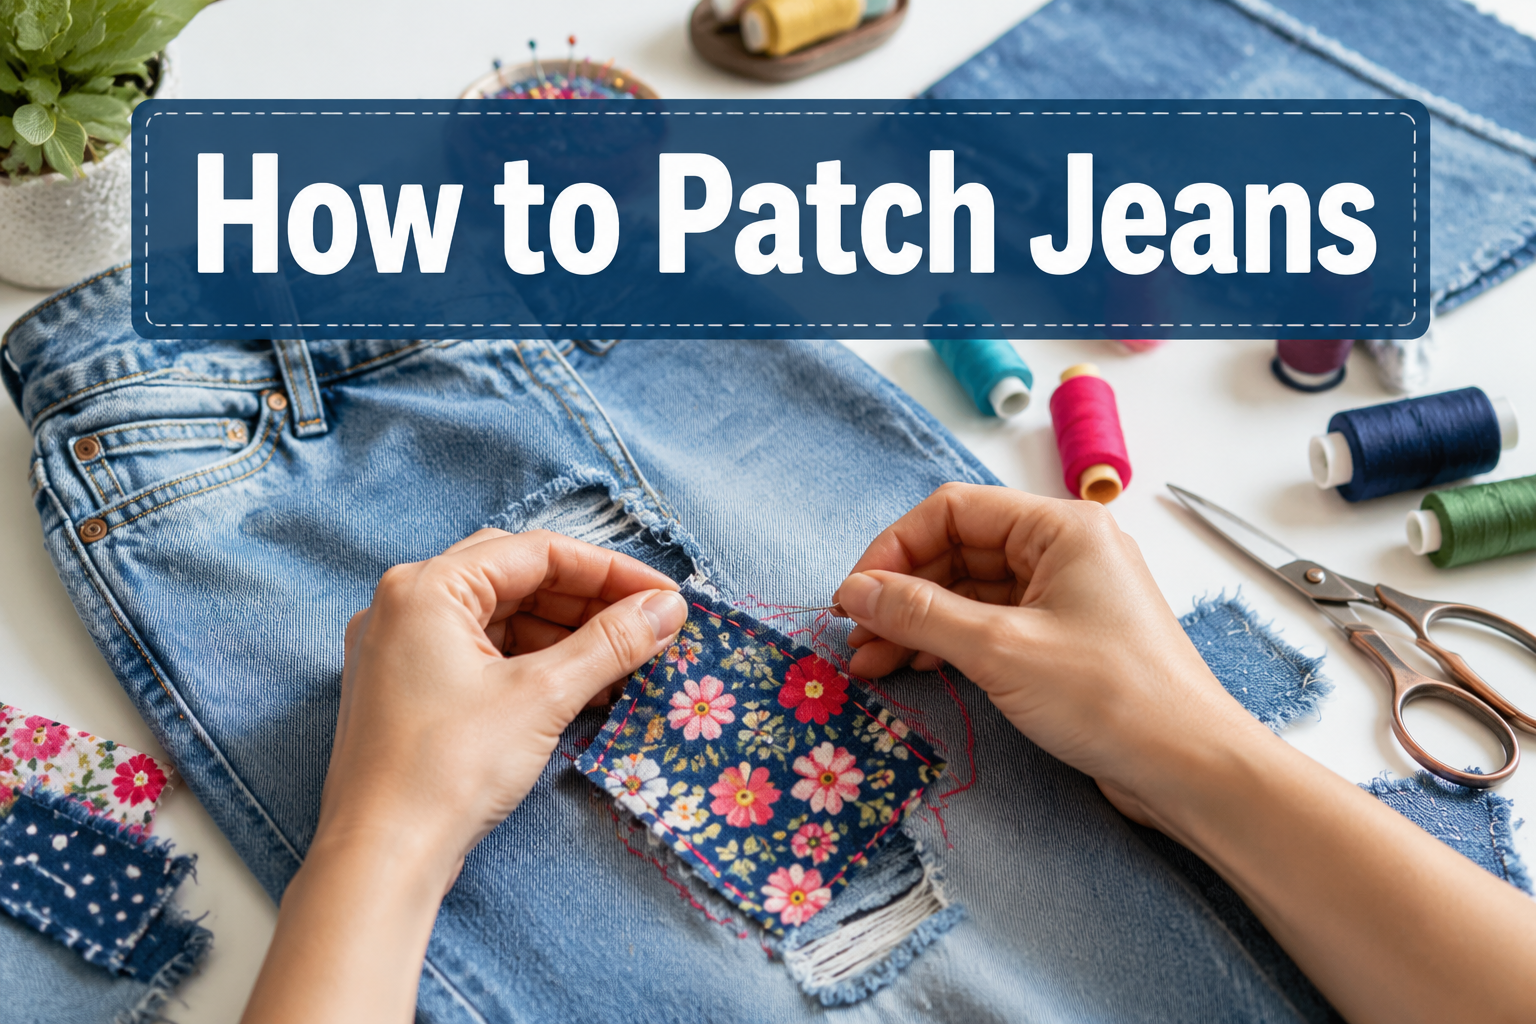
Quick Answer: Patching jeans involves either visible repairs (decorative patches sewn on the outside) or invisible repairs (hidden patches applied from the inside with matching thread). Both methods can be done by hand or machine, using denim or iron-on patches, and typically take 15-45 minutes depending on hole size and technique. The key difference is aesthetic: visible patches make a statement, while invisible patches preserve the original look.
Key Takeaways
- Visible patches sit on the outside of jeans and can be decorative, while invisible patches are applied from the inside with matching thread to hide repairs
- Hand-sewing patches requires only a needle, thread, and scissors, no sewing machine needed
- Denim fabric works best for patching jeans, but lightweight canvas, twill, or iron-on patches are also effective
- Iron-on patches are faster (5-10 minutes) but less durable than sewn patches, especially after repeated washing
- Professional jean patching costs $15-$40 per repair, while DIY materials cost $2-$8
- Crotch blowouts can be patched but require reinforcement on both sides for durability
- Patches come off after washing due to inadequate stitching, wrong adhesive temperature, or fabric incompatibility
- For stretchy jeans, use stretch denim or knit patches to maintain elasticity
- Patching is worth it for quality jeans ($80+) or sentimental pieces, but fast-fashion jeans under $30 may not justify the effort
- Match thread color exactly to denim wash for invisible repairs; use contrasting colors for visible statement patches
What Is the Difference Between Visible and Invisible Jean Patches?
Visible patches are applied to the outside of jeans and are meant to be seen, often serving as decorative elements or fashion statements. Invisible patches are applied from the inside of the fabric and use matching thread and careful stitching techniques to blend seamlessly with the original denim, making the repair nearly undetectable.
Visible patches work well for:
- Large holes or tears where hiding the damage is impractical
- Adding personal style or covering stains
- Knee patches on kids’ jeans that will wear through again
- Vintage or distressed jean aesthetics
- Quick repairs where appearance isn’t the priority
Invisible patches are ideal for:
- Small to medium holes (under 3 inches) in visible areas
- Professional or formal settings where repairs shouldn’t show
- Preserving the original look of expensive or designer jeans
- Crotch or inner thigh repairs where discretion matters
- Maintaining resale value of quality denim
The technique you choose depends on the hole location, your skill level, and whether you want the repair to blend in or stand out. Many sewers use visible patches on knees and back pockets while reserving invisible repairs for thigh and crotch areas.
How to Patch Jeans by Hand Without a Sewing Machine
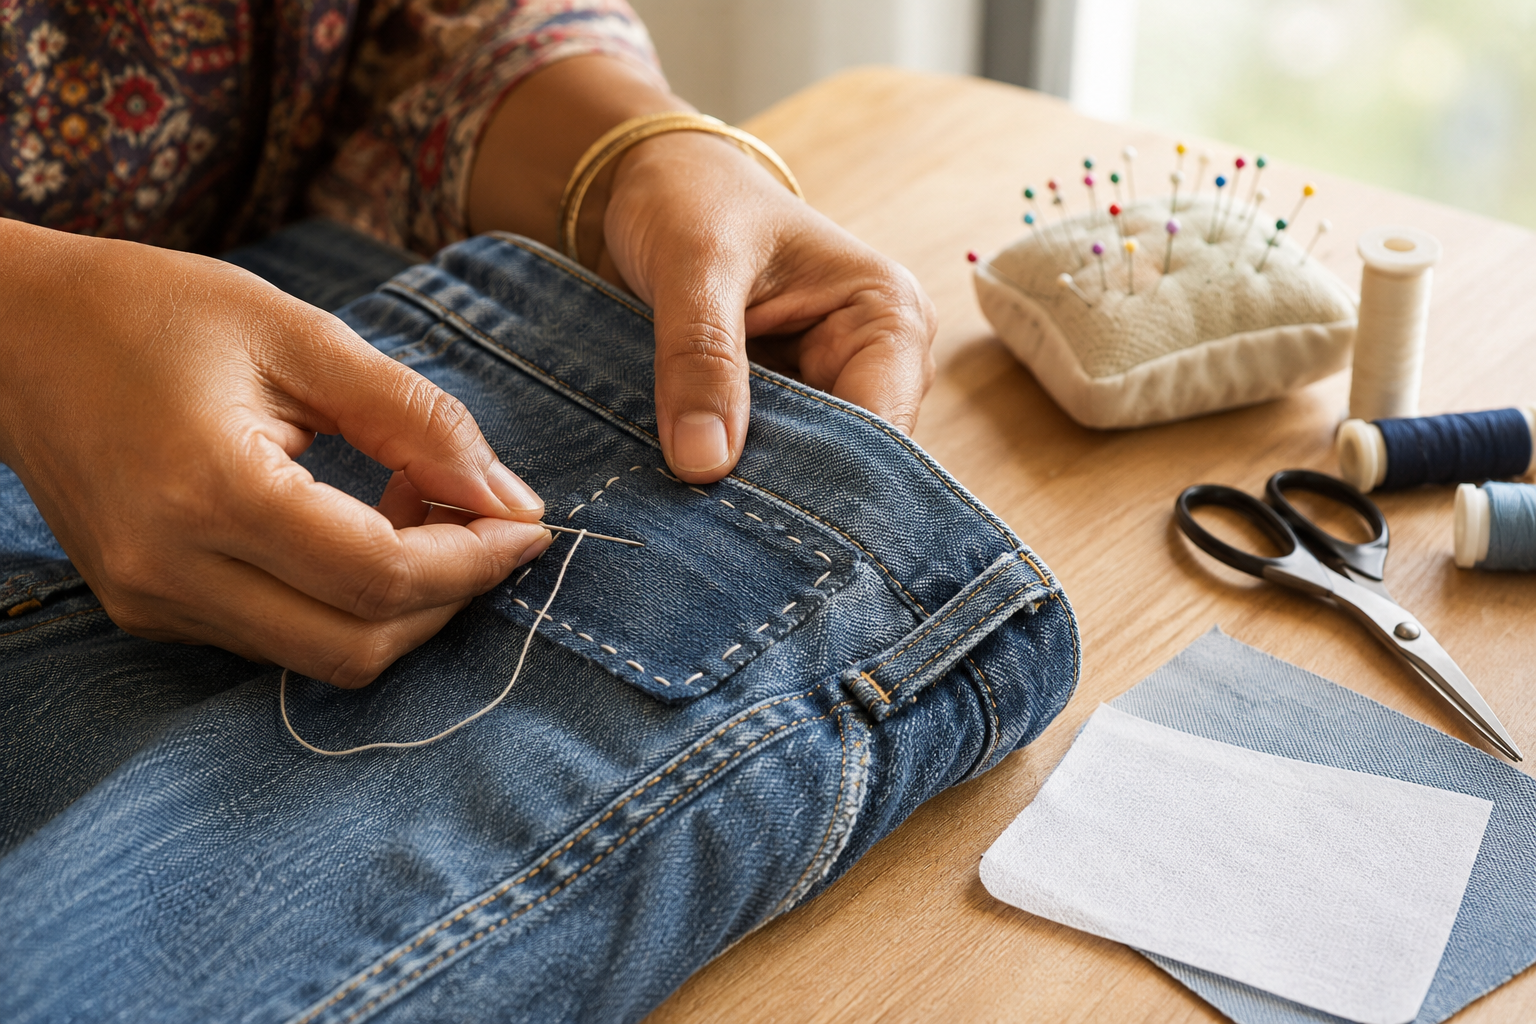
Hand-patching jeans requires only a needle, thread, scissors, and fabric, making it accessible for anyone without a sewing machine. The process takes 20-45 minutes depending on hole size and involves securing a patch with a running stitch, backstitch, or whip stitch around the damaged area.
Materials needed:
- Denim or canvas patch fabric (cut 1-2 inches larger than the hole)
- Heavy-duty thread (polyester or cotton-poly blend)
- Sharp hand-sewing needle (size 90/14 or larger for denim)
- Fabric scissors
- Pins or fabric clips
- Iron (optional, for pressing)
Step-by-step hand-patching process:
Prepare the area: Turn jeans inside out and trim any loose threads around the hole. If edges are frayed, trim them to create a cleaner working surface.
Cut your patch: Cut patch fabric 1.5-2 inches larger than the hole on all sides. For invisible repairs, match the denim weight and color as closely as possible.
Position the patch: Place patch fabric behind the hole (inside the jeans) and pin it securely. The patch should cover the entire damaged area with overlap.
Thread your needle: Use a double strand of thread (about 24 inches) and tie a knot at the end. For invisible repairs, match thread color exactly to your denim.
Stitch around the hole: Starting from the inside, use a running stitch or backstitch around the perimeter of the hole, catching both the patch and the jean fabric. Keep stitches small (about 1/8 inch) and close together for strength.
Reinforce with cross-stitching: For added durability, create a grid of stitches across the hole opening, weaving thread back and forth to fill the gap and secure the patch.
Finish and secure: Tie off thread on the inside with several small knots. Trim excess thread.
Common mistake: Using regular sewing thread instead of heavy-duty thread causes patches to fail under stress. Always use thread rated for denim or upholstery work.
For detailed guidance on hand-sewing techniques, check out our hand sewing resource.


JEAN PATCH MATERIAL: 100% Cotton, soft, comfortable and wearable.

Work With Fabric: Our fabric glue is suitable for all types of fabrics, including cotton, flannel, denim, leather, polyester, dolls, fabric, nylon, and other materials for repairs. Our fabric glue serves as the perfect alternative to traditional needle and thread, saving you time and effort.

Use patches to repair a tear, worn area, or hole
Best Fabric to Use for Patching Jeans
Denim fabric is the best choice for patching jeans because it matches the weight, texture, and durability of the original material, creating the strongest and most seamless repair. For invisible patches, use denim that matches your jeans’ weight (lightweight, medium, or heavyweight) and wash (light, medium, or dark).
Fabric options ranked by effectiveness:
Denim (best choice): Matches original fabric strength and appearance. Use old jeans, denim scraps, or purchase small cuts from fabric stores. Choose stretch denim for stretch jeans.
Canvas or duck cloth: Slightly lighter than denim but very durable. Works well for reinforcement patches on knees or crotch areas. More affordable than denim.
Twill: Medium-weight and durable with a diagonal weave. Good for inner patches where exact color match isn’t critical.
Iron-on denim patches: Pre-cut patches with heat-activated adhesive. Convenient but less durable than sewn patches. Best for temporary repairs or low-stress areas.
Decorative fabrics: Cotton prints, corduroy, or leather for visible statement patches. Choose based on style preference rather than durability.
Choose denim if: You want the repair to last years, the hole is in a high-stress area (crotch, inner thigh), or you’re doing an invisible repair.
Choose canvas if: You need a budget-friendly option for reinforcement patches or the repair is on a low-visibility area.
Choose iron-on patches if: You need a quick fix, don’t have sewing skills, or the jeans are for kids who will outgrow them soon.
Avoid: Thin cotton quilting fabric (tears easily), polyester (doesn’t breathe or age like denim), or any fabric lighter than the original jeans.
For more on working with different fabric types, visit our fabric sewing guide.

Premium Material: Our Iron On Patch For Jeans boast remarkable softness, comfort, and resistance to wear. They easily save beloved jeans, denim jackets, and other clothing from holes, tears, or fraying—whether on inner thighs, knees, or elbows, with reliable denim patches for inside jeans ready to tackle even the trickiest spots. More than just mending flaws, they allow you to incorporate creative designs to revitalize worn items, giving them a neat and refreshed appearance.

12 DENIM PATCHES: Includes twelve 3 x 4-1/4 in (7.5 x 10.5 cm) patches for matching different denim washes. Each has a 100% cotton denim face and adhesive backing. Made in the EU

Jeans Rescue Plan: Favorite jeans or denim jacket with holes and rips or fraying on the inner thighs, this denim fabric patch is the perfect rescue solution. It also allows you to be creative and add fresh designs to your worn jeans and denim jackets.
How to Make an Invisible Patch on Jeans Look Seamless
An invisible patch looks seamless when you match the thread color exactly to your denim, use small stitches (1/8 inch or less), and stitch in the direction of the fabric weave. The patch should be applied from the inside with edges that gradually blend into the surrounding fabric rather than creating a hard line.
Key techniques for invisible patching:
Thread matching: Hold your jeans up to natural light and match thread to the dominant color, not the highlights or shadows. Buy 2-3 similar shades and test on a hidden seam. Polyester thread holds color better than cotton through washing.
Stitch direction: Follow the diagonal twill lines of the denim weave when stitching. This makes stitches disappear into the fabric texture rather than standing out.
Feathering edges: Instead of stitching a hard rectangle around the patch, gradually reduce stitch density as you move away from the hole. This creates a fade effect that’s less noticeable.
Darning technique: For small holes (under 1 inch), skip the patch and use a darning technique, weave thread back and forth across the hole in a grid pattern, mimicking the fabric weave. This works especially well on lightweight denim.
Pressing: After stitching, press the repair from the inside with a hot iron and steam. This flattens stitches and helps them settle into the fabric.
Washing: Wash and dry the jeans once after patching. This softens the repair and helps new thread blend with aged denim.
Common mistakes that make patches visible:
- Using contrasting thread color (even slightly off shades show)
- Making stitches too large or too far apart
- Pulling thread too tight, which puckers fabric
- Using shiny thread on matte denim
- Cutting patch edges with pinking shears (creates visible texture difference)
Edge case: On heavily faded or distressed jeans, perfect invisibility is impossible. Instead, aim for “barely noticeable” by matching the overall tone and keeping stitches small.
Iron-On Patches vs Sew-On Patches for Jeans: Which Is Better?
Sew-on patches are better for long-term durability and high-stress areas, lasting years with proper stitching, while iron-on patches are faster and easier but typically last only 10-20 washes before edges lift or adhesive fails. Choose sew-on for quality jeans you want to keep; choose iron-on for quick fixes or children’s jeans.
Iron-on patches:
Pros:
- Takes 5-10 minutes to apply
- No sewing skills required
- Works well for decorative patches on low-stress areas
- Good for temporary repairs or kids’ jeans
- Inexpensive ($2-$5 per patch)
Cons:
- Adhesive weakens with washing and drying
- Doesn’t work on stretch denim (adhesive can’t flex)
- Can create stiff, uncomfortable patches
- Edges often lift after 10-20 washes
- Heat can damage some denim finishes
Best for: Knee patches on kids’ jeans, decorative patches on jackets, temporary repairs, or when you lack sewing equipment.
Sew-on patches:
Pros:
- Lasts years with proper stitching
- Works on all denim types including stretch
- Can be reinforced in high-stress areas
- More comfortable (no stiff adhesive)
- Can be repaired if stitching loosens
Cons:
- Takes 20-45 minutes to apply
- Requires basic sewing skills
- Needs needle and thread
- More visible if stitching is uneven
Best for: Crotch repairs, inner thigh holes, quality jeans over $80, jeans you want to keep for years.
Hybrid approach: Use iron-on patches as a base layer for stability, then sew around the edges for durability. This combines the ease of iron-on with the longevity of sewn patches.
Decision rule: If the jeans cost more than $50 or the hole is in a high-friction area (crotch, inner thigh, pocket), always sew. If it’s a decorative patch on a low-stress area or a quick fix for kids’ jeans, iron-on is acceptable.
If you’re using a sewing machine for patches, make sure you’re using the right needle, check our guide on jeans needles for proper selection.


FOR THE AREAS THAT WEAR THROUGH FIRST: Inner thigh, crotch, or knee—wherever your denim gets the most wear. These 5 x 5 inch iron on patches for clothes repair stretch denim from inside, reinforcing worn fabric from behind instead of covering it from the outside.

4 rolls of iron on jeans patches, 3 "x 20" (8 cm x 51 cm) per roll. Large sizes will help to repair both small and large holes and are big enough for you to create your own design. Blue will match your different clothes perfectly. The front of the patch is 100% cotton, and the back is covered with a thickened layer (0.1mm) of heatnbond adhesive.
How Much Does It Cost to Get Jeans Professionally Patched?
Professional jean patching costs $15-$40 per repair depending on hole size, location, and whether you want visible or invisible repairs. Tailors typically charge $15-$25 for simple patches, $25-$35 for crotch repairs, and $35-$50 for complex invisible repairs on designer denim.
Price breakdown by repair type:
- Simple visible patch: $15-$20 (knee, pocket, small holes)
- Invisible patch: $20-$30 (requires matching thread and careful stitching)
- Crotch repair: $25-$35 (high-stress area requiring reinforcement)
- Large hole or multiple patches: $30-$50
- Designer denim invisible repair: $40-$75 (requires expert color matching)
DIY cost comparison:
- Denim fabric scrap: $3-$5 (or free from old jeans)
- Thread: $2-$4 per spool
- Needle: $1-$3
- Iron-on patch kit: $5-$8
- Total DIY cost: $2-$8 per repair (if you already have basic supplies)
When professional patching is worth it:
- Designer jeans ($200+) where perfect color matching matters
- Complex repairs in difficult-to-reach areas
- You lack sewing skills or equipment
- The jeans have sentimental value and you want guaranteed results
- You need multiple pairs repaired (some tailors offer bulk discounts)
When DIY makes more sense:
- Jeans under $80 where the repair cost approaches replacement cost
- You have basic sewing skills
- The hole is in an easy-to-reach area
- You want a decorative visible patch
- You’re patching multiple pairs and can reuse materials
Common mistake: Paying $30 to patch $40 jeans. If professional repair costs more than 50% of the jeans’ value, consider whether replacement or DIY makes more sense.
For those interested in learning more about professional sewing services and costs, our professional sewing machine service page offers additional context.
Can You Patch Jeans That Have Ripped at the Crotch?
Yes, crotch rips can be patched successfully using a double-sided reinforcement technique where patches are applied to both the inside and outside of the seam area. This repair requires more fabric and stitching than standard patches because the crotch experiences constant friction and stress, but properly reinforced crotch patches can last 1-2 years.
Why crotch repairs are different:
The crotch seam is the highest-stress area on jeans, experiencing friction from walking, sitting, and stretching. Simple single-layer patches fail quickly because the fabric around the original hole is already weakened. Successful crotch repairs require reinforcement of the entire area, not just the visible hole.
Step-by-step crotch patching:
Assess the damage: Crotch repairs work best when the hole is under 3 inches and the surrounding fabric isn’t completely threadbare. If fabric is worn thin across a 4+ inch area, patching may only be temporary.
Cut two patches: Cut two pieces of denim or canvas, each 3-4 inches larger than the damaged area. One goes inside, one goes outside (or between the two fabric layers if the seam has separated).
Position inner patch: Turn jeans inside out. Place the first patch over the hole from the inside and pin it securely, covering the entire worn area.
Stitch inner patch: Using a backstitch technique, sew around the perimeter of the patch with small, tight stitches. Add cross-stitching over the hole for reinforcement.
Add outer reinforcement: Turn jeans right-side out. Place the second patch over the same area from the outside and stitch around the edges. This double-layer approach distributes stress across more fabric.
Reinforce the seam: If the crotch seam itself has split, restitch it using a double row of backstitching before applying patches.
For stretch jeans: Use stretch denim or knit fabric for patches to maintain flexibility. Rigid patches on stretch jeans will create uncomfortable stiff spots and fail faster.
Realistic expectations: Even well-executed crotch patches last only 1-2 years because the area experiences constant friction. This repair is best for extending the life of quality jeans ($80+) or sentimental pieces, not as a permanent fix.
Alternative: Some sewers add a crotch reinforcement patch to new jeans preventatively, before holes form. This can double the lifespan of the crotch area.
Why Does My Jean Patch Keep Coming Off After Washing?
Jean patches come off after washing due to inadequate stitching (too few stitches or weak thread), incorrect iron-on patch application (insufficient heat or pressure), or incompatibility between patch adhesive and denim finish. The most common cause is using iron-on patches on stretch denim, where the fabric’s flex breaks the rigid adhesive bond.
Common causes and fixes:
1. Insufficient stitching:
- Problem: Stitches are too far apart (more than 1/4 inch) or thread is too thin
- Fix: Use heavy-duty thread and place stitches no more than 1/8 inch apart around the entire patch perimeter. Add cross-stitching over holes for reinforcement.
2. Wrong iron temperature:
- Problem: Iron-on patches need 300-350°F for 30-45 seconds of firm pressure. Lower temperatures or shorter times don’t fully activate adhesive.
- Fix: Set iron to “cotton” or highest setting (no steam). Press firmly for full 45 seconds, applying body weight. Let cool completely before moving jeans.
3. Stretch denim incompatibility:
- Problem: Iron-on adhesive is rigid and cracks when stretch denim flexes
- Fix: Always sew patches on stretch jeans, even if they’re iron-on style. The adhesive can provide initial hold, but stitching is required for durability.
4. Washing too soon:
- Problem: Washing jeans within 24 hours of applying iron-on patches doesn’t allow adhesive to fully cure
- Fix: Wait 48 hours before washing newly patched jeans. Wash inside-out in cold water.
5. Dryer heat:
- Problem: High dryer heat can re-melt iron-on adhesive, causing it to separate from fabric
- Fix: Air-dry patched jeans or use low heat. Turn inside-out to protect patches.
6. Fabric finish interference:
- Problem: Some denim has silicone or resin finishes that prevent adhesive bonding
- Fix: Wash jeans before patching to remove finishes. For stubborn cases, lightly sand the patch area with fine sandpaper to improve adhesion.
7. Patch size too small:
- Problem: Patches that barely cover the hole have insufficient surface area for strong bonding
- Fix: Always cut patches 1.5-2 inches larger than the hole on all sides.
Decision rule: If a patch has failed once, don’t re-apply the same type. Switch from iron-on to sewn, or add stitching to an existing iron-on patch.
For troubleshooting other sewing issues, see our guide on thread breaking and fabric feeding problems.
How to Patch Stretchy Jeans Without Losing Elasticity
To patch stretchy jeans without losing elasticity, use stretch denim or knit fabric for patches and choose thread with some give (polyester or cotton-poly blend). The key is matching the patch’s stretch percentage to your jeans’ stretch and using a zigzag stitch or hand-stitching that allows movement rather than rigid straight stitches.
Materials for stretch denim:
- Stretch denim patches: Look for denim with 2-5% spandex/elastane that matches your jeans’ stretch
- Knit fabric: Cotton-poly jersey or ponte knit works for inner patches
- Polyester thread: Has slight give unlike 100% cotton thread
- Ballpoint or stretch needle: Prevents skipped stitches on stretch fabric (size 90/14)
Stitching techniques for stretch:
Zigzag stitch (machine): Set your machine to a narrow zigzag (2-3mm width) instead of straight stitch. The zigzag allows the thread to stretch with the fabric without breaking. Use this around patch perimeters and for reinforcement stitching.
Stretch stitch (machine): Many machines have a dedicated stretch stitch that looks like a lightning bolt. This creates a stitch that can elongate up to 30% without breaking.
Hand-sewing for stretch: Use a running stitch with slight slack in the thread. Don’t pull thread tight, leave just enough looseness that the fabric can stretch 10-15% before the thread becomes taut.
Step-by-step for stretch jeans:
Test the stretch: Pull your jeans in the damaged area to see how much they stretch. Your patch fabric should stretch at least that much.
Cut patch with stretch direction: Stretch denim has a direction, it stretches more across the width than lengthwise. Cut your patch so the stretch direction matches the jeans.
Pin without stretching: Pin the patch in place while jeans are relaxed, not stretched. Pinning while stretched creates puckering when fabric relaxes.
Use zigzag or stretch stitch: Stitch around the patch perimeter with zigzag or stretch stitch, keeping fabric relaxed under the presser foot.
Test the repair: Gently stretch the patched area. Stitches should stretch with the fabric without puckering or thread breaking.
Common mistake: Using rigid denim or canvas patches on stretch jeans creates uncomfortable stiff spots that restrict movement and cause the patch to separate from the fabric.
Edge case: For very stretchy jeggings (20%+ spandex), traditional patches don’t work well. Instead, use iron-on knit patches designed for activewear, or hand-darn the hole with polyester thread in a loose grid pattern.
Is Patching Jeans Worth It or Should I Just Buy New Ones?
Patching jeans is worth it for quality denim over $80, designer jeans, or pieces with sentimental value, where a $5-$30 repair extends the life by 1-3 years. For fast-fashion jeans under $30 or jeans with multiple large holes and thin fabric throughout, replacement is usually more cost-effective than repair.
When patching makes sense:
Quality jeans ($80-$300+):
- Repair cost: $5-$30 DIY or $20-$40 professional
- Extended life: 1-3 years
- Cost per wear: Patching reduces cost per wear significantly
- Decision: Patch if fabric is still strong around the hole
Designer jeans ($200+):
- Repair cost: $40-$75 professional invisible repair
- Value retention: Patched designer jeans retain more value than discarded ones
- Decision: Always patch, preferably professionally for invisible repairs
Sentimental jeans:
- Emotional value: Can’t be replaced
- Decision: Patch regardless of cost
Vintage or discontinued styles:
- Replacement difficulty: May be impossible to find the same fit/wash
- Decision: Patch to extend life as long as possible
When replacement makes more sense:
Fast-fashion jeans ($20-$40):
- Repair cost: $15-$30 professional
- Cost comparison: Repair approaches replacement cost
- Decision: Replace unless you can DIY patch for under $5
Multiple holes or thin fabric:
- Problem: Patching one hole doesn’t prevent others from forming immediately
- Decision: If fabric is thin and worn throughout, patching is temporary
Poor fit or outdated style:
- Opportunity cost: Don’t invest in repairs for jeans you don’t love wearing
- Decision: Replace with better-fitting jeans
Environmental consideration: Patching is always more sustainable than replacement. Even fast-fashion jeans can be patched to reduce textile waste. If environmental impact matters to you, patch whenever possible and donate or recycle when jeans are beyond repair.
Cost-per-wear calculation:
- $100 jeans worn 100 times = $1 per wear
- $30 patch extends life by 50 wears = $0.60 additional cost per wear
- Total: $1.30 per wear vs. $1 per wear for new $100 jeans
- Verdict: Patching is cost-effective if it extends life by at least 30% of original wear count
What Thread Color Should I Use for Invisible Jean Patches?
For invisible jean patches, use thread that matches the dominant mid-tone color of your denim when viewed in natural daylight, not the highlights, shadows, or individual thread colors. Test 2-3 similar shades on a hidden seam and choose the one that disappears most completely, this is usually one shade lighter than you initially think.
Thread color matching process:
1. Check in natural light: Take your jeans outside or near a window in daylight. Artificial lighting (especially LED or fluorescent) distorts denim color and leads to poor matches.
2. Identify the dominant color: Denim is woven from different colored threads (usually blue warp and white weft). Don’t try to match individual threads, match the overall color your eye sees from 2-3 feet away.
3. Test multiple shades: Buy 2-3 thread colors in the same family (light blue, medium blue, dark blue). Wrap a few inches of each around your finger and hold it against the jeans in natural light.
4. Test on hidden seam: Stitch a few inches of each thread color on an inside seam or hem. The thread that disappears is your match, it’s often one shade lighter than the denim appears because thread reflects more light than fabric.
Thread color by denim wash:
- Light wash/bleached: Light blue-gray (Coats & Clark shade 420) or pale denim blue
- Medium blue: Medium blue-gray (Coats & Clark shade 415) or classic denim blue
- Dark indigo: Navy or dark blue-gray (Coats & Clark shade 405)
- Black jeans: True black (not blue-black)
- Gray jeans: Medium gray (not blue-gray)
Thread type matters:
- Polyester: Holds color better through washing, has slight sheen
- Cotton-poly blend: More matte finish, better for matching worn denim
- 100% cotton: Most matte, but weakens faster with washing
For faded or distressed jeans: Match the lightest areas if the patch is in a faded zone, or use two thread colors, one for the patch perimeter (matching faded areas) and one for reinforcement stitching (matching darker areas).
Common mistakes:
- Matching thread to the darkest areas (makes stitches too dark)
- Using blue thread on black jeans (creates visible purple tint)
- Choosing thread indoors under yellow lighting
- Using shiny embroidery thread instead of matte sewing thread
Edge case: On heavily sun-faded jeans where color varies by 3+ shades, perfect matching is impossible. Choose the mid-tone and accept that some stitches will be slightly visible.
How to Patch Large Holes in Jeans That Are Bigger Than 2 Inches
For holes larger than 2 inches, use a double-layer patch system with a large backing patch on the inside and either darning or a decorative patch on the outside to bridge the gap. Large holes require more reinforcement because there’s insufficient original fabric to support the repair, so the patch essentially becomes the new fabric in that area.
Technique for large holes (2-6 inches):
1. Assess fabric condition: Check if the fabric around the hole is strong or thin and worn. If it’s worn thin across a large area (4+ inches), even a good patch will only last 6-12 months because the surrounding fabric will continue to deteriorate.
2. Cut a large backing patch: Cut denim or canvas 3-4 inches larger than the hole on all sides. For a 3-inch hole, you need a 9-10 inch patch. This distributes stress across a larger area.
3. Prepare the hole: Trim loose threads and frayed edges. Don’t trim away all frayed fabric, leave about 1/4 inch of frayed edge to stitch through.
4. Apply backing patch: Turn jeans inside out. Center the backing patch over the hole and pin it securely with 8-12 pins around the perimeter.
5. Stitch the perimeter: Using heavy-duty thread and small stitches (1/8 inch apart), sew around the entire patch perimeter. This is the primary structural support.
6. Bridge the hole: You have three options for the visible side:
Option A – Darning (invisible): Turn jeans right-side out. Using matching thread, create a grid of stitches across the hole opening, weaving thread back and forth to fill the gap. This works best for holes under 3 inches.
Option B – Decorative patch (visible): Apply a second patch on the outside in a contrasting fabric or color. Stitch around the edges with decorative topstitching. This is fastest for large holes.
Option C – Denim insert (semi-invisible): Cut a piece of matching denim slightly larger than the hole. Position it over the hole from the outside and stitch around the edges with matching thread. This creates a visible seam but maintains the denim look.
7. Reinforce stress points: Add extra stitching at the corners or ends of the hole where stress concentrates. Use a bar tack or several layers of backstitch.
For holes larger than 6 inches: Consider whether the jeans are worth saving. Holes this large require extensive patching that may be uncomfortable and will likely be visible regardless of technique. This is often the point where replacement makes more sense unless the jeans have significant sentimental value.
Common mistake: Using a patch that’s too small for the hole size. The patch should extend at least 1.5 inches beyond the hole in all directions, more for large holes.
If you’re working with a sewing machine on large patches, proper presser foot selection can make the job easier.
Common Mistakes When Patching Jeans That Make Them Look Bad
The most common mistakes that make jean patches look bad are using mismatched thread color, cutting patches too small, pulling stitches too tight (causing puckering), and failing to secure patch edges completely. These errors create visible, unprofessional-looking repairs that draw attention rather than blending in.
Top mistakes and how to avoid them:
1. Wrong thread color:
- Mistake: Using navy thread on medium blue jeans or bright blue on faded denim
- Fix: Test 2-3 thread shades in natural light and choose the one that disappears
- Impact: Wrong thread color is the #1 giveaway of a patch
2. Patch too small:
- Mistake: Cutting patch the same size as the hole or only 1/2 inch larger
- Fix: Always cut patches 1.5-2 inches larger than the hole on all sides
- Impact: Small patches fail quickly and create visible edges
3. Pulling stitches too tight:
- Mistake: Yanking thread tight after each stitch, causing fabric to pucker
- Fix: Keep stitches snug but not tight, fabric should lie flat
- Impact: Creates visible dimples and wrinkles around the patch
4. Unfinished edges:
- Mistake: Leaving patch edges raw or only stitching partway around
- Fix: Stitch completely around the entire patch perimeter, then add reinforcement stitching
- Impact: Edges lift and fray after washing
5. Using wrong fabric:
- Mistake: Patching heavyweight denim with thin cotton or vice versa
- Fix: Match patch fabric weight to original jeans
- Impact: Creates stiff spots or weak repairs that fail quickly
6. Skipping the press:
- Mistake: Not ironing the patch area before and after stitching
- Fix: Press patch flat before pinning, then press finished repair from inside
- Impact: Lumpy, unprofessional appearance
7. Visible knots:
- Mistake: Starting and ending stitches with large knots on the outside
- Fix: Always tie knots on the inside and bury thread tails between fabric layers
- Impact: Bumpy, obvious repair
8. Straight stitch on stretch denim:
- Mistake: Using rigid straight stitches on jeans with spandex
- Fix: Use zigzag or stretch stitch on any jeans with stretch
- Impact: Stitches break and patch fails within weeks
9. Patch placement:
- Mistake: Centering patch on the hole without considering fabric grain
- Fix: Align patch so the weave direction matches the jeans
- Impact: Patch looks crooked or twisted even if stitching is straight
10. Rushing the job:
- Mistake: Trying to finish a patch in 10 minutes with large, uneven stitches
- Fix: Plan for 30-45 minutes and take time to make small, even stitches
- Impact: Sloppy appearance that screams “amateur repair”
Quality check before finishing: Before tying off your final stitch, check:
- Is the patch flat with no puckering?
- Are stitches evenly spaced and small?
- Is the entire perimeter secured?
- Does the thread color blend when viewed from 3 feet away?
- Can you see any raw patch edges?
If the answer to any question is no, fix it before finishing.
Do I Need to Use Denim Fabric for Patching Jeans or Can I Use Other Materials?
You don’t need to use denim fabric for patching jeans, canvas, twill, and even decorative cotton fabrics work well depending on the patch location and whether you want the repair to be visible or invisible. However, denim provides the best match for strength, texture, and appearance, especially for invisible repairs or high-stress areas like the crotch and inner thighs.
When to use denim:
- Invisible repairs where color and texture matching matters
- High-stress areas (crotch, inner thigh, pocket corners)
- Patches on expensive or designer jeans
- When you want the repair to last 2+ years
Alternative fabrics that work:
Canvas or duck cloth:
- Strength: Very durable, similar to denim
- Best for: Inner patches, reinforcement, knee patches
- Pros: Affordable, readily available, strong
- Cons: Different texture than denim, may show through lightweight jeans
Twill:
- Strength: Medium durability
- Best for: Inner patches on medium-weight jeans
- Pros: Smooth surface, easy to sew
- Cons: Less durable than denim or canvas
Cotton quilting fabric:
- Strength: Low durability
- Best for: Decorative visible patches only, not structural repairs
- Pros: Unlimited colors and patterns
- Cons: Tears easily, not suitable for high-stress areas
Corduroy:
- Strength: Medium durability
- Best for: Visible decorative patches, especially on vintage-style jeans
- Pros: Interesting texture, durable enough for low-stress areas
- Cons: Bulky, doesn’t work for invisible repairs
Leather or faux leather:
- Strength: High durability
- Best for: Visible decorative patches, especially on knees or back pockets
- Pros: Very durable, makes a style statement
- Cons: Requires leather needle, doesn’t breathe, can be uncomfortable
Knit fabric (for stretch jeans):
- Strength: Medium durability
- Best for: Inner patches on jeggings or high-stretch jeans
- Pros: Stretches with fabric, comfortable
- Cons: Can be visible through lightweight denim
Decision matrix:
Choose denim if: Invisible repair, high-stress area, or expensive jeans
Choose canvas if: Budget-friendly reinforcement or inner patch where appearance doesn’t matter
Choose decorative fabric if: Visible statement patch where durability is secondary to style
Choose knit if: Patching stretch jeans or jeggings
Sourcing patch fabric:
- Old jeans: Free and perfectly matched if you have old jeans in a similar wash
- Fabric stores: Denim scraps or fat quarters cost $3-$8
- Thrift stores: Buy cheap jeans in the right color and cut them up for patches
- Online: Pre-cut denim patch kits available for $8-$15
Common mistake: Using whatever fabric is handy without considering whether it matches the jeans’ weight and stretch. A thin cotton patch on heavyweight denim will tear out quickly, while a rigid canvas patch on stretch jeans will be uncomfortable and fail.
For more guidance on working with different fabric types, check our fabric care resources.
FAQ
How long does it take to patch jeans by hand? Hand-patching jeans takes 20-45 minutes depending on hole size and your sewing experience. Small holes (under 1 inch) can be patched in 20 minutes, while large holes (3+ inches) or crotch repairs may take 45-60 minutes with proper reinforcement.
Can you patch jeans without sewing? Yes, iron-on patches can be applied without sewing using heat and pressure from an iron. However, sewn patches last significantly longer, iron-on patches typically last 10-20 washes before edges lift, while sewn patches can last years.
What’s the strongest stitch for patching jeans? The backstitch is the strongest hand-sewing stitch for patching jeans because each stitch overlaps the previous one, creating a continuous line that won’t unravel if one stitch breaks. For machine sewing, use a straight stitch with 2.5mm length or a triple straight stitch.
Should I wash jeans before patching them? Yes, wash jeans before patching to remove dirt, oils, and fabric finishes that can interfere with adhesive bonding or thread grip. Let jeans dry completely before patching, and press the area flat with an iron for easier stitching.
Can you patch jeans with a sewing machine? Yes, sewing machines make patching faster and create stronger, more even stitches than hand-sewing. Use a denim needle (size 90/14 or 100/16), heavy-duty thread, and a straight stitch or zigzag for stretch denim. Lower feed dogs if patching over thick seams.
How do you prevent jeans from ripping in the same spot again? Prevent re-ripping by using a patch that extends 2+ inches beyond the original hole, reinforcing with cross-stitching, and addressing the cause (thigh friction, sharp belt buckles, or poor fit). For chronic thigh rub, apply preventative patches before holes form.
What size patch do I need for a 1-inch hole? For a 1-inch hole, cut a patch at least 3-4 inches square (1.5-2 inches larger than the hole on all sides). This provides sufficient surface area for strong stitching and distributes stress across a larger area to prevent the hole from expanding.
Can you patch black jeans with blue denim? No, blue denim patches will be highly visible on black jeans. Always use black denim or black canvas for patching black jeans. For invisible repairs, match both the color and the fabric weight as closely as possible.
How many times can you patch the same pair of jeans? You can patch jeans multiple times as long as the surrounding fabric remains strong. However, once fabric becomes thin and worn across large areas, additional patches become less effective. Quality jeans can typically handle 3-5 patches over their lifetime.
Do patches make jeans uncomfortable to wear? Properly applied patches should not be uncomfortable. Discomfort usually comes from patches that are too stiff (heavy canvas on lightweight jeans), pulled too tight (causing puckering), or placed in high-flex areas without stretch fabric. Match patch fabric to your jeans’ weight and stretch.
What’s the difference between darning and patching jeans? Darning weaves thread back and forth across a hole to fill it without adding fabric, creating an invisible repair for small holes (under 1 inch). Patching adds a separate piece of fabric behind or over the hole for structural support, necessary for holes larger than 1 inch.
Can you patch jeans that are ripped along the seam? Yes, seam rips are actually easier to repair than fabric holes. Simply restitch the seam using a backstitch or machine straight stitch, following the original seam line. Add a small patch on the inside if the seam area is worn thin to prevent immediate re-ripping.
Conclusion
Learning how to patch jeans (visible and invisible) extends the life of your favorite denim, saves money, and reduces textile waste. Whether you choose decorative visible patches that make a statement or invisible repairs that preserve the original look, the key to successful patching lies in matching materials properly, using small and secure stitches, and reinforcing high-stress areas adequately.
Start with simple hand-sewn patches on low-stress areas to build your skills, then progress to more complex invisible repairs or crotch reinforcements as you gain confidence. Remember that even imperfect patches extend jean life significantly, the goal is durability and function, not perfection.
Next steps:
- Assess your jeans and identify which holes are worth patching based on fabric condition and jean value
- Gather basic supplies: denim scraps, heavy-duty thread, needles, and scissors
- Practice on an old pair of jeans before patching your favorites
- Start with a simple visible patch to learn the technique
- Progress to invisible repairs once you’re comfortable with basic stitching
For more sewing guidance and troubleshooting, explore our beginner sewing tips and sewing techniques resources.


