


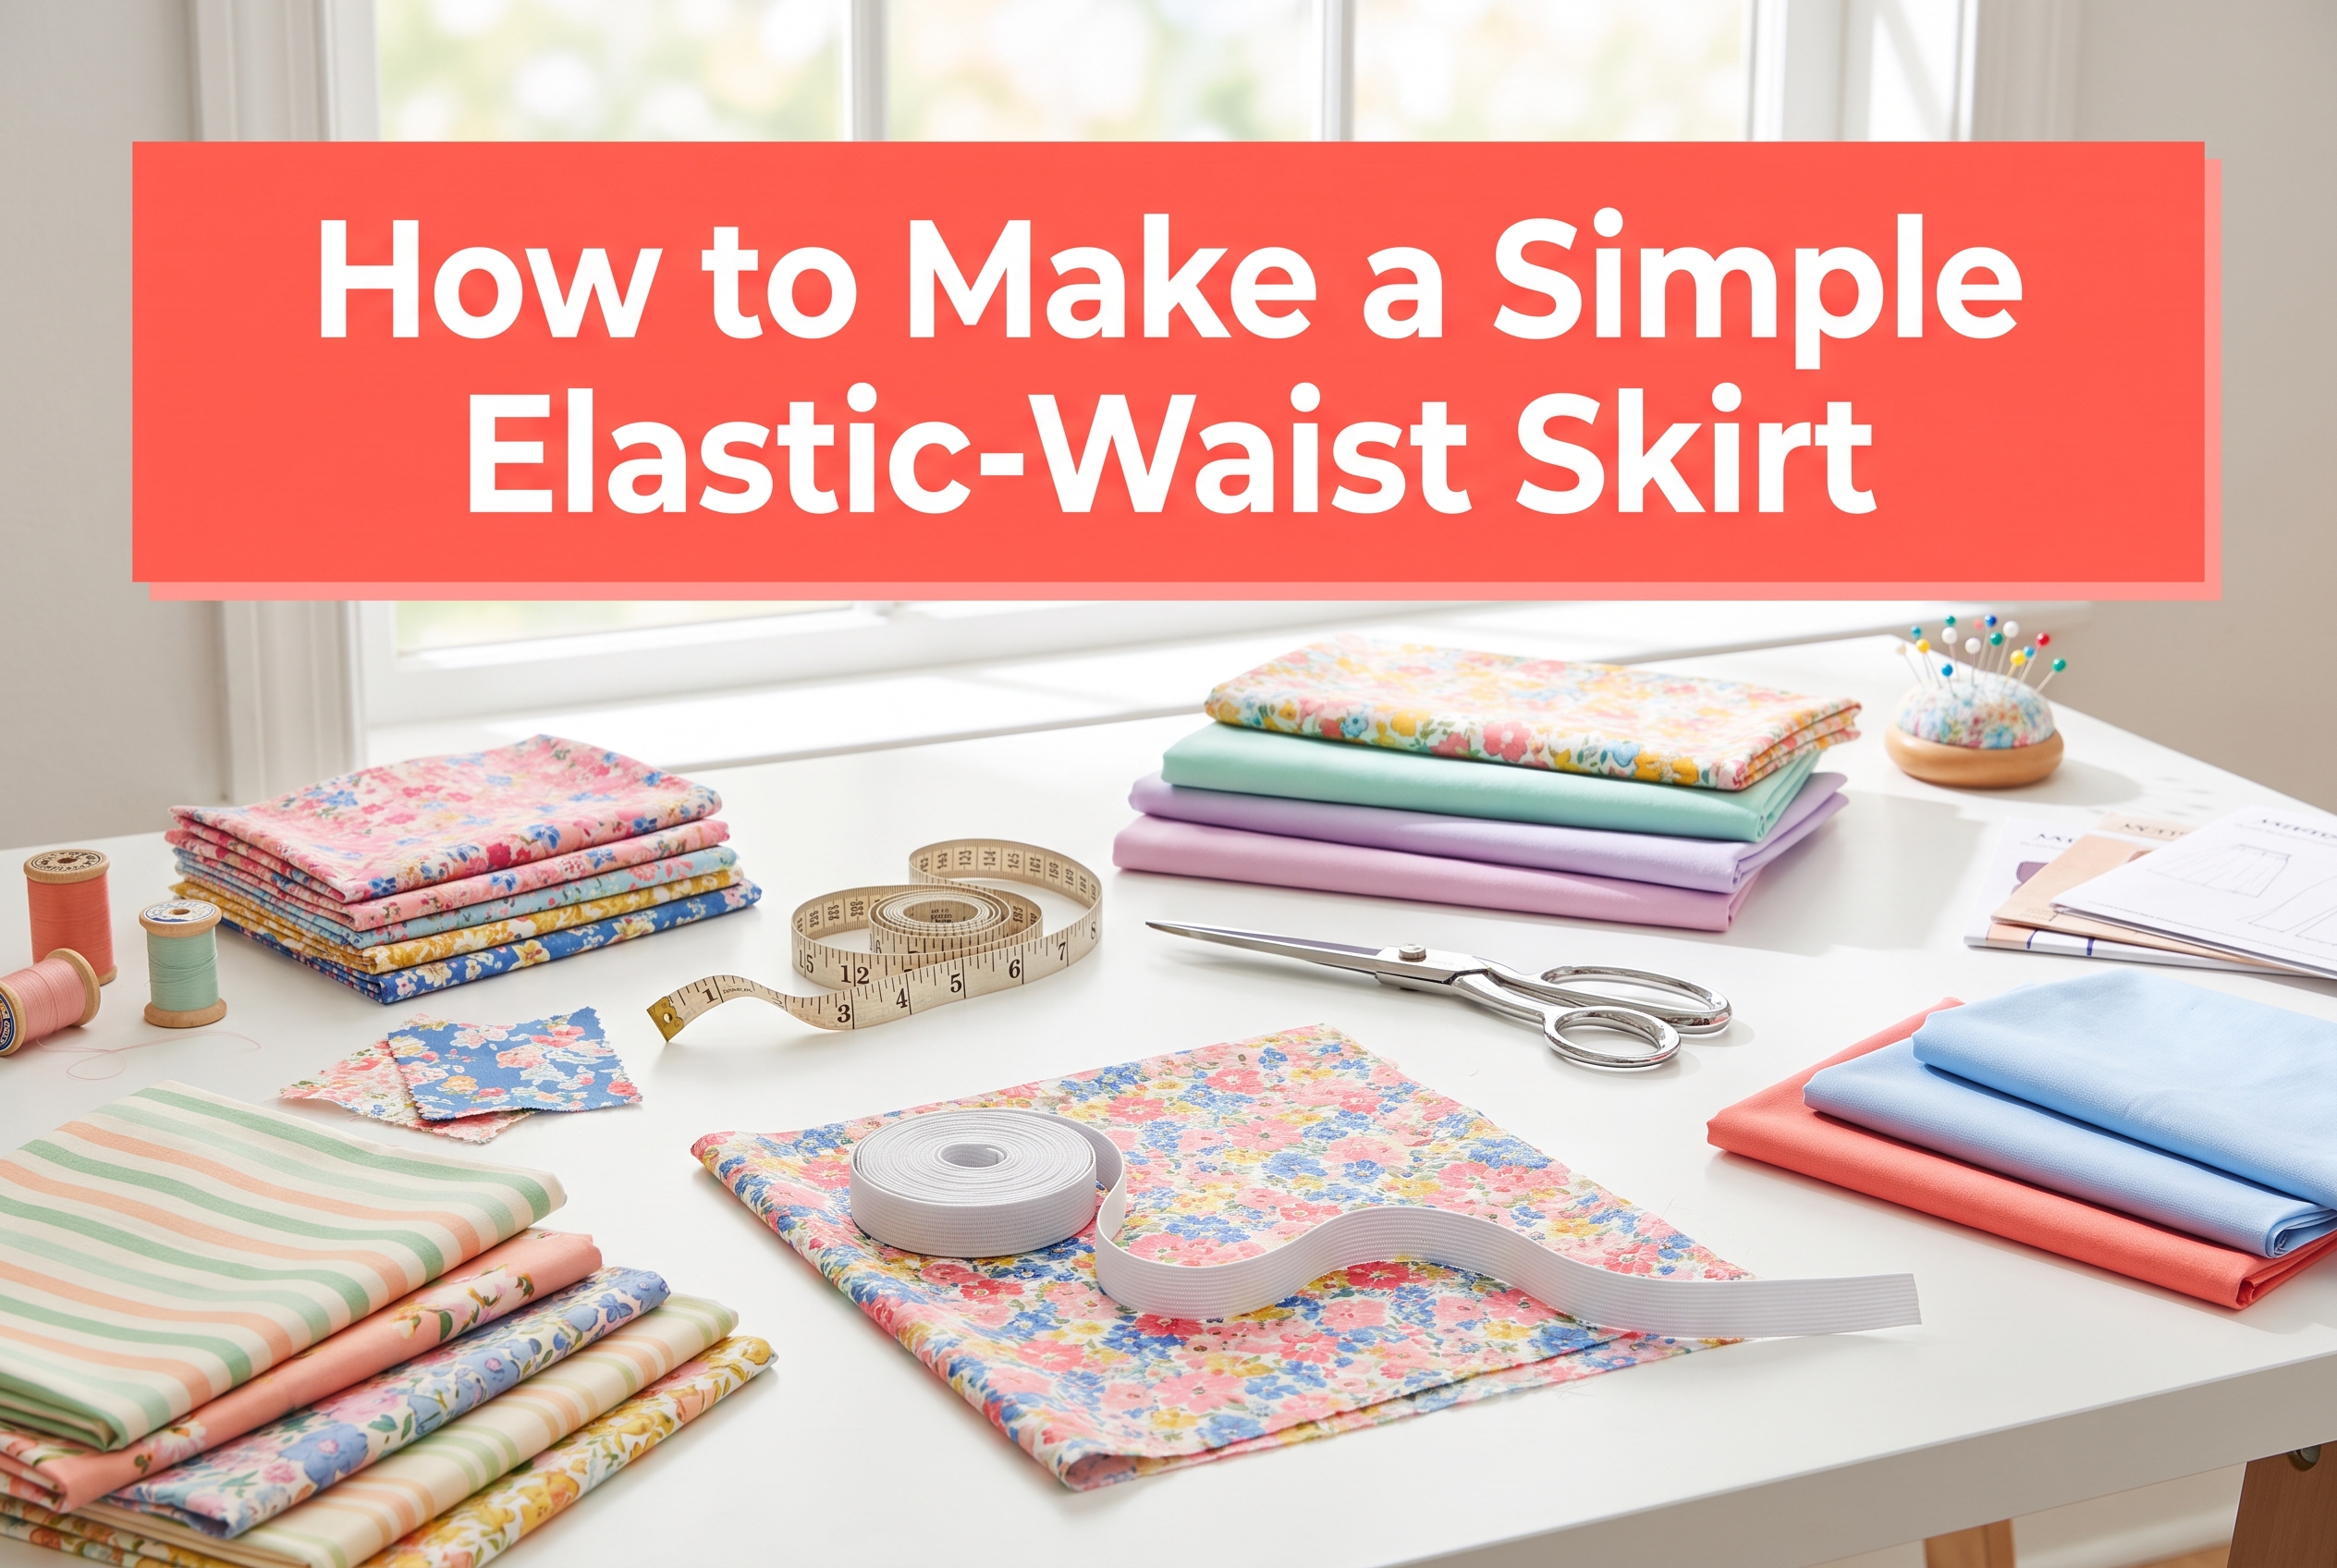
Quick Answer: An elastic-waist skirt is one of the easiest beginner sewing projects, requiring just two fabric rectangles, elastic, and basic straight stitches. Most sewers complete a simple version in 1-2 hours using a standard sewing machine, no serger required. The key steps are measuring your waist and desired length, cutting fabric panels, sewing side seams, creating a waistband casing, and threading elastic through.
Key Takeaways
- Elastic-waist skirts require minimal sewing skills, just straight seams and basic machine operation
- No serger needed, a regular sewing machine with a zigzag stitch works perfectly for finishing seams
- Fabric requirements, typically 1.5 to 2 yards for most adult sizes, depending on length and width
- Elastic measurement, cut elastic 2-4 inches smaller than your waist measurement for comfortable fit
- Pre-washing fabric prevents shrinkage, always wash and dry fabric before cutting
- Project time, expect 1-2 hours for your first skirt, 30-45 minutes once experienced
- Best fabrics, lightweight cotton, cotton blends, rayon, and linen work beautifully for beginners
- Common mistake, twisting elastic happens when the casing is too wide or elastic isn’t secured properly
What Is an Elastic-Waist Skirt?
An elastic-waist skirt is a garment with elastic sewn into the waistband that stretches to fit over your hips and sits comfortably at your natural waist or hips. Unlike skirts with zippers, buttons, or drawstrings, elastic-waist skirts pull on easily and adjust to your body without complicated closures.
These skirts work through a simple casing method: you fold the top edge of the fabric to create a tunnel, sew it down leaving a small opening, then thread elastic through that tunnel. The elastic gathers the fabric evenly around your waist, creating a comfortable, flexible fit that moves with you.
Elastic-waist skirts are popular for several reasons:
- Comfort, no rigid waistbands or hardware digging into your skin
- Adjustability, accommodates weight fluctuations and bloating
- Beginner-friendly, eliminates complex zipper installation or buttonholes
- Versatile styling, works for casual, athletic, and even dressy occasions depending on fabric choice
The construction is forgiving, making it an ideal first garment project for anyone learning how to use a sewing machine.
How Much Fabric Do I Need for an Elastic-Waist Skirt?
For most adult elastic-waist skirts, you’ll need 1.5 to 2 yards of 45-inch wide fabric or 1 to 1.5 yards of 60-inch wide fabric. The exact amount depends on your hip measurement, desired skirt length, and whether you want a gathered or straight silhouette.
Here’s a practical calculation method:
Width calculation:
- Measure your hip circumference (widest part)
- Multiply by 1.5 for a slightly gathered look, or by 2-2.5 for a fuller gathered skirt
- Add 2 inches for seam allowances
Length calculation:
- Measure from your natural waist to desired hem length
- Add 4 inches (3 inches for waistband casing, 1 inch for hem)
Example: For a 40-inch hip measurement and a 24-inch finished length with moderate gathering:
- Width needed: 40 × 1.5 = 60 inches + 2 inches = 62 inches total
- Length needed: 24 + 4 = 28 inches
- With 45-inch wide fabric, you’d cut two panels and seam them together, requiring about 1.75 yards
Fabric width considerations:
- 45-inch fabric, most common quilting cotton width; requires two panels sewn together for adult sizes
- 60-inch fabric, wider home décor or apparel fabric; often allows cutting in one piece for less bulk
Always buy an extra quarter yard for insurance, especially if you’re new to cutting or if your fabric has a directional print that requires pattern matching.
What Fabrics Work Best for Elastic-Waist Skirts?
Lightweight to medium-weight woven fabrics with some drape work best for elastic-waist skirts. Cotton quilting fabric, cotton lawn, rayon challis, and linen blends are ideal beginner choices because they’re easy to sew, press well, and gather nicely without excessive bulk.
Recommended fabrics:
- Cotton quilting fabric, widely available, affordable, comes in endless prints, easy to handle
- Cotton lawn or voile, lightweight and breathable, perfect for summer skirts
- Rayon challis, soft drape, comfortable, slightly more challenging to sew but beautiful results
- Linen or linen blends, breathable, casual aesthetic, wrinkles easily but that’s part of the charm
- Cotton poplin, crisp finish, holds shape well, good for structured looks
Fabrics to avoid as a beginner:
- Knit fabrics, require different techniques and often a serger or special knit fabric sewing needles
- Slippery fabrics (silk, satin, polyester charmeuse), slide around while cutting and sewing
- Heavy fabrics (denim, canvas, upholstery weight), create too much bulk in the gathered waistband
- Stretch fabrics, don’t need elastic waistbands and require different construction
Choose fabrics based on your intended use: lightweight cotton for everyday wear, rayon for dressier occasions, linen for casual summer skirts. If you’re unsure, start with a medium-weight quilting cotton, it’s the most forgiving option and available at any fabric store.

Fat Quarter Quilting Fabric Bundles
How to Make a Simple Elastic-Waist Skirt: Step-by-Step Instructions
Making an elastic-waist skirt involves six main steps that take most beginners 1-2 hours to complete. This method creates a basic gathered skirt with a casing waistband, the foundation technique you can customize later with pockets, different lengths, or decorative elements.
Materials needed:
- 1.5-2 yards fabric (see fabric requirements above)
- 1-inch wide elastic (measure your waist minus 2-4 inches)
- Matching thread
- Basic sewing supplies (scissors, pins, measuring tape, safety pin)
Step 1: Pre-wash and prepare fabric
Wash and dry your fabric using the same method you’ll use for the finished skirt. This prevents shrinkage after you’ve sewn it. Press the fabric smooth with an iron to remove wrinkles, accurate cutting requires flat fabric.
Step 2: Cut your fabric panels
- Measure and mark your fabric rectangles using the calculations from the fabric section
- Cut two identical rectangles if using 45-inch fabric, or one large rectangle if using 60-inch fabric
- Use sharp fabric scissors and cut in long, smooth strokes for clean edges
Step 3: Sew the side seams
- Place fabric panels right sides together (printed sides facing each other)
- Pin along both long edges
- Sew with a ½-inch seam allowance using a straight stitch
- Finish raw edges with a zigzag stitch or pinking shears to prevent fraying
- Press seams open or to one side
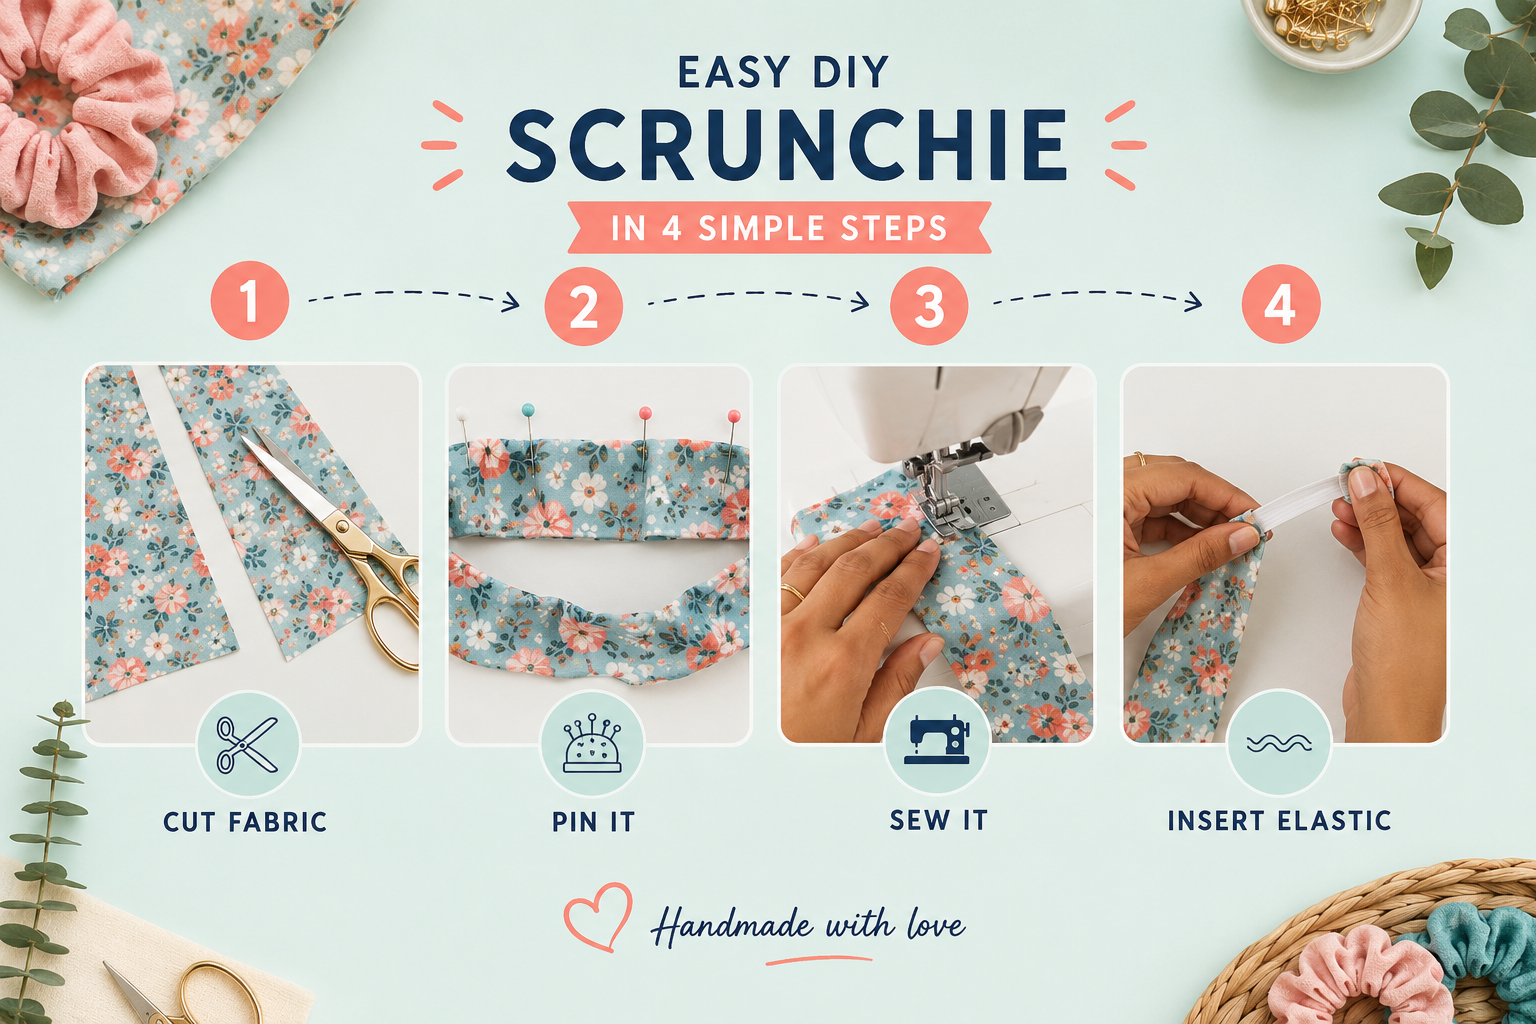
Step 4: Create the waistband casing
- Fold the top raw edge down ¼ inch and press
- Fold down again 1½ inches and press to create the casing
- Pin in place, leaving a 2-inch opening unsewn for threading elastic
- Sew close to the bottom folded edge (about ⅛ inch from the fold)
Step 5: Thread the elastic
- Cut elastic to your waist measurement minus 2-4 inches (try it around your waist for comfort)
- Attach a safety pin to one end of the elastic
- Thread the safety pin through the casing opening, working it all the way around
- Important: Pin the other end of elastic to the fabric so it doesn’t disappear into the casing
- Overlap elastic ends by 1 inch and sew together securely with a zigzag stitch
- Distribute gathers evenly around the waistband
Step 6: Finish the hem
- Try on the skirt and mark your desired length with pins
- Fold the bottom edge up ¼ inch and press
- Fold up again ½ inch and press
- Sew close to the top folded edge
Your elastic-waist skirt is complete! This basic method works for any size and can be adapted with different fabrics, lengths, and embellishments as you gain confidence.
Can I Make an Elastic-Waist Skirt Without a Serger?
Yes, absolutely, a serger is not necessary for making elastic-waist skirts. A basic sewing machine with straight stitch and zigzag capabilities is all you need. Sergers are convenient for finishing seams quickly, but they’re not required for durable, professional-looking results.
Seam finishing alternatives without a serger:
- Zigzag stitch, sew along the raw edge with your machine’s zigzag setting to prevent fraying
- Pinking shears, cut seam allowances with these special scissors that create a zigzag edge
- French seams, enclose raw edges inside the seam itself for a clean finish (learn more about French seams)
- Bias tape binding, encase raw edges in purchased bias tape for a decorative finish
Why sergers aren’t essential for this project:
- Elastic-waist skirts use simple straight seams that any machine can handle
- The waistband casing hides the top raw edge completely
- The hem is folded and enclosed, requiring no special finishing
- Woven fabrics (recommended for beginners) fray slowly and can be finished with basic techniques
If you’re experiencing issues with your basic machine, check our guide on common sewing machine problems before investing in additional equipment. Most beginners find that mastering their current machine is more valuable than adding specialized tools.
Choose zigzag finishing if: you want the fastest, easiest method and your fabric doesn’t fray excessively.
Choose French seams if: you’re making a lightweight or sheer skirt where seam allowances might show through, or you want an extra-polished interior.
What Type of Elastic Is Best for Waistbands?
Braided or woven elastic in 1-inch to 1½-inch width works best for skirt waistbands because it maintains consistent stretch, doesn’t roll or twist easily, and stays comfortable against skin. Avoid knit elastic for waistbands, it loses elasticity quickly and tends to narrow when stretched.
Elastic types explained:
Braided elastic
- Most common and affordable option
- Slightly textured surface that grips fabric well
- Narrows slightly when stretched but recovers well
- Good for most casual skirts
- Available everywhere
Woven elastic
- Premium choice for waistbands
- Maintains width when stretched
- Softer, more comfortable for all-day wear
- Doesn’t roll or twist inside casings
- Slightly more expensive but worth it
Knit elastic
- Soft and lightweight
- Not recommended for waistbands, loses stretch over time and rolls easily
- Better for sleeve cuffs or leg openings
Width recommendations:
- ¾ inch, children’s skirts or lightweight garments
- 1 inch, standard choice for most adult skirts, fits comfortably in a 1½-inch casing
- 1½ inch, wider waistbands for plus sizes or when you want extra support
- 2 inch, athletic or yoga-style waistbands (requires different construction method)
Quality matters: cheap elastic from discount stores often loses stretch after a few washes. Invest in name-brand elastic from fabric stores, it costs slightly more but lasts significantly longer. Dritz and Pellon are reliable brands available at most craft stores.
When shopping, gently stretch the elastic in the store. It should snap back quickly to its original length without staying stretched out. If it feels stiff or doesn’t recover well, choose a different brand.
How to Measure Elastic for a Comfortable Waist
Cut your elastic 2 to 4 inches shorter than your actual waist measurement for a comfortable, secure fit. The exact amount depends on the elastic’s stretch capacity, your comfort preference, and where you’ll wear the skirt (natural waist versus hips).
Measurement method:
- Measure your waist, wrap a measuring tape around your natural waist (narrowest part) or where you want the skirt to sit
- Test the elastic, wrap the elastic around your waist at the same spot, pulling until it feels comfortably snug but not tight
- Mark and measure, note where the elastic overlaps; this is your ideal length
- Add seam allowance, add 1 inch to your marked measurement for the overlap seam
General guidelines by elastic type:
- Firm braided elastic, subtract 4 inches from waist measurement
- Soft woven elastic, subtract 2-3 inches from waist measurement
- High-stretch athletic elastic, subtract 3-4 inches from waist measurement
Adjustment factors:
- Wearing at natural waist (narrowest point), use the smaller subtraction (2-3 inches)
- Wearing at hips (lower, wider), use the larger subtraction (3-4 inches) for security
- Prefer loose fit, subtract only 2 inches
- Prefer snug fit, subtract 4 inches
Pro tip: Before cutting your elastic, pin it into a circle at your estimated length and try it on over your hips (since you’ll need to pull the skirt over them). The elastic should slide over your hips with slight resistance but sit comfortably at your waist without digging in. Adjust before cutting.
Common mistake: cutting elastic too long results in a saggy waistband that slides down. It’s better to start slightly shorter, you can always make a new elastic piece if needed, but you can’t easily lengthen elastic that’s already sewn into the skirt.
Do I Need to Pre-Wash Fabric Before Making a Skirt?
Yes, always pre-wash fabric before cutting and sewing your skirt. Most fabrics shrink during their first wash, typically 3-5% for cotton, which can turn a perfectly fitted skirt into an unwearable garment after laundering. Pre-washing also removes chemical finishes and excess dye that can affect how fabric handles.
Pre-washing steps:
- Wash in warm or hot water, use the temperature you’ll use for the finished garment
- Dry completely, tumble dry on the heat setting you’ll use regularly (heat causes most shrinkage)
- Press smooth, iron the fabric to remove wrinkles before cutting
What pre-washing accomplishes:
- Prevents shrinkage, fabric shrinks during the first wash; better before cutting than after sewing
- Removes sizing, manufacturers add starch-like chemicals that make fabric stiff; washing reveals true drape
- Tests colorfastness, identifies fabrics that bleed dye before you’ve invested sewing time
- Softens fabric, especially important for quilting cotton, which can feel stiff off the bolt
Exceptions (fabrics you shouldn’t pre-wash):
- Dry-clean-only fabrics, silk, wool, or specialty fabrics labeled dry-clean only
- Fabrics with special finishes, water-resistant or stain-resistant treatments may wash out
- Fabrics you’ll dry-clean, if you plan to dry-clean the finished garment, don’t pre-wash
What happens if you skip pre-washing:
Your finished skirt might shrink 1-3 inches in length and width after the first wash, making it too short or too tight. The waistband elastic won’t shrink, creating puckering and an ill-fitting waistband. Some fabrics also pucker unevenly when different fabric components (thread, fabric, interfacing) shrink at different rates.
Time-saving tip: Pre-wash all your fabric when you buy it, before storing it in your stash. That way it’s always ready to use when inspiration strikes. Just make sure to keep a note with the fabric indicating it’s been pre-washed.
How Long Does It Take to Sew a Simple Elastic-Waist Skirt?
A simple elastic-waist skirt takes 1 to 2 hours for beginners and 30 to 45 minutes for experienced sewers. The timeline depends on your sewing speed, whether you’re following written instructions, and how much time you spend on finishing details like pressing seams and perfecting the hem.
Time breakdown by task:
- Cutting fabric, 10-15 minutes (longer if you’re measuring carefully or matching patterns)
- Sewing side seams, 10-15 minutes including pinning and finishing edges
- Creating waistband casing, 15-20 minutes with pressing and careful stitching
- Threading elastic, 5-10 minutes (can be tricky the first time)
- Hemming, 15-20 minutes with pressing and pinning
- Pressing throughout, adds 10-15 minutes total but improves results significantly
Factors that affect timing:
Faster completion:
- Using a rotary cutter and mat for cutting (versus scissors)
- Choosing solid-color fabric (no pattern matching)
- Skipping decorative elements
- Having all supplies ready before starting
- Using a machine with automatic thread cutting
Slower completion:
- First-time sewing (reading instructions, troubleshooting)
- Matching plaids or directional prints
- Adding pockets or other customizations
- Dealing with machine problems like thread tension or jamming
- Hand-sewing any portions
Realistic expectations:
Your first elastic-waist skirt will likely take the full 2 hours or slightly longer, and that’s completely normal. You’re learning new techniques, referring to instructions frequently, and probably ripping out and re-sewing at least one seam. By your third or fourth skirt, you’ll have the process memorized and work much faster.
Speed isn’t the goal for beginners. Focus on understanding each step, practicing straight seams, and creating something you’re proud to wear. The speed will come naturally with repetition.
Common Mistakes When Sewing Elastic Waistbands
The most common elastic waistband mistakes are twisting elastic inside the casing, cutting elastic too long or too short, and sewing the casing opening closed before inserting elastic. These errors are easy to make but also easy to prevent with proper technique and attention during construction.
Mistake 1: Elastic twisting inside the casing
Why it happens: The casing is too wide for the elastic width, or the elastic wasn’t secured properly while sewing the casing.
Prevention:
- Use 1-inch elastic with a 1½-inch casing (elastic should fill about ⅔ of the casing width)
- Pin the elastic to the fabric at several points around the waistband before closing the casing
- Sew through the elastic at the side seams to anchor it permanently
Mistake 2: Cutting elastic the wrong length
Why it happens: Measuring around your waist without accounting for stretch, or not testing the elastic before cutting.
Prevention:
- Always try the elastic around your waist before cutting
- Remember to subtract 2-4 inches from your waist measurement
- Pin the elastic into a circle and test it over your hips first
Mistake 3: Sewing the casing completely closed
Why it happens: Autopilot sewing without remembering to leave an opening.
Prevention:
- Mark the opening location with pins or fabric marker before you start sewing
- Sew slowly when approaching the opening area
- If you accidentally sew it closed, use a seam ripper to open 2 inches
Mistake 4: Uneven gathering
Why it happens: Elastic isn’t distributed evenly around the waistband after threading.
Prevention:
- Mark the elastic and casing into quarters before threading
- Match quarter marks and pin them together
- Adjust gathers between pins until they’re even
Mistake 5: Elastic ends coming apart
Why it happens: Insufficient overlap or weak stitching when joining elastic ends.
Prevention:
- Overlap elastic ends by at least 1 inch
- Sew a rectangle or box-X pattern through both layers
- Use a zigzag stitch for extra security
Mistake 6: Waistband puckering or rippling
Why it happens: Stretching the fabric while sewing the casing, or using thread tension that’s too tight.
Prevention:
- Let the fabric feed naturally through the machine without pulling
- Check your thread tension settings before starting
- Press the casing thoroughly before sewing
If you encounter persistent issues with your machine while sewing, consult our guide on why needles keep breaking or fabric not feeding through properly.
Can I Add Pockets to an Elastic-Waist Skirt?
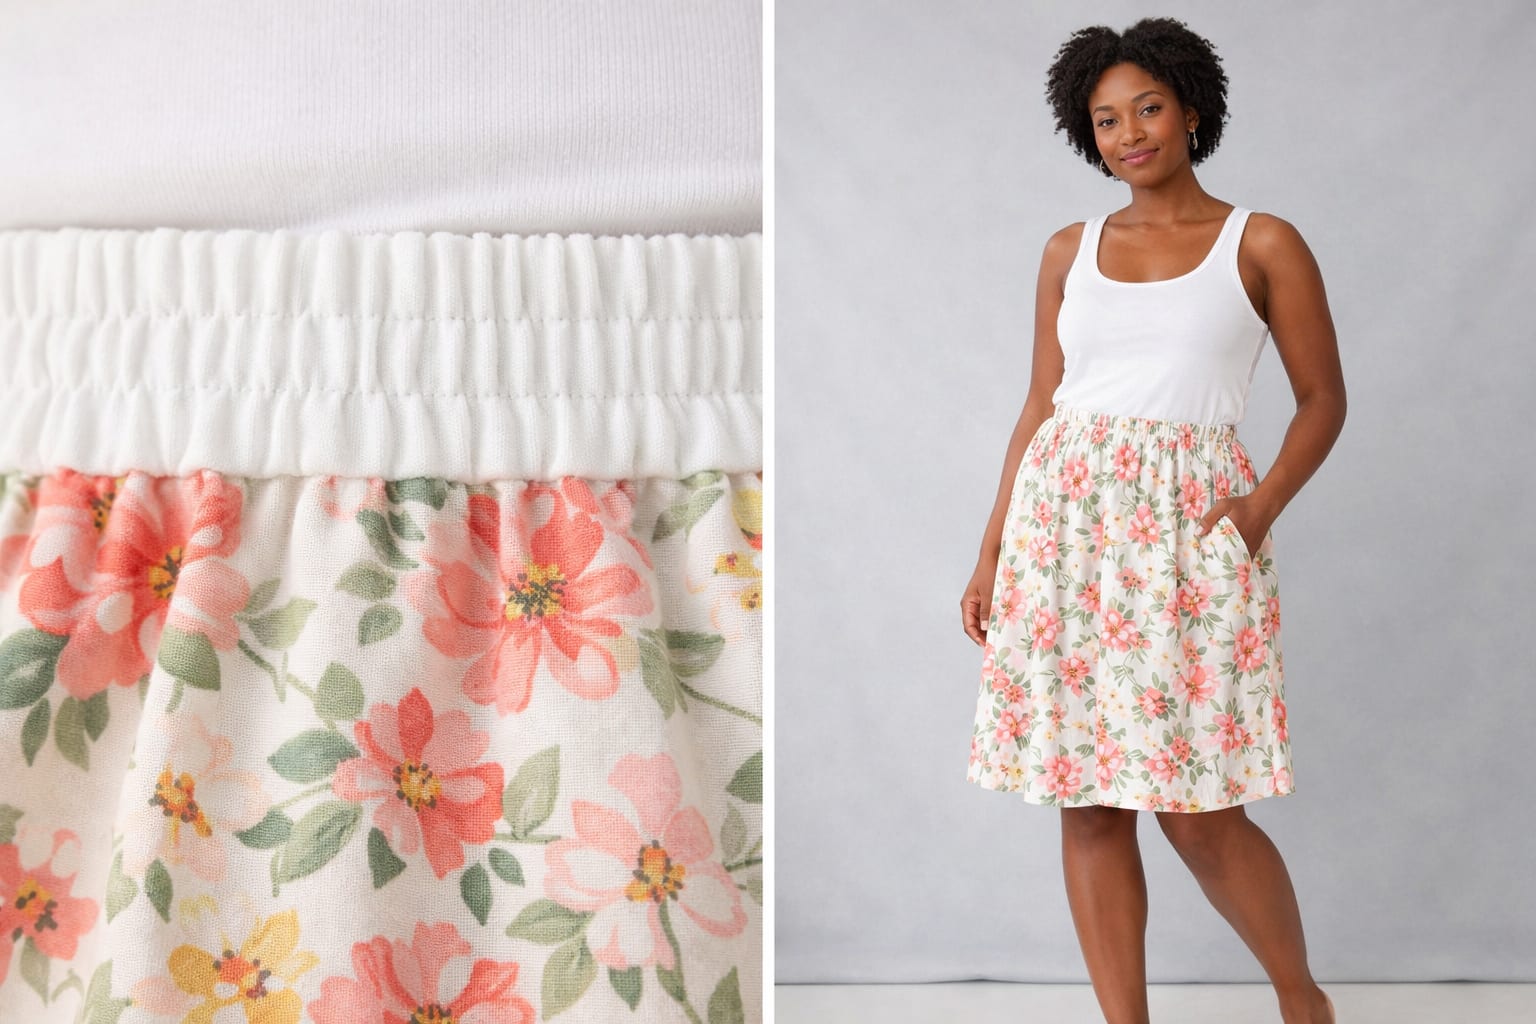
Yes, you can easily add pockets to an elastic-waist skirt by inserting side-seam pockets before sewing the side seams closed. This simple modification adds functionality without significantly increasing difficulty or construction time, expect to add about 20-30 minutes to your project.
Side-seam pocket method (easiest for beginners):
- Cut pocket pieces, cut four rectangles measuring 6 inches wide by 7 inches tall from matching or contrasting fabric
- Position pockets, place one pocket piece on each side of the front and back panels, right sides together, aligned with the side edge
- Mark pocket placement, position the top of the pocket 2-3 inches below where the waistband will sit
- Sew pocket to panel, stitch the pocket to the side edge of each panel with a ½-inch seam allowance
- Assemble skirt, place front and back panels right sides together and sew the side seams, catching the pocket edges in the seam
- Finish pocket edges, sew around the curved pocket opening with a zigzag stitch or serge to prevent fraying
Pocket placement tips:
- Position 2-3 inches below waistband, ensures the elastic doesn’t interfere with pocket access
- Angle slightly forward, makes pockets easier to reach and more comfortable
- Reinforce at stress points, backstitch at the top and bottom of the pocket opening for durability
Alternative pocket styles:
Patch pockets, sew rectangular pockets onto the outside of the skirt (easiest method but less polished)
In-seam pockets with pocket bags, use a separate pocket pattern piece for a more professional finish
Hidden zipper pockets, advanced technique that creates an invisible pocket opening
Considerations:
- Pockets add bulk at the hips, which may affect the drape of lightweight fabrics
- Use the same fabric as your skirt for invisible pockets, or contrasting fabric for a design element
- Pockets in gathered skirts can gape open, position them carefully and consider adding a small snap or button closure
Adding pockets transforms a simple skirt into a practical everyday garment. Once you’ve mastered the basic elastic-waist skirt construction, pockets are a logical next step in building your sewing skills.
Elastic-Waist Skirt vs Drawstring Skirt: Which Is Easier?
Elastic-waist skirts are slightly easier for beginners than drawstring skirts because they require fewer steps and no buttonhole or eyelet creation. Both styles are beginner-friendly, but elastic waistbands are more forgiving and create a more polished, consistent fit without manual adjustment.
Elastic-waist skirt advantages:
- Fewer steps, no buttonholes, eyelets, or drawstring threading required
- Consistent fit, elastic distributes tension evenly without manual tying
- Faster to wear, pull on and go, no adjusting needed
- More polished appearance, no visible ties or bows
- Better for active wear, stays secure during movement
Drawstring skirt advantages:
- Fully adjustable, can be loosened or tightened as needed throughout the day
- No elastic measurement required, one size fits a wider range
- Easier to alter, simply replace the drawstring if it wears out
- Decorative element, exposed drawstrings can be a design feature
- No elastic twisting issues, drawstrings can’t twist inside the casing
Construction comparison:
| Aspect | Elastic-Waist | Drawstring |
|---|---|---|
| Casing creation | Same technique | Same technique |
| Threading | Thread elastic once | Thread drawstring twice (both directions) |
| Securing ends | Sew elastic ends together | Create buttonholes or eyelets for drawstring exit |
| Skill level | Beginner | Beginner to intermediate |
| Time required | 1-2 hours | 1.5-2.5 hours |
Choose elastic-waist if: you want the simplest construction, prefer a clean finished look, or plan to wear the skirt for active purposes.
Choose drawstring if: you want maximum adjustability, enjoy decorative details, or want to avoid measuring and cutting elastic precisely.
Hybrid option: Some sewers create a casing with both elastic and a drawstring. The elastic provides the primary fit, while the drawstring allows for adjustment and adds a decorative element. This combines the benefits of both methods but adds complexity.
For absolute beginners, start with an elastic-waist skirt to master the basic casing technique, then experiment with drawstrings once you’re comfortable with the fundamentals.
How to Sew Elastic Directly to Fabric Without a Casing
You can sew elastic directly to fabric using a zigzag stitch while stretching the elastic to match the fabric edge, eliminating the need for a casing. This method works well for knit fabrics, athletic wear, and when you want a flatter waistband without the bulk of a folded casing.
Direct-application method:
- Cut elastic, measure your waist and subtract 3-4 inches; cut elastic to this length
- Mark quarters, divide both the elastic and the skirt waist edge into four equal sections and mark with pins
- Pin elastic to fabric, place elastic on the wrong side of the fabric, aligning the top edge of elastic with the raw edge of fabric; match quarter marks
- Set machine to zigzag, use a medium-width zigzag stitch (3-4mm wide)
- Stretch and sew, hold the elastic stretched to match the fabric length between pins, sewing with the zigzag stitch through both elastic and fabric
- Fold and topstitch, fold the elastic to the inside of the skirt and topstitch through all layers with a straight or zigzag stitch
Key techniques for success:
- Stretch only the elastic, not the fabric, hold the fabric relaxed while pulling the elastic taut
- Sew slowly, maintaining even tension while stretching requires control
- Use a walking foot, helps feed both layers evenly (optional but helpful)
- Backstitch at beginning and end, prevents elastic from pulling loose
When to use this method:
- Knit fabrics, the direct method works better than casings for stretchy fabrics
- Athletic or yoga skirts, creates a flatter, more comfortable waistband for active wear
- Reducing bulk, eliminates the folded fabric of a casing
- Exposed elastic design, when you want the elastic to show as a design element
When to avoid this method:
- Woven fabrics, casings work better and look more polished
- Beginners, requires more skill to maintain even tension while sewing
- Formal garments, the exposed elastic edge is more casual
This technique requires practice to master the stretching and sewing simultaneously. If you’re new to sewing, start with the traditional casing method first, then experiment with direct application once you’re comfortable with your machine’s capabilities.
Beginner Sewing Projects Easier Than Elastic-Waist Skirts
Several projects are easier than elastic-waist skirts for absolute beginners, including pillowcases, simple tote bags, cloth napkins, and drawstring bags. These projects involve fewer steps, require less precise measuring, and help you practice straight seams without the complexity of fitting a garment to your body.
Easier projects to start with:
1. Pillowcase
- Why it’s easier: Only three seams, no fitting required, forgiving measurements
- Skills learned: Straight seams, turning corners, finishing edges
- Time required: 30-45 minutes
2. Cloth napkins
- Why it’s easier: Just hemming practice, no construction complexity
- Skills learned: Mitered corners, even hems, pressing techniques
- Time required: 15-20 minutes each
3. Simple tote bag
- Why it’s easier: Straight seams, no curved edges, no elastic threading
- Skills learned: Sewing handles, reinforcing stress points, boxing corners
- Time required: 1-1.5 hours
4. Drawstring bag
- Why it’s easier: Similar to elastic-waist skirt but no fitting concerns, smaller scale
- Skills learned: Creating casings, threading drawstrings, sewing in the round
- Time required: 45 minutes to 1 hour
5. Table runner
- Why it’s easier: Rectangular construction, simple hems, no fitting
- Skills learned: Working with longer fabric pieces, straight stitching, pressing
- Time required: 1 hour
Progression path for beginners:
- Start with cloth napkins to practice hemming and corners
- Move to pillowcases to learn basic construction and seam finishing
- Try a simple tote bag to practice handles and reinforcement
- Make a drawstring bag to learn casing techniques
- Graduate to an elastic-waist skirt combining all these skills
Why elastic-waist skirts are intermediate-beginner:
While often recommended as a first garment project, elastic-waist skirts actually require several skills: accurate measuring for fit, creating even casings, threading elastic without twisting, and achieving a wearable finished product. The pressure to create something that fits and looks good can be frustrating for someone still learning to sew straight seams.
If you’re determined to start with a skirt: Choose a very simple pattern, use inexpensive fabric you don’t mind making mistakes on, and give yourself permission to make a practice version first. Many sewers make two or three skirts before achieving results they’re happy with, and that’s completely normal.
For more guidance on beginner sewing projects, explore our comprehensive resources for new sewers.
Why Is My Elastic Twisting Inside the Waistband?
Elastic twists inside the waistband when the casing is too wide for the elastic width, when the elastic isn’t secured at key points, or when the elastic quality is poor and naturally wants to curl. This frustrating problem creates uncomfortable lumps and an unprofessional appearance, but it’s preventable with proper construction techniques.
Primary causes and solutions:
Cause 1: Casing too wide
The casing should be only slightly wider than the elastic. If there’s too much room, the elastic can flip and twist as you move.
Solution:
- Use 1-inch elastic with a 1½-inch casing (elastic fills ⅔ of the space)
- Use 1½-inch elastic with a 2-inch casing
- If your casing is already sewn too wide, consider using wider elastic
Cause 2: Elastic not anchored
Free-floating elastic inside a casing can rotate with body movement and washing.
Solution:
- Sew through the elastic at both side seams before closing the casing opening
- Divide the waistband into quarters and stitch through elastic at each quarter mark
- Add a small vertical stitch through elastic and fabric every 3-4 inches around the waistband
Cause 3: Poor-quality elastic
Cheap elastic often has an uneven weave that naturally wants to curl or twist.
Solution:
- Invest in quality woven elastic from fabric stores rather than discount stores
- Test elastic before buying, it should lie flat when relaxed
- Replace twisted elastic with better quality elastic
Cause 4: Elastic cut on the bias
If elastic is cut at an angle rather than straight across, it will twist.
Solution:
- Always cut elastic perpendicular to the length using sharp scissors
- Use a ruler or cutting mat to ensure a straight cut
Prevention during construction:
- Pin elastic before closing casing, insert elastic, distribute gathers evenly, then pin elastic to fabric at multiple points
- Stitch in the ditch, sew through the side seam from the outside, catching the elastic inside
- Topstitch the waistband, sew a line of stitching ¼ inch from the top edge of the waistband, catching the elastic underneath
- Use non-roll elastic, specifically designed to resist twisting (labeled as “no-roll” or “non-roll”)
Fixing twisted elastic after construction:
If your elastic is already twisted inside a finished skirt:
- Use a seam ripper to open the casing at one side seam
- Pull the elastic out enough to untwist it
- Pin the elastic to the fabric at the side seam
- Sew through the elastic and fabric to anchor it
- Close the casing opening
- Repeat at the other side seam if needed
When to start over:
If the elastic is severely twisted throughout the entire waistband and the casing is too wide, it’s often faster to remove the elastic completely, adjust the casing width if possible, and thread new elastic with proper anchoring.
Frequently Asked Questions
What’s the best stitch length for sewing an elastic-waist skirt?
Use a 2.5 to 3mm stitch length for most seams on an elastic-waist skirt. This creates strong, durable seams that won’t pop under the stress of pulling the skirt over your hips. Shorter stitches (1.5-2mm) work well for the waistband casing where you want extra security, while longer stitches (3.5-4mm) can be used for basting or gathering.
Can I use a hand-sewing needle instead of a machine?
Yes, you can hand-sew an elastic-waist skirt, but it will take significantly longer, expect 6-8 hours versus 1-2 hours by machine. Use a backstitch for seams and a running stitch for hems and casings. Hand-sewing works well for repairs or small adjustments but isn’t practical for complete garment construction unless you don’t have access to a machine.
How do I prevent the hem from looking wavy?
Press the hem thoroughly before sewing, use a consistent seam allowance, and avoid stretching the fabric as it feeds through the machine. Wavy hems often result from pressing with too much steam or pulling the fabric while sewing. For best results, press the hem in stages, first fold and press ¼ inch, then fold and press the final hem depth before sewing.
What do I do if my elastic is too tight after sewing?
Open the casing at the side seam using a seam ripper, remove the elastic, cut a new piece 1-2 inches longer, and re-thread it through the casing. It’s easier to replace elastic than to try to stretch it permanently. Always test elastic length before sewing the ends together to avoid this problem.
Can I make an elastic-waist skirt from a bedsheet?
Yes, cotton bedsheets make excellent fabric for practice skirts, they’re inexpensive, pre-washed, and come in large pieces perfect for cutting skirt panels. Vintage sheets often have beautiful prints. Just ensure the sheet is 100% cotton or a cotton blend rather than polyester, which doesn’t breathe well and can be uncomfortable to wear.
How do I match plaids or stripes when sewing side seams?
Cut your fabric panels with the pattern running in the same direction, then pin the side seams carefully, matching the pattern lines at multiple points along the seam. Sew slowly and adjust as needed. For horizontal stripes, match them at hip level where they’re most visible. Vertical stripes are more forgiving and don’t require as much precision.
What’s the difference between elastic and elastic thread?
Elastic (also called elastic band or elastic ribbon) is the ½-inch to 2-inch wide material you thread through casings for waistbands. Elastic thread is thin, stretchy thread wound on a bobbin used for shirring or smocking effects. You cannot substitute elastic thread for waistband elastic, they serve completely different purposes.
Can I add a lining to an elastic-waist skirt?
Yes, cut a second set of skirt panels from lining fabric, sew them together, then treat the outer skirt and lining as one layer when creating the waistband casing. The lining should be ½ inch shorter than the outer skirt so it doesn’t peek out at the hem. Lining adds opacity, comfort, and a professional finish to lightweight or sheer fabrics.
How do I prevent my fabric from fraying while I work?
Finish raw edges immediately after cutting using pinking shears, a zigzag stitch, or liquid fray preventative. Store cut pieces flat rather than hanging them, which can stress the edges. If your fabric frays excessively, consider using a different fabric or finishing edges before assembling the skirt.
What’s the best way to store elastic so it doesn’t lose stretch?
Store elastic flat or loosely rolled in a cool, dry place away from direct sunlight. Don’t stretch elastic around cardboard or hang it, which can permanently deform it. Keep elastic in a sealed bag or container to prevent dust accumulation. Quality elastic stored properly can last years without losing elasticity.
Can I use a different width elastic than the pattern calls for?
Yes, but you’ll need to adjust the casing width accordingly. The casing should be ½ inch wider than the elastic width. If you use 1½-inch elastic instead of 1-inch, increase your casing fold from 1½ inches to 2 inches. Always adjust the casing to fit your elastic, not the other way around.
How do I fix puckering around the waistband?
Puckering usually indicates thread tension that’s too tight or that you stretched the fabric while sewing. Check your machine’s tension settings and adjust if needed. To fix existing puckering, carefully remove the waistband stitching with a seam ripper, adjust tension, and re-sew while letting the fabric feed naturally without pulling.
Conclusion
Learning how to make a simple elastic-waist skirt opens the door to endless wardrobe possibilities and builds essential sewing skills you’ll use in countless future projects. This beginner-friendly garment requires only basic materials, fabric, elastic, thread, and a standard sewing machine, yet produces a comfortable, wearable result you can customize with different fabrics, lengths, and embellishments.
The key to success lies in proper preparation: pre-washing your fabric, measuring carefully, cutting elastic to the right length, and taking time to press seams as you work. While your first skirt might take the full two hours and include a few learning moments, each subsequent project will go faster and turn out better as you internalize the techniques.
Your next steps:
- Gather your materials, choose a beginner-friendly cotton fabric, purchase quality 1-inch woven elastic, and ensure your sewing machine is properly maintained
- Take accurate measurements, measure your waist, hips, and desired length, then calculate fabric requirements
- Start with a practice version, use inexpensive fabric for your first attempt to build confidence
- Follow the steps methodically, don’t rush; focus on understanding each technique
- Troubleshoot as needed, refer back to the common mistakes section if issues arise
- Customize your next skirt, once you’ve mastered the basic version, experiment with pockets, different fabrics, or decorative elements
Remember that every experienced sewer started exactly where you are now, making the same mistakes and learning the same lessons. The elastic-waist skirt is a foundational project that teaches skills you’ll use throughout your sewing journey, from creating casings to finishing seams to achieving proper fit.
Don’t let perfectionism stop you from starting. Your first skirt doesn’t need to be flawless; it just needs to teach you something. With each project, your skills will improve, your speed will increase, and your confidence will grow. Before long, you’ll be designing and sewing custom skirts that fit perfectly and reflect your personal style, all from mastering this simple, versatile technique.


 By
By


