Quick Answer
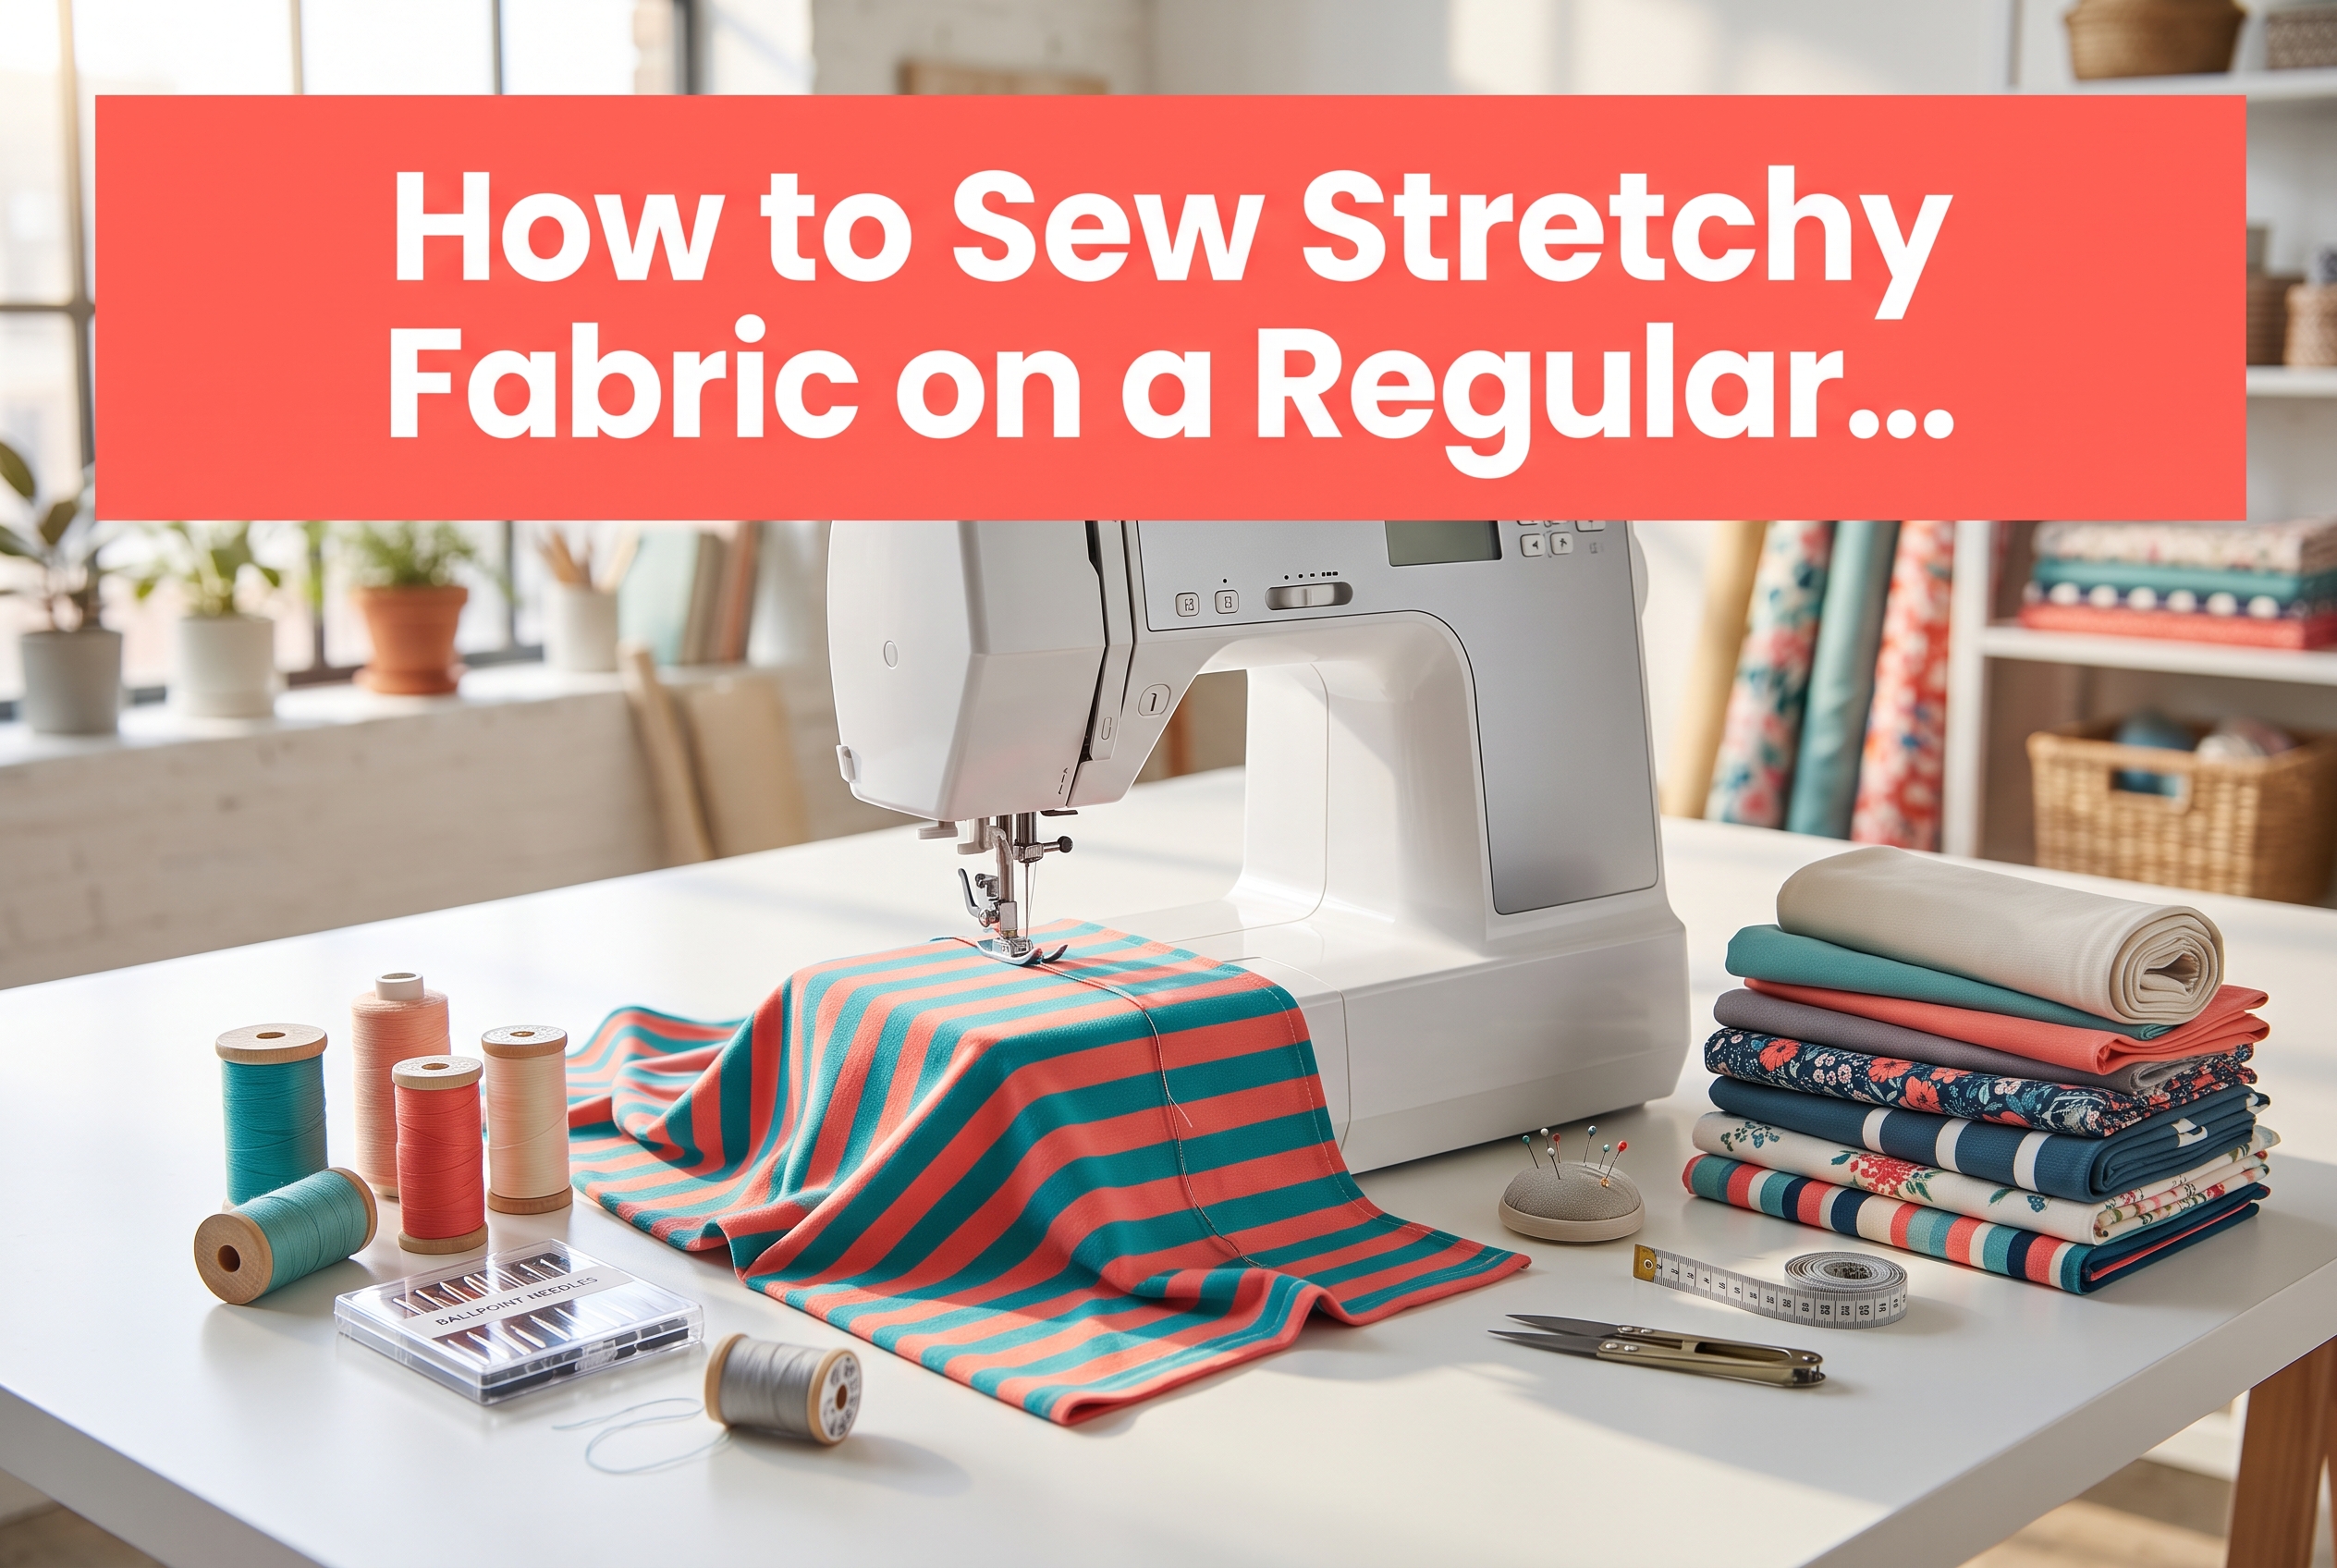
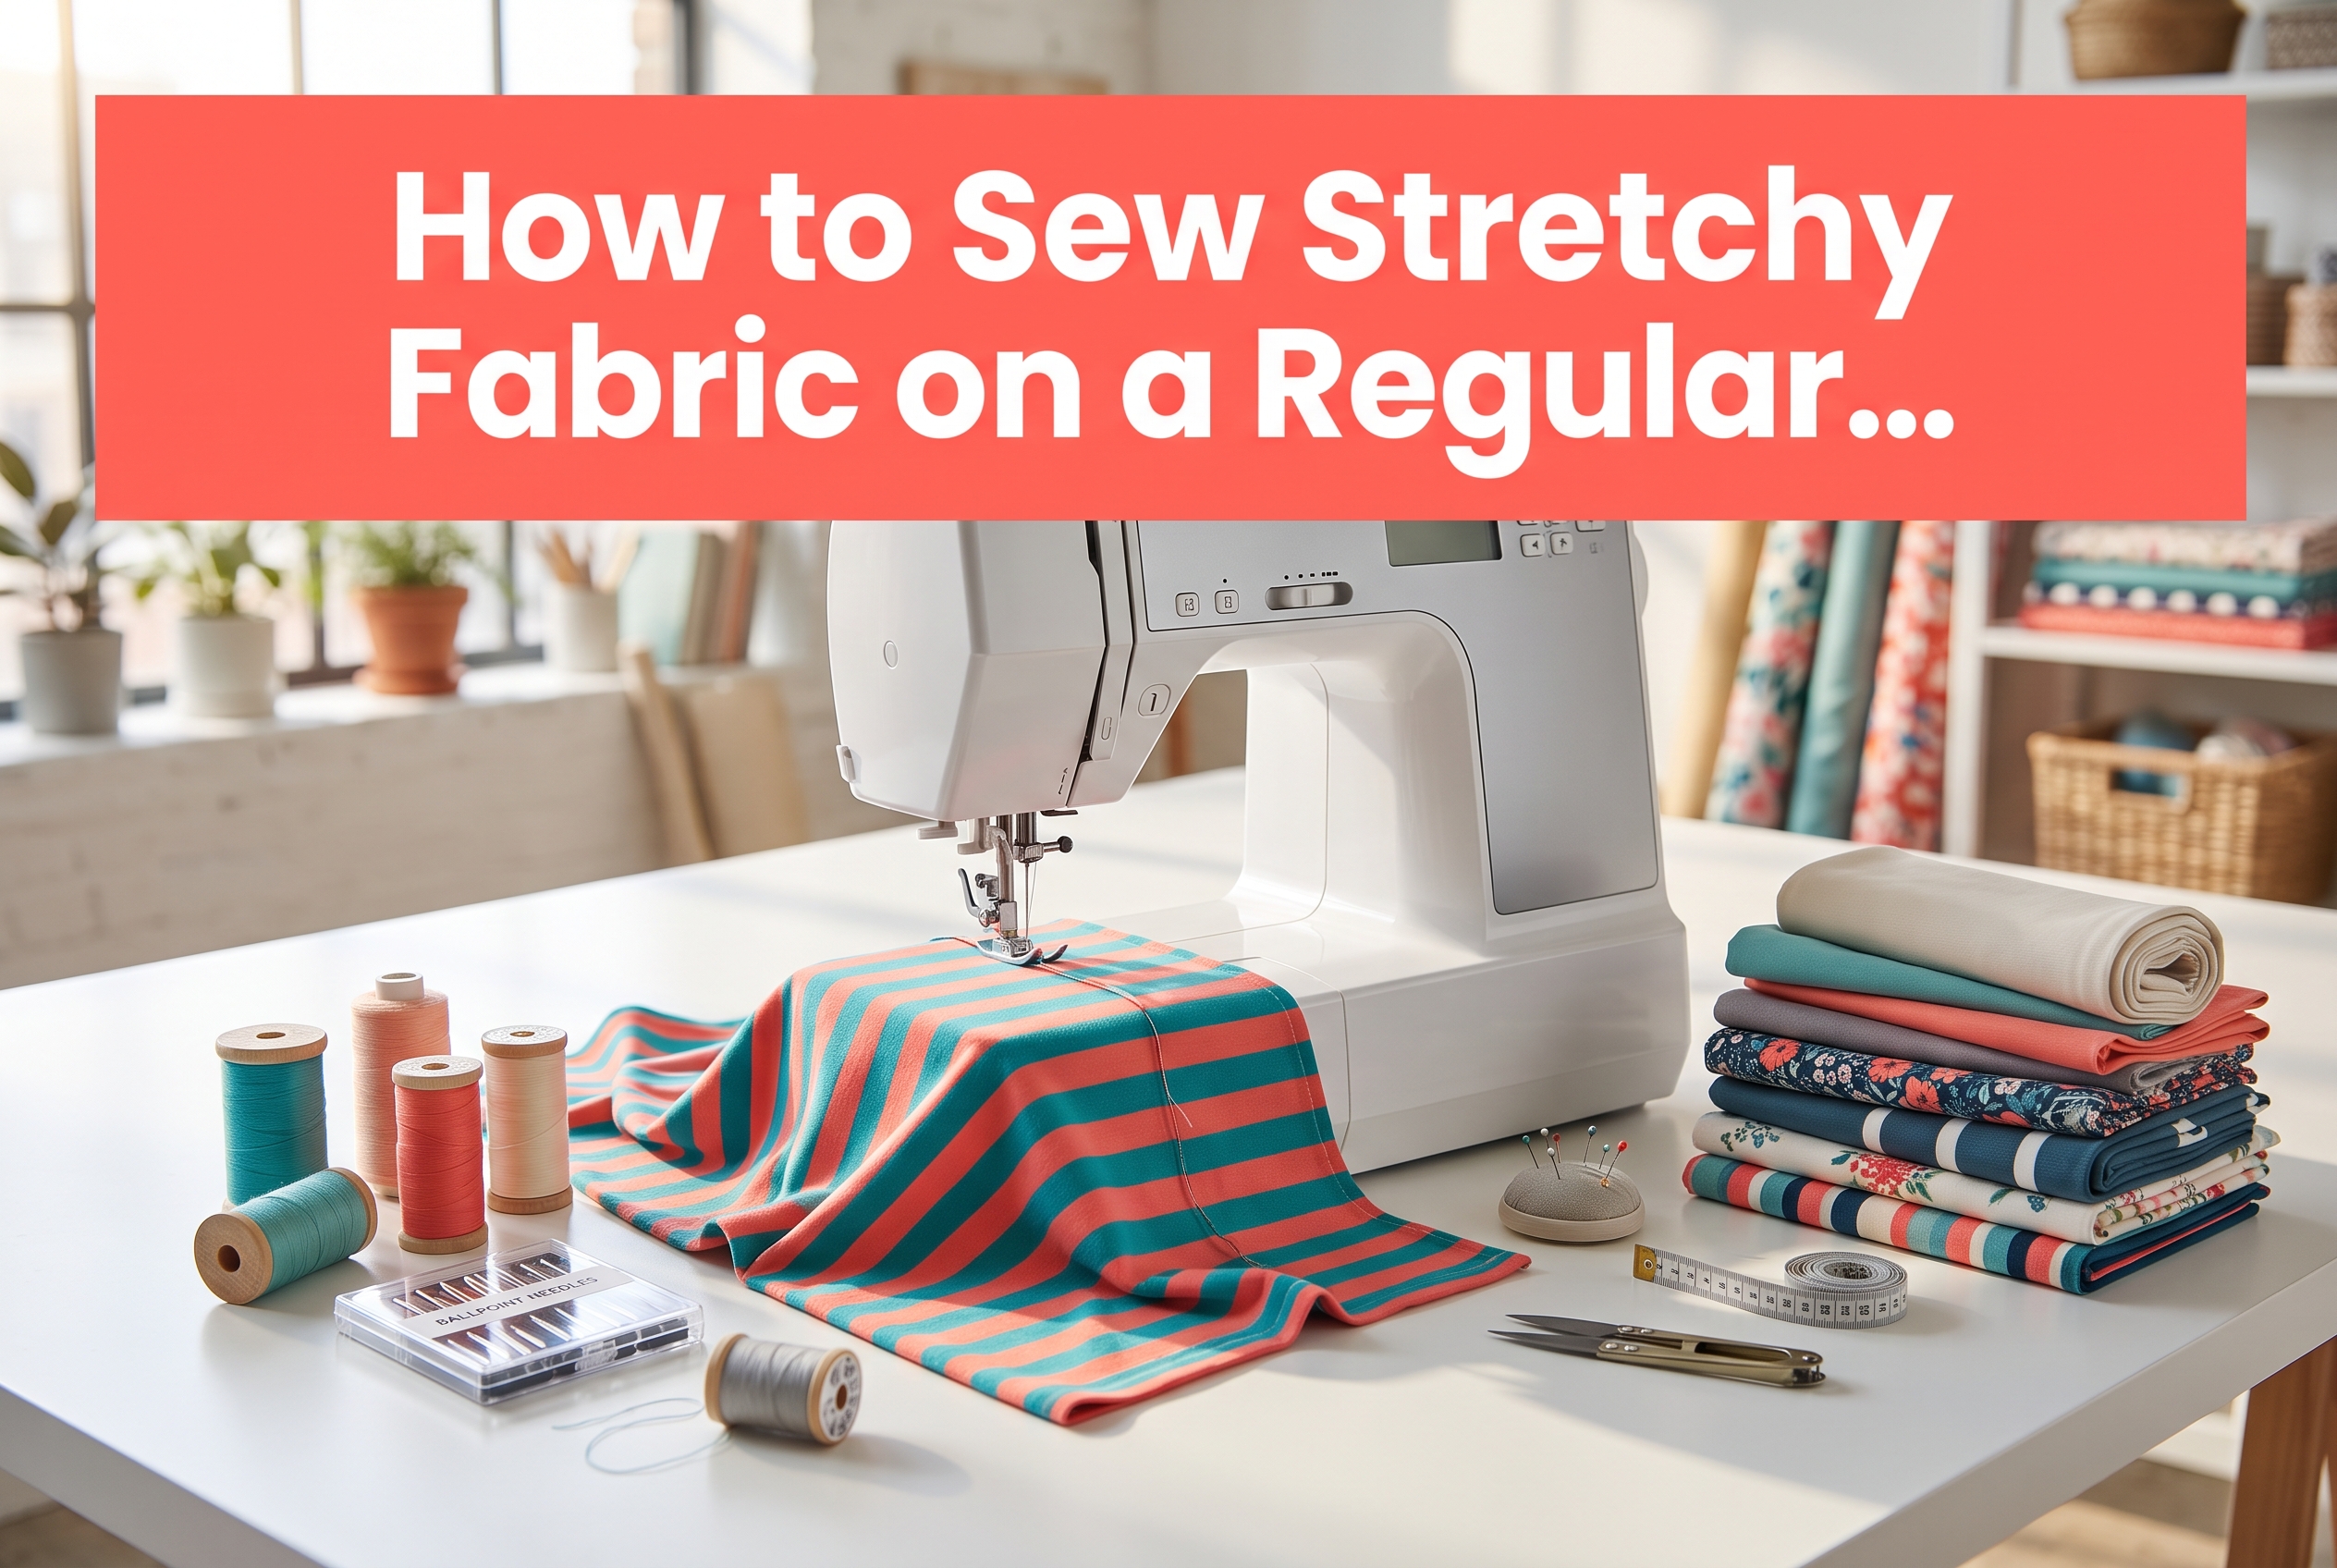
You can successfully sew stretchy fabric on a regular sewing machine by using a ballpoint or stretch needle, selecting a zigzag or stretch stitch, reducing presser foot pressure, and avoiding pulling the fabric as it feeds. Most standard machines handle knits well with these adjustments, no serger required.
Key Takeaways
- Ballpoint or stretch needles prevent snags by sliding between fibers instead of piercing them
- Zigzag stitch (width 1.5-2.5, length 2-3) allows seams to stretch without breaking
- Lower tension (typically 2-4 range) prevents puckering and thread breakage on knits
- Never pull or push stretchy fabric, let the feed dogs do the work to avoid distortion
- Walking foot helps but isn’t mandatory for most knit projects on regular machines
- Polyester thread offers more stretch and strength than cotton for knit seams
- Beginners can succeed with stretchy fabric using proper technique and patience
What Needle Do You Need for Sewing Stretchy Fabric?
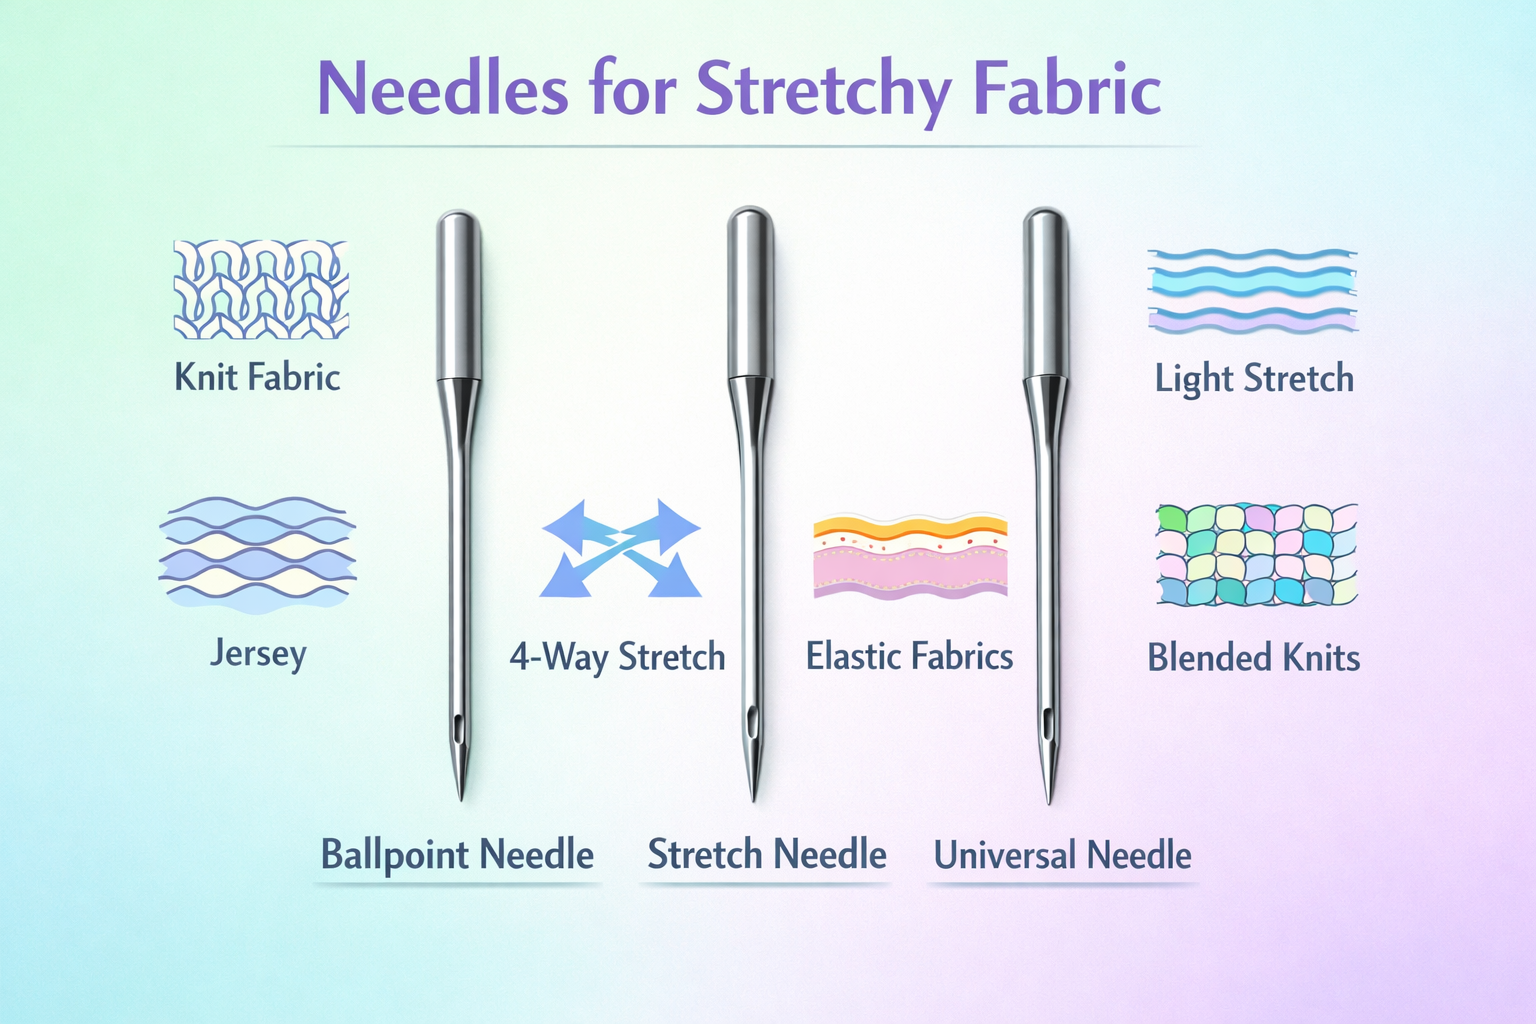
A ballpoint or stretch needle is essential for sewing stretchy fabric on a regular machine. These needles have rounded tips that slide between the fabric’s knit loops instead of piercing them, preventing snags, runs, and skipped stitches.
Ballpoint needles work for most knit fabrics including jersey, interlock, and cotton lycra blends. The rounded tip gently separates the fabric fibers as it penetrates.
Stretch needles feature an even more rounded tip plus a special scarf (the indentation above the eye) that helps prevent skipped stitches on fabrics with high elastane content like swimwear, activewear, and performance fabrics.
Universal needles have a slightly tapered point and can work in a pinch for stable knits, but they’re more likely to cause snags or skipped stitches on delicate or highly elastic fabrics.


Superior Control & Consistency: The SCHMETZ Jersey Ball Point needle features a rounded medium ball point design that glides between fabric fibers instead of piercing them, helping prevent snags, runs, and holes on delicate knits and stretch fabrics

Schmetz Stretch 130/705 H-S 75/11 Needles.
Needle Size Guide for Stretchy Fabrics
- Size 70/10 or 75/11: Lightweight knits (t-shirt jersey, lightweight modal)
- Size 80/12 or 90/14: Medium-weight knits (sweatshirt fleece, ponte, most jersey)
- Size 100/16: Heavy knits (thick fleece, double knit)
Common mistake: Using the same needle for too many projects. Needles dull quickly on synthetic fabrics and should be changed every 6-8 hours of sewing or after each major project. A dull needle causes skipped stitches and fabric damage even if it’s the correct type.
For more guidance on needle installation, check out our guide on how to insert a sewing machine needle.
Stretch Needle vs Ballpoint Needle: What’s the Difference?
Stretch needles and ballpoint needles both have rounded tips, but stretch needles include additional design features for highly elastic fabrics. The key difference lies in the scarf depth and the degree of tip rounding.
Ballpoint needles have a moderately rounded tip suitable for standard knits with 5-25% stretch. They work perfectly for everyday projects like t-shirts, leggings, and casual dresses made from jersey, rib knit, or interlock.
Stretch needles feature a deeper scarf (the cutaway section behind the needle eye) and a more pronounced rounded tip. This design prevents skipped stitches when sewing fabrics with 25%+ elastane content, think swimwear, athletic wear, compression fabrics, and power mesh.

ENGINEERED FOR STRETCH FABRIC: SCHMETZ Stretch Needles are specially engineered to sew through elastic, knit fabric, synthetic suede, minky, spandex, and other stretch materials, providing smooth, consistent stitches without skipping or bunching

Set of 5 stretch needles, single machine needles designed to work with spandex, lycra and suede

【Elastic Fabric】Volleyball shorts are made with an updated non-transparent fabric, containing 80% polyester and 20% spandex, perfectly contouring to your thighs, enhancing leg comfort and compression.
When to Choose Each Type
Choose ballpoint if you’re sewing:
- Cotton jersey t-shirts
- Bamboo or modal knits
- Sweatshirt fleece
- Ponte or double knit
Choose stretch if you’re sewing:
- Swimwear or rash guards
- Yoga pants or leggings with high spandex
- Athletic compression wear
- Dance or performance costumes
Decision rule: If your fabric bounces back immediately when stretched and contains more than 20% spandex/elastane (check the bolt label), use a stretch needle. For everyday knits that drape softly, ballpoint works great.
What Stitch Should You Use for Stretchy Fabric on a Regular Sewing Machine?
The zigzag stitch is the most reliable choice for sewing stretchy fabric on a regular machine because it allows the seam to stretch with the fabric without breaking. Set your machine to a narrow zigzag with a width of 1.5-2.5 and a length of 2-3 for most knit seams.
Zigzag stitch creates a seam that can expand and contract. The thread forms a slight wave pattern that accommodates fabric stretch. This prevents the thread from snapping when you pull on the finished garment.
Straight stitch will break on stretchy fabric unless you’re using it for decorative topstitching on areas that won’t stretch (like hems that are stabilized). Never use a straight stitch for structural seams on knits.
Stretch stitches (if your machine has them) are specifically designed for knits. Look for these built-in options:
- Lightning bolt stitch: Creates a narrow zigzag with forward and backward motion for extra strength
- Overlock stitch: Mimics a serger finish with a combination of straight and zigzag
- Triple stretch stitch: Sews each stitch three times for maximum durability
Recommended Stitch Settings
| Stitch Type | Width | Length | Best For |
|---|---|---|---|
| Narrow zigzag | 1.5-2.0 | 2.5-3.0 | Standard seams |
| Medium zigzag | 2.5-3.0 | 2.5-3.0 | Seam finishing edges |
| Lightning bolt | Auto | Auto | High-stress seams |
| Straight stitch | 0 | 3.0-3.5 | Topstitching only (stabilized areas) |
Pro tip: Test your stitch on a scrap piece folded double to mimic a seam. Stretch the sewn sample firmly, if the thread breaks, increase your zigzag width or switch to a stretch stitch.
For more on stitch techniques, see our article on how to backstitch and why it matters.
Zigzag Stitch vs Straight Stitch for Stretchy Fabric
Zigzag stitch is the correct choice for structural seams on stretchy fabric, while straight stitch should only be used for decorative topstitching on stabilized areas. The fundamental difference is that zigzag stitches can stretch without breaking, but straight stitches cannot.
When you sew a straight stitch on knit fabric and then stretch the seam, the thread has no give. It snaps because the thread line is shorter than the stretched fabric length. This creates weak seams that fail during wear.
A zigzag stitch creates a thread pattern that can elongate. As the fabric stretches, the zigzag opens up slightly, allowing the seam to move with the garment. The thread doesn’t break because it has built-in flexibility.
When Straight Stitch Is Acceptable
You can use straight stitch on stretchy fabric in these specific situations:
- Topstitching hems where you’ve used a twin needle (the two parallel lines of straight stitching have a zigzag on the underside)
- Basting temporary seams that will be removed
- Decorative details on areas that won’t stretch (like appliqués on stabilized sections)
- Sewing through stabilizer when you’ve added interfacing or stay tape to prevent stretch
Common mistake: Assuming a longer straight stitch will work better. Length doesn’t solve the problem, the stitch still can’t stretch. Always use zigzag or a dedicated stretch stitch for seams that will experience tension.
What Tension Setting Should You Use for Sewing Stretchy Fabric?
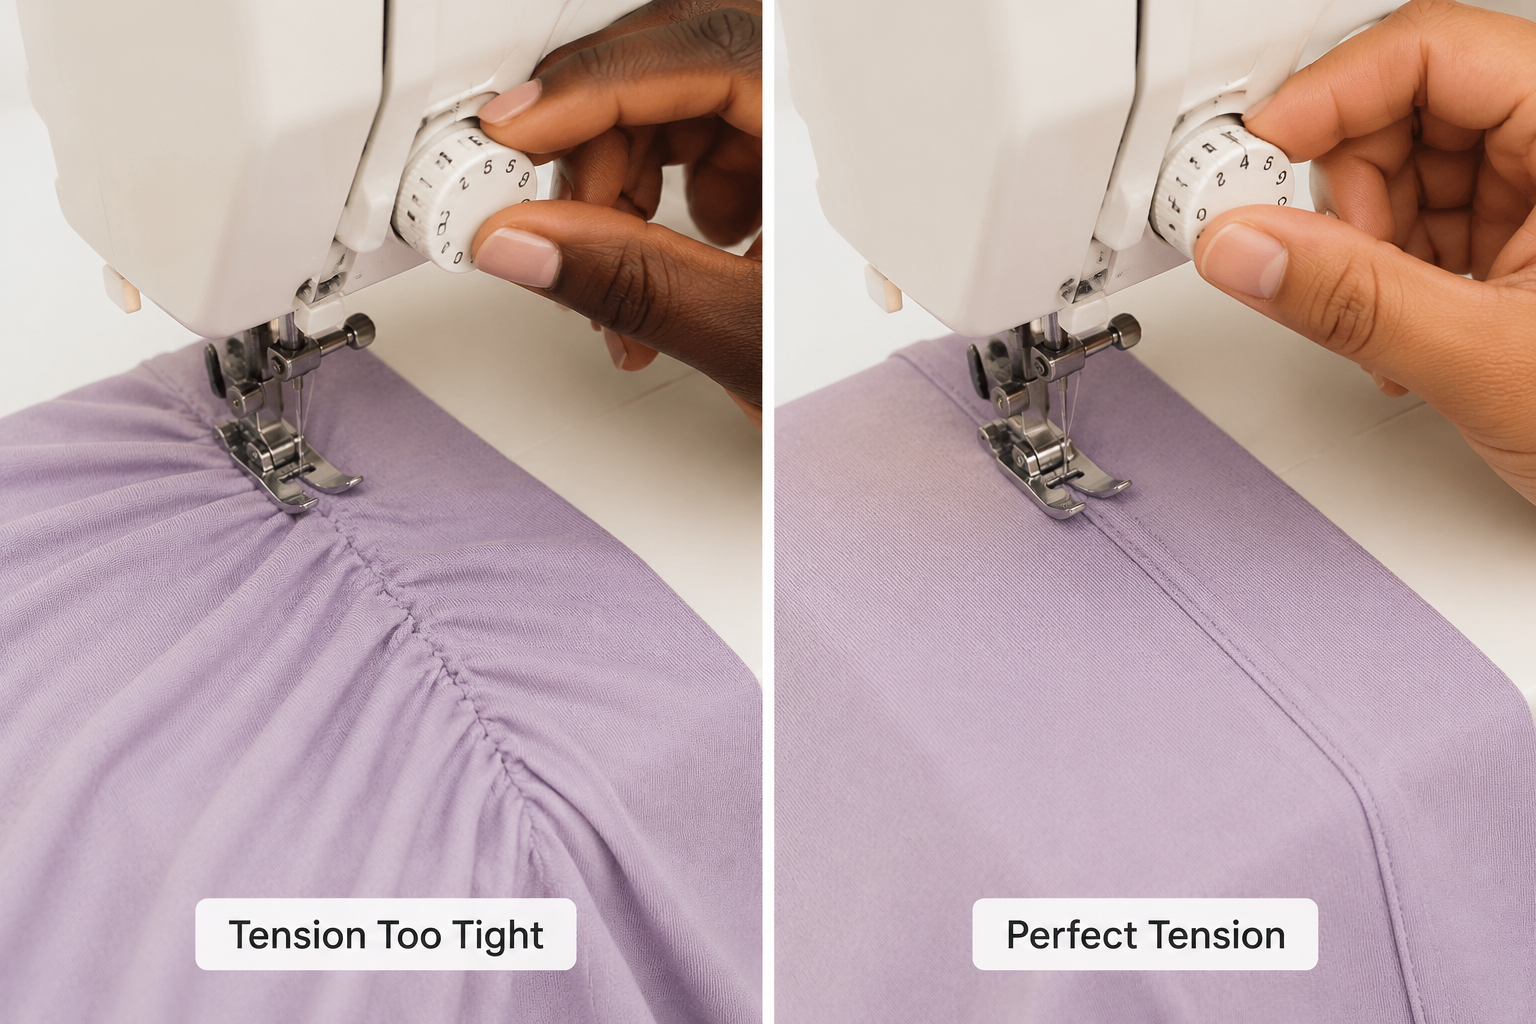
Lower your thread tension to the 2-4 range when sewing stretchy fabric on a regular machine. Knit fabrics are softer and more compressible than wovens, so standard tension (usually 4-5) pulls too tightly and causes puckering, tunneling, or thread breakage.
Start at tension setting 3 and test on a scrap. The ideal tension produces a seam where the top and bottom threads interlock in the middle of the fabric layers, not on the top or bottom surface.
Signs your tension is too high:
- Fabric puckering along the seam line
- Seam feels stiff or rope-like
- Thread breaks frequently while sewing
- Fabric tunnels (creates a ridge) along the seam
Signs your tension is too low:
- Loops of thread visible on the fabric surface
- Seam looks loose or sloppy
- Stitches pull out easily
Tension Adjustment Process
- Test on scrap: Use two layers of your actual project fabric
- Start at 3: Sew a 4-inch test seam
- Examine both sides: Check where threads interlock
- Adjust in small increments: Move up or down by 0.5 at a time
- Stretch the test seam: It should stretch without puckering or breaking
Bobbin tension note: Most machines have correctly calibrated bobbin tension from the factory. Only adjust bobbin tension if you’ve tested multiple top tension settings and still have problems. When in doubt, consult your machine’s manual or a technician.
For comprehensive tension troubleshooting, read our detailed guide on sewing machine tension explained.
Why Does My Stretchy Fabric Keep Puckering When I Sew It?
Stretchy fabric puckers when the thread tension is too tight, when you pull or push the fabric while sewing, or when the presser foot pressure is too high. These issues cause the fabric to compress or stretch unevenly, creating wavy, gathered seams.
Tension too tight is the most common cause. Knit fabric is compressible, and excessive tension pulls the fabric into the seam, creating puckers. Lower your tension to the 2-4 range and test again.
Pulling or pushing fabric while sewing stretches it out of shape. The fabric passes under the needle in a stretched state, then relaxes after sewing, causing the seam to pucker. Let the feed dogs move the fabric at their own pace, your job is only to guide direction, not control speed.
Presser foot pressure too high compresses the fabric excessively. Most machines have a pressure adjustment dial or lever (check your manual). Reduce pressure by one or two settings for knits.
Step-by-Step Puckering Fix
- Lower tension to 3 and test
- Reduce presser foot pressure if your machine allows adjustment
- Use a walking foot to feed top and bottom layers evenly
- Switch to a ballpoint or stretch needle if using universal
- Increase stitch length slightly (try 3.0-3.5) to reduce thread density
- Place tissue paper under the fabric while sewing, then tear away (stabilizes thin knits)
- Don’t stretch the fabric as you sew, use a light touch
Edge case: If puckering only happens on lightweight or slippery knits (like rayon jersey), the fabric may be too unstable. Use a water-soluble stabilizer underneath or switch to a walking foot to prevent the bottom layer from being pushed ahead of the top layer.
How to Keep Stretchy Fabric from Curling While Sewing
Stretchy fabric curls at the edges because knit construction creates tension in the fabric that releases when cut. To prevent curling while sewing, use fabric weights instead of pins, press edges with steam before sewing, or apply temporary spray starch to stabilize cut edges.
Steam pressing relaxes the fabric fibers and temporarily reduces curl. Hover your iron above the fabric edge (don’t press down hard) and apply steam. Let the fabric cool completely before sewing.
Spray starch or fabric stabilizer adds temporary body to knit edges. Spray lightly on the wrong side, let dry, then press. The starch washes out after the first laundering but keeps edges flat during construction.
Fabric weights hold pieces in place without creating pin holes that can cause runs in knits. Place weights along edges while cutting and preparing pieces.
Techniques to Manage Curling
- Cut with rotary cutter: Cleaner edges curl less than scissor-cut edges
- Sew soon after cutting: Edges curl more over time as fabric relaxes
- Use pattern weights: Avoid pins that can distort or snag knits
- Finger press seams: Use your fingers to open seams instead of an iron (which can stretch)
- Store flat: Don’t hang knit fabric, the weight causes stretching and more curl
For stubborn curl: Fuse a narrow strip of lightweight fusible interfacing (like tricot fusible) along seam allowances before sewing. This stabilizes edges without adding bulk or stiffness to the finished seam.
Can You Sew Knit Fabric Without a Serger?
Yes, you can sew knit fabric successfully on a regular sewing machine without a serger. While sergers create professional-looking seams quickly, a standard machine with the right needle, stitch, and technique produces durable, stretchy seams suitable for all knit projects including t-shirts, leggings, and activewear.
A serger’s main advantages are speed and a built-in edge finish that prevents raveling. However, knit fabrics don’t ravel like wovens, so edge finishing is less critical. A regular machine’s zigzag or stretch stitch provides adequate stretch and durability for knit seams.
What you need to sew knits on a regular machine:
- Ballpoint or stretch needle
- Zigzag or stretch stitch capability
- Polyester or polyester-blend thread
- Ability to adjust tension
- Optional: walking foot for better fabric feeding
Projects that work great without a serger:
- T-shirts and tops
- Leggings and yoga pants
- Knit dresses
- Baby and children’s clothing
- Casual knit garments
- Activewear (with appropriate fabric and stitches)
Finishing Seam Edges Without a Serger
If you want to finish raw edges for a professional look:
- Zigzag the edge: After sewing the seam, trim close to stitching and zigzag over the raw edge
- Mock overlock stitch: Many machines have a built-in stitch that combines straight and zigzag
- Fold and topstitch: Press seam allowances to one side and topstitch down (works for exposed seams)
- Bias tape binding: Encase raw edges in knit bias tape for a decorative finish
Reality check: Most ready-to-wear t-shirts use a serged seam, but plenty of commercial knit garments use regular machine stitching. Your handmade items will be just as durable with proper technique.
For related troubleshooting, see our guide on why fabric isn’t feeding through properly.
Do You Need a Walking Foot for Sewing Knits?
A walking foot is helpful but not mandatory for sewing knits on a regular machine. It feeds the top and bottom fabric layers at the same rate, preventing shifting and puckering, but most stable knits sew fine with a standard presser foot if you use proper technique.
When a walking foot helps most:
- Slippery knits (rayon jersey, modal, silk knit)
- Thick or bulky knits (fleece, sweatshirt material, double knit)
- Matching stripes or patterns across seams
- Sewing multiple layers (like binding or hemming)
- Preventing the top layer from stretching more than the bottom
When you can skip it:
- Stable cotton jersey
- Medium-weight ponte or interlock
- Single-layer topstitching
- Small projects with short seams
Walking Foot Alternatives
If you don’t have a walking foot, try these techniques:
- Reduce presser foot pressure to prevent the bottom layer from being pushed ahead
- Use a Teflon or roller foot for slippery fabrics
- Pin more frequently (perpendicular to the seam, removing as you sew)
- Hand-baste layers together before machine sewing
- Sew slowly to maintain better control
Cost consideration: Walking feet typically cost $25-60 depending on your machine brand. They’re a worthwhile investment if you sew knits frequently, but not essential for beginners working with stable knits.
For more on presser foot options, check out what all those presser feet are for.
How to Sew Stretchy Fabric Without It Stretching Out
To sew stretchy fabric without distorting it, never pull or push the fabric while sewing, use a walking foot or reduce presser foot pressure, and stabilize areas that shouldn’t stretch with stay tape or clear elastic. Let the feed dogs control fabric movement, your hands should only guide direction.
The golden rule: Touch the fabric lightly. Place your hands on either side of the presser foot, barely making contact, and let the machine do the work. Pulling stretches the fabric, causing wavy seams and distorted pieces.
Stabilizing techniques for areas that need to maintain their shape:
Stay tape or twill tape: Sew into shoulder seams, necklines, and armholes to prevent stretching during wear. Place the tape along the seam line and sew through all layers.
Clear elastic: Use in waistbands or necklines that need to hold their shape but still stretch for wearing. Stretch the elastic slightly while sewing so it gathers the fabric to the correct measurement.
Fusible interfacing: Apply to areas like button bands, pocket openings, or zipper plackets that need stability. Use lightweight tricot fusible designed for knits.
Preventing Stretch During Construction
- Cut accurately: Use a rotary cutter and mat for clean edges that won’t stretch
- Handle minimally: Don’t hang pieces while working, lay them flat
- Pin perpendicular: Place pins across the seam line, not parallel
- Sew directionally: Sew from the widest part toward the narrowest (hem to waist, not waist to hem)
- Support the fabric: Don’t let fabric hang off the table, support its weight
- Use a seam guide: Keep seam allowances consistent without pulling fabric to align
Common mistake: Stretching fabric to fit pattern pieces. If your fabric is stretching out during cutting or sewing, it may be too unstable for the pattern. Choose patterns designed for knits with appropriate stretch percentages.
What’s the Best Thread for Sewing Knit Fabric on a Regular Machine?
Polyester thread or polyester-core thread is best for sewing knit fabric on a regular machine because it has more stretch and strength than cotton thread. The slight elasticity in polyester prevents thread breakage when seams are stretched during wear.
Polyester thread (100% polyester) offers excellent strength, minimal shrinkage, and slight give that works well with knit fabrics. It’s available in a wide range of colors and works for most knit projects.
Polyester-core thread (cotton-wrapped polyester) combines polyester strength with a cotton exterior that reduces lint and sews smoothly. This is an excellent all-purpose choice for both knits and wovens.
Cotton thread lacks stretch and is more likely to break in knit seams, especially in high-stress areas like crotch seams or underarms. Save cotton thread for woven fabrics or decorative topstitching on knits where the seam won’t stretch.
Thread Selection Guide
| Thread Type | Stretch | Strength | Best For |
|---|---|---|---|
| 100% Polyester | Slight | High | All knit projects, activewear |
| Polyester-core | Slight | High | All-purpose, knits and wovens |
| 100% Cotton | None | Medium | Wovens only, decorative topstitching |
| Woolly nylon | High | Medium | Serger loopers, swimwear (not for regular machines) |
Thread weight: Use all-purpose weight thread (typically 50wt) for most knit projects. Heavier thread (40wt) works for topstitching or thick knits. Lighter thread (60wt) is suitable for delicate knits but may not be strong enough for structural seams.
Quality matters: Cheap thread creates more lint, breaks more easily, and can cause tension problems. Invest in quality brands like Gutermann, Coats & Clark, or Mettler for better results and less frustration.
For thread-related issues, see our troubleshooting guide on why thread keeps breaking.
Is Sewing Stretchy Fabric Good for Beginners?
Sewing stretchy fabric is moderately beginner-friendly if you start with stable knits like cotton jersey and use proper technique. While knits require different handling than wovens, they’re forgiving of fit issues and don’t require edge finishing, making them ideal for simple projects like t-shirts, lounge pants, and baby clothes.
Why knits work for beginners:
- Forgiving fit (stretch accommodates sizing variations)
- No edge finishing required (knits don’t ravel)
- Simple construction (fewer pattern pieces, minimal details)
- Comfortable to wear (encouraging for first projects)
- Mistakes are less visible (texture hides imperfect stitching)
Challenges for beginners:
- Requires different needle and stitch than wovens
- Can stretch out of shape if handled incorrectly
- Curling edges can be frustrating
- Requires tension adjustment
- Some knits are slippery or unstable
Best First Projects with Stretchy Fabric
Start with these if you’re new to sewing knits:
- Basic t-shirt: Simple pattern, minimal seams, instant gratification
- Knit lounge pants: Elastic waistband, straight seams, comfortable fit
- Baby leggings: Small scale, quick to complete, forgiving fit
- Infinity scarf: No fit issues, practice sewing knits in a tube
- Headband or hair accessories: Tiny projects to test techniques
Avoid as a beginner:
- Swimwear (requires specialized techniques)
- Fitted activewear (requires precise fit)
- Slippery rayons or silky knits (difficult to handle)
- Projects with zippers or buttonholes (add complexity)
Learning curve: Expect your first knit project to take longer as you learn proper handling. Your second project will go much faster once you understand the basics. Start with a stable, medium-weight cotton jersey for the easiest learning experience.
Why Does My Thread Keep Breaking When Sewing Stretchy Fabric?
Thread breaks when sewing stretchy fabric because tension is too tight, you’re using the wrong needle type or a dull needle, or the thread path has a snag or rough spot. Thread breakage is one of the most common frustrations when sewing knits, but it’s usually fixable with systematic troubleshooting.
Top causes and fixes:
Tension too high: Knits need lower tension (2-4 range). High tension pulls thread too tightly, causing it to snap. Lower your tension and test.
Wrong needle: Universal needles can cause thread breakage on knits. Switch to a ballpoint or stretch needle that’s designed for knit fabrics.
Dull or damaged needle: A dull needle creates friction that weakens thread. Change your needle, they should be replaced every 6-8 hours of sewing or after each project.
Poor quality thread: Cheap thread has weak spots and breaks easily. Invest in quality polyester thread from reputable brands.
Thread path obstruction: Check for lint buildup in the tension discs, around the bobbin case, or in the thread path. Clean your machine thoroughly.
Incorrect threading: Rethread your machine completely, ensuring thread is seated properly in all guides and tension discs. Thread with the presser foot up so tension discs are open.
Systematic Troubleshooting Steps
- Change the needle (ballpoint or stretch, fresh from package)
- Lower tension to 3
- Rethread the machine with presser foot up
- Clean the machine (remove lint from bobbin area and tension discs)
- Test with quality polyester thread
- Check bobbin for correct insertion and smooth winding
- Slow down (sewing too fast can cause breakage on some machines)
Edge case: If thread only breaks on thick seams (like crossing multiple layers), your needle may be too small. Size up to a 90/14 or 100/16 for bulky knits.
For more thread troubleshooting, read our article on why thread bunches under fabric.
Can You Hem Leggings with a Regular Sewing Machine?
Yes, you can hem leggings with a regular sewing machine using a twin needle for a professional-looking hem that stretches. A twin needle creates two parallel rows of straight stitching on the top with a zigzag on the underside, allowing the hem to stretch without breaking, exactly like ready-to-wear leggings.
Twin needle setup:
- Use a stretch twin needle (size 2.5/75 or 4.0/75 for the gap width/needle size)
- Thread two spools on your machine (or use one spool and the bobbin as a second thread source)
- Thread both needles through the same tension disc but separate needle eyes
- Use a zigzag or stretch stitch (the machine will automatically create the zigzag underside)
Hemming process:
- Try on leggings and mark desired length
- Add 1-1.5 inches for hem allowance
- Fold hem to wrong side and press lightly (don’t stretch)
- Pin or use fabric clips to hold hem in place
- Sew from the right side with twin needle, keeping fabric flat
- Trim excess fabric on wrong side close to zigzag stitching
Alternative Hemming Methods
If you don’t have a twin needle:
- Zigzag hem: Fold and press hem, then zigzag stitch from right side
- Stretch stitch hem: Use a built-in stretch stitch to secure hem
- Coverstitch look: Sew two parallel rows of straight stitching (less stretch but decorative)
- Lettuce edge: Stretch fabric while zigzagging the raw edge for a ruffled finish
Common mistake: Stretching the fabric while hemming. This creates a wavy, rippled hem. Keep the fabric flat and relaxed, letting the machine feed it naturally.
Pro tip: For leggings with a lot of spandex, use woolly nylon thread in the bobbin for extra stretch in the underside zigzag. This prevents the hem from restricting stretch.
How to Sew Stretchy Fabric on a Regular Machine: Step-by-Step Process
Sewing stretchy fabric successfully on a regular machine requires proper setup, the right materials, and careful handling throughout the process. Follow this comprehensive workflow for professional results on any knit project.
Before You Start
Gather your supplies:
- Ballpoint or stretch needle (appropriate size for your fabric weight)
- Polyester or polyester-core thread
- Fabric clips or pins
- Rotary cutter and mat (for clean edges)
- Walking foot (optional but helpful)
Prepare your fabric:
- Pre-wash knit fabric if the finished item will be washed (many knits shrink)
- Let fabric relax flat for several hours after washing
- Press with steam if needed, but don’t stretch while pressing
Step-by-Step Sewing Process
1. Set up your machine:
- Install a fresh ballpoint or stretch needle
- Thread with quality polyester thread
- Set stitch to narrow zigzag (width 1.5-2.5, length 2.5-3.0) or select a stretch stitch
- Lower tension to 3
- Reduce presser foot pressure if your machine allows
2. Test on scraps:
- Use two layers of your actual project fabric
- Sew a 4-inch test seam
- Stretch the seam firmly, it shouldn’t pucker or break
- Adjust tension, stitch width, or needle if needed
3. Cut your pattern pieces:
- Use a rotary cutter for clean edges
- Use pattern weights instead of pins when cutting
- Cut with fabric flat on the table, not hanging off edges
- Mark notches and other details with fabric marker or tailor’s tacks
4. Sew your seams:
- Pin perpendicular to seam line (or use fabric clips)
- Place fabric under presser foot without stretching
- Touch fabric lightly with your hands, let feed dogs control movement
- Sew at a moderate, consistent speed
- Remove pins as you approach them (don’t sew over pins)
5. Finish seams (optional):
- Trim seam allowances to 1/4 inch if desired
- Zigzag over raw edges for a clean finish
- Press seams to one side (don’t press open like wovens)
- Use finger pressing or a cool iron, high heat can damage synthetic knits
6. Hem your project:
- Use a twin needle for professional stretch hems
- Or fold and zigzag from the right side
- Don’t stretch fabric while hemming
Troubleshooting During Sewing
If fabric puckers: Lower tension, reduce presser foot pressure, or use a walking foot
If stitches skip: Change to a fresh ballpoint or stretch needle, check threading
If fabric stretches out: Stop pulling, let the machine feed fabric naturally
If edges curl: Press with steam before sewing, or use spray starch
If thread breaks: Lower tension, change needle, check for lint in thread path
For additional troubleshooting, see our guide on why sewing machines skip stitches.
Frequently Asked Questions
Do I need special thread for stretchy fabric? Polyester or polyester-core thread works best for stretchy fabric because it has slight elasticity that prevents breakage when seams stretch. Cotton thread lacks stretch and is more likely to snap in knit seams.
Can I use a straight stitch on stretchy fabric? Straight stitch will break when stretched, so it should only be used for decorative topstitching on stabilized areas. Always use zigzag or stretch stitches for structural seams on knits.
Why does my stretchy fabric bunch up under the needle? Fabric bunching happens when presser foot pressure is too high, tension is too tight, or you’re pushing the fabric instead of letting the feed dogs control movement. Lower pressure and tension, and use a lighter touch.
What’s the difference between knit and stretchy fabric? Knit fabric is made by looping yarn (like knitting), which creates inherent stretch. All knits are stretchy, but not all stretchy fabrics are knits, some wovens have elastane added for stretch. The term “stretchy fabric” generally refers to knits.
How much should I lower my tension for knits? Start at tension setting 3 (most machines default to 4-5). Test and adjust in small increments. Most knits sew well between 2-4, but the exact setting depends on your machine and fabric.
Can I sew activewear on a regular machine? Yes, you can sew activewear on a regular machine using a stretch needle, zigzag or stretch stitch, and polyester thread. For best results on high-performance fabrics, use a walking foot and test thoroughly on scraps.
Do I need to finish seams on stretchy fabric? Knit fabrics don’t ravel like wovens, so seam finishing isn’t structurally necessary. However, finishing seams with a zigzag or mock overlock stitch creates a neater appearance and can prevent curling.
Why is my fabric not feeding through when sewing knits? If fabric isn’t feeding, presser foot pressure may be too high, feed dogs may be lowered, or you may be pulling the fabric. Check that feed dogs are up, reduce presser foot pressure, and let the machine control fabric movement. For more help, see our guide on why fabric isn’t feeding through.
Can I use a serger foot on a regular machine? A serger foot (overlock foot) can be used on some regular machines if it’s compatible with your model. It helps guide fabric for edge finishing but doesn’t replicate a true serger’s cutting and multi-thread stitching.
How do I prevent stretchy fabric from stretching while cutting? Use a rotary cutter and mat for clean cuts without pulling, place pattern weights instead of pins, and keep fabric flat on the table without hanging over edges. Let fabric relax flat for several hours before cutting.
What’s the best stitch length for stretchy fabric? A stitch length of 2.5-3.0 works well for most knits. Shorter stitches create denser seams that may be too stiff, while longer stitches may not provide enough strength.
Do I need to backstitch on stretchy fabric? Yes, backstitch at the beginning and end of seams to secure stitching, just as you would on woven fabric. Use 3-4 reverse stitches to lock the seam without adding bulk.
Conclusion
Sewing stretchy fabric on a regular machine is absolutely achievable with the right setup and technique. The key elements are using a ballpoint or stretch needle, selecting a zigzag or stretch stitch, lowering your tension to the 2-4 range, and letting the feed dogs control fabric movement without pulling or pushing.
Start with stable, medium-weight cotton jersey for your first knit project to build confidence. As you master the basics, you can progress to more challenging knits like rayon jersey, performance fabrics, or swimwear. Remember that quality materials, a fresh needle, good thread, and properly maintained machine, make a significant difference in your results.
Your next steps:
- Gather supplies: Purchase ballpoint needles in appropriate sizes, quality polyester thread, and a small piece of cotton jersey for testing
- Test your machine: Sew practice seams on scrap fabric, adjusting tension and stitch settings until you achieve smooth, stretchy seams
- Choose a simple project: Start with a basic t-shirt, lounge pants, or baby leggings pattern designed for knits
- Practice handling: Focus on letting the machine feed fabric naturally without pulling or stretching
- Build your skills: Each project will improve your technique and confidence with stretchy fabrics
With these techniques and a bit of practice, you’ll be creating professional-looking knit garments that rival ready-to-wear quality. The learning curve is short, and the satisfaction of sewing comfortable, stretchy clothing is well worth the effort.