Quick Answer
Sewing curtains requires measuring your window accurately, choosing appropriate fabric (cotton, linen, or polyester blends work best), cutting panels with extra length for hems and headers, and stitching side seams, hems, and a rod pocket or tab top. Most beginners can complete a simple pair of unlined curtains in 3-4 hours using a standard sewing machine with a straight stitch.
Key Takeaways
- Cotton and linen are the easiest fabrics for beginners to sew curtains, while polyester blends offer wrinkle resistance and durability
- Calculate fabric needs by measuring window width (multiply by 1.5-2.5 for fullness) and length (add 8-12 inches for hems and headers)
- Any standard sewing machine with a straight stitch can sew curtains, no special equipment required
- Unlined curtains are significantly easier and faster for beginners than lined versions
- Rod pocket curtains are the simplest style to sew, while tab tops require more precision but create a modern look
- Common mistakes include skipping fabric pre-washing, using incorrect hem allowances, and not pressing seams properly
- Budget-friendly curtain projects can cost $15-30 per window using cotton or linen on sale
Can I Sew Curtains If I’m a Complete Beginner?
Yes, curtains are an excellent beginner sewing project because they use mostly straight seams and don’t require complex pattern fitting. If you can sew a straight line and understand basic hem techniques, you can successfully make curtains.
Curtains offer several advantages for new sewers:
- Forgiving construction: Small mistakes in stitching won’t affect how the curtains hang or function
- Minimal pattern reading: Most curtain projects use simple rectangular panels with straightforward measurements
- Immediate results: Unlike garment sewing, you’ll see your finished project displayed in your home right away
- Skill building: You’ll practice essential techniques like hemming, measuring accurately, and sewing long seams
Start with an unlined rod pocket curtain in a medium-weight cotton fabric. Avoid slippery fabrics like silk or satin for your first project, and skip blackout or thermal linings until you’ve mastered basic construction. For foundational techniques, review our guide on how to backstitch to secure your seams properly.
Choose a simple project if: You’re working with a small window (under 48 inches wide), want quick results, and have limited sewing experience.
What Fabric Is Best for Sewing Curtains?
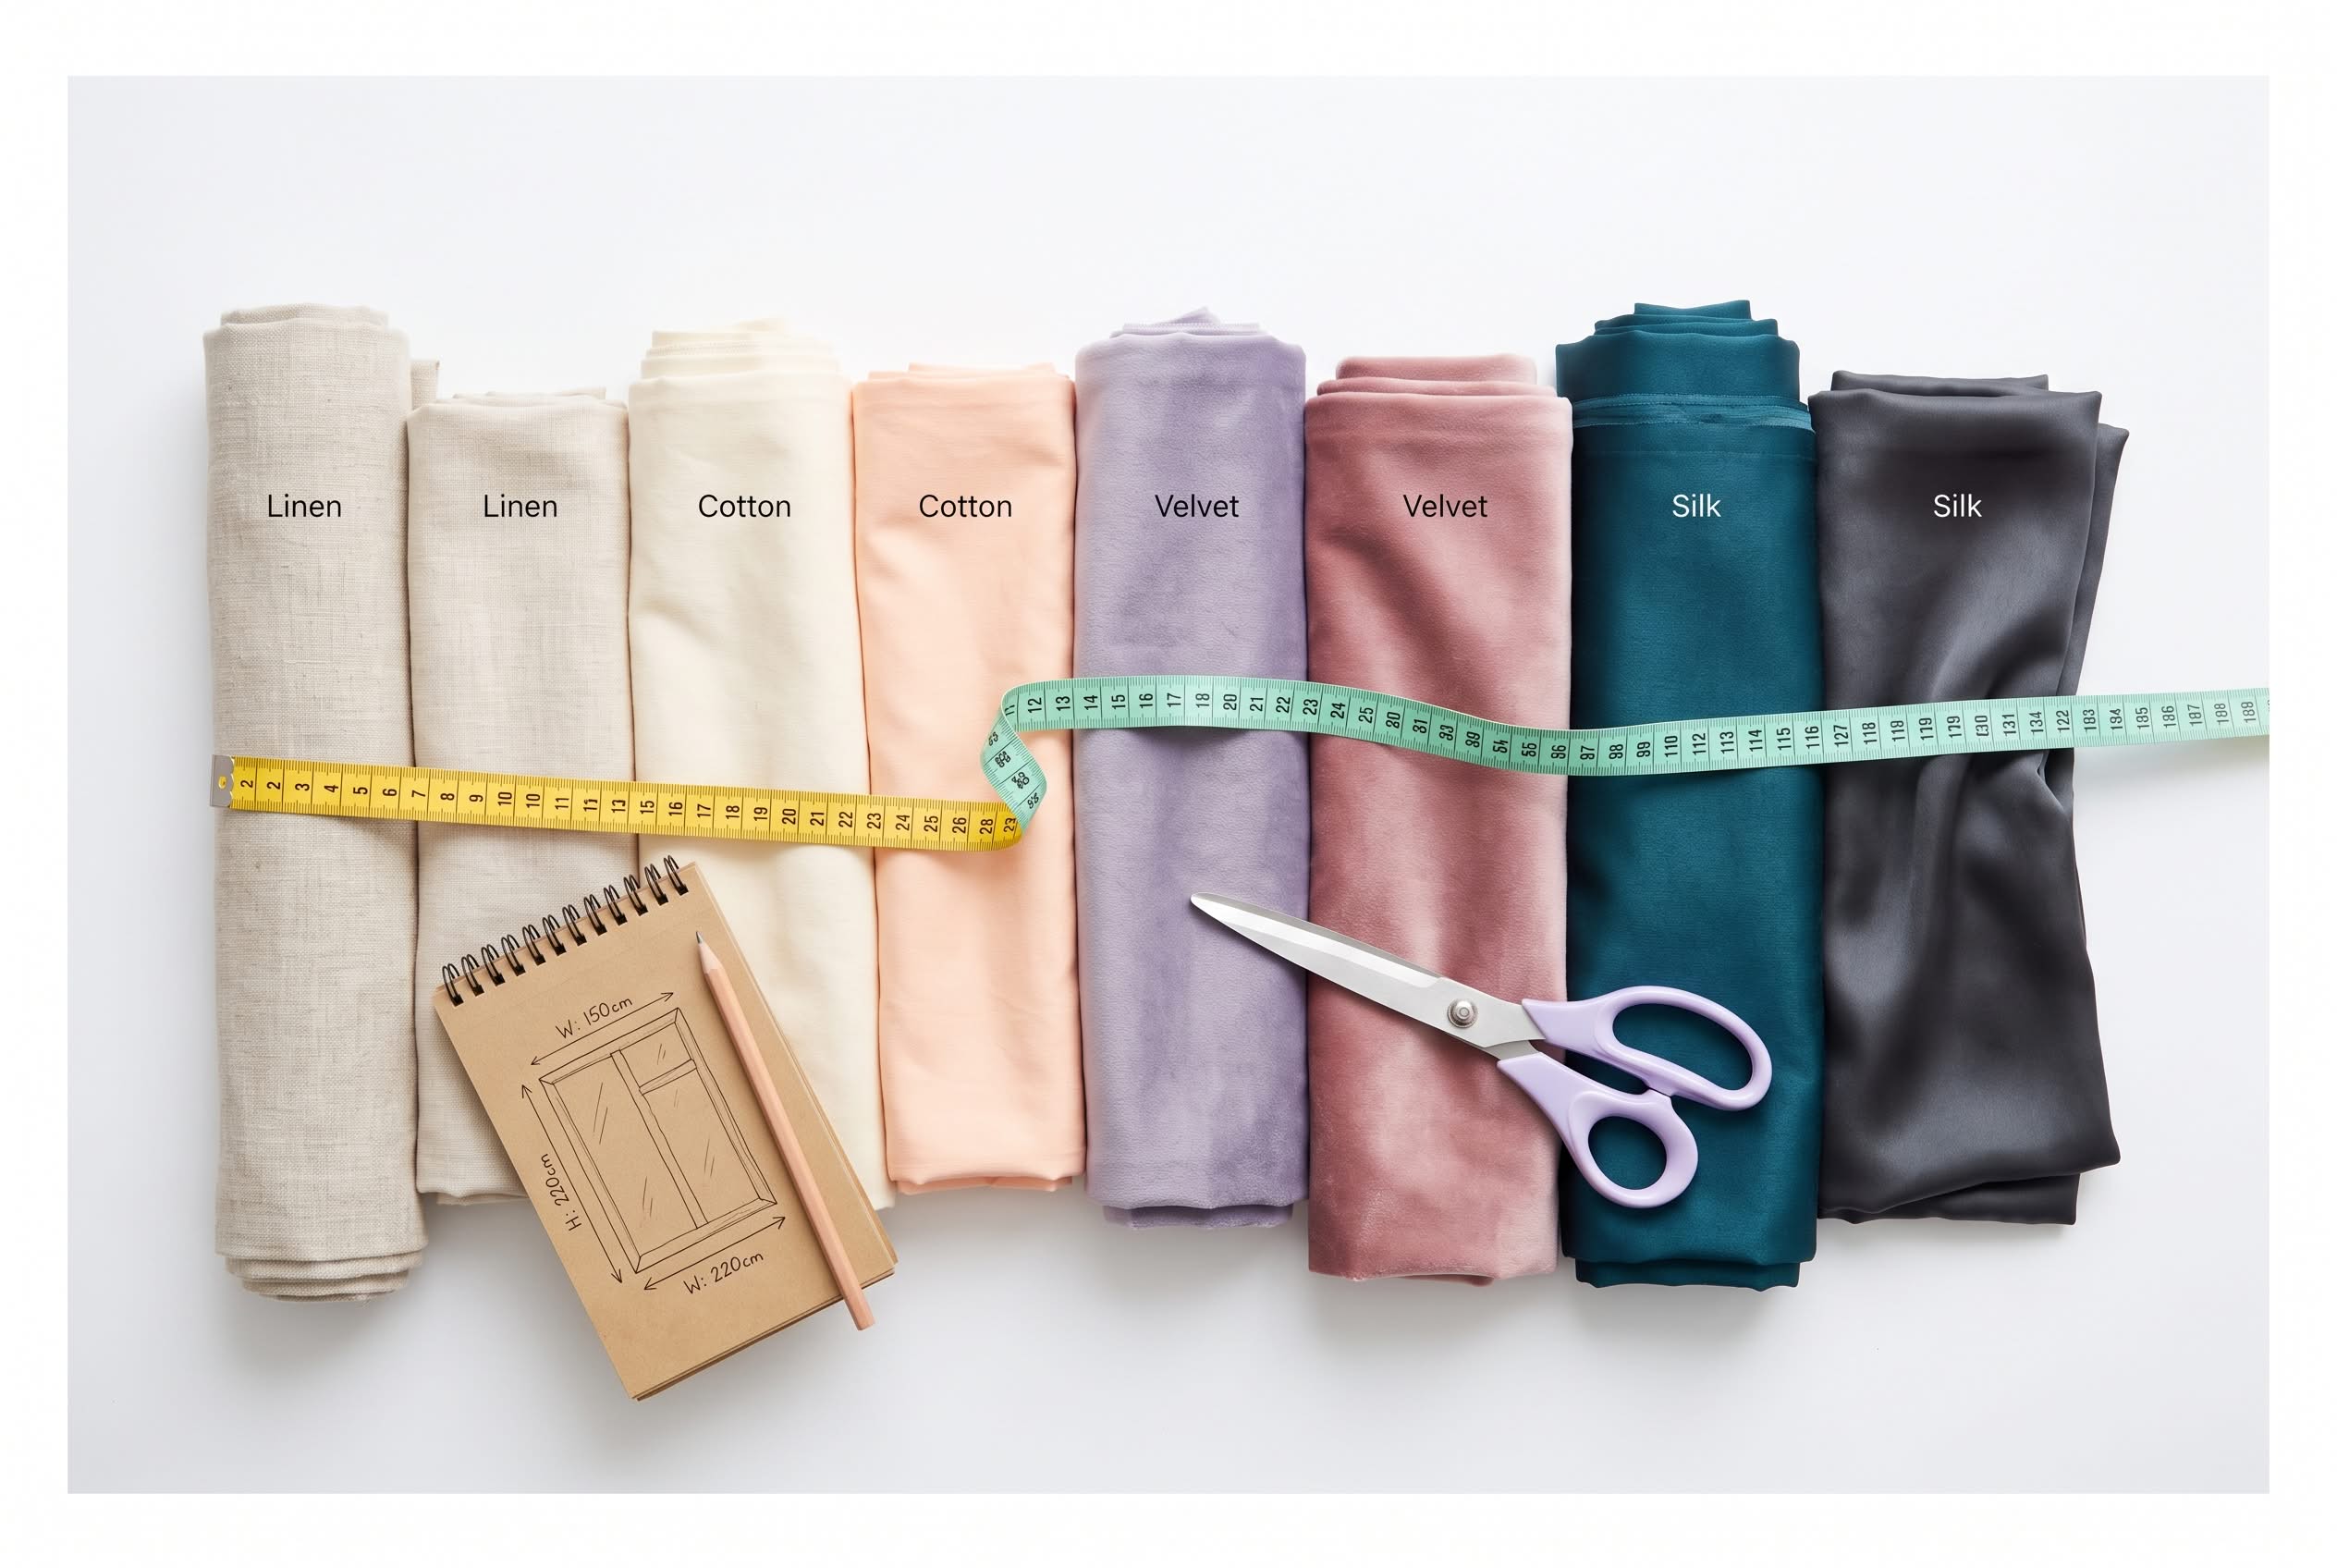
Cotton, linen, and cotton-polyester blends are the best fabrics for sewing curtains because they’re easy to work with, hold their shape well, and come in various weights suitable for different light-filtering needs. Cotton is ideal for beginners due to its stability and forgiveness during sewing.

✅ [ INDIVIDUAL COTTON DUCK CANVAS PIECES BY QUANTITY ] – Each order of our cotton duck canvas fabric is delivered as separate, individual pieces for your convenience. For example, if you select 2 yards of canvas fabric with a quantity of 5, you will receive 5 separate cotton duck canvas pieces, each measuring 2 yards — perfectly cut and ready for your next project.

2-PANEL SET WITH MATCHING TIE-BACKS FOR A COMPLETE WINDOW LOOK - Includes two (2) white reverse tab top curtain panels, each measuring 50 inches wide x 63 inches long (total width 100 inches), plus two coordinating tie-backs for versatile styling. These elegant white window curtains are ideal for bedrooms, living rooms, dining rooms, nurseries, dorm rooms, apartments, and guest rooms. Also available in 84", 96", and 108" lengths in both 2-panel and 4-panel sets.
Fabric Comparison by Type
Cotton: Medium-weight quilting cotton or home décor cotton (4-7 oz per square yard) provides excellent structure, minimal fraying, and easy pressing. It’s widely available in countless prints and solids, making it perfect for first-time curtain makers.
Linen: Natural linen offers a relaxed, textured look with beautiful drape. It wrinkles easily (which some consider part of its charm) and costs more than cotton, but it’s durable and filters light beautifully while maintaining privacy.
Polyester blends: Cotton-polyester blends (60/40 or 50/50) resist wrinkles better than pure cotton and are often more affordable. They’re machine-washable and hold up well in sunny windows without fading quickly.
Velvet and heavy fabrics: These provide excellent light blocking and insulation but require experience with heavy-duty sewing machines and proper needle selection to avoid skipped stitches.
Avoid for beginners: Silk, satin, sheer voile (too slippery), and loosely woven fabrics that fray excessively.
Common mistake: Buying fabric without pre-washing. Always wash and dry your curtain fabric before cutting to prevent shrinkage after your curtains are finished.
How Much Fabric Do I Need to Make Curtains for a Standard Window?
For a standard 36-48 inch wide window, you’ll need 3-6 yards of 54-inch wide fabric depending on your desired fullness and curtain length. Calculate by measuring window width times 2 for fullness, then add your desired length plus 12 inches for hems and headers.
Step-by-Step Fabric Calculation
- Measure window width: Measure the curtain rod from end to end (not the window frame)
- Multiply for fullness: Width × 1.5 (minimal fullness) to × 2.5 (luxurious fullness)
- Divide by fabric width: Total width ÷ 54 inches (standard home décor fabric width) = number of panels needed
- Calculate length: Measure from rod to desired endpoint (sill, apron, or floor) + 8 inches for bottom hem + 4 inches for top hem/rod pocket
- Multiply panels by length: Number of panels × length = total yards needed
Example: For a 48-inch wide window with floor-length curtains (84 inches):
- Width needed: 48 × 2 = 96 inches
- Panels: 96 ÷ 54 = 1.78, round up to 2 panels
- Length per panel: 84 + 12 = 96 inches (2.67 yards)
- Total fabric: 2 panels × 2.67 yards = 5.34 yards (buy 5.5 yards)
Budget tip: Single-width panels (one fabric width per side) work fine for narrow windows under 36 inches and save significant fabric costs.
How to Calculate Curtain Width and Length Before Sewing
Measure your curtain rod width and multiply by 1.5-2.5 for proper fullness, then measure from the rod to your desired endpoint and add 12 inches for hem allowances. Always round up measurements and account for pattern repeats if using printed fabric.
Professional Measuring Technique
Width calculation:
- Mount your curtain rod first (measure the actual rod, not the window)
- For standard fullness: rod width × 2
- For sheer curtains: rod width × 2.5-3 (more fullness needed)
- For flat panels: rod width × 1.5
Length calculation:
- Sill length: Rod to window sill + 1 inch
- Apron length: Rod to bottom of window trim + 3-4 inches
- Floor length: Rod to floor – 1 inch (prevents dragging)
- Puddle length: Rod to floor + 6-12 inches (formal look)
Add these allowances to your finished length:
- Bottom hem: 6-8 inches (double-fold hem)
- Top hem/rod pocket: 4-6 inches
- Total addition: 10-14 inches
Edge case: If your windows are very tall (over 96 inches), you may need to piece fabric horizontally. Plan seams to fall in inconspicuous areas and match patterns carefully.
Do I Need a Special Sewing Machine to Make Curtains?
No, any standard sewing machine with a straight stitch can sew curtains successfully. You don’t need special features, though a longer stitch length option (3.5-4mm) and the ability to handle multiple fabric layers are helpful for professional-looking results.

Universal Compatibility: This walking foot attachment is designed to fit Brother, Singer, Janome, and all low shank sewing machine models. Whether you own a Brother walking foot sewing machine or a Singer walking foot sewing machine, this accessory ensures seamless integration and enhanced stitching performance
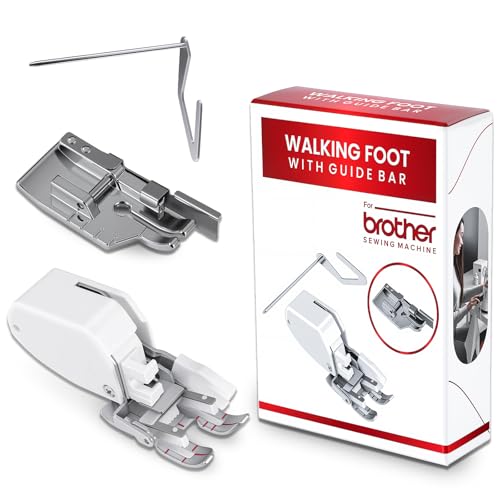
【UNIVERSAL LOW SHANK FIT】 Engineered to seamlessly fit Brother, Singer, Janome, Kenmore, and all low-shank sewing machines. Upgrade your domestic machine into a high-performance stitching powerhouse instantly without any extra adapters

SMOOTH FABRIC FEEDING: The SINGER Even Feed Walking Presser Foot ensures even fabric feeding for professional results, especially on thick or layered fabrics. Perfect for sewing challenging materials like velvet, denim, and quilts without shifting.
Machine Features That Help
Essential (most machines have these):
- Straight stitch
- Reverse stitch for backstitching
- Adjustable stitch length
Helpful but not required:
- Extended sewing surface or table for managing large fabric panels
- Walking foot or even-feed foot to prevent fabric shifting on long seams
- Adjustable presser foot pressure for thick hems
Your basic machine can handle curtain fabric as long as you use the correct needle (size 90/14 or 100/16 for home décor fabrics) and adjust thread tension appropriately. If you’re working with very heavy fabrics like velvet or multiple layers, check that your machine can handle the thickness before starting.
Troubleshooting: If your machine struggles with thick hems, try sewing slowly and using a walking foot to feed layers evenly. For more guidance on common issues, see our article on why sewing machines skip stitches.
Lined Curtains vs Unlined Curtains: Which Is Easier to Sew?
Unlined curtains are significantly easier to sew because they require half the fabric, fewer seams, and simpler construction, ideal for beginners. Lined curtains offer better light blocking, insulation, and a more polished look from outside but take 2-3 times longer to complete.

【Heavy Duty Sewing Kit】- This comprehensive sewing kit includes 32 leather sewing needles, 10 leather sewing threads (30 m/color), a needle bottle, an awl, a tape measure, scissors, and a sewing thimble.

Perfect Heavy Duty Sewing Kit: This fully-packed sewing kit contains all the necessary tools to sew for most of your sewing needs. You will get: 25* Hand Sewing Needles, 12* Upholstery Thread, 1* Inch Ruler, 1* Scissors, 1* Thimble, 3* Awl Tool, 2* Seam Ripper, 1* Threader.

Due to a change in zipper style, the received product may differ slightly from the image. You may receive either the version depicted in the image or the one shown in the video
Construction Comparison
Unlined curtains:
- Single layer of fabric with hemmed edges
- Sewing time: 2-4 hours for a pair
- Cost: $15-40 depending on fabric choice
- Best for: Kitchens, casual spaces, layering with blinds
- Light filtering: Depends entirely on fabric weight
Lined curtains:
- Fashion fabric plus lining fabric sewn together
- Sewing time: 5-8 hours for a pair
- Cost: $30-70 (requires double the yardage)
- Best for: Bedrooms, formal rooms, energy efficiency
- Light filtering: Significantly better, especially with blackout lining
Construction difference: Lined curtains require sewing the lining to the main fabric along side seams, turning right-side out, pressing carefully, and often hand-stitching the lining hem separately to allow for different shrinkage rates.
Choose unlined if: You’re a beginner, working on a budget, or your windows already have blinds or shades for light control.
What Is the Difference Between Rod Pocket and Tab Top Curtains?
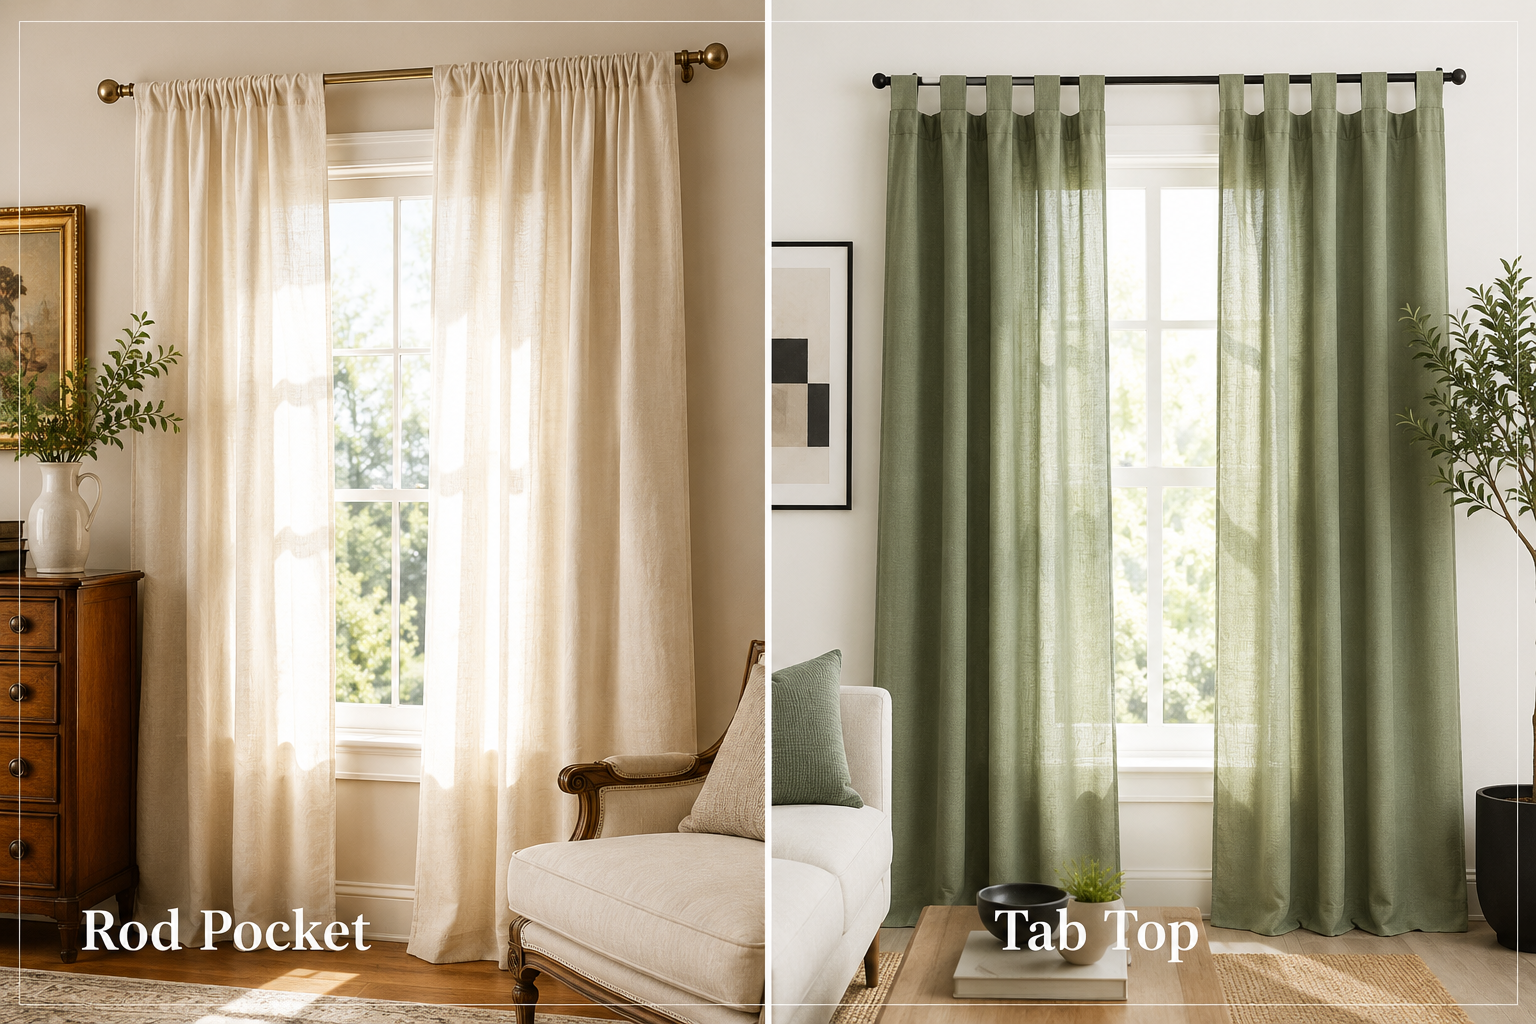
Rod pocket curtains have a sewn channel (pocket) at the top that slides directly onto a curtain rod, creating gathered fabric above and below the rod. Tab top curtains use fabric loops sewn to the top edge that slip over the rod individually, creating a more modern, tailored look with visible space between tabs.
Style and Construction Differences
Rod pocket curtains:
- Appearance: Gathered, traditional, soft folds
- Construction: Fold and stitch a 3-4 inch channel at the top
- Difficulty: Easier, just straight stitching
- Rod visibility: Rod is hidden inside the pocket
- Movement: Slides along rod (can be stiff with heavy fabric)
Tab top curtains:
- Appearance: Contemporary, structured, evenly spaced loops
- Construction: Cut and sew individual tabs, attach to curtain top
- Difficulty: Moderate, requires precise measuring and spacing
- Rod visibility: Rod shows between tabs (choose decorative rods)
- Movement: Slides easily, tabs can be removed for washing
Hybrid option: Rod pocket with header (extra fabric above the pocket) creates a ruffled top while maintaining the easy construction of a basic rod pocket.
Choose rod pocket if: You want the simplest construction, prefer a traditional gathered look, or plan to keep curtains closed most of the time.
Choose tab top if: You have a decorative rod you want to showcase, prefer a modern aesthetic, or want curtains that slide open and closed easily.
How to Sew Curtains: Step-by-Step Instructions
To sew basic unlined rod pocket curtains, pre-wash your fabric, cut panels to size, hem the sides and bottom with double-fold hems, create a rod pocket at the top, and press thoroughly for a professional finish. This method works for most window sizes and fabric types.
Complete Construction Process
Step 1: Prepare your fabric
- Pre-wash and dry fabric according to care instructions
- Press out all wrinkles with an iron
- Square up fabric edges using a cutting mat and rotary cutter or scissors
Step 2: Cut panels
- Cut panels to your calculated width and length
- For two panels, cut each panel half your total width plus 3 inches for side hems
- Ensure fabric pattern runs the same direction on all panels
Step 3: Sew side hems
- Fold each side edge 1.5 inches to wrong side, press
- Fold another 1.5 inches, press (creates double-fold hem)
- Stitch close to inner folded edge (about 1/8 inch from fold)
- Backstitch at beginning and end
Step 4: Sew bottom hem
- Fold bottom edge 4 inches to wrong side, press
- Fold another 4 inches, press (8-inch double-fold hem)
- Stitch close to inner folded edge
- Press hem flat
Step 5: Create rod pocket
- Fold top edge 1 inch to wrong side, press
- Fold another 3 inches, press
- Stitch close to first folded edge to create pocket
- Optional: Add a second line of stitching 1.5 inches above first to create a header ruffle
Step 6: Final pressing
- Press entire curtain, paying special attention to hems
- Hang immediately to prevent wrinkles
Common mistake: Skipping the pressing steps. Pressing after each fold creates crisp, professional-looking hems that distinguish homemade curtains from store-bought ones.
How to Make Curtains Look Professional, Not Homemade
To achieve professional-looking curtains, use wide double-fold hems (at least 3 inches on sides, 6-8 inches on bottom), press every seam thoroughly, ensure perfectly straight stitching, and choose quality fabric without obvious flaws. Proper measurements and generous fullness (2-2.5 times window width) also elevate the finished appearance.
Professional Finishing Techniques
Hem width matters: Store-bought curtains typically feature deeper hems than home sewers use. A 4-inch double-fold bottom hem (8 inches total) adds weight, helps curtains hang straight, and looks substantial.
Pressing is non-negotiable: Press every fold before stitching, then press the finished seam. Use steam and starch for crisp edges on cotton and linen. This single step makes the biggest visual difference.
Stitch quality: Use a longer stitch length (3.5-4mm) for seams that blend into the fabric. Shorter stitches can create puckering and look too “stitched.” Maintain consistent seam allowances and keep stitching straight, use your machine’s seam guide or mark with fabric chalk.
Fabric selection: Choose medium to heavyweight fabrics that drape well. Avoid fabric with printing flaws, uneven weave, or obvious texture inconsistencies. Solid colors and subtle patterns are more forgiving than bold prints where pattern matching becomes critical.
Fullness ratio: Skimpy curtains (less than 1.5× window width) look cheap. Aim for 2-2.5× fullness for a luxurious gathered appearance.
Weight the bottom: For curtains that hang perfectly straight, add drapery weights to bottom hem corners or use a weighted hem tape. This prevents billowing and creates a tailored look.
Edge finishing: For lined curtains, ensure lining doesn’t peek around edges by cutting it slightly narrower than the face fabric. For more precision work, understanding edge stitch techniques can improve your results.
Why Are My Curtains Puckering After Sewing?
Curtain puckering typically occurs due to incorrect thread tension, using too short a stitch length, pulling fabric while sewing, or mismatched thread and needle sizes. The fabric gathers along the seam line instead of lying flat, creating an unprofessional wavy appearance.
Troubleshooting Puckered Seams
Tension issues: Upper thread tension that’s too tight pulls the fabric, creating puckers. Test your tension on fabric scraps and adjust until stitches look balanced on both sides. Check our guide on sewing machine tension for detailed adjustment instructions.
Stitch length: Stitches shorter than 2.5mm can cause fabric to gather, especially on lightweight fabrics. Use 3-4mm stitch length for curtain seams.
Fabric handling: Never pull or push fabric through the machine, let the feed dogs do the work. Pulling creates uneven tension and puckering. If fabric isn’t feeding smoothly, check your feed dogs for lint buildup.
Needle and thread mismatch: Using heavy thread with a small needle or vice versa creates tension problems. Match needle size to fabric weight (90/14 for medium-weight cotton, 100/16 for heavier fabrics) and use all-purpose polyester thread.
Presser foot pressure: Too much pressure can stretch fabric as it feeds through. If your machine has adjustable pressure, reduce it slightly for lightweight fabrics.
Quick fix: If puckers are minor, aggressive steam pressing can sometimes relax them. For severe puckering, you’ll need to remove stitches and re-sew with corrected settings.
How to Hem Curtains Without a Sewing Machine
To hem curtains without a sewing machine, use iron-on hem tape (fusible web tape), fabric glue designed for washable projects, or hand-sewing with a blind stitch. Iron-on hem tape is the fastest no-sew method and creates a permanent, washable hem in minutes.
No-Sew Hemming Methods
Iron-on hem tape (best option):
- Fold hem to desired width and press
- Insert hem tape between folded layers
- Press with hot iron for 10-15 seconds per section
- Allow to cool completely before handling
- Washable and durable for most curtain fabrics
Fabric glue:
- Use permanent fabric glue labeled as washable
- Apply thin line along hem fold
- Press firmly and allow to dry per manufacturer instructions
- Less durable than hem tape but works for lightweight curtains
Hand-sewing blind stitch:
- Most time-consuming but most professional appearance
- Stitches are nearly invisible from the right side
- Secure and fully washable
- Takes 30-45 minutes per curtain panel
Clip-on hem weights: For temporary length adjustment without permanent hemming, use clip-on curtain weights to hold excess fabric in a fold at the bottom.
Limitation: No-sew methods work best for bottom hems on lightweight to medium-weight fabrics. Side hems and rod pockets still require sewing for durability and proper function.
Do Blackout Curtains Require Special Sewing Techniques?
Blackout curtains require slightly modified techniques because blackout fabric is thicker, heavier, and often has a rubberized or foam backing that can be damaged by high heat or stick to presser feet. Use a Teflon presser foot, lower iron temperature, and longer stitch length (4mm) to accommodate the extra bulk.
Working with Blackout Fabric
Fabric characteristics:
- 2-3 times thicker than regular curtain fabric
- Rubberized or acrylic foam backing
- Doesn’t fray as much as woven fabrics
- Can be stiff and harder to fold crisply
Sewing adjustments:
- Use size 100/16 or 110/18 needle for heavy fabrics
- Increase stitch length to 4mm to prevent fabric compression
- Reduce sewing speed for better control
- Use a Teflon or roller presser foot to prevent sticking
Pressing cautions:
- Never use high heat directly on blackout backing, it can melt
- Press from the face fabric side only
- Use a pressing cloth for extra protection
- Steam may damage some blackout coatings, test first
Hem considerations:
- Blackout fabric is bulky in double-fold hems, consider single-fold hems with serged or zigzag-finished edges
- Hand-sewing hems may be easier than machine-sewing through multiple thick layers
- Hem tape often doesn’t adhere well to rubberized backing
Alternative approach: Sew regular curtains and add blackout lining as a separate layer that hangs behind the decorative curtain. This avoids working with difficult blackout fabric while achieving the same light-blocking effect.
Common Mistakes When Sewing Curtains for Beginners
The most common curtain-sewing mistakes include skipping fabric pre-washing (causing shrinkage after completion), cutting panels too narrow (resulting in skimpy-looking curtains), using inadequate hem allowances, and failing to press seams properly. These errors make curtains look homemade rather than professional.
Top Mistakes and How to Avoid Them
Not pre-washing fabric: Cotton and linen can shrink 3-5% in the first wash. Always pre-wash and dry fabric before cutting to prevent finished curtains from becoming too short after the first cleaning.
Insufficient fullness: Curtains cut to exact window width look flat and cheap. Always multiply window width by at least 1.5, preferably 2, for proper fullness and drape.
Skimpy hem allowances: Narrow hems (less than 2 inches) look unfinished. Use 3-4 inch double-fold side hems and 6-8 inch bottom hems for professional weight and appearance.
Not pressing between steps: Pressing creates crisp folds that guide your stitching and create professional-looking hems. Skipping this step is the #1 reason homemade curtains look amateur.
Wrong needle or thread: Using a universal needle meant for lightweight fabrics on home décor weight cotton causes skipped stitches and thread breaks. Match needle size to fabric weight and use quality all-purpose thread. For persistent issues, see our guide on why needles keep breaking.
Uneven panel lengths: When sewing multiple panels, measure and cut carefully to ensure all panels are identical length. Even a 1-inch difference is noticeable when curtains hang side-by-side.
Ignoring pattern direction: Fabric with directional prints or nap (like velvet) must be cut with pattern running the same way on all panels. Mixing directions creates a mismatched appearance.
Pulling fabric through machine: This causes uneven seams, puckering, and fabric bunching. Let feed dogs move fabric at their own pace.
Cheapest Way to Sew Curtains on a Budget
The cheapest way to sew curtains is to use cotton bed sheets (flat sheets in king or queen size), buy fabric remnants or clearance home décor fabric, or shop seasonal sales at fabric stores. A pair of curtains can cost as little as $10-15 using these methods while still looking custom-made.
Budget-Friendly Strategies
Use flat sheets: King-size flat sheets (108″ × 102″) provide enough fabric for two floor-length curtain panels for most windows. Watch for white sales or clearance sheets at discount stores. Cost: $10-20 per pair of curtains.
Shop remnants: Fabric stores sell remnant pieces (leftover fabric from bolts) at 50-70% off. For curtains, you need continuous yardage, but remnants work well for shorter café curtains or valances.
Seasonal sales: Major fabric retailers run 50-60% off sales on home décor fabrics several times yearly. Stock up during these sales for future projects.
Simplify construction: Skip linings, fancy headers, and embellishments. Simple rod pocket curtains with basic hems require minimal fabric and sewing time.
Use what you have: Repurpose fabric from other projects, old tablecloths, or duvet covers. Vintage fabrics from thrift stores can create unique curtains for $5-10.
Buy online: Online fabric retailers often have lower prices than brick-and-mortar stores, especially for basic solids and home décor weights.
Cost breakdown example:
- 5 yards cotton fabric on sale: $15
- Thread: $3 (you likely have this)
- Total: $18 for a pair of custom curtains vs. $40-100 for ready-made
Don’t skimp on: Pre-washing (prevents costly mistakes) and pressing (makes budget fabric look expensive).
How Long Does It Take to Sew a Pair of Curtains?
Sewing a pair of simple unlined rod pocket curtains takes 3-4 hours for a beginner, including cutting, pressing, and sewing time. Experienced sewers can complete the same project in 1.5-2 hours. Lined curtains or complex styles with tabs, pleats, or embellishments take 6-10 hours.
Time Breakdown by Project Type
Simple unlined curtains (rod pocket):
- Cutting and prep: 30-45 minutes
- Pressing and pinning: 45-60 minutes
- Sewing: 60-90 minutes
- Final pressing: 15-30 minutes
- Total: 3-4 hours for beginners, 1.5-2 hours for experienced sewers
Lined curtains:
- Cutting both fabrics: 45-60 minutes
- Sewing lining to face fabric: 90-120 minutes
- Turning, pressing, and finishing: 60-90 minutes
- Total: 5-8 hours
Tab top curtains:
- Cutting and making tabs: 60-90 minutes
- Attaching tabs evenly: 45-60 minutes
- Hemming: 60-90 minutes
- Total: 4-6 hours
Time-saving tips:
- Cut multiple panels at once if making curtains for several windows
- Use a rotary cutter and mat for faster, straighter cutting
- Press as you go rather than saving all pressing for the end
- Set up an efficient workspace with iron near sewing machine
Plan for interruptions: If you’re sewing in short sessions, add 30-60 minutes to total time for setup and re-familiarizing yourself with the project between sessions.
Conclusion
Learning how to sew curtains opens up endless possibilities for customizing your home décor while building essential sewing skills. Whether you’re a complete beginner starting with simple unlined panels or ready to tackle more complex lined curtains with decorative headers, the key to success lies in accurate measuring, choosing appropriate fabric, and taking time to press each step thoroughly.
Start with a manageable project, a single window with basic rod pocket curtains in medium-weight cotton. This allows you to master the fundamental techniques of hemming, creating rod pockets, and achieving straight seams without feeling overwhelmed. As your confidence grows, experiment with different fabrics, styles, and embellishments to create truly custom window treatments.
Remember that even experienced sewers make mistakes. If your first attempt isn’t perfect, you’ve still gained valuable experience and practiced skills that transfer to countless other sewing projects. The beauty of curtains is that minor imperfections are rarely noticeable once they’re hanging, and the satisfaction of creating functional home décor far outweighs any small flaws.
Your next steps:
- Measure your windows and calculate fabric requirements
- Choose a beginner-friendly fabric (cotton or linen in a solid color or simple print)
- Gather basic supplies: fabric scissors, pins, thread, measuring tape, and iron
- Set aside an afternoon to complete your first pair of curtains
- Hang your finished curtains and enjoy the accomplishment of creating something beautiful and functional for your home
With practice, you’ll develop the skills to sew curtains for every room in your house, save hundreds of dollars compared to buying custom window treatments, and gain the confidence to tackle increasingly complex sewing projects.
Frequently Asked Questions
Can I sew curtains with a regular sewing machine? Yes, any standard sewing machine with a straight stitch can sew curtains. You don’t need special features, though adjustable stitch length and the ability to handle thick hems are helpful for professional results.
What’s the easiest curtain style for beginners to sew? Rod pocket curtains are the easiest style because they require only straight seams and a simple folded channel at the top. They’re more forgiving of minor mistakes than tab tops or pleated styles.
How do I keep my curtains from looking homemade? Use generous hem allowances (3-4 inches on sides, 6-8 inches on bottom), press thoroughly after every step, ensure adequate fullness (2× window width), and choose quality fabric without obvious flaws.
Should I line my first pair of curtains? No, start with unlined curtains for your first project. They’re significantly easier, take half the time, and allow you to master basic techniques before adding the complexity of lining.
What fabric width should I buy for curtains? Home décor fabric typically comes in 54-inch width, which is ideal for curtains. Quilting cotton (44-45 inches wide) works for narrow windows but may require seaming panels together for wider windows.
Can I use bed sheets to make curtains? Yes, flat sheets make excellent budget-friendly curtains. King-size sheets provide enough fabric for two floor-length panels for most standard windows and cost significantly less than buying fabric by the yard.
How much should curtains cost to make yourself? Simple unlined curtains cost $15-40 per window depending on fabric choice, compared to $50-150 for ready-made curtains. Using sheets or sale fabric can reduce costs to $10-15 per window.
Why are my curtain seams puckering? Puckering usually results from thread tension that’s too tight, stitch length that’s too short (use 3-4mm), or pulling fabric through the machine instead of letting feed dogs control the pace.
Do I need to pre-wash curtain fabric? Yes, always pre-wash and dry curtain fabric before cutting. Cotton and linen can shrink 3-5%, which would make finished curtains too short after the first washing.
How do I calculate how much fabric I need? Measure window width and multiply by 2 for fullness, then measure desired length and add 12 inches for hems. Divide total width by fabric width (usually 54 inches) to determine number of panels needed.
Can I hem curtains without sewing? Yes, use iron-on hem tape for a permanent, washable no-sew hem. This works well for bottom hems on lightweight to medium-weight fabrics but isn’t suitable for rod pockets or side seams.
What’s the difference between blackout and regular curtain fabric? Blackout fabric has a rubberized or foam backing that blocks light completely. It’s thicker and heavier than regular fabric and requires lower iron temperature and specialized presser feet to prevent sticking during sewing.