Quick Answer
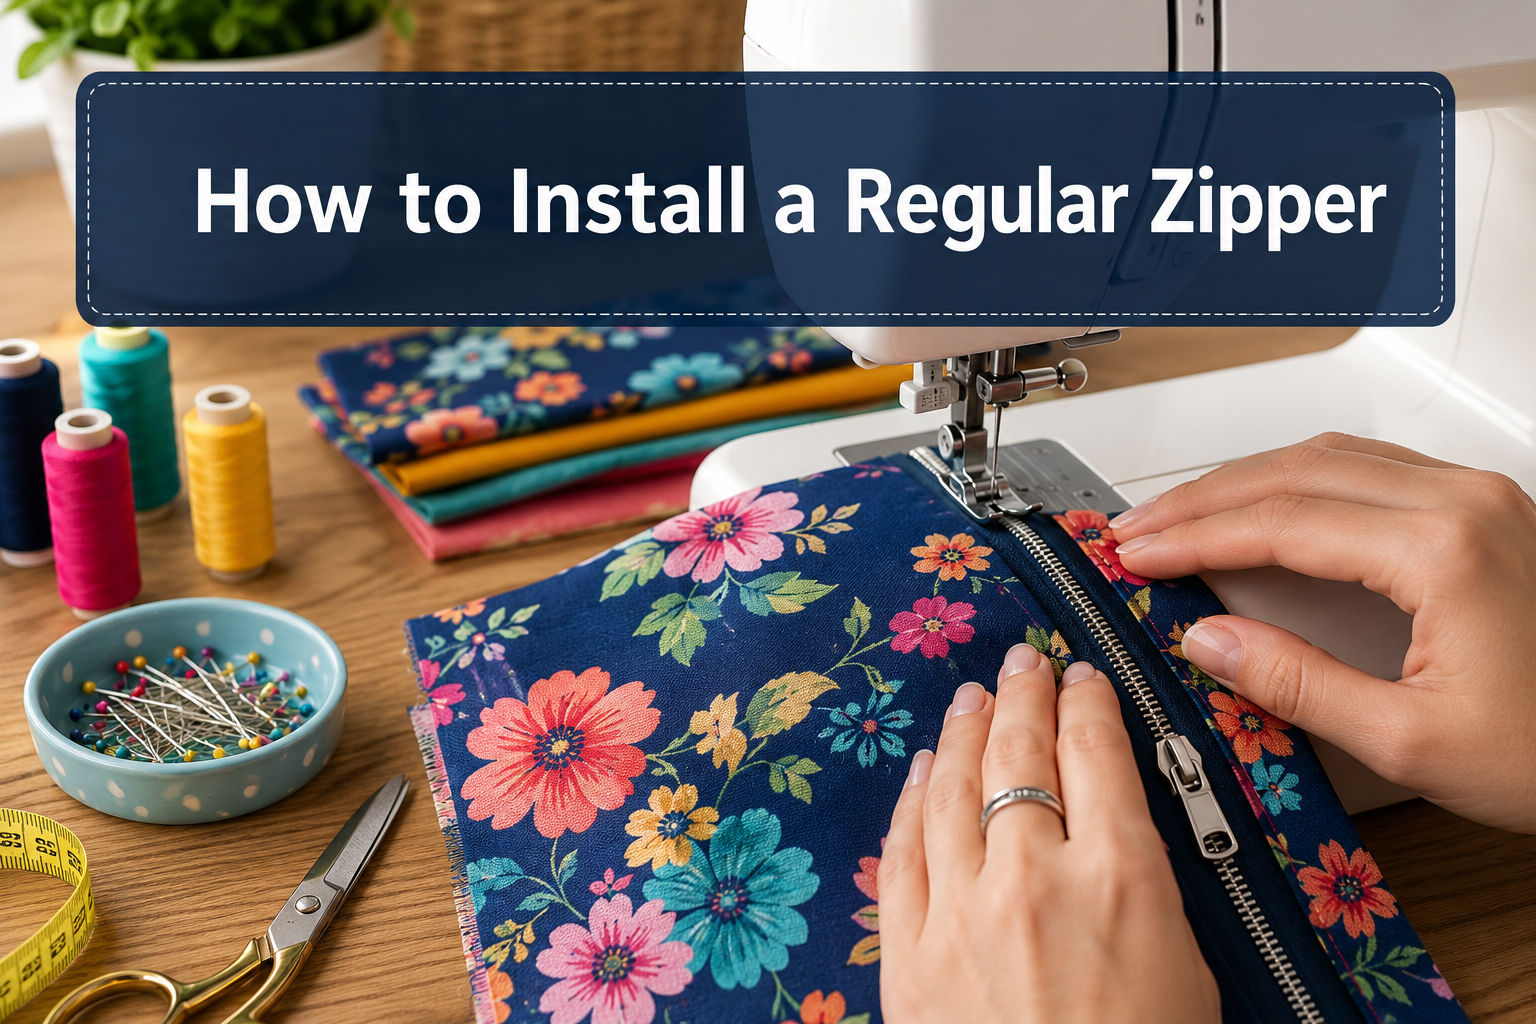
Installing a regular zipper involves pinning the zipper tape to your fabric’s seam allowance, basting it in place, then stitching close to the zipper teeth using a zipper foot attachment. The entire process takes 15-30 minutes for beginners and creates a professional closure for garments, bags, and home décor projects. With the right tools and technique, even first-time sewers can achieve clean, functional results.
Key Takeaways
- A zipper foot is essential for stitching close to zipper teeth without hitting the metal or plastic coils with your needle
- Centered zippers are easiest for beginners because both sides are sewn identically with visible stitching lines
- Basting prevents shifting and ensures your zipper stays aligned during final stitching
- Puckering happens when fabric isn’t stabilized, use interfacing on lightweight or stretchy fabrics
- Hand-sewing a zipper takes 45-60 minutes but requires only a needle, thread, and basic stitching skills
- Professional installation costs $15-$35 depending on garment type and local rates
- Practice on scrap fabric first to build confidence before working on your actual project
- Crooked zippers can be fixed by removing stitches with a seam ripper and re-sewing with better alignment
What Tools Do I Need to Sew in a Zipper?
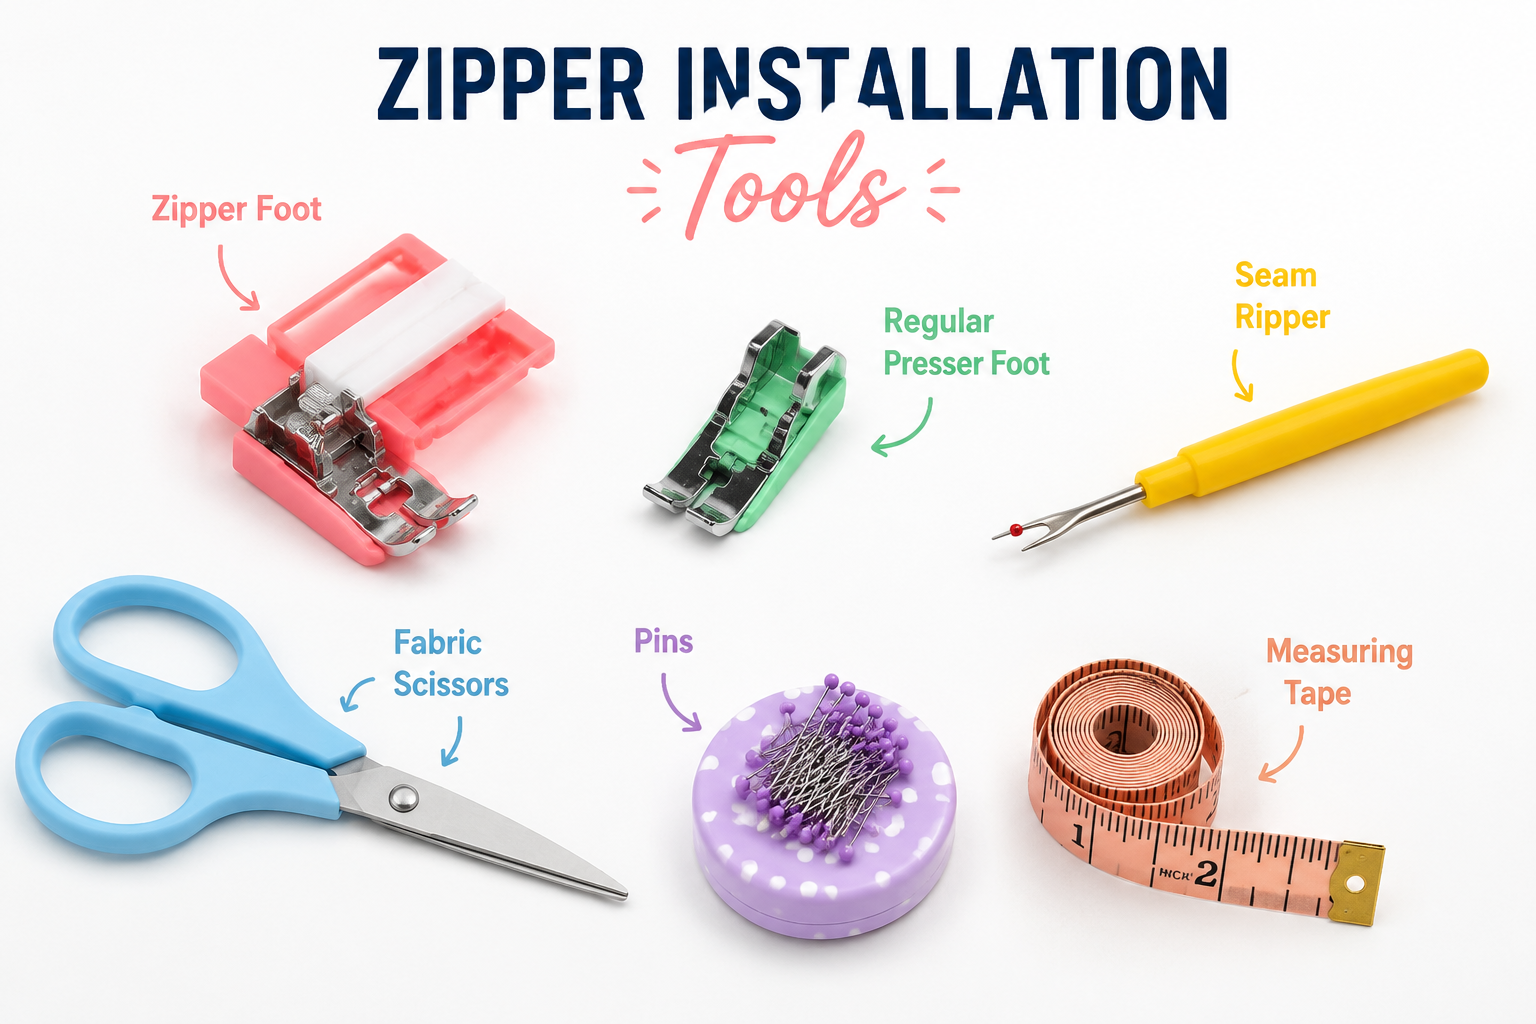
You need six essential tools to install a regular zipper: a zipper foot attachment, pins or clips, hand-sewing needle for basting, thread matching your fabric, fabric scissors, and a seam ripper for corrections. The zipper foot is the most critical tool because it allows you to stitch within 1/8 inch of the zipper teeth without your regular presser foot getting in the way.
Essential zipper installation toolkit:
- Zipper foot, narrow presser foot that sits to one side of the needle, available for all sewing machine brands
- Pins or fabric clips, hold zipper tape to fabric without shifting (clips work better on thick fabrics)
- Hand-sewing needle and thread, for basting the zipper temporarily before machine stitching
- Thread, polyester all-purpose thread in a color matching your fabric or zipper tape
- Fabric scissors, sharp shears for trimming zipper tape if needed
- Seam ripper, removes basting stitches and fixes mistakes without damaging fabric
- Measuring tape or ruler, ensures even seam allowances and centered placement
- Iron and pressing surface, presses seam allowances flat before zipper installation
Optional but helpful tools:
- Fabric marking pen or chalk for placement lines
- Interfacing for lightweight or stretchy fabrics
- Scotch tape to hold zipper in place (alternative to basting)
Choose a zipper foot that fits your machine model. Most machines come with one in the accessory box, but if yours is missing, universal zipper feet cost $8-$15 and work on most brands. The foot should have an adjustable position so you can move the needle to either side of the foot, allowing you to stitch both sides of the zipper without turning your fabric around.

🎈Simple and practical design, easy to operate;

Durable narrow clip-on zip zipper presser foot.

What Is a Zipper Foot and Do I Need One?
A zipper foot is a narrow presser foot attachment with a single toe that sits to the left or right of the needle, allowing you to stitch extremely close to raised edges like zipper teeth or piping. You absolutely need one for zipper installation because a regular presser foot is too wide and will hit the zipper teeth, preventing you from sewing close enough to create a professional finish.
The zipper foot typically has a center groove on the underside that glides over the zipper coil, and most models let you adjust which side of the needle the foot sits on. This adjustability means you can sew down the left side of your zipper with the foot on the right, then switch it to the left side to sew down the right side of the zipper, all without turning your fabric.
Key differences from regular presser foot:
- Width, zipper foot is 1/4 to 1/2 inch wide vs. 3/4 inch for regular foot
- Position, attaches to one side of needle bar vs. centered over needle
- Clearance, designed to avoid raised edges vs. flat fabric only
- Visibility, gives clear view of stitching line vs. partially blocked view
If you’re working on beginner sewing projects, investing in a quality zipper foot will improve your results immediately. The foot costs less than having one zipper professionally installed, and you’ll use it for dozens of projects including cushion covers, garment alterations, and bag making.
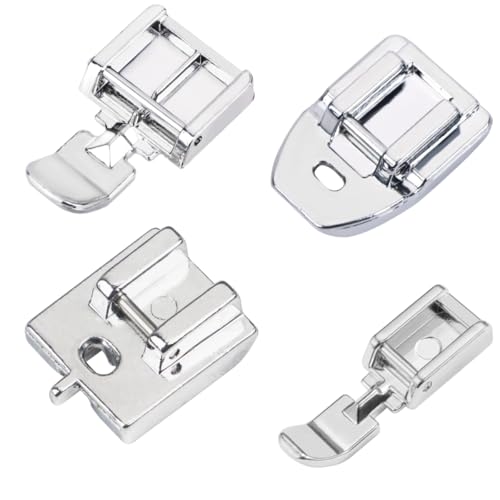
4 Essential Zipper Feet: Complete set includes wide zipper foot, narrow zipper foot, invisible zipper foot, and concealed zipper foot to handle every zipper sewing need

【5 FEET. EVERY ZIPPER. ZERO STRESS】Wide. Narrow. Invisible. Concealed. This presser invisible zipper foot set has every zipper foot you'll ever need. No more running to the store mid-project because you don't have the right foot. Just grab the one you need and keep sewing.

✅ PROFESSIONAL ZIPPER INSERTION: Sew zippers with precision by stitching close to zipper teeth for clean, secure finishes. Perfect for dresses, skirts, cushions, and other sewing projects requiring accurate zipper placement.
Can Beginners Install Zippers or Is It Too Advanced?
Beginners can absolutely install zippers, it’s a fundamental sewing skill that becomes easy with practice, not an advanced technique reserved for experts. The key is starting with a centered zipper application on a straight seam in medium-weight woven fabric like cotton, which is the most forgiving method and doesn’t require complex techniques.
Most sewing instructors introduce zippers within the first 5-10 projects because the skill opens up so many possibilities for garments and home décor. The “difficulty” reputation comes from people attempting invisible zippers or fly-front zippers as their first zipper project, which are genuinely more complex. A basic centered zipper in a cushion cover or simple skirt is actually easier than sewing a buttonhole.
Why beginners succeed with regular zippers:
- Forgiving technique, small imperfections don’t affect function
- Visible stitching lines, you can see exactly where to sew
- Removable mistakes, seam ripper fixes crooked stitching easily
- Immediate results, working zipper provides instant satisfaction
- Transferable skills, teaches precision that improves all sewing
Choose your first zipper project wisely:
- ✅ Best for beginners: cushion cover with centered zipper, tote bag pocket with zipper, simple zippered pouch
- ⚠️ Moderate difficulty: skirt or dress with centered back zipper, jacket with separating zipper
- ❌ Save for later: invisible zipper in formal dress, jeans fly zipper, zipper replacement in leather jacket
Start with a 7-9 inch zipper in a contrasting color so you can see your stitching lines clearly. Practice on scrap fabric first, cut two rectangles, sew them together leaving a gap for the zipper, then install the zipper in that gap. This practice run takes 20 minutes and builds confidence before you work on your actual project.
Difference Between Regular Zipper and Invisible Zipper Installation
Regular zipper installation places the zipper on top of or behind the seam allowance with visible stitching lines on the right side of the fabric, while invisible zipper installation hides the zipper teeth behind the seam so only the pull tab shows. Regular zippers are sewn with a standard zipper foot after the seam is partially closed, but invisible zippers require a special invisible zipper foot and are installed before the seam is sewn.
Key installation differences:
| Aspect | Regular Zipper | Invisible Zipper |
|---|---|---|
| Foot required | Standard zipper foot | Invisible zipper foot with grooves |
| When installed | After seam is sewn | Before seam is sewn |
| Stitching visibility | Visible topstitching | Hidden behind seam |
| Seam allowance | 5/8 inch standard | Must be exact, usually 5/8 inch |
| Difficulty level | Beginner-friendly | Intermediate skill |
| Best uses | Bags, cushions, casual garments | Formal dresses, skirts, fitted garments |
The installation sequence is completely different. For a regular zipper, you sew your seam first (leaving a gap for the zipper), press it open, then attach the zipper to the seam allowances. For an invisible zipper, you attach the zipper to the raw fabric edges first, then sew the seam below the zipper, which requires more precision in alignment.
Regular zippers are more forgiving because you can see your stitching and adjust as you go. Invisible zippers require the coil to be unrolled as you sew, and if your stitching isn’t close enough to the teeth, the zipper will be visible on the right side, a mistake that requires complete removal and reinstallation.
Choose regular zipper installation when:
- You’re new to zipper installation
- The project is casual or utilitarian (bags, cushions, jackets)
- You want a decorative element with contrasting zipper color
- The fabric is thick or textured (denim, canvas, upholstery)
Choose invisible zipper installation when:
- You have zipper installation experience
- The garment is formal or fitted (cocktail dress, pencil skirt)
- You want the closure to disappear into the seam
- The fabric is lightweight and smooth (silk, crepe, fine cotton)
How to Install a Regular Zipper: Step-by-Step Process
Installing a regular zipper requires preparing your seam, positioning the zipper tape, basting it in place, then machine stitching with a zipper foot. The entire process takes 20-30 minutes and creates a durable, professional closure when you follow proper technique and take time to align everything before final stitching.
Step 1: Prepare your seam
Sew your seam where the zipper will go, leaving an opening the exact length of your zipper teeth (not including the top stops). Use a regular stitch length (2.5mm) for the seam above and below the zipper opening, then switch to a basting stitch (4-5mm) for the opening itself. This basting holds the fabric edges together temporarily and will be removed after zipper installation.
Press the entire seam open, including the basted section. This creates flat, crisp edges that make zipper alignment much easier. If your fabric is lightweight or stretchy, apply a strip of lightweight fusible interfacing to the wrong side of each seam allowance before installing the zipper, this prevents puckering and adds stability.
Step 2: Position the zipper
Place your fabric right-side down on your work surface with the pressed-open seam facing up. Center the zipper face-down over the seam with the teeth directly over the basted seam line. The zipper tape edges should extend evenly onto both seam allowances. Pin or clip the zipper tape to the seam allowances, placing pins perpendicular to the zipper tape every 2 inches.
Check that the zipper pull is 1/2 inch below the top edge of your fabric opening. If your zipper is too long, you can sew across the teeth at the desired length to create a new bottom stop, then trim the excess tape.
Step 3: Baste the zipper
Using a hand-sewing needle and contrasting thread, baste the zipper tape to the seam allowances with long running stitches about 1/4 inch from the zipper teeth. Sew through the zipper tape, seam allowance, and the basted seam (all layers). This temporary stitching holds everything perfectly aligned for machine sewing.
Alternatively, use 1/2-inch strips of Scotch tape to hold the zipper in place instead of basting. Place tape across the zipper tape perpendicular to the teeth, securing it to the fabric. You’ll sew right over the tape and remove it afterward, this method is faster but works best on smooth fabrics.
Step 4: Machine stitch the zipper
Attach your zipper foot and adjust the needle position so the foot sits to the right of the needle. Turn your fabric right-side up. Starting at the bottom of the zipper on the left side, stitch from bottom to top, keeping your stitching line 1/8 to 1/4 inch from the zipper teeth. Backstitch at the beginning and end.
When you reach the zipper pull, stop with your needle down, lift the presser foot, carefully unzip the zipper to move the pull out of your way, lower the foot, and continue stitching to the top. This technique prevents the bulky pull from interfering with your stitching line.
Step 5: Stitch the second side
Move the needle position so the zipper foot sits to the left of the needle (or turn your fabric around if your foot doesn’t adjust). Stitch the right side of the zipper from bottom to top, again keeping 1/8 to 1/4 inch from the teeth and moving the pull out of the way when needed.
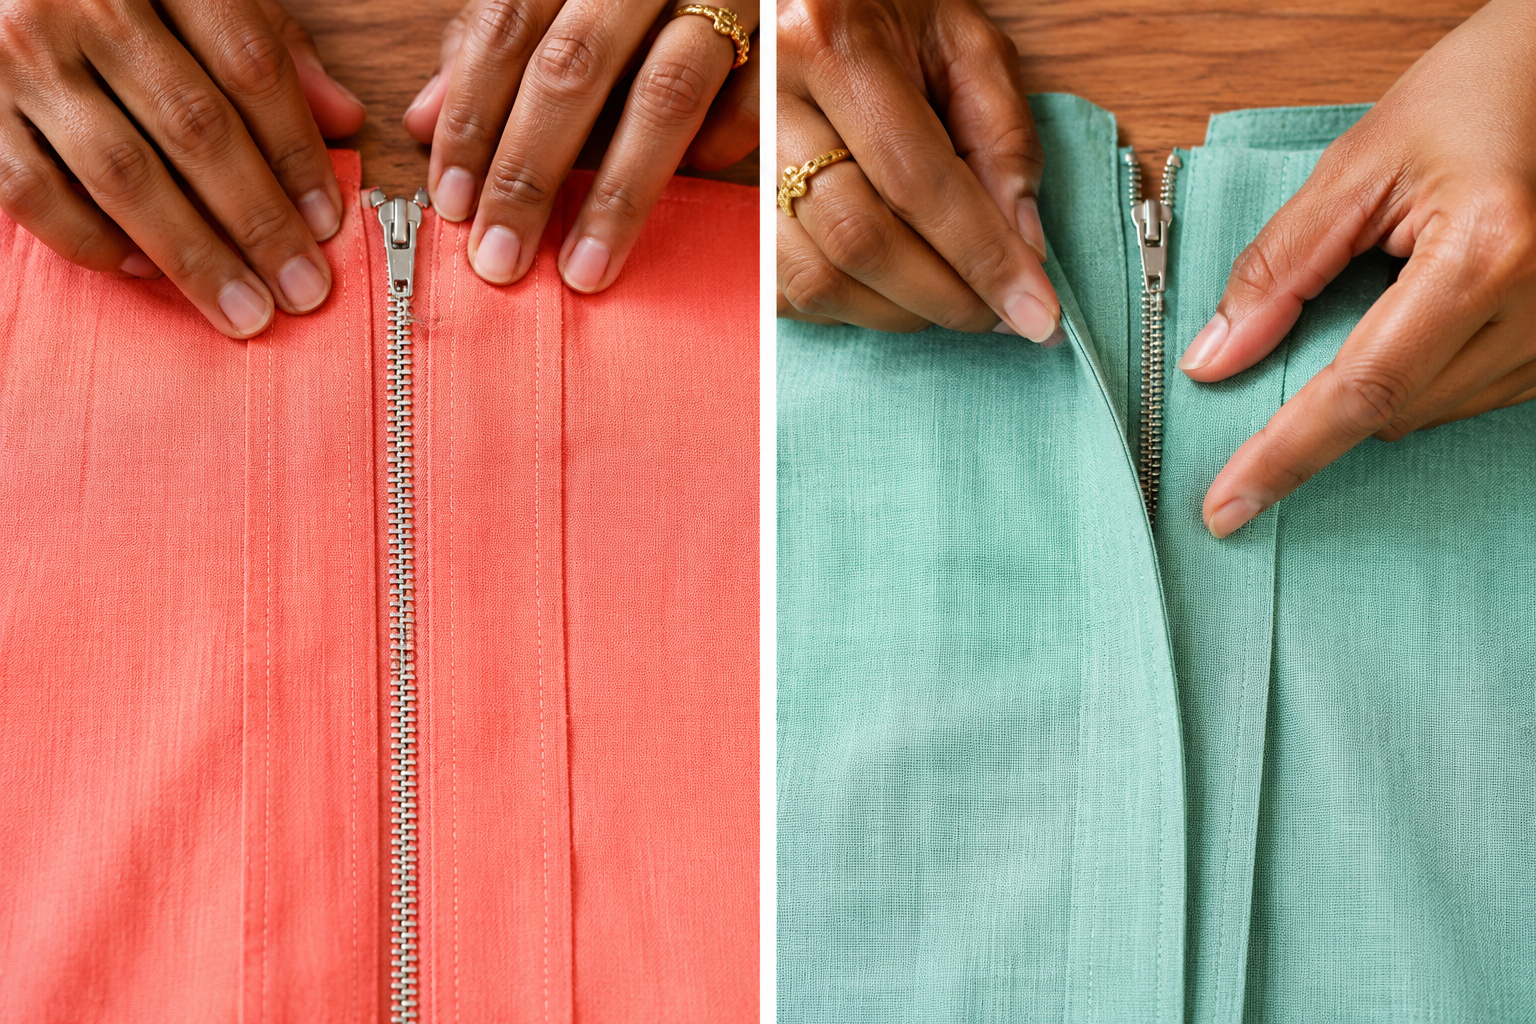
For a centered zipper, your stitching lines should be equidistant from the center seam on both sides. For a lapped zipper (where one side overlaps the other), the stitching pattern differs, the underlap is stitched close to the teeth, while the overlap is stitched 3/8 to 1/2 inch from the teeth.
Step 6: Remove basting and finish
Use a seam ripper to carefully remove the basting stitches from the seam opening, the zipper is now the only thing holding the opening closed. Remove any hand-basting stitches or tape from the zipper installation. Press lightly from the right side using a pressing cloth to protect the zipper teeth from direct iron heat.
Test the zipper by zipping and unzipping several times. It should glide smoothly without catching fabric. If it catches, check that no threads or fabric edges are trapped in the teeth, trim any loose threads close to the stitching line.
Centered Zipper vs Lapped Zipper: Which Is Easier?
A centered zipper is significantly easier for beginners because both sides are sewn identically with symmetrical stitching lines visible on the right side, while a lapped zipper has one side overlapping the other with different stitching patterns on each side that require more precision to look professional. Centered zippers take 20-25 minutes to install versus 30-40 minutes for lapped zippers.
Centered zipper characteristics:
- Both fabric edges meet at the center of the zipper teeth
- Stitching lines are equidistant from center on both sides (typically 1/4 inch)
- Zipper teeth are visible between the two stitching lines
- Symmetrical appearance, if one side looks good, both sides look good
- Common in sportswear, bags, cushions, and casual garments
- Easier to keep straight because you can see the center seam as a guide
Lapped zipper characteristics:
- One fabric edge overlaps the zipper, hiding the teeth completely
- Underlap side stitches close to teeth (1/8 inch), overlap side stitches farther away (3/8-1/2 inch)
- Creates a smooth, flat appearance with no visible zipper teeth
- Asymmetrical, requires careful measurement to keep the overlap even
- Common in skirts, dress pants, and tailored garments
- More formal appearance but requires intermediate skills
The lapped zipper’s difficulty comes from keeping the overlap fabric perfectly straight and even along the entire length. If the overlap shifts even slightly, the zipper teeth become visible or the fabric puckers. Centered zippers are self-correcting, as long as you stitch the same distance from the teeth on both sides, the result looks intentional.
Choose centered zipper installation if:
- This is your first or second zipper project
- The garment or item is casual or sporty
- You’re using a decorative zipper as a design element
- Time efficiency matters (it’s genuinely faster)
Choose lapped zipper installation if:
- You’ve successfully installed at least 2-3 centered zippers
- The garment is tailored or formal (dress pants, pencil skirt)
- You want the zipper to be as inconspicuous as possible
- You’re comfortable with precise measuring and marking
How to Install a Zipper by Hand Without a Sewing Machine
You can install a zipper entirely by hand using a backstitch or prickstitch, which creates strong, nearly invisible stitching that takes 45-60 minutes but requires only a needle, thread, and basic hand-sewing skills. Hand-sewn zippers are common in couture garments, alterations, and situations where machine access is limited or the fabric is too delicate for machine stitching.
Supplies for hand-sewing a zipper:
- Sharp hand-sewing needle (size 7-9 for medium-weight fabric)
- Thread matching your fabric (polyester or silk thread)
- Thimble to protect your finger when pushing the needle through multiple layers
- Beeswax or thread conditioner to strengthen thread and prevent tangling
- Pins or clips to hold zipper in place
- Fabric marking tool for stitching guidelines
Hand-installation technique:
Prepare and position exactly as you would for machine installation, sew and press the seam, position the zipper face-down on the wrong side, and pin it to the seam allowances.
Baste the zipper to the seam allowances using long running stitches 1/4 inch from the teeth, sewing through all layers. This is the same basting you’d do for machine sewing, but now it’s even more critical because you won’t have the machine’s feed dogs to keep things aligned.
Thread your needle with an 18-24 inch length of thread (longer tangles, shorter means constant rethreading). Run the thread through beeswax and knot one end. Start at the bottom of the zipper on the wrong side.
Backstitch the zipper tape to the seam allowance using tiny backstitches 1/8 inch long, working from bottom to top. A backstitch goes forward one stitch length, then back half a stitch length, creating a continuous line of stitching on the right side that looks almost like machine stitching. Keep your stitches even and your stitching line straight, about 1/4 inch from the zipper teeth.
Prickstitch from the right side for the most invisible finish. Turn the fabric right-side up and use a prickstitch (also called pickstitch), bring the needle up through all layers, take a tiny backward stitch catching just 1-2 threads of the surface fabric, then bring the needle forward 1/4 inch under the fabric before coming up again. This creates tiny dots of stitching on the right side that are nearly invisible.
Secure the ends by taking several tiny stitches in place at the top and bottom of the zipper, then running the thread under the stitching on the wrong side before trimming.
Hand-sewn zippers are actually stronger than machine-sewn ones when done with proper backstitch technique because each stitch locks the previous one. The technique is time-consuming but produces couture-quality results, and it’s the only option for replacing zippers in vintage garments where you can’t access the seam from the inside or when working with delicate fabrics that might be damaged by machine stitching.
Why Does My Zipper Pucker After Sewing It In?
Zipper puckering happens when the fabric stretches during installation, when the zipper tape is sewn under tension, or when lightweight or stretchy fabric lacks stabilization from interfacing. The puckering appears as wavy, rippled fabric along the zipper stitching lines and makes the zipper difficult to operate smoothly.
Common causes and solutions:
Cause 1: Fabric stretched during sewing
When you sew, the feed dogs can push the bottom layer of fabric forward faster than the top layer, causing the fabric to stretch and wave. Solution: Use a walking foot or reduce presser foot pressure, and hand-baste the zipper thoroughly before machine stitching so the layers can’t shift.
Cause 2: Zipper tape sewn under tension
If you pull the fabric or zipper tape as you sew, you’re stretching it, and when you release it, the fabric relaxes and puckers. Solution: Let the machine feed the fabric naturally without pulling or pushing. Guide the fabric gently with your hands flat on either side of the presser foot, but don’t apply forward or backward pressure.
Cause 3: Fabric lacks stability
Lightweight fabrics (chiffon, jersey, silk) and stretchy fabrics (knits, bias-cut wovens) need reinforcement or they’ll stretch and pucker around the zipper. Solution: Apply a 1-inch strip of lightweight fusible interfacing to the wrong side of each seam allowance before installing the zipper. The interfacing stabilizes the fabric and prevents stretching.
Cause 4: Seam allowances not pressed properly
If the seam allowances aren’t pressed completely flat and open before zipper installation, the fabric will have built-in waves that become permanent when you stitch the zipper. Solution: Press the seam thoroughly with steam, using a pressing cloth if needed, and make sure the seam allowances lie completely flat before positioning the zipper.
Cause 5: Stitch length too long
Long stitches (3mm or longer) don’t hold fabric firmly enough and allow it to shift and pucker between stitches. Solution: Use a 2-2.5mm stitch length for zipper installation, which creates enough stitches per inch to hold everything flat without being so short that it’s difficult to remove if you need to fix a mistake.
Cause 6: Wrong needle or thread
A dull needle or needle that’s too large for your fabric can push fabric threads aside rather than piercing cleanly, creating puckers. Solution: Use a fresh, sharp needle in the correct size for your fabric weight (size 70/10 or 80/12 for lightweight fabrics, 90/14 for medium-weight).
If you’ve already installed a puckered zipper, you have two options: remove it completely and reinstall it with proper stabilization, or try steaming and pressing the puckered area while gently pulling the fabric taut, this sometimes relaxes minor puckers but won’t fix severe ones. For more guidance on fabric handling issues, see our article on why fabric doesn’t feed through properly.
What Type of Zipper Should I Use for Jeans?
Use a heavy-duty metal or brass zipper with a closed bottom (non-separating) in a 7-inch length for standard jeans, specifically designed for denim and workwear applications. These zippers have larger, stronger teeth and reinforced tape that withstand the stress of tight-fitting pants and repeated washing, unlike lightweight dress zippers that will break within weeks on jeans.
Jeans zipper specifications:
- Type: Closed-bottom (non-separating) metal zipper
- Length: 7 inches for adult jeans (5-6 inches for children’s jeans)
- Teeth material: Brass, antique brass, or nickel-plated metal
- Tape material: Heavy cotton twill tape, often in denim blue or black
- Teeth size: #5 gauge (5mm wide when closed), larger than dress zippers
- Application style: Fly-front installation with shield/guard behind zipper
Why regular dress zippers fail in jeans:
- Teeth are too small and weak for the stress of sitting, bending, and tight fit
- Tape is too lightweight and tears away from the teeth
- Slider mechanism isn’t strong enough and breaks or separates
- Not designed for repeated washing and drying at high temperatures
Where to buy jeans zippers:
Look for zippers specifically labeled “jeans zipper,” “denim zipper,” or “heavy-duty trouser zipper” at fabric stores or online. Brands like YKK, Coats & Clark, and Gutermann make reliable jeans zippers. Expect to pay $4-$8 for a quality jeans zipper versus $2-$3 for a standard dress zipper, the extra cost is worth it for durability.
Installation considerations:
Installing a jeans fly zipper is more complex than a standard centered zipper because it requires a fly shield (the fabric piece behind the zipper that prevents skin contact with the teeth), specific topstitching patterns, and sewing through multiple layers of heavy denim. This is an intermediate-to-advanced zipper installation that beginners should practice on scrap denim before attempting on actual jeans. You’ll also need a heavy-duty needle (size 100/16 or 110/18) and strong thread (topstitching thread or heavy-duty polyester).
If you’re replacing a broken zipper in existing jeans, consider taking them to a professional alterations shop, jeans zipper replacement costs $15-$25 and takes an experienced sewer 30-45 minutes, but can take a beginner 2-3 hours with frustrating results if you’re not familiar with the technique.

#4 Non-separating zipper close end brass plated metal zippers sewing for jeans,jackets pocket , Bags, purses, jeans, denim skirts purses, crafts DIY production

SIZE: #5, 7 inch, Antique Brass metal zippers Closed End forJeans, Denim, Pockets,Sewing, Etc. Zippers are made of metal that are strong and sturdy to use.

Brass Zipper: A zipper with brass zipper teeth & detachable ends, the heavy duty brown zipper for sewing is lead-free, washable, and dryable, these work great as sturdy heavy jackets metal zipper, metal coats zippers, and dress zipper replacements.
Common Mistakes When Installing a Zipper for the First Time
The most common first-time zipper mistakes are not basting the zipper before machine stitching (causing it to shift and end up crooked), sewing with the zipper closed (making the slider impossible to move), and stitching too far from the zipper teeth (creating gaps where the teeth show through). These mistakes are easily avoided with proper preparation and technique.
Top 10 beginner zipper mistakes:
Skipping the basting step, Without basting, the zipper shifts as you machine stitch, resulting in crooked, uneven stitching lines. Always baste by hand or use tape to secure the zipper before machine stitching.
Sewing with the zipper closed, If you stitch the entire length with the zipper closed, the slider gets trapped and can’t move past your stitching. Open the zipper partway before you start stitching, then stop with the needle down, move the slider past the presser foot, and continue stitching.
Stitching too far from teeth, When your stitching line is more than 1/4 inch from the teeth, the fabric doesn’t hold the zipper tape firmly and gaps appear where the teeth show through. Stitch 1/8 to 1/4 inch from the teeth for a secure, professional look.
Not pressing the seam first, Unpressed seam allowances create bumps and waves that become permanent when you stitch the zipper. Always press the seam completely flat and open before positioning the zipper.
Using a regular presser foot, A regular foot can’t get close enough to the zipper teeth and will hit the slider. Always use a zipper foot for zipper installation, it’s not optional.
Forgetting to backstitch, Zipper stitching endures significant stress when the zipper is opened and closed. If you don’t backstitch at the beginning and end of each stitching line, the threads will pull out within a few uses.
Pinning parallel to the zipper, Pins placed parallel to the zipper tape are difficult to remove as you sew and can cause the fabric to shift. Always pin perpendicular to the zipper tape so you can pull pins out easily as you approach them.
Not testing the zipper before finishing, If you complete your entire project and then discover the zipper doesn’t work smoothly, you’ll have to remove significant stitching to fix it. Test the zipper immediately after installation while it’s still easy to access and fix.
Choosing the wrong zipper length, A zipper that’s too short won’t open far enough for the garment to fit over your body. A zipper that’s too long creates bulk at the top. Measure your opening carefully and choose a zipper that matches the opening length (measuring just the teeth, not the entire tape).
Installing the zipper upside down, It’s surprisingly easy to position the zipper with the pull on the wrong side, especially on projects like cushion covers where there’s no obvious “right” side. Always check that the zipper pull is on the side that will be visible when the project is complete.
Most of these mistakes are fixable with a seam ripper and patience, so don’t panic if your first zipper isn’t perfect. Every experienced sewer has installed crooked zippers, sewn over closed zippers, and made every mistake on this list. The key is learning from each mistake so you don’t repeat it on the next project. For additional troubleshooting help, check out our sewing troubleshooting guide.
How to Fix a Zipper That Was Sewn In Crooked
Remove the crooked stitching with a seam ripper, carefully cutting every 3-4 stitches on one side then pulling the thread from the other side, then re-baste the zipper in the correct position and re-stitch it using your original needle holes as a guide for where NOT to sew. The fix takes 20-30 minutes and results in a properly aligned zipper, though you may see faint marks from the original stitching on lightweight fabrics.
Step-by-step crooked zipper fix:
Step 1: Assess the problem
Determine whether the entire zipper is crooked or just one side. If only one side is crooked, you only need to remove and re-stitch that side. If both sides are crooked or the zipper itself is positioned incorrectly, you’ll need to remove all stitching and reposition the entire zipper.
Step 2: Remove the stitching
Use a sharp seam ripper to cut every 3-4 stitches on the right side of the fabric, working carefully to avoid cutting the fabric itself. Once you’ve cut along the entire stitching line, turn the fabric over and gently pull the bobbin thread, the entire stitching line should pull out easily. Remove all thread bits and check for any remaining stitches.
Step 3: Remove the zipper
If you basted the zipper to the seam allowances, remove those basting stitches as well. The zipper should now be completely free from the fabric. If the zipper tape has been damaged by the seam ripper, you may need to replace the zipper entirely, check for tears or holes in the tape.
Step 4: Reposition and re-baste
Position the zipper correctly, using a ruler to measure and ensure it’s straight and centered (or properly lapped, depending on your zipper style). Pin it carefully, then baste it again using hand stitches or tape. Take extra time with this step, the basting determines whether your second attempt will be straight.
Step 5: Re-stitch carefully
Machine stitch the zipper again, but position your new stitching line slightly closer to or farther from the zipper teeth than your original stitching so you’re not sewing through the same holes. Sewing through the same holes can cause skipped stitches and weak seams. If possible, shift your stitching line 1/8 inch in either direction.
Step 6: Press and test
Press the zipper area lightly from the right side using a pressing cloth. Test the zipper by opening and closing it several times to ensure it operates smoothly and the fabric lies flat without puckers or twists.
Preventing crooked zippers in the future:
- Use a fabric marking pen to draw your stitching lines before you start sewing
- Measure from the center seam to your stitching line at the top, middle, and bottom of the zipper to ensure it’s consistent
- Baste thoroughly, the more secure your basting, the less likely the zipper will shift during machine stitching
- Sew slowly and watch your stitching line, not the needle, looking ahead helps you steer straight
- Use the edge of your zipper foot as a guide, keeping it aligned with the zipper teeth for consistent distance
A crooked zipper is one of the most common and most fixable sewing mistakes. The second installation almost always turns out better than the first because you’ve learned exactly how the zipper behaves in that particular fabric.
How to Install a Zipper in a Cushion Cover
Install a cushion cover zipper by sewing two fabric panels together along three sides, leaving one side open, then centering a zipper along that open edge with the zipper face-down against the right side of the fabric, stitching it in place, and topstitching from the right side for a clean finish. This centered zipper application is the easiest zipper project for beginners and takes 25-35 minutes.
Cushion cover zipper installation:
Step 1: Prepare your fabric panels
Cut two fabric panels the size of your cushion plus 1/2 inch seam allowance on all sides. For an 18-inch cushion, cut two 19-inch squares. If you want a snug fit, cut the panels 1 inch smaller than the cushion dimensions, this prevents the cover from looking baggy.
Step 2: Sew three sides
Place the fabric panels right sides together and sew three sides with a 1/2-inch seam allowance, backstitching at the beginning and end of each seam. Leave one side (usually the bottom) completely open for the zipper. Press all seams open.
Step 3: Prepare the zipper opening
On the open side, press under 1/2 inch along both raw edges to create finished edges. These pressed edges will frame the zipper. Choose a zipper that’s 2-4 inches shorter than the opening width, for an 18-inch opening, use a 14-16 inch zipper. The zipper doesn’t need to extend the full width of the cushion.
Step 4: Position and baste the zipper
Open the zipper halfway. Place the cushion cover right-side up on your work surface. Position the zipper face-down on the right side of the fabric, centering it along the opening with the zipper teeth aligned with the pressed fold line. The zipper tape should extend onto the fabric. Pin the zipper tape to the fabric on both sides, then baste it in place with hand stitches or tape.
Step 5: Stitch the zipper
Using a zipper foot, stitch around all four sides of the zipper tape, creating a rectangular stitching pattern. Start at one corner, stitch across the short end, down the long side, across the other short end, and up the other long side. Move the zipper pull out of the way as needed. This stitching secures the zipper tape to the fabric.
Step 6: Topstitch from the right side
Turn the cushion cover right-side up. Topstitch from the right side, stitching 1/4 inch from the zipper teeth on both long sides and across both short ends. This creates a neat rectangular frame around the zipper and ensures the fabric folds lie flat.
Step 7: Finish the cover
Open the zipper at least halfway (this is critical, if you forget, you won’t be able to turn the cover right-side out after the next step). Fold the cover right sides together and sew the remaining portions of the zipper opening closed, from the edge of the fabric to the end of the zipper tape on each side. This closes the gaps at the ends of the zipper. Turn the cover right-side out through the zipper opening, insert your cushion, and zip it closed.
Cushion cover zipper tips:
- Use a zipper 2-4 inches shorter than the opening so you have fabric to sew closed at the ends
- Always open the zipper before sewing the final seams or you’ll trap the cover inside-out
- For outdoor cushions, use a water-resistant zipper or apply seam sealant to the zipper tape
- For a more polished look, add piping or cording around the cushion edges before installing the zipper
Cushion covers are the perfect first zipper project because the zipper installation is straightforward, mistakes are easy to fix, and you end up with a useful finished product. Once you’ve successfully installed a cushion cover zipper, you’ll have the confidence to tackle garment zippers.
Do I Need to Use Interfacing When Installing a Zipper?
You need interfacing when installing a zipper in lightweight fabrics (silk, chiffon, rayon), stretchy fabrics (knits, bias-cut wovens), or loosely woven fabrics (linen, gauze) because these fabrics will stretch, pucker, or distort around the zipper without stabilization. Medium to heavyweight woven fabrics (denim, canvas, twill, quilting cotton) typically don’t need interfacing for zipper installation.
When interfacing is required:
- Lightweight wovens, Silk, chiffon, voile, lawn, and other sheer or drapey fabrics lack the body to support a zipper and will ripple without interfacing
- Knit fabrics, All knits stretch, and that stretch will cause the zipper to wave and pucker; interfacing prevents the stretch in the zipper area while allowing the rest of the garment to maintain its stretch
- Bias-cut fabrics, Any fabric cut on the bias (45-degree angle to the grain) has significant stretch and needs interfacing to stabilize the zipper area
- Loosely woven fabrics, Linen, gauze, and other fabrics with visible gaps between threads need interfacing to prevent the zipper stitching from pulling through the weave
When interfacing is optional:
- Medium-weight wovens, Quilting cotton, poplin, broadcloth, and similar fabrics have enough body to support a zipper without interfacing, though adding it never hurts
- Heavy fabrics, Denim, canvas, duck cloth, upholstery fabric, and other heavy materials definitely don’t need interfacing for zipper installation
How to apply interfacing for zipper installation:
- Cut strips of lightweight fusible interfacing 1 to 1.5 inches wide and the length of your zipper opening plus 1 inch
- Position one strip on the wrong side of each seam allowance, centered over where the zipper will be installed
- Fuse the interfacing according to the manufacturer’s instructions (usually 10-15 seconds with a hot iron and steam)
- Allow the fabric to cool completely before handling
- Install the zipper as usual, the interfacing is now a permanent part of the fabric and will be caught in your zipper stitching
Choosing the right interfacing:
Use lightweight fusible interfacing (sometimes called “featherweight” or “sheer weight”) for zipper applications. Heavier interfacing creates too much bulk and stiffness. The interfacing should be barely noticeable in the finished garment, its only job is to prevent stretching and puckering, not to add structure.
Popular interfacing brands for zipper installation include Pellon Featherweight (SF101), Pellon Sheer Weight (906F), and Fusi-Knit. These cost $4-$8 per yard and one yard is enough for dozens of zipper installations since you only need narrow strips.
If you’re not sure whether your fabric needs interfacing, do a test: install a zipper in a scrap piece without interfacing and see if it puckers or waves. If it does, remove the zipper, add interfacing, and reinstall it. This test takes 20 minutes and prevents you from ruining your actual project.
How Much Does It Cost to Have Someone Install a Zipper for Me?
Professional zipper installation costs $15-$35 depending on the garment type, zipper style, and your location, with simple applications (cushion covers, simple skirts) at the lower end and complex installations (jeans fly, jacket separating zipper) at the higher end. Zipper replacement (removing a broken zipper and installing a new one) costs $20-$45 because it requires additional time to remove the old zipper.
Typical professional zipper installation costs:
- Cushion cover or pillow: $15-$20
- Simple skirt or dress (centered zipper): $18-$25
- Pants or jeans (fly zipper): $25-$35
- Jacket or coat (separating zipper): $30-$45
- Invisible zipper in formal dress: $25-$35
- Zipper replacement (any type): Add $5-$15 to the installation cost
Factors that affect cost:
- Location, Urban areas and high-cost-of-living regions charge more; small-town alterations shops charge less
- Fabric difficulty, Delicate fabrics (silk, lace) or thick fabrics (leather, heavy canvas) cost more because they require special handling
- Zipper length, Longer zippers take more time and cost more
- Rush service, Same-day or next-day service typically costs 50-100% more than standard turnaround (usually 3-5 days)
- Shop type, Independent alterations specialists often charge less than dry cleaners offering alterations, but quality varies
Finding a professional for zipper installation:
Look for local alterations shops, tailors, or seamstresses through Google searches, Yelp reviews, or recommendations from fabric stores. Many dry cleaners offer alterations services but may send the work out to a third party, which increases cost and turnaround time. Independent alterations specialists who work from home often offer the best combination of quality and value.
When professional installation makes sense:
- You don’t own a sewing machine or zipper foot
- The garment is expensive or sentimental and you don’t want to risk mistakes
- The zipper installation is complex (jeans fly, invisible zipper) and you’re a beginner
- You need the garment finished quickly and don’t have time to learn the technique
- You’ve attempted the installation and it didn’t turn out well
When DIY installation makes sense:
- You own a sewing machine and want to learn the skill
- You have multiple projects needing zippers (the time investment pays off)
- The project is low-stakes (cushion cover, tote bag) where mistakes aren’t costly
- You enjoy sewing and want to expand your skills
- The cost of professional installation is significant relative to the item’s value
For most sewers, learning to install zippers yourself is worthwhile because it’s a skill you’ll use repeatedly. The first zipper takes 45-60 minutes and might not be perfect, but by the third or fourth zipper, you’ll be installing them in 20-25 minutes with professional-looking results. That skill saves you $15-$35 per project for the rest of your sewing life.
How to Remove and Replace a Broken Zipper
Remove a broken zipper by carefully cutting the stitching that holds it in place with a seam ripper, pulling out all threads, then install a new zipper using the same technique as the original installation. The process takes 45-60 minutes and requires patience to remove the old zipper without damaging the fabric, but results in a garment that functions like new.
Step-by-step zipper replacement:
Step 1: Assess the damage
Determine what’s broken, the slider, the teeth, or the tape. Sometimes only the slider needs replacement (a $2-$5 fix that takes 5 minutes), not the entire zipper. If teeth are missing, the tape is torn, or the zipper won’t stay closed, you need full replacement.
Step 2: Purchase a replacement zipper
Buy a zipper the same length and style as the original. Bring the garment to the fabric store if possible so you can match the zipper exactly. If you can’t find the exact length, buy one slightly longer, you can shorten it by sewing across the teeth to create a new bottom stop.
Step 3: Remove the old zipper stitching
Use a seam ripper to cut the stitching that holds the zipper in place. Work from the right side of the garment, cutting every 3-4 stitches along the entire stitching line on both sides of the zipper. Turn the garment inside out and pull the bobbin threads to remove the stitching. Remove all thread bits.
Step 4: Remove the zipper
Once all stitching is removed, the zipper should pull free from the garment. If there’s basting or additional stitching holding the zipper tape to the seam allowances, remove that as well. Examine the fabric for damage, if the original zipper tore the fabric, you may need to patch or reinforce the area before installing the new zipper.
Step 5: Prepare the opening
Press the seam allowances flat and open. If the fabric has stretched or distorted from the broken zipper, apply strips of lightweight fusible interfacing to the wrong side of each seam allowance to stabilize the area and prevent future problems.
Step 6: Install the new zipper
Follow the standard zipper installation process for your zipper type (centered, lapped, or invisible). Position the new zipper exactly where the old one was, baste it in place, then machine stitch it using a zipper foot. Try to position your new stitching lines slightly offset from the old needle holes to avoid sewing through weakened fabric.
Step 7: Test and finish
Test the new zipper by opening and closing it several times. It should operate smoothly without catching fabric or sticking. Press the zipper area lightly from the right side using a pressing cloth.
Common zipper replacement challenges:
- Old stitching difficult to remove, If the original stitching was done with heavy-duty thread or very small stitches, removal takes longer. Work patiently and avoid cutting the fabric.
- Fabric damaged around old zipper, If the fabric is torn or has large holes from the old stitching, you may need to patch it with a small piece of matching fabric fused to the wrong side before installing the new zipper.
- Can’t find matching zipper, If the original zipper was a unique color or style, consider using a contrasting zipper as a design element, or dye a white zipper to match your fabric using fabric dye.
- Zipper was installed with special technique, Some garments use industrial zipper installation methods that are difficult to replicate at home. If you can’t figure out how the original zipper was installed, take the garment to a professional.
Zipper replacement is an excellent way to extend the life of garments that are otherwise in good condition. A broken zipper doesn’t mean the end of a favorite jacket or pair of pants, with 45-60 minutes of work and a $3-$8 zipper, you can make the garment functional again. This repair is especially worthwhile for expensive or well-made garments where the fabric and construction are still in excellent condition.
Frequently Asked Questions
Can I install a zipper without a zipper foot?
You can install a zipper without a zipper foot by using a regular presser foot and stitching farther from the teeth (3/8 to 1/2 inch), but the result won’t look as professional and the zipper may not function as smoothly because the fabric won’t hold the tape firmly. A zipper foot costs $8-$15 and dramatically improves results, making it a worthwhile investment for anyone installing more than one zipper.
How long should a zipper be for a 9-inch opening?
Choose a zipper where the teeth measure 9 inches, not the entire tape length, zippers are sized by teeth length, and the tape extends beyond the teeth by 1-2 inches on each end. For a 9-inch opening, buy a 9-inch zipper, and the total tape length will be approximately 11-13 inches depending on the manufacturer.
Can I shorten a zipper that’s too long?
Yes, shorten a closed-bottom zipper by sewing across the teeth at your desired length using a tight zigzag stitch or multiple straight stitches to create a new bottom stop, then trim the excess tape 1/2 inch below your stitching. This works for metal and plastic coil zippers but not for separating zippers (jackets) where the bottom mechanism can’t be replicated.
Why does my zipper keep unzipping after I install it?
A zipper that unzips on its own usually indicates the slider is worn out or the wrong size for the teeth, not an installation problem. Replace the slider (available at fabric stores for $2-$5) or replace the entire zipper if the slider replacement doesn’t solve the problem. Occasionally, fabric tension pulling on the zipper can cause it to unzip, this happens when the garment is too tight or the zipper is under constant stress.
What’s the difference between a #3, #5, and #7 zipper?
The number indicates the width of the zipper teeth when closed, measured in millimeters, a #3 zipper has 3mm teeth (lightweight for dresses), #5 has 5mm teeth (medium-weight for pants and jackets), and #7 has 7mm teeth (heavy-duty for outerwear and bags). Choose the zipper weight based on your fabric weight and the stress the zipper will endure.
Can I install a zipper in knit fabric?
Yes, install zippers in knit fabric by first stabilizing the zipper area with lightweight fusible interfacing to prevent stretching, then using a ballpoint needle and slight zigzag stitch (or narrow stretch stitch) instead of a straight stitch. The interfacing prevents the knit from stretching around the zipper while allowing the rest of the garment to maintain its stretch. For more on working with knits, see our guide to knit fabric sewing.
How do I install a zipper in a bag with thick fabric?
Install zippers in thick fabrics (canvas, upholstery fabric, leather) using a heavy-duty needle (size 100/16 or 110/18), strong thread (topstitching thread or heavy-duty polyester), and a longer stitch length (3-3.5mm) to accommodate the fabric thickness. Reduce presser foot pressure if your machine has that adjustment, and sew slowly to avoid breaking needles. A walking foot helps feed thick layers evenly.
What do I do if my needle hits the zipper teeth?
If your needle hits the zipper teeth, stop immediately, continuing will break the needle or damage the teeth. Reposition your stitching line farther from the teeth (1/4 inch minimum), or move the zipper pull out of the way if you’re hitting the slider. If you’re consistently hitting the teeth, your zipper foot may not be positioned correctly, check your machine’s manual for proper zipper foot installation.
Can I use a zipper that’s shorter than my opening?
Yes, use a zipper shorter than your opening by sewing the opening closed above and below the zipper, this is common in cushion covers and bags where the zipper doesn’t need to extend the full width. For garments, the zipper should be long enough to allow the garment to fit over your body, which usually means the zipper needs to be at least 75% of the opening length.
How do I install a separating zipper in a jacket?
Install a separating zipper (one that comes completely apart at the bottom) by attaching each side of the zipper to its corresponding fabric edge separately, starting at the bottom and working up, then topstitching from the right side. Separating zippers require more precision than closed-bottom zippers because both sides must align perfectly at the bottom or the zipper won’t connect. This is an intermediate-level technique best attempted after you’ve successfully installed several closed-bottom zippers.
Why is my zipper wavy after installation?
A wavy zipper indicates the fabric stretched during installation or the zipper tape was sewn under tension. Fix it by removing the zipper, applying interfacing to the seam allowances for stability, then reinstalling the zipper while being careful not to pull or push the fabric as you sew, let the machine feed the fabric naturally. Pressing the seam thoroughly before installation also prevents waviness.
Can I install a zipper in a garment that wasn’t designed for one?
Yes, add a zipper to a garment that wasn’t designed for one by creating a seam where you want the zipper (cutting the fabric and adding seam allowances), then installing the zipper in that seam. This is common when converting pullover garments to front-opening garments or adding zipper pockets to bags. Plan carefully and test on scrap fabric first because you’re permanently altering the garment.
Conclusion
Installing a regular zipper transforms from intimidating to achievable once you understand the core technique: stabilize your fabric, position the zipper carefully, baste it securely, then stitch close to the teeth with a zipper foot. Whether you’re working on your first cushion cover or tackling a garment zipper, the same principles apply, preparation and precision matter more than speed.
Start with a centered zipper in a simple project like a cushion cover or zippered pouch. Use medium-weight cotton fabric and a contrasting zipper color so you can see your stitching lines clearly. Practice the technique on scrap fabric first, and don’t skip the basting step even though it feels tedious, those 5 minutes of hand-basting prevent 30 minutes of fixing a crooked zipper.
Your next steps:
- Gather your tools, Invest in a quality zipper foot if you don’t have one; it’s the single most important tool for zipper success
- Choose a beginner-friendly project, Cushion covers, simple tote bags, or zippered pouches are ideal first zipper projects
- Buy the right zipper, Match the zipper type and weight to your fabric and project requirements
- Practice on scraps, Spend 20 minutes installing a practice zipper before working on your actual project
- Work slowly and carefully, Zipper installation isn’t a race; taking time to position and baste properly ensures success
- Learn from mistakes, If your first zipper isn’t perfect, analyze what went wrong and adjust your technique for the next one
Remember that every experienced sewer has installed crooked, puckered, or otherwise imperfect zippers. The skill develops through practice, and each zipper you install teaches you something new about fabric behavior, tension control, and precision stitching. By your third or fourth zipper, you’ll wonder why it ever seemed difficult.
For additional sewing guidance, explore our resources on seam allowances, presser feet, and sewing machine threading. Each skill builds on the others, creating a foundation for confident, creative sewing.