


A crooked hem can ruin an otherwise perfect dress, but achieving an even hemline is simpler than most sewers think. To hem a dress evenly, you need to measure the desired length from the floor up (not from the waistline down), mark the hemline while the dress is on the wearer or dress form, and use consistent folding and stitching techniques around the entire circumference. The key is working from a fixed reference point, the floor, rather than trusting the original hem or fabric edge.
Key Takeaways
- Measure from the floor up, not from the waistline down, to account for body shape and fabric drape
- Mark the hemline with the dress on a body or dress form to ensure the fabric hangs naturally before measuring
- Use a hem gauge or ruler to maintain consistent fold depth all the way around the dress
- Press before and after stitching to set sharp, even folds that prevent waviness
- Choose your stitch based on fabric: slip stitch for invisible hems on wovens, blind hem stitch for knits, straight stitch for casual fabrics
- Hem tape and fusible webbing work for no-sew or temporary hems but won’t hold up as well as stitched hems over time
- Circular and flowy dresses require hanging for 24 hours before hemming to let bias-cut fabric settle
- Common mistakes include measuring from the waist, skipping the press, and pulling thread too tight
What Does Hemming a Dress Mean?
Hemming a dress means folding and securing the raw bottom edge of the fabric to create a clean, finished edge at the desired length. The hem prevents fraying, adds weight to help the dress hang properly, and gives the garment a polished appearance. Most dress hems involve folding the fabric up once or twice (depending on the hem allowance) and stitching it in place either by hand or machine.
A proper hem is invisible or nearly invisible from the right side of the fabric. The fold should be even in depth all the way around, and the stitches should be secure without puckering or distorting the fabric. Different hem types, rolled, blind, double-fold, or faced, suit different fabrics and dress styles, but all share the goal of creating a straight, level finished edge.
For beginners, hemming is one of the most practical skills to master because it allows you to customize ready-to-wear clothing and finish homemade garments professionally.
How to Measure Hem Length Evenly All Around
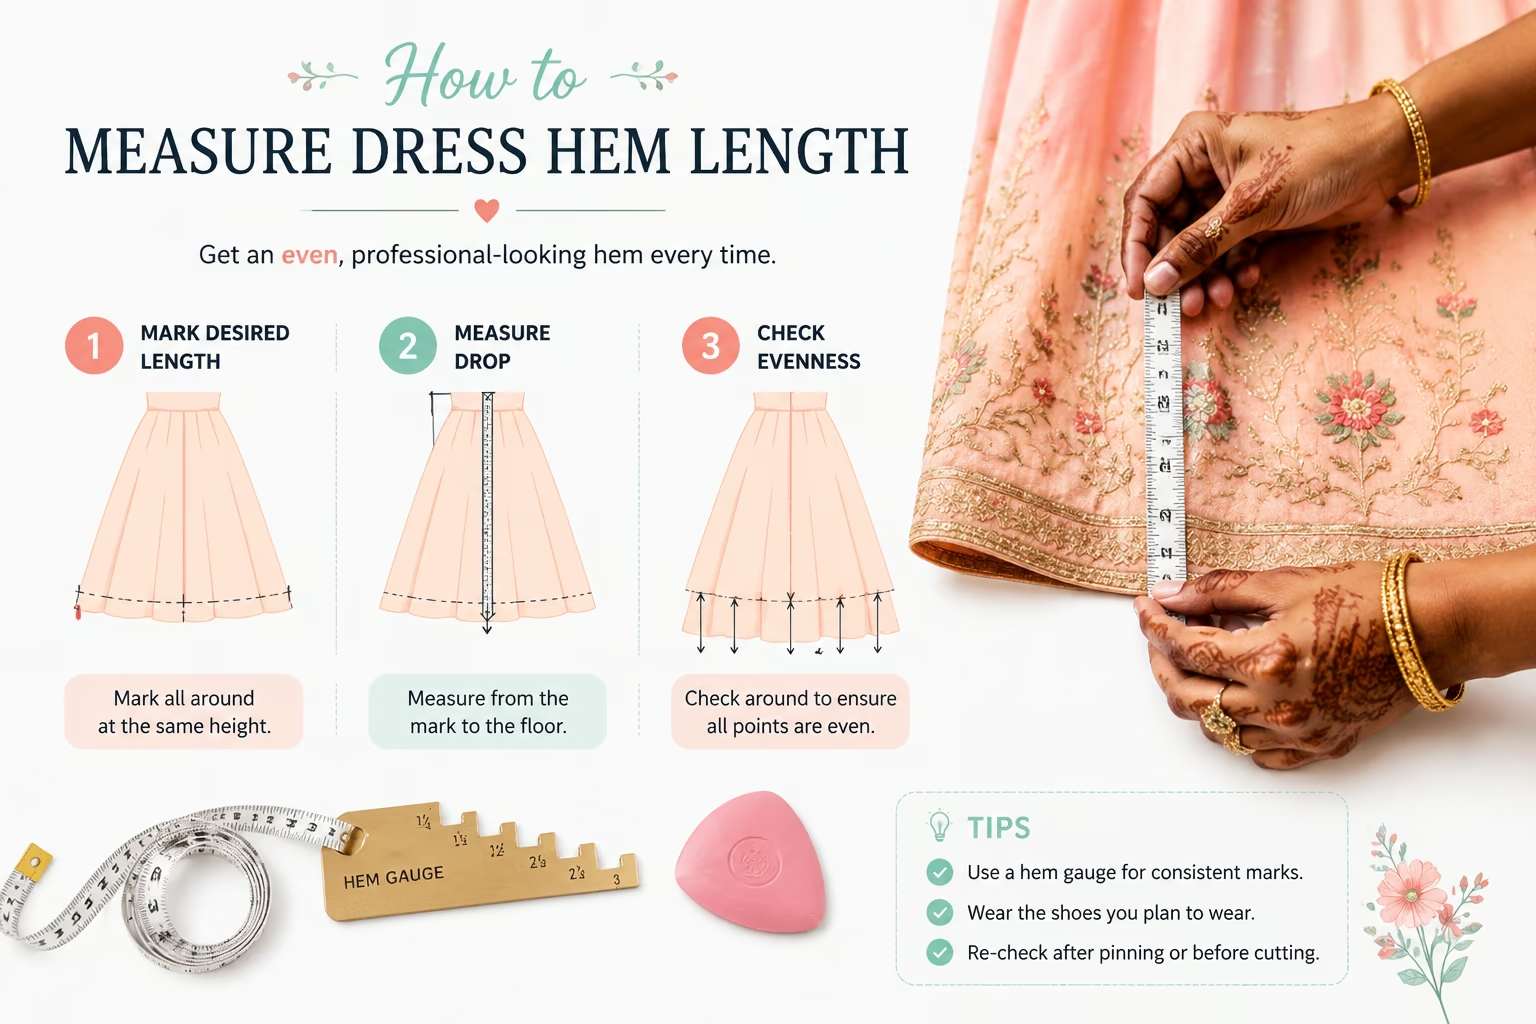
Measuring hem length evenly requires working from the floor up, not the waistline down. Put the dress on the wearer (or a dress form that matches the wearer’s measurements) and have them wear the shoes they’ll pair with the dress. Stand the wearer on a flat, level surface.
Step-by-step measuring process:
- Use a yardstick or hem marker held vertically from the floor
- Decide the finished length (for example, 2 inches above the floor)
- Mark that measurement with tailor’s chalk or pins at multiple points around the entire hem, front, back, and both sides
- Space marks 2-3 inches apart to ensure accuracy around curves and seams
- Connect the marks with a chalk line or by folding the fabric up to the marked points
The reason you measure from the floor is that bodies are asymmetrical and fabric drapes differently over hips, thighs, and curves. Measuring from the waist down will replicate any unevenness in the original cut or the wearer’s body, resulting in a crooked hem.
Common mistake: Measuring on a hanger or flat surface. The fabric must hang naturally under its own weight to reveal the true hemline.
What Tools Do You Need to Hem a Dress Evenly?
To hem a dress evenly, you need measuring tools, marking tools, pressing equipment, and sewing supplies. Having the right tools makes the difference between a professional finish and a wavy, uneven hem.
Essential tools:
- Measuring tape or yardstick for marking hem length from the floor
- Hem gauge (a small ruler with a sliding marker) to measure consistent fold depth
- Tailor’s chalk or fabric marking pen that washes out or fades
- Straight pins or hem clips to hold the fold in place
- Iron and ironing board to press sharp creases
- Hand-sewing needle and thread or a sewing machine, depending on your method
- Fabric scissors to trim excess hem allowance if needed
- Seam ripper to remove the old hem if you’re altering an existing dress
Optional but helpful:
- Dress form in the wearer’s size for hands-free marking
- Hem marker tool (a stand with a chalk puffer or pin dispenser at adjustable heights)
- Blind hem foot for your sewing machine if you’re machine-hemming
If you’re just starting out, you likely already own most of these items. A basic sewing machine and a good iron are the two most important investments for consistent, professional-looking hems.

【Quantity & Packaging Notice】 2 Rolls Included in 1 Pack: Contains 1 roll of 1/4" x 49ft and 1 roll of 1/2" x 49ft (Total 98FT). Note: Both rolls are securely packed together in a single package—please check the inner layer if you think any roll is missing. Specifically designed for clothing repair, folding, and crafting. Whether used for temporary or daily repairs, these sizes ensure efficient and convenient use.
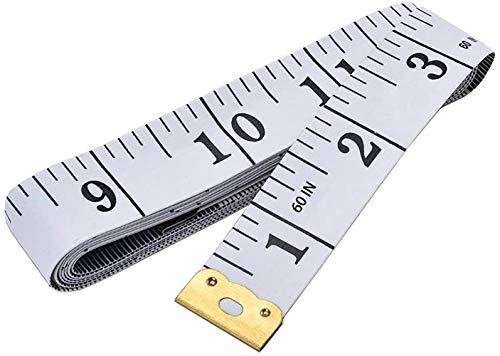
Measuring range: 0 to 60 inches and 0 to 150 centimeters. There is a centimeter scale on the back, which is accurately printed in inches and centimeters. Both sides can be measured according to your requirements. You can put one in your pocket or backpack without taking up too much space
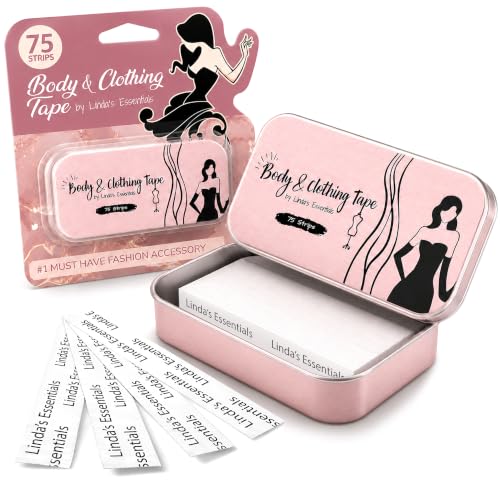
KEEP YOUR CLOTHES IN PLACE: Take control of your clothes with our premium double sided tape for clothes. Designed to handle fashion emergencies like sagging necklines or slipping straps, this clothing tape for women double sided provides a secure hold for your clothing. Experience comfort and confidence in any outfit, knowing your clothes will stay perfectly in place, whether used as dress tape or a discreet boob tape alternative.
How to Hem a Dress Evenly: Step-by-Step Process
Hemming a dress evenly involves careful preparation, accurate marking, and consistent stitching. Follow this process whether you’re hemming by hand or machine.
Step 1: Prepare the dress
Try the dress on with the shoes you’ll wear. Mark the desired finished length from the floor up, placing pins or chalk marks every 2-3 inches around the entire hem.
Step 2: Remove the dress and lay it flat
Connect the marks with a chalk line if needed. Measure the hem allowance (the fabric between your marked line and the raw edge). Most hems need 1-2 inches of allowance; trim excess fabric if you have more than 2.5 inches.
Step 3: Fold and press the hem
For a double-fold hem, fold the raw edge up ½ inch and press. Then fold again to your marked line and press firmly. Use a hem gauge to check that the fold depth is consistent all the way around.
Step 4: Pin the hem in place
Insert pins perpendicular to the fold, spacing them 2-3 inches apart. Check that the fold is even by measuring from the fold to the floor at several points.
Step 5: Stitch the hem
Choose your stitch method (see sections below). Keep your stitches even and avoid pulling the thread tight, which causes puckering.
Step 6: Press the finished hem
A final press sets the stitches and removes any waviness. Use a pressing cloth on delicate fabrics to prevent shine.
Decision rule: If your dress has a lining, hem the lining ½ inch shorter than the outer fabric so it doesn’t peek out at the bottom.

Value Pack:GDMINLO offers a 3-pack of retractable, automatic button tape measures and a soft folding tape, each 60 inch/150 cm long, ensuring precision in inches and centimeters for various applications.
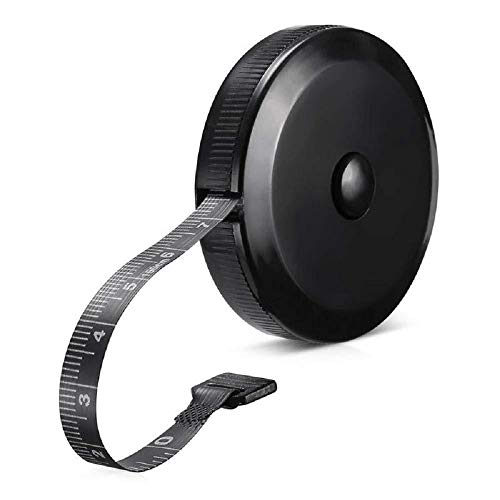
Package Include:1 Pack Soft Retractable Black Dual Sided Tape Measure Body Measuring Tape Set, Dual sided, 150cm/60inch in length, large and clear markings in both Inches and CM for easier reading, Retractable black measuring tape size 2 x 2 x 0.5 inches, weight 0.02 KG/0.7 OZ
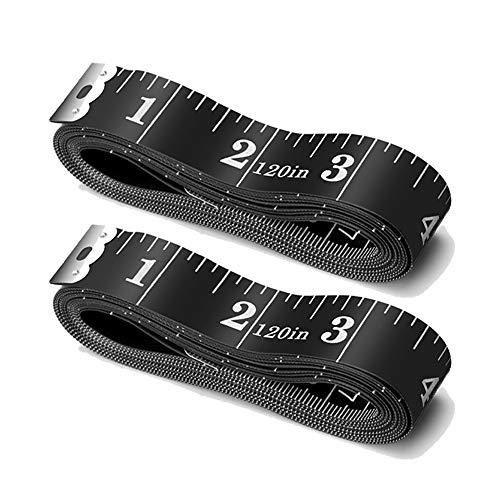
Ultra Long Measuring Range: Different than normal 60 Inch soft tape measure, ours are 120 Inch long, which can meet more needs and get you out of the trouble of insufficient length
Best Stitch for Hemming a Dress by Hand
The slip stitch (also called a blind stitch) is the best hand stitch for hemming a dress because it’s nearly invisible from the right side and provides a secure, flexible hold. This stitch works well on woven fabrics like cotton, linen, silk, and wool.
How to sew a slip stitch:
- Thread a hand-sewing needle with thread that matches your fabric
- Knot the end and hide the knot inside the folded hem
- Catch 1-2 threads of the dress fabric (not the full thickness)
- Slide the needle through the folded edge of the hem for about ¼ inch
- Repeat, spacing stitches ¼ to ½ inch apart
- Keep tension even, don’t pull tight
The slip stitch is ideal for formal dresses, delicate fabrics, and any garment where you want the hem to be invisible. It takes longer than machine stitching but gives you complete control over tension and stitch placement.
Alternative hand stitches:
- Catch stitch (also called herringbone stitch): Best for knit fabrics and stretchy materials because it allows some give
- Whip stitch: Quick and easy but visible; suitable for casual garments or inside hems that won’t show
For more guidance on hand sewing techniques, beginners can practice on scrap fabric before working on a finished dress.

Hem a Dress with a Sewing Machine vs By Hand
Machine hemming is faster and more durable, while hand hemming is more invisible and better for delicate fabrics. Choose based on the dress fabric, your skill level, and how much time you have.
Machine hemming advantages:
- Speed: A machine hem takes 5-10 minutes versus 30-60 minutes by hand
- Strength: Machine stitches withstand washing and wear better than hand stitches
- Consistency: Even stitch length and tension throughout
- Best for: Casual dresses, sturdy fabrics (denim, canvas, heavy cotton), everyday wear
Machine hemming methods:
- Straight stitch: Simple and visible; use a matching thread color
- Blind hem stitch: Uses a special presser foot to create nearly invisible stitches; requires practice
- Zigzag or stretch stitch: For knit fabrics that need to stretch
Hand hemming advantages:
- Invisibility: Properly done slip stitches are completely invisible from the right side
- Control: You can adjust tension and stitch placement for curves and tricky fabrics
- Portability: No machine required; hem anywhere
- Best for: Formal dresses, delicate fabrics (silk, chiffon, lace), tailored garments, heirloom sewing
Decision rule: Use machine hemming for everyday cotton or linen dresses and children’s clothing. Use hand hemming for special-occasion dresses, sheer fabrics, and any garment where the hem will be highly visible.
If you’re new to machine hemming, check your sewing machine’s feed dogs to ensure they’re feeding the fabric evenly, which prevents wavy hems.

The metal guide in the center of the blind hem stitch foot keeps the fabric snugly fit against the foot for accuracy and helps to prevent unnecessary slipping. Besides, the seam width changes with it.

Precise Stitching: The blind hem stitch foot features a metal guide in the center, ensuring a snug fit of the fabric against the foot for accurate stitching. This metal guide also helps prevent unnecessary slipping, allowing you to maintain control and achieve precise results. Additionally, the seam width can be easily adjusted using the foot, providing versatility for different sewing projects.

ACHIEVE PROFESSIONAL-QUALITY HEMS: The SINGER Blind Hem Presser Foot ensures neatly finished, invisible hems, giving your garments a high-end, professional look. Ideal for projects where visible stitching would detract from the design.
How to Hem a Dress Without a Sewing Machine
You can hem a dress without a sewing machine using hand stitches, fusible hem tape, or fabric glue. Hand stitching gives the most professional and durable result, while no-sew methods work for temporary fixes or non-washable garments.
Hand-stitching method (most durable):
Follow the slip stitch instructions above. This method works on all fabrics and lasts through repeated washing and wearing. Budget 30-60 minutes depending on the dress circumference.
Fusible hem tape method (no-sew):
- Fold and press the hem to the desired depth
- Insert a strip of fusible hem tape (like Stitch Witchery or HeatnBond) between the folded layers
- Press with a hot iron for 10-15 seconds, following the product instructions
- Let cool completely before moving the fabric
Fusible tape creates a permanent bond on most fabrics but may not hold up to frequent washing. It works best on cotton, polyester, and blends. Avoid using it on delicate fabrics like silk or sheer chiffon, as the adhesive can create visible stiffness or discoloration.
Fabric glue method (temporary):
Apply a thin line of fabric glue (like Aleene’s Fabric Fusion) inside the folded hem. Press and let dry for 24 hours. This method is best for costume hems or temporary alterations. The bond weakens with washing.
Decision rule: If the dress will be washed regularly, hand-stitch the hem. If it’s a one-time wear (costume, photo shoot) or dry-clean only, fusible tape is a quick alternative.
Can You Use Hem Tape Instead of Sewing a Dress?
Yes, you can use hem tape instead of sewing, but it’s best for temporary hems, delicate fabrics you don’t want to puncture with a needle, or garments that won’t be washed frequently. Fusible hem tape bonds fabric layers with heat-activated adhesive, creating a no-sew hem in minutes.
When hem tape works well:
- Costume or special-occasion dresses worn once or twice
- Dry-clean-only garments where washing won’t stress the bond
- Quick alterations when you need a hem in under 10 minutes
- Delicate fabrics like organza or tulle where hand stitching might be visible
When hem tape fails:
- Frequent washing: The adhesive weakens over time, especially in hot water
- Heavy fabrics: Denim, canvas, and thick wool are too heavy for most hem tapes to hold securely
- High-stress areas: Active wear or children’s clothing that gets pulled and stretched
- Sheer fabrics: The tape can create a visible line or stiffness
How to apply hem tape correctly:
- Choose a hem tape width that matches your hem depth (common widths: ¼ inch, ½ inch, ¾ inch)
- Fold and press the hem sharply before inserting the tape
- Use a hot, dry iron (no steam) and press firmly for the time specified on the package
- Let the fabric cool completely before handling, the bond strengthens as it cools
Common mistake: Moving the fabric before the adhesive cools, which breaks the bond. Always let the hem sit undisturbed for at least 5 minutes after pressing.
How to Hem Different Dress Fabrics Like Chiffon or Denim
Different fabrics require different hemming techniques to prevent puckering, fraying, or visible stitches. Adjust your method based on the fabric weight, weave, and stretch.
Chiffon, silk, and sheer fabrics:
These delicate fabrics show every stitch and pucker easily. Use a rolled hem (a very narrow hem, about ⅛ inch) or a hand-rolled hem for the most invisible finish. Use fine thread (silk or polyester), a sharp needle (size 60/8 or 70/10), and short stitch length (1.5-2mm) if machine sewing. Press gently with low heat and a pressing cloth.
Denim and heavy cotton:
Thick fabrics need a sturdy hem. Use a double-fold hem with a ½-inch first fold and a 1-inch second fold. Sew with a denim needle (size 90/14 or 100/16) and heavy-duty thread. Topstitch with a longer stitch length (3-3.5mm) for a casual look, or use a blind hem stitch for a more polished finish. Press with high heat and steam.
Knit and stretchy fabrics:
Knits need hems that stretch with the fabric. Use a twin needle for a professional double-row topstitch, or sew a zigzag stitch or stretch stitch by hand or machine. A catch stitch by hand allows the most stretch. Use a ballpoint needle (size 70/10 or 80/12) to avoid snagging the fibers. Don’t pull the fabric as you sew, which causes waviness.
Linen and medium-weight wovens:
These fabrics hem easily with standard techniques. Use a double-fold hem or single-fold hem with a slip stitch by hand or a blind hem stitch by machine. Press thoroughly with high heat and steam for crisp folds.
Satin and slippery fabrics:
Pin generously (every 1-2 inches) to prevent shifting. Use a slip stitch by hand or a straight stitch by machine with a walking foot to feed the fabric evenly. Press with medium heat and a pressing cloth to avoid shine.
Decision rule: If the fabric frays easily (linen, cotton), use a double-fold hem to encase the raw edge. If it doesn’t fray (knits, felt), a single-fold hem is sufficient.
How to Hem a Flowy or Circular Dress Evenly
Flowy and circular dresses have bias-cut or curved hemlines that stretch and distort easily, making them challenging to hem evenly. The key is to let the dress hang for 24-48 hours before hemming so the bias-cut fabric can settle and stretch naturally under its own weight.
Step-by-step for circular hems:
- Hang the dress on a hanger or dress form for 24-48 hours in a humid environment (like a bathroom after a shower) to let the fabric relax and stretch
- Try on the dress and mark the desired hem length from the floor up, placing pins every 1-2 inches around the entire hem (circular hems need more frequent marks than straight hems)
- Trim the hem allowance to a consistent 1-1.5 inches, following the curved edge
- Fold and press the hem in small sections (6-8 inches at a time) rather than trying to press the entire circle at once
- Use a narrow hem (½ inch or less) to reduce bulk on the curves
- Hand-stitch with a slip stitch or use a narrow zigzag stitch by machine to allow some stretch
Why circular hems are tricky:
Circular and bias-cut fabrics stretch more in some areas than others because the fabric grain runs diagonally. If you hem immediately after cutting, the fabric will continue to stretch after hemming, creating an uneven, wavy hemline.
Common mistake: Pulling the fabric taut as you sew, which causes the hem to ripple when the fabric relaxes. Let the fabric feed naturally through the machine or rest in your hand without tension.
For very full circle skirts, consider a rolled hem or lettuce-edge hem (for knits) to minimize bulk and weight at the hem.
Why Is My Dress Hem Uneven After Sewing?
An uneven hem after sewing usually results from measuring incorrectly, pulling the fabric while stitching, or skipping the pressing step. The fabric may also have stretched or shifted during sewing if it wasn’t pinned securely.
Common causes and fixes:
1. Measured from the waist instead of the floor
The waistline isn’t level on most bodies, so measuring down from the waist replicates that unevenness. Always measure up from the floor.
2. Pulled the thread too tight
Tight stitches cause the fabric to pucker and draw up, making the hem shorter in some areas. Re-sew with looser tension.
3. Didn’t press before stitching
Unpressed folds shift as you sew. Always press the fold sharply before pinning and stitching.
4. Fabric stretched while sewing
Lightweight or bias-cut fabrics stretch easily. Use a walking foot or check your feed dogs to ensure even feeding. Don’t pull the fabric through the machine.
5. Pinned on a flat surface instead of on the body
Fabric drapes differently when hanging versus lying flat. Always mark the hem while the dress is on a body or dress form.
6. Skipped the 24-hour hang for bias-cut fabrics
Circular and bias-cut dresses continue to stretch after cutting. Let them hang before hemming.
How to fix an uneven hem:
Put the dress back on and re-mark the hem from the floor up. Remove the old stitches with a seam ripper, re-fold and press, then re-stitch. If the hem is only slightly uneven (less than ¼ inch difference), you can often fix it by pressing and steaming the fabric to relax the tight areas.
How to Fix a Wavy Hem on a Dress
A wavy hem happens when the fabric stretches unevenly during sewing, when the hem allowance is too wide for the fabric weight, or when the fabric wasn’t stabilized properly before stitching. Fixing it requires re-pressing, adjusting tension, or re-cutting the hem.
Quick fixes for minor waviness:
- Press with steam: Lay the hem flat on an ironing board and press with heavy steam, gently pulling the fabric straight as you press. Let it cool completely before moving.
- Ease-stitch the hem: Sew a line of long basting stitches (4-5mm) just inside the hem fold, then gently pull the bobbin thread to gather the excess fabric slightly. Distribute the gathers evenly and press.
Permanent fixes for severe waviness:
- Remove the hem with a seam ripper
- Re-mark the hemline from the floor up while the dress is on a body or dress form
- Trim the hem allowance to 1 inch or less (wide hem allowances are more prone to waviness)
- Use interfacing or stay tape: For very lightweight or bias-cut fabrics, iron a strip of lightweight fusible interfacing or sew a strip of twill tape along the hem fold line to stabilize it before folding and stitching
- Sew with a walking foot or reduce presser foot pressure to prevent the fabric from stretching as it feeds through the machine
Prevention tips:
- Always press the hem fold before stitching
- Use a shorter stitch length (2-2.5mm) for lightweight fabrics
- Don’t pull the fabric as you sew, let the feed dogs do the work
- For knits and stretchy fabrics, use a stretch stitch or zigzag instead of a straight stitch
If you’re experiencing fabric feeding problems that contribute to wavy hems, check your machine’s tension and feed dog settings.
Common Mistakes When Hemming a Dress at Home
Even experienced sewers make hemming mistakes that result in uneven, puckered, or visible hems. Avoiding these common errors will improve your results immediately.
1. Measuring from the waistline down
This replicates body asymmetry and fabric irregularities. Always measure from the floor up.
2. Skipping the press
Unpressed folds shift during sewing. Press before pinning, press after pinning, and press after stitching.
3. Using the wrong thread
Thread that’s too thick creates visible stitches; thread that’s too thin breaks easily. Match thread weight to fabric weight, and choose a color that blends.
4. Pulling the fabric while sewing
Let the machine feed the fabric naturally. Pulling causes stretching and waviness.
5. Hemming immediately after cutting
Bias-cut and circular fabrics need 24-48 hours to settle. Hang the dress before hemming.
6. Making the hem allowance too wide
Wide hems (more than 2 inches) add bulk and are harder to fold evenly. Trim excess fabric to 1-2 inches.
7. Not testing the stitch first
Always test your stitch length, tension, and needle on a scrap of the same fabric before sewing the actual hem.
8. Forgetting to finish the raw edge
If you’re using a single-fold hem on a fabric that frays, finish the raw edge with a zigzag stitch, serger, or pinking shears before folding.
9. Sewing with dull needles
Dull needles snag fabric and create uneven stitches. Change your needle after every 8-10 hours of sewing or before starting a new project.
10. Not checking the hem from the right side
Flip the dress to the right side frequently as you work to check for puckers, visible stitches, or uneven folds.
How Much Does It Cost to Get a Dress Hemmed Professionally?
Professional dress hemming typically costs $15-$50 depending on the fabric, hem type, and dress style. Simple straight hems on casual dresses cost less, while complex hems on formal gowns or delicate fabrics cost more.
Average professional hemming costs (2026):
- Basic straight hem (unlined cotton or polyester dress): $15-$25
- Lined dress hem (both layers hemmed): $25-$35
- Formal gown or wedding dress hem: $40-$75
- Circular or handkerchief hem: $35-$60
- Hem with lace or beading: $50-$100+
- Rush service (under 1 week): Add $10-$20
Prices vary by location, with urban tailors charging more than suburban or rural alterations shops. Bridal shops and specialty boutiques charge premium rates compared to independent tailors.
When professional hemming is worth it:
- Expensive or sentimental garments (wedding dresses, heirloom pieces)
- Complex fabrics (beaded, sequined, or multi-layered gowns)
- Time constraints (you need the dress hemmed in 1-2 days)
- Lack of equipment (you don’t own a sewing machine or proper tools)
When to hem it yourself:
- Casual everyday dresses where a less-than-perfect hem is acceptable
- Practice and skill-building (hemming is one of the best ways to improve sewing skills)
- Budget constraints (DIY hemming costs only the price of thread)
For comparison, if you’re considering whether to invest in sewing equipment, check out how much sewing machine repair costs to understand the full cost of maintaining your tools.
Is Hemming a Dress Good for Beginners or Do I Need Experience?
Hemming a dress is an excellent beginner project because it teaches fundamental sewing skills, measuring, marking, pressing, and stitching, without requiring complex pattern reading or garment construction. Most beginners can successfully hem a simple dress after practicing on scrap fabric for 30-60 minutes.
Why hemming is beginner-friendly:
- Straightforward process: The steps are simple and repetitive
- Immediate results: You can see and wear your finished project right away
- Low-stakes practice: Mistakes are easy to fix by removing stitches and re-sewing
- Builds core skills: Pressing, measuring, and stitch control apply to all future sewing projects
- No pattern required: You’re working with an existing garment, not cutting and assembling pieces
Skills you’ll develop:
- Accurate measuring and marking
- Consistent folding and pressing
- Even hand stitches or machine stitches
- Fabric handling and tension control
Start with easy fabrics:
Begin with a cotton or linen dress with a straight hem. Avoid slippery fabrics (silk, satin), stretchy knits, or circular hems until you’ve mastered basic straight hems on stable woven fabrics.
Practice first:
Before hemming your actual dress, practice on scrap fabric or an old pillowcase. Fold, press, pin, and stitch a practice hem to get comfortable with the process and test your stitch tension.
When to seek help:
If you’re hemming a valuable or sentimental dress (wedding gown, vintage piece), consider practicing on a similar fabric first or having a professional do the work. For everyday dresses, dive in, the worst that can happen is you’ll need to remove stitches and try again.
For more beginner guidance, explore our sewing for beginners resources.
FAQ
How long does it take to hem a dress?
Hand-hemming a dress takes 30-60 minutes depending on the circumference and fabric. Machine hemming takes 10-20 minutes. Add 15-30 minutes for measuring, marking, and pressing.
Can you hem a dress that’s too short?
You can’t add length to a dress that’s already hemmed unless there’s excess hem allowance folded up inside. Let down the existing hem, press out the crease, and re-hem at the maximum length. If there’s no hem allowance left, you can add a contrasting fabric band, lace trim, or ruffle to extend the length.
Do you hem a dress before or after adding a zipper?
Hem after installing the zipper and completing all other construction. The dress needs to hang naturally with all seams and closures in place before you can accurately mark the hem length.
What’s the difference between a hem and a seam?
A hem is a folded and stitched edge that finishes the bottom of a garment. A seam joins two pieces of fabric together. Hems are visible on the outside of the garment (though the stitches may be invisible), while seams are usually hidden inside.
Can you use a glue gun to hem a dress?
Hot glue guns are not recommended for hemming because the glue is stiff, visible, and doesn’t hold up to washing. Use fabric glue or fusible hem tape instead if you need a no-sew option.
How do you hem a dress with a curved hemline?
Mark the hem while the dress is on a body or dress form, following the curve. Use a narrow hem (½ inch or less) to reduce bulk. Sew in small sections, easing the fabric around the curves. Consider a hand-stitched slip stitch for the most control.
Should the hem be the same width all the way around?
Yes, the folded hem depth should be consistent all the way around for an even appearance. Use a hem gauge to measure and maintain the same fold depth at every point.
What do you do if you cut the hem too short?
If you cut too much fabric off, you can add length by sewing on a contrasting band, decorative trim, lace, or a ruffle. Another option is to embrace the shorter length and hem it cleanly at the new length.
Can you hem a dress without pins?
Yes, you can use fabric clips, wonder clips, or basting stitches instead of pins. Some sewers prefer clips because they don’t distort the fabric or create pin holes in delicate materials.
How do you hem a dress with a lining?
Hem the lining and the outer fabric separately. The lining should be ½ inch shorter than the outer fabric so it doesn’t peek out at the bottom. Fold and stitch each layer independently.
What’s a blind hem and when should you use it?
A blind hem is a nearly invisible hem created with a special stitch that catches only a few threads of the outer fabric. Use it on formal dresses, tailored garments, and any project where you want the hem to be as invisible as possible. It requires a blind hem presser foot for machine sewing.
Can you hem a knit dress the same way as a woven dress?
No, knit dresses need hems that stretch with the fabric. Use a zigzag stitch, stretch stitch, twin needle, or a hand-sewn catch stitch instead of a straight stitch. Don’t pull the fabric as you sew.
Conclusion
Hemming a dress evenly is a foundational sewing skill that transforms ill-fitting garments into perfectly tailored pieces. The key to success lies in measuring from the floor up, marking the hem while the dress hangs naturally, pressing thoroughly at every stage, and choosing the right stitch for your fabric type. Whether you’re hand-stitching a formal gown or machine-hemming a casual cotton dress, the principles remain the same: accurate measuring, consistent folding, and controlled stitching.
Start with simple straight hems on stable woven fabrics to build your confidence, then progress to more challenging projects like circular hems and delicate materials. Remember that even experienced sewers make mistakes, the beauty of hemming is that you can always remove the stitches and try again. With practice, you’ll develop the muscle memory and eye for detail that make hemming second nature.
Next steps:
- Gather your tools: measuring tape, hem gauge, tailor’s chalk, pins, iron, and thread
- Practice on scrap fabric to test your stitch tension and technique
- Choose a simple dress with a straight hem and stable fabric for your first project
- Measure carefully from the floor up while the dress is on a body or dress form
- Press at every stage,before pinning, after pinning, and after stitching
- Take your time,rushing leads to uneven hems and puckered stitches
For more sewing guidance and troubleshooting tips, explore our fabric sewing resources and sewing techniques guides. Happy hemming!


