


Quick Answer
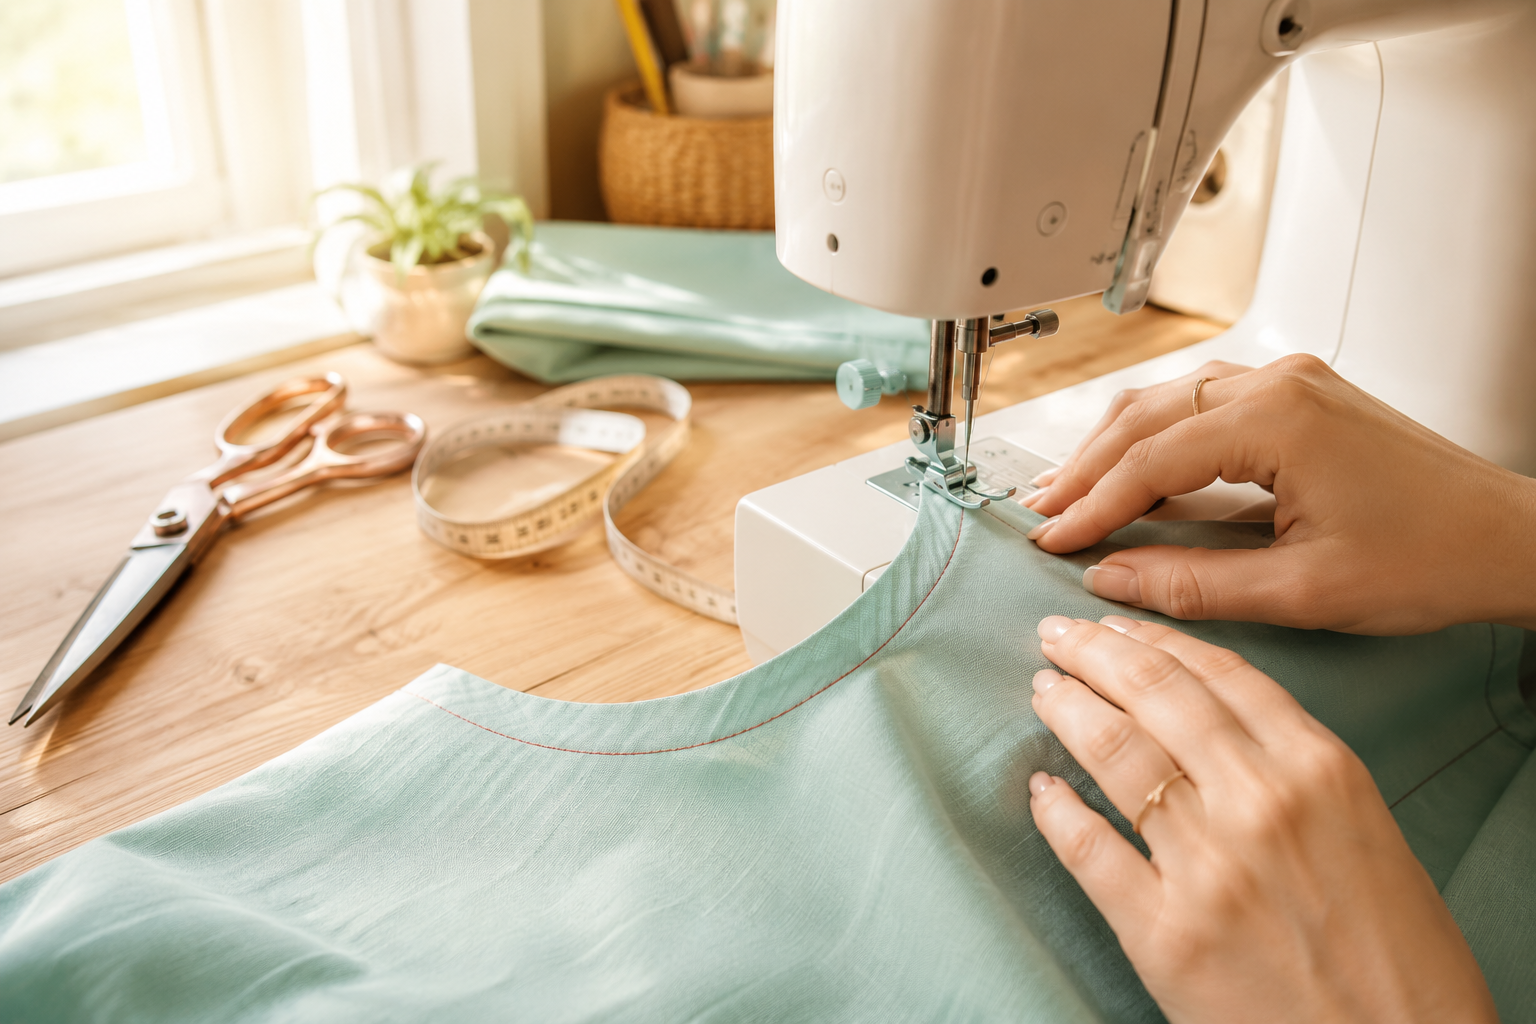
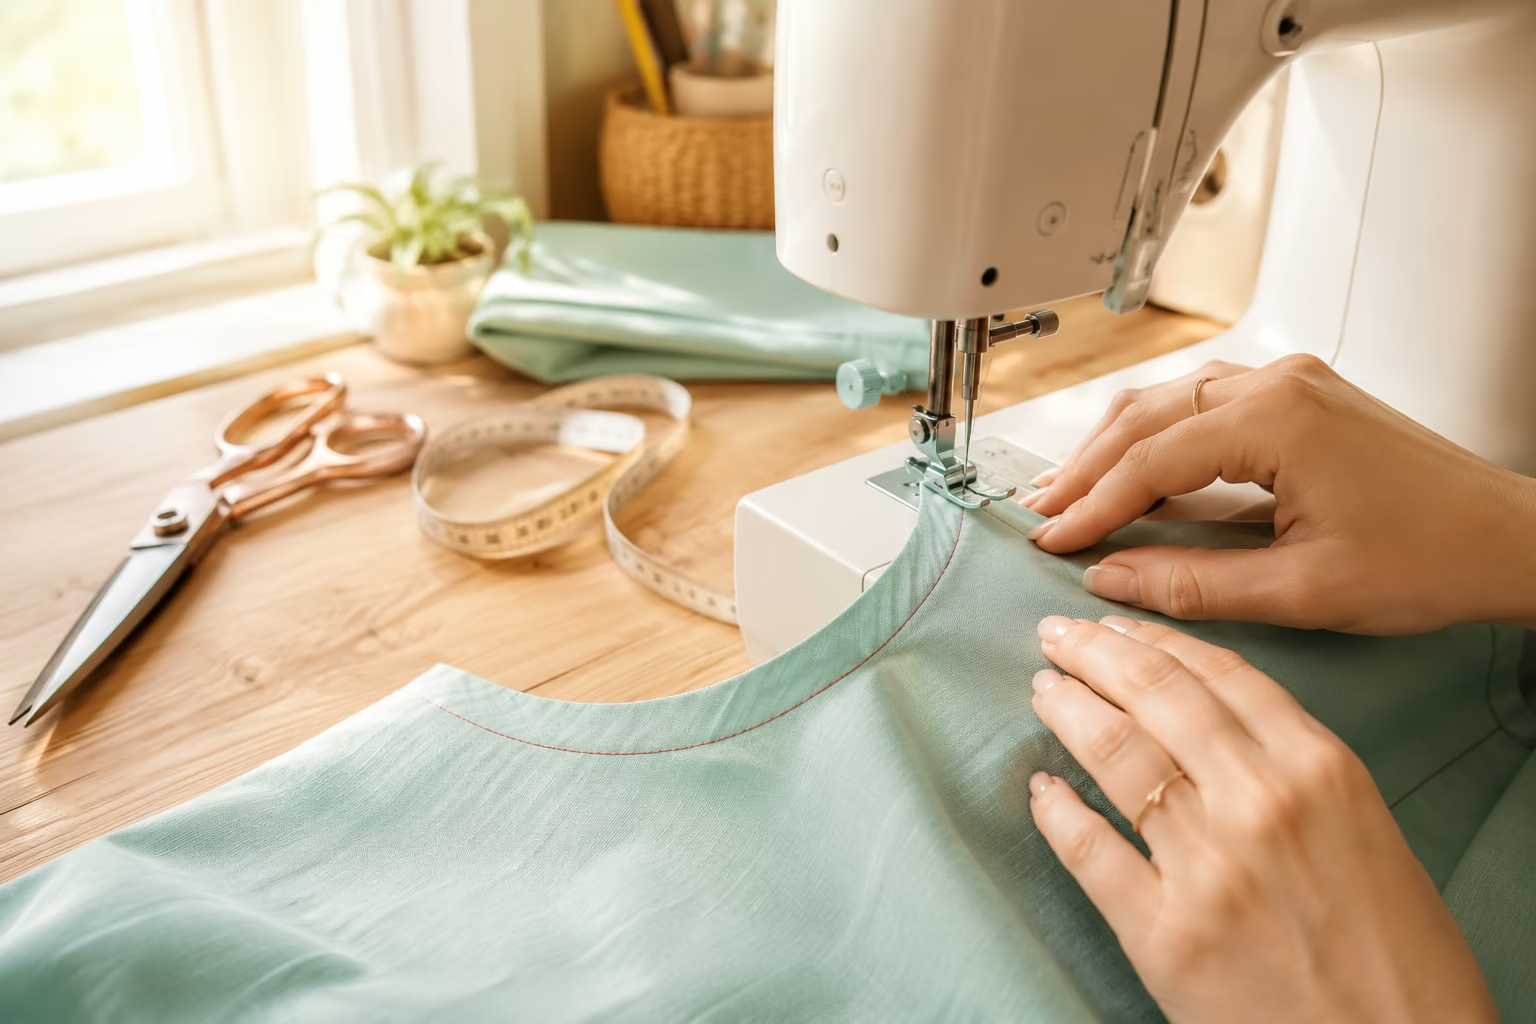
Stay stitching is a single line of straight machine stitching sewn through one layer of fabric within the seam allowance, typically ⅛ to ½ inch from the cut edge. This technique prevents curved or bias-cut edges from stretching or distorting during garment construction. Stay stitching is applied immediately after cutting pattern pieces and before any other construction steps, serving as an invisible stabilizer that maintains the original shape of your fabric edges throughout the sewing process.
Key Takeaways
- Stay stitching stabilizes fabric edges before construction to prevent stretching and distortion on curves and bias cuts
- Applied within the seam allowance (typically ⅛,½ inch from edge) so it never shows on the finished garment
- Done immediately after cutting pattern pieces, before any pinning, pressing, or seam sewing
- Uses regular stitch length (2.0-2.5mm) and stays permanently in the garment, you don’t remove it
- Essential for necklines, armholes, and curved seams especially in lightweight or stretchy fabrics
- Different from basting which uses longer stitches and is temporary
- Can be skipped on stable fabrics with straight-grain edges, but adds insurance for beginners
- Directional stitching matters,always stitch from the widest to narrowest part of a curve
- Common mistake: Stitching too close to the edge or using the wrong stitch length
- Takes 2-3 minutes per garment but prevents hours of frustration fixing stretched seams
What Is Stay Stitching in Sewing?
Stay stitching is a foundational sewing technique that involves sewing a single line of regular-length straight stitches through one layer of fabric, positioned within the seam allowance to stabilize edges before construction begins. The stitch line acts as a reinforcement that locks the fabric threads in their original position, preventing the natural tendency of curved and bias-cut edges to stretch, warp, or fray during handling.
This technique is applied to individual pattern pieces immediately after cutting and before any other sewing steps. The stitching remains permanently in the garment, hidden within the seam allowance where it continues to provide stability throughout the garment’s life.
Why fabric edges need stabilization: Woven fabrics have three grain directions, lengthwise grain (strongest), crosswise grain (moderate stretch), and bias (maximum stretch at 45 degrees). When pattern pieces include curved edges like necklines or armholes, portions of those curves inevitably fall on or near the bias grain. Without stabilization, these sections stretch during handling, pinning, and sewing, resulting in wavy, distorted seams that are nearly impossible to fix after construction.
Stay stitching is particularly critical for:
- Curved necklines and V-necks
- Armhole curves
- Princess seam curves
- Waistline curves on fitted garments
- Any edge cut on the bias
- Lightweight fabrics (silk, rayon, lawn)
- Loosely woven fabrics (linen, gauze)
The technique takes only a few minutes per garment but prevents construction problems that can ruin hours of work. Professional sewers and pattern instructions routinely include stay stitching as a standard first step for quality garment construction.
How Does Stay Stitching Differ from Regular Stitching?
Stay stitching differs from regular construction stitching in three fundamental ways: it’s sewn through a single layer of fabric rather than joining two layers, it’s positioned within the seam allowance rather than on the seamline, and its purpose is stabilization rather than joining pieces together.
Single layer vs. seam construction: Regular stitching joins two or more fabric layers together along a seamline. Stay stitching is applied to one fabric layer at a time, before any pieces are joined. You stitch each pattern piece individually after cutting but before construction begins.
Placement within the seam allowance: While construction seams are sewn exactly on the seamline (typically ⅝ inch from the edge for garments), stay stitching is placed closer to the raw edge, usually between ⅛ and ½ inch from the cut edge. This positioning keeps the stitching well within the seam allowance so it never shows on the finished garment and doesn’t interfere with the actual construction seam.
Stitch length and tension: Stay stitching uses the same regular stitch length as construction seams (2.0-2.5mm), not the longer stitches used for basting. The tension should be normal, not loose like gathering stitches. This creates a permanent, stable line that won’t pull out during handling.
Timing in the construction sequence: Stay stitching is always the first stitching step after cutting pattern pieces. Regular construction stitching happens later, after all preparation steps (stay stitching, marking, interfacing) are complete.
Choose stay stitching when you need to stabilize edges before construction. Choose regular construction stitching when you’re ready to join pieces together. The two techniques work together, stay stitching prepares the edges, then construction stitching joins them with confidence that the shapes won’t distort.
When Do You Need to Use Stay Stitching?
You need stay stitching whenever a pattern piece has curved edges, bias-cut edges, or is made from fabric prone to stretching or distortion. The technique is essential for necklines, armholes, and any seam that will be handled extensively before final construction.
Mandatory situations for stay stitching:
- Curved necklines,front and back neck edges on dresses, tops, and jackets
- Armhole curves,both the garment armhole and the sleeve cap
- V-necklines,especially the point where stress concentrates
- Princess seams,the long curved seams on fitted bodices
- Bias-cut garments,any edge cut at 45 degrees to the grain
- Lightweight fabrics,silk, rayon, voile, lawn, chiffon
- Loosely woven fabrics,linen, gauze, some cotton blends
When you can skip stay stitching:
- Straight edges cut on the lengthwise or crosswise grain
- Stable, tightly woven fabrics like denim or canvas
- Knit fabrics (which don’t fray and have built-in stretch)
- Edges that will be immediately stabilized with interfacing
- Very short seams with minimal handling
Beginner recommendation: If you’re new to sewing, stay stitch all curved edges regardless of fabric. The technique takes minimal time and provides insurance against common beginner mistakes like excessive pulling or stretching during construction. As you gain experience, you’ll develop intuition for when you can safely skip the step.
Fabric-specific guidelines: Silk and rayon always need stay stitching due to their slippery nature and tendency to stretch. Cotton quilting fabrics on straight grain rarely need it. Linen benefits from stay stitching on all curves because its loose weave makes it prone to distortion. When in doubt, stay stitch, the few extra minutes prevent problems that can’t be fixed later.
How to Do Stay Stitching Step by Step
Stay stitching is a straightforward process that takes 2-3 minutes per pattern piece when you follow the correct sequence and technique. The key is working immediately after cutting and stitching in the proper direction to prevent distortion.
Step 1: Cut your pattern pieces
Cut all fabric pieces according to your pattern instructions. Transfer any necessary markings (notches, dots, grainlines) to the fabric using tailor’s chalk or fabric markers.
Step 2: Set up your machine
- Thread your machine with regular sewing thread (matching or contrasting, it won’t show)
- Set stitch length to 2.0-2.5mm (regular straight stitch)
- Use a universal needle appropriate for your fabric weight
- Set tension to normal (same as construction stitching)
Step 3: Identify edges that need stay stitching
Look for curved edges, bias-cut edges, and any seams your pattern instructions specify. Common areas include necklines (front and back), armholes, and princess seam curves.
Step 4: Position the fabric
Place the pattern piece wrong side up under the presser foot. Position the needle ⅛ to ½ inch from the raw edge, well within your seam allowance. For standard ⅝-inch seam allowances, ⅜ inch from the edge works well.
Step 5: Stitch in the correct direction
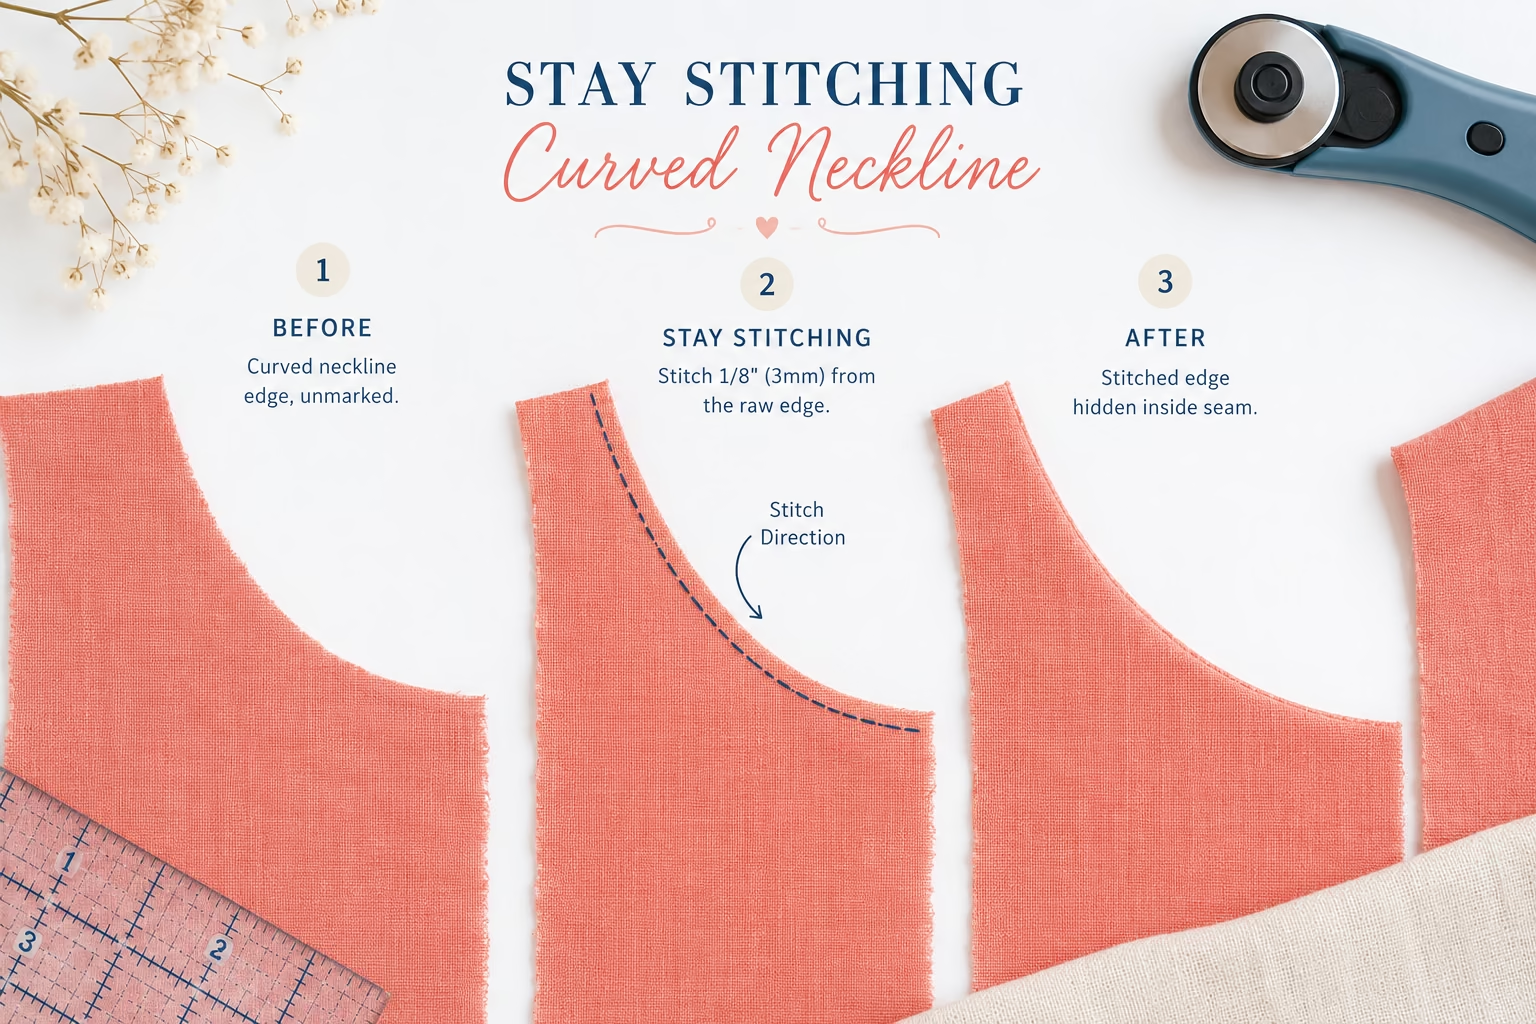
This is critical: always stitch from the widest part of a curve toward the narrowest part. For necklines, stitch from shoulder to center front or center back. For armholes, stitch from underarm toward the shoulder. This directional stitching prevents the fabric from stretching as you sew.
Step 6: Don’t backstitch
Start and stop your stitching without backstitching at the ends. The stay stitching will be secured when you sew the construction seam, and backstitching can create bulk within the seam allowance.
Step 7: Repeat for all edges
Stay stitch each edge that needs stabilization before moving to any other construction steps.
Common mistake to avoid: Don’t pull or stretch the fabric as you guide it through the machine. Let the feed dogs move the fabric naturally. Pulling defeats the entire purpose of stay stitching by stretching the edge before you stabilize it.
For more guidance on proper machine setup, check out our guide on presser feet to ensure you’re using the right foot for straight stitching.

2X STRONGER STEEL — Constructed with reinforced, thick shafts that withstand the resistance of dense, heavy fabrics without bending or breaking, staying sharp longer for consistent, skip-free stitching through any material from start to finish.

Pack of 10 Genuine Singer Sewing Machine Needles

Set of 10 regular point machine needles in assorted sizes
What Stitch Length Should You Use for Stay Stitching?
Use a regular stitch length of 2.0 to 2.5mm for stay stitching, the same length you’d use for permanent construction seams. This creates a stable, secure line that won’t pull out during handling and provides effective stabilization without puckering the fabric.
Why regular stitch length matters: Longer stitches (3.0mm+) used for basting are too loose to effectively stabilize fabric edges. They allow too much movement between stitches, defeating the purpose of stay stitching. Shorter stitches (1.5mm or less) create excessive perforations that can weaken the fabric and make it more prone to tearing along the stitch line.
Stitch length by fabric weight:
- Lightweight fabrics (silk, voile, lawn): 2.0mm, slightly shorter stitches provide better control
- Medium-weight fabrics (cotton, linen, rayon): 2.0-2.5mm, standard setting works perfectly
- Heavier fabrics (wool, denim): 2.5mm, slightly longer stitches move through bulk more easily
Tension settings: Keep your tension at the normal setting you use for construction stitching. The stitches should lie flat against the fabric without puckering or creating visible dimples. If you notice puckering, your tension may be too tight or your stitch length too short.
Test first: Before stay stitching your actual garment pieces, test your stitch length on a scrap of the same fabric. The stitching should create a smooth, straight line that doesn’t distort the fabric. If the fabric puckers, lengthen the stitch slightly. If the stitches look loose or gapped, shorten them.
Machine settings to check: Most modern sewing machines default to 2.5mm for straight stitching, which works well for stay stitching. If you’ve been doing other techniques like gathering or basting, remember to reset your stitch length before stay stitching. For troubleshooting stitch quality issues, see our stitch quality guide.
Do You Remove Stay Stitching After Sewing?
No, you never remove stay stitching, it remains permanently in the finished garment, hidden within the seam allowance. Unlike basting stitches which are temporary and meant to be removed, stay stitching becomes a permanent part of the garment structure that continues to stabilize edges throughout the garment’s life.
Why stay stitching stays: The entire purpose of stay stitching is to prevent fabric edges from stretching during construction and wear. Once applied, the stitching locks the fabric threads in their original position. Removing it would eliminate that stabilization and potentially allow the edges to distort, even after construction seams are sewn.
Where the stitching ends up: When you sew your construction seams (typically at ⅝ inch from the edge), the stay stitching (positioned at ⅜ inch or closer to the edge) falls within the seam allowance between the construction seam and the raw edge. After seam finishing (serging, zigzag, or binding), the stay stitching is completely enclosed and invisible from both the right and wrong sides of the garment.
Does it add bulk? Stay stitching adds negligible bulk because it’s a single line of regular stitching through one layer of fabric. Even in lightweight fabrics, the additional thickness is imperceptible in the finished garment.
Comparison with basting: Basting stitches use longer stitch length (4.0mm+) and are designed to be temporary, they hold pieces together for fitting or construction, then are removed. Stay stitching uses regular stitch length and is permanent. If your pattern instructions say “baste,” that’s different from stay stitching and should be removed. If they say “stay stitch,” it stays.
Exception: If you accidentally stay stitch outside your seam allowance (too far from the edge) and the stitching will show on the finished garment, you’ll need to remove it and restitch correctly. This is why proper placement within the seam allowance is critical.

Stay Stitching vs. Basting Stitch: What’s the Difference?
Stay stitching and basting are fundamentally different techniques with opposite purposes: stay stitching stabilizes single-layer edges permanently, while basting temporarily holds multiple layers together for fitting or construction and is always removed.
Key differences at a glance:
| Feature | Stay Stitching | Basting |
|---|---|---|
| Purpose | Stabilize edges | Hold layers temporarily |
| Layers | Single layer | Multiple layers |
| Stitch length | 2.0-2.5mm (regular) | 4.0-6.0mm (long) |
| Permanence | Permanent | Temporary, removed |
| Placement | Within seam allowance | On or near seamline |
| Timing | First step after cutting | During construction |
| Visibility | Never visible | May be visible until removed |
When to use stay stitching: Apply stay stitching to individual pattern pieces immediately after cutting to prevent curved or bias edges from stretching. Use regular stitch length and leave it in the garment permanently.
When to use basting: Use basting to temporarily hold layers together for fitting, matching plaids or stripes, or positioning details like pockets before permanent stitching. Use long stitch length and remove after the permanent seam is sewn.
Can you use both? Yes, on the same garment. You might stay stitch a neckline edge immediately after cutting to stabilize it, then later baste the neckline facing to the garment for fitting before sewing the permanent seam. The stay stitching remains; the basting is removed.
Common confusion: Some sewers mistakenly use long basting stitches for stay stitching, thinking it will be easier to remove if needed. This defeats the purpose, long stitches don’t provide adequate stabilization. Always use regular stitch length for stay stitching.
Pattern instruction clarity: Well-written patterns clearly distinguish between “stay stitch” and “baste.” If instructions say “stay stitch neckline,” use 2.0-2.5mm stitches and don’t remove them. If they say “baste shoulder seams for fitting,” use 4.0mm+ stitches and remove after fitting.


100% Long Staple Polyester
It is a time saving product, perfect for fuse basting, quilt bindings, appliques, zippers and more
Which Fabric Edges Need Stay Stitching?
Fabric edges need stay stitching when they’re curved, cut on the bias, or prone to stretching during handling, specifically necklines, armholes, V-necks, princess seams, and any edge that will be manipulated before the construction seam is sewn.
Priority edges that always need stay stitching:
Necklines (front and back): The curved neck edge on bodices, dresses, and tops is the most critical area for stay stitching. Neckline curves typically fall partially on the bias, making them extremely prone to stretching. A stretched neckline is one of the most visible construction flaws and nearly impossible to fix after assembly.
Armholes: Both the garment armhole and the sleeve cap benefit from stay stitching. The armhole curve experiences significant stress during wear, and stabilization prevents gaping or distortion. Stitch from underarm toward shoulder on both front and back armholes.
V-necklines: The point of a V-neck concentrates stress and is vulnerable to stretching and tearing. Stay stitch both sides of the V, stitching from shoulder toward the point. Some sewers reinforce the point with a second line of stay stitching for extra security.
Princess seams: The long, gentle curves of princess seams on fitted bodices need stabilization on both the front and side-front pieces. These seams are handled extensively during construction and fitting.
Waistline curves: On fitted dresses or separates with curved waist seams, stay stitch the waistline edge to maintain the intended shape.
Shoulder seams on bias-cut garments: When an entire garment is cut on the bias for drape, even straight-looking edges need stay stitching because they’re all on the bias grain.
Edges you can skip:
- Straight edges on lengthwise or crosswise grain
- Edges immediately stabilized with interfacing
- Knit fabric edges (knits don’t fray and have intentional stretch)
- Very short seams (under 3 inches) with minimal handling
- Stable fabrics like denim or canvas on straight grain
Fabric-specific considerations: Slippery fabrics (silk, rayon, satin) need stay stitching on more edges than stable cottons. Loosely woven fabrics (linen, gauze) benefit from stay stitching even on relatively straight edges. When working with unfamiliar fabric, err on the side of stay stitching more rather than less.
For more on working with different seam allowances and edge treatments, see our comprehensive guide.

Transparent thread will blend with any fabric

Made in China

Premium invisible thread
Can You Skip Stay Stitching on Stable Fabrics?
Yes, you can skip stay stitching on stable, tightly woven fabrics when edges are cut on the straight grain (lengthwise or crosswise), but the technique still provides insurance against handling mistakes and is recommended for beginners regardless of fabric stability.
When it’s safe to skip:
- Tightly woven cotton (quilting cotton, broadcloth) on straight-grain edges
- Denim and canvas on any straight edge
- Stable synthetic blends (polyester/cotton) on straight grain
- Edges with interfacing applied immediately after cutting
- Very experienced sewers who handle fabric carefully and understand grain behavior
When you should stay stitch even stable fabrics:
- Any curved edge, regardless of fabric stability
- Bias-cut edges, even in stable fabrics
- Edges that will be handled extensively before construction
- Projects where precision is critical (tailored jackets, special occasion garments)
- When you’re a beginner still learning proper fabric handling
The stability spectrum: Fabric stability exists on a continuum. Tightly woven cotton quilting fabric is highly stable; silk charmeuse is extremely unstable. Most fashion fabrics fall somewhere in between. Linen, for example, is relatively stable when tightly woven but its loose weave makes it prone to distortion on curves.
Risk vs. time investment: Stay stitching takes 2-3 minutes per garment. Fixing a stretched neckline or distorted armhole can take hours or may be impossible, requiring you to recut and start over. For most sewers, the time investment is worthwhile even when working with stable fabrics.
Beginner recommendation: If you’re new to sewing, stay stitch all curved edges regardless of fabric type. As you gain experience and develop better fabric handling skills, you’ll learn to recognize situations where you can safely skip the step. Until then, stay stitching provides valuable insurance against common beginner mistakes like pulling fabric through the machine or excessive pinning that distorts edges.
Professional practice: Many professional sewers and pattern companies include stay stitching as a standard first step for all curved edges, regardless of fabric. This consistent practice ensures quality results and eliminates the need to make judgment calls about each fabric.
Common Mistakes When Stay Stitching
The most common stay stitching mistakes are stitching too close to the raw edge, using incorrect stitch length, pulling fabric through the machine, and stitching in the wrong direction, all of which undermine the technique’s effectiveness and can actually cause the distortion you’re trying to prevent.
Mistake #1: Stitching too close to the edge
Placing stay stitching less than ⅛ inch from the raw edge leaves insufficient fabric between the stitching and the edge, making the fabric prone to tearing along the stitch line during handling. The stitching can also get caught in serging or seam finishing. Solution: Position stay stitching ⅜ to ½ inch from the edge for standard ⅝-inch seam allowances.
Mistake #2: Using basting stitch length
Long stitches (3.0mm+) don’t provide adequate stabilization because too much fabric exists between stitches, allowing stretching. Solution: Use regular stitch length of 2.0-2.5mm for effective stabilization.
Mistake #3: Pulling or stretching fabric while stitching
Pulling fabric through the machine as you sew stretches the edge before the stitching stabilizes it, defeating the entire purpose. Solution: Guide fabric gently without pulling, letting the feed dogs move it naturally. If you’re experiencing fabric feeding issues, address those problems before stay stitching.
Mistake #4: Stitching in the wrong direction
Stitching from narrow to wide on curves (e.g., from center front toward shoulder on a neckline) can stretch the fabric as you sew. Solution: Always stitch from the widest part of a curve toward the narrowest part. For necklines, stitch from shoulder toward center. For armholes, stitch from underarm toward shoulder.
Mistake #5: Backstitching at the ends
Backstitching creates unnecessary bulk within the seam allowance and can cause puckering. Solution: Start and stop without backstitching, the construction seam will secure the stay stitching.
Mistake #6: Stay stitching after other construction steps
Applying stay stitching after pinning, pressing, or handling pattern pieces means the edges may already be stretched. Solution: Stay stitch immediately after cutting, before any other steps.
Mistake #7: Stitching outside the seam allowance
Placing stay stitching too far from the edge (beyond ½ inch) can make it visible on the finished garment or interfere with construction seams. Solution: Keep stay stitching well within the seam allowance, typically ⅜ inch from the edge.
Mistake #8: Skipping stay stitching to save time
Omitting stay stitching on edges that need it leads to stretched, distorted seams that require time-consuming fixes or complete reconstruction. Solution: Invest the 2-3 minutes per garment, it’s faster than fixing problems later.
For more troubleshooting help with common sewing issues, visit our sewing troubleshooting guide.
Stay Stitching Necklines and Armholes: Special Considerations
Necklines and armholes require special attention when stay stitching because they’re the most visible curved edges on a garment and experience the most stress during construction and wear. Proper technique for these areas prevents the most common and noticeable construction flaws.
Neckline stay stitching technique:
Direction matters most: For front and back necklines, always stitch from the shoulder seam (or where the shoulder will be) toward the center front or center back. This directional stitching works with the fabric grain to prevent stretching. Never stitch continuously around the entire neckline in one direction.
V-necklines need reinforcement: The point of a V-neck concentrates stress and is prone to tearing. Stitch from shoulder toward the point on both sides, overlapping stitches slightly at the point. Some sewers add a second line of stay stitching ¼ inch from the first for extra reinforcement at the point.
Curved vs. straight sections: On necklines with both curved and straight sections (like a square neckline with curved corners), stay stitch only the curved portions. Straight sections on-grain don’t need stabilization.
Armhole stay stitching technique:
Stitch direction: For both front and back armholes, stitch from the underarm point toward the shoulder. This prevents the curve from stretching as you sew. The underarm area is the deepest part of the curve and the most prone to distortion.
Sleeve cap consideration: The sleeve cap (the curved top of the sleeve) also benefits from stay stitching, especially in set-in sleeves. Stitch from the center of the cap toward each side, following the curve.
Dealing with notches: When you encounter notches (the small cuts or marks that help match pieces), stitch right through them. The stay stitching will reinforce the notch area and prevent it from tearing during construction.
Placement precision: For both necklines and armholes, position stay stitching ⅜ inch from the raw edge when using standard ⅝-inch seam allowances. This placement keeps the stitching well within the seam allowance while providing effective stabilization close enough to the edge.
Pressing after stay stitching: After stay stitching necklines and armholes, press the stitching line gently (not the entire piece) to set the stitches. Avoid stretching or distorting the edge during pressing. This step helps the stabilization “set” before you continue construction.
Does Stay Stitching Show on the Finished Garment?
No, stay stitching never shows on a properly constructed finished garment because it’s positioned within the seam allowance, well away from the seamline, and becomes completely enclosed when the construction seam is sewn and finished.
Why it remains invisible:
Placement within seam allowance: Stay stitching is positioned ⅜ to ½ inch from the raw edge, while construction seams are typically sewn at ⅝ inch from the edge. This means the stay stitching falls between the construction seam and the raw edge, in the portion of the seam allowance that’s trimmed, enclosed, or finished.
Enclosed by construction seams: When you sew the actual construction seam (joining two pieces together), the stay stitching on both pieces ends up sandwiched between the layers, completely hidden from view on both the right side and the inside of the garment.
Seam finishing covers it: After sewing construction seams, you typically finish the raw edges with serging, zigzag stitching, or binding. These finishing techniques further enclose or cover the stay stitching, ensuring it remains invisible.
Thread color doesn’t matter: Because stay stitching is hidden within the seam allowance, you can use contrasting thread without worrying about visibility. Some sewers prefer contrasting thread because it makes the stay stitching line easier to see during construction, helping them avoid stitching over it accidentally.
When stay stitching might show (mistakes to avoid):
Stitching outside the seam allowance: If you place stay stitching more than ½ inch from the edge, it may fall outside the construction seam and be visible on the finished garment. Always keep stay stitching well within the seam allowance.
Using the wrong seam allowance: If your pattern uses a narrower seam allowance (like ½ inch or ⅜ inch), adjust your stay stitching placement accordingly. It should always be closer to the raw edge than the construction seamline.
Visible on sheer fabrics: On very sheer fabrics like organza or chiffon, stitching within the seam allowance may be slightly visible as a shadow. Use matching thread and the finest needle possible to minimize visibility.
Quality check: After completing a garment, examine the finished seams from both the right and wrong sides. If stay stitching is visible, it indicates incorrect placement and should be corrected in future projects.
What Happens If You Don’t Stay Stitch?
Skipping stay stitching on edges that need it results in stretched, wavy, or distorted seams that are difficult or impossible to fix after construction, often requiring you to recut pattern pieces and start over, a frustrating waste of time and fabric.
Immediate consequences during construction:
Stretched necklines: Without stay stitching, neckline edges stretch during handling, pinning, and sewing. The finished neckline becomes too large, gapes away from the body, and looks sloppy. This is the most common and visible result of skipped stay stitching.
Wavy armholes: Unstabilized armhole curves stretch unevenly, creating wavy, rippled seams that don’t lie flat. The armhole may also become too large, causing the sleeve to fit poorly or the garment to slip off the shoulder.
Distorted princess seams: The long curves of princess seams shift and stretch without stay stitching, making it nearly impossible to match the seam edges properly. The finished seams pucker, wave, or pull in unexpected directions.
Frayed edges: On loosely woven fabrics, handling unstabilized edges causes excessive fraying, reducing the effective seam allowance and potentially causing seams to pull apart during wear.
Long-term consequences:
Permanent distortion: Once fabric edges stretch during construction, the distortion is permanent. Pressing, steaming, or blocking cannot restore the original shape because the fabric threads have been pulled out of position.
Structural weakness: Stretched edges create weak points in seams that are prone to tearing or pulling apart during wear, especially in stress areas like armholes and necklines.
Unprofessional appearance: Garments with stretched seams look homemade in the worst sense, they lack the crisp, professional finish of properly constructed garments.
Fixing stretched edges (limited options):
Before construction: If you notice stretched edges before sewing construction seams, you may be able to ease the excess fabric back into shape using careful steam pressing and gentle manipulation. This rarely works perfectly.
After construction: Once construction seams are sewn, fixing stretched edges is nearly impossible. Options include:
- Recutting the affected pieces and reconstructing (best option but time-consuming)
- Adding decorative trim or binding to disguise distorted edges (camouflage, not a fix)
- Accepting the flaw and learning for next time (least satisfying option)
Prevention is easier than cure: The 2-3 minutes required for stay stitching is infinitely faster and less frustrating than trying to fix stretched edges or recut and reconstruct garment sections.
Is Stay Stitching Necessary for Beginners?
Yes, stay stitching is especially important for beginners because it provides insurance against common handling mistakes like pulling fabric through the machine, excessive pinning, or improper grain alignment, all of which can stretch edges before you develop the experience to recognize and prevent these problems.
Why beginners benefit most:
Compensates for inexperience: Beginners typically haven’t developed the gentle fabric handling skills that experienced sewers use instinctively. Stay stitching stabilizes edges before handling, preventing damage from common beginner mistakes.
Builds good habits: Learning to stay stitch as a standard first step establishes professional construction habits early. This systematic approach to garment construction leads to better results across all projects.
Reduces frustration: Nothing is more discouraging for a beginner than spending hours on a project only to have it ruined by stretched seams. Stay stitching prevents this common source of frustration and helps beginners experience success.
Teaches fabric behavior: The process of stay stitching helps beginners learn which edges are vulnerable to stretching and why, building understanding of fabric grain and stability that informs all future sewing decisions.
When beginners can skip it:
Even as a beginner, you can safely skip stay stitching on:
- Straight edges cut on lengthwise or crosswise grain
- Very stable fabrics like denim or canvas
- Practice projects where precision isn’t critical
- Edges immediately stabilized with interfacing
Learning progression:
Stage 1 (absolute beginner): Stay stitch all curved edges on every project, regardless of fabric. This builds the habit and ensures success.
Stage 2 (developing skills): Begin to recognize which fabrics and edges truly need stay stitching. Experiment with skipping it on stable fabrics with straight edges while continuing to stay stitch all curves.
Stage 3 (experienced): Make informed decisions about when stay stitching is necessary based on fabric type, edge shape, and project requirements.
Time investment: For beginners, stay stitching adds 5-10 minutes to a project (including setup and learning time). This small investment prevents problems that could add hours of fixing time or require starting over completely.
Pattern instructions: Follow your pattern’s stay stitching instructions exactly when you’re learning. Pattern companies include these steps for good reason, and skipping them often leads to construction problems that beginners don’t yet have the skills to fix.
FAQ
How far from the edge should stay stitching be?
Stay stitching should be positioned ⅜ to ½ inch from the raw edge for standard ⅝-inch seam allowances. This placement keeps the stitching well within the seam allowance so it never shows on the finished garment while providing effective stabilization close enough to the edge to prevent stretching.
Can you use a serger for stay stitching?
No, don’t use a serger for stay stitching. Sergers cut and finish edges while stitching, which removes the seam allowance you need for construction. Stay stitching must be done with a regular sewing machine using a straight stitch, positioned within the seam allowance without cutting the edge.
Should you stay stitch knit fabrics?
No, knit fabrics don’t need stay stitching because they don’t fray and their stretch is intentional and uniform across the fabric. Stay stitching is specifically for woven fabrics that can stretch unevenly on bias or curved edges. Knits require different stabilization techniques like stay tape or clear elastic when needed.
What thread should you use for stay stitching?
Use regular sewing thread in any color, matching or contrasting both work fine since stay stitching remains hidden within the seam allowance. Some sewers prefer contrasting thread because it makes the stay stitching line easier to see during construction, helping avoid accidentally stitching over it.
Is stay stitching the same as understitching?
No, stay stitching and understitching are completely different techniques. Stay stitching stabilizes single-layer edges before construction. Understitching is done after construction, stitching the seam allowance to the facing or lining to prevent it from rolling to the outside. They serve different purposes and are done at different stages.
Do you stay stitch before or after interfacing?
Stay stitch before applying interfacing when possible, especially on edges that will be handled during interfacing application. However, if your pattern instructs you to interface first, the interfacing itself provides stabilization and may eliminate the need for stay stitching on that edge.
Can you stay stitch by hand?
Yes, you can stay stitch by hand using a small running stitch (about 8-10 stitches per inch) if you don’t have access to a sewing machine. Hand stay stitching takes longer but provides the same stabilization. Use a single strand of regular thread and keep stitches even and consistent.
What’s the difference between stay stitching and ease stitching?
Stay stitching stabilizes edges to prevent stretching, using regular stitch length and normal tension. Ease stitching gathers fabric slightly to fit a smaller edge (like easing a sleeve cap into an armhole), using slightly longer stitches and looser tension. They’re done in different locations for different purposes.
Should you press stay stitching?
Yes, gently press the stay stitching line (not the entire piece) after stitching to set the stitches. Use a dry iron or minimal steam and avoid stretching or distorting the edge. This step helps the stabilization “set” before continuing with construction.
Does stay stitching work on bias-cut garments?
Yes, stay stitching is essential for bias-cut garments because all edges are on the bias grain and extremely prone to stretching. Stay stitch every edge that will be sewn, even edges that appear straight, because they’re all cut at 45 degrees to the grain and have maximum stretch potential.
Can you remove stay stitching if you make a mistake?
Yes, you can remove stay stitching using a seam ripper if you placed it incorrectly (too close or too far from the edge). However, removing it eliminates the stabilization, so you should immediately restitch correctly. If the edge has already stretched, removing stay stitching may make the problem worse.
How do you stay stitch a V-neck point?
Stitch from the shoulder toward the point on both sides of the V, overlapping stitches slightly at the point. Some sewers add a second line of stay stitching ¼ inch from the first at the point for extra reinforcement. Always stitch directionally from wide to narrow, never across the point.
Conclusion
Stay stitching is one of the simplest yet most powerful techniques in garment construction, a single line of regular stitching applied immediately after cutting that prevents curved and bias edges from stretching or distorting throughout the construction process. This foundational technique takes just 2-3 minutes per garment but prevents hours of frustration and the need to recut and reconstruct stretched seams.
The key principles to remember: use regular stitch length (2.0-2.5mm), position stitching ⅜ to ½ inch from the raw edge within the seam allowance, stitch directionally from wide to narrow on curves, and apply it immediately after cutting before any other construction steps. Stay stitching remains permanently in the garment, hidden within the seam allowance where it continues to provide stabilization throughout the garment’s life.
Your next steps:
Review your current project: Identify all curved edges (necklines, armholes, princess seams) that need stay stitching before you continue construction.
Set up your machine: Thread with regular thread, set stitch length to 2.0-2.5mm, and test on a fabric scrap to ensure proper tension and stitch quality.
Practice directional stitching: On scrap fabric, practice stitching curves from wide to narrow to develop the muscle memory for proper technique.
Make it a habit: Add stay stitching as the first step in your construction sequence for every project with curved edges, building this professional technique into your standard workflow.
Expand your knowledge: Explore related techniques like seam allowances and proper machine maintenance to continue building your sewing skills.
Stay stitching is the mark of a thoughtful, skilled sewer who understands that quality construction begins with proper preparation. Master this simple technique, and you’ll see immediate improvement in the professional finish of every garment you create.


