


Quick Answer
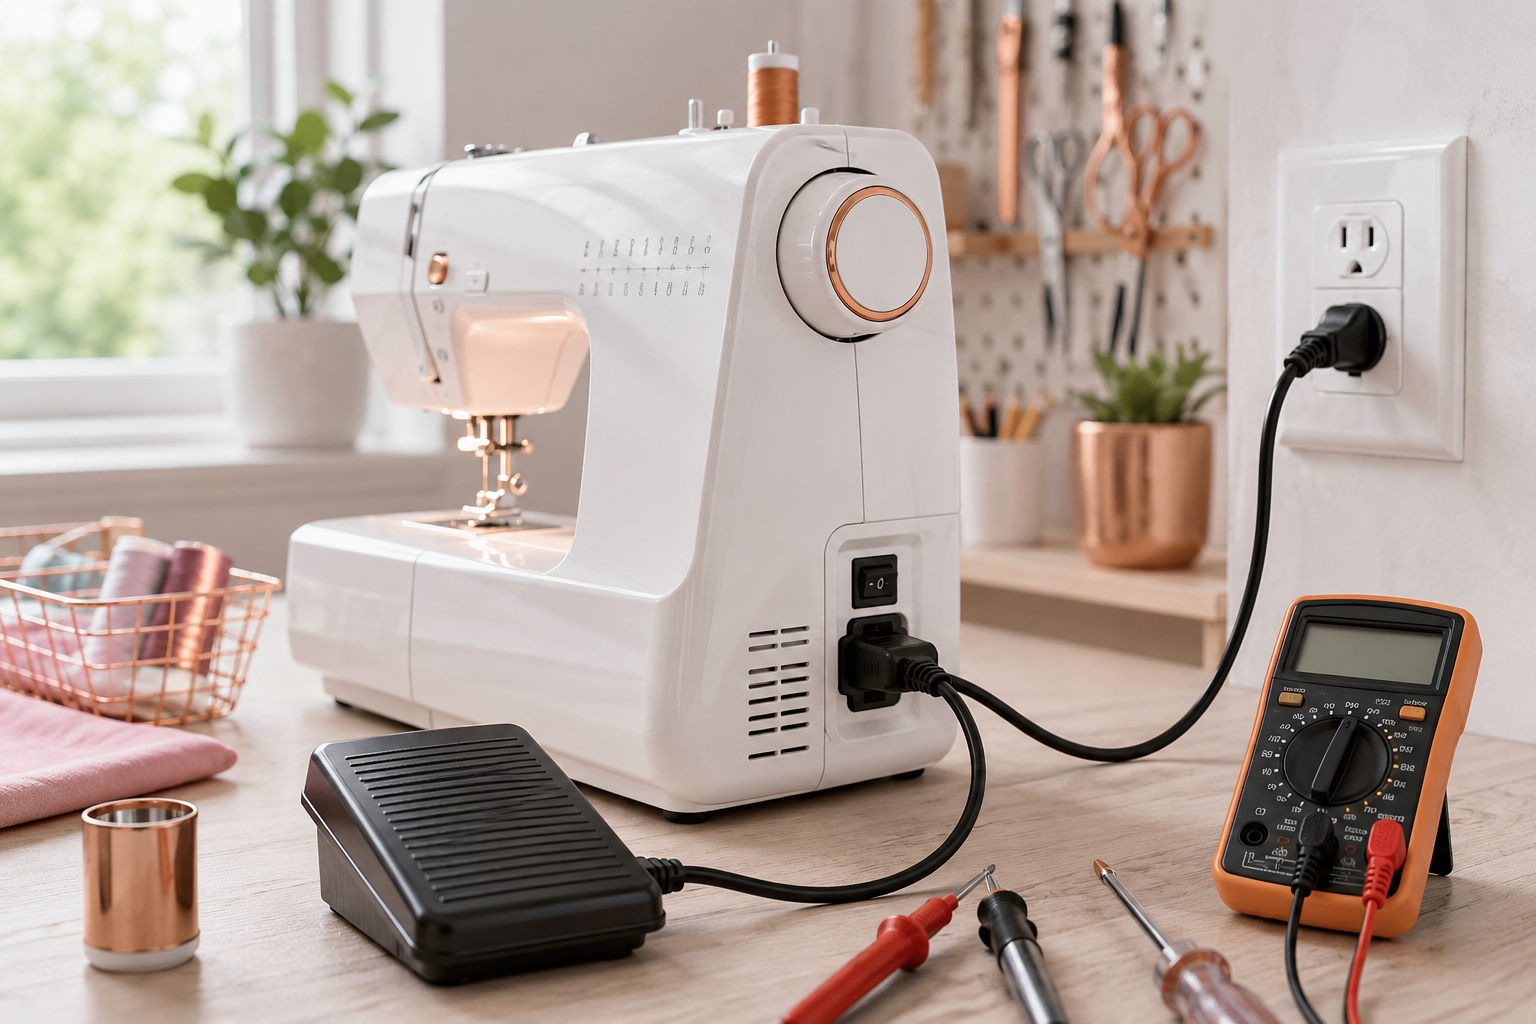
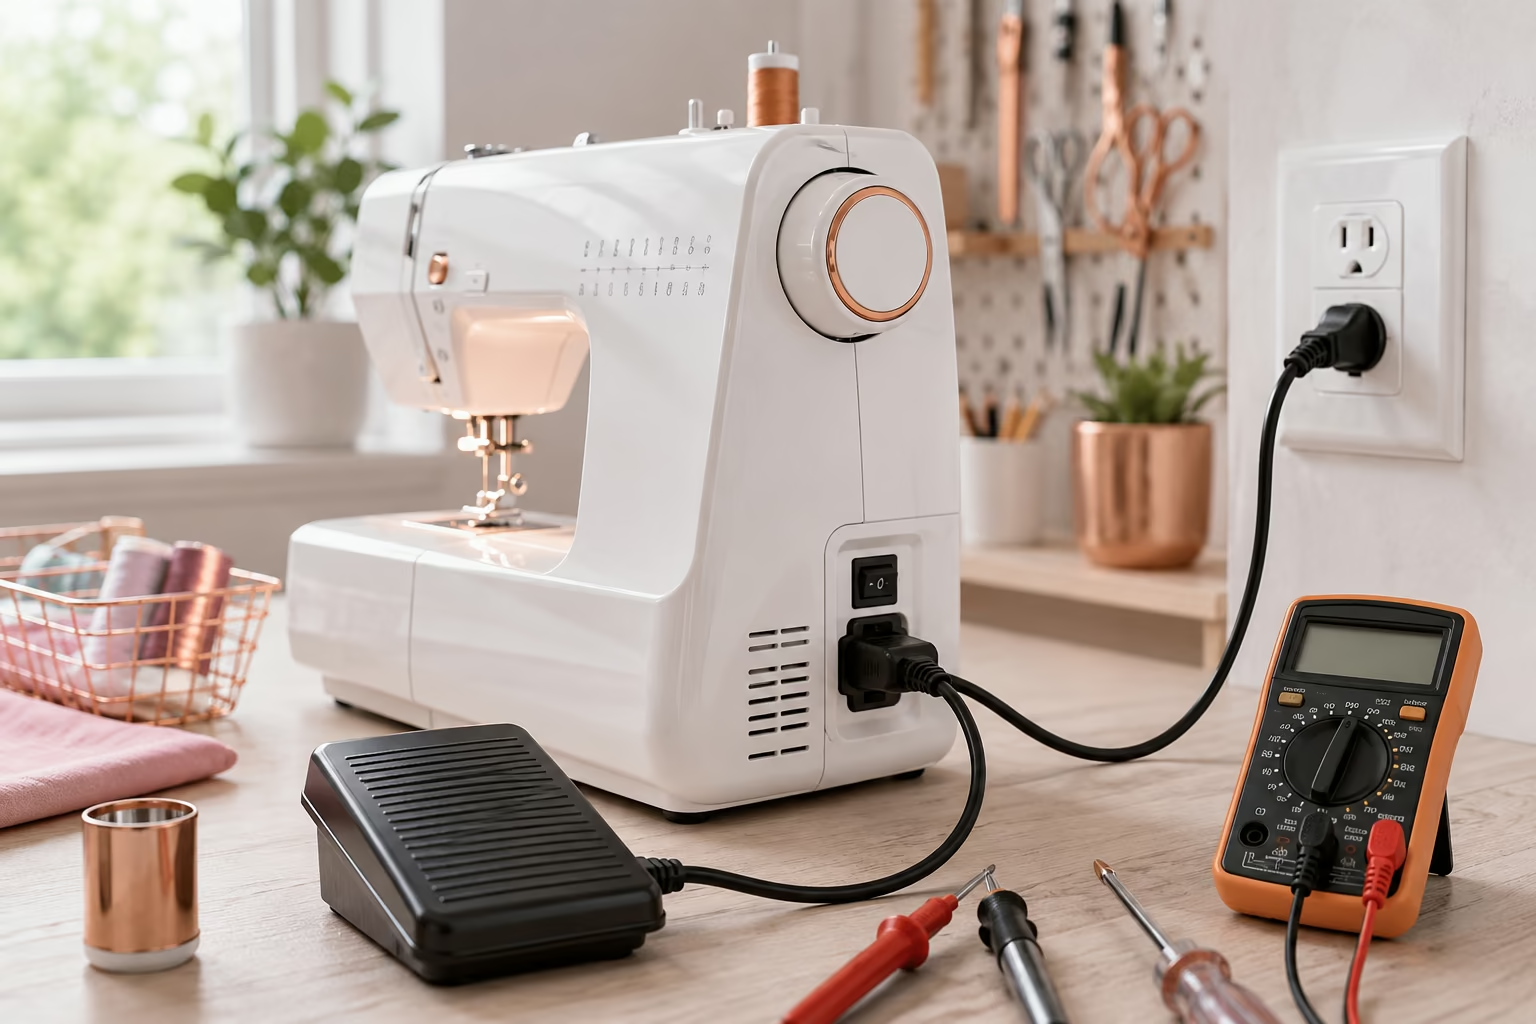
When your sewing machine won’t turn on, the problem is usually a simple electrical issue you can fix yourself. Start by checking the power outlet with another device, inspect the power cord for damage, test the foot pedal connection, and verify the machine’s on/off switch is functioning. Most no-power problems stem from loose connections, tripped breakers, or worn cords rather than expensive internal failures.
Key Takeaways
- Test the outlet first, Plug in a lamp or phone charger to confirm the outlet works before assuming your machine is broken
- Inspect all cords visually, Look for fraying, kinks, or exposed wires on both the power cord and foot pedal cable
- Check connections firmly, Loose plugs at the machine, foot pedal, or wall outlet cause most intermittent power issues
- Verify the foot pedal, A faulty pedal can prevent power from reaching the motor even when everything else works
- Look for a reset button, Many modern machines have a thermal reset button on the bottom or back that trips during overuse
- Test systematically, Work through each component in order rather than jumping to expensive repairs
- Know when to stop, If basic checks don’t solve it, a qualified technician should handle internal electrical work
- Consider machine age, Machines over 20 years old may cost more to repair than replace, especially if multiple electrical components fail
Why Won’t My Sewing Machine Turn On at All?
A completely dead sewing machine usually means power isn’t reaching the motor, which happens for three main reasons: no power at the source (outlet or breaker issue), a break in the power delivery path (damaged cord or loose connection), or a failed internal component (switch, fuse, or motor). The good news is that about 70% of these cases involve external issues you can fix without opening the machine.
Start with the simplest explanation. Plug a lamp or phone charger into the same outlet your machine uses. If that device doesn’t work either, you’ve found your problem, check your circuit breaker panel for a tripped breaker or test a different outlet. If the outlet works fine, move to the next step in your sewing machine troubleshooting process.
Common causes in order of likelihood:
- Tripped circuit breaker or blown fuse in your home’s electrical panel
- Damaged power cord with internal wire breaks
- Loose connection between foot pedal and machine
- Failed on/off switch on the machine body
- Blown internal fuse (on machines that have them)
- Faulty foot pedal preventing power flow
- Dead motor or control board (least common)
One mistake beginners make: Assuming the machine is broken when they’ve accidentally left it in bobbin-winding mode. Many machines disable the needle motor when the bobbin winder is engaged. Check that the bobbin winder is pushed fully to the left (disengaged position) before diagnosing electrical problems.
How to Check If Your Sewing Machine Power Cord Is Broken
Power cords fail gradually through repeated bending, especially near the plug ends where stress concentrates. To check yours properly, unplug the machine and examine the entire cord length in good lighting, flexing it gently every few inches while looking for cracks in the insulation, exposed copper wire, or spots that feel unusually stiff or soft.
Pay special attention to three high-stress zones: where the cord enters the machine body, where it connects to the foot pedal (if applicable), and the last six inches before the wall plug. Run your fingers along these sections, you’re feeling for kinks, flat spots, or areas where the cord bends at sharp angles. A damaged cord might work intermittently when positioned just right, then fail when moved.
Step-by-step cord inspection:
- Unplug from wall and machine completely
- Straighten the cord on a clean, light-colored surface
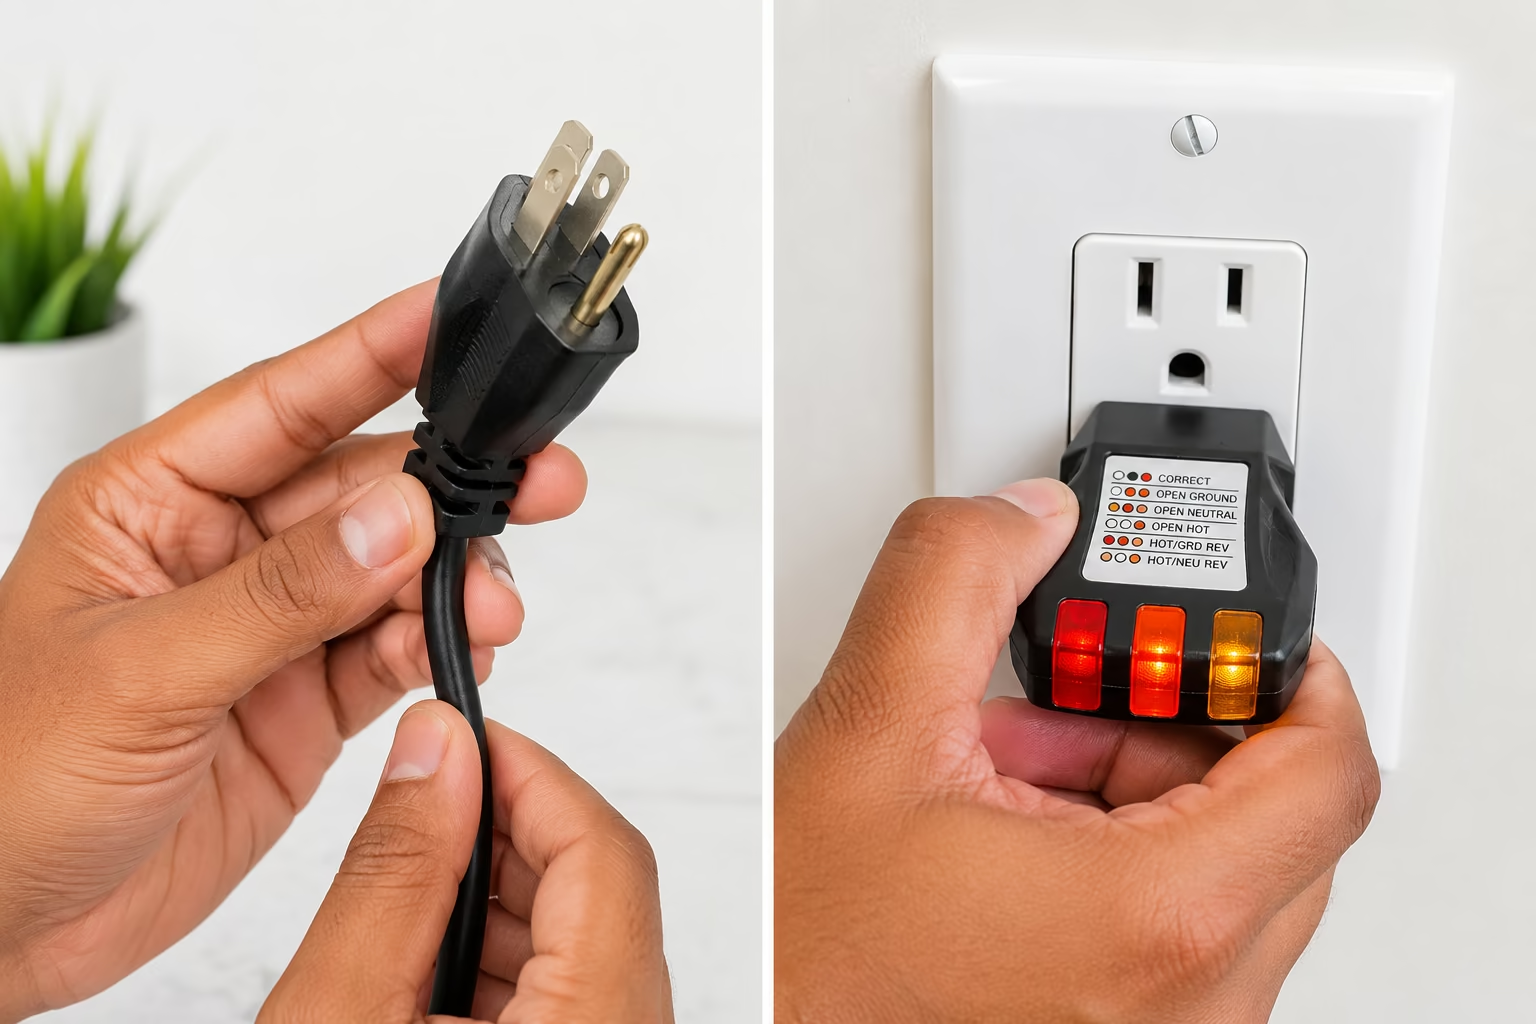
- Inspect the plug prongs for burn marks, corrosion, or bent pins
- Flex the cord near the plug while watching for cracks
- Check the middle section for cuts, pinches, or pet chew marks
- Examine where the cord enters the machine for strain damage
- If your machine has a removable cord, test the connection port for looseness
Testing tip: If you have a multimeter, set it to continuity mode (the symbol looks like sound waves) and touch one probe to each prong of the plug while someone flexes the cord. A working cord will beep continuously. Any interruption in the beep indicates a break inside the insulation.
Replacement cords for most machines cost $15-30 and are available through the manufacturer or universal options at fabric stores. Always match the voltage and amperage rating printed on your machine’s label. For more guidance on maintaining your machine’s electrical components, see our guide on how often to service a sewing machine.

Compatible with: Brother, Singer, Bernina, White, Baby-Lock, Viking, Pfaff and other brands sewing machine.

[Compatible Models] Foot pedal power cord replacement for singer 359102-001, 1116, 1120, 1234, 1412, 1507, 1525, 1725, 1732, 1748, 2250, 2259, 2263, 2277, 2639, 2662, 2732, 2932, 3207, 3210, 3221, 3223, 3229, 3321, 3337, 3342, 3820, 4111, 4205, 4206, 4210, 4212, 4220, 4228, 4411, 4423, 4432, 4452, 5511, 5523, 5532, 5554, 6510, 6518, 6550, 7312, 7350, 8280, 14T948DC, 14T967DC, 14T968DC, 44s, 50t8, 85SCH, E10, e99670, Esteem II 2273, Fashion Mate 3333, FC 1902, HD0400S, HD725, Heavy Duty 6380, KD 1902, m1150, m1500, m2100, m3220, m3300, m3305, m3400, m3500, mx231, mx60, Promise 1512/1409/1408/, Serger s0230, Start 1304, Start 1306, Talent 3323

This is a great replacement cord for your sewing machine, whether you've lost your old cord because of damage or loss.
Sewing Machine Foot Pedal Not Working: Troubleshooting Guide

The foot pedal acts as a variable resistor that controls motor speed, and when it fails, your machine either won’t start at all or runs at only one speed regardless of pressure. Pedal problems account for roughly 30% of “won’t turn on” complaints because the pedal contains moving parts that wear out and a cord that gets stepped on repeatedly.
First, disconnect the pedal from your machine and inspect the connection plug. Look for bent pins, corrosion, or debris in the socket. Plug it back in firmly, you should feel a solid click or resistance, not a loose wobble. If your machine has a knee-lift or direct-power option, try bypassing the pedal entirely to determine if the machine itself works. Some computerized machines have a start/stop button that lets you test the motor without the pedal.
Common foot pedal failures:
- Broken internal spring, Pedal feels mushy or doesn’t return to the up position
- Worn carbon contacts, Machine runs erratically or only at full speed
- Cord damage at pedal entry, Power cuts out when you press down or release
- Loose connection plug, Intermittent power that comes and goes
- Debris buildup, Lint or thread wrapped around the pedal mechanism
DIY test: If you’re comfortable with basic electronics, you can test whether the pedal is the problem by carefully opening its case (usually 2-4 screws on the bottom). Look for obvious breaks, burned components, or loose wires. Many pedals have a simple rheostat (variable resistor) that you can clean with electrical contact cleaner. However, if you see capacitors or circuit boards, close it back up and consult a professional.
Replacement pedals range from $25 for basic mechanical models to $80+ for computerized machine pedals. Always buy the exact model specified for your machine, universal pedals rarely work correctly with modern computerized machines. Check if your machine is still under warranty before purchasing, as pedal failures are often covered.

Carbon Pile Foot Control Pedal with Light and Motor Block. Single Speed.

1PCS Electric Pedal Foot Speed Control with Power Cable for Motor Pedal Control .

[Compatible Models] Foot pedal power cord replacement for brother #j00360051, 1034D, 1634D, 273C, 3034D, 5234prw, 5261CW, 834DP, 888-E42, 888-X55, 888-X64, 920D, 925D, 929D, BM2800, BM3850, DZ1234, GX37, JX2517, KD1902, LR43670, LS1217, LS1520, LS1717, LS2000, LS2020, LS2125, LS2220, LS2250prw, LS2300prw, LS2350, LS2400, LS30, LS590, LX2375, LX2500, LX2763, LX3014, LX3125, LX3817, PS1000, SB170, SM1400, SM1704, SM2700, SM3701, ST371HD, ST531HD, VX1010, VX1120, VX1140, VX1200, VX1435, VX1500, VX710, VX780, VX808, VX809, VX810, VX857, VX950,
How to Tell the Difference Between a Motor Problem and an Electrical Problem
A motor problem means the motor itself has failed mechanically or electrically, while an electrical problem means power isn’t reaching a working motor. The distinction matters because motor replacement costs $80-200 plus labor, while electrical fixes often cost under $50. Here’s how to tell them apart without opening the machine.
If it’s an electrical problem, you’ll typically see:
- No sound at all when you press the pedal (complete silence)
- No lights on computerized machines (display is dark)
- No response to any button or control
- Works fine for a while, then suddenly stops (suggests loose connection)
If it’s a motor problem, you’ll typically see:
- Lights and display work normally, but motor doesn’t run
- Humming or buzzing sound when you press the pedal, but no movement
- Burning smell coming from the machine body
- Motor runs but with unusual grinding, clicking, or squealing sounds
- Machine worked fine, then gradually got slower over several sessions
The definitive test: If your machine has a hand wheel (the large wheel on the right side), turn it manually with the power off. It should rotate smoothly with slight resistance. If it’s locked up, extremely hard to turn, or makes grinding sounds, that’s a mechanical problem, not electrical. If it turns smoothly but the machine still won’t run when powered on, you’re likely dealing with an electrical issue.
For machines that show some signs of life (lights work, display functions) but the motor won’t run, check if you’ve accidentally engaged the bobbin winder or if the machine is in a special mode that disables the needle. Consult your manual for any safety lockouts that might prevent operation. More complex motor issues may require professional sewing machine service.
How Much Does It Cost to Repair a Sewing Machine Electrical Issue?
Basic electrical repairs typically cost $50-120 for parts and labor, while complex issues involving motor replacement or circuit board repair can run $150-300. The final price depends on your machine’s brand, age, and whether parts are readily available. A simple cord replacement might cost $30-40 at a repair shop, while diagnosing and fixing an intermittent short circuit could take two hours of labor at $50-75 per hour.
Typical repair costs in 2026:
| Issue | DIY Parts Cost | Professional Repair Cost |
|---|---|---|
| Power cord replacement | $15-30 | $40-60 |
| Foot pedal replacement | $25-80 | $50-120 |
| On/off switch replacement | $10-25 | $60-100 |
| Internal fuse replacement | $5-15 | $50-80 |
| Motor replacement | $80-200 | $150-300 |
| Circuit board repair | Not DIY | $200-400 |
Cost factors to consider:
- Brand matters, Singer and Brother parts are widely available and affordable; Bernina and Pfaff parts cost more but machines are built to last longer
- Age matters, Machines over 15 years old may need obsolete parts that cost extra to source
- Diagnostic fees, Most shops charge $40-75 just to diagnose the problem, sometimes credited toward repair
- Shipping costs, If you can’t find local service, shipping a machine both ways adds $40-80
For a detailed breakdown of repair costs across different scenarios, check our comprehensive guide on how much sewing machine repair costs.
When repair doesn’t make sense: If the estimate exceeds 50% of a comparable new machine’s price, and your machine is over 10 years old, replacement is usually smarter. A $200 repair on a $300 machine that’s 12 years old means you’re paying near-new prices for old technology. However, vintage all-metal machines and high-end models like Bernina often justify expensive repairs because they’re built better than modern equivalents.
Can You Fix a Sewing Machine That Won’t Turn On Yourself, or Do You Need a Professional?
You can safely handle about 60% of electrical issues yourself if you’re comfortable with basic tools and follow safety precautions. DIY-friendly fixes include replacing cords, pedals, and external switches, plus cleaning connections and testing outlets. However, anything involving opening the machine’s main body, working with capacitors, or diagnosing circuit boards should go to a qualified technician.
Safe for DIY (no special skills needed):
- Testing and replacing the power cord
- Swapping out a faulty foot pedal
- Cleaning connection ports with compressed air
- Checking and resetting circuit breakers
- Replacing an external on/off switch (if accessible without disassembly)
- Tightening loose connection screws
- Testing outlets with a simple plug tester
Requires professional help:
- Opening the machine body to access internal components
- Testing or replacing capacitors (they can hold dangerous charges even when unplugged)
- Circuit board diagnosis and repair
- Motor removal and replacement
- Rewiring internal connections
- Timing adjustments after motor replacement
- Any repair on a machine still under warranty
Safety rules for DIY electrical work:
- Always unplug the machine before touching any electrical component
- Never work on a machine with wet hands or in a damp area
- Don’t bypass safety features like thermal fuses or grounding wires
- If you smell burning or see charred components, stop and consult a professional
- Take photos before disconnecting anything so you can reconnect correctly
- Use tools with insulated handles when working near electrical connections
For basic maintenance that can prevent electrical issues, explore our resources on DIY sewing machine maintenance. If you’re unsure about any repair, the cost of a professional diagnosis ($40-75) is worth the peace of mind and safety.
How to Test Your Sewing Machine Outlet and Circuit Breaker
Before assuming your machine is broken, spend five minutes testing the power source. Electrical outlets fail, circuit breakers trip, and GFCI outlets (the ones with reset buttons, common in bathrooms and kitchens) can shut off without obvious cause. This simple check can save you an unnecessary service call.
Quick outlet test (2 minutes):
- Plug a lamp or phone charger into the same outlet your machine uses
- If it works, the outlet is fine, move to the next troubleshooting step
- If it doesn’t work, check your circuit breaker panel before doing anything else
Circuit breaker check:
Locate your home’s electrical panel (usually in a basement, garage, or utility closet). Open the panel door and look for a breaker switch that’s in the middle position or pointing the opposite direction from the others. Tripped breakers don’t always flip all the way to “off”, they often stop halfway. To reset, push the switch firmly to “off” first, then back to “on.” You should feel a solid click.
GFCI outlet reset:
If your machine is plugged into a bathroom, kitchen, garage, or outdoor outlet, it’s probably a GFCI (Ground Fault Circuit Interrupter) outlet with “test” and “reset” buttons between the plug sockets. These trip when they detect any electrical irregularity. Press the “reset” button firmly, you should hear a click and feel it pop out slightly. If it won’t reset or immediately trips again, there’s either a ground fault in your machine or a problem with the outlet itself.
Advanced outlet testing:
For $10-15, you can buy a simple outlet tester at any hardware store. These plug-in devices have three lights that show whether the outlet is wired correctly. Incorrect wiring (reversed polarity or missing ground) can cause machines to malfunction or not run at all. If the tester shows a wiring problem, call an electrician, this isn’t a DIY fix unless you’re qualified.
Common outlet problems:
- Loose outlet, The receptacle wiggles when you plug things in, causing intermittent connection
- Worn contacts, Old outlets lose their grip, and plugs fall out easily
- Backstabbed wiring, A shortcut wiring method that fails over time (requires electrician)
- Overloaded circuit, Too many devices on one circuit cause repeated trips
If you’ve confirmed the outlet works but your machine still doesn’t, the problem is definitely in the machine or its cords. Move on to testing those components.

【Clear LCD Display & Bottom Indicators】- Equipped with a vibrant color LCD display, this tester shows whether an outlet is wired correctly (green for good, orange for faults) and displays real-time voltage. Bottom indicator lights enhance visibility in dark or tight spaces. The intuitive design makes it easy to read wiring status and voltage at a glance.

CLEAR LCD READOUT: GFCI Receptacle Tester features a large backlit LCD readout for easy voltage reading and clear indication of wiring conditions
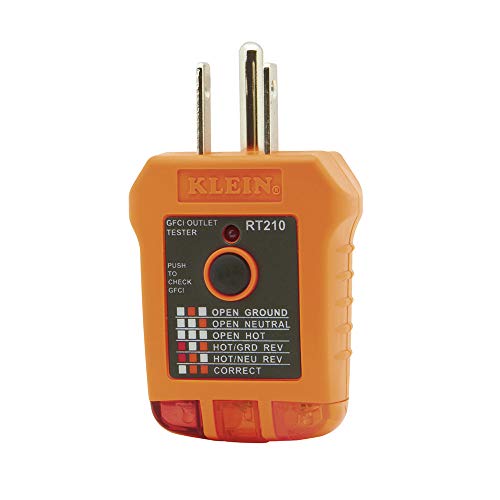
EFFECTIVE GFCI WIRING PROBLEM DETECTION: GFCI Tester detects common wiring problems in standard and GFCI receptacles, ensuring electrical safety
Common Mistakes When Troubleshooting Sewing Machine Power Issues
Even experienced sewers make these errors when diagnosing electrical problems, often leading to unnecessary repairs or missed simple fixes. Avoiding these mistakes will save you time and money.
Mistake #1: Not checking the bobbin winder position
Many machines disable the needle motor when the bobbin winder is engaged. If your machine has a small lever or spindle on top that you push to the right to wind bobbins, make sure it’s pushed fully to the left. This is the most common “my machine won’t run” call that repair shops receive, and it’s not actually a problem.
Mistake #2: Assuming the outlet works without testing it
Just because other things in the room work doesn’t mean that specific outlet is fine. Outlets fail independently, and one dead outlet doesn’t affect others on the same wall. Always test the exact outlet with another device before moving to more complex diagnosis.
Mistake #3: Overlooking the power switch position
Some machines have a switch on the body plus a switch on the power cord, and both must be “on.” Computerized machines may also have a sleep mode that makes them appear off when they’re actually in standby. Check every switch and button before assuming a power failure.
Mistake #4: Forcing stuck components
If the hand wheel won’t turn or a switch feels jammed, don’t force it. You might have thread wrapped around the bobbin case, a broken needle stuck in the mechanism, or a timing issue. Forcing stuck parts can turn a $50 repair into a $200 one. For related mechanical issues, see our guide on why sewing machines jam.
Mistake #5: Mixing up symptom and cause
“My machine won’t turn on” might actually mean “my machine turns on but the needle won’t move” or “my machine hums but doesn’t sew.” Be precise about what’s happening. Does the light come on? Do you hear any sound? Does the hand wheel turn freely? Accurate symptom description helps technicians (or online helpers) give you the right solution.
Mistake #6: Skipping the manual
Your machine’s manual has a troubleshooting section that addresses model-specific quirks. Some machines have reset procedures, hidden switches, or safety lockouts that aren’t obvious. Download a PDF manual from the manufacturer’s website if you’ve lost your printed copy.
Mistake #7: Working on a machine that’s still plugged in
This seems obvious, but people do it. Always unplug before inspecting cords, cleaning connections, or opening any panels. Even battery-powered lights on some machines don’t mean the motor circuit is safe to touch.
What to Check When Your Sewing Machine Turns On But the Motor Won’t Run
This specific scenario, lights work, display functions, but pressing the pedal does nothing, points to a problem between the control system and the motor itself. The good news is that the main power supply is working, which narrows down the possible causes significantly.
First, verify these non-electrical causes:
- Bobbin winder engaged, Push the bobbin winder spindle or lever fully to the left
- Presser foot up, Some machines won’t sew with the presser foot raised (safety feature)
- Buttonhole mode, Certain modes lock the machine until you complete a sequence
- Thread sensor triggered, Computerized machines may stop if they detect no thread
- Needle position, Make sure the needle is fully raised or lowered, not stuck mid-stroke
If those check out, test these electrical components:
Foot pedal connection, Unplug and reconnect the pedal firmly. Try wiggling the connection while pressing the pedal. If the motor starts intermittently, you’ve found a loose connection. Clean the plug and socket with electrical contact cleaner and reconnect.
Motor belt, On machines with a rubber belt connecting the motor to the hand wheel, the belt can slip off, break, or stretch. Turn the hand wheel by hand. If it spins freely with almost no resistance, the belt may be disconnected. This requires opening the machine, but it’s a $10 part and a straightforward fix if you’re handy.
Thermal reset button, Many machines have a small button (usually red or black) on the bottom or back that pops out when the motor overheats. Press it firmly to reset. If it trips repeatedly during normal use, the motor is failing or you’re sewing through materials that are too thick for your machine.
Clutch or motor coupling, Some machines have a clutch that can slip or disengage. If the hand wheel turns but you hear no motor sound at all, the motor might be running but not connected to the drive mechanism. This is a professional repair.
For machines that show intermittent motor function, the problem is usually a failing capacitor (the component that helps the motor start) or worn motor brushes. Both require professional service. If your machine is older and you’re considering whether repair is worthwhile, read our analysis of whether old sewing machines are better than new ones.
Is Your Old Sewing Machine Worth Repairing If It Won’t Power On?
The repair-or-replace decision depends on four factors: the machine’s age, its original quality, the repair cost, and your attachment to it. A $150 repair makes sense for a $1,200 Bernina but not for a $180 entry-level Brother that’s 8 years old. Here’s how to make a smart decision.
Repair makes sense when:
- The machine is less than 5 years old and was mid-range or better quality ($300+ when new)
- It’s a vintage all-metal machine (pre-1980) in good mechanical condition
- It’s a high-end brand (Bernina, Pfaff, Janome top models) regardless of age
- The repair cost is under 40% of a comparable new machine’s price
- The machine has sentimental value and works well otherwise
- You’ve invested in specialty feet and accessories that won’t fit other machines
Replacement makes sense when:
- The machine is over 10 years old and was budget-priced when new
- Multiple components are failing (electrical plus mechanical issues)
- Repair costs exceed 50% of a new comparable machine
- Parts are obsolete or hard to find
- You’ve been wanting to upgrade to more features anyway
- The machine has had multiple repairs in the past two years
The math: If repair costs $180 and a similar new machine costs $400, you’re paying 45% of new price for old technology. However, if your machine is a $900 Janome that needs a $200 motor, you’re paying 22% of replacement cost, that’s a good deal, especially since the rest of the machine is proven reliable.
Special case, vintage machines: All-metal machines from the 1950s-1970s (Singer Featherweight, vintage Kenmore, old Pfaff models) are often worth repairing even at high cost because they’re built better than most modern machines under $600. These machines can run for another 50 years with proper care. For more on vintage machine value, see our guide on vintage sewing machine care.
Get a written estimate before authorizing any repair over $75. Ask the technician to explain what failed and why, and whether other components are likely to fail soon. A good technician will be honest about whether repair makes economic sense.
How to Tell If Your Sewing Machine Fuse Is Blown
Not all sewing machines have user-replaceable fuses, but many do, especially older models and some mid-range computerized machines. A fuse is a safety device that breaks the circuit if too much current flows, protecting the motor and electronics from damage. When a fuse blows, the machine goes completely dead with no lights, no sound, and no response to any control.
Locating the fuse:
Check your manual first, it will show the fuse location if your machine has one. Common locations include:
- Inside a small compartment on the bottom of the machine (often near the power cord entry)
- Behind a small panel on the back or side
- Inside the foot pedal (less common)
- Inline on the power cord (looks like a small cylinder)
If your manual doesn’t mention a fuse, your machine probably doesn’t have a user-replaceable one, though it may have an internal fuse that requires professional service to access.
Testing a fuse:
- Unplug the machine completely
- Remove the fuse from its holder (it may twist out or pull straight out)
- Look at the fuse, if the metal strip inside is broken or the glass is blackened, it’s blown
- For a definitive test, use a multimeter set to continuity mode and touch the probes to each end of the fuse (should beep if good)
Replacing a fuse:
Fuses are rated by amperage (usually 3A, 5A, or 8A for sewing machines) and must be replaced with the exact same rating. Using a higher-rated fuse defeats the safety purpose and could damage your machine or create a fire hazard. Using a lower-rated fuse will blow immediately. The rating is printed on the fuse body.
Replacement fuses cost $2-5 at hardware stores or electronics shops. Buy several so you have spares. If the new fuse blows immediately when you plug in the machine, there’s a short circuit somewhere that needs professional diagnosis, don’t keep replacing fuses.
Why fuses blow:
- Power surge or lightning strike
- Short circuit in the wiring
- Failing motor drawing too much current
- Using the wrong voltage (plugging a 110V machine into 220V, or vice versa)
- Age, old fuses can fail even without a fault
If your machine doesn’t have a fuse and won’t turn on after a power surge, the internal electronics may be damaged. This is an expensive repair that often isn’t worth doing on machines under $500.
What to Do When Your Sewing Machine Worked Yesterday But Is Completely Dead Today
Sudden, complete failure with no warning usually points to a specific event rather than gradual wear. Something changed between yesterday and today, and identifying what changed is the fastest path to a solution.
Work through this checklist systematically:
1. Check for power events
Did you have a storm, power outage, or see lights flicker? Power surges can blow fuses or damage electronics. Check other devices in the same room, if multiple things stopped working, it’s your home’s electrical system, not the machine.
2. Verify nothing was unplugged
This sounds silly, but check that the power cord is firmly seated in both the wall and the machine. Pets, vacuum cleaners, and kids can disconnect cords without you noticing. Also check that any extension cord or power strip is still on and working.
3. Look for tripped breakers or GFCI outlets
Someone might have plugged in a space heater or hair dryer that tripped the circuit. Check your breaker panel and press the reset button on any GFCI outlets in the area.
4. Inspect for physical damage
Did you move the machine? Drop something on it? Spill liquid near it? Physical trauma can break internal connections or damage components. Look for any signs of impact or moisture.
5. Check if anything is jammed
Try turning the hand wheel by hand. If it’s locked up, you might have a broken needle, tangled thread, or mechanical jam that’s triggering a safety shutoff. This isn’t technically an electrical problem, but it can prevent the machine from powering on.
6. Test with a different outlet
Move the machine to a completely different room and outlet. This rules out local electrical issues and tests whether the problem travels with the machine.
If none of these reveal the problem:
The failure is likely internal, a blown fuse, failed switch, or damaged component. At this point, you need either a multimeter and some electrical knowledge or a professional technician. Don’t keep trying to force the machine to work, as you might cause additional damage.
Prevention tip: Use a surge protector (not just a power strip) for your sewing machine, especially if you have an expensive computerized model. A good surge protector costs $20-40 and can save you from a $300 circuit board replacement after a lightning strike. For ongoing care that prevents problems, review our guide on sewing machine maintenance.
Beginner’s Guide to Checking Sewing Machine Electrical Problems Safely
If you’ve never diagnosed electrical issues before, the process can feel intimidating. However, most sewing machine electrical problems are low-voltage and safe to investigate if you follow basic precautions. Here’s a step-by-step approach designed for complete beginners.
Safety first, absolute rules:
- Always unplug the machine before touching any electrical component
- Never work on a machine with wet hands or in a damp area
- Don’t use metal tools near exposed electrical connections while the machine is plugged in
- If you smell burning or see smoke, unplug immediately and don’t plug back in
- When in doubt, stop and consult a professional
Your beginner’s diagnostic process:
Step 1: Visual inspection (5 minutes)
With the machine unplugged, examine every visible electrical component. Look for obvious damage: frayed cords, bent plug prongs, cracks in the foot pedal, loose connections, or burn marks. About 40% of problems are visible to the naked eye.
Step 2: Connection check (3 minutes)
Unplug and reconnect every connection point: wall outlet to power cord, power cord to machine, foot pedal to machine. Make sure each connection is firm and fully seated. Wiggle each connection gently, nothing should feel loose.
Step 3: Outlet test (2 minutes)
Plug a lamp into the outlet your machine uses. If the lamp works, the outlet is fine. If not, check your circuit breaker panel.
Step 4: Bypass test (if possible)
If your machine has a start/stop button or can run without the foot pedal, try that. If the machine works without the pedal, the pedal is your problem. If it still doesn’t work, the issue is in the machine or power cord.
Step 5: Hand wheel test (1 minute)
With the machine unplugged, turn the hand wheel manually. It should rotate smoothly with slight resistance. If it’s locked up or extremely difficult to turn, you have a mechanical jam, not an electrical problem.
Step 6: Switch and button check (2 minutes)
Make sure every switch is in the correct position. Check the on/off switch, bobbin winder position, and any mode buttons. Consult your manual for the correct “ready to sew” configuration.
What you’ll need:
- Good lighting (a flashlight or phone light helps)
- Your machine’s manual (download a PDF if you’ve lost it)
- A lamp or phone charger for outlet testing
- Optional: A $10 outlet tester from a hardware store
- Optional: A multimeter ($20-40) if you want to test cords and fuses
When to stop and call a professional:
- If you need to open the machine’s main body
- If you see burned or melted components
- If the problem isn’t obvious after these basic checks
- If you’re not comfortable working with electrical components
- If the machine is still under warranty (DIY repairs can void coverage)
Most beginners can successfully diagnose and fix cord, pedal, and connection problems. Internal issues require more expertise. For other common beginner problems, explore our sewing troubleshooting resources.
Frequently Asked Questions
Why does my sewing machine turn on but the light doesn’t work?
The light bulb has likely burned out or the bulb socket has a loose connection. The light circuit is separate from the motor circuit, so a dead light doesn’t affect sewing function. Replace the bulb with the correct type (check your manual), most use small appliance bulbs available at fabric stores or online.
Can a sewing machine be fixed if it got wet?
It depends on how wet and how quickly you act. Unplug immediately, don’t try to turn it on, and let it dry completely for at least 48-72 hours in a warm, dry place. Water damage to electronics is often permanent, but motors can sometimes be saved if dried thoroughly before powering on. Take it to a professional for assessment before plugging it back in.
How long should a sewing machine last before electrical problems start?
Quality machines typically run 10-15 years before electrical components begin failing, though this varies widely by brand and usage. Budget machines ($100-200) often develop issues after 5-7 years, while high-end machines ($800+) can run 20+ years with proper maintenance. Vintage all-metal machines from the 1950s-1970s often outlast modern machines.
Is it normal for my sewing machine to spark when I plug it in?
A small spark when plugging in is normal, it’s the initial current flow. However, repeated sparking, large sparks, or sparks during use indicate a serious problem. Unplug immediately and have it inspected. Sparking can indicate a short circuit, damaged cord, or failing motor that could cause fire.
Why does my machine work for a few minutes then stop?
This is classic thermal overload, the motor overheats and a safety device shuts it down. Causes include sewing too fast for extended periods, sewing through materials that are too thick, or a motor that’s failing and drawing too much current. Let it cool for 30 minutes, then try again. If it happens repeatedly, reduce your speed or have the motor checked.
Can I use an extension cord with my sewing machine?
Yes, but use a heavy-duty extension cord rated for at least 15 amps. Thin extension cords cause voltage drop that can make the motor run poorly or not at all. Keep the cord as short as possible, under 25 feet is best. Never daisy-chain multiple extension cords together.
What does it mean if my machine hums but doesn’t sew?
The motor is getting power and trying to run, but something is preventing movement. Common causes include a seized motor bearing, broken drive belt, jammed mechanism, or a capacitor that’s failing to provide the starting boost the motor needs. Turn the hand wheel by hand to check for mechanical jams before assuming it’s electrical.
Should I repair a sewing machine that’s out of warranty?
It depends on the repair cost versus replacement cost. Get a written estimate first. If repair costs less than 40% of a comparable new machine and your current machine otherwise works well, repair makes sense. If the machine has had multiple problems or repair costs approach replacement cost, buying new is usually smarter.
How can I prevent electrical problems in my sewing machine?
Use a surge protector, keep the machine clean and covered when not in use, avoid bending cords at sharp angles, unplug during storms, and have it professionally serviced every 2-3 years. Don’t overwork the motor by sewing through materials that are too thick for your machine’s capacity.
Why won’t my computerized sewing machine turn on after a power outage?
Power outages can cause the machine’s computer to lock up or corrupt its memory. Try unplugging the machine for 5 minutes, then plugging it back in, this forces a complete reset. If that doesn’t work, check if there’s a reset button or procedure in your manual. Power surges during outages can also damage electronics, requiring professional repair.
Is there a reset button on sewing machines?
Many modern machines have a thermal reset button (usually on the bottom or back) that pops out when the motor overheats. Press it firmly to reset. Some computerized machines also have an electronic reset procedure (often unplugging for several minutes or holding specific button combinations), check your manual for model-specific instructions.
Can I replace a sewing machine motor myself?
Motor replacement is technically possible for someone with mechanical skills and the right tools, but it’s not beginner-friendly. You’ll need to disassemble the machine, disconnect wiring, remove the old motor, install and align the new one, and potentially adjust timing. Most people find it more cost-effective to pay a professional, as improper installation can damage other components.
Conclusion
When your sewing machine won’t turn on, the solution is usually simpler than you think. Start with the basics in this electrical checklist: test the outlet, inspect all cords for damage, verify connections are tight, check the foot pedal, and look for reset buttons or tripped breakers. These straightforward checks solve the majority of power problems without requiring expensive repairs or professional help.
Work through the diagnostic steps systematically rather than jumping to conclusions. A dead machine doesn’t automatically mean a dead motor, it’s far more likely to be a loose connection, worn cord, or tripped safety device. Take your time with each check, and don’t skip steps even if they seem obvious.
Your next steps:
- Work through the electrical checklist in order, starting with the outlet test
- Document what you find, photos and notes help if you need to consult a technician
- Attempt only repairs you’re comfortable with; know when to call a professional
- Get a written estimate before authorizing any repair over $75
- Consider whether repair makes economic sense given your machine’s age and value
For ongoing machine health, establish a regular maintenance routine that includes cleaning, oiling, and periodic professional service. Prevention is always cheaper than repair. If you determine your machine isn’t worth fixing, explore our sewing machine comparison resources to find the right replacement.
Remember that most electrical problems have simple causes and straightforward solutions. With patience and systematic troubleshooting, you’ll likely have your machine running again without a costly service call.


