Quick Answer
Most children can begin learning basic hand-sewing skills around age 5 with close supervision, while machine sewing typically becomes appropriate between ages 7-8 depending on the child’s fine motor skills and attention span. Younger children (ages 3-4) can start with pre-sewing activities like lacing cards and fabric play. The key factor isn’t just age but the individual child’s dexterity, ability to follow safety instructions, and genuine interest in the craft.
Key Takeaways
- Hand sewing can start around age 5 with large plastic needles, felt fabric, and close adult supervision
- Machine sewing is typically safe from age 7-8 when children can follow multi-step instructions and understand safety rules
- Pre-sewing activities (ages 3-4) like lacing cards and fabric sorting build foundational skills
- Safety is paramount: always supervise young sewers, use age-appropriate tools, and establish clear rules before starting
- Hand sewing before machine sewing helps children understand thread tension, stitch formation, and fabric handling
- First projects should be simple: felt bookmarks, fabric coasters, and pillowcases work better than clothing
- Kids’ sewing machines cost $50-150 and feature safety guards, slower speeds, and simplified threading
- Common mistakes include rushing to machines too early and choosing projects that are too complex for skill level
- Sewing benefits children with ADHD by providing structured, hands-on focus and visible progress
- Teaching at home vs. classes both work well; choose based on your own sewing confidence and your child’s learning style
What Age Can Kids Start Learning to Sew Safely?
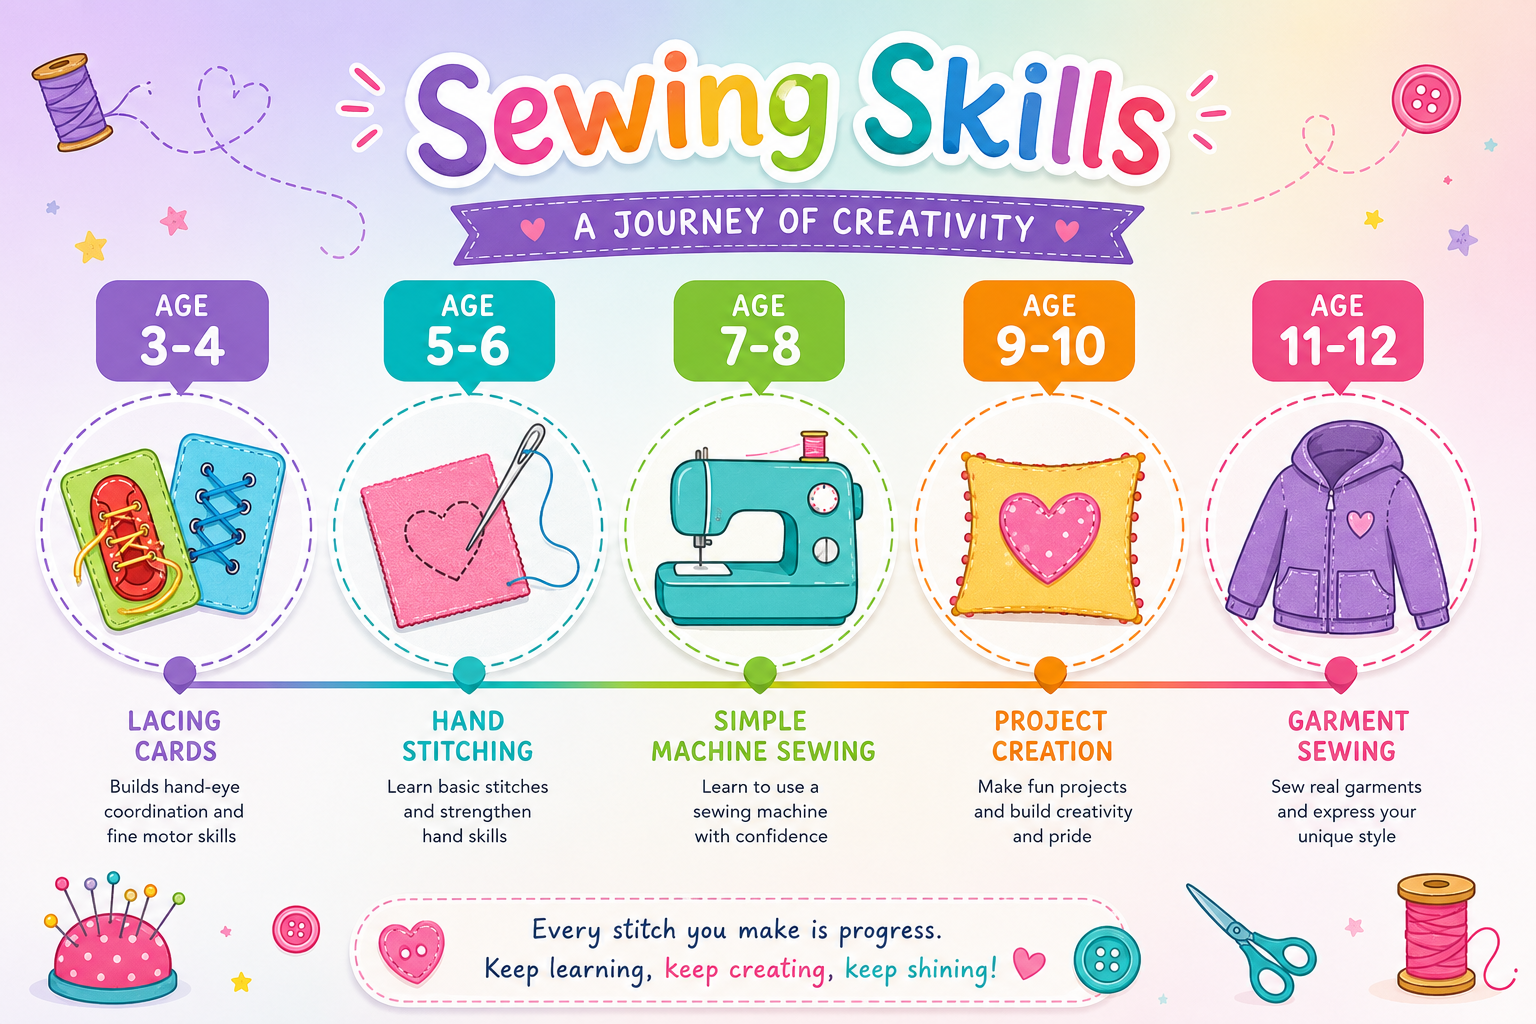
Children can safely begin sewing activities as early as age 3-4 with pre-sewing exercises, progress to supervised hand sewing around age 5, and typically handle beginner sewing machines by age 7-8. The exact starting age depends more on individual development than a specific number.
Age 3-4: Pre-Sewing Foundation
- Lacing cards with thick yarn
- Sorting fabric scraps by color and texture
- Playing with large plastic “sewing” toys
- Developing pincer grip through other crafts
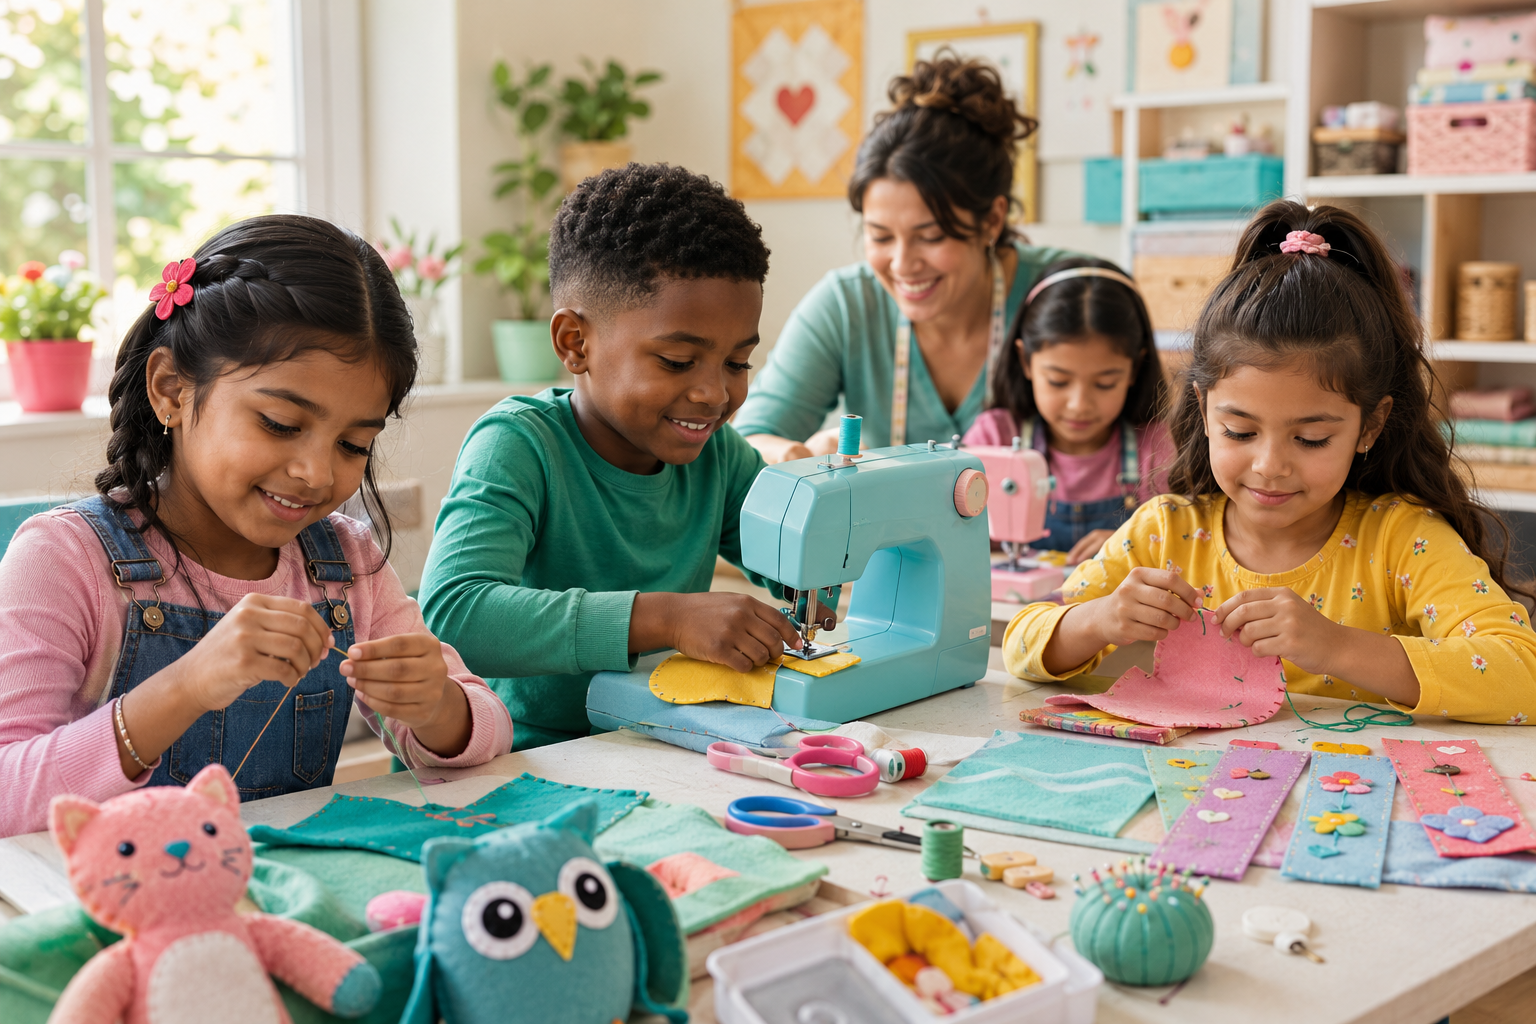
Age 5-6: Hand Sewing Basics
- Large plastic needles with blunt tips
- Felt or burlap (easy-to-pierce fabrics)
- Simple running stitch and whip stitch
- Constant adult supervision required
Age 7-8: Introduction to Machines
- Child-safe sewing machines with finger guards
- Understanding basic machine parts and their functions
- Straight-line sewing on practice fabric
- Following multi-step safety instructions
Age 9+: Independent Skill Building
- More complex projects and techniques
- Learning about seam allowances and pattern following
- Supervised use of standard machines
- Beginning to troubleshoot simple problems
Choose hand sewing first if your child is under 7, has shorter attention span, or you want to minimize safety concerns. Choose machine introduction if your child is 8+, has demonstrated responsibility with other tools, and shows sustained interest in sewing.
Is 4 Too Young to Start Sewing with Supervision?
Four years old is not too young to start sewing-related activities, but it’s too early for traditional needle-and-thread sewing. At this age, children benefit most from pre-sewing activities that build the fine motor skills and hand-eye coordination needed for actual sewing later.
Appropriate Activities for 4-Year-Olds:
- Lacing boards and cards: Thick plastic needles with yarn through pre-punched holes
- Fabric collages: Gluing fabric scraps onto cardboard
- Button sorting: Organizing buttons by size, color, or number of holes
- Weaving with paper strips: Understanding over-under patterns
- Play sewing kits: Toy machines and plastic tools that mimic real sewing
Red flags that a child isn’t ready:
- Cannot follow two-step instructions consistently
- Puts small objects in mouth
- Lacks interest and becomes frustrated quickly
- Cannot sit still for 5-10 minute activities
Common mistake: Pushing needle skills too early can create frustration and kill interest. If your 4-year-old shows exceptional fine motor skills and intense interest, you can try large plastic tapestry needles with felt under constant supervision, but most children this age aren’t developmentally ready.
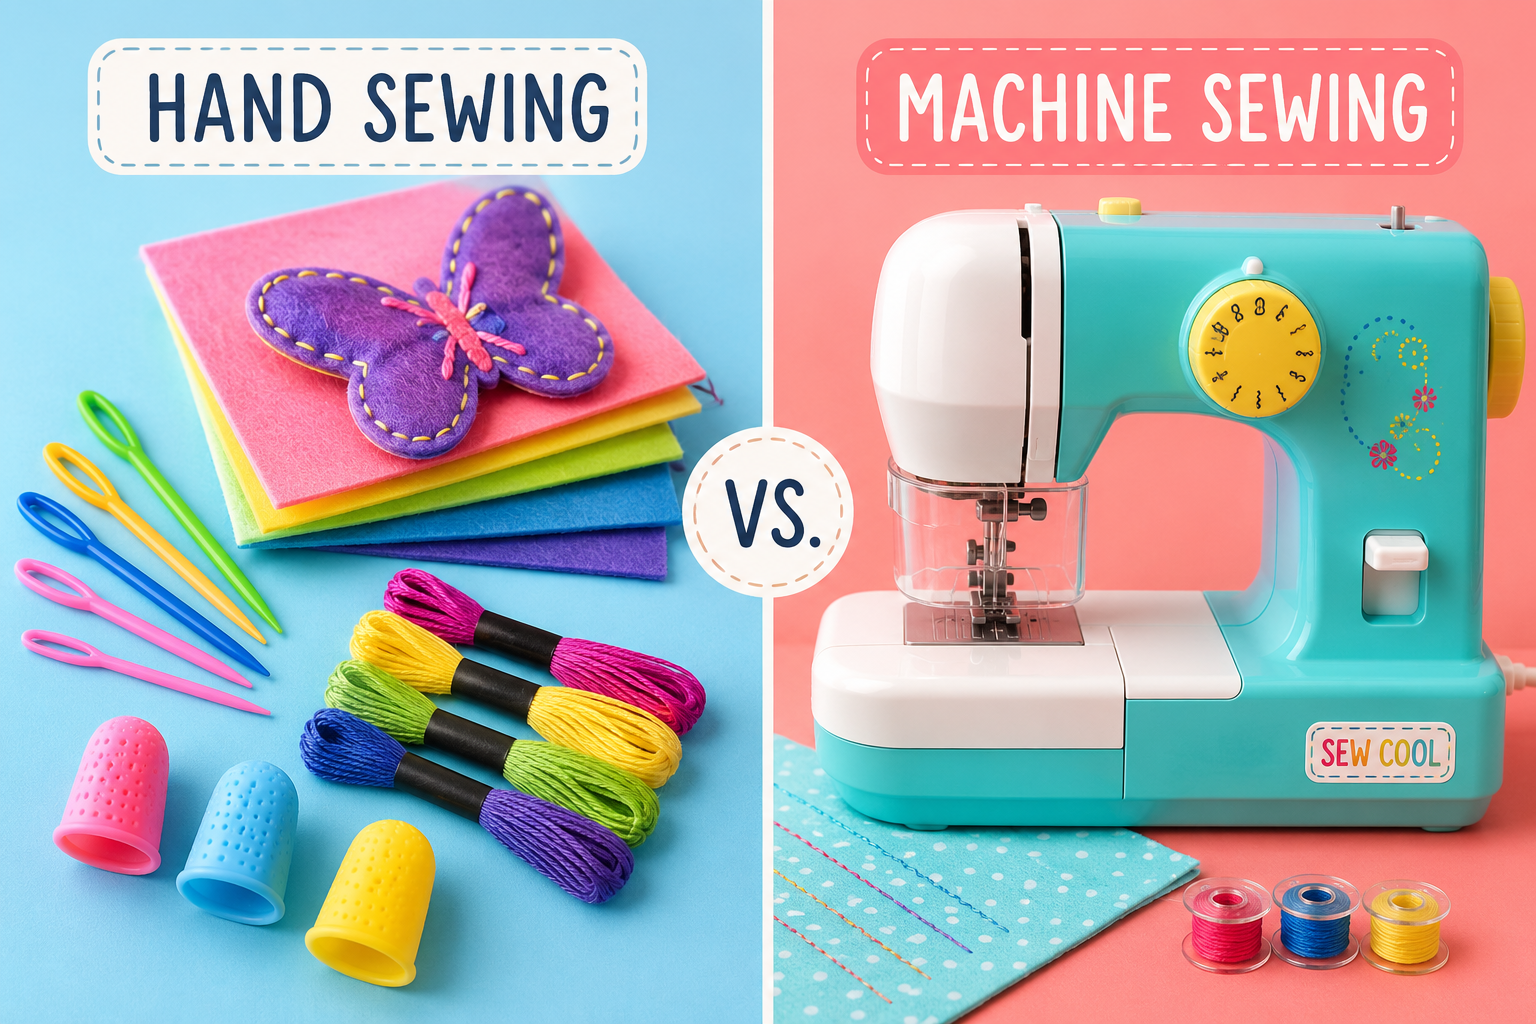
Hand Sewing vs Machine Sewing for Young Children
Hand sewing should come before machine sewing for most children because it teaches fundamental concepts at a slower, more controllable pace. Hand sewing allows kids to feel the needle entering fabric, understand thread tension, and develop the patience needed for quality work.
Hand Sewing Advantages:
- Complete control: Child sets the pace entirely
- Tactile learning: Feeling how thread moves through fabric
- Lower cost: Minimal equipment investment ($10-20 for supplies)
- Portable: Can sew anywhere with good lighting
- Immediate feedback: See and feel mistakes instantly
- Safety: No moving parts or electrical components
Machine Sewing Advantages:
- Faster results: Completed projects in one session
- Straight, even stitches: Less frustration with appearance
- Modern skill: Most adult sewing uses machines
- Exciting factor: Kids often find machines more engaging
- Stronger seams: Better for functional items
The ideal progression: Start with 6-12 months of hand sewing (ages 5-7), then introduce machines around age 7-8. This builds understanding of how stitches work before adding the complexity of threading a machine and controlling speed.
Exception: If your child is 9+ and brand new to sewing, you can introduce both simultaneously, spending a few sessions on hand stitches before moving to the machine.
How to Teach a 5-Year-Old Basic Sewing Skills
Teaching a 5-year-old to sew requires breaking skills into tiny steps, using high-contrast materials, and keeping sessions short (15-20 minutes). Start with the running stitch on felt using embroidery floss and a large plastic needle.
Step-by-Step First Lesson:
Setup (5 minutes)
- Sit side-by-side at a well-lit table
- Use a 6-inch square of felt in a bright color
- Thread a plastic tapestry needle with contrasting embroidery floss
- Tie a large knot at the thread end together
Demonstrate slowly (3 minutes)
- Show the “up and down” motion of the running stitch
- Use simple language: “Poke up from the bottom, pull through, poke down from the top”
- Let them watch you complete 5-6 stitches
Guided practice (10 minutes)
- Place your hand over theirs for the first few stitches
- Gradually reduce assistance as they get the rhythm
- Praise effort, not perfection: “You pulled the thread all the way through!”
Independent practice (5 minutes)
- Let them complete a line of stitches alone
- Sit close but don’t hover
- Intervene only for safety or if they ask
Materials checklist for beginners:
- Plastic tapestry needles (size 13 or larger)
- Felt squares in multiple colors
- Embroidery floss (easier to grip than regular thread)
- Child-safe scissors with rounded tips
- Needle threader (makes setup faster)
Common mistake: Expecting neat, even stitches. At age 5, the goal is simply completing the motion and building confidence. Precision comes later.
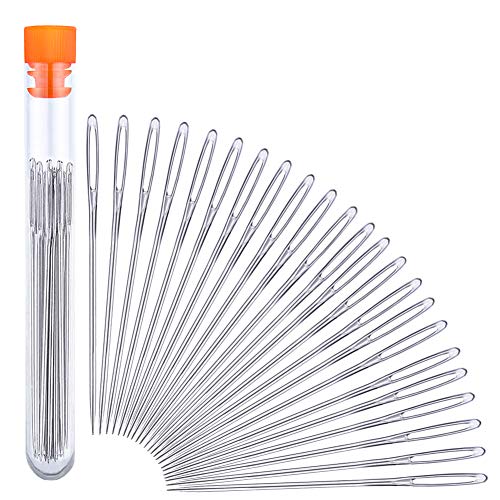
Sewing Needles Set:The package includes 23 pieces large eye sewing needles (2.36in Sewing Sharp Needles) and a transparent needle bottle (color is random)
Sewing Safety Tips for Kids Under 10
Children under 10 need clear safety rules, age-appropriate tools, and constant supervision when sewing. Establish non-negotiable rules before the first lesson and enforce them consistently.
Essential Safety Rules:
For Hand Sewing:
- Needles stay on the table, never in pockets or mouths
- Always push the needle away from your body
- Use a thimble or finger guard when learning
- Count needles before and after each session
- Store needles in a magnetic holder or pincushion immediately after use
- Never sew while walking or standing
For Machine Sewing:
- Fingers stay at least 2 inches from the needle
- Never lean face close to the needle area
- Turn off and unplug machine when threading or changing settings
- Keep hair tied back and avoid loose sleeves
- Adult must be within arm’s reach at all times
- No running or playing near the sewing machine
Age-Appropriate Tool Modifications:
- Ages 5-6: Plastic needles only, no pins, child-safe scissors
- Ages 7-8: Metal needles with adult supervision, magnetic pin holder, basic presser feet
- Ages 9-10: Standard tools with supervision, introduction to rotary cutters (with extreme caution)
Emergency preparedness: Keep a first-aid kit nearby with bandages and antiseptic. Teach children to immediately tell an adult if they prick themselves, even if it seems minor.
Choose plastic needles if your child is under 7, easily distracted, or new to following safety rules. Choose metal needles if your child is 8+, has demonstrated consistent rule-following, and plastic needles are bending or breaking on their projects.
Best Beginner Sewing Machine for 7-Year-Olds
The best beginner sewing machine for a 7-year-old features a finger guard, adjustable slow speed, simple threading, and a lightweight design. Expect to spend $50-150 for a quality kids’ machine that will last through the learning phase.
Top Features to Look For:
- Finger guard: Clear plastic shield that prevents fingers near the needle
- Speed control: Adjustable or permanently slow speed (under 400 stitches per minute)
- Simple threading: Color-coded path or automatic threader
- Lightweight: Child can carry it (under 10 pounds)
- Basic stitches: Straight stitch and zigzag are sufficient
- Free arm: Allows sewing tubes like pillowcases
- Reverse lever: Easy to reach and operate
Recommended Starter Machines (2026):
- Janome Sew Mini: $80-100, excellent finger guard, very simple
- Brother XM1010: $100-120, grows with the child, good safety features
- Singer Start 1304: $90-110, durable, straightforward controls
Avoid these features in kids’ machines:
- Too many stitch options (overwhelming)
- Computerized displays (unnecessary complexity)
- High speed without adjustment (safety risk)
- Flimsy plastic construction (breaks easily)
Common mistake: Buying a toy sewing machine that can’t handle real fabric. These $30-40 machines frustrate children because they jam constantly and produce poor results. Invest in a real beginner machine instead.
When to upgrade: If your child is still sewing regularly after 12-18 months and wants to try garment sewing or more complex projects, consider a standard beginner machine. Many beginner-friendly machines work well for older children and adults.
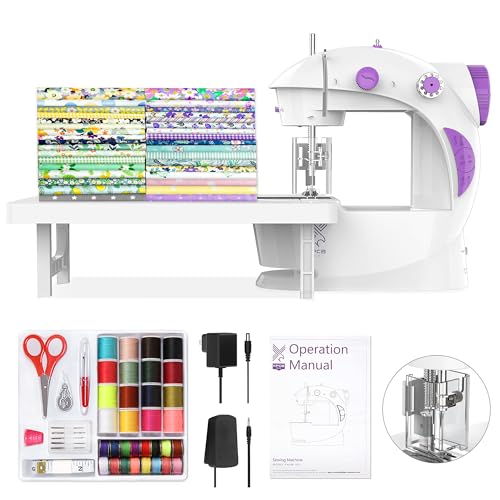
【Fabric Bundles】Equipped with 20pcs 8” x8”in and 100% cotton fabrics square with different patterns, it helps to create your unique sewing project, do the patch work or school projects. And it is also the great practice tool for sewing.
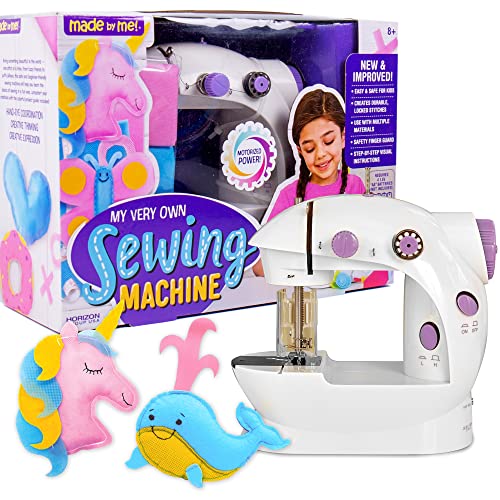
NEW & IMPROVED DESIGN: This battery-operated, two-speed sewing machine is designed to make sewing easy for beginners. It’s loaded with user-friendly features like an on/off switch, adjustable stitches and lengths, pre-threaded bobbins, and more!
Should My Child Learn Hand Sewing Before Using a Machine?
Yes, children should learn basic hand sewing before using a machine because it builds foundational understanding of how stitches work, develops patience, and teaches problem-solving without the added complexity of mechanical controls. Plan for 6-12 months of hand sewing before introducing a machine.
What Hand Sewing Teaches:
- Thread tension: Feeling how tight is too tight
- Stitch formation: Understanding how thread locks fabric together
- Fabric behavior: Learning that different fabrics need different approaches
- Patience: Accepting that quality work takes time
- Problem-solving: Fixing mistakes by hand before dealing with machine troubleshooting
Skills to Master Before Machine Introduction:
- Threading a needle independently
- Tying secure knots
- Running stitch with relatively even spacing
- Backstitch for reinforcement
- Whip stitch for edges
- Sewing a straight line following a drawn guide
The transition process:
- Continue hand sewing for hems, buttons, and repairs even after learning machine skills
- Explain that machines do the same stitches, just faster
- Let them watch you sew on a machine before trying themselves
- Start machine practice with straight lines on paper (no thread)
Exception: Children 10+ who are new to sewing can learn both simultaneously, but should still spend several sessions on hand stitches first to understand the fundamentals.
Best First Sewing Projects for 8-Year-Olds
The best first projects for 8-year-olds are functional items with straight seams, minimal pattern pieces, and visible results in one session. Felt bookmarks, fabric coasters, and simple drawstring bags work better than clothing or stuffed animals.
Ideal Starter Projects (Ranked by Difficulty):
Level 1: Hand Sewing
- Felt bookmark: Single layer, decorative stitching around edges (30 minutes)
- Fabric coaster: Two squares sewn together, turned right-side out (45 minutes)
- Bean bag: Small square pillow filled with rice or beans (1 hour)
Level 2: Beginning Machine
- Pillowcase: Two rectangles, three straight seams (1-2 hours)
- Drawstring bag: Rectangle folded and sewn, casing for cord (1.5 hours)
- Table runner: Long rectangle with hemmed edges (1 hour)
Level 3: Intermediate
- Tote bag: Rectangles with handles, understanding seam allowances (2-3 hours)
- Pajama pants: Simple pattern, elastic waist (3-4 hours)
- Zippered pouch: Introduction to zipper installation (2 hours)
Project Selection Criteria:
- Success rate: 90%+ of kids should complete it successfully
- Time: Finishable in 1-2 sessions to maintain interest
- Usefulness: Child will actually use the finished item
- Skill building: Teaches one new technique per project
Avoid these common first-project mistakes:
- Stuffed animals (curves, small pieces, turning difficulties)
- Clothing with fitted elements (requires precision)
- Projects with more than 5 pattern pieces
- Anything requiring precise matching or gathering
Choose felt projects if your child is still building confidence, prefers hand sewing, or gets frustrated easily. Choose simple machine projects if your child has mastered straight stitching, wants faster results, and can follow multi-step instructions.
How Much Does a Kids Sewing Machine Cost?
A quality kids’ sewing machine costs between $80-150 in 2026, while basic hand-sewing supplies run $15-30. Avoid machines under $50, which are typically toys that can’t handle real fabric, and don’t overspend on features young beginners won’t use.
Cost Breakdown by Category:
Hand Sewing Starter Kit: $15-30
- Plastic tapestry needles: $3-5
- Embroidery floss pack: $8-12
- Felt squares (20-pack): $8-10
- Child-safe scissors: $5-8
- Needle threader: $2-3
Kids’ Machine Package: $80-150
- Basic kids’ machine: $80-120
- Extra needles: $5-8
- Bobbins (pack of 10): $6-10
- Thread set (basic colors): $12-15
- Seam ripper: $3-5
Optional Additions: $20-50
- Sewing table or lap desk: $15-25
- Storage caddy: $10-15
- Pattern book for kids: $12-18
- Fabric starter pack: $15-20
Long-term costs:
- Thread: $3-5 per spool (lasts 10-20 projects)
- Fabric: $5-15 per project depending on size
- Needles: $5-8 per pack (replace every 6-8 hours of sewing)
- Maintenance: $0 for kids’ machines (no professional servicing needed)
Budget-saving strategies:
- Buy fabric from thrift store sheets and curtains
- Join fabric swap groups online
- Use embroidery floss instead of regular thread for hand sewing (cheaper, easier to handle)
- Start with hand sewing to confirm interest before investing in a machine
Common mistake: Buying the cheapest machine available. A $35 toy machine will break within weeks and teach your child that sewing is frustrating. A $100 real beginner machine will last years and actually work properly.

Adults & Kids Sewing Machine Kit: Mini sewing machine kit includes: small sewing machine, 50 pieces of 10” x 10” fabric, 16 threaded bobbins, 4 spare bobbins, 5 sewing machine needles, 16 spools of thread, 10 sewing clips, thimble, needle threader, seam ripper, scissors, tape measure, chalk pencil, foldable 12” ruler, & guide book.
My Child Keeps Tangling Thread: What Am I Doing Wrong?
Thread tangling in kids’ sewing usually happens because of incorrect threading, too much thread length, or pulling thread at the wrong angle. The solution depends on whether they’re hand sewing or using a machine.
Hand Sewing Thread Tangles:
Most common causes:
- Thread longer than 18 inches (use arm’s-length as maximum)
- Thread not conditioned (run through beeswax or Thread Heaven)
- Pulling thread at sharp angles instead of straight up
- Cheap thread that splits and knots easily
- Needle eye too small for thread thickness
Quick fixes:
- Cut thread to 12-15 inches maximum
- Teach the “straight pull” technique: always pull thread perpendicular to fabric
- Use embroidery floss (less prone to tangling than regular thread)
- Tie knot at the end you cut, not the end from the spool
- Switch to a larger needle if thread barely fits through the eye
Machine Sewing Thread Tangles:
Most common causes:
- Incorrect threading path (missed a guide or tension disc)
- Bobbin inserted backwards or wound unevenly
- Thread tension too loose or too tight
- Sewing too fast for skill level
- Old, brittle thread
Quick fixes:
- Re-thread the entire machine following the manual exactly
- Check that thread tension is set to middle (usually 4-5)
- Wind a fresh bobbin slowly and evenly
- Practice on scrap fabric at slowest speed
- Replace thread if it’s more than 2 years old
Diagnostic test: If thread tangles on every project, it’s a setup issue. If it only happens occasionally, it’s a technique issue.
Common mistake: Letting kids use thread that’s too thin or too old. Cheap, old thread splits and tangles constantly. Invest in quality all-purpose thread (Gutermann or Coats & Clark) for better results.
Sewing Classes for Kids Near Me vs Teaching at Home
Both sewing classes and home teaching work well for kids; choose classes if you’re not confident in your own sewing skills or if your child learns better from non-parent teachers, and choose home teaching if you enjoy sewing, want flexible scheduling, and prefer one-on-one attention.
Sewing Classes Advantages:
- Expert instruction: Teachers trained in child education
- Peer learning: Kids motivate each other and share ideas
- Equipment provided: No need to buy a machine initially
- Structured curriculum: Progressive skill building
- Social component: Makes sewing a group activity
- Parent break: Productive activity while you have free time
Home Teaching Advantages:
- Flexible schedule: Sew when inspiration strikes
- One-on-one attention: Pace matches your child exactly
- Lower cost: No class fees (typically $15-30 per session)
- Bonding time: Shared hobby builds connection
- Immediate practice: Can sew anytime, not just class days
- Custom projects: Make what your child actually wants
Cost Comparison (2026):
- Classes: $120-200 for 6-8 week session (1 hour weekly)
- Home: $100-150 initial investment, minimal ongoing costs
Finding quality classes:
- Local fabric stores (Jo-Ann, independent shops)
- Community centers and libraries
- 4-H clubs and youth organizations
- Private instructors (search “kids sewing classes [your city]”)
- Check reviews and ask about class size (6-8 kids maximum is ideal)
Making home teaching successful:
- Set a regular “sewing time” weekly
- Create a dedicated, well-lit sewing space
- Use online tutorials to supplement your knowledge
- Join online communities for project ideas and troubleshooting
- Be patient with your own learning curve as a teacher
Choose classes if you don’t sew yourself, your child responds better to non-parent instruction, or you want them to develop sewing friendships. Choose home teaching if you’re comfortable with basic sewing techniques, prefer flexible scheduling, or your child is shy in group settings.
When Are Kids Ready to Use Sharp Sewing Scissors?
Most children are ready to use sharp fabric scissors around age 8-9, but readiness depends more on demonstrated responsibility with other tools and consistent rule-following than age alone. Start with child-safe scissors and upgrade when they’ve shown 6+ months of careful handling.
Readiness Checklist:
- Consistently follows safety rules with other tools
- Understands that fabric scissors never cut paper (dulls blades)
- Can carry scissors properly (closed, pointing down)
- Doesn’t run or play while holding scissors
- Asks permission before using scissors
- Returns scissors to storage immediately after use
- Has the hand strength to cut through multiple fabric layers
Progression Path:
Ages 5-7: Child-Safe Scissors
- Rounded tips, spring-loaded handles
- Can cut felt and thin cotton
- Builds cutting skills safely
Ages 8-9: Youth Fabric Scissors
- Pointed tips but shorter blades (5-6 inches)
- Sharp enough for most fabrics
- Easier to control than full-size scissors
Ages 10+: Standard Fabric Scissors
- Full-size shears (8-10 inches)
- Professional-quality cutting
- Requires demonstrated responsibility
Safety rules for sharp scissors:
- Always cut away from your body
- Keep non-cutting hand flat on table, away from blade path
- Close scissors when not actively cutting
- Never walk with open scissors
- Store in a case or sheath when not in use
Common mistake: Letting kids use household scissors for fabric. These are too dull for clean cuts and teach bad habits. Invest in proper fabric scissors when they’re ready.
Alternative: Rotary cutters with safety guards can be introduced around age 10-11 for straight cuts, but require even more supervision than scissors due to the extremely sharp blade.
Is Sewing Good for Kids with ADHD or Focus Issues?
Yes, sewing is excellent for children with ADHD because it provides structured, hands-on activity with immediate visual feedback, engages multiple senses simultaneously, and produces tangible results that build confidence. Many occupational therapists recommend sewing as a focus-building activity.
Why Sewing Helps ADHD:
- Multi-sensory engagement: Touch, sight, and proprioception all active
- Clear beginning and end: Defined project scope reduces overwhelm
- Immediate feedback: See results of each stitch instantly
- Repetitive motion: Calming, meditative quality
- Visible progress: Motivating to see project taking shape
- Fine motor development: Strengthens hand-eye coordination
- Executive function practice: Planning, sequencing, problem-solving
Adaptations for ADHD Learners:
Session structure:
- Keep sessions short (15-30 minutes initially)
- Build in movement breaks every 10 minutes
- Use timers to create manageable chunks
- Allow fidgeting with fabric scraps during instruction
Project selection:
- Choose projects completable in 1-2 sessions
- Break larger projects into distinct steps
- Use high-contrast fabrics (easier to see stitches)
- Avoid projects with many small pieces
Environment setup:
- Minimize visual distractions in sewing area
- Use noise-canceling headphones or calm music
- Ensure excellent lighting (reduces eye strain and frustration)
- Keep only current project supplies visible
Instruction approach:
- Demonstrate each step immediately before they do it
- Use simple, concrete language
- Provide written or visual step-by-step guides
- Celebrate effort and progress, not just finished products
Common challenges and solutions:
| Challenge | Solution |
|---|---|
| Loses interest mid-project | Choose shorter projects; keep a “project menu” to switch between |
| Rushes and makes mistakes | Build in quality-check pauses; use “slow and steady” mantras |
| Frustrated by imperfection | Emphasize that mistakes are learning opportunities; show your own mistakes |
| Difficulty following multi-step instructions | Break into single steps; use photo guides |
Choose hand sewing if your child needs more calming, meditative activity. Choose machine sewing if your child needs more immediate results and finds hand sewing too slow.
What Are Common Mistakes When Teaching Kids to Sew?
The most common mistakes when teaching kids to sew are starting with projects that are too complex, expecting adult-level precision, rushing to machine sewing before hand-sewing skills are solid, and not establishing clear safety rules from day one.
Top 10 Teaching Mistakes:
1. Starting with clothing
Clothing requires precision, fitting, and multiple techniques. Start with home decor items instead (pillows, bags, coasters).
2. Choosing projects the child doesn’t care about
Let them pick projects they’ll actually use. A superhero cape beats a generic pillow every time.
3. Correcting every mistake
Over-correction kills confidence. Only fix mistakes that affect safety or function, not aesthetics.
4. Using low-quality materials
Cheap thread tangles, cheap fabric frays, cheap scissors don’t cut. Quality supplies make learning easier.
5. Skipping the practice phase
Let kids sew on paper or scrap fabric before starting real projects. Practice builds muscle memory.
6. Teaching too many techniques at once
One new skill per project maximum. Master straight seams before adding curves, zippers, or buttonholes.
7. Not demonstrating slowly enough
What seems obvious to you is brand new to them. Demonstrate each step 2-3 times at slow speed.
8. Comparing siblings or peers
Every child progresses at their own pace. Comparison creates anxiety and kills enjoyment.
9. Pushing when interest wanes
If sewing becomes a chore, take a break. Forced sewing creates permanent dislike.
10. Forgetting to celebrate progress
Take photos of finished projects, display them prominently, and praise specific skills (“Your stitches are so much straighter than last month!”).
Recovery strategies:
- If you’ve made these mistakes, acknowledge it: “I think I pushed too hard. Let’s try something easier and more fun.”
- Return to simpler projects to rebuild confidence
- Ask your child what they want to make and work backward to the skills needed
- Remember that the goal is lifelong enjoyment of sewing, not perfect technique at age 8
Frequently Asked Questions
Can a 3-year-old learn to sew?
No, 3-year-olds aren’t developmentally ready for actual sewing, but they can do pre-sewing activities like lacing cards, fabric sorting, and playing with toy sewing kits that build foundational skills.
What’s the best first stitch to teach kids?
The running stitch is the best first stitch because it’s simple (just up and down), creates visible progress quickly, and teaches the basic needle motion needed for all other stitches.
Do kids need their own sewing machine or can they use mine?
Kids 7-9 should use a child-specific machine with safety features like finger guards and slow speed; kids 10+ can use a standard beginner machine with close supervision.
How long should a child’s first sewing session be?
First sessions should be 15-20 minutes for ages 5-7, and 30-45 minutes for ages 8+, always stopping before frustration sets in to keep the experience positive.
What fabric is easiest for kids to learn on?
Felt is easiest for hand sewing (doesn’t fray, easy to pierce), while quilting cotton is best for machine sewing (stable, forgiving, widely available in fun prints).
Should I let my child use my expensive fabric scissors?
No, kids should have their own age-appropriate scissors to learn proper care and handling before graduating to expensive shears, which typically happens around age 10-12.
How do I know if my child is ready for a sewing machine?
Your child is ready for a machine when they can follow multi-step safety instructions consistently, have mastered basic hand stitches, and can sit focused for 20-30 minutes.
What if my child wants to quit after a few lessons?
Take a break for several weeks or months, then reintroduce sewing with a project they’re excited about; forcing continued lessons will create permanent negative associations.
Can boys learn to sew or is it just for girls?
Sewing is an essential life skill for everyone regardless of gender; many professional tailors, costume designers, and fashion designers are men, and all adults benefit from basic mending skills.
How much supervision do 8-year-olds need while sewing?
Eight-year-olds need an adult within the same room and checking in every 5-10 minutes, with closer supervision during machine threading, needle changes, or any new technique.
What’s a reasonable budget for starting a child in sewing?
Budget $100-150 total for a quality kids’ machine, basic supplies, and first project materials; hand sewing only requires $20-30 to start.
Should I teach my child to sew by hand or machine first?
Teach hand sewing first for 6-12 months to build understanding of stitch formation, thread tension, and fabric behavior before adding the complexity of machine controls.
Conclusion
Sewing for kids can start as early as age 5 with hand-sewing basics, progressing to machine sewing around age 7-8 when children have developed the fine motor skills and attention span needed for safe operation. The key to success isn’t rushing to advanced techniques but building a strong foundation through age-appropriate projects, consistent safety practices, and celebrating progress over perfection.
Remember that every child develops at their own pace. Some 6-year-olds will master hand stitching quickly, while others won’t show interest until age 9 or 10, and both paths are completely normal. The goal is to foster a lifelong love of creating with fabric, not to produce perfect stitches by a certain age.
Your Next Steps:
- Assess your child’s readiness using the age guidelines and skill checklists in this guide
- Gather age-appropriate supplies: hand-sewing kit for ages 5-7, beginner machine for ages 8+
- Choose a simple first project your child is excited about (felt bookmark, fabric coaster, or pillowcase)
- Establish clear safety rules before the first lesson and enforce them consistently
- Keep sessions short and positive, stopping before frustration sets in
- Celebrate every finished project with photos and display to build confidence
- Connect with resources: join online sewing communities, visit your local fabric store for kids’ classes, or explore beginner sewing tips for ongoing support
Whether you’re teaching at home or enrolling in classes, you’re giving your child valuable skills that will serve them for life. From mending torn clothing to creating handmade gifts, sewing builds confidence, patience, and creativity. Start where your child is, move at their pace, and enjoy watching their skills grow stitch by stitch.