


Quick Answer: Taking in pants at the waist involves removing excess fabric by sewing new seams along the center back, side seams, or waistband to create a smaller circumference. Most sewers can reduce a waistband by 1-4 inches using a sewing machine or hand-stitching, though the exact method depends on the pant style, fabric type, and how much adjustment is needed.
Key Takeaways
- Taking in pants at the waist means permanently altering the waistband by removing fabric to reduce the circumference, typically by 1-4 inches before fit issues arise
- The center back seam method works best for most pants because it preserves pocket placement and side seam alignment
- You can alter pants without a sewing machine using hand-stitching techniques, though machine sewing creates more durable seams
- Professional tailors charge $15-35 for waist alterations depending on garment complexity and regional rates
- Elastic waist pants require a different approach: shortening the elastic itself rather than taking in seams
- Common mistakes include removing too much fabric at once, skipping fitting tests, and ignoring grain line alignment
- Not all pants can be taken in successfully, heavily embellished waistbands, pre-pleated styles, and jeans with complex back pocket stitching present challenges
What Does Taking In Pants at the Waist Mean?
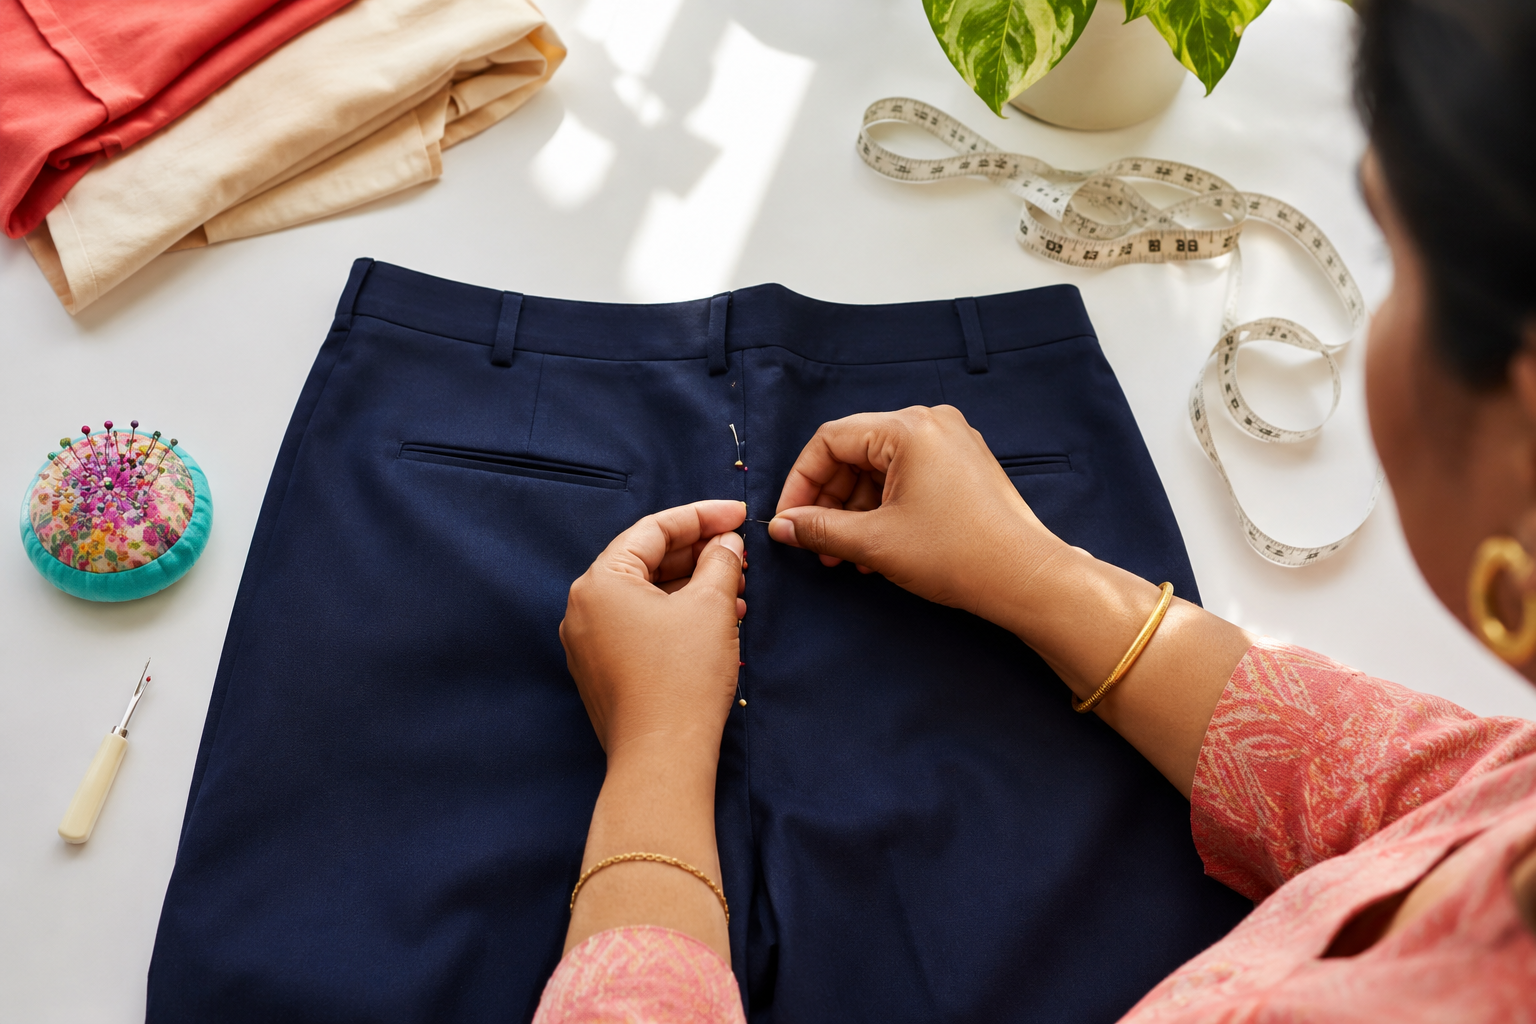
Taking in pants at the waist means permanently reducing the waistband circumference by removing excess fabric and sewing new seams. This alteration makes the waist opening smaller so pants fit snugly without gapping, sliding, or requiring a belt to stay up.
The process involves opening existing seams, marking new stitching lines closer to the center, removing the extra fabric, and re-sewing the seams. Sewers typically take in pants along the center back seam (the vertical seam running down the back of the pants), the side seams, or a combination of both, depending on how much reduction is needed and the pant construction.
This alteration differs from simply adding darts or elastic, which gather fabric rather than remove it. Taking in the waist creates a permanent size reduction and maintains the original pant silhouette when done correctly.
Choose this method if: Your pants are 1-4 inches too large at the waist but fit well everywhere else (hips, thighs, length). If the entire pant is oversized, you may need more comprehensive alterations.
How Much Does It Cost to Get Pants Taken In at the Waist by a Tailor?
Professional tailors typically charge $15-35 to take in pants at the waist, with the exact price depending on garment complexity, fabric type, and your geographic location. Simple alterations on basic trousers with a center back seam cost less, while jeans with rivets, dress pants with lining, or pants requiring multiple seam adjustments cost more.
Price factors that increase cost:
- Lined pants: Add $5-10 because the lining must be altered separately
- Jeans with hardware: Rivets and thick seams require specialized equipment, adding $5-15
- Multiple seam adjustments: Taking in both side seams and center back costs more than a single-seam alteration
- Rush service: Same-day or next-day alterations typically double the base price
- High-end tailors in major cities: Expect $30-50 in metropolitan areas like New York or San Francisco
Most alterations take 3-7 business days. If you’re comfortable with basic sewing skills and own or can borrow a machine, doing it yourself costs only the thread (under $5) and saves the tailoring fee, though your first attempt will take 1-2 hours as you learn the process.
Can I Take In Pants at the Waist Without a Sewing Machine?
Yes, you can take in pants at the waist entirely by hand using a backstitch or running backstitch, though the process takes longer and requires more physical effort than machine sewing. Hand-sewn alterations work best for lightweight to medium-weight fabrics like cotton, linen, or wool blends, and can create seams nearly as durable as machine stitching when done correctly.
Hand-sewing steps for taking in pants:
- Mark your new seam line with tailor’s chalk after trying on the pants inside-out
- Pin the fabric along the marked line, removing the old stitching in that section
- Thread a sharp needle with strong polyester thread, doubled and knotted
- Use a backstitch (the strongest hand stitch) by inserting the needle backward into the previous stitch, creating overlapping stitches that won’t pull apart under stress
- Keep stitches small and even,aim for 8-10 stitches per inch for durability
- Secure the ends with several backstitches in place, then knot and trim
Common mistake: Using a simple running stitch (in-and-out without backtracking) creates weak seams that split when you sit or bend. Always backstitch for structural seams like waistbands. For a refresher on proper backstitching technique, see our guide on how to backstitch and why it matters.
Hand-sewing a waist alteration typically takes 45-90 minutes depending on fabric thickness and the length of seam you’re adjusting. If you plan to alter multiple garments regularly, investing in a basic sewing machine will save significant time.

【Heavy Duty Sewing Kit】- This comprehensive sewing kit includes 32 leather sewing needles, 10 leather sewing threads (30 m/color), a needle bottle, an awl, a tape measure, scissors, and a sewing thimble.

Perfect Heavy Duty Sewing Kit: This fully-packed sewing kit contains all the necessary tools to sew for most of your sewing needs. You will get: 25* Hand Sewing Needles, 12* Upholstery Thread, 1* Inch Ruler, 1* Scissors, 1* Thimble, 3* Awl Tool, 2* Seam Ripper, 1* Threader.
Taking In Pants at Waist vs Taking In at Side Seams: Which Is Better?
Taking in pants at the center back seam is usually better than side seams because it preserves the original side seam placement, maintains pocket positioning, and keeps the pant silhouette balanced. The center back method works for most pant styles and allows you to remove up to 2 inches of fabric without distorting the fit.
Center back seam advantages:
- Doesn’t affect pocket placement or belt loops
- Maintains the original hip-to-waist ratio
- Easier to mark and sew in a straight line
- Less visible when wearing a tucked-in shirt
- Works well for pants with side pockets
Side seam advantages:
- Necessary when pants lack a center back seam (some jeans, leggings)
- Distributes the alteration across two seams (take in ½ inch on each side instead of 1 inch in one place)
- Better for pants with decorative center back details or yokes
Decision rule: Use the center back seam method if your pants have one and you need to remove 2 inches or less. If you need to remove 2-4 inches total, split the alteration between the center back (remove 1-2 inches) and both side seams (remove ½-1 inch from each side). This prevents over-tightening any single seam, which can create puckering or distort the grain line.
Edge case: Pants with no center back seam (common in athletic wear and some jeans) must be altered at the side seams only. In this case, divide the total reduction equally between both sides to maintain balance.
How to Take In Elastic Waist Pants
Taking in elastic waist pants requires shortening the elastic itself rather than taking in seams, because the fabric is designed to gather around the elastic casing. This method works for sweatpants, pajama bottoms, casual joggers, and any pants with a fully elastic waistband.
Step-by-step process:
Locate the elastic opening: Most elastic waistbands have a small opening in the casing (often at the center back) where the elastic ends meet. If there’s no opening, you’ll need to open a small section of the casing seam with a seam ripper.
Measure how much to remove: Put on the pants and pinch the excess elastic at the back. Measure this distance, this is how much you’ll remove. Subtract ½ inch to account for seam allowance.
Pull out the elastic: Attach a safety pin to one end of the elastic and carefully pull it through the casing until both ends are accessible outside the opening.
Cut and rejoin: Cut the measured amount from the elastic. Overlap the two ends by ½ inch and sew them together securely using a zigzag stitch (by machine) or multiple rows of straight stitching. Hand-sewing works but may not withstand repeated stretching.
Feed the elastic back: Let the elastic retract into the casing, distributing the gathers evenly around the waistband.
Close the opening: Sew the casing opening closed with a few hand stitches or machine topstitching.
Common mistake: Cutting the elastic before testing the fit. Always pin the elastic at the new length and wear the pants for a few minutes to ensure they’re comfortable before making the cut, elastic alterations are difficult to reverse.
Alternative method: If the elastic is worn out or you want a more permanent solution, you can replace the entire elastic with a shorter piece. This takes more time but gives you a fresh, stretchy waistband.
What Tools Do I Need to Take In Pants at the Waist Myself?
Taking in pants at the waist requires only basic sewing tools that most beginners already own or can purchase for under $30 total. Having the right tools makes the process faster and produces cleaner results.
Essential tools:
- Seam ripper: Opens existing stitches without damaging fabric ($3-5)
- Tailor’s chalk or fabric marking pen: Marks new seam lines that wash out ($2-4)
- Straight pins: Holds fabric in place while sewing ($3-6 for a box)
- Measuring tape: Ensures accurate measurements ($2-5)
- Sharp scissors or fabric shears: Trims excess fabric cleanly ($8-15)
- Sewing machine or hand-sewing needle: Creates the new seams
- Thread matching your fabric: Polyester thread works for most fabrics ($2-3 per spool)
Helpful but optional:
- Iron and ironing board: Presses seams flat for a professional finish
- Pinking shears: Cuts fabric edges in a zigzag pattern to prevent fraying ($10-15)
- Seam gauge: Small ruler for measuring seam allowances precisely ($4-8)
If you’re using a sewing machine, make sure it’s properly threaded and the tension is adjusted for your fabric type. Thread tension problems are a common source of frustration for beginners, if your stitches look uneven or the thread keeps breaking, check out our sewing machine tension guide for troubleshooting tips.
Budget tip: If you don’t own a sewing machine and aren’t ready to invest in one, hand-sewing with a needle and thread works perfectly well for this project. A pack of hand-sewing needles costs $2-4 and will last for dozens of projects.
Common Mistakes When Taking In Pants at the Waist
Even experienced sewers make errors when altering waistbands. Knowing these common mistakes helps you avoid them and achieve professional-looking results on your first attempt.
Removing too much fabric at once: Taking in more than 2 inches at a single seam distorts the pant shape and can create puckering or pulling. If you need to remove more than 2 inches total, distribute the alteration across multiple seams (center back plus both side seams).
Skipping the fitting test: Always try on pants inside-out with the new seam pinned before sewing permanently. Walk, sit, and bend to ensure the fit is comfortable. Seams that feel fine while standing may be too tight when sitting.
Ignoring the grain line: Fabric has a natural grain (the direction threads run). Taking in seams unevenly can pull the grain off-angle, causing the pant legs to twist. Always measure and mark both sides of a seam equally from the original stitching line.
Forgetting to backstitch: Starting and ending seams without backstitching (sewing backward for 3-4 stitches) causes the thread to unravel over time. Always backstitch at the beginning and end of every seam.
Cutting before sewing: Never trim excess fabric until after you’ve sewn and tested the new seam. If the fit isn’t right, you’ll need that fabric to let the seam back out.
Using the wrong needle: Heavy fabrics like denim require a denim or heavy-duty needle (size 16 or 18). Using a universal needle on thick fabric causes skipped stitches and needle breakage. Match your needle to your fabric type for best results.
Sewing over pins: While some experienced sewers do this carefully, beginners should remove pins as they sew to avoid breaking the needle or damaging the machine. Pin perpendicular to the seam line so they’re easy to remove as you approach them.
Can All Types of Pants Be Taken In at the Waist?
Not all pants can be successfully taken in at the waist, some styles have construction features that make alterations difficult, expensive, or impossible without compromising the garment’s appearance. Understanding which pants are good candidates for alteration saves you time and frustration.
Easy to alter:
- Basic trousers with a center back seam and simple waistband
- Casual cotton or linen pants without lining
- Dress pants with a plain waistband (no pleats or complex details)
- Sweatpants and joggers with elastic waists
Challenging but possible:
- Jeans (require heavy-duty equipment and careful pocket management)
- Lined dress pants (lining must be altered separately)
- Pants with belt loops (loops may need to be repositioned)
- Pants with a faced waistband (requires more advanced technique)
Difficult or not recommended:
- Pants with decorative waistband stitching or embellishments that can’t be replicated
- Pre-pleated pants (taking in the waist affects pleat placement and appearance)
- Pants with no center back seam and complex side pockets
- Jeans with intricate back pocket stitching that extends into the waistband area
- Pants with elastic inserts or mixed construction (part elastic, part structured)
Decision rule: If the alteration requires removing or repositioning decorative elements that you can’t replicate (like branded stitching, embroidery, or metal hardware), consider whether the final result will look intentional or obviously altered. Sometimes buying pants that fit is more cost-effective than extensive alterations.
Edge case: Vintage or high-quality pants with unique details are often worth the extra effort or professional tailoring cost, while fast-fashion pants may not justify the time investment.

How Much Can You Take In Pants at the Waist Before It Looks Weird?
You can safely take in pants by 1-2 inches at the center back seam or 2-4 inches total when distributing the alteration across multiple seams before the fit starts looking distorted. Beyond these limits, the pant proportions change noticeably, the rise (crotch depth) becomes too long, pockets shift out of position, and the seat area develops excess fabric.
Visual indicators you’ve taken in too much:
- Saggy seat: Excess fabric pools below the buttocks because the hip measurement hasn’t changed but the waist has shrunk significantly
- Twisted legs: Seams no longer run straight down the side of the leg but spiral around
- Pocket gapping: Side pockets pull open or shift toward the back
- Long rise: The crotch seam hangs too low, creating a baggy, unflattering silhouette
Measurement guideline: If your pants are more than 4 inches too large at the waist, the entire pant is likely the wrong size. Taking in only the waist won’t create a good fit, you’ll need comprehensive alterations (waist, hips, seat, and possibly thighs) or should consider buying a smaller size.
Exception: Pants that fit perfectly everywhere except the waist (common for people with a defined waist-to-hip ratio) can usually be taken in by 2-3 inches without issues. This is especially true for high-waisted styles where the waist sits at the natural waistline rather than the hips.
Professional tip: If you’re unsure whether the alteration will look right, take in only 1 inch initially, test the fit, then take in more if needed. It’s easier to remove more fabric than to add it back.
Is Taking In the Waist Good for Beginners or Should I Go to a Tailor?
Taking in pants at the waist is a beginner-friendly project if you’re comfortable using a sewing machine, can sew a straight line, and are willing to spend 1-2 hours on your first attempt. This alteration teaches fundamental skills like seam ripping, marking, pinning, and sewing structural seams that apply to many other projects.
You can DIY if:
- Your pants have a simple construction (center back seam, no lining, minimal hardware)
- You need to remove 2 inches or less
- You own or can borrow a sewing machine in good working condition
- You’re patient and willing to test the fit before making cuts
- The pants aren’t expensive or sentimental (practice on thrift store finds first)
Consider a tailor if:
- You need to alter expensive or sentimental pants and want guaranteed results
- The pants have complex construction (lining, pleats, decorative stitching)
- You need to remove more than 2 inches (requires advanced fitting knowledge)
- You don’t own a sewing machine and don’t want to hand-sew
- You need the alteration done quickly (tailors are faster than first-time DIYers)
Learning curve: Most beginners successfully complete their first waist alteration with acceptable results, though the seams may not look as neat as professional work. By the third or fourth pair of pants, most sewers achieve near-professional quality.
Cost-benefit analysis: If you plan to alter only one pair of pants, paying a tailor $20-30 is reasonable. If you have multiple pants to alter or want to learn a useful skill, investing 2-3 hours to learn the technique saves money long-term and builds confidence for future projects.
For beginners just starting out, having the right equipment makes a big difference. If you’re shopping for your first machine, check out our recommendations for the best sewing machines for beginners.
Why Do My Pants Gap at the Back Waist After Taking Them In?
Back waist gapping after taking in pants usually means you’ve removed fabric from the wrong location or haven’t addressed the underlying fit issue. Gapping occurs when the waistband stands away from your lower back, creating a visible gap between the fabric and your body, and typically indicates that the seat curve doesn’t match your body shape.
Common causes and fixes:
Cause 1: You took in the side seams instead of the center back Side seam alterations reduce the waist circumference but don’t address the curve of the lower back. If you have a pronounced curve (sway back), you need to remove fabric specifically from the center back seam, which shortens the back rise and eliminates the gap.
Cause 2: You need a curved alteration, not a straight seam Simply taking in the center back seam in a straight line reduces width but doesn’t adjust for body curves. To fix gapping, you need to create a curved dart or wedge alteration that removes more fabric at the waistband and gradually tapers to nothing by mid-hip.
Cause 3: The rise is too long for your body If the crotch seam hangs too low (common when taking in oversized pants), the entire back panel has excess length. This requires shortening the rise by removing fabric horizontally at the waistband, not just taking in the seams vertically.
How to fix existing gapping:
- Put the pants on inside-out and pinch out the excess fabric at the center back waist
- Notice whether the excess forms a horizontal fold (rise too long) or a vertical fold (waist too wide)
- For horizontal folds: Remove fabric from the waistband itself by opening the waistband, cutting ½-1 inch from the top edge, and reattaching
- For vertical folds: Take in more at the center back seam, creating a gentle curve that removes more at the waist and tapers to the original seam by hip level
Prevention tip: Always try on pants inside-out and pin the alteration while wearing them. Have someone help you pin the back, or use a three-way mirror to see the back view clearly. The fit should feel snug but comfortable with no gapping when you stand naturally.
How to Take In Jeans at the Waist Without Ruining Back Pockets
Taking in jeans at the waist requires careful planning to avoid disrupting the back pocket placement and decorative stitching that defines the jean’s style. The key is working around the pockets rather than through them.
Best approach for jeans:
Assess pocket placement: Most jeans have back pockets that sit 1-2 inches below the waistband. If your alteration line runs through the pocket, you’ll need to remove and reposition the pocket, a complex task best left to professionals.
Use the center back seam method: Take in jeans at the center back seam (the vertical seam between the two back pockets) rather than the side seams. This keeps pockets in their original position and preserves the jean’s silhouette.
Stop above the pockets: When marking your new seam line, taper it back to the original seam before reaching the pocket line. You can typically remove 1-2 inches at the waistband, gradually reducing to zero by the time you reach the top of the pockets.
Use a denim needle: Jeans are thick, tightly woven fabric that requires a size 16 or 18 denim needle in your machine. Using a regular needle causes skipped stitches, broken needles, and frustration. For more on choosing the right needle, see our needle selection guide.
Topstitch with matching thread: Jeans typically have visible topstitching in gold or contrasting thread. After taking in the seam, topstitch along the new seam line to match the original construction.
Common mistake: Trying to take in jeans at the side seams disrupts the side pocket bags (the fabric pouches inside the pockets) and requires extensive reconstruction. Unless you’re an experienced sewer, stick to center back alterations for jeans.
Hardware challenge: If your jeans have a metal rivet or button at the waistband center back, you’ll need to remove it before altering and reattach it afterward. This requires special tools (rivet setter) or a professional’s help.
When to use a professional: If your jeans have complex back pocket stitching (like branded designs), decorative waistband details, or you need to remove more than 2 inches, a professional tailor with jean alteration experience will produce better results. The cost ($25-40) is often worth it to preserve expensive or favorite jeans.
Alternatives to Taking In Pants If Waist Is Too Big
If taking in pants at the waist seems too complicated or time-consuming, several alternatives can improve the fit without permanent alterations. These solutions work best for pants that are only slightly too large (½-2 inches).
Temporary fixes:
Belt: The simplest solution, a belt cinches the waist and prevents pants from sliding down. Works best for casual pants with belt loops. Downside: creates bunching and bulk around the waist, especially under fitted tops.
Elastic waistband inserts: Small elastic strips that attach to the inside of the waistband with buttons or clips, pulling the fabric tighter. Available at fabric stores for $5-10. Works for pants without belt loops.
Safety pin or binder clip: A quick emergency fix, fold excess fabric at the center back inside the waistband and secure with a large safety pin or binder clip. Hidden under a shirt, this works for a day but isn’t comfortable long-term.
Waistband button extenders (in reverse): While typically used to make waists larger, you can use the elastic loop to pull the button closer to the buttonhole, effectively reducing the waist by ½-1 inch.
Semi-permanent solutions:
Add elastic to the waistband: Sew a strip of elastic to the inside back waistband, creating a gathered section that pulls the waist tighter. This works well for casual pants and maintains some adjustability.
Install adjustable side tabs: Add button tabs (like those on vintage trousers) to the side seams, allowing you to cinch the waist without a belt. Requires basic sewing skills but is easier than taking in seams.
Permanent alternatives:
Darts: Instead of taking in seams, add small darts (triangular folds) at the back waist to remove excess fabric. Faster than seam alterations but creates a slightly different silhouette.
Sell or donate and buy the right size: If pants are significantly oversized, the time and effort to alter them may not be worth it. Selling them and buying pants that fit properly is sometimes the most practical solution.
Decision rule: Use temporary fixes for pants you wear occasionally or when you’re between sizes due to weight fluctuation. Invest in permanent alterations or replacements for pants you wear regularly and want to look polished.
Step-by-Step: How to Take In Pants at the Waist Using the Center Back Seam Method
This comprehensive walkthrough covers the most common and beginner-friendly method for taking in pants at the waist. Plan for 1-2 hours for your first attempt, including fitting time.
Materials needed:
- Seam ripper
- Tailor’s chalk or fabric marking pen
- Straight pins
- Measuring tape
- Sewing machine (or needle and thread for hand-sewing)
- Thread matching your pants
- Iron and ironing board
- Scissors
Step 1: Try on and measure (10 minutes) Put the pants on inside-out. Pinch the excess fabric at the center back waist and have someone measure how much you’re pinching together, or use a mirror to mark it yourself. This measurement is how much you’ll remove. Divide by two, this is how much you’ll take in from each side of the center back seam.
Step 2: Mark the new seam line (10 minutes) Lay the pants flat with the center back seam facing up. Using tailor’s chalk and a ruler, measure in from the existing seam line by the amount calculated in Step 1 (half the total reduction). Draw a line parallel to the original seam, starting at the waistband and gradually tapering back to the original seam by hip level (usually 6-8 inches down). Repeat on the other side of the seam so both sides are symmetrical.
Step 3: Pin the new seam (5 minutes) Fold the pants along the new marked line, right sides together, and pin every 1-2 inches. Make sure the pins are perpendicular to the seam line for easy removal while sewing.
Step 4: Try on for fit check (5 minutes) Put the pants on inside-out with the new seam pinned. Walk, sit, and bend to test the fit. The waist should feel snug but comfortable. If it’s too tight, remove some pins and adjust the seam line. If it’s still loose, mark a new line taking in more fabric.
Step 5: Sew the new seam (15-20 minutes) Using a straight stitch (2.5-3.0 stitch length), sew along the marked line. Backstitch at the beginning and end for 3-4 stitches to secure the seam. Remove pins as you approach them, don’t sew over them. Sew slowly and keep the fabric aligned with your machine’s seam guide.
Step 6: Try on again (5 minutes) Before cutting anything, try the pants on right-side-out to confirm the fit. If adjustments are needed, you can still unpick the seam and re-sew.
Step 7: Trim excess fabric (5 minutes) Once you’re satisfied with the fit, trim the excess fabric to ½ inch from the new seam line using sharp scissors. If your fabric frays easily, finish the raw edge with a zigzag stitch or pinking shears.
Step 8: Press the seam (5 minutes) Press the seam open with an iron (both seam allowances lying flat) or press it to one side, depending on the original construction. Pressing creates a professional finish and helps the seam lie flat.
Step 9: Topstitch (optional, 10 minutes) If the original pants had visible topstitching along the center back seam, replicate it by sewing a straight line ⅛ inch from the seam on the right side of the fabric. This secures the seam allowances and matches the original construction.
Troubleshooting:
- Seam puckering: Your thread tension may be too tight. Check your machine tension settings and test on scrap fabric.
- Needle breaking: You’re using the wrong needle for your fabric weight. Switch to a heavier needle (size 14-16 for medium fabrics, 16-18 for denim).
- Uneven seam: Your fabric shifted while sewing. Pin more frequently and sew slowly, keeping the fabric aligned with your seam guide.
FAQ
How long does it take to take in pants at the waist? Taking in pants at the waist takes 1-2 hours for beginners, including measuring, marking, pinning, sewing, and pressing. Experienced sewers complete the alteration in 30-45 minutes. Hand-sewing takes longer, plan for 1.5-2.5 hours.
Can you take in pants that are too big everywhere? If pants are too large in the waist, hips, thighs, and legs, taking in only the waist won’t create a good fit. You’ll need comprehensive alterations across multiple seams, which is time-intensive and may cost $50-100 at a tailor. Buying the correct size is usually more practical.
Will taking in the waist affect the rise? Taking in the waist at the center back seam doesn’t change the rise (crotch depth) if done correctly. However, removing more than 2 inches can create excess fabric in the seat, making the rise appear longer. Distribute large alterations across multiple seams to maintain proportions.
Do I need to remove the waistband to take in pants? No, you don’t need to remove the waistband for basic center back or side seam alterations. The waistband stays attached while you take in the seams below it. Only remove the waistband if you’re shortening the rise or completely reconstructing the waist.
Can you let out pants that were taken in too much? Yes, if you haven’t trimmed the excess fabric yet. Carefully unpick the new seam, press the fabric flat, and re-sew at the correct measurement. If you’ve already trimmed the seam allowance, you can only let out as much fabric as remains in the seam allowance (usually ½ inch).
What’s the difference between taking in the waist and adding darts? Taking in the waist removes fabric by sewing new seams along existing seam lines, permanently reducing the circumference. Adding darts creates triangular folds that gather excess fabric without removing it, which is faster but creates a slightly different silhouette with visible dart lines.
Can you take in pants with a lining? Yes, but you must alter the lining separately from the outer fabric. Pin and sew the outer fabric first, then pin the lining to match and sew it. Lined pants take twice as long to alter and are more challenging for beginners.
How do you take in pants with an elastic waistband? For pants with elastic in a casing, shorten the elastic itself rather than taking in seams. Pull the elastic out through the casing opening, cut the excess length, rejoin the ends, and feed it back into the casing. This takes 15-30 minutes.
Will taking in jeans weaken the fabric? No, taking in jeans doesn’t weaken the fabric if you use the correct needle (denim needle, size 16-18) and strong thread. The new seam is as durable as the original construction. However, repeatedly altering and re-sewing the same area can create weak spots.
Can you take in dress pants with pleats? Taking in pleated pants is challenging because altering the waist affects pleat placement and depth. Small adjustments (1 inch or less) are possible, but larger alterations require repositioning pleats, which is an advanced technique. Consider professional tailoring for pleated pants.
Do you need special thread for taking in pants? Polyester all-purpose thread works for most fabrics. Match the thread color to your pants for invisible seams. For heavy fabrics like denim or canvas, use heavy-duty or topstitching thread for extra strength.
How much does fabric type affect the alteration? Fabric type significantly affects difficulty. Lightweight wovens (cotton, linen) are easiest for beginners. Stretchy fabrics (knits, spandex blends) require a stretch stitch or zigzag to prevent seam breakage. Heavy fabrics (denim, canvas) need a denim needle and slower sewing speed.
Conclusion
Taking in pants at the waist is a practical skill that transforms ill-fitting garments into wardrobe staples. By working methodically through the center back seam method, measuring carefully, pinning for fit tests, and sewing with proper technique, even beginners can achieve professional-looking results. Remember that successful alterations start with realistic expectations: remove no more than 2 inches at a single seam, always test the fit before cutting, and choose pants with simple construction for your first attempts.
Your next steps:
- Gather your tools: Seam ripper, tailor’s chalk, pins, thread, and a sewing machine (or hand-sewing supplies)
- Choose practice pants: Start with an inexpensive pair from a thrift store to build confidence before altering favorites
- Follow the step-by-step process: Measure, mark, pin, test fit, sew, and press, don’t skip the fitting tests
- Learn from each project: Your first alteration teaches you what to improve on the second
For sewers ready to expand their skills beyond basic alterations, mastering foundational techniques like proper backstitching and tension adjustment will elevate all your future projects. Whether you choose to DIY or work with a professional tailor, understanding how pants alterations work empowers you to make informed decisions about your wardrobe and develop valuable sewing skills that last a lifetime.


