


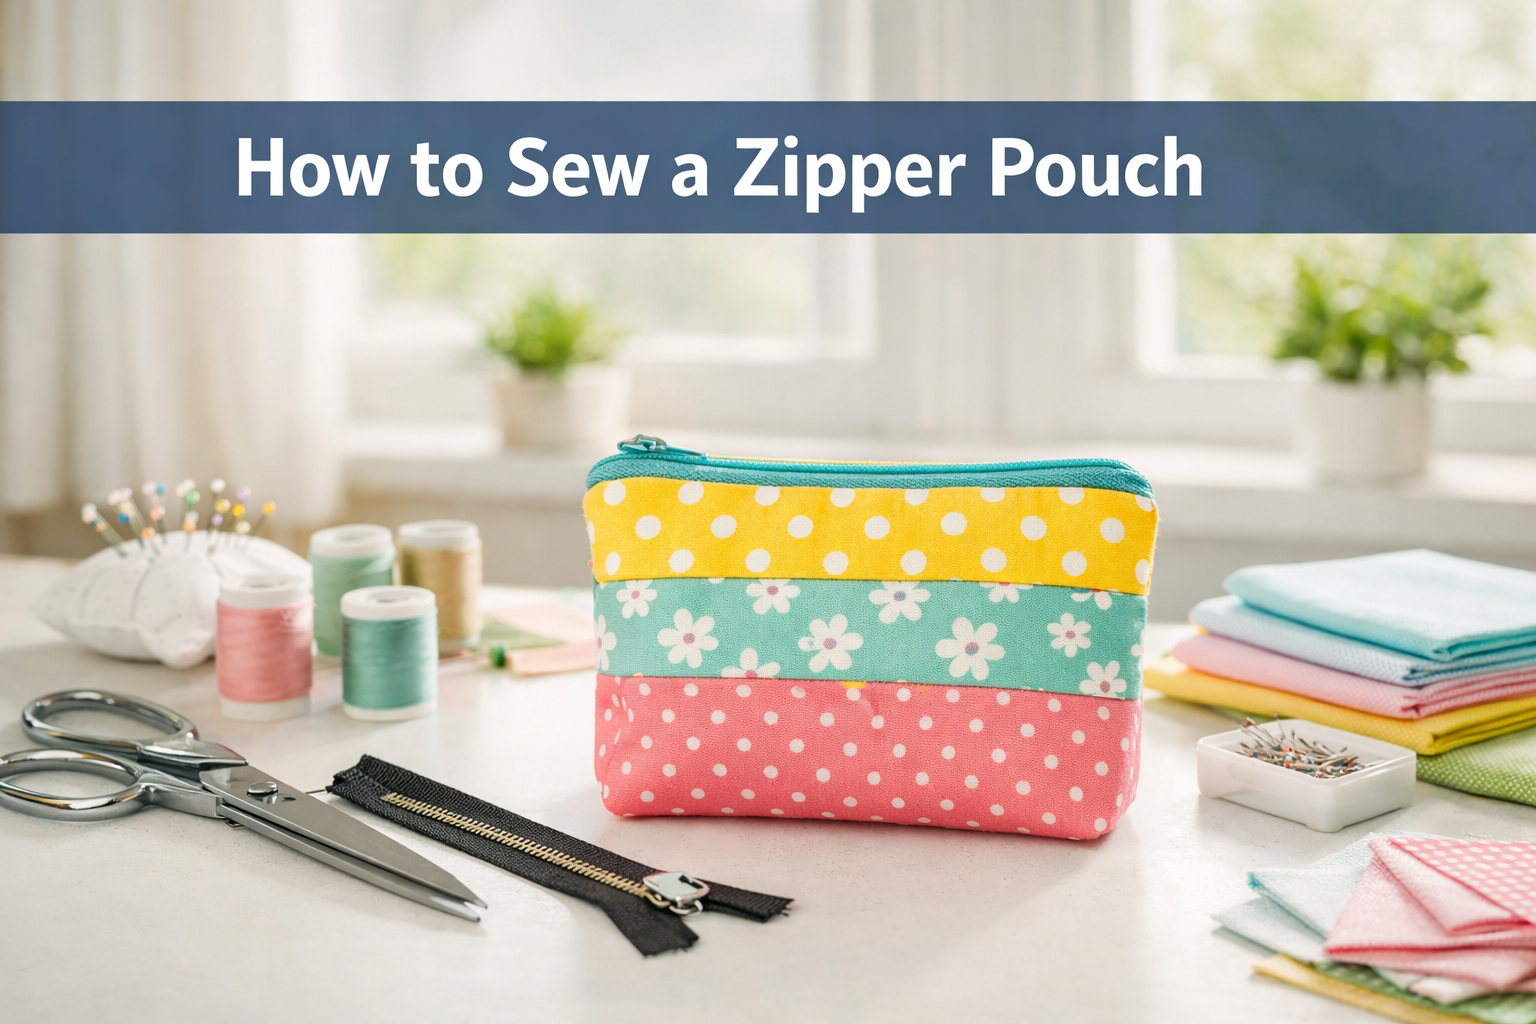
Quick Answer: A zipper pouch is a small fabric container with a zipper closure that can be sewn in under an hour using basic materials: two fabric pieces, a zipper, thread, and a sewing machine. The basic method involves sandwiching the zipper between fabric layers, stitching along both sides, then sewing the remaining edges to create a functional pouch perfect for storing cosmetics, coins, or small accessories.
Key Takeaways
- A basic zipper pouch requires just two fabric rectangles (typically 6″×8″), one zipper, and basic sewing skills
- The zipper is installed before sewing the side seams, making it easier to maneuver under your machine
- You can sew a zipper without a specialized zipper foot, though one makes the process smoother
- Interfacing adds structure and prevents puckering but isn’t mandatory for lightweight fabrics
- Boxed corners transform a flat pouch into a three-dimensional bag with more storage capacity
- Common mistakes include forgetting to open the zipper partway before closing the pouch (making it impossible to turn right-side out)
- Beginner sewers can successfully complete a basic zipper pouch as a first or second project
- Metal zippers work best for small pouches because they hold their shape better than lightweight nylon zippers
What Is a Zipper Pouch and What Can You Use It For?
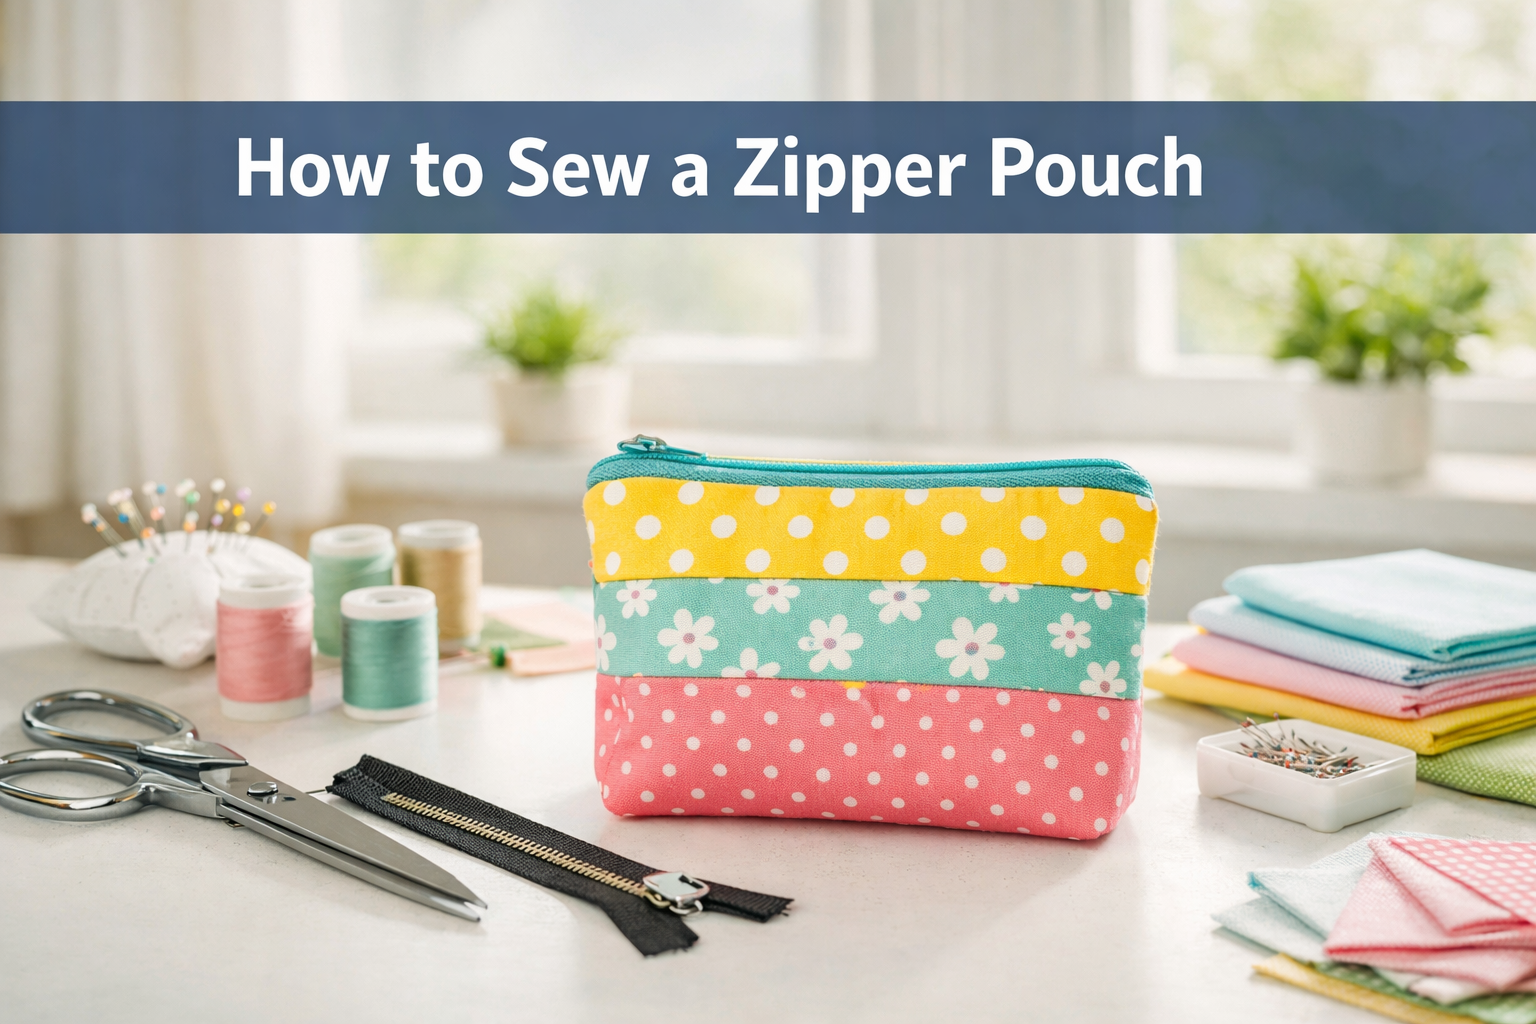
A zipper pouch is a small sewn fabric bag with a zipper closure along one edge, typically rectangular or square in shape. These versatile containers serve countless purposes: makeup bags, pencil cases, coin purses, travel organizers for toiletries or electronics, gift packaging, or storage for sewing notions like buttons and pins.
The beauty of zipper pouches lies in their adaptability. You can make them in any size from tiny 3″×4″ coin pouches to large 10″×12″ project bags. The basic construction method remains the same regardless of size, making it an ideal project for practicing zipper installation techniques.
Common uses for handmade zipper pouches:
- Cosmetics and makeup brushes
- Charging cables and earbuds
- First aid supplies
- Snacks for kids’ lunchboxes
- Jewelry during travel
- Craft supplies like embroidery floss
- Cash and cards as a simple wallet
Choose your fabric based on the intended use. Cotton quilting fabric works beautifully for most purposes, while laminated cotton or vinyl is ideal for pouches that might get wet or dirty.
How to Sew a Zipper Pouch for Beginners Step by Step
Sewing a basic zipper pouch involves installing the zipper first, then closing the remaining edges. This method is beginner-friendly because you work with flat pieces before creating the three-dimensional shape.
Materials needed:
- Two fabric rectangles (6″×8″ for a standard pouch)
- One zipper at least 7″ long
- Matching thread
- Scissors or rotary cutter
- Pins or clips
- Sewing machine with standard presser foot
Step-by-step instructions:
Prepare your fabric pieces. Cut two rectangles to your desired finished size plus ½” on all sides for seam allowance. Press with an iron to remove wrinkles.
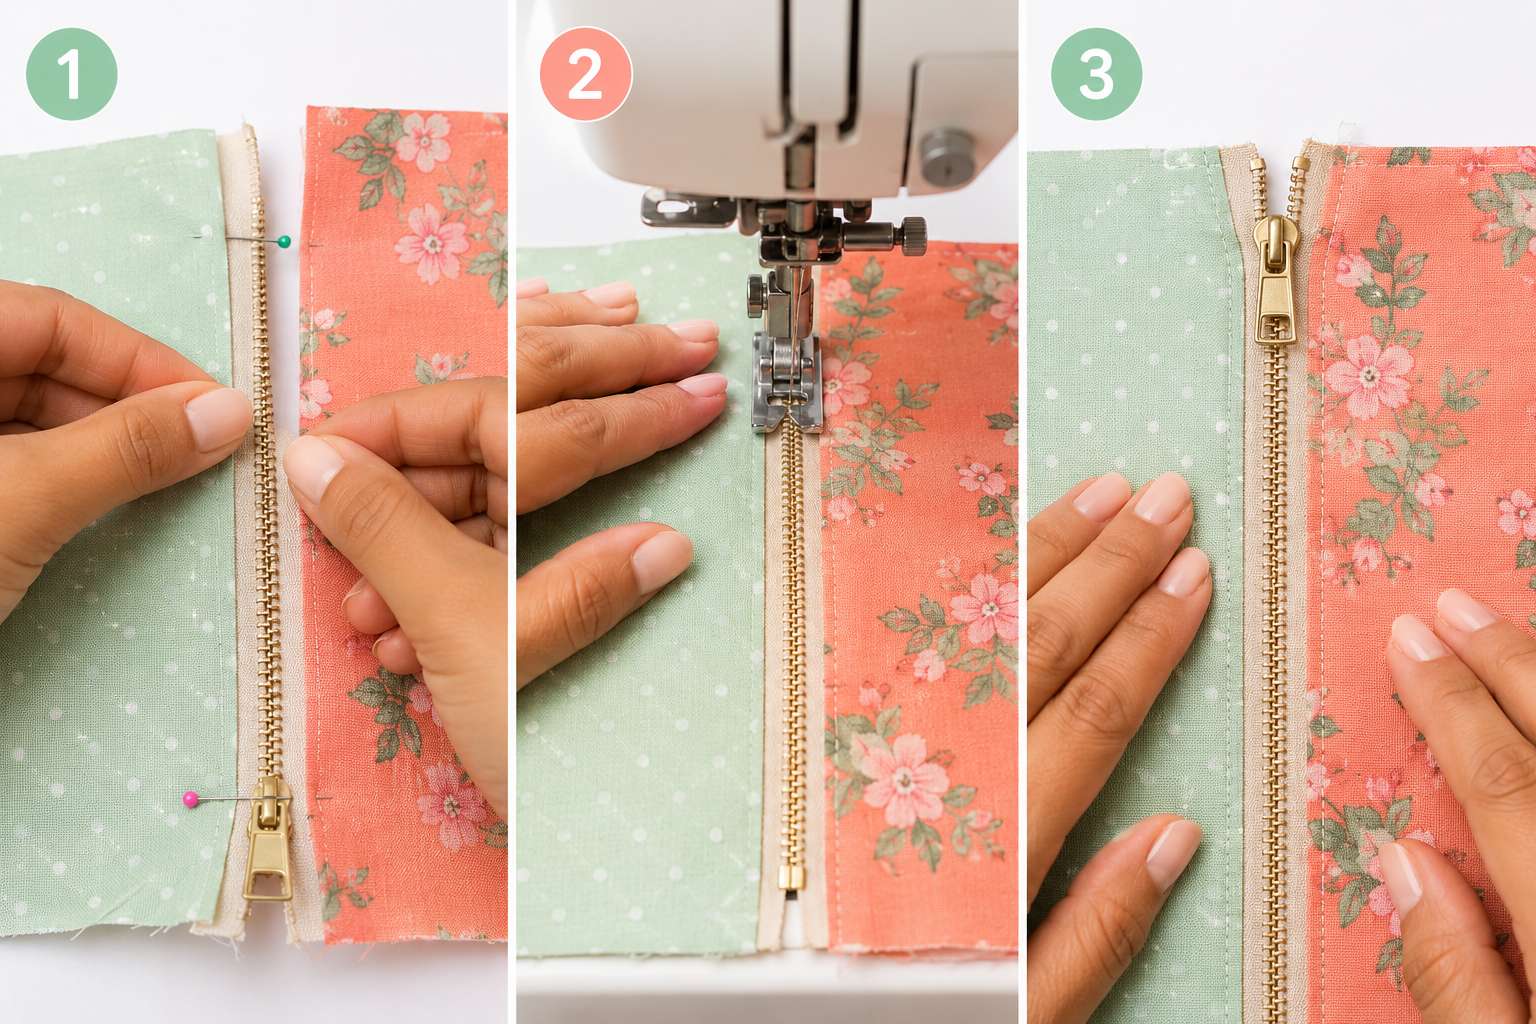
Position the first fabric piece. Place one rectangle right-side up on your work surface. Lay the zipper face-down on top, aligning the zipper tape edge with the top raw edge of the fabric.
Add the second fabric piece. Place the second rectangle right-side down on top of the zipper, creating a fabric-zipper-fabric sandwich. The right sides of both fabrics should face each other with the zipper between them. Pin or clip in place.
Sew the first zipper seam. Using a ½” seam allowance, stitch through all three layers close to the zipper teeth. If you have a zipper foot, use it to get closer to the teeth; otherwise, a standard foot works fine.
Flip and press. Open the fabric pieces away from the zipper and press the seam flat. You should now see the right side of one fabric with the zipper attached along one edge.
Attach the second side. Repeat steps 2-5 with the remaining raw edges and the other side of the zipper tape. When finished, both fabric pieces will be attached to opposite sides of the zipper.
Open the zipper halfway. This step is critical, if you skip it, you won’t be able to turn the pouch right-side out later.
Sew the remaining edges. Fold the pouch so the two fabric pieces are right sides together and the zipper is folded in half. Pin the three remaining raw edges. Sew around these edges with a ½” seam allowance, backstitching at the beginning and end.
Trim and turn. Trim the corners diagonally to reduce bulk. Turn the pouch right-side out through the open zipper. Use a chopstick or turning tool to push out the corners.
Press and finish. Give the finished pouch a final press, and it’s ready to use.
Common beginner mistake: Sewing over the zipper pull. If your needle hits the metal slider, stop with the needle down, lift the presser foot, carefully move the zipper pull past the needle, lower the foot, and continue sewing.
Is a Zipper Pouch Project Good for Beginner Sewers?
Yes, a basic zipper pouch is an excellent beginner project, typically ranking as a second or third sewing project after mastering straight seams. The project teaches fundamental skills including seam allowances, turning corners, and working with a closure mechanism, all while creating something immediately useful.
Beginners should start with a simple unlined pouch in a medium-weight cotton fabric. This construction method is more forgiving than trying to sew garments with curved seams or fitted pieces. The entire project takes 30-60 minutes once you understand the steps.
Why zipper pouches work well for beginners:
- Small size means less fabric to manage
- Straight seams only (no curves to navigate)
- Immediate gratification with a finished project in one sitting
- Mistakes are low-stakes and easily corrected
- Teaches zipper installation in a simple context
- Uses minimal fabric (great for testing new skills)
When to wait: If you’ve never used a sewing machine before, complete one or two practice projects with straight seams first. Try a simple pillowcase or fabric coaster to get comfortable with your machine’s speed and basic sewing machine operation before adding the complexity of a zipper.
What Type of Zipper Is Best for a Small Pouch?
Metal zippers in the 7-9 inch range work best for small pouches because they maintain their shape and don’t ripple as easily as lightweight nylon zippers. Standard zippers (not invisible zippers) are easier for beginners to install and more durable for items that will be opened and closed frequently.
Zipper types and their best uses:
- Metal zippers: Best for structured pouches, heavy use, and a professional finish. The weight helps the zipper lay flat during installation.
- Nylon coil zippers: Lightweight and flexible, good for curved applications but can ripple in straight pouches if not stabilized with interfacing.
- Plastic molded-tooth zippers: Mid-weight option that’s easier on needles than metal. Good all-purpose choice for medium-weight fabrics.
- Separating zippers: Unnecessary for pouches (these are for jackets where both ends need to come apart).
Sizing guidance: Choose a zipper 1-2 inches longer than the opening of your pouch. For a 6″ wide pouch, a 7″ or 8″ zipper works perfectly. The extra length extends beyond the seam allowances on both ends, making installation easier. You can trim excess zipper tape after sewing, or fold it into the side seams.
Where to buy: Most fabric stores carry basic zippers, but online retailers like Wawak, Zipper Stop, or Etsy shops offer wider color selections and bulk pricing. For beginners, buying a multi-pack of assorted zippers provides options for multiple projects at a lower per-zipper cost.
How Much Fabric Do I Need to Make a Zipper Pouch?
For a standard 6″×8″ finished pouch, you need two fabric rectangles measuring 7″×9″ each (adding 1″ total for seam allowances). This requires approximately ¼ yard of fabric, though you can easily make multiple pouches from a single ½-yard cut.
Fabric calculation formula:
- Finished width + 1″ (for two ½” seam allowances) = cut width
- Finished height + 1″ (for two ½” seam allowances) = cut height
- Multiply by 2 (for front and back pieces)
Popular finished sizes and their fabric requirements:
| Finished Size | Cut Size (each piece) | Total Fabric Needed |
|---|---|---|
| 4″×6″ (coin purse) | 5″×7″ | ⅛ yard |
| 6″×8″ (cosmetic bag) | 7″×9″ | ¼ yard |
| 8″×10″ (large pouch) | 9″×11″ | ⅓ yard |
| 5″×7″ (phone case) | 6″×8″ | ¼ yard |
Fabric selection tips: Medium-weight quilting cotton is the most beginner-friendly choice. Avoid very lightweight fabrics like voile or very heavy fabrics like canvas for your first pouch. If using directional prints, add extra fabric to ensure the pattern runs the same direction on both pieces.
For lined pouches with boxed corners (covered later), double the fabric requirements since you’ll need four pieces total instead of two.
How to Install a Zipper Without a Zipper Foot
You can successfully install a zipper using a standard presser foot by adjusting the needle position or the fabric placement. The key is keeping your stitching line close to the zipper teeth (about ⅛” away) while avoiding sewing directly over them.
Method 1: Adjust needle position. Most modern sewing machines allow you to move the needle position left or right. Shift the needle as far as possible toward the zipper teeth while keeping the standard foot on. This brings your stitching line closer to the zipper without requiring a special foot.
Method 2: Offset the fabric. Instead of centering the fabric under the presser foot, shift it so the zipper teeth run along the edge of the foot rather than under the center. This naturally positions your stitching line closer to the zipper.
Method 3: Use a one-sided foot. If your machine came with multiple presser feet, look for one that’s open on one side or narrower than the standard foot. Even if it’s not labeled as a zipper foot, it may work better for this application.
Why a zipper foot helps: A proper zipper foot is narrow and can be attached on either the left or right side of the needle, allowing you to stitch very close to the zipper teeth from either direction. This creates a more professional finish with less visible zipper tape. However, thousands of sewers successfully install zippers without one, especially for casual projects like pouches where perfection isn’t required.
Practical tip: Sew slowly when working near the zipper teeth. If you hear clicking or feel resistance, stop immediately, you’re too close or about to hit the zipper pull. Adjust your fabric position and continue.
Can You Sew a Zipper Pouch Without Interfacing?
Yes, you can sew a zipper pouch without interfacing, especially when using medium-weight quilting cotton or other fabrics with natural body. Interfacing adds structure and prevents the fabric from puckering around the zipper, but it’s not mandatory for all projects.
When to skip interfacing:
- Using medium to heavyweight fabric (quilting cotton, canvas, denim)
- Making a casual pouch where some softness is acceptable
- Creating a lined pouch (the lining provides structure)
- Working with laminated or coated fabrics that already have body
When interfacing is recommended:
- Using lightweight fabrics (lawn, voile, thin cotton)
- Making a professional gift or item for sale
- Creating an unlined pouch that needs to stand upright
- Working with fabrics that tend to ripple or distort
Types of interfacing for pouches:
- Fusible woven interfacing: Adds body without stiffness, maintains fabric drape
- Fusible non-woven interfacing: Provides more structure, good for bags that need to hold shape
- Pellon SF101 or similar: Popular lightweight fusible that works well for most pouch projects
Application method: Cut interfacing pieces the same size as your fabric pieces. Following the manufacturer’s instructions (usually a hot, dry iron pressed for 10-15 seconds), fuse the interfacing to the wrong side of each fabric piece before beginning zipper installation.
Alternative to interfacing: If you want structure without interfacing, make a lined pouch instead. The double layer of fabric provides similar stability while creating a more finished interior.
Why Does My Zipper Pouch Pucker at the Seams?
Zipper pouch puckering typically occurs when the fabric is stretched during sewing, when thread tension is too tight, or when the zipper tape is sewn with uneven pressure. The most common cause is pulling or pushing the fabric through the machine rather than letting the feed dogs move it naturally.
Primary causes and fixes:
Stretched fabric during sewing: Let the machine feed the fabric at its own pace. Avoid pulling from the front or pushing from behind. Your hands should guide the fabric direction but not control the speed. This is especially important when sewing near the zipper teeth where the layers are bulkier.
Incorrect thread tension: If your upper thread tension is too tight, it will pull the fabric and create puckering. Test your tension on scrap fabric with the same number of layers as your project. The stitches should look balanced on both sides. For more details on fixing tension issues, see our guide on thread tension problems.
Mismatched fabric layers: When sandwiching the zipper between fabric pieces, ensure all edges align perfectly before pinning. If the layers shift during sewing, one piece will be longer than the other, causing puckering when you try to match them up later.
Wrong needle or dull needle: Using a dull or incorrect needle can cause fabric bunching and puckering. For cotton fabrics, use a fresh universal needle size 80/12 or 90/14. Change your needle regularly, learn more about how often to change your needle.
Prevention tips:
- Pin or clip every 1-2 inches to keep layers aligned
- Use a walking foot if available (it feeds all layers evenly)
- Reduce presser foot pressure if your machine has this adjustment
- Sew slowly and steadily, especially around corners
- Press seams after each step to set the stitches
Common Mistakes When Sewing Zippers Into Pouches
The most common mistake when sewing zipper pouches is forgetting to open the zipper partway before sewing the side seams closed. This leaves no opening to turn the pouch right-side out, requiring you to unpick seams to fix it.
Top mistakes and how to avoid them:
1. Forgetting to open the zipper before closing the pouch
- Why it matters: You need the zipper opening to turn the finished pouch right-side out
- Fix: Always open the zipper at least halfway before sewing the final seams
- If you forget: Carefully unpick 3-4 inches of one side seam, turn the pouch, then re-sew the opening
2. Sewing over the zipper pull
- Why it matters: Can break your needle or damage the zipper
- Prevention: Stop with needle down when you reach the zipper pull, lift the presser foot, slide the pull past the needle, lower the foot, and continue
- Alternative: Position the zipper pull at the opposite end from where you’ll start sewing
3. Not backstitching at zipper ends
- Why it matters: Zipper seams experience stress every time the pouch is opened; without backstitching, the seam will unravel
- Fix: Always backstitch 3-4 stitches at the beginning and end of each zipper seam
4. Using too short a zipper
- Why it matters: If the zipper is shorter than the pouch opening, you’ll have gaps at the ends
- Prevention: Choose a zipper 1-2 inches longer than your pouch width; excess can be trimmed or folded into seams
5. Skipping the pressing step
- Why it matters: Unpressed seams create lumps and make it harder to sew subsequent steps accurately
- Fix: Press after attaching each side of the zipper and again after turning right-side out
6. Inconsistent seam allowances
- Why it matters: Varying seam allowances create a lopsided pouch
- Prevention: Mark the ½” seam allowance line on your machine with tape, or use the edge of your presser foot as a guide
How to Sew a Lined Zipper Pouch With Boxed Corners
A lined zipper pouch with boxed corners creates a professional, three-dimensional bag with a finished interior and no raw seams visible. This method requires four fabric pieces (two exterior, two lining) and takes about 45-60 minutes.
Materials for a lined pouch:
- Two exterior fabric rectangles (7″×9″ for a 6″×8″ finished size)
- Two lining fabric rectangles (same size)
- One 7-9″ zipper
- Matching thread
Construction steps:
Create two panels. Treat each pair of fabrics (one exterior + one lining) as a unit. Place exterior fabric right-side up, zipper face-down on top, then lining fabric right-side down. Sew through all three layers along the zipper tape. Repeat for the other side of the zipper with the remaining exterior and lining pieces.
Press and topstitch. Open both panels away from the zipper and press. For a professional finish, topstitch ⅛” from the zipper on both sides through the exterior fabric and zipper tape (this keeps the lining from getting caught in the zipper).
Open the zipper halfway. Critical step, don’t skip it.
Arrange for sewing. Fold the pouch so exterior fabrics are right sides together and lining fabrics are right sides together. The zipper will be folded in half between them. Pin around all edges.
Sew around the perimeter. Sew with a ½” seam allowance around the entire pouch, leaving a 3-4″ opening in the bottom of the lining for turning. Backstitch on both sides of the opening.
Box the corners. At each bottom corner, flatten the corner so the side seam aligns with the bottom seam, creating a triangle. Measure 1-2″ from the point (depending on how much depth you want) and draw a line perpendicular to the seam. Sew across this line. Repeat for all four corners (two exterior, two lining). Trim the corner triangles off ¼” from the stitching line.
Turn and close. Turn the entire pouch right-side out through the lining opening. Push out all corners. Hand-stitch the lining opening closed with a ladder stitch, or machine-stitch it closed. Push the lining inside the pouch.
Press and finish. Press the finished pouch, paying special attention to the zipper area.
Boxed corner depth guide:
- 1″ line = shallow box, adds about ½” depth
- 1.5″ line = medium box, adds about ¾” depth
- 2″ line = deep box, adds about 1″ depth

Zipper Pouch vs Zippered Bag: What’s the Difference?
A zipper pouch typically refers to a small, flat or lightly structured container with a zipper along one edge, while a zippered bag usually describes a larger, more structured item with handles or straps and often multiple compartments. The terms overlap significantly, and the distinction is more about size and complexity than construction method.
Zipper pouch characteristics:
- Usually 10 inches or smaller in largest dimension
- Single compartment
- No handles or straps (though some have wrist straps)
- Flat or minimal structure
- Quick project (under 1 hour)
- Used for storage and organization
Zippered bag characteristics:
- Typically larger than 10 inches
- May have multiple pockets or compartments
- Often includes handles, straps, or both
- More structured construction with interfacing or stabilizers
- Longer project time (2+ hours)
- Used for carrying items
Practical distinction: If you can make it in under an hour with less than ½ yard of fabric, it’s probably a pouch. If it requires more planning, multiple pattern pieces, and hardware, it’s probably a bag. However, many sewers use the terms interchangeably, and there’s no official definition separating them.
Where to Buy Zippers for Sewing Pouches Online
Online zipper suppliers offer better variety, pricing, and color selection than most local fabric stores. Buying zippers in bulk packs significantly reduces the per-zipper cost, making them affordable for multiple projects or small business production.
Recommended online sources:
Wawak Sewing Supplies (wawak.com)
- Bulk pricing on quality zippers
- Wide color selection
- Fast shipping
- Good for small business orders
Zipper Stop (zipperstop.com)
- Specializes exclusively in zippers
- Every length and color imaginable
- Wholesale pricing available
- Custom zipper options
Etsy shops
- Search “nylon coil zippers” or “metal zippers bulk”
- Many shops offer curated color packs
- Good for unique colors or vintage-style zippers
- Read reviews for quality assessment
Amazon
- Convenient for Prime members
- Mixed quality (read reviews carefully)
- Good for trying different types before bulk buying
- Search “YKK zippers” for reliable brand
Local fabric store chains (Joann, Hobby Lobby)
- Use online coupons (often 40-50% off)
- Order online for in-store pickup
- Limited color selection compared to specialty suppliers
Buying tips:
- YKK is the gold standard for zipper quality
- Buy a variety pack first to test different types
- Metal zippers cost more but last longer
- Nylon coil zippers are most economical for bulk projects
- Consider buying by the yard and adding your own pulls for maximum flexibility
How to Fix a Zipper That Won’t Close on a Handmade Pouch
A zipper that won’t close on a handmade pouch usually has one of three problems: misaligned teeth, a worn slider, or fabric caught in the mechanism. Most issues can be fixed without replacing the entire zipper.
Diagnosis and fixes:
Misaligned teeth: If the zipper closes partway then separates, the teeth aren’t interlocking properly. Run the slider back and forth several times slowly while applying gentle pressure to help the teeth realign. If teeth are bent, use needle-nose pliers to gently straighten them.
Worn slider: Over time, the slider can widen and no longer press the teeth together firmly. Use pliers to gently squeeze the slider from both sides (top and bottom, not front and back) to narrow the gap. Test after each small adjustment, too much pressure will make the slider impossible to move.
Fabric caught in zipper: This is the most common issue in handmade pouches. Carefully pull the fabric out while moving the slider slightly back and forth. If the fabric is firmly stuck, use a seam ripper to carefully cut away the caught threads, then move the slider past the damaged area. The zipper will still function with a few missing teeth.
Zipper pull came off: Thread a small key ring, paper clip, or ribbon through the hole in the slider as a temporary pull. For a permanent fix, purchase replacement zipper pulls online (sold in packs) and use pliers to attach one.
Prevention tips:
- Always open and close zippers slowly in handmade items
- Keep the seam allowances pressed away from the zipper teeth
- Topstitch close to the zipper to hold fabric away from the mechanism
- Choose quality zippers (YKK brand) for items that will see heavy use
When to replace: If the teeth are missing or severely damaged, or if the slider won’t stay on the track even after adjustment, it’s time to replace the zipper. Carefully unpick the zipper seams, install a new zipper following the original construction method, and re-sew.
Alternatives to Zippers for Small Fabric Pouches
Several closure methods work well for small fabric pouches when you want to avoid installing a zipper. Each alternative offers different benefits in terms of ease of construction, security, and aesthetic appeal.
Drawstring closure:
- Construction: Create a casing at the top of the pouch and thread cord or ribbon through
- Best for: Casual pouches, gift bags, dice bags, jewelry storage
- Pros: Very beginner-friendly, no special tools needed, adjustable opening
- Cons: Less secure than zipper, items can fall out if not cinched tight
Magnetic snap:
- Construction: Install two-part magnetic closure on the inside of the pouch opening
- Best for: Clutches, cosmetic bags, pouches that need quick access
- Pros: Easy one-handed opening, professional look, secure closure
- Cons: Requires interfacing for stability, magnets can affect electronics
Velcro/hook-and-loop tape:
- Construction: Sew strips of hook-and-loop tape to the inside edges of the opening
- Best for: Kids’ pouches, casual storage, items accessed frequently
- Pros: Very easy to install, adjustable, inexpensive
- Cons: Can catch on fabric contents, loses grip over time, visible closure
Button and loop:
- Construction: Sew a button on one side and a fabric loop or elastic on the other
- Best for: Decorative pouches, gifts, vintage-style projects
- Pros: Decorative element, easy to replace if damaged
- Cons: Slower to open/close, less secure for small items
Fold-over flap:
- Construction: Extend one side of the pouch to create a flap that folds over the opening
- Best for: Envelope-style clutches, simple storage pouches
- Pros: No closure hardware needed, clean minimalist look
- Cons: Not secure (items can fall out), requires precise measurements
Choosing the right alternative: Consider how the pouch will be used. For items that need security (money, jewelry), choose magnetic snaps or button closures. For casual storage or gift packaging, drawstrings or fold-over flaps work beautifully. For children’s items, Velcro offers easy operation without pinched fingers.
Frequently Asked Questions
Do I need a special sewing machine to sew a zipper pouch? No, any basic sewing machine that can sew a straight stitch will work for zipper pouches. A zipper foot attachment is helpful but not required. Even vintage machines can handle this project successfully.
Can I hand-sew a zipper pouch? Yes, though it takes significantly longer (2-3 hours versus 30 minutes by machine). Use a backstitch for strength along the zipper and side seams. Hand-sewn pouches work best with lightweight fabrics and shorter zippers.
What’s the smallest zipper pouch I can make? Practical minimum is about 3″×4″ finished size. Smaller than this becomes difficult to turn right-side out and challenging to use. Coin purses typically fall in the 3″×5″ to 4″×6″ range.
How do I wash a handmade zipper pouch? Close the zipper fully before washing to protect the teeth and slider. Machine wash on gentle cycle in cold water, or hand wash. Air dry or tumble dry on low. Avoid high heat which can warp plastic zippers.
Can I use a zipper longer than my pouch? Yes, this is actually recommended. Choose a zipper 1-2 inches longer than your pouch width. The excess extends into the seam allowances on both ends. You can trim it after sewing or fold it into the side seams.
Why does my needle keep breaking when sewing near the zipper? You’re likely hitting the metal zipper teeth or pull. Sew slowly near the zipper, stop with the needle down when you reach the pull, lift the presser foot, move the pull past the needle, then continue. For more needle troubleshooting, see why needles keep breaking.
How do I make a waterproof zipper pouch? Use laminated cotton, oilcloth, or vinyl for the exterior fabric. These materials don’t fray, so you can skip seam finishing. Use a Teflon presser foot to prevent sticking, and lengthen your stitch length slightly (3.0-3.5mm) to avoid perforating the waterproof coating.
Can I add a wrist strap to my zipper pouch? Yes, cut a fabric strip 1.5″×8″, fold it lengthwise with right sides together, sew the long edge, turn right-side out, and press. Fold it in half to create a loop. Pin the raw ends into one side seam before sewing the pouch closed.
What’s the best stitch length for sewing zipper pouches? Use a standard stitch length of 2.5mm for most seams. You can reduce to 2.0mm when sewing very close to zipper teeth for extra security, or increase to 3.0mm when sewing through thick layers at corners.
How do I prevent the lining from getting caught in the zipper? After installing the zipper, topstitch ⅛” from the zipper teeth through the exterior fabric and zipper tape. This creates a barrier that holds the lining away from the zipper mechanism.
Can I use a serger instead of a sewing machine? A serger works well for finishing seam allowances but cannot install the zipper itself. Use a regular sewing machine for zipper installation, then finish the side and bottom seams with a serger if desired for a professional interior finish.
How do I center a design or monogram on my zipper pouch? Cut your fabric pieces larger than needed, center and apply your design, then trim to the correct size. This ensures your design placement is perfect even if it shifts slightly during embroidery or appliqué.
Conclusion
Learning how to sew a zipper pouch opens up endless possibilities for creating practical, personalized storage solutions and handmade gifts. This beginner-friendly project teaches essential sewing skills including zipper installation, seam finishing, and working with multiple fabric layers, all while producing something useful in under an hour.
Start with a basic unlined pouch using medium-weight cotton fabric and a metal zipper to build your confidence. Once you’ve mastered the fundamental technique, experiment with lined versions, boxed corners, different sizes, and decorative fabrics to expand your skills. Remember the critical step of opening the zipper partway before sewing the final seams, and take your time when stitching near the zipper teeth to avoid broken needles.
Your next steps:
- Gather materials for your first pouch (two 7″×9″ fabric rectangles, one 7-9″ zipper, matching thread)
- Review the step-by-step instructions and set up your sewing space
- Practice on inexpensive fabric before using special materials
- Make multiple pouches to refine your technique and build speed
- Explore variations like boxed corners, lining, and different closure types
The beauty of zipper pouches lies in their versatility and quick completion time. Whether you’re organizing your own supplies, creating gifts for friends, or building skills for more complex sewing projects, mastering this technique will serve you well. With practice, you’ll be able to complete a professional-looking zipper pouch from start to finish in just 30 minutes.

 By
By


