


Quick Answer
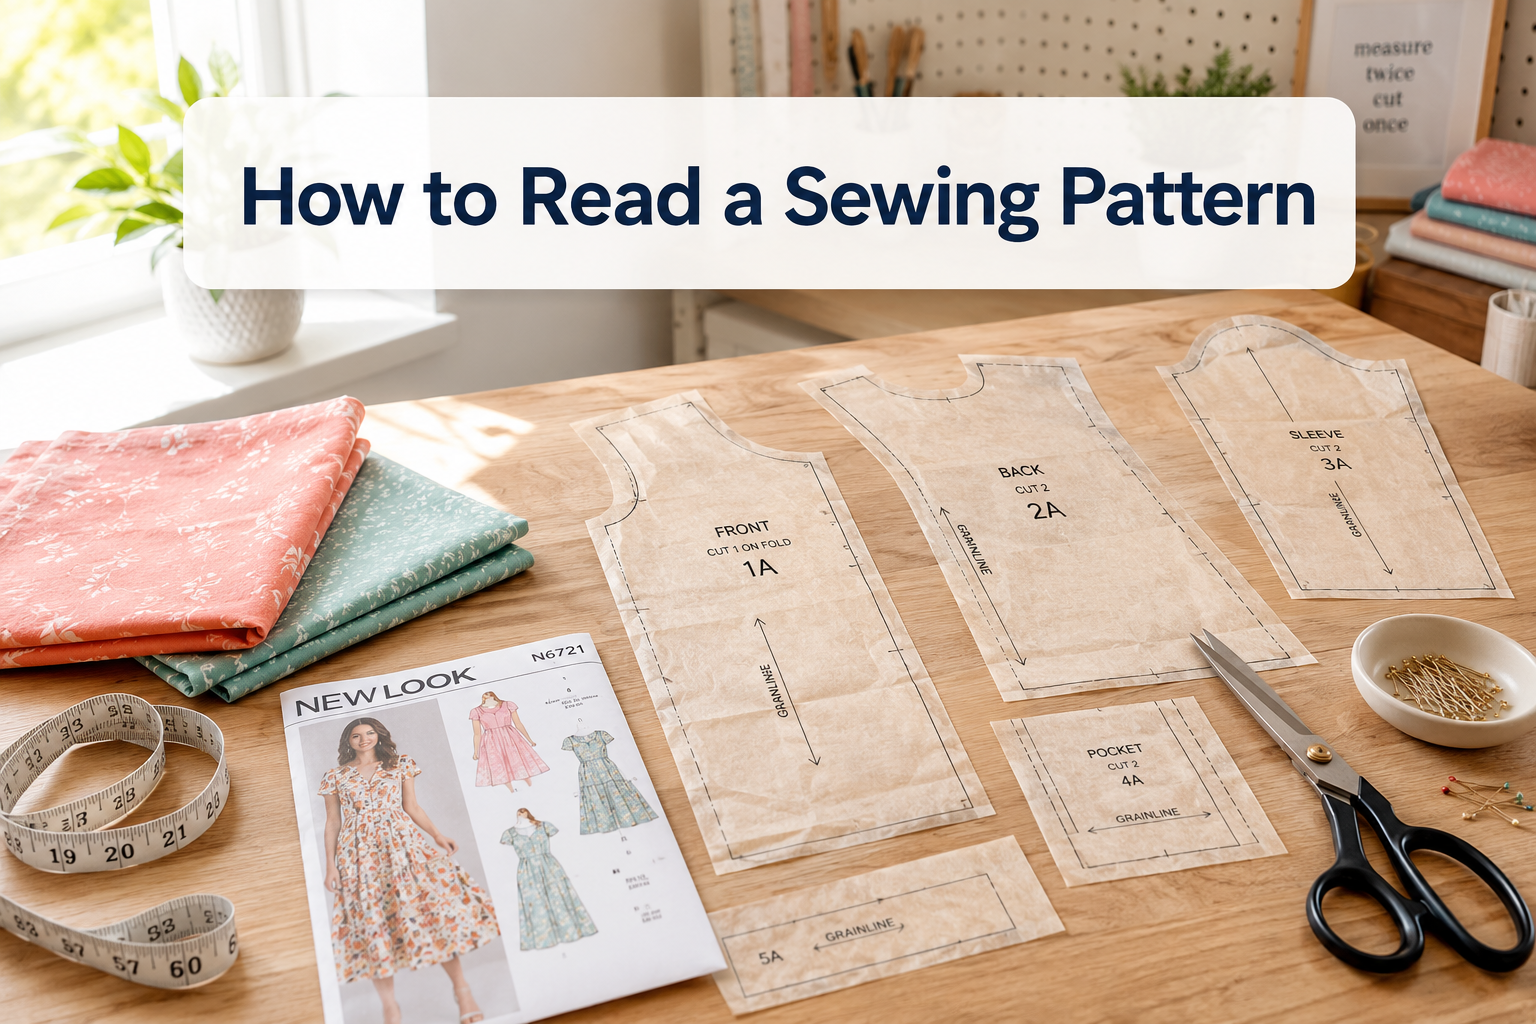
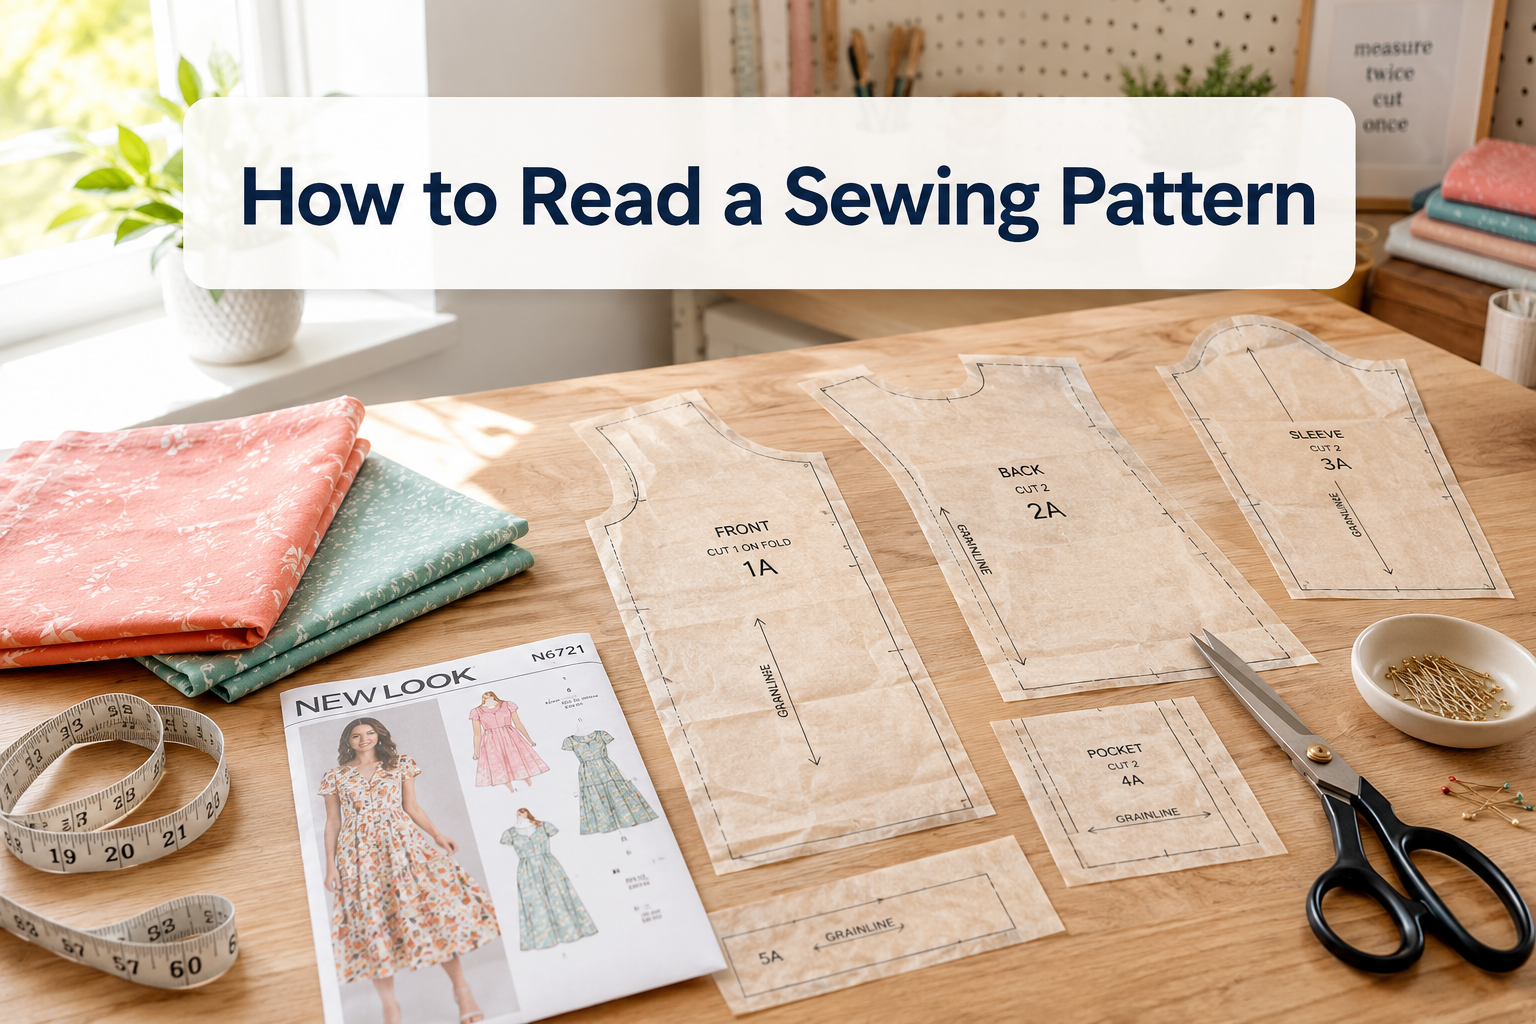
Learning how to read a sewing pattern involves understanding the symbols, markings, and instructions printed on both the pattern envelope and the tissue pieces inside. The envelope tells you fabric requirements, sizing, and notions needed, while the pattern pieces show cutting lines, grainlines, notches, darts, and construction markings that guide you through cutting and assembling your garment. Most beginners can master basic pattern reading in one afternoon by familiarizing themselves with standard symbols and practicing on a simple project.
Key Takeaways
- Pattern envelopes contain sizing charts, fabric requirements, and suggested fabrics, read these before purchasing materials
- Grainline arrows must align parallel to the fabric selvage for proper drape and fit
- Notches (small triangles) help you match seams accurately during construction
- Cutting lines are solid outer edges; sewing lines are dashed lines showing the seam allowance
- Multi-size patterns print several sizes on one tissue, choose your size based on body measurements, not ready-to-wear sizing
- Pattern markings like dots, squares, and triangles indicate dart points, pocket placement, and button positions
- Most patterns include a legend or key explaining all symbols used
- Ease refers to extra room built into the pattern beyond your exact measurements for comfort and movement
What Information Does a Pattern Envelope Contain?
The pattern envelope is your first stop when learning how to read a sewing pattern. It displays the pattern number, suggested fabrics, required yardage for each size and view, notions needed (zippers, buttons, interfacing), and finished garment measurements.
The front of the envelope shows line drawings or photos of all design variations (called “views”) included in the pattern. Each view is typically labeled A, B, C, etc., and may feature different sleeve lengths, necklines, or hem options.
The back of the envelope contains:
- Body measurement chart: Bust, waist, hip, and back-waist length measurements for each size
- Fabric requirements: Yardage needed for each view, organized by size and fabric width (typically 45″ or 60″)
- Suggested fabrics: Recommended fabric types like cotton, linen, or knit
- Notions list: Buttons, zippers, elastic, interfacing, and other supplies
- Finished garment measurements: The actual dimensions of the completed piece, including ease
Common mistake: Many sewers buy patterns based on their clothing size rather than their body measurements. Always measure yourself and compare to the pattern’s measurement chart, pattern sizing often runs 2-4 sizes larger than ready-to-wear.
What Do the Symbols on a Sewing Pattern Mean?
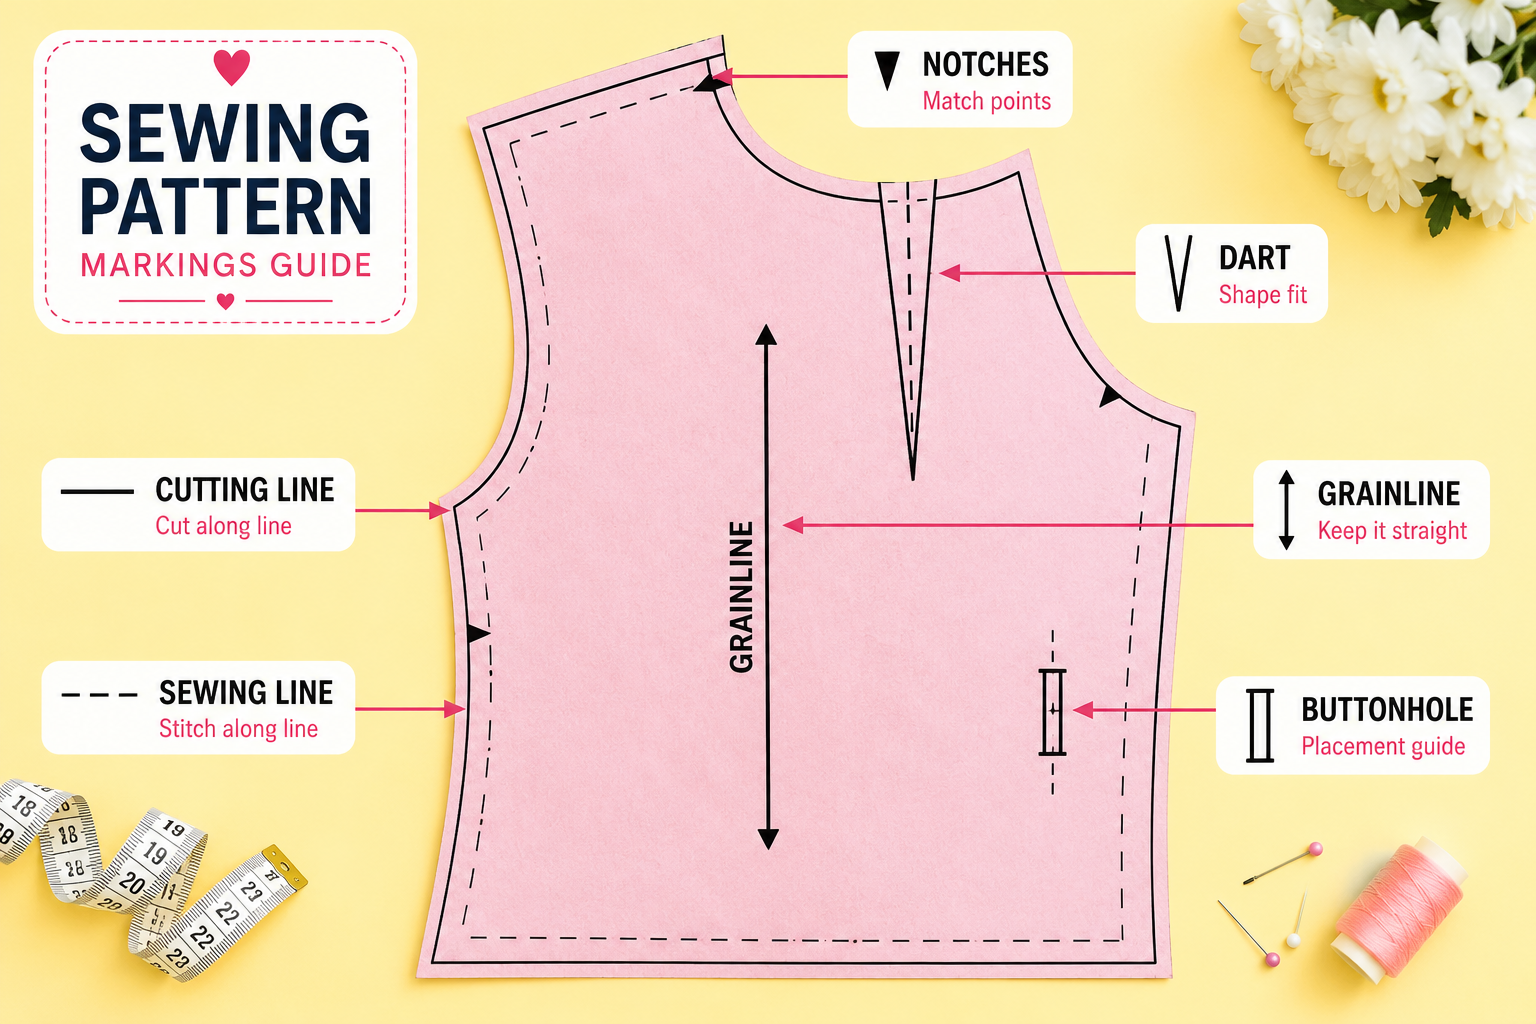
Sewing patterns use standardized symbols to communicate construction details. Understanding these symbols is essential for learning how to read a sewing pattern accurately.
Standard pattern symbols include:
- Grainline arrow: A long arrow with arrowheads at both ends showing fabric grain direction
- Notches: Small triangles extending from the cutting line that mark matching points
- Dots or circles: Mark dart points, pocket placement, or button positions
- Squares: Often indicate buttonholes or specific construction points
- Triangles: May mark pleat folds or gathering points
- Dashed lines: Indicate sewing lines, fold lines, or placement lines
- Solid lines: Show cutting lines (the outer edge where you cut)
- “Place on fold” bracket: A line with arrows at both ends indicating the pattern edge should align with folded fabric
- Lengthen/shorten lines: Double parallel lines showing where to adjust pattern length
- Dart lines: Converging lines forming a V-shape with a dot at the point
Most patterns include a legend or key on the instruction sheet explaining all symbols used. Keep this sheet handy as you work, especially when starting out.
Choose this approach if: You’re working with a pattern from an unfamiliar company, as symbol conventions can vary slightly between brands.

master your craft
Used Book in Good Condition
How to Understand Sewing Pattern Markings and Notches
Pattern markings and notches serve as your roadmap during construction. Notches are small triangular marks that extend beyond the cutting line, helping you match corresponding seam edges accurately.
Notch types and their meanings:
- Single notch: Typically marks front pattern pieces or the first matching point
- Double notch: Usually indicates back pattern pieces or the second matching point
- Triple notch: Less common, used for sleeve caps or complex matching
When cutting your fabric, cut outward around notches to preserve them as small triangles, or cut inward to create a small V-shaped nick (be careful not to cut into your seam allowance). These marks ensure you’re joining the correct edges, front to front, back to back.
Other important markings:
- Dots: Transfer these to your fabric using tailor’s tacks, chalk, or a fabric marker. They mark dart endpoints, pocket corners, or gathering start/stop points
- Squares: Often indicate buttonhole placement, transfer the exact position and length
- Circles: May mark button placement or zipper stops
Common mistake: Ignoring notches and trying to match seams by eye leads to twisted seams, puckering, and poor fit. Always match notches precisely before pinning.
For more guidance on precision sewing techniques, check out our sewing tips collection.
What Is the Difference Between Cutting Line and Sewing Line?
The cutting line is the solid outer edge of your pattern piece, this is where your scissors follow. The sewing line is a dashed line inside the cutting line that shows where your needle should stitch. The space between these two lines is your seam allowance.
Most commercial patterns include a 5/8-inch (1.5 cm) seam allowance, though some European patterns use 1.5 cm and children’s patterns may use 1/4 inch. The pattern instructions will specify the seam allowance used.
Key differences:
| Aspect | Cutting Line | Sewing Line |
|---|---|---|
| Appearance | Solid outer edge | Dashed inner line |
| Purpose | Where you cut fabric | Where you stitch |
| Visibility | Always printed | Sometimes omitted on modern patterns |
| Measurement | Includes seam allowance | Finished seam position |
Modern pattern trend: Many contemporary patterns print only the cutting line and assume you know the seam allowance. Always check the instruction sheet for the specified seam allowance, then use your machine’s seam guide or mark your fabric accordingly.
Choose this approach if: You’re working with vintage patterns (pre-1970s), which almost always print both lines and may use different seam allowances for different seams.
What Does Grainline Mean on a Sewing Pattern?
The grainline is one of the most critical markings when learning how to read a sewing pattern. It’s a long arrow printed on each pattern piece that must align parallel to the fabric’s selvage (the finished edge).
Fabric has three grain directions:
- Lengthwise grain: Runs parallel to the selvage; strongest and most stable
- Crosswise grain: Runs perpendicular to the selvage; has slight stretch
- Bias: Runs at a 45-degree angle to the selvage; maximum stretch and drape
Most pattern pieces are cut on the lengthwise grain for stability and proper drape. The grainline arrow shows you exactly how to position the pattern.
How to align grainline correctly:
- Measure from one end of the grainline arrow to the selvage
- Measure from the other end of the arrow to the selvage
- Both measurements must be exactly equal
- Pin the pattern in place only after confirming alignment
Common mistake: Eyeballing grainline alignment instead of measuring leads to garments that twist on the body, hang unevenly, or don’t fit properly. Always measure both ends of the arrow.
Exception: Some pattern pieces are intentionally cut on the bias for decorative effect or maximum stretch. These will be clearly marked “cut on bias” or show a diagonal grainline arrow.
How to Determine What Size to Cut on a Multi-Size Pattern
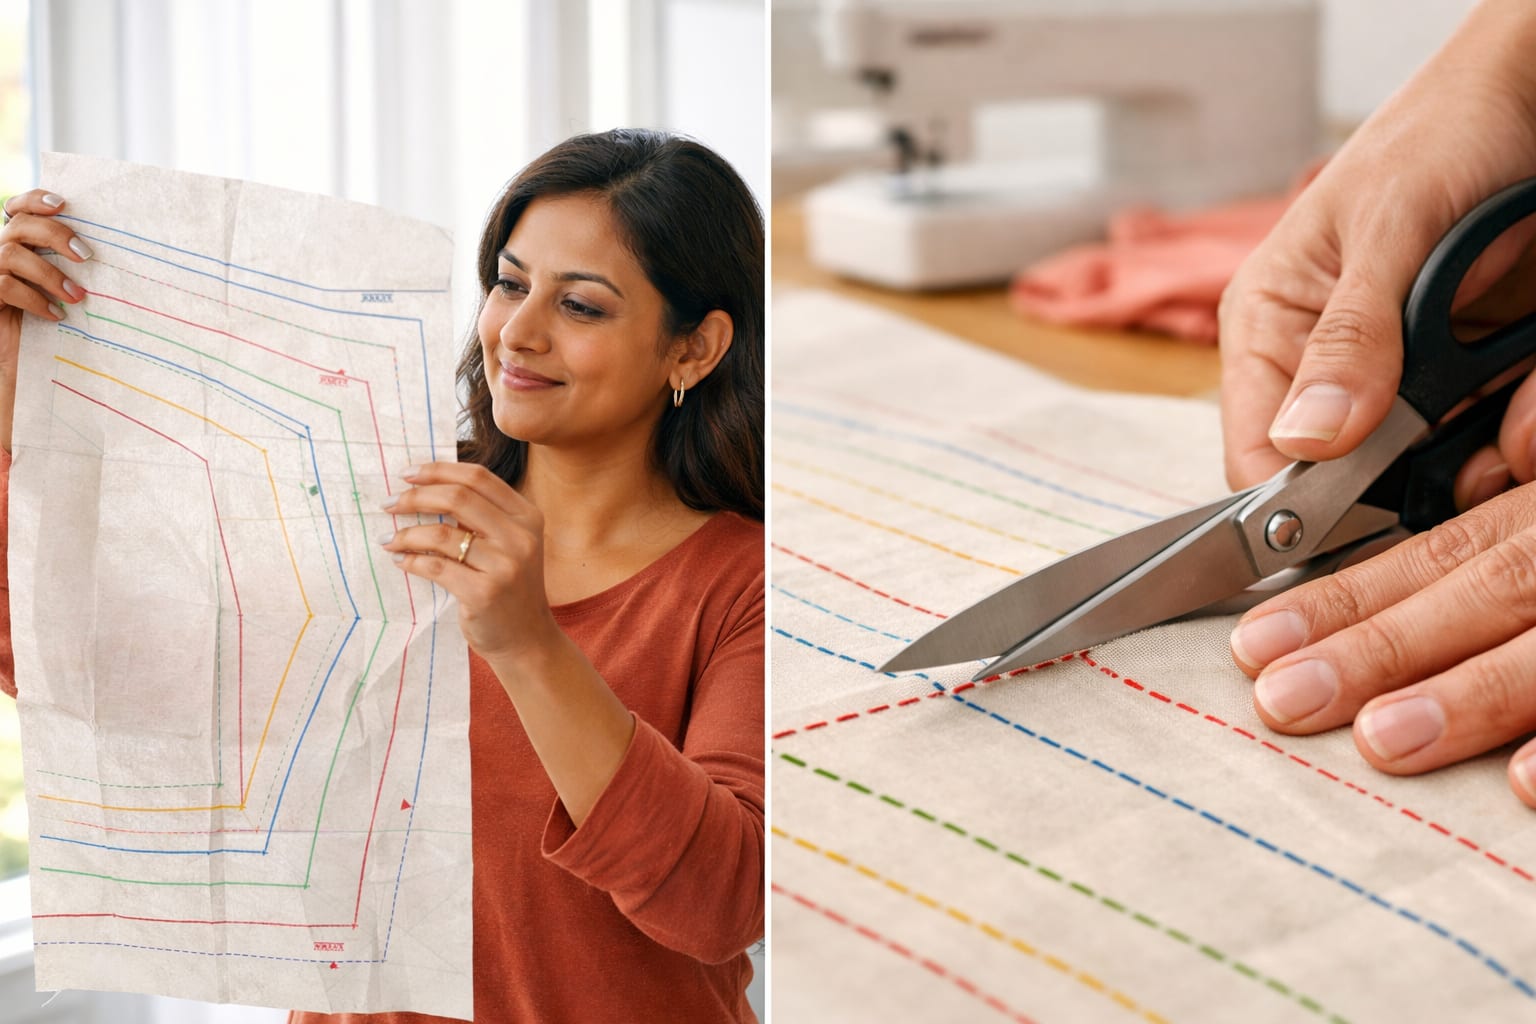
Multi-size patterns print several sizes on one tissue, with each size shown as a different line style (solid, dashed, dotted) or color. This format lets you cut the size you need without buying multiple patterns.
Steps to choose your size:
- Take accurate body measurements: Measure bust, waist, and hips in undergarments
- Compare to the pattern’s measurement chart: Use the chart on the envelope, not ready-to-wear sizing
- Choose based on the largest measurement: If your measurements span multiple sizes, cut the largest size needed
- Consider the garment type: For fitted tops, use bust measurement; for pants, use hip measurement
- Check the finished garment measurements: Compare these to a similar garment you own that fits well
What if your measurements fall between two pattern sizes? Cut the larger size if you prefer a looser fit, or cut between the lines and blend the sizes smoothly. Many sewers cut one size at the bust, grade to another at the waist, and blend to a third at the hips.
Cutting tips for multi-size patterns:
- Use a highlighter to mark your chosen size before cutting
- Cut carefully along only one line, don’t accidentally switch sizes mid-piece
- Consider tracing your size onto pattern paper to preserve the original tissue for future use
Common mistake: Cutting the same size you wear in ready-to-wear clothing. Pattern sizing hasn’t changed since the 1950s, while ready-to-wear has implemented “vanity sizing.” You may need a pattern size 2-4 sizes larger than your usual clothing size.
For beginners just starting their sewing journey, our sewing for beginners resources provide additional guidance.
Where to Buy Sewing Patterns for Beginners
Sewing patterns are available from multiple sources, each with advantages for different skill levels and project types.
Commercial pattern companies:
- Big Four brands (Simplicity, McCall’s, Butterick, Vogue): Available at fabric stores like Joann, often on sale for $1.99-$3.99
- Burda: European sizing, available in magazines and online
- New Look, Kwik Sew: Budget-friendly options with clear instructions
Independent pattern designers:
- PDF patterns: Download instantly, print at home on regular paper, tape together
- Printed patterns: Mailed to you, often on sturdier paper than commercial patterns
- Popular indie brands: Tilly and the Buttons, Closet Core, Grainline Studio, Helen’s Closet
Where to shop:
- Fabric stores: Joann, Hobby Lobby (in-person browsing, frequent sales)
- Online retailers: PatternReview.com, Etsy, independent designer websites
- Pattern marketplaces: Makerist, Seamwork (subscription service)
For beginners, choose patterns labeled:
- “Easy” or “Beginner”
- Minimal pattern pieces (under 10)
- Simple construction (no zippers, buttonholes, or set-in sleeves initially)
- Clear, illustrated instructions
Cost considerations: Commercial patterns range from $2-$20 depending on sales. PDF patterns typically cost $10-$18. Subscription services like Seamwork offer unlimited patterns for $9/month.

PATTERN S1563 SIZING: Simplicity pattern includes women's, men's, and teens' sizes XS-XL so you can sew your ideal fit. Pattern sizing runs differently from ready-to-wear clothing, so measure and check the body size chart before cutting.


PATTERN S1575 SIZING: Simplicity pattern includes children's sizes 7-14 so you can sew your ideal fit. Pattern sizing runs differently from ready-to-wear clothing, so measure and check the body size chart before cutting.
Can You Reuse a Sewing Pattern After Cutting It Out?
Yes, you can reuse sewing patterns multiple times with proper care. The key is how you handle the pattern during initial use and storage afterward.
Best practices for pattern reuse:
- Trace instead of cutting: Copy the pattern onto pattern paper, Swedish tracing paper, or medical exam paper before cutting your fabric
- Use weights instead of pins: Pins create holes that weaken tissue over time
- Fold carefully: Follow original fold lines to prevent tearing
- Store properly: Keep patterns in their original envelopes or large ziplock bags with the instruction sheet
- Label traced patterns: Write the pattern number, size, and any adjustments on traced copies
Pattern durability by type:
- Tissue patterns (Big Four brands): Fragile but reusable 3-5 times with care
- Printed indie patterns: Sturdier paper, reusable 5-10+ times
- PDF patterns: Print unlimited copies as needed
- Traced patterns: Virtually unlimited reuse
When to trace your pattern:
- You plan to make the garment multiple times
- You need to blend sizes or make adjustments
- You’re working with delicate vintage patterns
- You want to preserve the original for future size changes
Common mistake: Cutting directly on the original pattern tissue without considering future use. Once cut, patterns are harder to reuse for different sizes or views.
What Does Ease Mean in Sewing Patterns?
Ease refers to the extra room built into a pattern beyond your exact body measurements. This additional space allows for comfort, movement, and the intended fit of the garment. Understanding ease is crucial when learning how to read a sewing pattern and choose the right size.
Types of ease:
- Wearing ease: The minimum amount needed to move, sit, and breathe comfortably (typically 2-4 inches in the bust)
- Design ease: Extra fullness added for style, creates loose, oversized, or flowing silhouettes
- Negative ease: Pattern is smaller than body measurements, used for stretchy knit fabrics that expand to fit
Typical ease amounts:
- Very close-fitting: 0-1 inch (requires stretch fabric)
- Close-fitting: 1-2 inches (fitted blouses, dresses)
- Fitted: 2-3 inches (tailored shirts, jackets)
- Semi-fitted: 3-4 inches (casual tops)
- Loose-fitting: 4-6 inches (oversized styles)
- Very loose-fitting: 6+ inches (cocoon coats, swing dresses)
How to find ease information:
Check the pattern envelope’s “finished garment measurements” and subtract your body measurements. For example, if the finished bust is 38 inches and your bust measures 34 inches, the pattern has 4 inches of ease.
Choose this approach if: You’re between sizes or unsure which to cut. Understanding ease helps you decide whether to size up or down based on your preferred fit.
For more precision in your sewing projects, proper thread tension is equally important.
How to Read Fabric Requirements on Pattern Envelope
The fabric requirements chart on the pattern envelope tells you exactly how much fabric to buy for your chosen view and size. This chart prevents costly mistakes and ensures you have enough material.
Understanding the fabric chart:
The chart is organized by:
- View (A, B, C, etc.)
- Size (rows)
- Fabric width (columns, typically 45″ or 60″)
- Fabric type (with or without nap)
Key terms:
- Nap/With nap: Fabric with directional pattern, pile, or sheen (velvet, corduroy, one-way prints)
- Without nap: Non-directional fabric (solid colors, all-over prints)
- Fabric width: Measured selvage to selvage, usually 45″ or 60″
How to use the chart:
- Find your chosen view (A, B, C)
- Locate your size in the left column
- Find the fabric width you’re buying (check the bolt end)
- Note whether your fabric has nap or not
- Buy the yardage listed (always round up)
Example: View A, Size 12, 45″ wide fabric without nap = 2⅜ yards
Pro tips:
- Always buy extra: Add ¼-½ yard for mistakes, pattern matching, or preshrinking
- Nap requires more fabric: One-way layouts need 10-30% more yardage
- Wider fabric saves money: 60″ wide fabric often requires less yardage
- Check for additional fabrics: Some patterns need contrast fabric or lining
Common mistake: Buying fabric width 44″ when the pattern assumes 45″, or vice versa. Even one inch difference can affect whether pieces fit on your fabric.

Durable Poly Cotton Blend – Made from a balanced mix of polyester and cotton, combining softness, breathability, and long-lasting durability. Generous 58"/60" Width –...
Common Mistakes When Reading Sewing Patterns
Even experienced sewers make errors when reading patterns. Recognizing these pitfalls helps you avoid frustration and wasted materials.
Top pattern-reading mistakes:
- Skipping the instruction sheet: Always read through all instructions before cutting
- Ignoring the cutting layout: The diagram shows the most efficient fabric arrangement
- Cutting all pieces at once: Cut and mark one piece at a time to prevent confusion
- Forgetting to transfer markings: Dots, notches, and lines are essential for construction
- Mixing up right and wrong sides: Pay attention to which side faces up in layouts
- Not checking pattern pieces: Count pieces against the list before cutting
- Overlooking “cut 2” or “cut 4” instructions: Some pieces need multiple copies
- Ignoring directional prints: One-way patterns must all face the same direction
- Skipping pattern adjustments: Lengthen/shorten before cutting if needed
- Not testing fit: Make a muslin (test garment) for fitted or expensive projects
Prevention strategies:
- Read instructions completely before starting
- Highlight or check off each step as you complete it
- Keep pattern pieces organized in labeled groups
- Use a design wall or large table to lay out all pieces
- Double-check measurements and markings before cutting
When to make a muslin: For fitted garments, expensive fabrics, or patterns you’re trying for the first time, cut a test version from cheap fabric first. This reveals fit issues before you cut your good fabric.
If you encounter issues during construction, our sewing troubleshooting guide can help.
Are PDF Sewing Patterns Easier to Read Than Paper Ones?
PDF patterns and traditional paper patterns each have advantages depending on your learning style and workspace. Neither is universally “easier,” but one may suit your needs better.
PDF pattern advantages:
- Instant access: Download immediately, no shipping wait
- Unlimited copies: Print as many times as needed
- Layers: Many PDFs let you print only your size
- Projector option: Project directly onto fabric (requires equipment)
- Storage: No physical storage needed
- Adjustments: Easy to print multiple sizes or modified versions
PDF pattern disadvantages:
- Assembly required: Must print and tape together 20-40+ pages
- Printer needed: Requires home printer or print shop access
- Paper cost: Ink and paper add to pattern cost
- Test square: Must verify printer scale accuracy before printing
- Time investment: Assembly takes 30-60 minutes
Traditional paper pattern advantages:
- Ready to use: No assembly required
- Tactile: Easier to see all pieces at once
- Familiar format: Standard if you learned on paper patterns
- No technology: No printer or computer needed
- Durable options: Indie patterns often use heavier paper
Traditional paper pattern disadvantages:
- Single use: Cutting destroys the original
- Shipping time: Must wait for delivery or visit store
- Storage: Requires physical space
- All sizes printed: Must identify your size among multiple lines
Choose PDF patterns if: You have a reliable printer, enjoy digital tools, want instant access, or plan to make multiple sizes or versions.
Choose paper patterns if: You prefer tactile learning, lack printing resources, want to start immediately after purchase, or find assembly tedious.
Many sewers use both formats depending on the project. For detailed construction guidance, refer to pattern instructions resources.
What If My Measurements Fall Between Two Pattern Sizes?
Having measurements that span multiple sizes is extremely common. Most bodies don’t match pattern proportions exactly, and knowing how to adjust is an essential part of learning how to read a sewing pattern.
Solutions for between-size measurements:
1. Cut the larger size
- Simplest approach for beginners
- Easier to take in than let out
- Best for loose-fitting garments
2. Grade between sizes
- Cut one size at bust, blend to another at waist/hips
- Creates custom fit for your proportions
- Requires smooth transition between sizes (use a curved ruler)
3. Choose based on garment area
- Tops/dresses: Use bust measurement
- Pants/skirts: Use hip measurement
- Fitted garments: Use largest measurement
4. Make a muslin first
- Test fit in cheap fabric
- Adjust before cutting good fabric
- Essential for fitted or expensive projects
Grading technique:
- Mark your sizes on the pattern (e.g., size 10 at bust, 12 at waist, 14 at hip)
- Draw smooth transition lines between sizes using a curved ruler
- Blend gradually over 2-3 inches, never make sharp angles
- Cut along your custom line
Common scenarios:
- Large bust, small waist: Cut bust size, grade down to waist
- Small bust, large hips: Cut hip size, grade up to bust
- Athletic build: May need to add width at shoulders while reducing at waist
When to size up vs. down:
- Size up if: The garment is fitted, you prefer ease, or the fabric doesn’t stretch
- Size down if: The garment is loose-fitting, you prefer close fit, or you’re using stretchy fabric
Pro tip: Take photos of yourself in the muslin to see fit issues you might miss in the mirror. Side and back views are especially revealing.
How to Transfer Pattern Markings to Fabric Correctly
Transferring markings from pattern to fabric is a crucial step that many beginners rush or skip entirely. These marks guide construction and ensure professional results.
Marking methods:
1. Tailor’s tacks (most accurate)
- Thread through pattern and both fabric layers
- Clip threads between layers
- Leaves temporary thread marks
- Best for: Delicate fabrics, permanent marks needed
2. Chalk or fabric markers
- Mark through pattern holes or after removing pattern
- Quick and easy
- Best for: Casual garments, washable fabrics
- Warning: Test markers on scraps, some don’t wash out
3. Tracing wheel and paper
- Roll wheel over markings with carbon paper underneath
- Fast for multiple marks
- Best for: Muslin, stable fabrics
- Avoid on: Delicate or light-colored fabrics (may not wash out)
4. Pins
- Pin through pattern dots, then mark fabric after removing pattern
- Quick but less accurate
- Best for: Simple markings, stable fabrics
5. Snips
- Tiny cuts at notches or marks (1/8 inch maximum)
- Fast and permanent
- Best for: Seam allowances only
- Never snip: Into the garment body or seam line
What to transfer:
- ✓ All dots (dart points, pocket placement, button positions)
- ✓ Notches (match points)
- ✓ Grainline (if making adjustments)
- ✓ Fold lines
- ✓ Pleat lines
- ✓ Gathering indicators
- ✓ Buttonhole placement
Step-by-step marking process:
- Keep pattern pinned to fabric
- Mark all dots and symbols on top fabric layer
- Use pins or tailor’s tacks to transfer through to bottom layer
- Remove pattern carefully
- Complete marking on bottom layer
- Double-check all marks before removing pins
Common mistake: Removing the pattern before transferring all markings, then trying to remember where everything goes. Always mark completely before unpinning.
For smooth construction after marking, ensure your machine is properly maintained, learn how to thread a sewing machine correctly.
Do I Need to Know How to Read Patterns to Start Sewing?
You can absolutely start sewing without mastering pattern reading. Many beginners begin with pattern-free projects, then gradually learn pattern skills as they progress.
Pattern-free beginner projects:
- Pillowcases (rectangles only)
- Simple tote bags
- Elastic-waist skirts
- Scarves and infinity scarves
- Table runners
- Zippered pouches
- Baby blankets
When patterns become necessary:
- Fitted garments (shirts, dresses, pants)
- Garments with set-in sleeves
- Tailored items (blazers, coats)
- Complex designs (princess seams, collars)
Learning progression for beginners:
- Start: Pattern-free rectangle projects
- Next: Very simple patterns (4-6 pieces, labeled “Easy”)
- Then: Basic garments (elastic-waist pants, simple tops)
- Finally: Fitted garments with multiple pieces
Beginner-friendly pattern features:
- “Easy” or “Learn to Sew” designation
- Fewer than 10 pattern pieces
- Minimal or no closures (zippers, buttons)
- Elastic waists instead of fitted waistbands
- Simple necklines (no collars)
- Illustrated step-by-step instructions
- Recommended for beginners on envelope
Choose this approach if: You feel overwhelmed by pattern instructions. Build confidence with simple projects first, then tackle patterns when you’re ready.
Alternative learning path: Take a beginner sewing class where an instructor guides you through your first pattern. Many fabric stores offer these classes, and having hands-on help makes pattern reading much less intimidating.
For additional beginner support, explore our beginner sewing resources.
Frequently Asked Questions
How long does it take to learn to read sewing patterns?
Most beginners grasp basic pattern reading in 2-4 hours of focused study and practice. Complete confidence typically develops after completing 3-5 patterns. Start with simple patterns and progress to complex ones as your skills grow.
Do all sewing patterns use the same symbols?
Most commercial patterns use standardized symbols, but minor variations exist between companies and countries. European patterns (Burda) may differ slightly from American patterns (Big Four). Always check the pattern’s legend or key for symbol definitions.
Can I use a sewing pattern multiple times?
Yes, with proper care. Trace patterns onto pattern paper to preserve the original, fold carefully along original lines, and store in envelopes or bags. Tissue patterns last 3-5 uses; sturdier indie patterns last 10+ uses. PDF patterns can be printed unlimited times.
What’s the difference between commercial and indie patterns?
Commercial patterns (Big Four) are mass-produced, widely available in stores, frequently on sale, and use vintage sizing. Indie patterns are designed by small companies, often available as PDFs, use modern sizing, include more detailed instructions, and cost $10-$18.
How do I know which pattern size to buy?
Measure your bust, waist, and hips, then compare to the pattern’s measurement chart on the envelope. Choose based on your largest measurement, not your clothing size. Pattern sizing runs 2-4 sizes larger than ready-to-wear due to different sizing standards.
What does “cut on fold” mean?
“Cut on fold” means place that pattern edge exactly on folded fabric, then cut around the other edges. When you unfold the fabric, you’ll have a symmetrical piece twice as wide as the pattern. This creates mirror-image halves without a center seam.
Why do patterns have different line styles?
Multi-size patterns print several sizes on one tissue using different line styles (solid, dashed, dotted) or colors to distinguish each size. This lets you cut your size without buying multiple patterns. Always highlight your size before cutting to avoid confusion.
What is a muslin in sewing?
A muslin is a test garment sewn from inexpensive fabric (traditionally unbleached cotton muslin, but any cheap fabric works) to check fit and construction before cutting your good fabric. It’s essential for fitted garments, expensive fabrics, or unfamiliar patterns.
How much extra fabric should I buy beyond pattern requirements?
Add ¼-½ yard extra for mistakes, preshrinking, pattern matching, or adjustments. For directional prints or napped fabrics, add 10-30% more. For expensive fabric or first-time patterns, consider buying enough for a muslin test version first.
Can I adjust a pattern for a different fabric type?
Some adjustments work; others don’t. You can often substitute similar-weight wovens (cotton for linen) or similar-stretch knits. Don’t substitute woven for knit or vice versa without significant pattern modifications. Check the pattern’s suggested fabrics for guidance.
What does “RST” mean in pattern instructions?
RST stands for “right sides together”, place the fabric’s right (outer/printed) sides facing each other before sewing. This hides the seam inside the garment. WST means “wrong sides together” (inner sides facing).
How do I fix a pattern that’s too small after cutting?
If you haven’t sewn yet, you can add fabric strips to seam allowances, use contrast panels, or add design details like godets or gussets. If already sewn, options include letting out seams (if seam allowance exists), adding side panels, or converting to a different style.
Conclusion
Learning how to read a sewing pattern opens the door to creating custom-fitted garments and brings your creative visions to life. Start by understanding the pattern envelope’s sizing and fabric requirements, then familiarize yourself with standard symbols like grainlines, notches, and cutting lines. Take accurate body measurements, choose your size based on those measurements rather than ready-to-wear sizing, and don’t hesitate to grade between sizes for a custom fit.
Your next steps:
- Choose a beginner-friendly pattern labeled “Easy” with fewer than 10 pieces
- Read through all instructions before cutting any fabric
- Practice on inexpensive fabric to build confidence without risk
- Transfer all markings carefully using your preferred method
- Keep the instruction sheet handy as your reference guide
- Join a sewing community online or locally for support and advice
Remember that every experienced sewer was once a beginner puzzling over pattern symbols. With each project, pattern reading becomes more intuitive until you can glance at a pattern piece and immediately understand its construction. Start simple, be patient with yourself, and celebrate each completed project as a learning milestone.
Ready to put your pattern-reading skills into practice? Choose your first pattern, gather your supplies, and start creating. The garment you’ve been imagining is just one pattern away.


