


A single misaligned cut can turn a perfectly drafted pattern into a garment that twists, puckers, and refuses to hang straight, no matter how carefully you sew. Learning how to cut fabric on grain is the foundation of professional-looking sewing projects, ensuring your finished pieces drape beautifully and wear evenly over time. The grain line determines how fabric behaves, stretches, and holds its shape, making proper alignment essential before you make that first cut.
Key Takeaways
- Cutting on grain means aligning your pattern pieces parallel to the fabric’s lengthwise or crosswise threads for proper drape and stability
- Lengthwise grain runs parallel to the selvage and has minimal stretch, while crosswise grain runs perpendicular with slightly more give
- Off-grain cutting causes garments to twist, seams to pucker, and hems to hang unevenly
- Straightening fabric before cutting (by pulling threads or tearing) ensures accurate grain alignment
- Knit fabrics also have grain lines that affect stretch direction and garment fit
- Most pattern pieces should be cut on lengthwise grain unless specifically marked for crosswise or bias placement
- A rotary cutter, clear ruler, and cutting mat are essential tools for accurate grain-line cutting
- Fixing off-grain cuts is difficult but sometimes possible through blocking or strategic seam placement
What Does Cutting Fabric on Grain Mean?
Cutting fabric on grain means aligning your pattern pieces so they run parallel to the fabric’s woven or knitted thread structure. Woven fabrics have two sets of perpendicular threads: the lengthwise grain (warp threads running parallel to the selvage) and the crosswise grain (weft threads running from selvage to selvage). When you cut on grain, you’re respecting this thread structure to ensure your finished project hangs correctly and maintains its intended shape.
The grain line marked on commercial patterns typically indicates lengthwise grain placement. This arrow or line should be positioned parallel to the selvage edge, ensuring the strongest, most stable threads run vertically through your garment. Proper grain alignment affects everything from how a skirt hangs to whether a collar lies flat.
Why grain matters: Fabric behaves differently depending on which direction you pull it. Lengthwise grain has almost no stretch because those threads are held taut during weaving. Crosswise grain has slight give. Ignoring these properties leads to garments that don’t fit as intended.
Difference Between Grain Line and Bias in Fabric
The grain line refers to the direction of threads in woven fabric, either lengthwise (parallel to selvage) or crosswise (perpendicular to selvage), while bias runs at a 45-degree angle to both grain lines and has maximum stretch. True bias is the diagonal sweet spot where fabric becomes fluid and drapey, perfect for binding edges or creating garments that hug curves without darts.
Here’s how they compare:
| Direction | Stretch | Best Uses | Stability |
|---|---|---|---|
| Lengthwise grain | Minimal | Garment body, vertical pieces | Highest |
| Crosswise grain | Slight | Sleeves, horizontal details | Moderate |
| True bias (45°) | Maximum | Binding, cowl necks, bias-cut gowns | Lowest |
Most garment pieces are cut on lengthwise grain for stability and to prevent stretching during wear. Bias cutting is reserved for specific design elements where drape and stretch are desired. Cutting a straight skirt on bias, for example, would cause it to stretch out and lose its shape within hours of wearing.
Common mistake: Confusing bias with off-grain. Bias is an intentional diagonal cut for specific effects, while off-grain is an accidental misalignment that causes problems.
How to Find the Grain Line on Fabric
To find the lengthwise grain, locate the selvage edges, the tightly woven finished edges that run along both sides of the fabric as it comes off the bolt. The lengthwise grain runs parallel to these selvages and represents the strongest, most stable direction. For crosswise grain, look perpendicular to the selvages, from one selvage edge to the other.
Step-by-step method:
- Identify the selvages, These are the factory-finished edges, often with printed information or a different texture
- Check the fold line, Fabric is usually folded lengthwise on the bolt, with selvages aligned
- Pull a thread, For precise grain identification, snip into the selvage and pull a single crosswise thread; the line it creates shows true crosswise grain
- Test the stretch, Pull fabric in different directions; lengthwise grain barely stretches, crosswise has slight give, and diagonal (bias) stretches most
For knit fabrics, the lengthwise grain runs parallel to the ribs or wales (vertical columns of stitches), while crosswise grain follows the courses (horizontal rows). Knits don’t have selvages, so look for the direction with least stretch to identify lengthwise grain.
Edge case: Some fabrics like batiks or hand-dyed materials may not have visible selvages. In these cases, the pull-thread method is your most reliable option.
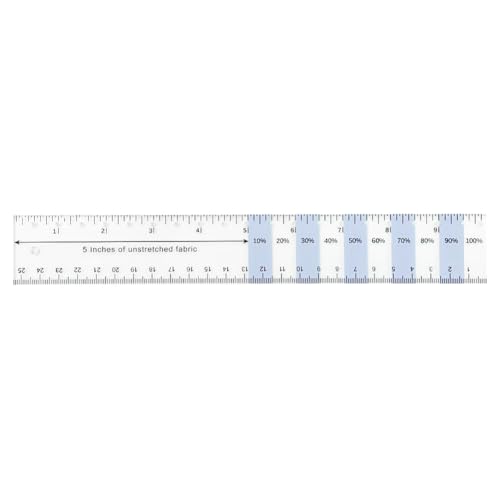
Why Measure? It is necessary to know the stretch of your fabric when sewing, sometimes the pattern need a particular percentage of stretch, it helps to do your job better

6.5" x 12" Quilting Ruler -- This acrylic quilt ruler is designed for precise measuring, cutting and layout work. The 6.5" x 12" size is convenient for quilting blocks, fabric strips, sewing patterns, paper crafts and DIY templates.
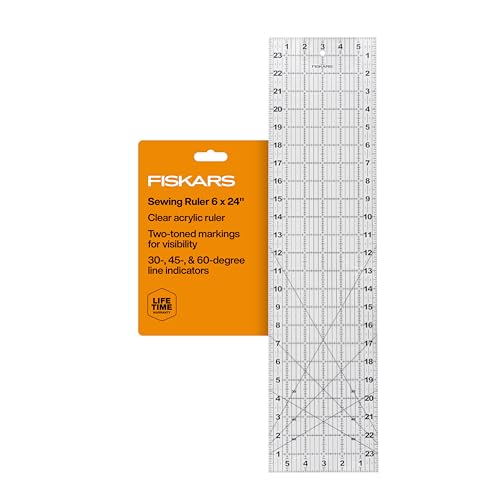
ARTS AND CRAFTS STAPLE: Fiskars Sewing Ruler (6 in. x 24 in.) is an ideal size for cutting fabric from the bolt
What Happens If You Cut Fabric Off Grain?
Cutting fabric off grain causes garments to twist around the body, seams to pucker, hems to hang unevenly, and the entire piece to lose its intended shape. A dress cut even 2-3 degrees off grain will spiral around your body as you wear it, with side seams migrating toward the front or back. The fabric fights against its natural thread structure, creating stress points that worsen with washing and wearing.
Specific problems you’ll encounter:
- Twisted seams, Vertical seams rotate and won’t press flat
- Uneven hems, One side hangs lower than the other, impossible to fix by trimming
- Puckered fabric, The material bunches and won’t lie smooth, even with pressing
- Distorted fit, Garments that should hang straight pull diagonally across the body
- Accelerated wear, Stress on misaligned threads causes premature fabric breakdown
These issues are especially noticeable in garments with vertical lines like dresses, pants, and button-front shirts. Even quilts suffer from off-grain cutting, with blocks that won’t align and borders that ripple instead of lying flat.
Choose prevention: Spending an extra five minutes to verify grain alignment before cutting saves hours of frustration later. For more tips on working with fabric properly, check out our guide on fabric techniques.

How to Straighten Fabric Before Cutting on Grain
Straightening fabric ensures your cuts follow the true grain, even if the fabric was cut crookedly at the store or shifted on the bolt. For woven fabrics, the most accurate method is pulling a thread: make a small snip in the selvage about 1 inch from the cut edge, grab a single crosswise thread, and gently pull it across the width of the fabric. The puckered line it creates shows the exact crosswise grain, giving you a perfect cutting guide.
Three straightening methods:
Thread-pulling method (most accurate)
- Snip selvage edge 1 inch from the end
- Grasp a single crosswise thread with tweezers or pin
- Pull gently while pushing fabric along the thread
- Cut along the puckered line created
- Works best for plain weaves and quilting cottons
Tearing method (fast but rough)
- Make a small snip in the selvage
- Firmly tear across the fabric width
- Only works with tightly woven cottons
- Creates a perfectly straight grain line but leaves rough edges
- Not suitable for delicate or loosely woven fabrics
Ruler and rotary cutter method (for stable fabrics)
- Align fabric fold with cutting mat grid lines
- Match selvages precisely
- Use a long quilting ruler perpendicular to selvages
- Cut with rotary cutter for clean edge
- Verify alignment by checking both ends
After straightening one end, check if the fabric is “on grain” by folding it lengthwise with selvages aligned. If the fabric lies flat without bubbles or diagonal pulls, it’s properly aligned. If it buckles or twists, you may need to gently pull the fabric on the bias in the opposite direction to realign the threads.
For knit fabrics: Don’t tear or pull threads. Instead, fold the fabric so the ribs (lengthwise grain) align vertically, then use a ruler and rotary cutter to trim the edge perpendicular to the ribs.
Cutting on Grain vs Cross Grain vs Bias
Cutting on grain typically refers to lengthwise grain placement, which provides maximum stability and minimal stretch, ideal for garment bodies, pants legs, and any piece that should maintain its shape. Crosswise grain offers slightly more give and is often used for sleeves, yokes, or design elements that benefit from a bit of ease. Bias cutting, at 45 degrees to both grain lines, creates maximum stretch and drape, perfect for binding, cowl necks, or figure-hugging vintage-style gowns.
When to use each direction:
Lengthwise grain (parallel to selvage):
- Main garment pieces (bodice, skirt panels, pant legs)
- Anything requiring stability and shape retention
- Pieces with vertical design lines or stripes
- Default placement for most pattern pieces
Crosswise grain (perpendicular to selvage):
- Sleeves that need ease across the bicep
- Ruffles and gathered details (more stretch = better gathers)
- Border prints that should run horizontally
- Pieces specifically marked “cut on crosswise grain”
True bias (45° diagonal):
- Bias binding and tape
- Cowl necklines and draped details
- Vintage bias-cut gowns and skirts
- Curved edges that need to lie flat without puckering
Decision rule: If your pattern doesn’t specify otherwise, always cut on lengthwise grain. Only deviate when the pattern explicitly instructs crosswise or bias placement, or when you’re intentionally creating a design effect.

Edging Fabric Bias Tape: The polyester double bias tape or cinta bies de tela holds shape better than cotton bias tape and has no sheen like satin bias tape & silk bias tape. The colorfast thin bias tape is washable, and makes the perfect flat bias tape sewing trim.

Wide Double Fold Design – This 1-inch (25mm) wide double fold bias tape is pre-folded for convenience, saving you time on ironing and making it easy to apply directly to fabric edges.

MATERIAL QUALITY: Made from cotton blend with a classic herringbone weave pattern, providing durability and stability for various sewing projects
Do You Need to Cut Knit Fabric on Grain?
Yes, knit fabric should be cut on grain to ensure proper stretch direction and prevent twisted garments, even though knits are more forgiving than wovens. The lengthwise grain in knits (parallel to the ribs or wales) typically has less stretch than the crosswise grain, and most knit patterns are designed with this stretch distribution in mind. Cutting a knit garment off grain can result in uneven stretch, twisted side seams, and necklines that pull to one side.
Knit-specific considerations:
- Identify the grain, Lengthwise grain runs parallel to the ribs (vertical columns); crosswise grain follows the courses (horizontal rows)
- Stretch direction matters, Most knit patterns expect maximum stretch to run around the body (crosswise), not up and down
- Curling edges, Knit fabric edges curl toward the right side along the crosswise grain, which helps identify grain direction
- Recovery matters, Cutting on proper grain ensures the fabric springs back to shape after stretching
For knit projects, lay the fabric flat and let it relax for several hours before cutting. Knits can become distorted on the bolt or during storage. Once relaxed, fold the fabric so the ribs align vertically, then position pattern pieces with grain lines parallel to these ribs.
Exception: Some sweater knits and specialty fabrics have equal stretch in all directions. For these, grain alignment is less critical, but maintaining consistency across all pattern pieces still ensures the best results. Learn more about working with different fabric types in our knit fabric sewing guide.
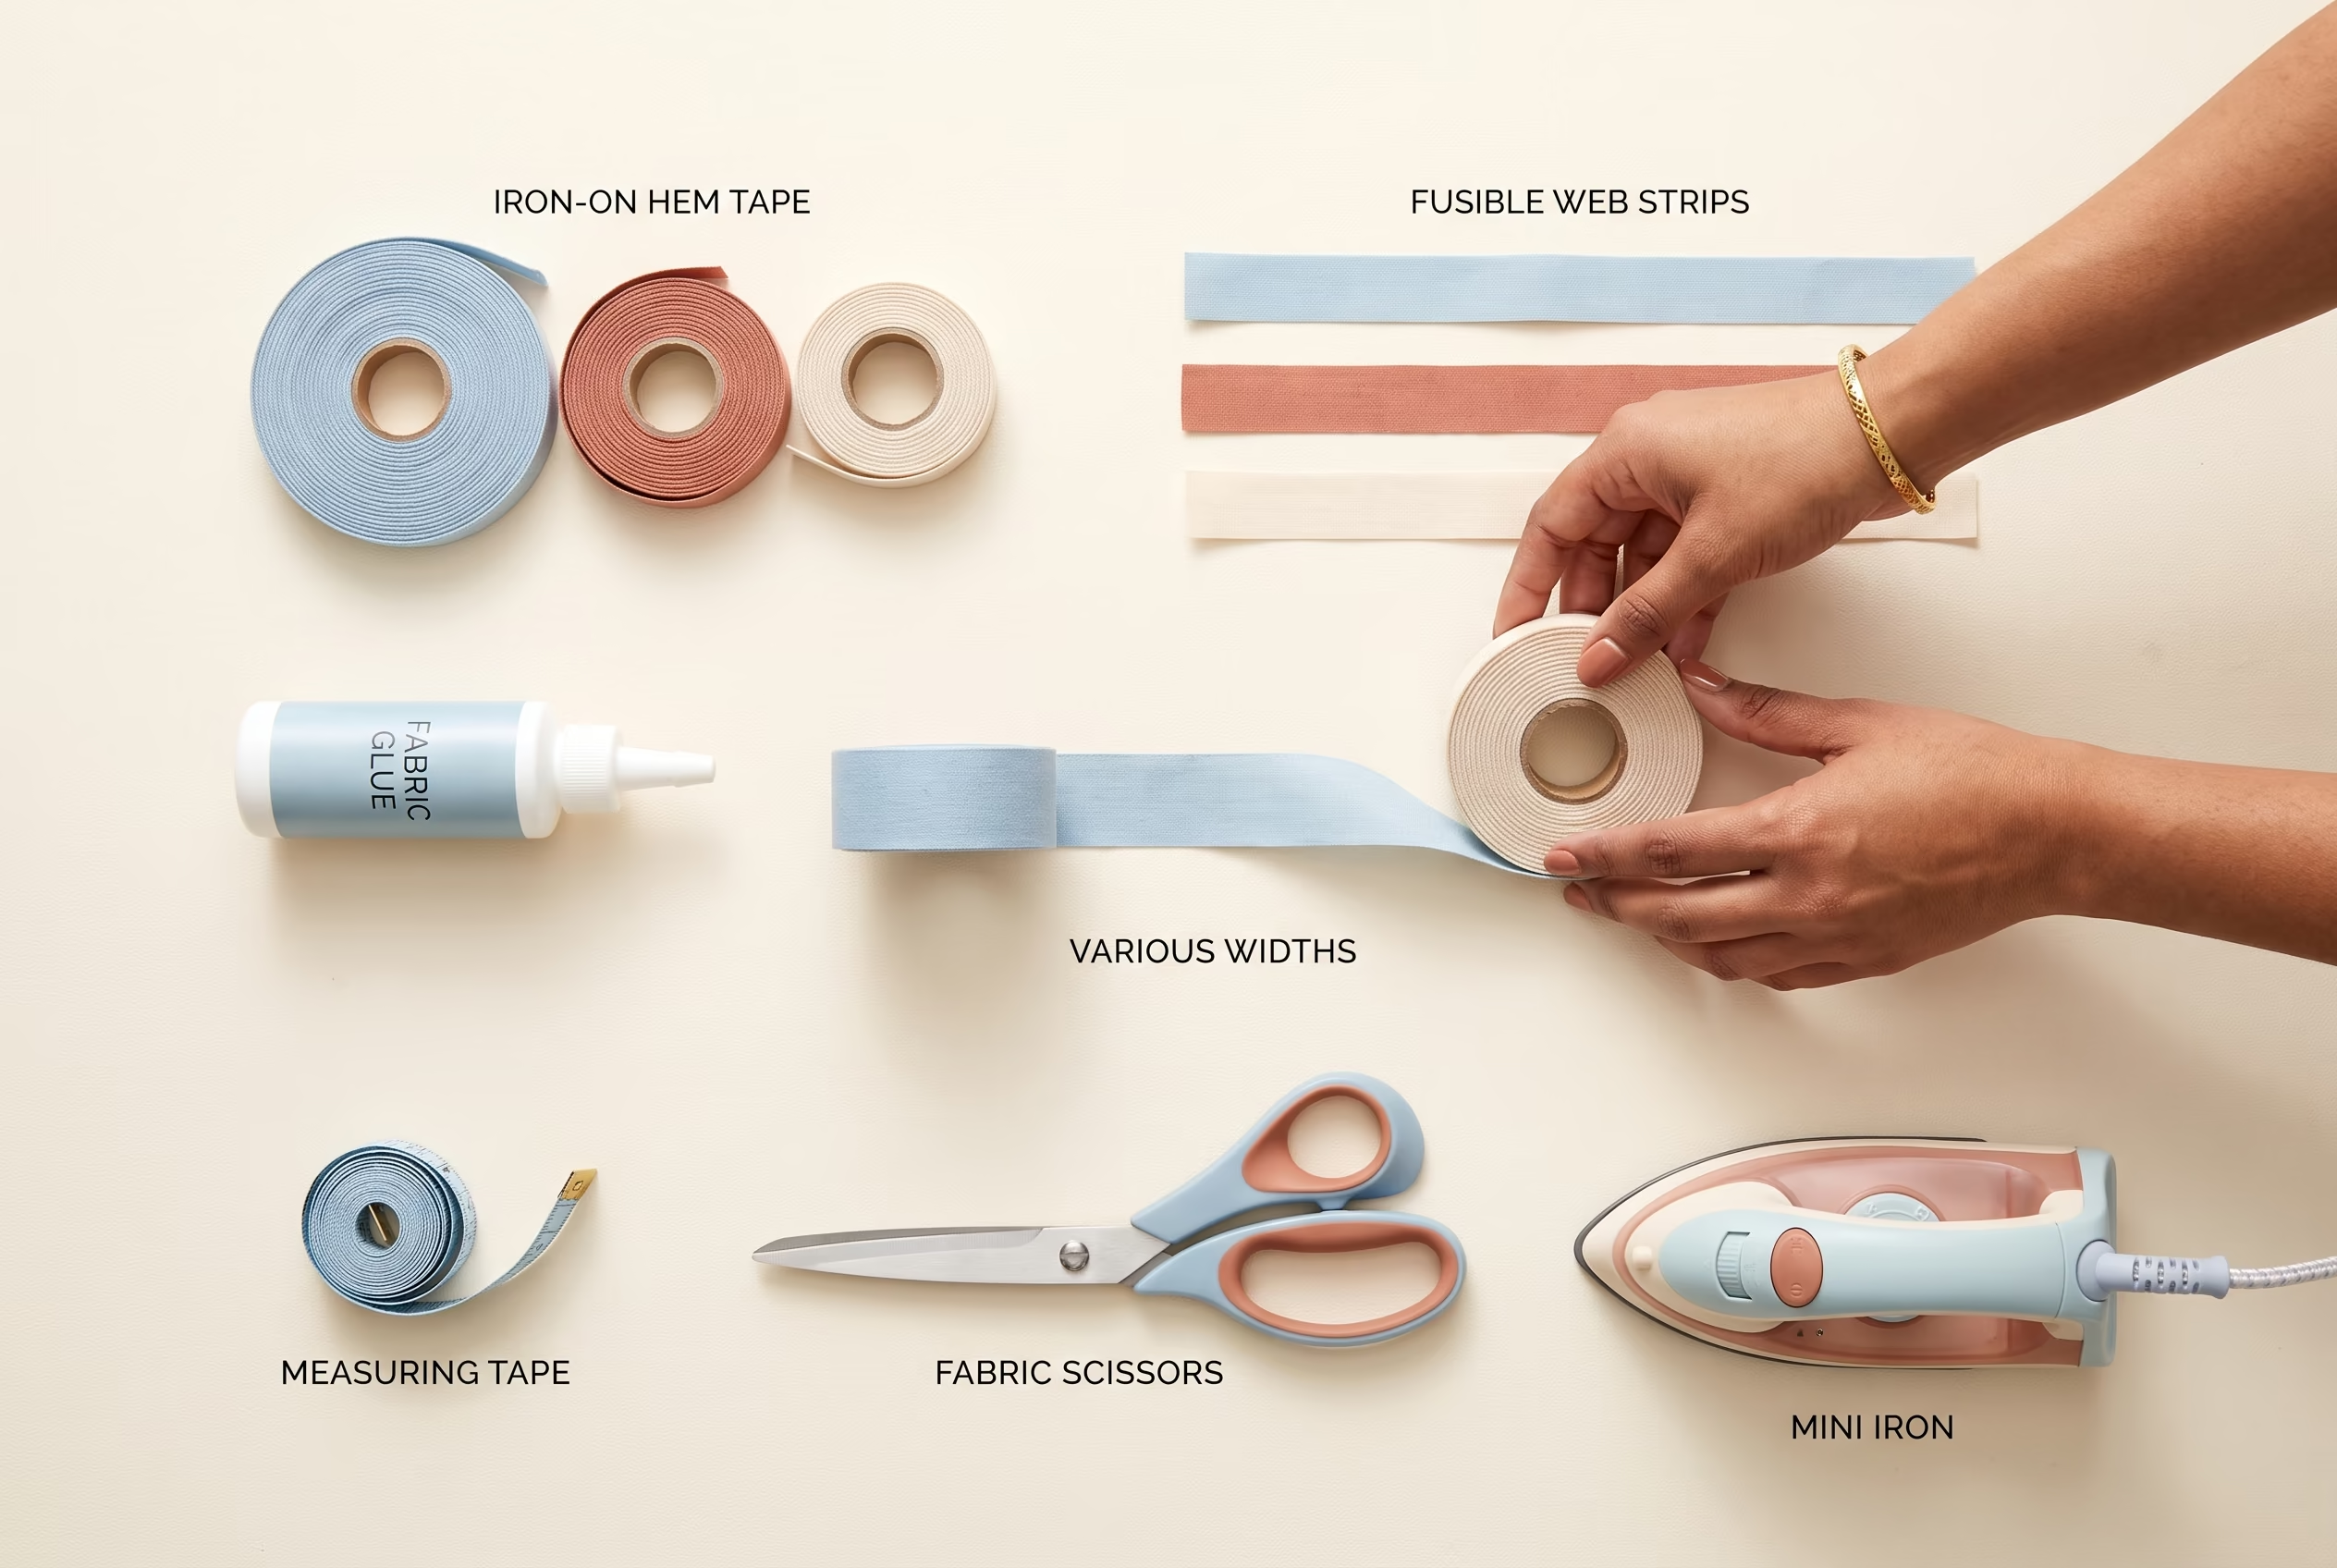
Tools Needed to Cut Fabric on Grain Accurately
A rotary cutter, clear acrylic quilting ruler, and self-healing cutting mat form the essential trio for accurate grain-line cutting, providing straight edges and precise measurements that scissors alone can’t match. Add fabric weights or pins, a measuring tape, and good lighting, and you have everything needed for professional-quality cutting that respects the grain.
Essential tools:
- Rotary cutter (45mm), Cuts through multiple layers cleanly without shifting fabric; keeps blade perpendicular to grain
- Clear acrylic ruler (24″ × 6″), Grid lines help align with grain; long enough to span fabric width
- Self-healing cutting mat, Grid lines assist with grain alignment; protects work surface and blade
- Fabric weights, Hold pattern and fabric in place without pins that can distort grain
- Measuring tape, Verify grain line placement from selvage at multiple points
- Fabric scissors (8″), For detail work and notches after rotary cutting
- Thread snips, For pulling threads when straightening fabric
Optional but helpful:
- Quilting ruler with 45° line, Makes bias cutting accurate and repeatable
- Pattern weights, Specialized weights designed for pattern pieces
- Tailor’s chalk or fabric marker, Mark grain lines directly on fabric when needed
- T-square ruler, Ensures perfect 90° angles for crosswise grain
Using the tools together: Place fabric on the cutting mat with selvages aligned to the mat’s grid lines. Position your pattern piece with the grain line arrow parallel to the selvage, measuring from selvage to arrow at both ends to ensure perfect alignment. Secure with weights, then use the ruler and rotary cutter to cut along pattern edges in one smooth motion.
Budget tip: Start with a rotary cutter, one good ruler, and a mat. These three tools transform cutting accuracy and are worth the investment for anyone serious about sewing. For more on essential sewing tools, visit our sewing tips section.

♡ What You Get - This rotary cutter set includes 1pcs 45mm fabric cutter, 5pcs extra rotary blades, 1pcs A3 fabric cutting mat, 1pcs 6.5 x 12 inch quilting ruler, 1pcs #11 craft knife and 10pcs replacement blades, 20pcs sewing clips.

【SEWING CUTTING MAT】Aneuzs self-healing cutting mat protects your work surface. Compatible with rotary cutters and straight blades, won't hurt the cutter blade and keep the blade sharpness. Ideal for artist, crafters, quilters, engraver and hobbyists

SELF HEALING ROTARY MAT - Our rotary mat is self-healing, it reseals surface cuts for a continually smooth cutting surface. Using a self-healing cutting mat extends the life of your blade and protects the surfaces of your work area.
Why Is My Fabric Still Warping After Cutting on Grain?
Fabric can warp after cutting on grain due to improper pre-washing, fabric that was off-grain when manufactured, or handling that stretched the fabric during cutting or sewing. Some fabrics, particularly loosely woven or bias-cut pieces, are inherently unstable and will distort even with perfect grain alignment. Additionally, pressing with too much steam or pressure can pull fabric off grain after cutting.
Common causes and solutions:
Pre-washing issues:
- Fabric wasn’t pre-washed and shrinks unevenly after construction
- Solution: Always pre-wash fabric the same way you’ll wash the finished garment
- Tumble drying can pull fabric off grain; line drying or flat drying preserves alignment
Manufacturing problems:
- Fabric was rolled onto the bolt off-grain at the mill
- Threads aren’t perfectly perpendicular (common in lower-quality fabrics)
- Solution: Straighten fabric by pulling gently on the bias in the opposite direction of the distortion
Handling during construction:
- Stretching fabric while pinning or sewing
- Letting fabric hang off the table edge, which pulls it out of shape
- Solution: Support fabric weight during sewing; use a proper feeding technique to prevent distortion
Pressing mistakes:
- Using too much steam, which relaxes fibers and allows distortion
- Pressing with a back-and-forth motion instead of lifting and lowering the iron
- Solution: Press with an up-and-down motion; use a pressing cloth for delicate fabrics
Fabric type factors:
- Loosely woven fabrics (gauze, linen) are naturally unstable
- Fabrics with unbalanced weaves distort easily
- Solution: Underline unstable fabrics with a stable material, or choose a different fabric
Edge case: If you’ve done everything correctly and fabric still warps, the issue may be with the fabric itself. Some bargain fabrics or remnants were cut off-grain at the store and can’t be fully corrected.
Can You Fix Fabric That Was Cut Off Grain?
Fixing fabric cut off grain is difficult and often impossible once pieces are cut, but minor misalignments (under 5 degrees) can sometimes be corrected through blocking, strategic seam adjustments, or careful pressing. Severely off-grain pieces, those cut 10 degrees or more off true grain, will always fight their thread structure and are better recut if you have enough fabric.
Salvage strategies for minor off-grain cuts:
Blocking method (for natural fibers)
- Dampen the cut piece thoroughly with water
- Pin to a blocking board or padded surface, gently pulling to align grain
- Let dry completely before unpinning
- Works best for wool, cotton, and linen
- Won’t work for synthetics or blends
Seam adjustment technique
- Adjust seam allowances to compensate for slight twisting
- Take deeper seams on one side, shallower on the other
- Only works for misalignments under 3 degrees
- May affect final garment size
Underlining solution
- Cut underlining fabric on perfect grain
- Baste off-grain fashion fabric to stable underlining
- The underlining controls the grain, stabilizing the outer layer
- Best for structured garments like jackets
When to recut instead:
- Misalignment exceeds 5 degrees
- Fabric is for a fitted garment where drape is critical
- You have enough fabric to recut properly
- The piece is a focal point (bodice front, skirt front panel)
Prevention is easier: Double-check grain alignment before cutting by measuring from the grain line arrow to the selvage at both ends. The measurements should be identical. If you’re unsure about your fabric’s behavior, check our guide on fabric care for more tips.
Is Cutting on Grain Necessary for Quilting?
Cutting on grain is essential for quilting to ensure blocks lie flat, seams align precisely, and the finished quilt doesn’t ripple or distort. Quilting involves joining many small pieces, and even slight off-grain cuts multiply across blocks, causing misalignment that’s impossible to correct during assembly. Borders cut off grain will wave and refuse to lie flat, no matter how carefully you pin or press.
Why grain matters in quilting:
- Block stability, Pieces cut on grain maintain their shape through multiple seams and pressing
- Seam alignment, On-grain pieces nest together perfectly at intersections
- Border flatness, Borders cut on lengthwise grain lie flat without rippling
- Binding durability, Bias binding (intentionally off grain) flexes around curves, while straight-grain binding works for straight edges
- Quilt longevity, On-grain construction prevents stretching and distortion over years of use
Quilting-specific grain rules:
- Squares and rectangles, Cut with at least two sides on straight grain (lengthwise or crosswise)
- Triangles, Position the longest edge on straight grain for stability
- Borders, Always cut lengthwise grain for best results; crosswise grain is acceptable but less stable
- Binding, Use bias binding for curved edges, straight-grain binding for straight edges
- Background fabric, Maintain consistent grain direction across all background pieces in a block
Common quilting mistake: Cutting strips across the fabric width (crosswise grain) for borders because it’s faster. While this works for small quilts, larger quilts need lengthwise-grain borders to prevent wavy edges.
Decision rule: If you’re piecing a quilt top, treat grain alignment as non-negotiable. The precision required for successful quilting depends on it.
How to Mark Grain Line on Pattern Pieces
Mark the grain line on pattern pieces by drawing a long arrow or straight line that indicates the direction parallel to the selvage, typically running through the center of the pattern piece from top to bottom. Commercial patterns include this marking, but when drafting your own patterns or working with vintage patterns where markings have faded, you’ll need to add or refresh grain lines to ensure accurate cutting.
Marking techniques:
For commercial patterns:
- Grain line is pre-printed as an arrow with double-ended points
- Measure from both ends of the arrow to the selvage; distances must be equal
- If the pattern is wrinkled, press it flat before measuring
For self-drafted patterns:
- Draw a line parallel to the center front or center back
- Add arrows at both ends pointing in opposite directions
- Label “grain line” or “straight of grain”
- Position the line where it won’t interfere with other markings
For traced patterns:
- Transfer grain line from original using tracing paper
- Use a ruler to ensure the line is perfectly straight
- Extend the line if the original is too short for accurate measurement
Placement tips:
- Position grain lines away from darts, pleats, and other details that might obscure them
- Make grain lines long enough to measure from both ends (at least 6-8 inches)
- For pieces cut on fold, the fold line IS the grain line
- Mark bias pieces with “cut on bias” or a 45° angle indicator
Verification method: Before cutting, place your pattern on fabric and measure from the grain line to the selvage at both the top and bottom of the arrow. If measurements differ by more than 1/8 inch, adjust the pattern until they match. This simple check prevents off-grain cutting.
Common Mistakes When Cutting Fabric on Grain
The most common mistake when cutting fabric on grain is failing to verify grain alignment at both ends of the pattern piece, resulting in cuts that are several degrees off true grain. Many sewers measure at one end only, or eyeball the alignment, leading to twisted garments that could have been prevented with 30 seconds of careful measurement.
Top mistakes and how to avoid them:
1. Trusting the cut edge from the store
- Store cuts are rarely on grain
- Always straighten fabric before cutting pattern pieces
- Use the thread-pulling method for accuracy
2. Measuring grain line at only one point
- Grain line must be equidistant from selvage at both ends
- Measure at the top and bottom of the grain line arrow
- Adjust pattern until measurements match exactly
3. Letting fabric hang off the table
- Hanging fabric stretches under its own weight, distorting grain
- Support all fabric on the cutting surface
- Use a large table or cutting mat on the floor for big pieces
4. Cutting through folded fabric without checking alignment
- Folded fabric can shift, putting layers off grain relative to each other
- Pin or weight layers together before cutting
- Verify selvages are perfectly aligned before cutting
5. Ignoring grain on “small” pieces
- Collars, cuffs, and facings need proper grain alignment too
- Off-grain small pieces cause puckering and poor fit
- Treat every pattern piece with the same care
6. Using dull rotary cutters or scissors
- Dull blades push fabric instead of cutting cleanly, distorting grain
- Change rotary blades regularly
- Keep scissors sharp and use them only for fabric
7. Skipping pre-washing
- Unwashed fabric may shrink unevenly, pulling finished garments off grain
- Pre-wash all washable fabrics before cutting
- Press fabric after washing to restore smooth surface
8. Pressing with back-and-forth motion
- Sliding the iron can stretch fabric off grain
- Use an up-and-down pressing motion
- Let fabric cool before moving it
If you’re experiencing issues with fabric handling during sewing, our guide on why fabric isn’t feeding through can help troubleshoot related problems.
Frequently Asked Questions
Can you cut fabric on the bias instead of on grain? Yes, you can intentionally cut fabric on the bias (45 degrees to the grain) for specific design effects like drape, stretch, and the ability to mold around curves. Bias cutting is used for bias binding, cowl necklines, and vintage-style bias-cut gowns. However, bias pieces require more fabric, are less stable, and need careful handling during construction.
How do you know if fabric is cut on grain? Fold the fabric lengthwise with selvages aligned. If the fabric lies flat without bubbles, twists, or diagonal pulls, it’s on grain. If it buckles or the crosswise edge forms a V-shape, it’s off grain. You can also pull a thread across the width, if the thread runs perpendicular to the selvages, the fabric is on grain.
Does grain direction matter for quilting cotton? Yes, grain direction matters significantly for quilting cotton. Pieces cut off grain won’t align properly at seam intersections, blocks will twist, and borders will ripple. Quilting requires precision, and proper grain alignment is fundamental to achieving flat, square blocks and a professional-looking finished quilt.
What’s the difference between selvage and grain? The selvage is the tightly woven finished edge running along both sides of the fabric as it comes off the bolt, while grain refers to the direction of threads throughout the fabric. Lengthwise grain runs parallel to the selvages, and crosswise grain runs perpendicular to them. The selvage is a reference point for finding grain direction.
Can you fix a garment that was sewn off grain? Fixing a sewn garment that’s off grain is extremely difficult and often impossible. Minor issues might be improved through blocking (dampening and pinning to shape), but severely off-grain garments will always twist and pull. Prevention through careful cutting is far easier than attempting repairs after construction.
How much does grain alignment affect garment fit? Grain alignment dramatically affects garment fit, drape, and appearance. Even a 3-5 degree misalignment causes garments to twist around the body, seams to spiral, and hems to hang unevenly. Proper grain alignment ensures the garment hangs as the designer intended and moves comfortably with your body.
Do you need special tools to cut on grain? While you can cut on grain with basic scissors and a measuring tape, a rotary cutter, clear ruler, and cutting mat make the process significantly more accurate and efficient. These tools help maintain straight cuts and precise grain alignment, especially for multiple layers or large pieces.
Should pattern pieces always be cut on lengthwise grain? Most pattern pieces should be cut on lengthwise grain unless the pattern specifically indicates otherwise. Some pieces, like sleeves or ruffles, may be marked for crosswise grain, and specialty pieces like bias binding are cut on the bias. Always follow the grain line markings on your pattern.
How do you cut knit fabric on grain without it stretching? Let knit fabric relax flat for several hours before cutting. Use a rotary cutter and ruler rather than scissors to minimize handling. Place pattern pieces with grain lines parallel to the ribs (lengthwise grain), and use weights instead of pins to avoid distorting the fabric. Cut with confident, smooth strokes.
What happens if you wash fabric after cutting but before sewing? Washing cut pieces before sewing can cause fraying and distortion, especially if pieces are cut on bias or are small. If you need to wash cut pieces, finish the edges with a serger or zigzag stitch first, or cut pieces larger than needed to account for fraying and shrinkage.
Can you use a rotary cutter on all fabric types? Rotary cutters work on most woven and knit fabrics, from delicate silks to heavy denim. However, very thick or coated fabrics may dull the blade quickly, and extremely delicate fabrics like chiffon may need tissue paper underneath for stability. Always use a sharp blade and appropriate cutting mat.
How do you mark grain line on fabric without a pattern? To mark grain line directly on fabric, use tailor’s chalk or a fabric marker to draw a line parallel to the selvage. Measure from the selvage at multiple points to ensure the line stays equidistant. This technique is useful when draping or working without a pattern.
Conclusion
Cutting fabric on grain is the invisible foundation of every successful sewing project, determining whether your finished garment hangs beautifully or fights against its own structure. By taking time to identify grain lines, straighten fabric edges, and verify alignment before cutting, you prevent hours of frustration and ensure professional results that last through years of wear and washing.
Your next steps:
- Gather your tools, Invest in a rotary cutter, clear ruler, and cutting mat if you haven’t already
- Practice straightening, Use the thread-pulling method on scrap fabric until it becomes second nature
- Measure twice, cut once, Always verify grain line alignment at both ends before cutting
- Start with simple projects, Build your grain-cutting confidence with straight-seamed garments before tackling bias or complex patterns
- Keep learning, Explore our fabric sewing resources for more techniques to improve your skills
Remember that even experienced sewers take time to verify grain alignment, it’s not a step to rush. The few extra minutes spent ensuring proper grain placement pay dividends in garments that fit better, last longer, and look professionally made. Your future self will thank you for the care you take today.


