


Quick Answer
Learning your first stitch takes just 15 minutes with the right approach. Thread a needle, tie a knot at the end, push the needle up through fabric from the back, then down through the front about 1/4 inch away, that’s a running stitch, the easiest starting point for complete beginners. With basic supplies (needle, thread, scrap fabric) and these simple steps, anyone can master hand stitching in a single short session.
Key Takeaways
- A basic running stitch takes 10-15 minutes to learn and requires only a needle, thread, and fabric
- Thread your needle by wetting the thread end and pushing it through the eye, then tie a knot at the tail
- Running stitch is the easiest beginner stitch,simply weave the needle in and out of fabric in a straight line
- Cotton thread and medium-weight cotton fabric work best for practice sessions
- Thread knotting happens when thread is too long,keep it under 18 inches to prevent tangles
- Tie off stitches with 2-3 small backstitches in the same spot to secure your work
- Hand stitching is easier than machine sewing for first-timers because you control every movement
- Uneven stitches are normal at first,consistency improves with practice over 20-30 minutes
- Kids ages 6 and up can learn basic stitching with supervision and child-safe needles
- After mastering running stitch, learn backstitch next for stronger, more durable seams
What Is a Stitch in Sewing for Complete Beginners
A stitch is a single loop of thread that passes through fabric to join pieces together or create decorative patterns. When you push a threaded needle through fabric from one side to the other and pull it tight, you’ve made one stitch. Multiple stitches in a row create a seam or line of stitching.
Hand stitches come in many varieties, but they all follow the same basic principle: thread goes in one side of the fabric and comes out the other. The pattern you follow, straight lines, diagonal angles, or overlapping loops, determines which type of stitch you’re making.
For absolute beginners, understanding that stitching is just repeated needle movements through fabric removes the mystery. You’re not trying to master complex techniques right away. You’re simply learning to control a needle and thread to create a line that holds fabric together.
What Supplies Do I Need to Practice My First Stitch
You need just four basic items to start stitching: a hand-sewing needle, all-purpose thread, a piece of scrap fabric, and small scissors. That’s it. No sewing machine, no special tools, no expensive equipment.
Essential supplies for your first stitch:
- Hand-sewing needle (size 7 or 8 sharps work for most fabrics)
- All-purpose polyester or cotton thread in any color
- Scrap fabric (cotton quilting fabric, old pillowcase, or dish towel)
- Small scissors for cutting thread
- Thimble (optional but helpful for pushing needles through thick fabric)
Choose a needle with an eye large enough to see clearly but not so large that it leaves visible holes in your fabric. Medium-weight cotton fabric is ideal for practice because it’s easy to see your stitches and the needle passes through smoothly without snagging.
Avoid slippery fabrics like satin or stretchy materials like jersey for your first attempts. These require more skill to control. Stick with plain woven cotton until you’ve built confidence with basic stitches.

𝑩𝒊𝒓𝒕𝒉𝒅𝒂𝒚 𝑮𝒊𝒇𝒕𝒔 𝑰𝒅𝒆𝒂𝒔: This sewing kit is terrific gifts for people who travel frequently, mother, grandmother, backpacker, adults, kids and teen girls! The emergency kit is also suitable for both men and women, beginners and professionals alike, and it is definitely something that everyone needs in their life

【Complete Sewing Needles Set】 The FIVEIZERO Hand Sewing Needles Set includes 30 assorted hand sewing needles and 2 needle threaders for hand sewing (random colors), perfect for all your hand sewing, embroidery, and DIY craft projects. Needles come in a convenient round plastic compact for easy storage.

[Leather Needles for Hand Sewing]: The leather sewing needle set includes 9pcs needles of various sizes and shapes. Each type needle has a unique purpose, which are suitable for various sewing or maintenance projects to meet your different sewing and repair needs.
How to Thread a Needle Properly Before Starting Your First Stitch
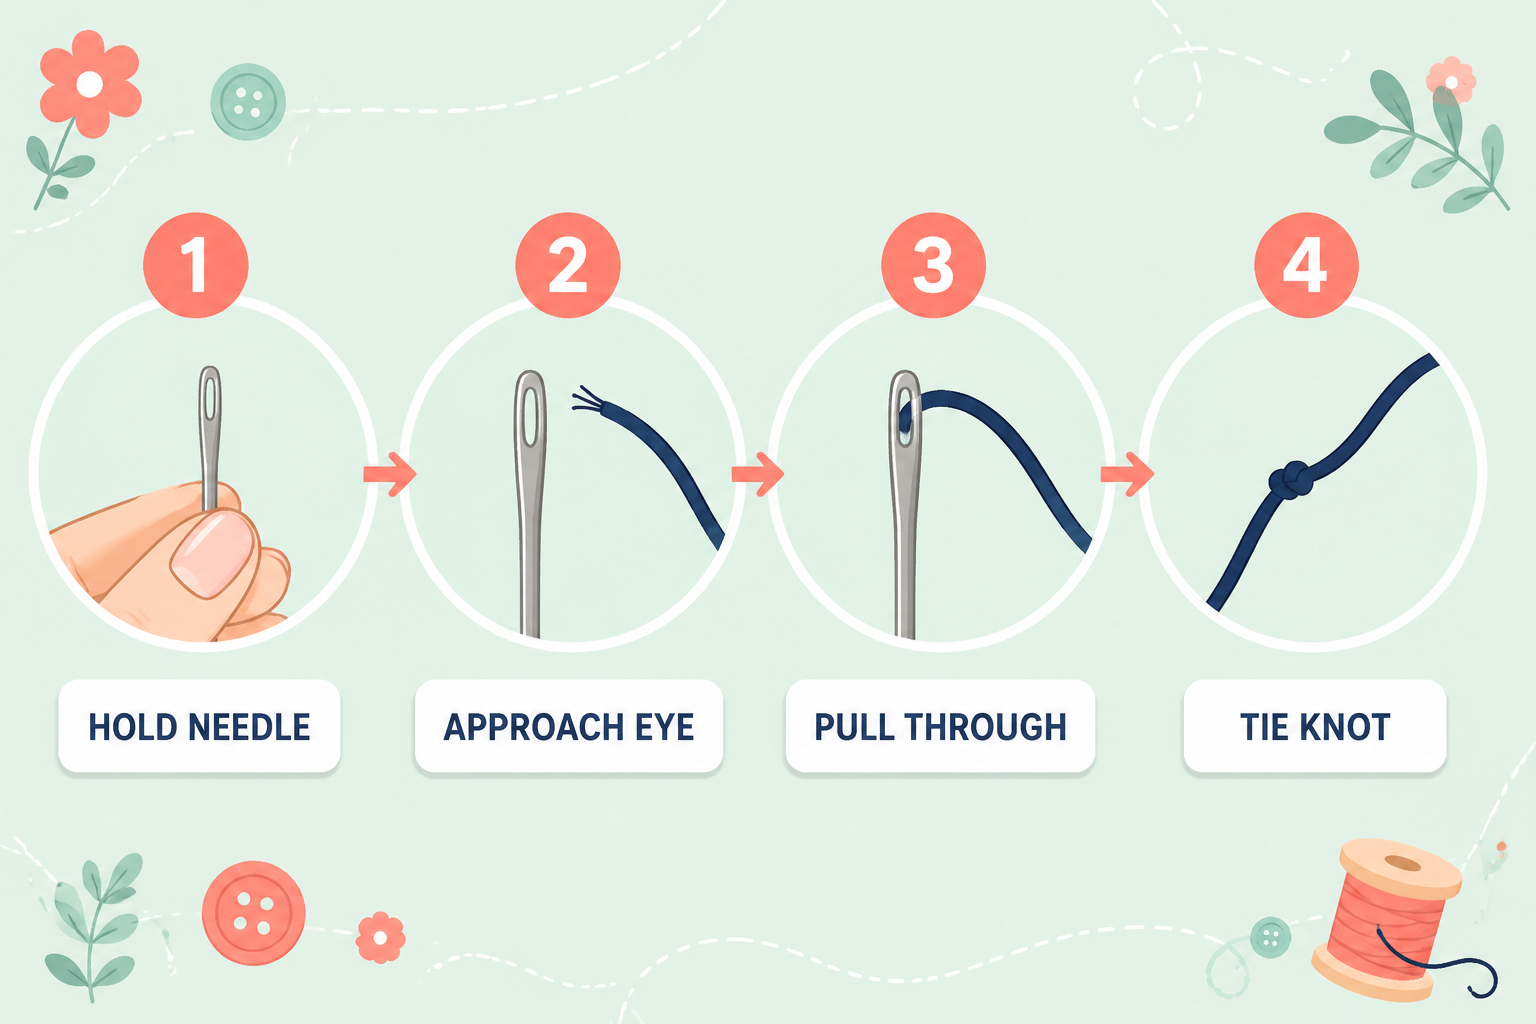
Threading a needle correctly prevents frustration and saves time. Cut your thread at a sharp angle, wet the tip slightly with your tongue or a damp cloth, and push it through the needle’s eye in one smooth motion. Pull about 6 inches of thread through, leaving a longer tail to work with.
Step-by-step needle threading:
- Cut thread cleanly at a 45-degree angle with sharp scissors
- Wet the thread tip to stiffen the fibers and make them stick together
- Hold the needle steady between your thumb and forefinger
- Push thread through the eye in good lighting (near a window works well)
- Pull 6 inches through so the thread doesn’t slip out while stitching
- Tie a knot at the long end by wrapping thread around your finger, rolling it off, and pulling tight
If you struggle to see the needle’s eye, try holding it against a white background or use a needle threader, a small wire tool that loops through the eye and grabs your thread. Many sewing kits include one.
Common mistake: Using thread longer than 18 inches. Longer thread tangles more easily and wastes time. Keep your working thread short for better control.
Running Stitch vs Backstitch: Which Is Easier for Beginners
The running stitch is significantly easier for beginners because it moves in one direction and requires no backtracking. You simply weave the needle in and out of fabric in a straight line, creating evenly spaced stitches. Backstitch is stronger but requires you to reverse direction with each stitch, making it more complex to learn first.
Running stitch characteristics:
- Moves forward only, left to right
- Fastest hand stitch to learn and execute
- Creates a dashed line appearance
- Best for basting, gathering, and simple seams
- Takes 10-15 minutes to master
Backstitch characteristics:
- Moves forward then backward with each stitch
- Creates a solid, continuous line
- Stronger and more durable than running stitch
- Better for permanent seams and repairs
- Takes 30-45 minutes to master
Start with the running stitch for your first 15-minute session. Once you can create a straight line of even stitches without looking at your hands, you’re ready to try backstitch techniques that offer more strength.
Choose running stitch if you’re practicing, basting pieces together temporarily, or gathering fabric. Choose backstitch when you need a seam that won’t pull apart with stress, like repairing a torn pocket or hemming pants.

【Heavy Duty Sewing Kit】- This comprehensive sewing kit includes 32 leather sewing needles, 10 leather sewing threads (30 m/color), a needle bottle, an awl, a tape measure, scissors, and a sewing thimble.


Perfect Heavy Duty Sewing Kit: This fully-packed sewing kit contains all the necessary tools to sew for most of your sewing needs. You will get: 25* Hand Sewing Needles, 12* Upholstery Thread, 1* Inch Ruler, 1* Scissors, 1* Thimble, 3* Awl Tool, 2* Seam Ripper, 1* Threader.
How to Do Your First Stitch: 15-Minute Quickstart Step-by-Step
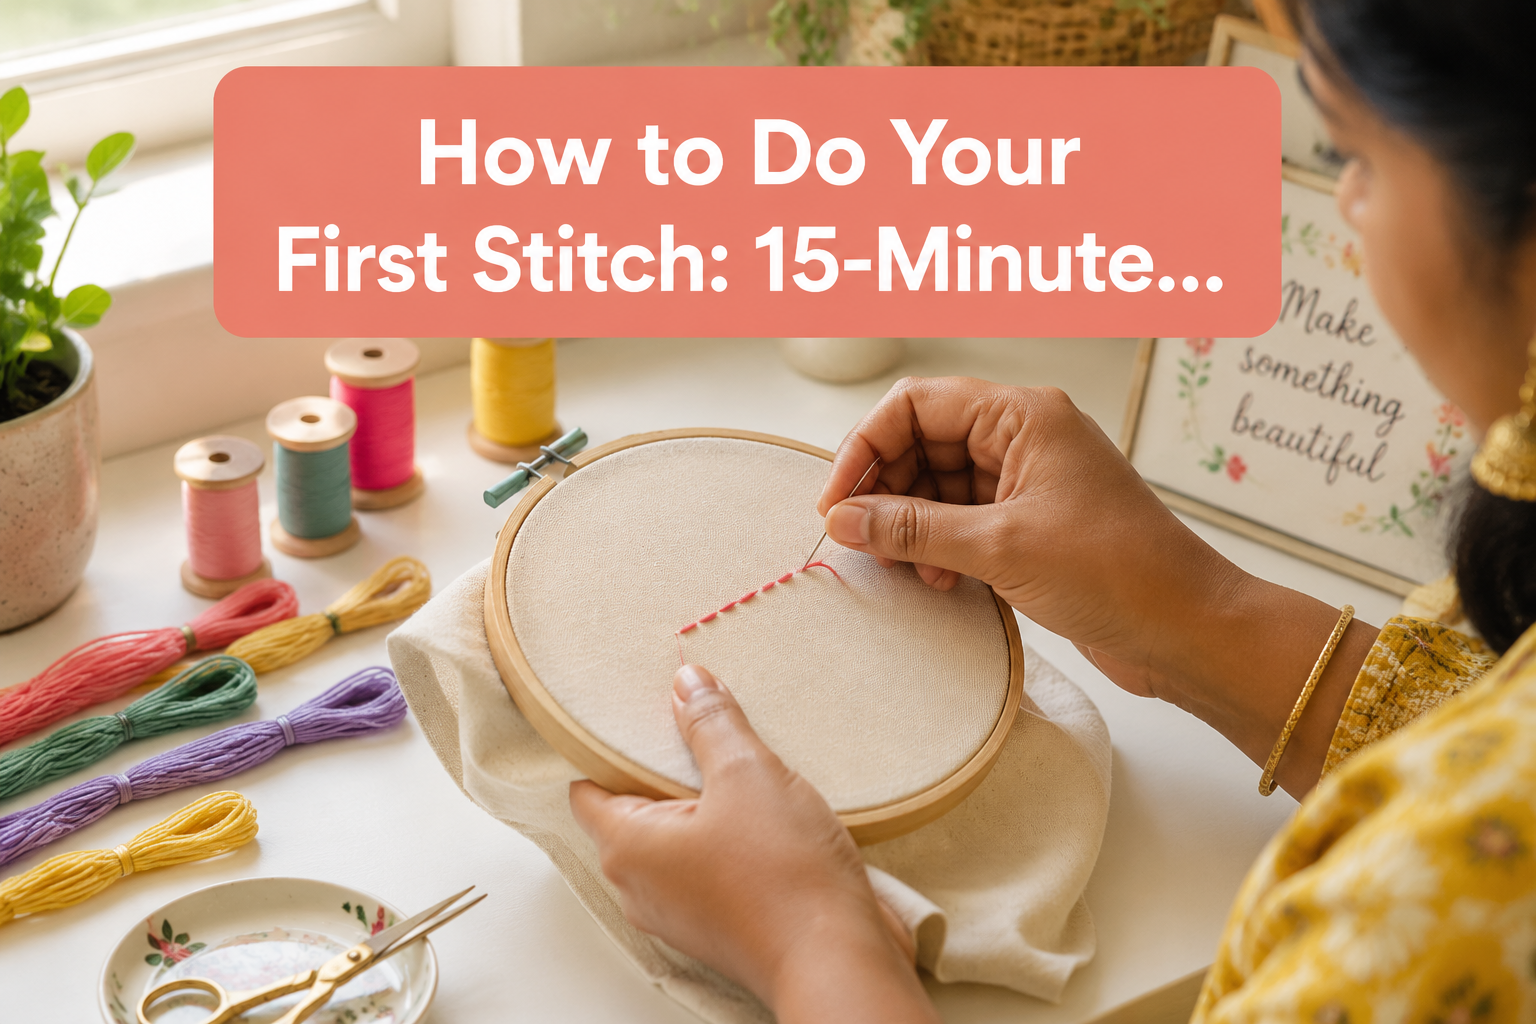
Your first running stitch takes just five simple steps. Thread your needle, tie a knot, push the needle up from the back of the fabric, bring it down through the front about 1/4 inch away, and repeat to create a line of stitches.
Complete beginner’s first stitch process:
- Prepare your workspace: Sit in good lighting with your fabric flat on a table or held in your lap
- Thread and knot: Follow the threading steps above, leaving a knot at the long tail end
- Start from the back: Push your needle up through the fabric from the wrong side (back) to the right side (front), pulling until the knot catches
- Make your first stitch: Push the needle back down through the fabric about 1/4 inch away from where it came up
- Continue the line: Bring the needle back up 1/4 inch ahead, then down again, creating a dashed line pattern
- Keep stitches even: Try to make each stitch the same length and the same distance apart
- Tie off when done: Make 2-3 tiny stitches in the same spot, then cut your thread
Pro tip: You can load multiple stitches onto your needle at once by weaving it in and out several times before pulling the thread through. This speeds up the process once you’ve practiced the basic motion.
Your first line of stitches will probably look uneven, that’s completely normal. The goal is to understand the motion and build muscle memory, not to create perfect work immediately.
Why Does My Thread Keep Knotting When I Try to Stitch
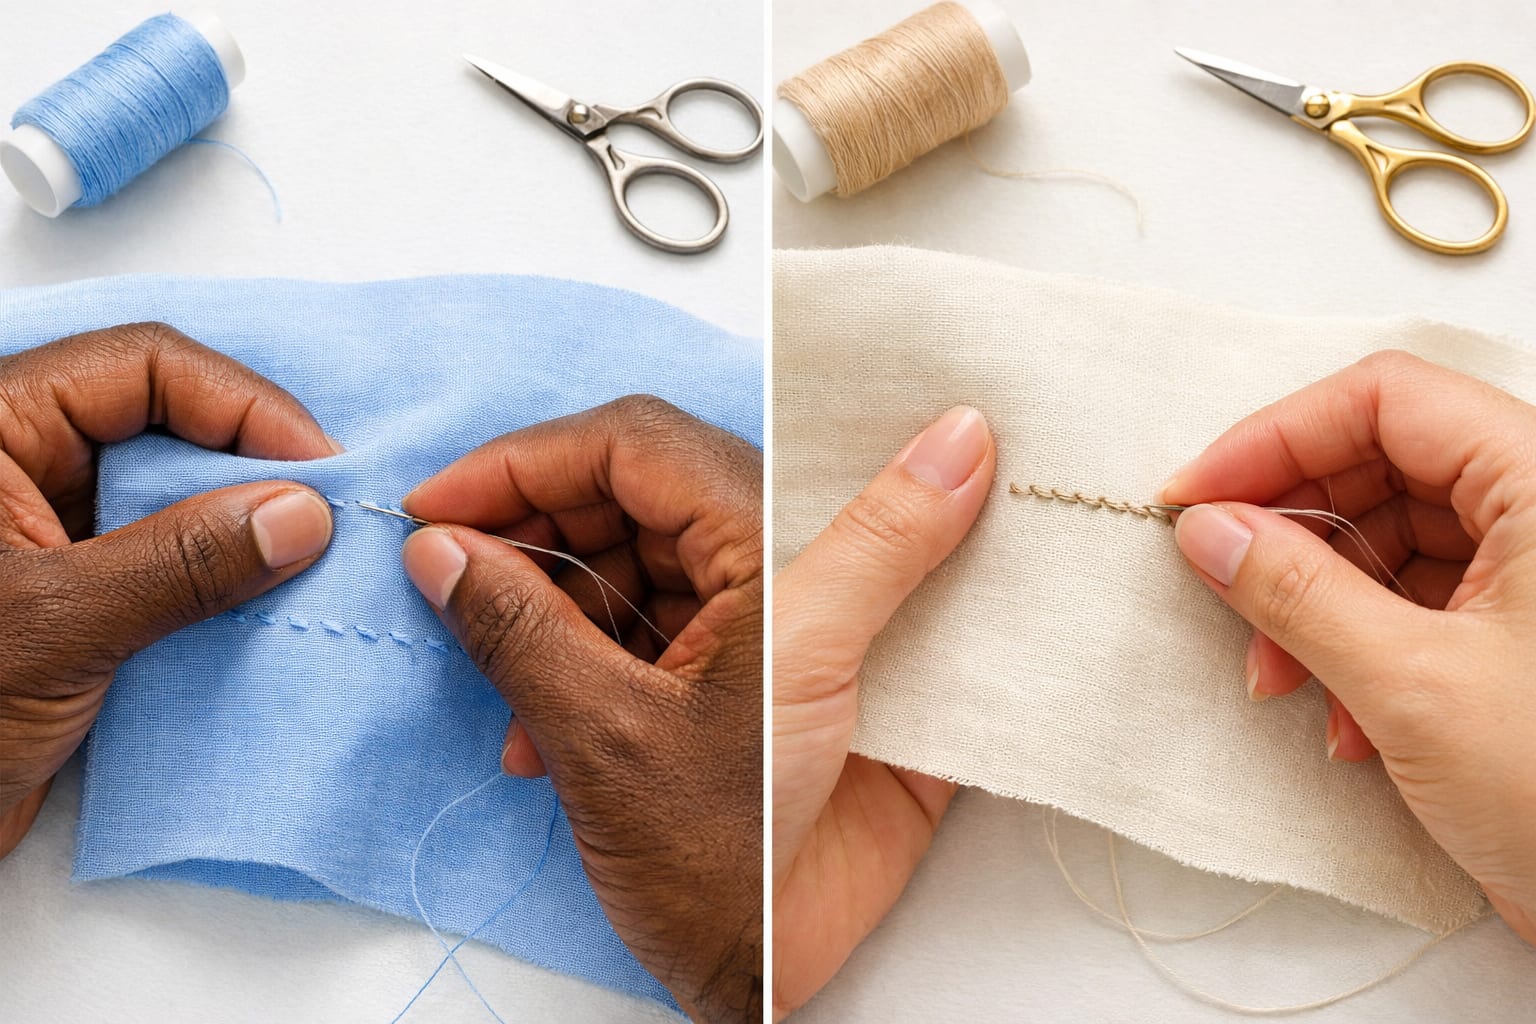
Thread knots during stitching when it’s too long, twisted, or pulled at the wrong angle. The most common cause is using thread longer than 18 inches, which gives it more opportunity to loop back on itself as you work. Cutting your thread shorter immediately reduces knotting by 80%.
Main causes of thread knotting:
- Thread too long (over 18 inches creates tangles)
- Thread twisted (untwist by letting needle dangle and spin freely)
- Pulling at wrong angle (pull straight up, not at a diagonal)
- Thread quality (cheap thread has loose fibers that catch)
- Stitching too fast (slow down to prevent loops forming)
To prevent knots, cut thread to 12-18 inches maximum. If your thread starts to twist while stitching, stop and let your needle hang down freely, the thread will untwist itself. Pull your thread straight up and away from the fabric after each stitch rather than at an angle.
If you’re experiencing persistent thread problems, check that you’re using quality all-purpose thread rather than old or cheap thread that shreds easily.
How to Tie Off a Stitch So It Doesn’t Come Undone
Tie off your stitching by making 2-3 tiny backstitches in the same spot at the end of your seam, then cutting the thread close to the fabric. This creates a secure anchor that won’t unravel even with stress. The backstitches essentially knot the thread to itself through the fabric.
Simple tie-off method:
- Complete your last stitch and bring the needle to the back of the fabric
- Make a tiny stitch (1/8 inch or smaller) right next to your last stitch
- Repeat 2-3 times in the exact same spot, stitching through previous stitches
- Pull tight after each backstitch to secure
- Cut thread leaving a 1/4 inch tail
Alternative knot method: After your last stitch, make a small loop near the fabric surface, pass your needle through the loop twice, then pull tight to create a knot directly against the fabric. This works well when you can’t easily backstitch.
Never just cut your thread without securing it. Even a few stitches will unravel quickly without a proper tie-off, especially if the fabric experiences any tension or washing.
Is Hand Stitching Harder Than Using a Sewing Machine for First Timers
Hand stitching is actually easier than machine sewing for complete beginners because you control every movement directly with your hands. There’s no machine to thread, no bobbin to wind, no tension to adjust, and no foot pedal to coordinate. You can see exactly what’s happening with each stitch and stop instantly if something goes wrong.
Hand stitching advantages for beginners:
- Complete control over speed and stitch placement
- No machine setup or troubleshooting required
- Immediate feedback as you see each stitch form
- Portable and requires no electricity or workspace
- Builds fundamental skills that transfer to machine sewing later
When machines are better:
- Long seams that would take hours by hand
- Projects requiring perfectly even stitches
- Heavy fabrics that are hard to push needles through
- Production work or multiple identical items
Start with hand stitching to understand how thread and fabric interact. Once you’re comfortable with basic stitches, transitioning to a machine becomes much easier because you already understand the fundamentals. Many experienced sewers still prefer hand stitching for detailed work, repairs, and finishing touches even when they own machines.
If you do move to machine sewing later, understanding hand stitches helps you troubleshoot common issues like skipped stitches or loose stitches.

[ INCLUDES EVERYTHINGS YOU NEED ] Exquisite gift box contains 4 embroidered fabrics with patterns, 20 color threads, 4 instructions, 9 needles, 1 pair of scissors, 1 embroidery thread board, 1 embroidery hoop, 1 needle threader, 1 seam ripper,meeting all your needs in the process of advancing your embroidery skills!

【Beginner Embroidery Kit With Step-by-Step Guidance】New to embroidery? This embroidery kit for beginners includes clear instructions and QR-code video tutorials, so you can follow along easily and start stitching with confidence—even if you've never stitched before.

Clear 4K Video Tutorials & Bound Guide - Learn with Zero Guesswork: This embroidery kit for beginners has it all-no extra purchases, no missing tools: even if you've never held a needle, stitch confidently from day one: inside, a professionally bound, full-color instruction booklet guides you step by step: scan the QR code for 4K video tutorials with slow-motion close-ups of every embroidery stitch: a confidence-building experience-like a patient instructor sitting beside you
What Fabric Is Best to Practice Stitching on as a Beginner
Medium-weight cotton fabric is the best choice for practicing your first stitches because it’s stable, easy to see stitches on, and the needle passes through smoothly. Quilting cotton, old cotton pillowcases, or cotton dish towels all work perfectly for practice sessions.
Best practice fabrics:
- Quilting cotton (ideal weight and weave)
- Cotton broadcloth (smooth and easy to handle)
- Old cotton sheets or pillowcases (free and perfect for practice)
- Cotton dish towels (good weight and readily available)
- Muslin (inexpensive practice fabric sold by the yard)
Fabrics to avoid as a beginner:
- Silk or satin (too slippery to control)
- Jersey or knit fabrics (stretch makes stitches uneven)
- Denim or canvas (too thick for beginners to push needles through)
- Sheer fabrics (too delicate and hard to see stitches)
- Faux fur or fleece (thick pile hides stitches)
Choose light or medium colors for practice so you can clearly see your stitches. White, cream, or pastel fabrics show thread contrast better than dark colors. Cut your practice fabric into 6-inch squares, large enough to hold comfortably but small enough that you’re not overwhelmed by empty space.
Do I Need Special Thread for Hand Stitching or Will Any Work
All-purpose polyester or cotton thread works perfectly for hand stitching, you don’t need special hand-sewing thread for basic stitches. The same thread you’d use in a sewing machine works fine for hand sewing, though some sewers prefer cotton thread for hand work because it’s less likely to tangle than polyester.
Thread options for beginners:
- All-purpose polyester thread (strong, widely available, works for everything)
- Cotton thread (traditional choice, less tangling, slightly weaker)
- Cotton-wrapped polyester (combines benefits of both)
Avoid using heavy-duty thread, elastic thread, or specialty threads like metallic or embroidery floss for basic hand stitching. These require different techniques and needle sizes.
Thread weight matters: Standard thread weight is 50wt (the higher the number, the finer the thread). This works for 90% of hand-sewing projects. Heavier threads (30wt or 40wt) are harder to pull through fabric and create bulkier stitches.
Any thread you already have at home will work for practice. Don’t buy special supplies until you’ve decided you enjoy sewing and want to continue. The thread that came with a basic sewing kit is fine for learning your first stitches.
Common Mistakes Beginners Make When Learning to Stitch
The most common beginner mistake is using thread that’s too long, which leads to constant tangling and frustration. New stitchers also tend to pull thread too tight, creating puckered fabric, or leave it too loose, making stitches that don’t hold. Finding the right tension comes with practice but awareness helps you improve faster.
Top beginner stitching mistakes:
- Thread too long (keep it under 18 inches)
- Pulling too tight (fabric should lie flat, not pucker)
- Inconsistent stitch length (practice makes this even)
- Not securing the starting knot (stitches pull through fabric)
- Skipping the tie-off (work unravels immediately)
- Using dull needles (makes pushing through fabric harder)
- Poor lighting (causes eye strain and missed stitches)
- Rushing (slow, deliberate stitches build better habits)
How to fix uneven stitches: Place a ruler or marked line on your fabric and stitch along it, trying to keep each stitch exactly 1/4 inch long. After 10-15 minutes of deliberate practice with a guide, your muscle memory improves and you can stitch evenly without measuring.
Common mistake to avoid: Don’t stitch with your fabric held in mid-air. Rest it on a table or your lap so you have a stable surface. This gives you better control and reduces hand fatigue.
Many beginners also give up after their first attempt looks messy. Remember that your first line of stitches is supposed to look imperfect, you’re building a new skill. By your third or fourth practice session, you’ll see noticeable improvement.
Can Kids Learn Basic Stitching or Is It Too Difficult
Kids ages 6 and up can absolutely learn basic hand stitching with appropriate supervision and child-safe supplies. Hand stitching builds fine motor skills, patience, and creativity while being safer and simpler than machine sewing. Start children with plastic needles or blunt tapestry needles and thick thread or yarn on stiff fabric like felt.
Age-appropriate stitching guidelines:
- Ages 6-8: Plastic needles, felt, thick yarn, simple running stitch
- Ages 9-11: Blunt metal needles, cotton fabric, embroidery floss, running and backstitch
- Ages 12+: Regular needles with supervision, all basic stitches
Kid-friendly modifications:
- Use felt instead of woven fabric (doesn’t fray, easier to handle)
- Choose embroidery floss or yarn (thicker and easier to see than regular thread)
- Pre-mark stitch lines with washable marker
- Start with lacing cards (pre-punched holes make stitching easier)
- Keep sessions short (10-15 minutes) to match attention span
Supervise children closely when using metal needles and teach proper needle safety: always point needles away from the body, store them in a pincushion when not in use, and count needles before and after each session to ensure none are lost.
Many schools teach basic hand stitching in elementary art classes, confirming that children can successfully learn this skill with proper instruction and materials.
How Long Does It Actually Take to Learn One Basic Stitch
Learning a basic running stitch takes 10-15 minutes from threading your first needle to completing a recognizable line of stitches. Achieving consistent, even stitches takes an additional 20-30 minutes of practice. Most beginners can confidently execute a running stitch after a single 30-45 minute practice session.
Realistic learning timeline:
- First 5 minutes: Threading needle, tying knots, understanding the motion
- Minutes 5-15: Creating your first line of stitches (will look uneven)
- Minutes 15-30: Practicing 3-4 more lines, improving consistency
- Minutes 30-45: Stitches become more even, speed increases
- After 1 hour total practice: Comfortable with basic running stitch
Progression to other stitches:
- Backstitch: Add 20-30 minutes after mastering running stitch
- Whipstitch: Add 15-20 minutes
- Blanket stitch: Add 30-40 minutes
The “15-minute quickstart” is realistic for understanding and executing the basic motion. Mastery, creating professional-looking, perfectly even stitches, takes several hours of practice spread over multiple sessions. But you don’t need mastery to complete useful projects. Even imperfect hand stitching holds fabric together effectively.
Practice tip: Set a timer for 15 minutes and stitch continuously without stopping to judge your work. When the timer goes off, look at your first stitches versus your last stitches, you’ll see noticeable improvement even in that short time.
My Stitches Look Uneven and Messy: How Do I Fix This
Uneven stitches are completely normal for beginners and improve naturally with practice, your first attempts are supposed to look messy. To speed improvement, focus on one element at a time: first make all stitches the same length, then work on spacing them evenly, then refine your tension. Trying to perfect everything simultaneously overwhelms your brain and slows progress.
Targeted practice for even stitches:
- Draw a guide line with washable marker or pencil on your fabric
- Mark stitch points every 1/4 inch along the line
- Stitch slowly from mark to mark, focusing only on hitting each point
- Practice 3-4 lines with guides before trying without marks
- Compare your lines to see improvement over time
Specific fixes for common issues:
- Stitches different lengths: Slow down and look at each stitch before pulling thread through
- Spacing uneven: Mark dots where needle should enter/exit fabric
- Thread too loose: Pull thread snug (but not tight) after each stitch
- Fabric puckers: You’re pulling too tight, ease up on tension
- Stitches slant: Keep needle perpendicular to fabric, not angled
Reality check: Professional sewers’ hand stitches aren’t perfectly even either, they’re just more consistent than beginners’. Hand stitching naturally has slight variations that machine stitching doesn’t. This is part of the charm of handmade items, not a flaw.
If you’re struggling with stitch quality after several practice sessions, check that your needle isn’t bent and your thread isn’t old or damaged. Sometimes equipment issues masquerade as skill problems.
What Stitch Should I Learn After Mastering the Basic Running Stitch
Learn the backstitch next after mastering the running stitch because it uses similar motions but creates stronger, more durable seams. Backstitch is the most useful hand stitch for repairs, alterations, and permanent seams, making it the logical second skill to develop. The transition from running stitch to backstitch typically takes 20-30 minutes.
Recommended learning progression:
- Running stitch (your first stitch, 15 minutes)
- Backstitch (strongest basic stitch, 30 minutes)
- Whipstitch (for joining edges, 20 minutes)
- Slip stitch (invisible hems, 30 minutes)
- Blanket stitch (decorative edges, 40 minutes)
Why backstitch comes next: It reinforces the in-and-out needle motion you learned with running stitch but adds the backward component that makes seams strong enough for clothing repairs. Once you can backstitch confidently, you can repair torn seams, reattach buttons securely, and hem pants, practical skills you’ll use regularly.
Our detailed guide on how to backstitch and why it matters walks through the technique step-by-step with visual references.
Alternative second stitch: If you’re more interested in decorative sewing or embroidery than repairs, learn the blanket stitch next instead. It creates a beautiful finished edge on felt projects and appliqué work.
Don’t rush to learn multiple stitches in one session. Master each stitch individually until you can execute it without thinking about the steps. This builds solid fundamentals that make advanced techniques easier later.
Frequently Asked Questions
How tight should I pull my stitches? Pull stitches snug enough that the thread lies flat against the fabric without any loops showing, but not so tight that the fabric puckers or gathers. The fabric should remain flat and smooth. If you can slide a pin under the thread easily, it’s too loose; if the fabric bunches up, it’s too tight.
Can I use embroidery floss for regular hand stitching? Yes, embroidery floss works for hand stitching, but use only 2-3 strands separated from the 6-strand floss. Full 6-strand floss is too thick for most sewing projects and creates bulky, visible stitches. It’s better suited for decorative embroidery than functional seams.
What’s the difference between a sharp needle and a ballpoint needle? Sharp needles have pointed tips that pierce woven fabrics cleanly, while ballpoint needles have rounded tips that slide between knit fabric fibers without breaking them. For your first stitches on cotton fabric, use a sharp needle (labeled “sharps” or “universal”).
Do I need a thimble for hand sewing? Thimbles aren’t necessary for soft fabrics or short stitching sessions, but they protect your finger when pushing needles through thick or multiple layers of fabric. If your fingertip gets sore after 10-15 minutes of stitching, try a thimble on your middle finger of your pushing hand.
Can I hand stitch without a knot at the end of my thread? No, you need either a knot or several backstitches to anchor your thread at the start. Without an anchor, your first stitch will pull completely through the fabric when you tug the thread. Always secure the thread beginning before starting your stitch line.
Why does my needle keep bending? Needles bend when you push them through fabric at an angle or try to force them through material that’s too thick for the needle size. Keep your needle perpendicular to the fabric and use a thimble for thick materials. Bent needles should be discarded and replaced, they’ll never stitch properly again.
How do I know what size needle to use? For most beginner projects on cotton fabric, size 7 or 8 sharps needles work perfectly. Smaller numbers mean thicker needles (for heavy fabric), larger numbers mean finer needles (for delicate fabric). When in doubt, start with size 8.
Can I reuse thread I’ve pulled out of old stitches? Avoid reusing thread from old projects because it’s been weakened by the first use and may have knots or frayed sections. Thread is inexpensive, use fresh thread for new projects to ensure your stitches hold properly.
What’s the best way to store needles between sewing sessions? Store needles in a pincushion, magnetic needle holder, or the paper packet they came in. Never leave needles loose in a drawer or stuck in fabric where they can rust, get lost, or accidentally prick someone. Always count your needles before and after sewing.
How can I see the needle eye better if I have vision problems? Use a needle threader tool, try self-threading needles with a split eye, or use a magnifying glass with good lighting. Some sewers find that holding the needle against a white background makes the eye more visible. LED magnifying lamps designed for sewing provide both magnification and bright light.
Is it normal for my hand to get tired when learning to stitch? Yes, hand fatigue is normal when you’re building new fine motor skills and using small muscles in unfamiliar ways. Take breaks every 10-15 minutes, stretch your fingers, and don’t push through pain. Your stamina will increase naturally as you practice over several sessions.
Can I practice stitching on paper instead of fabric? Paper works for understanding the basic needle motion but doesn’t teach you how thread behaves in fabric or how to manage fabric texture. Practice on cheap fabric scraps instead, old sheets or dish towels are free and much better learning tools than paper.
Conclusion
Learning how to do your first stitch in 15 minutes is absolutely achievable with the right approach and basic supplies. Start with a simple running stitch using a threaded needle, cotton fabric, and all-purpose thread. Focus on understanding the basic motion, needle up through fabric, down through fabric, repeat, before worrying about perfection.
Your first attempts will look uneven, and that’s completely normal. Improvement comes quickly with deliberate practice. After 30-45 minutes of focused stitching, you’ll notice your stitches becoming more consistent and your confidence growing.
Next steps to continue your stitching journey:
- Practice running stitch for 15 minutes daily for one week
- Try stitching your name or simple shapes to make practice more engaging
- Learn backstitch techniques as your second stitch
- Complete a simple project like a fabric bookmark or small pouch
- Explore basic sewing techniques to expand your skills
Hand stitching opens the door to countless creative projects, practical repairs, and the satisfaction of making things with your own hands. The 15 minutes you invest in learning your first stitch today builds a foundation for a lifetime of sewing skills. Pick up your needle, thread it, and make that first stitch, you’ll be surprised how quickly this ancient craft becomes second nature.


