


Quick Answer
Fixing timing on a sewing machine involves realigning the needle and hook mechanism so they meet at the precise moment to catch the thread loop. Most sewers can tackle timing adjustments on mechanical machines with basic tools and patience, but computerized models and complex issues often require professional help. The repair typically takes 30-90 minutes for a confident DIYer, while a professional service costs $75-150.
Key Takeaways
- Timing controls stitch formation by synchronizing when the needle and hook meet to catch the upper thread loop
- Common signs include skipped stitches, thread bunching underneath, needle hitting the bobbin case, or loops forming on fabric
- DIY is feasible for mechanical machines (Singer, Brother, Janome) if you’re comfortable with screwdrivers and following detailed steps
- Professional help is safer for computerized machines, vintage collectibles worth over $500, or if you’ve never opened your machine before
- Basic tools needed include small screwdrivers (Phillips and flathead), needle-nose pliers, magnifying glass, and your machine’s service manual
- Timing differs from tension, tension affects thread tightness while timing controls the mechanical hook-and-needle synchronization
- Cost comparison: DIY costs $0-20 for tools you likely own; professional repair runs $75-150 depending on your location
- Time investment: Plan 1-2 hours for your first DIY attempt, including research and careful adjustments
- Risk assessment: Incorrect timing adjustment can worsen skipped stitches but rarely causes permanent damage to the machine
What Does Timing Mean on a Sewing Machine?
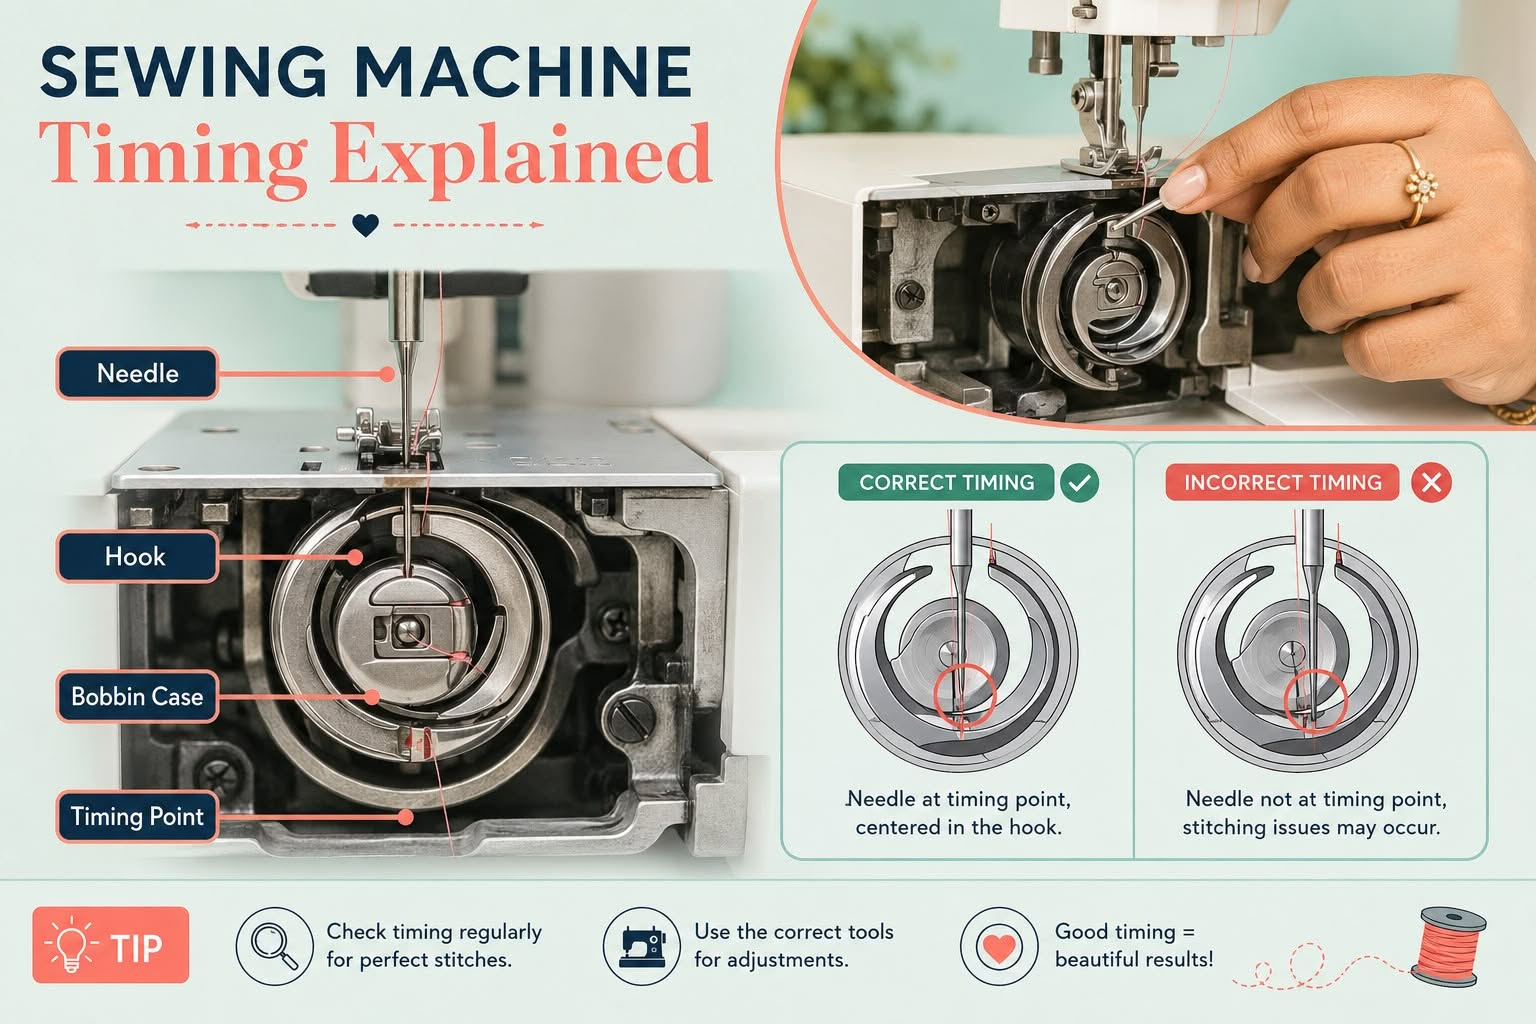
Timing refers to the precise synchronization between your sewing machine’s needle and the rotating hook (or shuttle) that catches the upper thread to form a stitch. When the needle descends through the fabric and begins to rise, it creates a small loop of thread behind the needle. The hook must arrive at exactly the right moment to catch this loop and wrap it around the bobbin thread below.
This coordination happens at high speed, often 800-1,500 stitches per minute on domestic machines. The timing mechanism ensures the hook point passes 1.5-2mm above the needle’s eye precisely when the needle is rising from its lowest position. If this relationship shifts even slightly, the hook misses the thread loop entirely or catches it incorrectly.
Key timing components include:
- Needle bar, moves the needle up and down
- Hook assembly, rotates or oscillates to catch the thread loop
- Drive shaft and gears, connect these parts in synchronized motion
- Timing marks, alignment indicators stamped on gears or shafts
Think of timing like a relay race where the baton must be passed at the exact moment both runners are in position. Miss that window by a fraction of a second, and the handoff fails. The same principle applies to your machine’s sewing machine parts working in harmony.
How Do I Know If My Sewing Machine Timing Is Off?
Your machine will show clear symptoms when timing drifts out of alignment. The most obvious sign is consistent skipped stitches, not occasional skips caused by a dull needle, but regular gaps in every seam regardless of fabric or thread. You’ll also notice thread loops forming on the underside of your fabric, or worse, the needle actually striking the bobbin case or hook with an alarming clicking sound.
Definitive timing problem indicators:
- Skipped stitches on every seam even after changing needles and rethreading
- Needle hits the shuttle or bobbin case creating a metallic clicking or scraping sound
- Thread nests underneath the fabric (bird’s nesting) that won’t resolve with tension adjustments
- Needle breaks frequently without hitting pins or thick seams
- Upper thread won’t catch the bobbin thread at all when you start sewing
Before assuming timing is the culprit, rule out simpler issues first. Try a fresh needle (size appropriate for your fabric), rethread both top and bobbin following your manual exactly, and check that your sewing machine tension is properly set. Clean out lint from the bobbin area and hook race. If problems persist across different fabrics, threads, and needles, timing is likely the issue.
When it’s NOT a timing problem:
- Skips happen only on stretchy knits (you need a ballpoint needle)
- Issues resolve after cleaning the bobbin area
- Problems occur only with one specific thread brand
- Tension adjustments fix the loops or bunching
Can I Fix Sewing Machine Timing Myself or Do I Need a Professional?
Most sewers with moderate mechanical confidence can adjust timing on mechanical sewing machines, those without computerized controls or LCD screens. If you’re comfortable using a screwdriver, following step-by-step instructions, and have patience for precise adjustments, DIY timing repair is achievable. Mechanical models from Brother, Singer, Janome, and similar brands use accessible timing mechanisms that home sewers have successfully adjusted for decades.
Choose DIY if:
- You own a mechanical machine (manual dials and knobs, no computer board)
- The machine’s value is under $300 or it’s a common model
- You can find a service manual or detailed video for your specific model
- You’re comfortable taking photos before disassembling parts
- You have 1-2 hours to work carefully without rushing
Seek professional help when:
- Your machine is computerized with electronic controls, these often have sensors and calibration requirements beyond simple mechanical timing
- The machine is a vintage collectible or heirloom worth over $500
- You’ve never opened the machine’s base or removed covers before
- The machine is still under warranty (DIY voids most warranties)
- You’ve attempted adjustment and made things worse
- Multiple issues exist beyond just timing (motor problems, broken gears, etc.)
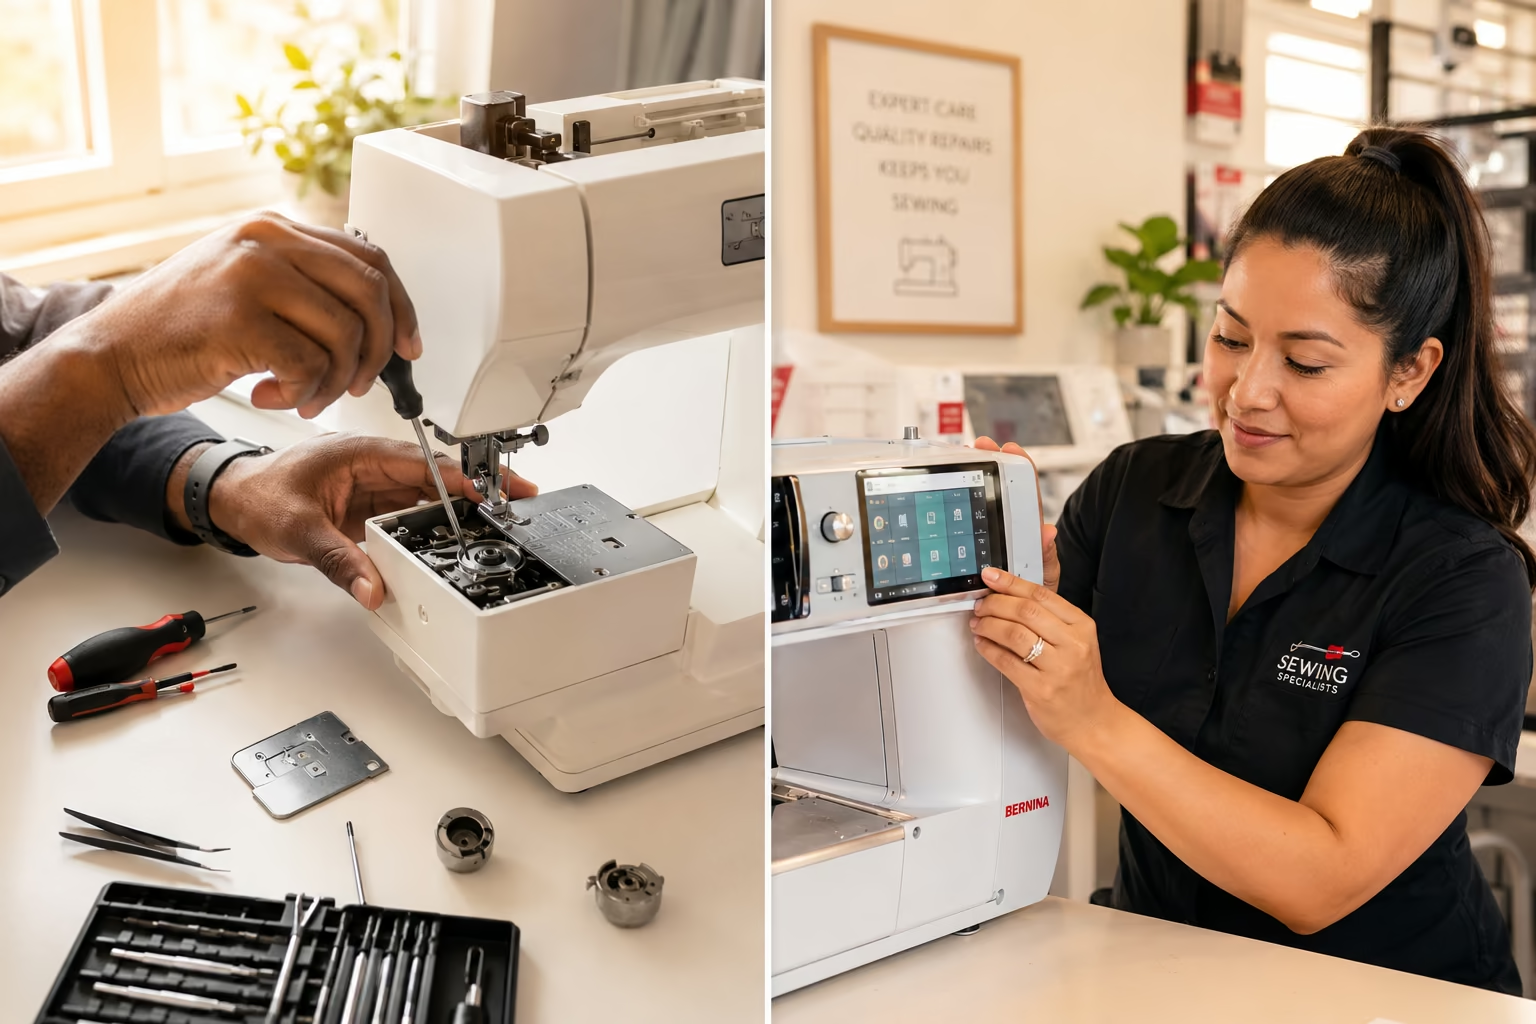
Professional sewing machine repair technicians have specialized tools, replacement parts on hand, and experience with dozens of models. They can also spot related problems you might miss. However, for a straightforward timing adjustment on a common mechanical machine, many sewers successfully handle the repair themselves and gain valuable knowledge about their equipment.
What Tools Do I Need to Adjust Sewing Machine Timing?
The good news: timing adjustment requires only basic hand tools most sewers already own or can borrow. You won’t need specialized equipment for most mechanical machines, though having the right items makes the job significantly easier and safer for your machine.
Essential tools:
- Small screwdriver set, both Phillips and flathead in multiple sizes (most machine screws are quite small)
- Needle-nose pliers, for holding small parts and removing stubborn screws
- Magnifying glass or reading glasses, timing marks are tiny and easy to miss
- Good lighting, a desk lamp or headlamp to illuminate the work area
- Your machine’s service manual, shows timing marks specific to your model (often available free as PDFs online)
- Smartphone camera, take photos before removing each part so you remember reassembly order
Helpful but optional:
- Tweezers, for retrieving dropped screws from inside the machine
- Small flashlight, to see into tight spaces
- Painter’s tape and marker, to label screws and parts as you remove them
- Clean cloth, to wipe away old oil and lint while you have access
- Sewing machine oil, to lubricate the hook race after adjustment
You likely won’t need to purchase anything if you have a basic household toolkit. The most important “tool” is actually your service manual or a detailed video tutorial for your specific machine model. Generic timing instructions can help, but each brand positions timing marks differently. Brother machines, for example, use different reference points than vintage Singer models.
Before starting, clear a well-lit workspace where you can lay out parts in order. Place a white towel or sheet under your machine to catch any screws that drop, they’re surprisingly easy to lose in carpet or between floorboards.

Precision for Serger Needs: The 4 Piece Serger Screwdriver Set offers industrial precision tailored for serger needles and overlock sewing machines, making it an essential tool for professionals working with more brands

Ideal for specialty threads

Double functions: for threading, it can help pass thread through the needle eye conveniently, in case of poor eyes or poor lighting; For inserting, it holds needles firmly to prevent falling while changing needles
Step-by-Step Guide to Fix Timing on a Brother Sewing Machine
Brother mechanical machines are among the most DIY-friendly for timing adjustments because they use accessible hook assemblies and clear timing marks. This guide works for most Brother mechanical models, but always cross-reference with your specific manual. The process takes 45-90 minutes for first-timers.
Preparation steps:
- Unplug the machine completely, never work on a plugged-in machine
- Remove the needle and presser foot, prevents accidental injury
- Take out the bobbin case, gives you clear access to the hook assembly
- Remove the needle plate (throat plate), usually held by 1-2 screws
- Photograph everything before proceeding, you’ll thank yourself during reassembly
Accessing the timing mechanism:
- Tip the machine back or lay it on its side (place a towel underneath to protect the finish)
- Remove the bottom cover plate, typically 4-6 screws around the base
- Locate the handwheel and drive shaft, you’ll see gears connecting to the needle bar and hook assembly
- Find the timing marks, usually small lines or dots on the handwheel, needle bar, or hook gear
Making the timing adjustment:
- Loosen the hook timing set screw, this small screw locks the hook assembly to the drive shaft (don’t remove it completely, just loosen 1-2 turns)
- Manually turn the handwheel toward you (the normal sewing direction) until the needle is at its lowest position, then continue until it rises about 2-3mm
- Position the hook point so it passes 1.5-2mm above the needle’s eye at this moment, the hook point should be directly behind the needle, not to the left or right
- Align the timing marks on the gears or shaft according to your manual’s diagram
- Tighten the set screw firmly while holding the hook in position
- Rotate the handwheel slowly through several complete cycles, watching the needle and hook relationship, the hook should consistently pass just above the needle eye as the needle rises
Testing and reassembly:
- Replace the needle plate and bobbin case
- Thread the machine with contrasting thread colors (top and bobbin) so you can see stitch formation clearly
- Test on scrap fabric, try straight stitches, zigzag, and different stitch lengths
- Check both sides of the fabric, stitches should be balanced with no loops
- If skipping persists, repeat the adjustment in tiny increments (timing is measured in fractions of millimeters)
Common mistake: Tightening the set screw too much can strip the threads. Snug is sufficient, you’re not trying to crush the screw. Another frequent error is turning the handwheel backward during adjustment, which can throw off your reference point.
If you’re uncomfortable with any step, stop and consult a professional. A sewing machine technician can complete this repair in 20-30 minutes and ensure it’s done correctly the first time.

【Package includes】- 1 pcs curved nose tweezers, 1 pcs double-ended fluff brush, 1 pcs needle board screwdriver and 4 pcs screwdrivers, 7 pcs in total. Different styles of screwdrivers, a sufficient number of tools are sufficient for your daily cleaning and repair needs.

17 built-in stitches
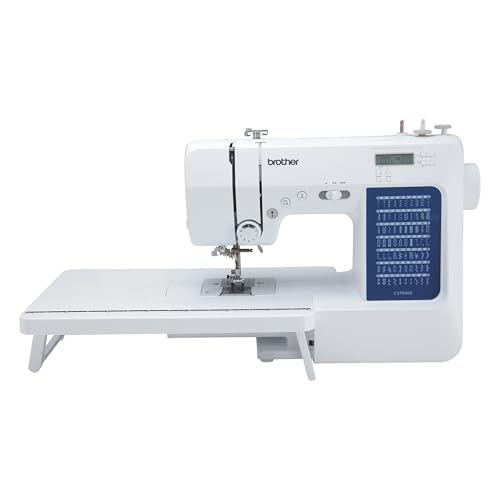
70 UNIQUE BUILT-IN STITCHES: The Brother CS7000X sewing and quilting machine includes 70 built-in stitches including utility, decorative, heirloom and quilting stitch functions, and 7 1-step auto-size buttonholes
How Much Does It Cost to Have a Repair Shop Fix Sewing Machine Timing?
Professional timing adjustment typically costs $75-150 depending on your location, the shop’s hourly rate, and your machine’s complexity. Urban areas and specialty vintage repair shops charge toward the higher end, while small-town repair services or dealer service departments may charge less. This price usually includes cleaning, oiling, and a basic tune-up alongside the timing adjustment.
Cost breakdown by scenario:
| Repair Type | Typical Cost | What’s Included |
|---|---|---|
| Basic timing adjustment | $75-100 | Timing correction, basic cleaning, test sewing |
| Timing + full service | $100-150 | Timing, deep cleaning, oiling, tension check, belt inspection |
| Vintage/antique machines | $125-200 | Specialized knowledge, sourcing old parts, extra time |
| Computerized machines | $150-250 | Electronic calibration, sensor checks, software updates |
Most shops charge a diagnostic fee of $25-50 that applies toward the repair if you proceed. If you decline the repair, you pay only the diagnostic fee. This fee covers the technician’s time to assess the problem and provide an estimate. Some dealers offer free diagnostics if you purchased the machine from them.
Additional costs to consider:
- Parts replacement, if the hook assembly or gears are damaged, add $20-80 for parts
- Rush service, expedited repair within 24-48 hours may cost 25-50% more
- Pickup/delivery, some shops charge $15-30 if you can’t transport the machine yourself
Compare this to the DIY cost of essentially $0-20 if you already own basic tools. However, factor in the value of your time and the risk of making the problem worse. For a $150 machine, paying $100 for professional repair might not make economic sense compared to buying a new machine. For a $600 machine or a sentimental heirloom, professional service is often the smarter investment.
Check our detailed guide on sewing machine repair cost for more pricing information across different repair types.

Packing list: The sewing machine tool kit includes 1 curved nose tweezers, 1 double headed lint brush, 2 needle board screwdrivers, 4 flat head cross head screwdrivers, 2 seam rippers, 4 silicone brushes, 14 pieces in total; Different styles of screwdrivers and brushes, a sufficient number of tools are enough to meet your daily needs for cleaning and repairing your sewing machine

Packing list: The sewing machine tool kit includes 1 curved nose tweezers, 1 double headed lint brush, 1 needle board screwdrivers, 4 flat head cross head screwdrivers, 2 seam rippers, 12 silicone brushes, 21 pieces in total;For daily cleaning and maintenance of sewing machines.

Complete 7-Piece Sewing Maintenance Tool Set: Simplify your sewing routine with the SINGER 7pc Sewing Maintenance Tool Set. This sewing machine repair kit features a Universal Machine Needle Inserter, Angled-Edge Lint Brush, Machine Needle Threader, 3 purpose-built Sewing Machine Screwdrivers, and a Clear Mesh Zipper Storage Pouch. Together, these tools form a reliable sewing machine cleaning kit that helps maintain your machine's optimal performance for years of dependable use.
Difference Between Timing Issues and Tension Problems on a Sewing Machine
Timing and tension problems create similar symptoms, loops, skipped stitches, and frustrating sewing, but they stem from completely different mechanical systems. Understanding the distinction saves you from adjusting the wrong thing and helps you communicate clearly with repair shops.
Tension problems affect how tightly the upper and lower threads pull against each other. The tension discs (for upper thread) and bobbin case spring (for lower thread) control this pressure. When tension is wrong, you’ll see loops on one side of the fabric, puckered seams, or thread that pulls too easily through the fabric. Crucially, tension issues still form complete stitches, they’re just unbalanced or too loose/tight.
Timing problems affect whether stitches form at all. The mechanical synchronization between needle and hook determines if the upper thread loop gets caught. When timing is off, you’ll see skipped stitches (gaps with no thread), the needle hitting metal parts, or complete failure to form any stitch. The threads aren’t connecting because the hook misses the needle’s thread loop entirely.
Quick diagnostic test:
- Sew a test seam on medium-weight cotton with contrasting thread colors (bright top, dark bobbin)
- Examine both sides of the fabric carefully
If you see:
- Loops on top = bobbin tension too loose or top tension too tight
- Loops underneath = top tension too loose or bobbin tension too tight
- Balanced stitches but puckered fabric = both tensions too tight
- Regular gaps with no thread = timing problem
- Needle hitting metal = timing problem (or bent needle)
Tension adjustments are simple and reversible, you turn a dial or adjust a screw on the bobbin case. Most sewers handle tension tweaks routinely. Timing adjustments require opening the machine and working with internal mechanisms. Always rule out tension, needle problems, and threading errors before assuming timing is the culprit.
Our comprehensive guide to sewing machine tension includes test strips you can print to diagnose tension issues definitively.
What Are Signs That Timing Is Too Difficult to Fix at Home?
Some timing problems signal deeper mechanical issues that require professional diagnosis and specialized tools. Recognizing these red flags early prevents you from spending hours on a repair that’s beyond DIY scope or potentially damaging your machine further.
Stop and call a professional if:
- The hook assembly is visibly damaged, bent hook point, cracked shuttle race, or scored metal surfaces indicate the timing problem caused (or resulted from) physical damage requiring parts replacement
- Gears are stripped or worn, if you see missing teeth on timing gears or excessive play/wobble in the drive shaft, the machine needs parts you can’t easily source
- The needle bar is bent, this throws off timing but can’t be fixed by adjustment alone; the bar must be replaced or straightened with specialized tools
- Multiple screws are stripped, if previous repair attempts stripped the set screw heads, you’ll need screw extractors and possibly retapping
- You’ve adjusted timing but problems persist, if you’ve carefully followed instructions and the machine still skips stitches, a secondary issue (worn hook point, incorrect needle bar height, damaged feed dogs) may be present
- The machine makes grinding or clicking sounds even after timing adjustment, indicates bearing wear, gear damage, or other internal problems
- It’s a computerized machine, electronic machines often have sensors that must be recalibrated after timing adjustment, requiring diagnostic software
Vintage machine warning signs:
- Rust or corrosion on internal parts, frozen or corroded timing mechanisms need penetrating oil, patience, and sometimes parts fabrication
- Missing or broken parts, vintage machines may need custom-made components no longer manufactured
- Collectible value over $500, professional restoration preserves value and authenticity
If you’ve already attempted timing adjustment and made things worse, don’t panic. Most timing mistakes are reversible. Take clear photos of the current state, note what you changed, and bring the machine to a repair shop with an honest explanation. Technicians appreciate knowing what’s been attempted and can often correct DIY adjustments quickly.
For machines that are jamming frequently alongside timing issues, multiple problems may be compounding each other.
Common Mistakes When Adjusting Sewing Machine Timing Yourself
Even experienced sewers make predictable errors during timing adjustment. Knowing these pitfalls in advance dramatically improves your success rate and helps you avoid creating bigger problems than you started with.
Top DIY timing mistakes:
1. Turning the handwheel backward
Many people instinctively turn the wheel both directions while checking timing. This can shift the timing relationship and give you false readings. Always turn the handwheel toward you (counterclockwise when facing the wheel), the normal sewing direction. If you accidentally turn it backward, complete a full forward rotation before checking timing again.
2. Forgetting to photograph before disassembly
You’ll be amazed how quickly you forget which screw came from where or how parts were oriented. Take photos from multiple angles before removing each component. These photos are invaluable during reassembly and help you spot if something’s not quite right.
3. Over-tightening the timing set screw
The small screw that locks the hook assembly to the shaft doesn’t need gorilla strength. Over-tightening can strip threads, crack the hook assembly, or make future adjustments impossible. Tighten until snug, then add just a quarter-turn more. If you can’t turn the handwheel smoothly after tightening, you’ve gone too far.
4. Adjusting timing without ruling out simpler problems first
At least 40% of suspected timing issues are actually dull needles, incorrect threading, or tension problems. Before opening your machine, try a new needle (correct size and type), rethread completely, clean the bobbin area, and check tension. These five-minute fixes solve many “timing” problems.
5. Losing track of the needle’s position
Timing is set when the needle is rising 2-3mm from its lowest point. Many people adjust with the needle at the wrong position in its cycle. Mark the correct position with a piece of tape on the handwheel so you can return to it consistently during adjustment.
6. Ignoring the service manual’s specific timing marks
Generic timing instructions help you understand the concept, but your specific machine model has unique timing marks and specifications. A Brother machine’s marks differ from Singer’s or Janome’s. Always cross-reference generic instructions with your model’s manual or a video for your exact machine.
7. Working in poor lighting
Timing marks are tiny, often just small lines or dots stamped into metal. Working in dim light means you’ll miss these critical reference points. Use a bright desk lamp or headlamp to illuminate the work area clearly.
8. Rushing the process
Timing adjustment requires patience and precision. Rushing leads to mistakes, stripped screws, and frustration. Set aside 1-2 hours when you won’t be interrupted. If you feel frustrated, take a break and return with fresh eyes.
If you make a mistake, the most common result is continued skipped stitches or slightly worse performance. Catastrophic damage from timing adjustment is rare unless you force parts or over-tighten screws. Most errors are reversible with careful attention to returning parts to their original positions.
Is It Worth Fixing Timing on an Old Sewing Machine or Should I Buy New?
The repair-versus-replace decision depends on your machine’s value, sentimental attachment, and the cost of alternatives. A $100 timing repair makes perfect sense for some machines but not others.
Repair timing if:
- The machine is worth $300+, professional timing adjustment costs $75-150, preserving a valuable machine
- It’s a vintage collectible or heirloom, machines from the 1950s-1970s often outlast modern machines once repaired; brands like Singer Featherweight, vintage Bernina, or all-metal Kenmore models are worth maintaining
- It sews beautifully otherwise, if timing is the only problem and the machine has features you love, repair makes sense
- Parts are readily available, common brands like Brother, Singer, Janome, and Pfaff have accessible parts and repair networks
- You’re comfortable with DIY, free timing adjustment (your time only) makes even a $150 machine worth fixing
Consider replacing if:
- The machine cost under $150 new, repair costs may equal or exceed replacement cost for budget machines
- Multiple problems exist, if timing issues accompany motor problems, cracked plastic parts, or electrical issues, total repair costs can exceed $200-300
- It’s a no-name brand, obscure brands from discount retailers often lack available parts and service support
- You’ve outgrown its capabilities, if you need features your current machine lacks (walking foot, automatic buttonholes, adjustable stitch width), upgrading makes more sense than repairing
- Parts are unavailable, some vintage machines and discontinued brands can’t be repaired due to parts scarcity
Cost comparison example:
- Repair: $100 professional timing adjustment + $50 full service = $150 total
- Replace: New mechanical machine with similar features = $200-400
- Net difference: $50-250 more to replace
For a machine you love and know well, spending $150 to keep it running for another 5-10 years makes economic sense. For a basic machine you’ve been frustrated with, that $150 could go toward a better replacement.
Check our comparison of old vs new sewing machines to understand the trade-offs. Also consider whether it’s time to replace your sewing machine entirely based on age and condition.
How Long Does It Take to Fix Sewing Machine Timing DIY?
Plan for 1-2 hours for your first DIY timing adjustment, including research, disassembly, adjustment, and testing. Experienced sewers who’ve done it before can complete the job in 30-45 minutes, but rushing your first attempt invites mistakes.
Time breakdown:
- Research and preparation (15-30 minutes), finding your service manual, watching videos for your specific model, gathering tools, and setting up your workspace
- Disassembly (15-20 minutes), removing covers, needle plate, and accessing the timing mechanism while photographing each step
- Timing adjustment (20-40 minutes), locating timing marks, loosening the set screw, positioning the hook correctly, and tightening everything back
- Reassembly (10-15 minutes), replacing covers and components in reverse order
- Testing and fine-tuning (15-30 minutes), threading the machine, sewing test seams, and making minor adjustments if needed
Factors that extend the timeline:
- First-time repair, expect to take the full 2 hours as you learn the process
- Difficult access, some machines require removing more covers or components to reach timing mechanisms
- Stripped or stuck screws, old machines may have corroded screws that need penetrating oil and patience
- Trial and error, timing adjustment is precise; you may need 2-3 attempts to get it perfect
- Poor lighting or workspace, fumbling in dim light or a cramped space slows everything down
Professional timing adjustment takes a technician 20-30 minutes because they’ve done it hundreds of times and have the right tools immediately at hand. However, shops typically keep your machine for 3-7 days due to scheduling and workload, so total turnaround time is longer even though actual repair time is shorter.
Time-saving tips:
- Watch a video specific to your machine model before starting, seeing the process once makes it much clearer
- Print your service manual’s timing section so you can reference it without switching between phone and machine
- Work during daylight hours with good natural light
- Don’t attempt timing adjustment when you’re tired or rushed
- Have a backup project ready in case the repair takes longer than expected
If you’re spending more than 2 hours and still struggling, stop and reassess. You may be missing a key step or dealing with a more complex problem. At that point, professional help often makes more sense than continuing to troubleshoot.
Regular sewing machine maintenance and knowing how often to service your machine can prevent timing issues from developing in the first place.
What Happens If I Mess Up the Timing Adjustment Even More?
The good news: timing adjustment mistakes rarely cause permanent damage. The worst-case scenario is usually continued skipped stitches or slightly worse performance than before you started. Understanding what can go wrong helps you work confidently and know when to stop.
Most common outcomes of incorrect timing:
1. Continued or worse skipped stitches
If you don’t align the timing marks precisely, the hook will still miss the thread loop. The machine will skip stitches just as it did before, or perhaps skip more frequently. This is frustrating but not damaging, you can try again or take it to a professional.
2. Needle hitting the bobbin case or hook
If timing is significantly off, the needle may strike metal parts during sewing. You’ll hear a distinct clicking or scraping sound. Stop immediately if this happens, continued sewing can bend the needle, damage the hook point, or crack the bobbin case. Return the timing to the original position (this is why you took photos) and reassess.
3. Thread tangling or bird’s nesting
Incorrect timing can cause the hook to catch the thread loop at the wrong angle, creating thread nests underneath the fabric. This wastes thread and fabric but doesn’t damage the machine. Adjust timing in small increments until the problem resolves.
4. Difficulty turning the handwheel
If you over-tighten the timing set screw or position parts incorrectly, the handwheel may become stiff or impossible to turn. Never force it, you could strip gears or bend the drive shaft. Loosen the set screw and reposition the hook assembly with more clearance.
What WON’T happen (despite common fears):
- The machine won’t explode or become completely unusable, timing adjustment affects stitch formation, not the machine’s fundamental operation
- You won’t void the warranty by looking, opening covers to inspect timing doesn’t automatically void warranties, though making adjustments might (check your warranty terms)
- Parts won’t fall out or get lost, sewing machine components are secured; you’d have to deliberately remove screws or clips for parts to come loose
If you’ve made things worse:
- Return to the original position using your photos as reference
- Consult your service manual or find a video tutorial for your specific model
- Try again with better lighting and more patience
- Seek professional help if you’ve attempted adjustment 2-3 times without success
Professional technicians regularly fix DIY timing attempts. Be honest about what you’ve tried, this information helps them diagnose the problem faster. Most shops charge the standard timing adjustment rate even if they’re correcting a DIY attempt, as long as you haven’t damaged parts.
The key is knowing when to stop. If you’ve spent 2+ hours, made multiple attempts, and the problem persists or worsens, professional help is the smart choice. You’ve learned valuable information about your machine and can make an informed decision about repair versus replacement.
Which Sewing Machine Brands Are Easiest to Fix Timing On?
Some brands design their machines with service and repair in mind, while others prioritize compact design or cost-cutting that makes timing adjustment more difficult. If you’re considering DIY timing repair, brand matters significantly.
Most DIY-friendly brands:
Brother
Brother mechanical machines consistently rank as the easiest for home timing adjustment. They use accessible hook assemblies, clear timing marks, and straightforward screw placements. Service manuals are readily available online, and the large user community means you’ll find model-specific video tutorials. Brother’s consistent design across model lines means skills transfer between machines.
Singer (vintage and mechanical models)
Vintage Singer machines from the 1950s-1980s were designed when home repair was expected. Models like the Singer 401, 500 series, and Featherweight have well-documented timing procedures and abundant parts availability. Modern Singer mechanical machines maintain this accessibility, though computerized models are more complex.
Janome (mechanical models)
Janome mechanical machines feature logical layouts and good service documentation. The brand’s reputation for reliability means timing issues are less common, but when they occur, the repair process is straightforward. Janome uses quality metal components that hold adjustments well.
Moderately difficult brands:
Pfaff
Pfaff machines are beautifully engineered but sometimes require removing more covers to access timing mechanisms. Service manuals are detailed but may be harder to find for older models. The quality of construction means timing stays accurate longer once properly set.
Bernina
Bernina’s precision engineering makes timing adjustment exacting, tolerances are tighter than budget brands. While the process isn’t more complex, it requires more precision and patience. Bernina dealers often discourage DIY repair to protect their service revenue.
Avoid DIY timing on:
Computerized machines (all brands)
Electronic machines from Brother, Singer, Janome, or any other brand add complexity beyond mechanical timing. Sensors, circuit boards, and software calibration mean DIY timing adjustment can create electronic errors even if you get the mechanical timing correct. These machines need professional service with diagnostic computers.
Vintage European machines
Brands like Elna, Necchi, and older Pfaff models may have metric hardware, unusual timing mechanisms, or parts that are difficult to source. Unless you’re experienced with vintage repair, these machines are best left to specialists.
No-name budget brands
Machines from discount retailers often lack service manuals, have proprietary parts, and use inconsistent designs. Finding timing information for these machines is nearly impossible, and parts availability is poor.
Brand-specific timing resources:
- Brother: Excellent YouTube community with model-specific tutorials
- Singer: Comprehensive vintage manuals available through ISMACS (International Sewing Machine Collectors’ Society)
- Janome: Dealer network provides service manuals for most models
- Pfaff: Active online forums with experienced users sharing repair tips
If you’re shopping for a new machine and anticipate doing your own repairs, mechanical models from Brother, Singer, or Janome offer the best combination of reliability, documentation, and DIY-friendly design. For more guidance, check our sewing machine comparison resources.
Do Computerized Sewing Machines Have Timing Issues Like Mechanical Ones?
Yes, computerized sewing machines have timing mechanisms just like mechanical machines, the needle and hook must still synchronize to form stitches. However, computerized machines add electronic sensors and software calibration that make timing problems more complex and DIY adjustment much riskier.
How computerized timing differs:
Computerized machines use sensors to monitor needle position, motor speed, and stitch formation. When you adjust mechanical timing on these machines, you may also need to recalibrate the electronic sensors so the computer knows where the needle actually is. Without this recalibration, the machine may display error codes, refuse to sew, or form stitches incorrectly even though mechanical timing is correct.
Additional complications:
- Error codes, computerized machines detect timing problems and display error messages, sometimes locking the machine until professionally serviced
- Software calibration, requires diagnostic software and cables that only dealers and repair shops possess
- Warranty concerns, opening computerized machines almost always voids warranties, which are often longer (3-5 years) than mechanical machine warranties
- Circuit board proximity, timing mechanisms sit near delicate electronics that can be damaged by static discharge or dropped screws
When computerized machines need timing adjustment:
Timing issues are actually less common in computerized machines because electronic motor control maintains precise synchronization. When timing does drift, it’s often due to:
- Impact or dropping the machine, which can jar timing mechanisms
- Worn hook assembly after tens of thousands of stitches
- Previous repair attempts that didn’t properly recalibrate sensors
- Manufacturing defect (usually appears within the first year and is covered by warranty)
Professional service is essential for:
- Any computerized machine still under warranty
- High-end machines (Bernina, Pfaff, Janome Horizon series) where repair costs are justified by machine value
- Machines displaying error codes alongside timing symptoms
- Situations where you’re not confident about the mechanical timing adjustment itself
DIY is risky because:
Even if you successfully adjust mechanical timing, the machine may not recognize the change and continue to malfunction. You could spend hours on a repair that ultimately requires professional recalibration anyway. Worse, you might void your warranty and create additional problems.
The exception: Some older computerized machines (late 1990s-early 2000s) have simpler electronics that don’t require recalibration after timing adjustment. If you can find specific documentation confirming your model doesn’t need electronic recalibration, DIY may be feasible. However, this information is rarely available, making professional service the safer choice.
For computerized machines, focus your DIY efforts on regular maintenance, cleaning, oiling, and tension adjustment, while leaving timing and electronic issues to professionals. Learn more about computerized sewing machine care to prevent problems before they start.
FAQ
How can I tell if my sewing machine timing is off or if it’s just a needle problem?
Replace the needle with a fresh one (correct size and type for your fabric) and rethread the machine completely. If skipped stitches persist across different fabrics and threads with the new needle, timing is likely the issue. Needle problems typically resolve immediately with a new needle.
Can I adjust timing without a service manual for my specific machine?
It’s possible but much more difficult and risky. Generic timing principles apply across machines, but timing mark locations and specifications vary by brand and model. Without your manual, you may misidentify timing marks or adjust to incorrect specifications. Search for your model number plus “service manual PDF”, many are available free online.
Will adjusting timing fix my machine if it’s making a knocking sound?
A knocking sound usually indicates the needle is hitting the bobbin case or hook due to incorrect timing. Adjusting timing can fix this, but first verify the needle isn’t bent and is inserted correctly. If knocking persists after timing adjustment, the hook assembly may be damaged and need replacement.
How often does sewing machine timing need adjustment?
Properly set timing should last years or even decades with normal use. Timing typically drifts only after impact (dropping the machine), extremely heavy use (industrial sewing), or when internal parts wear out. Most home sewers never need timing adjustment if they maintain their machines properly.
Can I fix timing on a serger or overlock machine?
Sergers have more complex timing because multiple needles and loopers must synchronize. While the principles are similar, serger timing adjustment is significantly more difficult and almost always requires professional service. The tight tolerances and multiple timing relationships make DIY repair impractical for most sewers.
What’s the difference between static timing and dynamic timing?
Static timing refers to the needle-hook relationship when you manually turn the handwheel slowly. Dynamic timing is how they synchronize at full sewing speed. Most home timing adjustments address static timing. If your machine sews correctly at slow speed but skips stitches at high speed, you may have a dynamic timing issue requiring professional diagnosis.
Is it normal for timing to be slightly different on zigzag versus straight stitch?
No, timing should remain consistent across all stitch types. If you experience problems only on zigzag or decorative stitches, the issue is more likely related to needle bar swing mechanism, stitch width calibration, or needle deflection rather than basic timing.
Can old, dried-out oil cause timing problems?
Old oil doesn’t directly affect timing, but it can cause the hook to rotate inconsistently or stick, which mimics timing symptoms. Clean and re-oil your machine’s hook race and moving parts before assuming timing is off. Many “timing” problems resolve with thorough cleaning and fresh oil.
Should I adjust timing if my machine only skips stitches on thick fabrics?
No, this indicates needle deflection (the needle bends slightly when penetrating thick fabric, moving the thread loop away from the hook). Use a larger, stronger needle (size 16 or 18), reduce sewing speed, and consider a walking foot. Timing adjustment won’t fix needle deflection issues.
How do I know if I’ve stripped the timing set screw?
If the screwdriver spins in the screw head without gripping, or if the screw won’t tighten no matter how much you turn it, the screw is stripped. You’ll need a screw extractor or professional help to remove it and replace it with a new screw. This is one reason to avoid over-tightening.
Can timing problems cause my bobbin thread to break?
Incorrect timing can cause excessive tension on the bobbin thread as the hook catches the loop at the wrong angle, potentially leading to breaks. However, bobbin thread breaks are more commonly caused by incorrect bobbin threading, damaged bobbin case, or using old, brittle thread.
Will timing adjustment fix my machine if it’s bunching thread underneath?
Maybe. Thread bunching (bird’s nesting) can result from timing issues, but it’s more often caused by incorrect upper threading, tension problems, or a dull needle. Rule out these simpler causes first. If bunching occurs with perfect threading, correct tension, and a new needle, timing may be the culprit.
Conclusion
Fixing timing on a sewing machine is one of the more advanced DIY repairs, but it’s absolutely achievable for mechanically inclined sewers working on mechanical machines. The key is knowing when to tackle the job yourself and when professional help makes more sense.
DIY timing adjustment works best when:
- You own a mechanical Brother, Singer, or Janome machine
- You can find a service manual or detailed video for your specific model
- You have 1-2 hours to work carefully without rushing
- The machine’s value justifies the time investment
- You’re comfortable with basic hand tools and following precise instructions
Professional service is the smarter choice for:
- Computerized machines with electronic sensors
- Vintage collectibles or machines worth over $500
- Situations where you’ve attempted adjustment without success
- Machines still under warranty
- Complex problems beyond simple timing (damaged parts, multiple issues)
Remember that timing problems are relatively uncommon compared to simpler issues like dull needles, incorrect threading, or tension problems. Always rule out these quick fixes before opening your machine. When you do adjust timing, work methodically, take photos at every step, and don’t rush the process.
Your next steps:
- Diagnose accurately, confirm timing is actually the problem by testing with a new needle, fresh threading, and proper tension
- Gather resources, find your service manual, watch model-specific videos, and assemble your tools
- Decide DIY or professional, weigh the machine’s value, your comfort level, and the cost of professional service
- Work carefully, if you choose DIY, follow instructions precisely and don’t force anything
- Test thoroughly, after adjustment, sew test seams on various fabrics before starting important projects
Whether you fix timing yourself or take your machine to a professional, understanding how timing works makes you a more informed sewer and helps you maintain your equipment better. Regular cleaning and maintenance prevent many timing issues from developing in the first place, and knowing when to service your machine keeps it running smoothly for years.


