


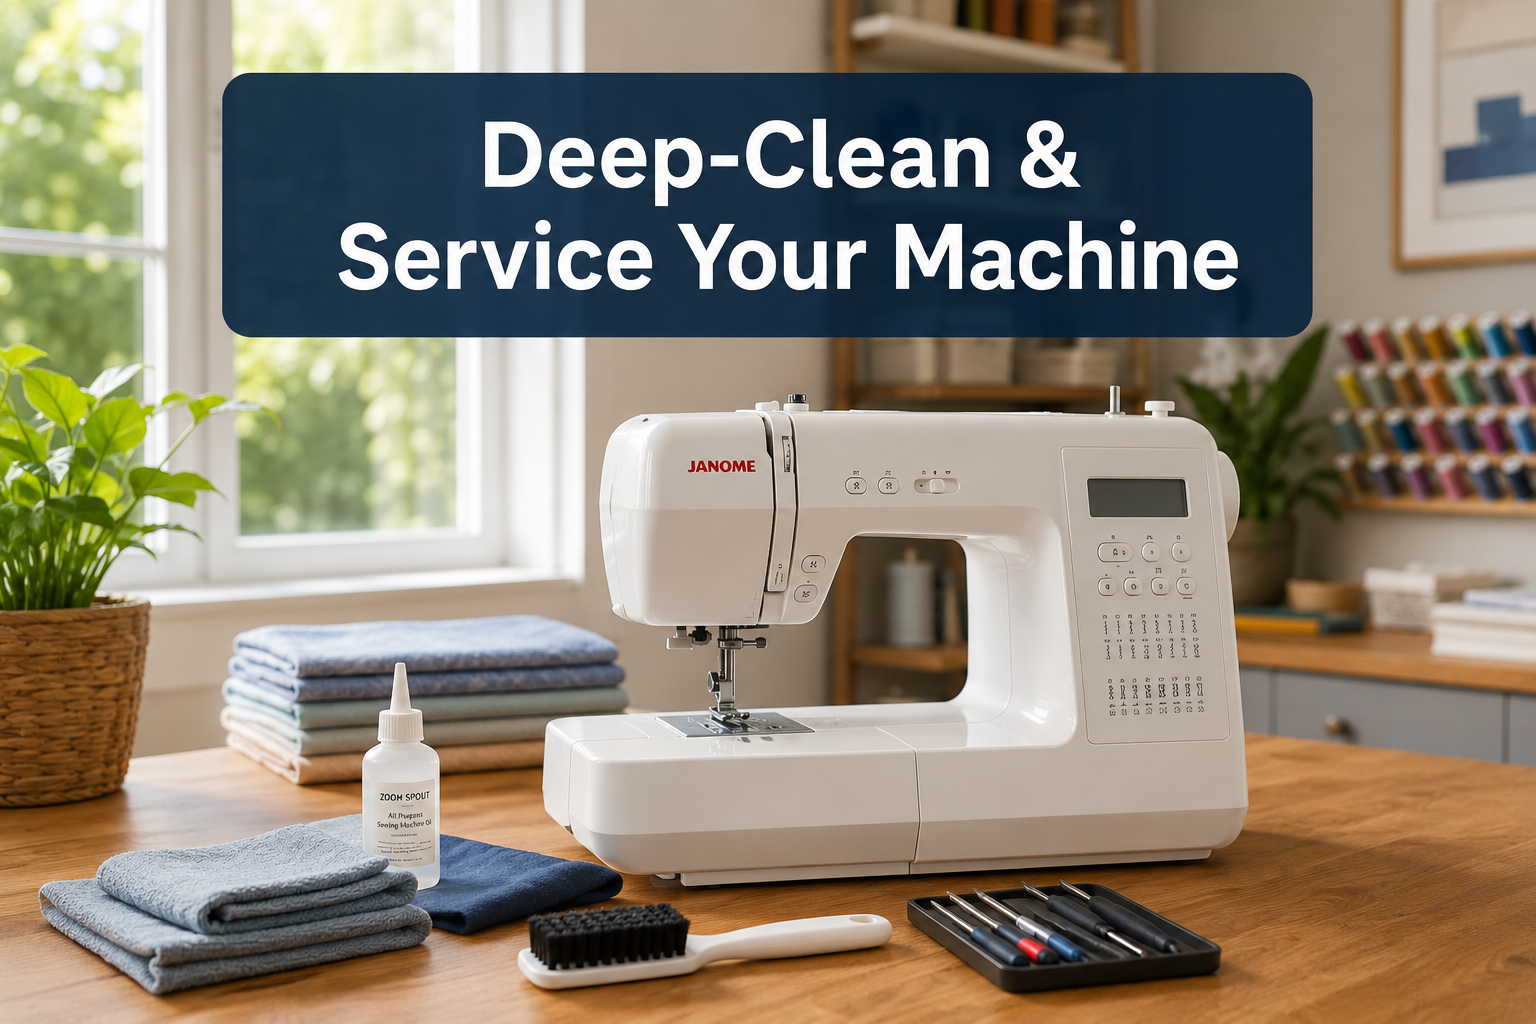
Quick Answer
Deep-cleaning and servicing your sewing machine at home involves removing lint and debris from the bobbin area, oiling moving parts with proper sewing machine oil, checking tension settings, and replacing worn needles. Most sewing machines benefit from a thorough home cleaning every 8-10 hours of sewing time, with professional servicing recommended annually for heavy users or every 2-3 years for occasional sewers.
Key Takeaways
- Deep cleaning means disassembling accessible parts (bobbin case, feed dogs, needle plate) to remove lint, dust, and thread fragments that accumulate during normal use
- Basic supplies needed: lint brush, sewing machine oil, small screwdrivers, soft lint-free cloths, tweezers, and your machine’s manual
- Frequency matters: Clean after every 8-10 hours of sewing; service professionally once yearly for frequent use or every 2-3 years for occasional sewing
- Home cleaning saves money: DIY deep cleaning costs under $15 in supplies versus $75-150 for professional service
- Warranty considerations: Most manufacturers allow user cleaning of bobbin areas and oiling, but avoid disassembling computerized components
- Common mistakes: Using household oils instead of sewing machine oil, over-oiling, and forcing parts that don’t easily detach
- When to call a pro: Persistent timing issues, motor problems, computerized malfunctions, or if you’re uncomfortable disassembling parts
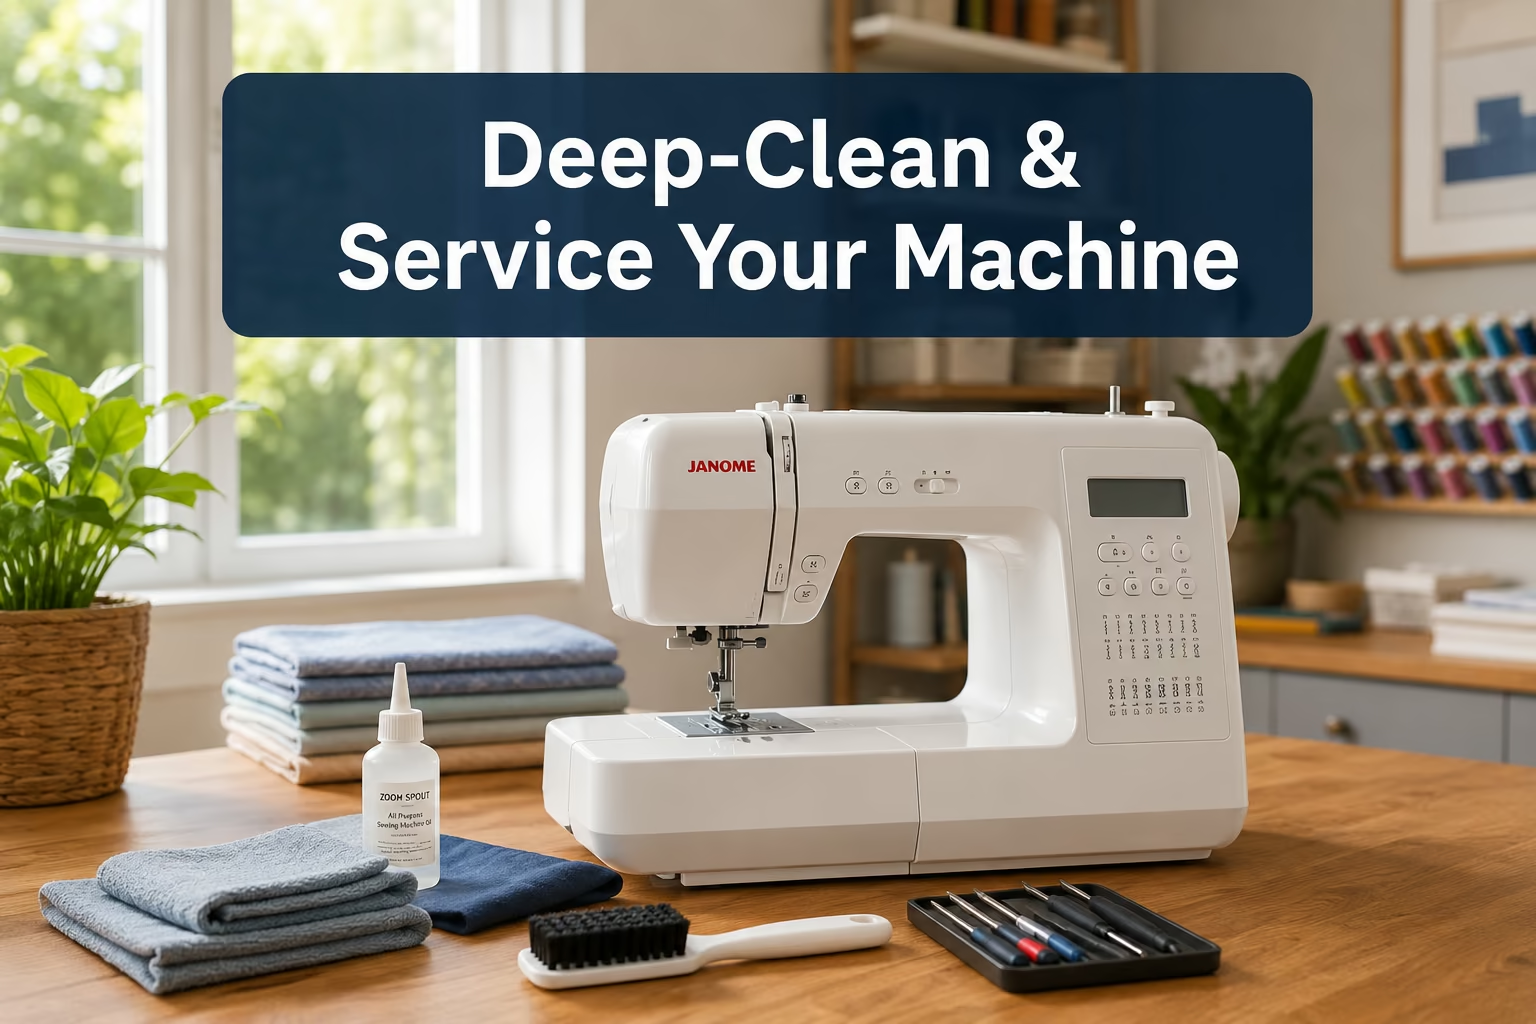
What Does Deep Cleaning a Machine Actually Mean
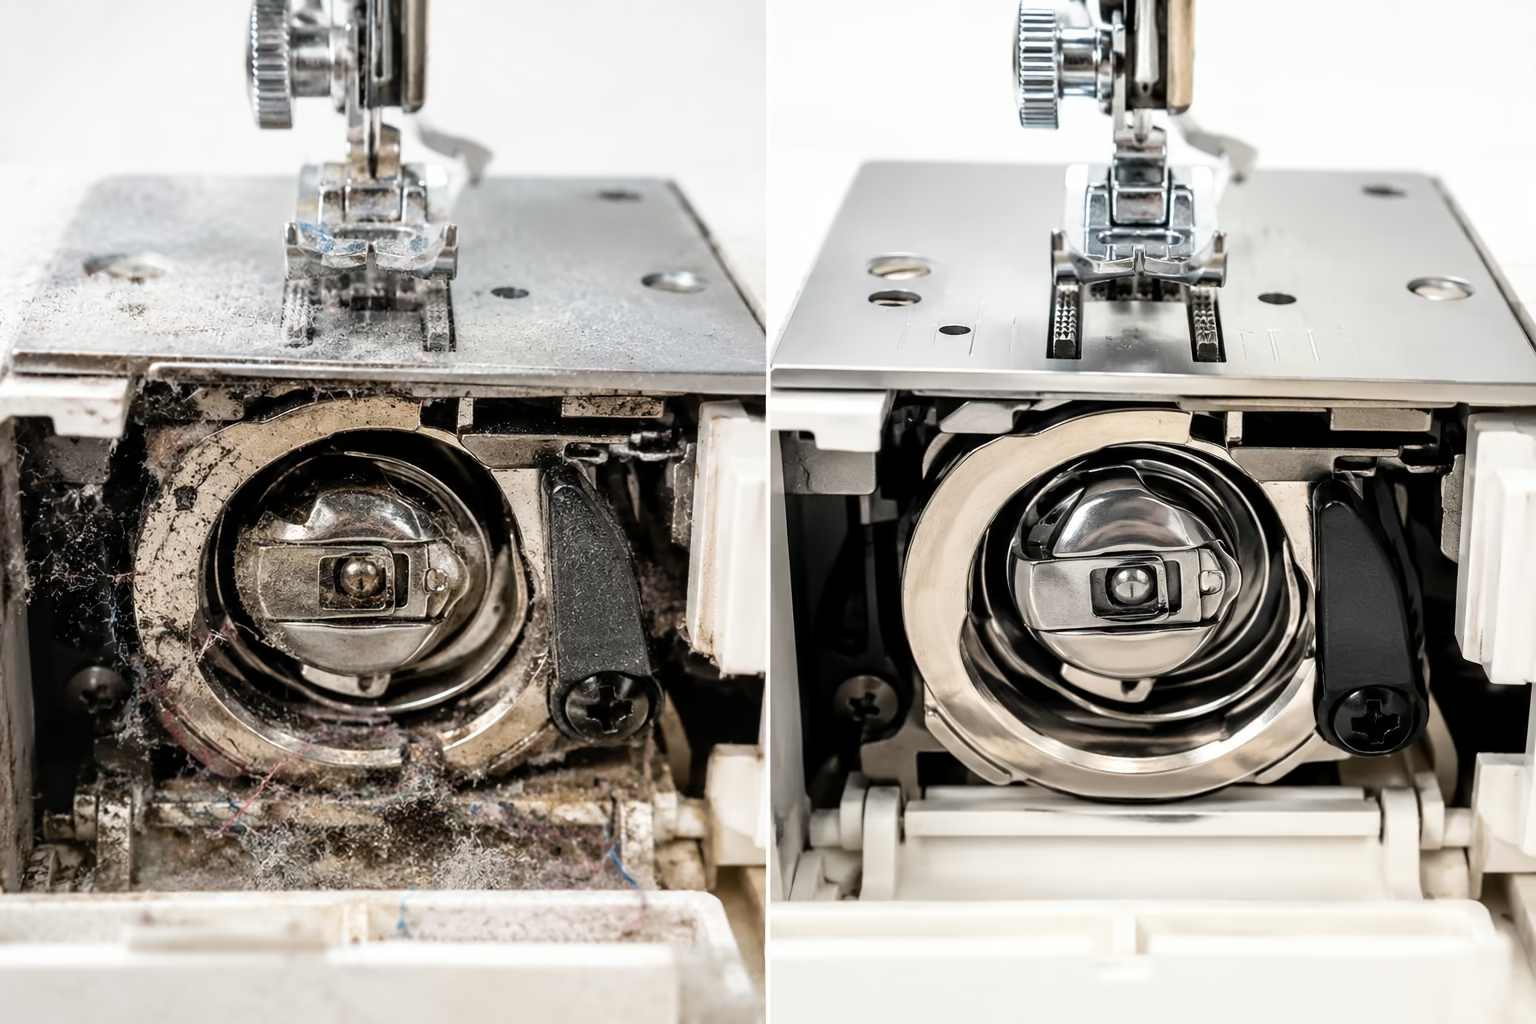
Deep cleaning a sewing machine means systematically removing and cleaning all user-accessible parts to eliminate lint, dust, thread fragments, and old oil that accumulate in the bobbin area, feed dogs, tension discs, and other mechanical components. This goes beyond wiping the exterior and involves partial disassembly to reach hidden areas where debris causes jamming, skipped stitches, and poor stitch quality.
The process typically includes:
- Removing the needle plate and bobbin case to access the feed dog area where most lint collects
- Brushing out the bobbin race and shuttle hook where thread debris wraps around moving parts
- Cleaning tension discs (on machines where they’re accessible) to remove thread residue
- Wiping down all exterior surfaces and removing dust from ventilation areas
- Checking and cleaning the thread path from spool pin to needle
Deep cleaning differs from regular maintenance (quick brush-outs between projects) and professional servicing (which includes timing adjustments, motor inspection, and internal component replacement). Think of it as the middle tier: more thorough than daily upkeep but less invasive than what a technician performs with specialized tools.
For most home sewers, regular sewing machine cleaning prevents 80% of common mechanical problems and extends machine life significantly.
How Often Should You Deep Clean Your Sewing Machine
You should deep-clean your sewing machine every 8-10 hours of active sewing time, which translates to weekly for daily sewers, monthly for weekend hobbyists, or after completing 2-3 major projects. Machines used with lint-producing fabrics like fleece, flannel, or denim require more frequent cleaning than those used primarily with tightly-woven cottons or synthetics.
Frequency guidelines by usage pattern:
- Heavy daily use (quilting, garment production): Deep clean weekly, professional service annually
- Regular hobbyist (5-10 hours/week): Deep clean every 2-3 weeks, professional service every 18-24 months
- Occasional sewer (monthly projects): Deep clean every 2-3 months, professional service every 2-3 years
- Vintage or all-metal machines: May need more frequent oiling but less frequent professional service due to simpler mechanics
Signs your machine needs immediate cleaning:
- Visible lint buildup around the bobbin case or feed dogs
- Thread nesting or bunching underneath fabric
- Skipped stitches or uneven stitch length
- Unusual noise (clicking, grinding, or squeaking)
- Difficulty turning the handwheel
- Thread breaking frequently
The recommended service frequency depends heavily on your sewing habits, but establishing a consistent cleaning routine prevents most mechanical issues before they require professional repair.
Deep Clean Machine at Home vs Professional Service Cost Comparison
Home deep cleaning costs $10-15 for basic supplies (lint brush, quality sewing machine oil, and cleaning cloths) that last for years, while professional sewing machine service typically ranges from $75-150 per visit, with additional charges for parts replacement or repairs. For most sewers, performing quarterly home cleanings and scheduling professional service every 1-3 years offers the best balance of cost savings and machine longevity.
Cost breakdown comparison:
| Service Type | Initial Investment | Per-Service Cost | Annual Cost (Regular User) |
|---|---|---|---|
| DIY Home Cleaning | $10-15 (one-time supplies) | ~$0 (supplies last 2+ years) | $5-10 |
| Professional Service | $0 | $75-150 per visit | $75-150 |
| Hybrid Approach | $10-15 + $75-150 | Varies | $85-165 |
What you get with professional service that home cleaning can’t provide:
- Timing and tension calibration using specialized gauges
- Internal motor inspection and lubrication
- Replacement of worn gears, belts, or electronic components
- Diagnostic testing for computerized functions
- Warranty-protected repairs on newer machines
When professional service is worth the cost:
Choose professional sewing machine service if your machine shows persistent problems after home cleaning, makes unusual mechanical noises, has computerized features malfunctioning, or hasn’t been serviced in 3+ years. For vintage machines or high-end models, annual professional maintenance protects your investment better than DIY alone.
Most sewers find that quarterly home deep cleaning combined with professional service every 18-24 months provides excellent machine performance at reasonable cost. The typical repair cost for neglected machines often exceeds preventive service expenses.
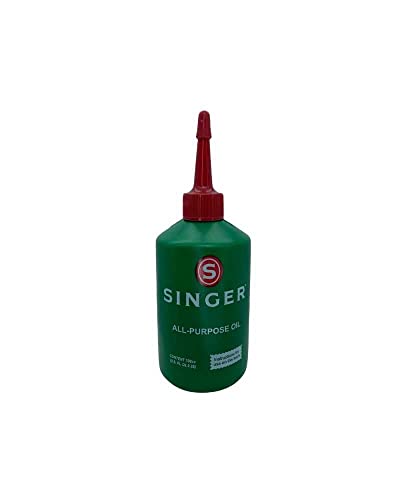

KEEPS MACHINES RUNNING SMOOTH - Crystal-clear, non-staining light oil (ISO VG-10) made from highly refined mineral oil; odorless, resists gumming; quiets hook/bobbin, shafts & bearings.

Clear Non Staining Oil: The crystal clear odorless formula makes this sewing machine oil the perfect lubricant for textile applications, completely solving slow stalls and buzzing on your machine, while also reducing friction and preventing rust! Makes using your sewing machine easier and more enjoyable.
What Supplies Do You Need to Deep Clean Your Appliances Yourself
To deep-clean your sewing machine at home, you need five essential items: a quality lint brush or small paintbrush, genuine sewing machine oil (never household oils), a set of small screwdrivers (usually Phillips and flathead), lint-free cloths or microfiber towels, and your machine’s user manual. Optional but helpful tools include tweezers for removing stubborn thread bits, a magnifying glass for inspecting small parts, and rubbing alcohol for cleaning exterior surfaces.
Essential supplies checklist:
- Lint brush or 1-inch natural-bristle paintbrush ($3-8), Stiff enough to dislodge debris but soft enough not to scratch
- Sewing machine oil ($5-10), Must be clear, odorless, and specifically formulated for sewing machines (brands like Tri-Flow or Lily White)
- Small screwdriver set ($8-15), For removing needle plates and accessing bobbin areas
- Lint-free cloths ($5-10 for a pack), Microfiber works best; avoid paper towels that shed fibers
- Tweezers ($3-5), Precision tip for extracting thread tangles from tight spaces
Optional but useful items:
- Compressed air canister ($6-10), For blowing out hard-to-reach areas (use short bursts, never continuously)
- Cotton swabs ($3), For cleaning tension discs and small crevices
- Rubbing alcohol (70% isopropyl) ($4), For removing adhesive residue and cleaning plastic surfaces
- Magnifying glass or headlamp ($10-20), Improves visibility in dark bobbin areas
- Small container or magnetic tray ($5-8), Keeps screws organized during disassembly
What NOT to use:
Never use WD-40, 3-in-1 oil, vegetable oil, or any household lubricant on your sewing machine. These products contain additives that attract dust, gum up moving parts, and can damage plastic components. Similarly, avoid harsh chemical cleaners, abrasive scrubbers, or excessive water near electronic components.
Most machine maintenance supplies are available at fabric stores, sewing machine dealers, or online retailers. A complete starter kit costs $25-40 and lasts for years of regular cleaning.

✅ Clear & Residue‑Free: Made with ISO VG‑10 light machine oil, this sewing machine oil is crystal clear, non‑staining and leaves no residue. It helps eliminate sticking and humming noise, keeping the needle bar, bobbin area and bearings running smoothly like new.

✅Clear & Residue‑Free: Made with ISO VG‑10 light machine oil, this premium sewing machine oil is crystal clear, won’t stain fabric, and leaves no residue. Helps reduce sticking and annoying humming noise, keeping the needle bar, bobbin area and bearings smooth and like new for longer.

Complete 21 Piece Sewing Machine Repair & Cleaning Kit: Everything you need for routine maintenance in one set. Includes 2×1 fl oz premium sewing machine oils, 10 universal bobbins, 4 silicone brushes, 3 screwdrivers, a 2-in-1 needle threader & seam ripper, and a cleaning brush to keep your machine running smoothly
Can You Use Vinegar and Baking Soda to Deep Clean All Machines
No, you should never use vinegar or baking soda inside your sewing machine’s mechanical components, as vinegar’s acidity can corrode metal parts and baking soda’s abrasiveness can scratch precision surfaces and leave residue in moving parts. These household cleaners are safe only for wiping down exterior plastic surfaces, foot pedals, and removable accessories like bobbins or spool pins that can be thoroughly rinsed and dried.
Safe uses for vinegar and baking soda:
- Exterior plastic housing: Diluted white vinegar (1:1 with water) on a cloth removes sticky residue and fingerprints
- Foot pedal cleaning: Wipe with vinegar solution to remove dust and grime
- Bobbin and accessory cleaning: Soak metal bobbins in vinegar to remove rust spots, then rinse and dry completely
- Thread spool pins: Clean with baking soda paste to remove thread residue buildup
Why these cleaners damage internal components:
Vinegar’s acetic acid reacts with metal alloys used in gears, shafts, and springs, causing microscopic pitting that leads to premature wear. Baking soda, while mild, is still abrasive enough to scratch polished metal surfaces and can leave alkaline residue that attracts moisture and promotes rust. Both substances can also damage the finish on painted or anodized parts.
Better alternatives for internal cleaning:
- For metal parts: Dry lint brush or compressed air only
- For stubborn grime: Rubbing alcohol (70% isopropyl) on a cotton swab
- For lubrication: Only genuine sewing machine oil in designated oil points
- For plastic components: Mild dish soap solution on a barely-damp cloth
The safest approach for sewing machine care is to use only products specifically designed for sewing machines or those recommended in your owner’s manual. When in doubt, stick with dry brushing and proper sewing machine oil.

My Machine Still Smells Bad After Deep Cleaning What Did I Do Wrong
If your sewing machine still smells after deep cleaning, you likely missed cleaning the bobbin race area thoroughly, used too much oil that’s now attracting dust and creating a musty odor, or have old thread fragments decomposing in hidden crevices behind the bobbin case or inside the tension assembly. Persistent odors can also indicate mold growth in machines stored in damp environments or burnt insulation from electrical issues.
Common causes and solutions:
1. Incomplete lint removal in the bobbin race
- Remove the bobbin case entirely and clean the shuttle hook area with a stiff brush
- Use tweezers to extract thread bits wedged behind the hook
- Shine a flashlight into the cavity to spot hidden debris
2. Over-oiling creating rancid smell
- Wipe away excess oil with a lint-free cloth
- Run the machine at medium speed for 2-3 minutes on scrap fabric to work out surplus oil
- Remember: one drop per oil point is sufficient
3. Decomposing thread or fabric fibers
- Check behind the face plate (if removable) for trapped fabric scraps
- Clean the thread path from spool pin through all thread guides
- Inspect the bobbin case area for thread wrapped around the case holder
4. Mold or mildew in stored machines
- Wipe all surfaces with 70% rubbing alcohol
- Allow machine to air-dry completely with cover off for 24 hours
- Store in a climate-controlled space with a dehumidifier if necessary
5. Electrical or motor issues (burnt smell)
- Unplug immediately and do not use
- This indicates overheating, worn motor brushes, or electrical short
- Requires professional inspection, do not attempt DIY repair
When the smell persists:
If odors continue after thorough cleaning and proper oiling, the problem may be internal motor dust buildup or deteriorating insulation that requires professional service. Burnt electrical smells always warrant immediate professional attention, as they indicate potential fire hazards.
How to Service a Coffee Machine at Home Without Voiding Warranty
For sewing machines specifically, you can safely perform user-level maintenance like cleaning the bobbin area, oiling designated points, changing needles, and adjusting tension without voiding your warranty, as these tasks are explicitly covered in owner’s manuals as routine user maintenance. However, disassembling the machine beyond user-accessible areas, removing the motor housing, opening computerized control panels, or using unauthorized repair parts will typically void manufacturer warranties.
Warranty-safe maintenance tasks:
- Removing and cleaning the bobbin case, shuttle hook, and feed dog area
- Oiling points marked in your manual (usually 2-5 specific locations)
- Replacing needles, presser feet, and bobbins
- Adjusting thread tension using the tension dial
- Cleaning exterior surfaces and thread path
- Replacing light bulbs (on models with user-replaceable bulbs)
Actions that typically void warranty:
- Removing screws that access internal motor or timing mechanisms
- Opening computerized control boxes or circuit boards
- Attempting to adjust timing or hook-to-needle clearance
- Using non-manufacturer-approved oils or lubricants
- Forcing parts that don’t easily detach
- Making electrical modifications or repairs
How to verify what’s allowed:
Check your warranty documentation for a section titled “User Maintenance” or “Owner Responsibilities.” Most manufacturers explicitly state which tasks users can perform. When in doubt, contact the manufacturer’s customer service or consult an authorized dealer before proceeding.
Maintaining warranty coverage:
Keep records of your maintenance activities, including dates of cleaning and products used. Some warranties require proof of regular maintenance to remain valid. For machines still under warranty, consider having the first professional service performed by an authorized dealer to establish a service history.
For computerized sewing machine care, be especially cautious about opening any panels with electronic components. Most modern machines have clear boundaries between user-accessible mechanical areas and sealed electronic sections.
Is Deep Cleaning Enough or Do You Need to Replace Parts Too
Deep cleaning addresses accumulated debris and maintains existing components, but worn parts like needles, belts, and bobbin cases eventually require replacement regardless of how well you clean. A needle should be replaced every 8-10 hours of sewing or after completing each major project, while belts, light bulbs, and bobbin cases need replacement based on visible wear indicators like cracks, fraying, or loss of tension.
Parts that need regular replacement (cleaning won’t fix):
Needles, Replace every 8-10 hours of sewing
- Dull or bent needles cause skipped stitches, thread breakage, and fabric damage
- See our guide on how often to change needles
Bobbin cases, Replace when cracked or showing burrs (every 3-5 years for metal, sooner for plastic)
- Rough edges snag thread and cause tension problems
- Check by running a cotton ball along the inside edge; snags indicate replacement needed
Drive belts, Replace when stretched, cracked, or slipping (every 5-10 years depending on use)
- Symptoms include inconsistent speed, squealing, or handwheel resistance
Light bulbs, Replace when burned out or dimming
- LED replacements last longer than incandescent originals
Presser feet, Replace when worn, bent, or damaged
- Scratched or uneven feet cause feeding problems
Signs cleaning alone won’t solve the problem:
- Persistent skipped stitches after needle replacement and cleaning
- Continued jamming despite thorough bobbin area cleaning
- Tension problems that don’t resolve with adjustment and cleaning
- Unusual noises that persist after oiling
- Visible cracks, rust, or deformation on any component
When to combine cleaning with parts replacement:
During your deep cleaning session, inspect all visible parts for wear. Replace the needle as standard practice, and examine the bobbin case, presser foot, and any rubber components for deterioration. This proactive approach prevents future problems and ensures your freshly cleaned machine performs at its best.
For DIY sewing machine maintenance, keeping a small inventory of replacement needles, bobbins, and a spare bobbin case ensures you can address common wear issues immediately.

What you get: the package includes 4 pieces sewing machine bobbin case, you can change and replace according to your own interest, or share with others
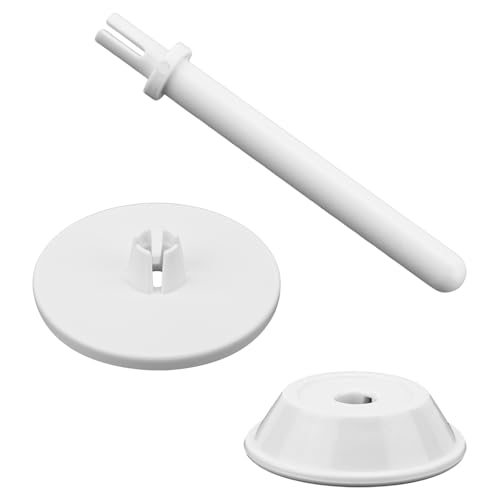
Product Included: You will receive 3 pieces of sewing machine accessories, including 1 small spool cover, 1 large spool cover, and 1 spool pin. It can meet your daily use needs.

Package comes with 2 pieces sewing machine bobbin cases, 20 pieces metal sewing machine bobbins, enough quantity to meet your long time use and replacements, you can take them as backup or share with others
Which Machines Are Safe to Deep Clean Yourself vs Need a Technician
You can safely deep-clean any mechanical or computerized sewing machine’s user-accessible areas (bobbin case, feed dogs, needle plate, and exterior surfaces), but should consult a technician for timing adjustments, motor repairs, computerized circuit board issues, or any problem requiring disassembly beyond what your owner’s manual describes. Vintage all-metal machines are generally more DIY-friendly for deep maintenance, while modern computerized models have clear boundaries between user-serviceable and technician-only zones.
Safe for home deep cleaning:
- Mechanical machines (vintage Singer, Kenmore, basic Brother models), Most parts are user-accessible
- Modern mechanical machines, Bobbin area, feed dogs, tension assembly (external dial only)
- Computerized machines, All mechanical areas; avoid opening electronic control panels
- Sergers/overlockers, Blade area, loopers, and thread paths (but timing is complex)
Requires professional service:
- Timing adjustments, When hook and needle aren’t synchronized properly
- Motor problems, Overheating, burning smell, or failure to run
- Circuit board issues, Error codes, display malfunctions, button failures
- Gear replacement, Internal gears that require case disassembly
- Tension spring replacement, Internal tension mechanisms (not the external dial)
- Bent or damaged hook/shuttle, Requires specialized tools and expertise
How to know your limits:
If your owner’s manual doesn’t describe how to access a particular area, don’t force it open. Most manufacturers design clear boundaries: screws that users can remove are typically larger and easily accessible, while internal screws are often hidden or require removing multiple layers of housing.
Special considerations by machine type:
Vintage machines: More forgiving of DIY maintenance but may need specialized knowledge of their specific mechanisms. Vintage sewing machine care often involves more extensive oiling than modern machines.
Industrial machines: Built for heavy use and often easier to service, but their power and speed make proper maintenance critical. Industrial sewing machine maintenance typically requires more frequent oiling.
Computerized machines: User maintenance is limited to mechanical components; never open electronic housings or attempt to repair circuit boards.
When in doubt, consult a qualified sewing machine technician rather than risk damaging your machine or voiding your warranty.
Common Mistakes People Make When Cleaning Their Machines at Home
The most common mistake when cleaning sewing machines at home is using the wrong type of oil (household oils like WD-40 or 3-in-1 oil instead of proper sewing machine oil), which gums up moving parts and attracts lint. Other frequent errors include over-oiling, using compressed air too aggressively (which blows lint deeper into the machine), forcing parts that don’t easily detach, and neglecting to clean the tension assembly and thread path.
Top 10 cleaning mistakes to avoid:
1. Using wrong lubricants
- Never use WD-40, cooking oil, 3-in-1 oil, or automotive lubricants
- Only use clear, odorless sewing machine oil
- These wrong oils contain additives that attract dust and eventually harden
2. Over-oiling
- One drop per oil point is sufficient
- Excess oil attracts lint and can stain fabric
- If oil drips out, you’ve used too much
3. Aggressive compressed air use
- Short, gentle bursts only
- Holding the trigger continuously blows lint into inaccessible areas
- Can damage delicate electronic components
4. Forcing parts apart
- If something doesn’t easily detach, consult your manual
- Forcing can break plastic clips or bend metal components
- Take photos before disassembly to remember reassembly order
5. Neglecting the thread path
- Lint accumulates in thread guides, tension discs, and take-up lever
- Clean from spool pin to needle, not just the bobbin area
- Use a small brush or cotton swab for thread guides
6. Cleaning with the machine plugged in
- Always unplug before cleaning to prevent accidental starts
- Especially important when working near the foot pedal
7. Using water or wet cloths near electronics
- Keep moisture away from computerized components
- Use barely-damp cloths for exterior only, never internal parts
- Ensure everything is completely dry before reassembling
8. Losing or mixing up small parts
- Use a magnetic tray or small container for screws
- Keep parts from different areas separated
- Take photos during disassembly for reference
9. Skipping the manual
- Every machine has unique oil points and disassembly procedures
- Manuals show exactly which screws are user-removable
- Download a PDF if you’ve lost your printed manual
10. Cleaning but not testing
- Always test on scrap fabric after cleaning and oiling
- Check for oil spots on fabric (indicates over-oiling)
- Verify stitch quality before starting a project
The right approach:
Follow a systematic process: unplug, photograph, remove user-accessible parts only, brush out lint, apply one drop of oil per designated point, reassemble, and test. This methodical approach prevents most common mistakes and ensures thorough cleaning without damage.
For troubleshooting persistent issues after cleaning, see our guide on sewing machine troubleshooting.
How to Deep Clean a Front Load Washer With Mold Buildup
Note: This article focuses on sewing machines. For information about deep-cleaning and servicing your sewing machine at home, the process involves removing the bobbin case and needle plate to access lint buildup in the feed dog area, which is the sewing machine equivalent of hidden moisture areas in other appliances.
For sewing machines specifically, mold or musty odors typically result from storing the machine in damp environments or leaving it covered with a non-breathable cover in humid conditions. The solution involves cleaning all accessible areas with 70% rubbing alcohol, allowing the machine to air-dry completely for 24 hours, and storing it in a climate-controlled space.
Preventing mold in stored sewing machines:
- Store in a room with humidity below 60%
- Use breathable dust covers, not plastic bags
- Leave the machine uncovered occasionally to air out
- Wipe down all surfaces with rubbing alcohol before long-term storage
- Place silica gel packets near the machine in storage
If you notice a musty smell in your sewing machine, clean all surfaces with rubbing alcohol, remove and clean the bobbin case and shuttle area thoroughly, and ensure the machine is completely dry before using or storing it again.
Do You Need to Disassemble Your Machine to Deep Clean It Properly
You need to disassemble only the user-accessible parts of your sewing machine for proper deep cleaning, which typically includes removing the needle plate, bobbin case, presser foot, and sometimes the face plate or side cover (if your manual shows how). Complete disassembly of the machine housing or internal mechanisms is unnecessary for routine deep cleaning and can cause more problems than it solves if you’re not a trained technician.
Parts you should remove for thorough cleaning:
Always remove:
- Needle and presser foot
- Bobbin and bobbin case
- Needle plate (throat plate), Usually held by 1-2 screws
- Thread spool and spool pin cap
Remove if your manual shows how:
- Face plate or front cover (on some models)
- Side access panels (on machines with external access to oil points)
- Feed dog cover (on machines where it’s separate from the needle plate)
Never remove (leave to professionals):
- Motor housing or motor itself
- Timing covers or gear assemblies
- Computerized control panels
- Internal wiring or circuit boards
- Handwheel or drive mechanisms (unless manual specifically instructs)
Step-by-step disassembly for deep cleaning:
- Unplug the machine and move it to a well-lit workspace
- Photograph the machine before removing anything (for reassembly reference)
- Remove the needle by loosening the needle clamp screw
- Remove the presser foot by releasing the presser foot holder
- Take out the bobbin and bobbin case (note how the case sits in the shuttle)
- Remove the needle plate by unscrewing the 1-2 screws holding it in place
- Set all parts and screws in a container to prevent loss
Cleaning the exposed areas:
Once disassembled, use a stiff lint brush to clean the shuttle hook, feed dogs, and all exposed metal surfaces. Use tweezers to remove stubborn thread bits. Apply one drop of sewing machine oil to designated points (usually marked in your manual with red dots or oil symbols).
Reassembly tips:
- Refer to your photos if you’re unsure about part placement
- Ensure the bobbin case clicks into place properly
- Tighten needle plate screws firmly but don’t over-torque
- Replace the needle with a fresh one
- Test on scrap fabric before starting a project
Most sewing machines are designed so that the areas requiring regular cleaning are easily accessible without tools or with just a screwdriver. If you find yourself needing to remove more than 3-4 screws or pry apart housing pieces, you’ve gone beyond routine maintenance territory.
For specific guidance on your machine model, consult your owner’s manual or search for video tutorials specific to your brand and model. Many manufacturers provide detailed cleaning videos on their websites.
Alternatives to Harsh Chemicals for Cleaning Kitchen Appliances
For sewing machines, harsh chemicals are never necessary or recommended. The safest and most effective cleaning method uses only a dry lint brush, sewing machine oil, and occasionally 70% rubbing alcohol for removing adhesive residue or cleaning plastic surfaces. These simple, non-toxic supplies clean thoroughly without risking damage to metal, plastic, or electronic components.
Safe, chemical-free cleaning supplies for sewing machines:
For lint and dust removal:
- Stiff natural-bristle brush or dedicated lint brush
- Compressed air (short, gentle bursts only)
- Tweezers for stubborn thread bits
- Soft microfiber cloths for wiping surfaces
For cleaning and disinfecting:
- 70% isopropyl rubbing alcohol on a cloth (for exterior surfaces only)
- Mild dish soap solution (heavily diluted, for exterior plastic only)
- Dry cotton swabs for small crevices
For lubrication:
- Only genuine sewing machine oil (clear, odorless, specifically formulated)
- Never substitute with household oils or lubricants
Why chemicals aren’t needed:
Sewing machine maintenance doesn’t involve grease, food residue, or biological contamination that would require chemical cleaners. The primary cleaning task is removing dry lint and thread fibers, which a brush handles perfectly. The only “chemical” you need is proper sewing machine oil, which is actually a highly refined mineral oil designed not to gum up or attract dust.
When rubbing alcohol is useful:
- Removing sticky residue from stabilizer or tape
- Cleaning the exterior plastic housing
- Disinfecting the machine if it’s been in storage or purchased used
- Cleaning the foot pedal
Apply alcohol to a cloth first, never directly to the machine, and keep it away from electronic components and internal mechanical parts.
The minimalist approach works best:
The most effective sewing machine cleaning routine uses the fewest products: brush out lint, wipe down surfaces with a dry or barely-damp cloth, apply one drop of oil per designated point, and test. This simple approach prevents the problems that occur when people over-complicate maintenance with unnecessary products.
For more guidance on proper sewing machine maintenance, focus on regular cleaning with simple tools rather than searching for specialized cleaning products.
How Long Does a Full Deep Clean and Service Take to Do at Home
A thorough home deep clean of your sewing machine takes 30-45 minutes for most models, including time to disassemble user-accessible parts, clean all areas, oil designated points, reassemble, and test on scrap fabric. Your first deep cleaning may take up to an hour as you familiarize yourself with your machine’s specific disassembly process, but subsequent cleanings become faster with practice.
Time breakdown by task:
- Preparation and disassembly: 5-10 minutes (removing needle, bobbin case, needle plate, presser foot)
- Lint removal and brushing: 10-15 minutes (thorough cleaning of bobbin race, feed dogs, shuttle hook)
- Oiling: 3-5 minutes (locating oil points and applying one drop each)
- Reassembly: 5-10 minutes (replacing all parts, ensuring proper seating)
- Testing and adjustment: 5-10 minutes (running test stitches, checking tension, verifying performance)
Factors that affect cleaning time:
Faster cleaning (20-30 minutes):
- Simple mechanical machines with few parts
- Machines cleaned regularly (less lint accumulation)
- Experienced users familiar with their machine
- Basic cleaning without detailed inspection
Longer cleaning (45-60 minutes):
- First-time deep cleaning on a new-to-you machine
- Heavily soiled machines with significant lint buildup
- Computerized machines with more complex threading paths
- Including time to consult manual or watch tutorial videos
- Combining cleaning with parts inspection and replacement
Efficiency tips to speed up the process:
- Keep all cleaning supplies in one dedicated container
- Take photos before disassembly for quick reassembly reference
- Use a magnetic tray to keep screws organized
- Clean in good lighting to spot lint easily
- Follow the same sequence each time to build muscle memory
How often you clean affects duration:
If you clean every 8-10 hours of sewing (as recommended), each session is quick because lint hasn’t accumulated heavily. If you wait months between cleanings, you’ll spend more time extracting compacted debris and may need to repeat the brushing process multiple times.
Scheduling your cleaning:
Plan to clean your machine when you have an uninterrupted hour available, even if the actual cleaning takes only 30-45 minutes. This buffer allows time to address any issues you discover (like a bent needle or worn bobbin case) and ensures you’re not rushing through the process.
Many sewers incorporate deep cleaning into their routine by scheduling it on the same day each month or after completing each major project. This consistency makes the task feel less daunting and keeps the machine in peak condition.
For comparison, professional sewing machine service typically takes 1-2 hours at a shop, plus travel time and the machine being out of your possession for several days.
Frequently Asked Questions
How do you know when your sewing machine needs deep cleaning?
Your sewing machine needs deep cleaning when you notice visible lint around the bobbin case or feed dogs, experience skipped stitches or thread nesting, hear unusual clicking or grinding noises, or have difficulty turning the handwheel. As a general rule, clean after every 8-10 hours of sewing time or when stitch quality declines.
Can you use WD-40 to clean a sewing machine?
No, never use WD-40 on a sewing machine. WD-40 is a water-displacement product, not a proper lubricant, and contains additives that attract dust and eventually gum up moving parts. Use only clear, odorless sewing machine oil specifically formulated for sewing machines.
What happens if you never clean your sewing machine?
If you never clean your sewing machine, accumulated lint and thread fragments will cause skipped stitches, thread breakage, jamming, and eventually damage to the timing mechanism and motor. Lack of proper oiling leads to increased friction, wear on moving parts, and potential seizure of mechanical components.
How much does professional sewing machine service cost?
Professional sewing machine service typically costs $75-150 for a standard cleaning, oiling, and timing adjustment. Additional repairs or parts replacement cost extra. Most technicians recommend professional service annually for heavy users or every 2-3 years for occasional sewers.
Should you oil your sewing machine after every use?
No, you should not oil your sewing machine after every use. Most modern machines need oiling only every 8-10 hours of sewing time or monthly for regular users. Over-oiling attracts lint and can stain fabric. Always follow your specific machine’s manual for oiling frequency and locations.
Can you clean a sewing machine with compressed air?
Yes, but use compressed air carefully with short, gentle bursts only. Holding the trigger continuously or using high pressure can blow lint deeper into the machine or damage delicate electronic components. A lint brush is often more effective and safer for most cleaning tasks.
What parts of a sewing machine need regular replacement?
Needles should be replaced every 8-10 hours of sewing or after each major project. Bobbin cases need replacement when cracked or showing burrs (every 3-5 years). Drive belts require replacement when stretched or cracked (every 5-10 years). Light bulbs and presser feet are replaced as needed when damaged.
Is it better to clean or replace a sewing machine?
Clean and maintain your current machine if it’s mechanically sound and meets your sewing needs. Replace it only if repairs would cost more than 50% of a new machine’s price, if parts are no longer available, or if you’ve outgrown its capabilities. Regular cleaning extends machine life significantly and is always the first step.
How do you clean a sewing machine that hasn’t been used in years?
For a long-stored machine, remove all accessible parts, brush out dust and old lint thoroughly, wipe all surfaces with rubbing alcohol, apply fresh sewing machine oil to designated points, replace the needle, and test on scrap fabric. If the machine doesn’t run smoothly after cleaning, consult a professional for internal inspection.
Can you use rubbing alcohol to clean sewing machine parts?
Yes, 70% isopropyl rubbing alcohol is safe for cleaning exterior plastic surfaces, removing adhesive residue, and disinfecting the machine. Apply it to a cloth first, never directly to the machine, and keep it away from internal mechanical parts and electronic components. Use it sparingly and ensure complete drying before use.
What’s the difference between cleaning and servicing a sewing machine?
Cleaning involves removing lint, dust, and debris from accessible areas and applying oil to designated points, tasks you can do at home. Servicing includes cleaning plus timing adjustments, internal motor inspection, gear lubrication, tension calibration, and parts replacement, tasks requiring professional tools and expertise.
How often should you change the needle on your sewing machine?
Change your sewing machine needle every 8-10 hours of sewing time or after completing each major project. Also replace the needle immediately if it becomes bent, dull, or if you notice skipped stitches, popping sounds when sewing, or pulls in your fabric. Different fabric types may require more frequent changes.
Conclusion
Learning how to deep-clean and service your machine at home empowers you to maintain peak sewing performance, prevent costly repairs, and extend your machine’s lifespan significantly. By investing just 30-45 minutes every 8-10 hours of sewing time, you’ll avoid most common mechanical problems and keep your machine running smoothly for years.
Your action plan for machine maintenance:
Start by gathering your essential supplies: a quality lint brush, genuine sewing machine oil, small screwdrivers, and lint-free cloths. Schedule your first deep cleaning session when you have an uninterrupted hour available. Follow your owner’s manual to identify which parts you can safely remove, and take photos before disassembly to guide reassembly.
Make cleaning a regular habit by marking it on your calendar monthly or after completing each major project. This consistency prevents heavy lint buildup and makes each cleaning session quick and easy. Combine your home cleaning routine with professional service every 1-3 years (depending on usage) to address internal components you can’t access yourself.
Remember that prevention is always easier than repair. A well-maintained sewing machine rewards you with consistent stitch quality, fewer frustrating interruptions, and the confidence to tackle any project. Your machine is an investment in your creative pursuits, treat it with the regular care it deserves, and it will serve you faithfully for decades.
Ready to get started? Unplug your machine, grab your lint brush, and give your faithful sewing companion the thorough cleaning it’s been waiting for. Your next project will thank you with perfect stitches from start to finish.


