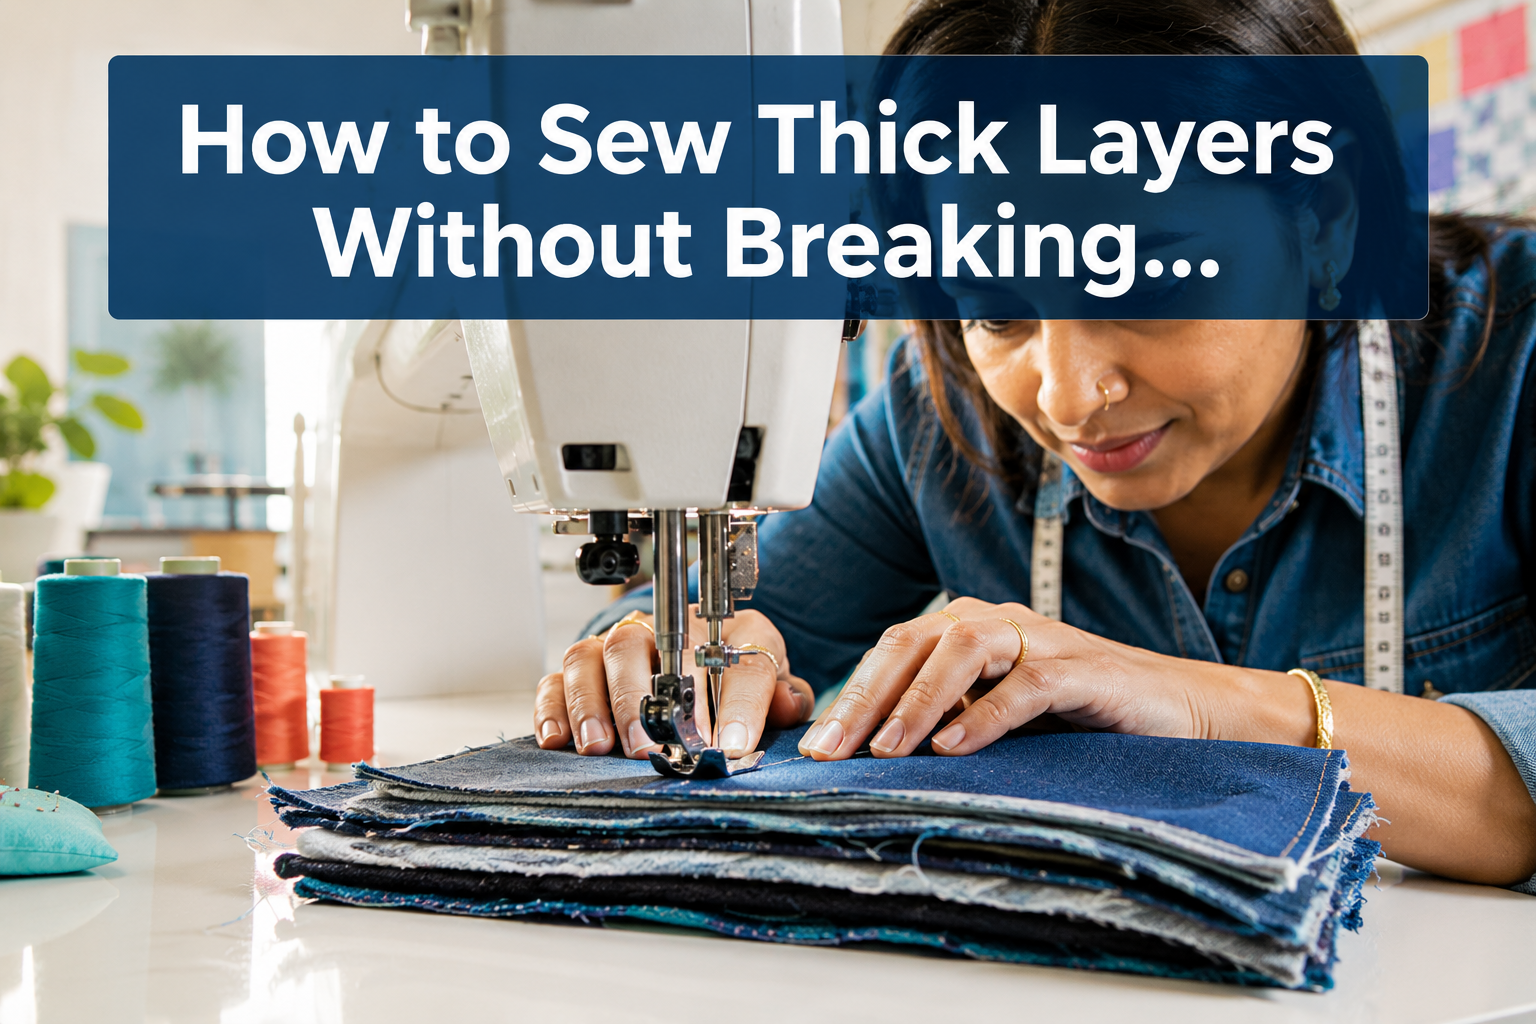
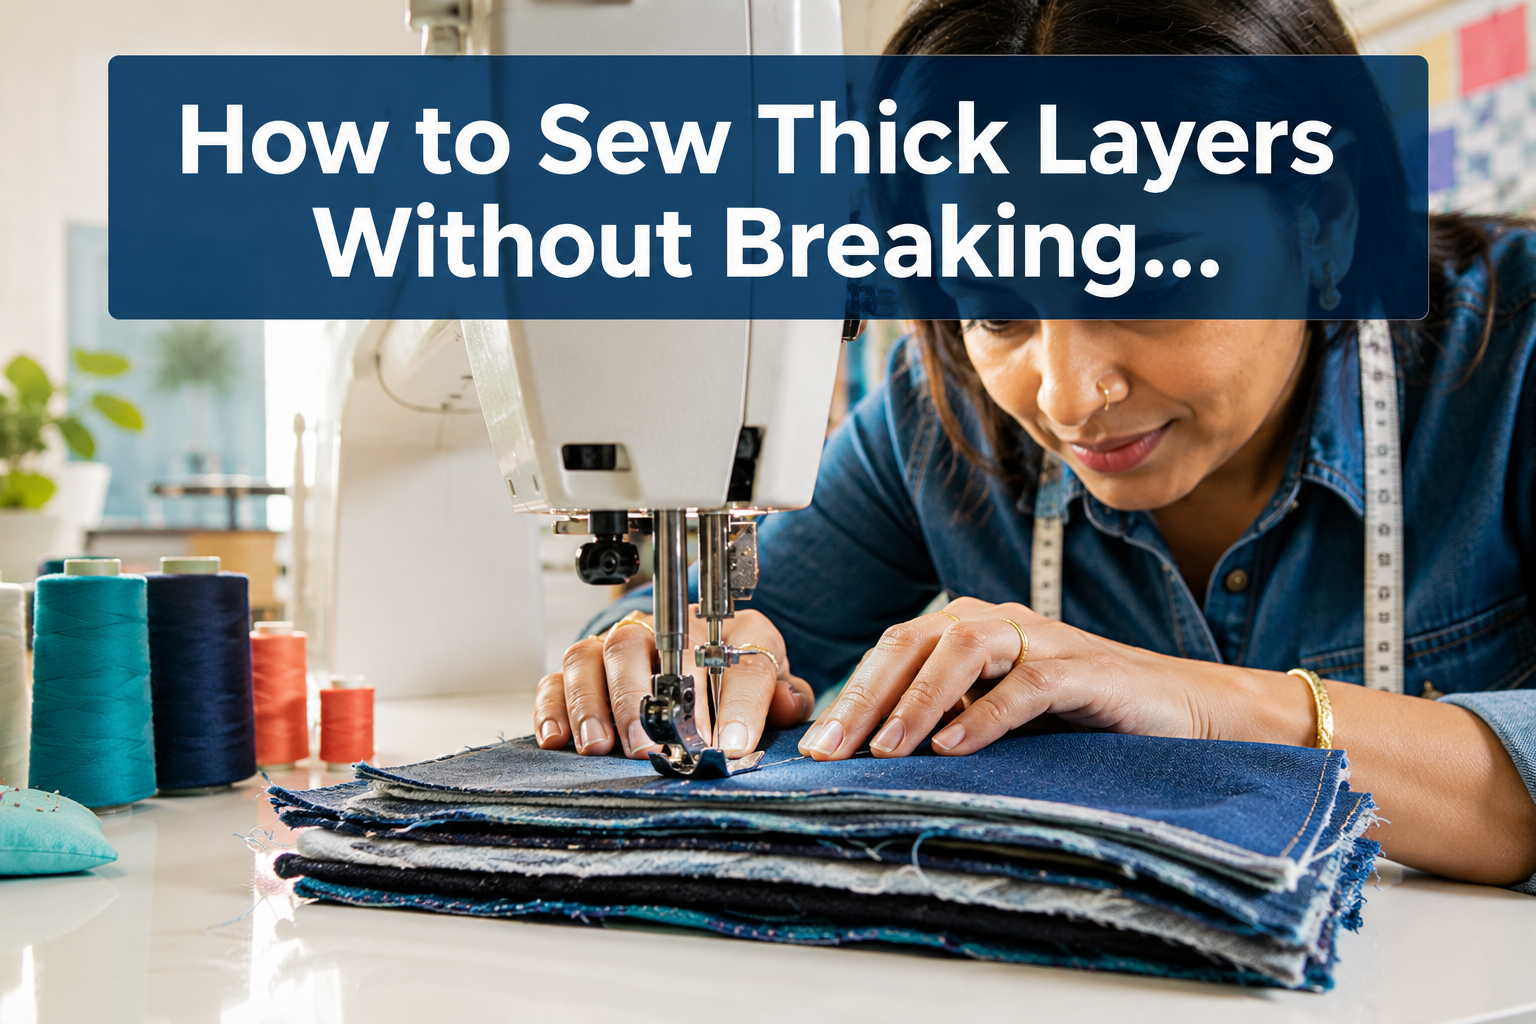
Breaking a needle mid-project when sewing through thick fabric is one of the most frustrating experiences for any sewist. How to sew thick layers without breaking needles comes down to three essentials: using the correct needle type and size for your fabric, adjusting your machine settings (especially tension and speed), and employing the right presser foot and techniques for bulky seams. Master these fundamentals, and you’ll tackle denim hems, quilted projects, and canvas bags with confidence.
Key Takeaways
- Use specialized needles designed for thick fabrics: jeans/denim needles (size 90/14 to 110/18), leather needles, or topstitch needles with reinforced shafts
- Slow down your sewing speed to reduce needle stress and improve control when penetrating multiple layers
- Install a walking foot to feed thick layers evenly and prevent fabric shifting that can bend or break needles
- Adjust thread tension slightly lower for thick materials to reduce strain on the needle as it pierces dense fabric
- Avoid forcing fabric through the machine; let the feed dogs do the work and never pull or push aggressively
- Use a hump jumper or seam leveler when crossing bulky intersections like waistbands to keep the presser foot level
- Change needles frequently because dull or damaged needles are far more likely to break on thick fabric
- Choose appropriate thread (polyester or heavy-duty cotton) that matches the fabric weight and needle size
What Needle Size Do I Need for Sewing Thick Fabric?
For thick fabrics like denim, canvas, upholstery material, or multiple quilted layers, you need a size 90/14 to 110/18 needle depending on the fabric density. The first number (90-110) is the European sizing system, while the second (14-18) is the American equivalent. Heavier fabrics require larger needles because the shaft must be strong enough to penetrate without bending or breaking.
Needle size guidelines for thick materials:
- Size 90/14: Medium-weight denim, canvas, corduroy, or 3-4 layers of quilting cotton
- Size 100/16: Heavy denim, duck canvas, upholstery fabric, or 5-6 layers of cotton
- Size 110/18: Very heavy materials like multiple denim layers, leather, vinyl, or thick canvas bags
The needle size directly affects how easily it can pierce your fabric. Too small a needle will bend under pressure and eventually snap, while an appropriately sized needle creates a clean hole without excessive resistance. When working with thick layers, always err on the side of a larger needle rather than smaller.
Common mistake: Many sewists continue using the universal size 80/12 needle that came with their machine for all projects. This needle is designed for lightweight to medium fabrics and will break almost immediately when faced with thick layers. Understanding proper needle selection is fundamental to successful sewing.

Set of 5 heavy duty sewing machine needles, size 100/16

2X STRONGER STEEL — Constructed with reinforced, thick shafts that withstand the resistance of dense, heavy fabrics without bending or breaking, staying sharp longer for consistent, skip-free stitching through any material from start to finish.

Medium Ball Point
Why Does My Sewing Machine Needle Keep Breaking on Denim?
Your needle keeps breaking on denim because it’s either the wrong type or size for the fabric weight, it’s dull or damaged from previous use, or you’re sewing too fast without proper machine adjustments. Denim is a tightly woven twill fabric that requires a sharp, sturdy needle specifically designed to handle its density.
Primary causes of needle breakage on denim:
- Wrong needle type: Universal needles have a slightly rounded point that can deflect when hitting dense denim weave, causing the needle to hit the throat plate or bobbin case and break
- Dull needle: A needle that has sewn through 6-8 hours of fabric (or hit a pin) develops a burr on the point that catches in the denim fibers and snaps
- Excessive speed: Sewing too fast through thick denim doesn’t give the needle time to fully penetrate before the next stitch cycle begins, creating lateral stress
- Improper threading or tension: If the thread path is incorrect or tension is too tight, it pulls the needle off-center as it tries to form a stitch
- Fabric forcing: Pulling or pushing the fabric instead of letting the feed dogs move it naturally bends the needle until it breaks
The solution is to use a jeans/denim needle (marked with a blue band on Schmetz needles) in size 90/14 or 100/16. These needles have a sharp point and reinforced shaft specifically engineered for penetrating dense woven fabrics. Learn more about why needles break and how to prevent it.
Choose a jeans needle if: You’re sewing any weight of denim, canvas, or tightly woven cotton twill. Choose size 90/14 for regular denim and 100/16 for heavy or multiple layers.

Value Package: You will receive 50 pcs. The quantity is adequate for you to replace.
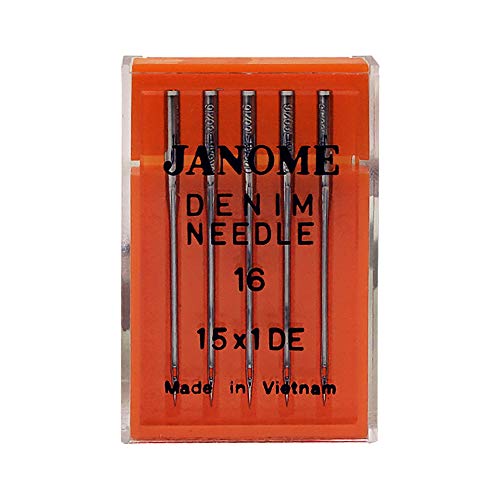
These Janome needles are preferred for heavyweight fabrics such as leather, denim, and vinyl

Schmetz Jean needle chrome Size 100/16 5Pc
Best Sewing Machine Needles for Multiple Layers of Fabric
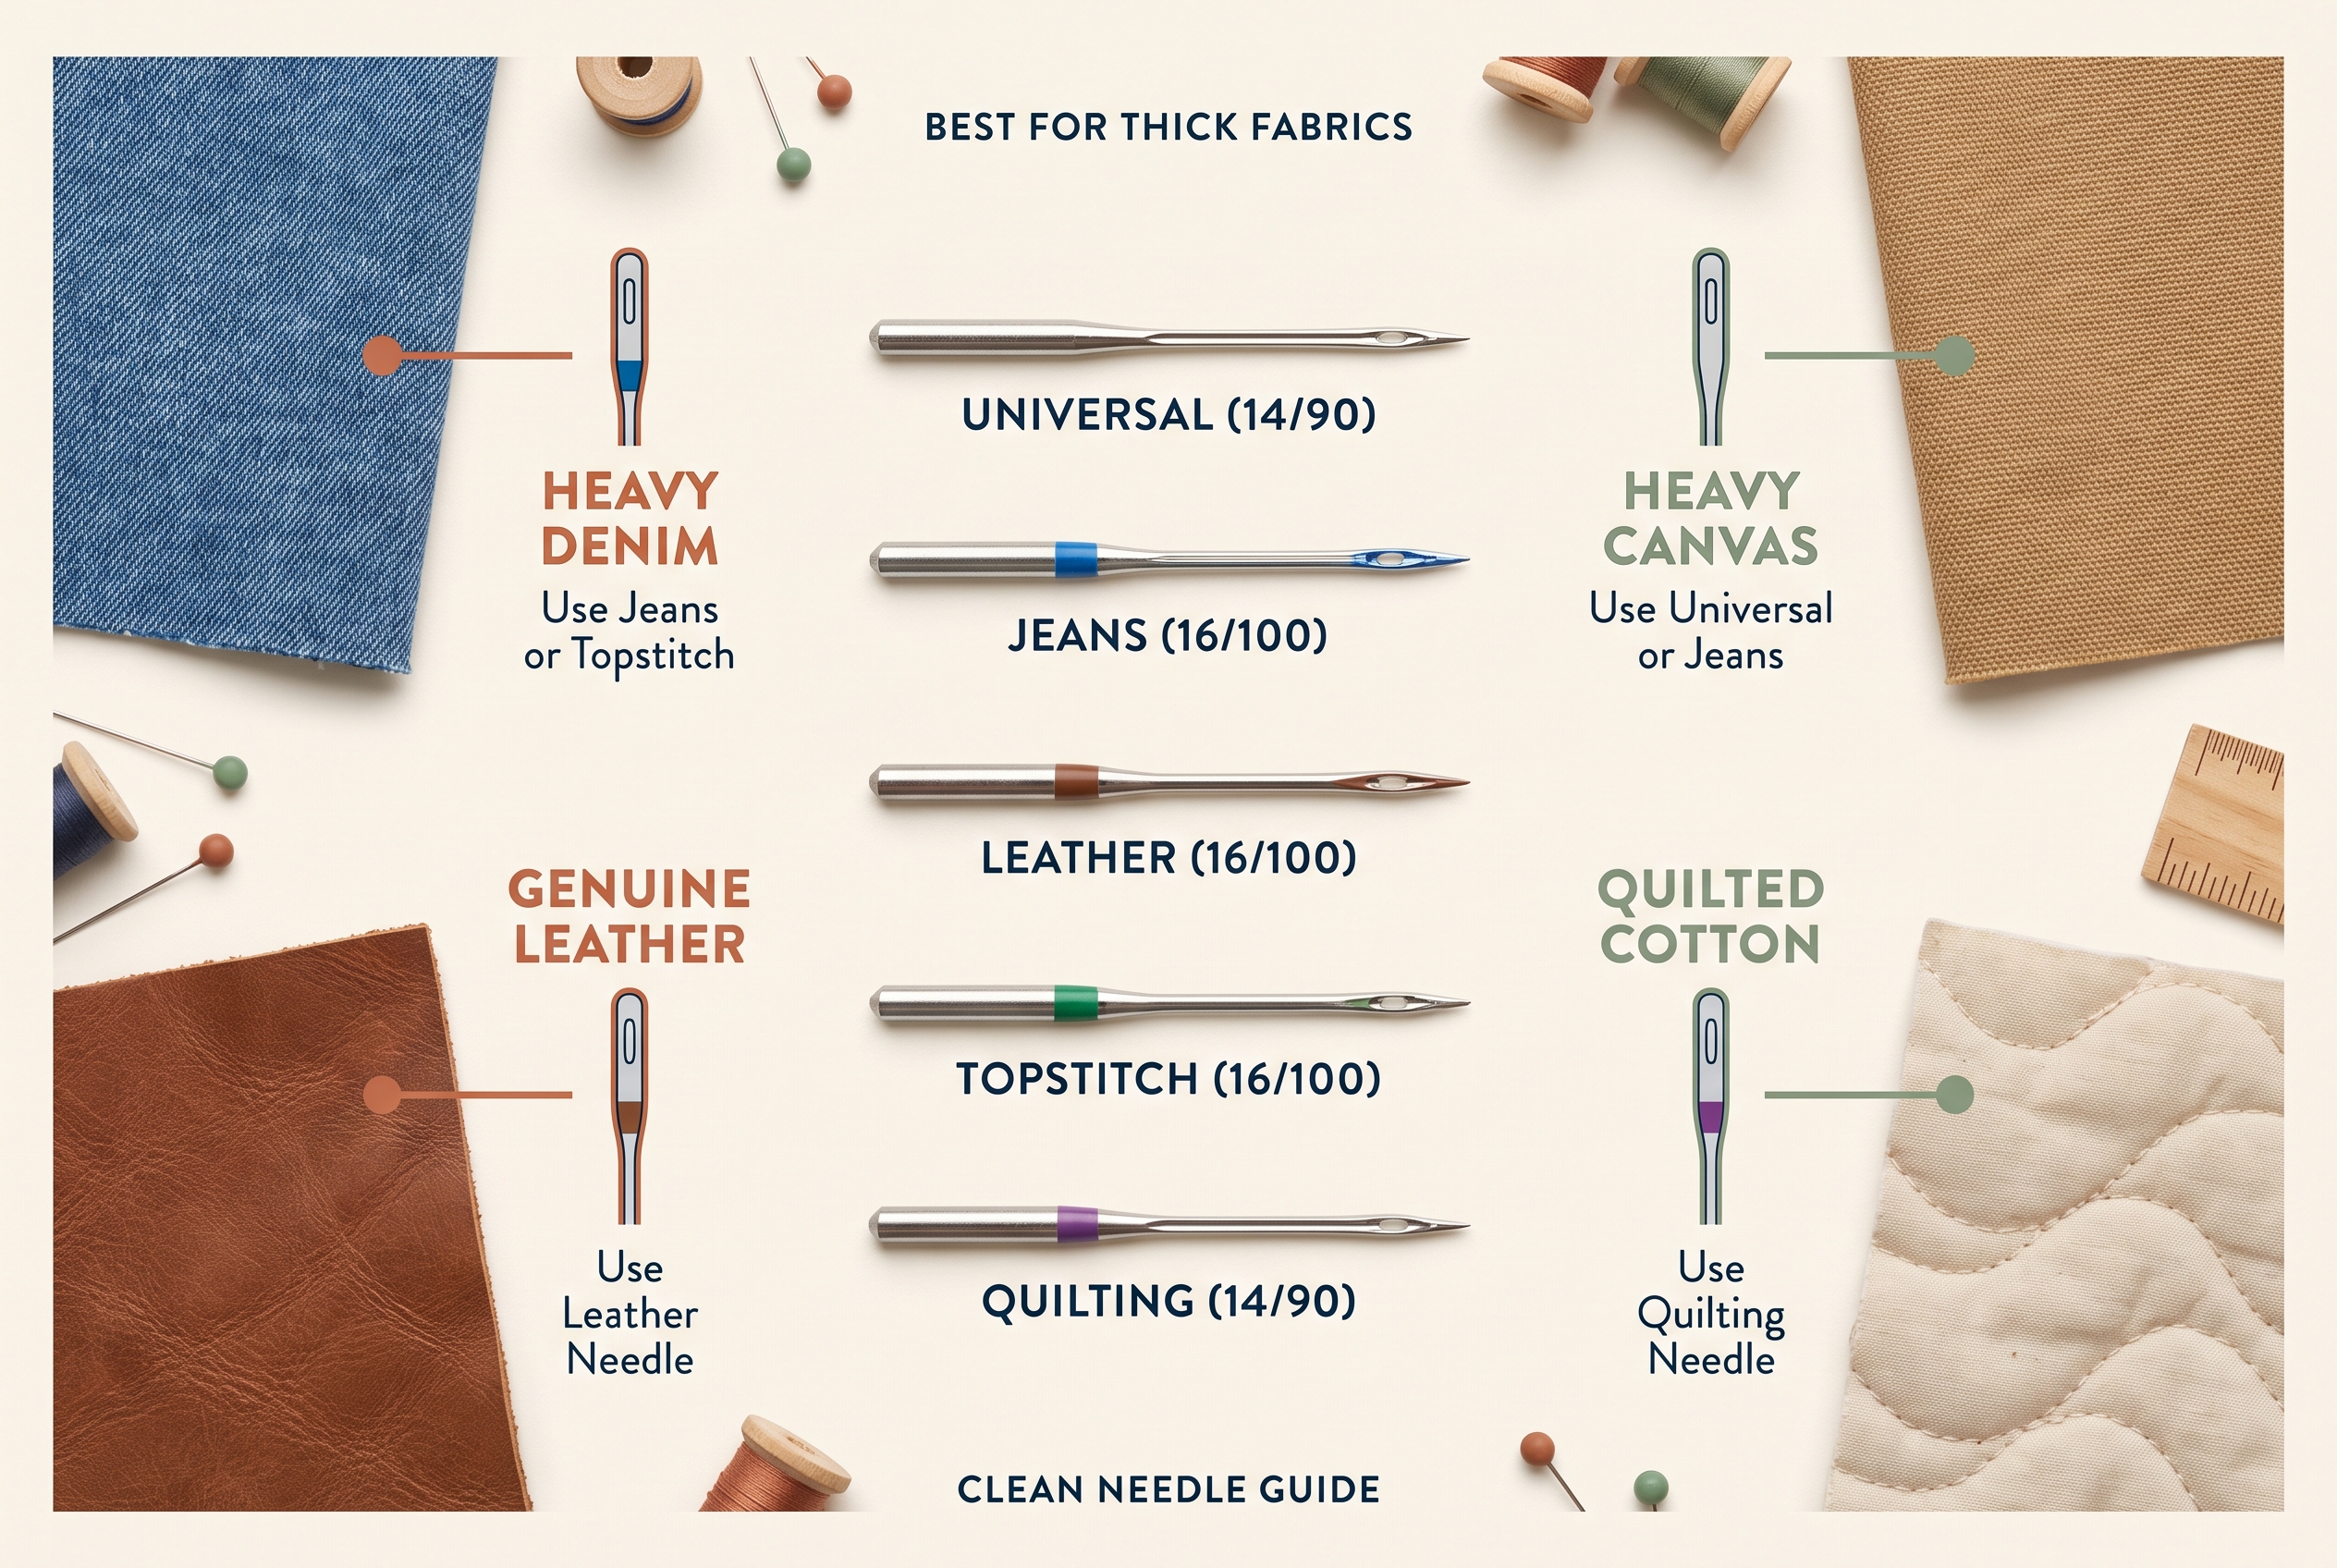
The best needles for sewing multiple layers are jeans/denim needles (size 100/16), topstitch needles (size 90/14 to 100/16), or quilting needles (size 90/14), depending on your specific fabric type and project. Each needle type is engineered with features that help it handle the increased resistance of thick layers.
Needle type comparison for thick layers:
| Needle Type | Best For | Key Feature | Size Range |
|---|---|---|---|
| Jeans/Denim | Denim, canvas, heavy cotton | Sharp point, reinforced shaft | 90/14 – 110/18 |
| Topstitch | Multiple layers, decorative stitching | Extra-large eye, very sharp point | 80/12 – 100/16 |
| Quilting | Quilted layers, batting | Tapered point, prevents damage | 75/11 – 90/14 |
| Leather | Leather, vinyl, suede | Cutting point (wedge-shaped) | 90/14 – 110/18 |
| Universal | Light to medium single layers | Slightly rounded point | 70/10 – 90/14 |
Topstitch needles deserve special mention for thick layers because they have an extra-large eye that accommodates heavier thread and reduces thread breakage. The very sharp point and strong shaft make them excellent for penetrating multiple fabric layers, even if you’re not doing decorative topstitching.
Quilting needles are designed specifically for piercing through the quilt sandwich (top fabric, batting, backing) without causing pulls or damage. The tapered point glides between fibers rather than cutting them, which is ideal when you want to preserve the integrity of your fabric layers.
For projects involving leather, vinyl, or faux leather combined with thick fabric layers, use a leather needle with its distinctive wedge-shaped cutting point. This needle actually cuts a small slit in the material rather than pushing between fibers, preventing tearing and needle breakage. Explore different needle types to understand which works best for your projects.


Universal Use for All Home Sewing Machines: Engineered with a flat shank side for perfect positioning in the needle holder and for smooth, reliable performance, SCHMETZ Topstitch Needles are compatible with all home sewing machine brands, including Brother, Janome, Singer, Baby Lock, and more

Needle System : HAX130N (Same as Schmetz 130N Topstitch needles)
How to Sew Through Thick Seams Without Needle Breaking
To sew through thick seams without breaking your needle, use a hump jumper (also called a seam leveler) to keep your presser foot level, reduce your sewing speed to about half your normal pace, and consider hammering or pressing bulky seam intersections flat before sewing. The key challenge at thick seam intersections is that your presser foot tilts, causing the needle to hit the throat plate at an angle.
Step-by-step technique for bulky seams:
- Prepare the seam intersection: Before you reach a bulky spot (like where a waistband meets side seams), stop with the needle down and lift the presser foot
- Insert a hump jumper: Place this small wedge-shaped tool behind the presser foot to level it as you approach the thick area
- Hand-walk the needle: Turn the handwheel manually to make 2-3 stitches through the thickest part, ensuring the needle fully penetrates before proceeding
- Resume at slow speed: Once past the bulk, remove the hump jumper and continue at reduced speed
- Use the seam leveler on the descent: As you come down off the thick seam, place the leveler in front of the presser foot to prevent it from diving forward
Alternative techniques when you don’t have a hump jumper:
- Fold a scrap of fabric to the same thickness as your seam and place it under the back of the presser foot to create a level surface
- Hammer seam intersections with a rubber mallet or use a wooden clapper to compress the layers before sewing
- Grade your seams by trimming each seam allowance to a different width so they don’t all stack at the same point
- Stitch in the ditch by sewing directly in the seam line where the fabric is already compressed
Common mistake: Trying to power through thick seams at full speed. This is the fastest way to break a needle because the machine doesn’t have time to fully penetrate before the needle bar starts to rise, creating lateral stress that snaps the needle.
Walking Foot vs Regular Foot for Thick Fabric
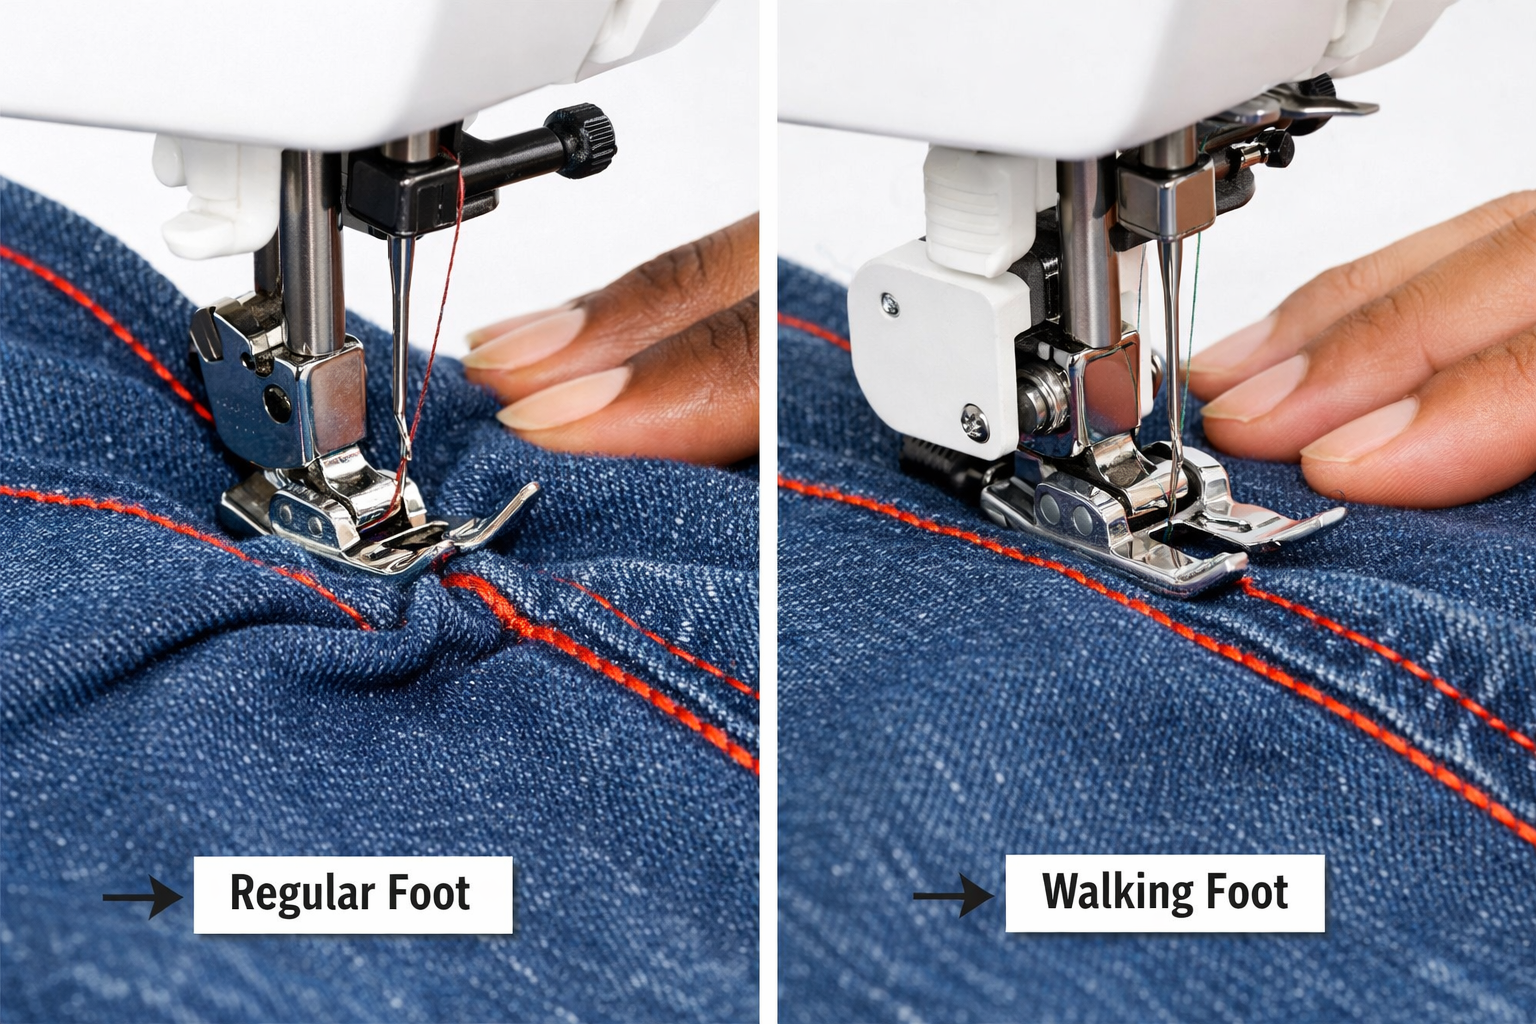
A walking foot feeds the top layer of fabric at the same rate as the bottom layer, preventing shifting and reducing needle stress, making it far superior to a regular presser foot for thick fabrics. A regular foot only applies downward pressure while the feed dogs move the bottom layer, which causes the top layer to lag behind on thick or slippery materials.
How a walking foot prevents needle breakage:
When fabric layers shift at different rates, the needle enters the fabric at a slight angle rather than perfectly vertical. This lateral stress is a primary cause of needle breakage on thick materials. The walking foot has its own set of feed dogs on top that grip the fabric surface and move in sync with the machine’s feed dogs below, keeping everything aligned.
When to use a walking foot:
- Sewing through 3+ layers of fabric
- Working with denim, canvas, or upholstery materials
- Quilting (especially with thick batting)
- Sewing vinyl, leather, or other materials that stick to a regular foot
- Matching stripes or plaids across seams
- Any project where fabric shifting causes puckering or uneven stitches
When a regular foot is sufficient:
- Single or double layers of lightweight to medium fabric
- Projects where you need to see the needle area clearly (walking feet are bulkier)
- Detailed work like topstitching close to edges where a walking foot’s size is cumbersome
Most modern sewing machines accept a snap-on walking foot attachment, though some high-end machines have a built-in dual-feed system that serves the same purpose. The investment in a walking foot (typically $30-60) pays for itself by preventing broken needles, skipped stitches, and fabric shifting. Learn about different presser feet and their specific uses.
Can I Use a Regular Needle for Quilting Thick Layers?
You can use a regular universal needle for quilting thin batting with lightweight cotton, but for thick batting or multiple layers, you should use a quilting needle (size 90/14) or a jeans needle (size 90/14 to 100/16) to prevent breakage and skipped stitches. Regular universal needles in the standard size 80/12 lack the shaft strength and point design needed for thick quilted layers.
Why quilting needles work better for thick layers:
Quilting needles have a tapered point that’s sharper than a universal needle but not as aggressive as a jeans needle. This design allows the needle to glide between the woven threads of quilting cotton without cutting or damaging them, while still having enough strength to penetrate through batting and backing fabric. The slightly rounded taper also helps prevent the needle from deflecting when it hits the dense areas where seams intersect.
Needle selection guide for quilting:
- Thin batting (2-4 oz) + cotton: Universal 80/12 or quilting 75/11 will work
- Medium batting (6-8 oz) + cotton: Quilting 90/14 (recommended) or universal 90/14
- Thick batting (10+ oz) or multiple layers: Jeans 90/14 to 100/16 for the extra shaft strength
- Minky or fleece backing: Stretch or ballpoint 90/14 to avoid snagging the knit fibers
Common mistake: Using the same needle for an entire quilt project. Quilting puts significant wear on needles because they’re constantly penetrating multiple layers. Change your needle after every 6-8 hours of quilting or when you notice skipped stitches or a popping sound as the needle enters the fabric.
How to Adjust Tension When Sewing Thick Materials
When sewing thick materials, reduce your upper thread tension by 1-2 numbers (or turn the dial slightly toward the lower numbers) to prevent excessive strain on the needle and reduce thread breakage. Thick fabrics require more thread to form each stitch because the thread must travel through more material, so loosening the tension slightly accommodates this increased thread consumption.
Signs your tension needs adjustment for thick fabric:
- Thread breaking frequently: Tension is too tight for the fabric thickness
- Needle breaking: Excessive tension pulls the needle off-center as it tries to form a stitch
- Puckered seams: Too much tension is compressing the thick fabric layers
- Bobbin thread visible on top: Tension is too loose (tighten slightly)
- Top thread loops on bottom: Tension is too tight (loosen more)
Step-by-step tension adjustment process:
- Test on scrap fabric: Always use the exact same fabric layers and thread you’ll use in your project
- Start with standard tension: Begin at your machine’s normal setting (usually 4-5 on a dial of 0-9)
- Sew a test seam: Stitch 4-5 inches and examine both sides of the fabric
- Adjust incrementally: If stitches look tight or thread breaks, reduce tension by one number
- Test again: Sew another sample and check for balanced stitches where the threads lock in the middle of the fabric layers
- Fine-tune: Make small adjustments until stitches look even on both sides
Important note about bobbin tension: In most cases, you should not adjust bobbin tension when sewing thick fabrics. The bobbin tension is factory-set and should remain constant. Only adjust upper thread tension to compensate for different fabric weights. If you’ve previously adjusted bobbin tension and are having problems, return it to the factory setting before troubleshooting further.
For comprehensive guidance on achieving perfect stitches, see our complete tension guide with test strips.
What’s the Difference Between Jeans Needles and Universal Needles?
Jeans needles have a sharp, reinforced point and a stronger shaft designed specifically for penetrating dense, tightly woven fabrics like denim and canvas, while universal needles have a slightly rounded point that works for a variety of light to medium-weight woven and knit fabrics. The structural differences make jeans needles far less likely to break when sewing thick layers.
Key structural differences:
| Feature | Jeans/Denim Needle | Universal Needle |
|---|---|---|
| Point shape | Very sharp, acute angle | Slightly rounded, less acute |
| Shaft strength | Reinforced, thicker | Standard thickness |
| Penetration power | High (cuts through dense weave) | Medium (pushes between fibers) |
| Best fabric types | Denim, canvas, heavy cotton, thick layers | Woven cotton, linen, light knits |
| Deflection resistance | High (stays straight under pressure) | Lower (can bend on thick fabric) |
The sharp point of a jeans needle is the critical difference. When a needle encounters dense fabric, a rounded point can deflect or bounce off the tight weave, causing the needle to hit the throat plate or bobbin case at an angle and break. The sharp point of a jeans needle pierces directly through the fabric without deflection.
When to choose each needle type:
- Use jeans needles for: Any weight of denim, canvas, duck cloth, heavy twill, multiple layers of cotton, upholstery fabric, or any project where you’re experiencing needle breakage with universal needles
- Use universal needles for: Quilting cotton, linen, chambray, lightweight wovens, stable knits (with some stretch), or general sewing with light to medium fabrics
Can you use a jeans needle for everything? Technically yes, but the very sharp point can damage delicate fabrics by cutting fibers rather than sliding between them. For lightweight fabrics, a universal needle is gentler and produces better results. Understanding needle selection helps you choose the right tool for each project.
Do I Need a Heavy Duty Sewing Machine for Thick Fabric?
You don’t necessarily need a heavy-duty machine for occasional thick fabric projects, but if you regularly sew denim, canvas, upholstery, or multiple thick layers, a heavy-duty machine provides a stronger motor, metal internal parts, and better feed dogs that make the work easier and prevent motor burnout. Most standard domestic machines can handle thick fabrics occasionally with the right needle, foot, and technique.
Signs your current machine can handle thick fabrics:
- Motor doesn’t strain or slow down significantly when sewing through 4-6 layers of denim
- Machine has adjustable presser foot pressure
- Feed dogs are strong enough to move thick fabric without slipping
- You can install a walking foot attachment
- Machine doesn’t skip stitches or make unusual noises on thick materials
Signs you need a heavy-duty machine:
- Motor strains, slows dramatically, or stops when encountering thick seams
- Machine skips stitches frequently even with correct needle and tension
- Feed dogs slip on thick fabric instead of moving it forward
- You smell burning or the motor gets very hot during thick fabric projects
- You regularly sew upholstery, bags, outdoor gear, or heavy garments
Heavy-duty machine advantages for thick fabrics:
- Stronger motor: Typically 1.0+ amps vs. 0.6-0.8 amps in standard machines, providing consistent power through thick layers
- Metal frame and internal parts: Less vibration and better stability when penetrating dense fabric
- Higher presser foot lift: Usually 12-13mm vs. 9-10mm, accommodating thicker fabric layers
- Stronger feed dogs: Better grip and more consistent fabric feeding
- Built-in needle threader that works with larger needles: Many standard machines’ threaders don’t accommodate size 100/16 or 110/18 needles
For sewists who work with thick fabrics regularly, investing in a heavy-duty machine prevents frustration and extends the life of your equipment. However, if you only occasionally sew thick layers, your standard machine will work fine with proper technique, the right needle, and a walking foot.
How to Sew Over Bulky Seams Like Waistbands
To sew over bulky seams like waistbands, use a hump jumper or folded fabric scrap to level your presser foot, hand-walk the needle through the thickest part, and sew at half speed. The primary challenge is that when your presser foot tilts on a thick seam, the needle enters at an angle and can break or create skipped stitches.
Detailed technique for waistband intersections:
- Approach slowly: As you near the bulky intersection, reduce speed to about 50% of normal
- Stop before the bulk: With the needle down, stop about 1/4 inch before the thick seam
- Level the presser foot: Place a hump jumper, Jean-a-ma-jig, or folded fabric scrap behind the presser foot so it’s level rather than tilted up
- Hand-walk through: Turn the handwheel manually to make 3-4 stitches through the thickest part, checking that the needle fully penetrates and rises before each stitch
- Resume slow sewing: Once the needle is through the bulk, remove the leveling tool and continue at reduced speed
- Level on the descent: As you come down off the thick seam, place the leveling tool in front of the presser foot to prevent it from diving forward and creating uneven stitches
Additional strategies for extremely bulky seams:
- Hammer the intersection: Use a rubber mallet or wooden clapper to compress the seam allowances before sewing, making them flatter and easier to penetrate
- Grade seam allowances: Trim each layer of seam allowance to a different width (1/4″, 3/8″, 1/2″) so they don’t all stack at the same point
- Stitch in the ditch: Sew directly in the existing seam line where the fabric is already compressed and the needle has an easier path
- Use a size 110/18 needle: The largest needle size provides maximum strength for the most challenging intersections
- Reduce presser foot pressure: If your machine allows adjustment, lower the pressure slightly so the foot can ride over the bulk more easily
Common mistake: Trying to force the fabric through by pulling it or pushing from behind. This bends the needle and guarantees breakage. Always let the feed dogs do the work, and if the machine is struggling, stop and hand-walk through the difficult section. Learn about proper feed dog function to understand how fabric should move through your machine.
Common Mistakes When Sewing Thick Layers That Break Needles
The most common mistakes that break needles when sewing thick layers are using the wrong needle type or size, sewing too fast, forcing fabric through the machine, and continuing to use a dull or damaged needle. Each of these errors creates stress that the needle can’t withstand, leading to breakage mid-project.
Top needle-breaking mistakes and solutions:
1. Using a universal needle for thick fabric
- Why it breaks: Universal needles have a slightly rounded point and standard shaft that deflects on dense fabric
- Solution: Switch to a jeans needle (size 90/14 to 100/16) with a sharp point and reinforced shaft
2. Sewing at full speed through thick layers
- Why it breaks: The needle doesn’t have time to fully penetrate before the next stitch cycle begins, creating lateral stress
- Solution: Reduce speed to 50% or less when sewing through thick or multiple layers
3. Pulling or pushing fabric
- Why it breaks: Manual force bends the needle as it tries to penetrate the fabric
- Solution: Let the feed dogs move the fabric naturally; your hands should only guide, not force
4. Using a dull or damaged needle
- Why it breaks: A burr on the point catches in fabric fibers and creates resistance that snaps the needle
- Solution: Change your needle every 6-8 hours of sewing or after hitting a pin
5. Incorrect threading or tension
- Why it breaks: Thread pulls the needle off-center as it tries to form a stitch
- Solution: Rethread completely with the presser foot up, and adjust tension for thick fabric
6. Not using a walking foot
- Why it breaks: Fabric layers shift at different rates, causing the needle to enter at an angle
- Solution: Install a walking foot for any project with 3+ layers or thick materials
7. Sewing over pins
- Why it breaks: Hitting a pin damages the needle point and can snap the needle immediately
- Solution: Always remove pins before they reach the needle, or pin perpendicular to the seam and remove as you sew
8. Ignoring machine strain signals
- Why it breaks: A struggling motor can’t maintain consistent needle timing, causing the needle to hit internal parts
- Solution: If your machine slows down, makes unusual noises, or smells hot, stop and reassess your needle, settings, and technique
Understanding why needles break helps you prevent the problem before it happens.
Alternatives to Sewing Through Really Thick Fabric by Hand
When machine sewing through extremely thick fabric becomes impractical, alternatives include using fabric glue or fusible tape for hems, hand-sewing with a leather needle and waxed thread, reducing bulk by grading or trimming seam allowances, or taking the project to a professional with an industrial machine. Sometimes the best solution is to redesign the construction method to avoid the thick area entirely.
Practical alternatives for extremely thick layers:
Fabric adhesives:
- Fabric glue (like Aleene’s Fabric Fusion or Beacon Fabri-Tac) creates a permanent bond for hems and seams
- Fusible hem tape (like Stitch Witchery) melts when ironed to bond layers without sewing
- Best for: Hems on jeans, canvas bags, or anywhere the seam won’t experience significant stress
Hand-sewing techniques:
- Leather needle and waxed thread: Provides more control and strength than machine sewing for very thick materials
- Saddle stitch: A hand-sewing technique that creates a strong, professional-looking seam
- Best for: Leather goods, heavy canvas, or small areas where machine access is difficult
Construction modifications:
- Grade seam allowances: Trim each layer to a different width so they don’t stack
- Topstitch instead of enclosing: Use exposed seams with topstitching rather than enclosed seams that double the thickness
- Reduce seam allowance: Use 1/4″ instead of 5/8″ to minimize bulk at intersections
- Best for: Any project where you can control the construction method
Professional services:
- Industrial machine sewing: Tailors and upholstery shops have machines designed for thick materials
- Leather workers: Specialize in extremely thick materials with appropriate equipment
- Best for: Projects beyond your machine’s capability or one-time thick fabric needs
Common mistake: Assuming you must sew through every thick area. Sometimes the best solution is to redesign the construction to avoid the problem. For example, instead of hemming thick denim with a traditional folded hem (creating 4 layers), use a flat-felled seam or single-fold hem with topstitching (creating only 2-3 layers).
Is a Leather Needle the Same as a Denim Needle?
No, a leather needle has a wedge-shaped cutting point that slices through leather and vinyl, while a denim needle has a sharp piercing point that penetrates between woven fabric threads. Using the wrong needle type can damage your fabric or cause needle breakage.
Key differences between leather and denim needles:
| Feature | Leather Needle | Denim/Jeans Needle |
|---|---|---|
| Point shape | Wedge-shaped cutting point | Sharp, acute piercing point |
| How it works | Cuts a small slit in the material | Pierces between woven threads |
| Best for | Leather, vinyl, suede, faux leather | Denim, canvas, heavy cotton, twill |
| Fabric damage risk | Will cut and damage woven fabrics | May struggle with leather (can tear) |
| Hole appearance | Clean slit | Round puncture |
When to use a leather needle:
- Sewing genuine leather, suede, or nubuck
- Working with vinyl, pleather, or faux leather
- Projects like bags, upholstery, or garments with leather accents
- Any material where you need to cut through rather than push between fibers
When to use a denim needle:
- Any weight of denim or chambray
- Canvas, duck cloth, or heavy cotton
- Multiple layers of woven fabric
- Tightly woven materials like twill or drill cloth
What happens if you use the wrong needle?
- Leather needle on denim: The cutting point will slice through the woven threads, potentially weakening the fabric and creating visible damage
- Denim needle on leather: The piercing point may tear the leather rather than making a clean hole, and the needle is more likely to break because leather doesn’t have a woven structure to penetrate between
Can you use a leather needle for thick denim? Only as a last resort if you have no other option and are experiencing repeated breakage with denim needles. The leather needle’s cutting action will work, but it may damage the fabric structure. It’s better to use a larger size denim needle (100/16 or 110/18) or a topstitch needle with its extra-strong shaft.
How Slow Should I Sew When Working With Thick Layers?
When sewing thick layers, reduce your speed to approximately 50% of your normal sewing pace, or about 400-600 stitches per minute if your machine displays speed. For extremely thick intersections like waistband seams, slow down even further or hand-walk the needle through by turning the handwheel manually.
Why speed matters for thick fabric:
At high speeds, the needle bar moves up and down so quickly that the needle doesn’t have time to fully penetrate thick fabric before the next stitch cycle begins. This creates lateral stress on the needle shaft, causing it to bend and eventually snap. Slower speeds give the needle time to pierce completely through all layers, rise fully, and form a proper stitch without strain.
Speed guidelines by fabric thickness:
- 2-3 layers of cotton: 70-80% of normal speed (about 800-1000 stitches per minute)
- 4-6 layers or medium denim: 50-60% of normal speed (about 600-700 stitches per minute)
- Heavy denim or canvas: 40-50% of normal speed (about 400-600 stitches per minute)
- Bulky seam intersections: Hand-walk or slowest possible speed (about 200-300 stitches per minute)
Signs you’re sewing too fast:
- Needles breaking frequently
- Skipped stitches appearing in thick areas
- Machine motor straining or slowing down audibly
- Popping or clicking sounds as the needle enters fabric
- Thread breaking repeatedly
- Fabric not feeding smoothly
Machine speed control options:
- Foot pedal control: Press more gently for slower, more controlled speed
- Speed limiter: Many modern machines have a slider or dial that sets maximum speed regardless of pedal pressure
- Start/stop button: Provides consistent speed without pedal variation
- Handwheel: Manual control for the most challenging sections
Common mistake: Thinking that powering through thick fabric at full speed will make the project go faster. In reality, you’ll spend more time re-threading, changing broken needles, and fixing skipped stitches than you would have spent simply sewing at an appropriate slower pace from the beginning.
Conclusion
Learning how to sew thick layers without breaking needles transforms frustrating projects into successful ones. The key is understanding that thick fabrics require a different approach: specialized needles (jeans, topstitch, or leather needles in size 90/14 to 110/18), reduced sewing speed, proper presser feet (especially walking feet), and adjusted tension settings. When you encounter bulky seam intersections, use leveling tools like hump jumpers and hand-walk through the thickest sections rather than forcing the machine.
Your action plan for sewing thick layers successfully:
- Assess your fabric and choose the appropriate needle type and size before you begin
- Install a walking foot if you’re working with 3+ layers or any thick material
- Test on scraps using the exact fabric layers and thread you’ll use in your project
- Adjust tension down by 1-2 numbers from your standard setting
- Reduce speed to about 50% of your normal pace
- Change needles frequently, don’t try to complete an entire thick fabric project with one needle
- Use leveling tools for bulky seam intersections and hand-walk through the thickest parts
Remember that proper needle maintenance and understanding your machine’s tension system are foundational skills that prevent most sewing problems. With the right tools, settings, and techniques, your machine can handle thick layers confidently, and you’ll complete projects like hemming jeans, making canvas bags, or quilting thick batting without a single broken needle.
Frequently Asked Questions
Can I use a size 80 needle for thick fabric? No, a size 80/12 needle is too small and weak for thick fabric and will break almost immediately. Use size 90/14 minimum for thick materials, and size 100/16 or 110/18 for very heavy fabrics like multiple denim layers or canvas.
Why does my needle break only at thick seam intersections? The presser foot tilts when it encounters a thick seam, causing the needle to enter at an angle rather than vertically. Use a hump jumper to level the presser foot and hand-walk through the intersection to prevent breakage.
Do I need to adjust bobbin tension for thick fabric? No, in most cases you should not adjust bobbin tension. Only adjust the upper thread tension (reduce it by 1-2 numbers) when sewing thick materials. Bobbin tension should remain at the factory setting.
Can a walking foot prevent needle breakage? Yes, a walking foot prevents fabric layers from shifting at different rates, which keeps the needle entering vertically rather than at an angle. This significantly reduces needle stress and breakage on thick fabrics.
How often should I change needles when sewing thick fabric? Change your needle every 6-8 hours of sewing time when working with thick materials, or immediately if you hit a pin or notice skipped stitches. Thick fabrics dull needles faster than lightweight materials.
What’s the strongest sewing machine needle? Size 110/18 jeans or leather needles are the strongest available for home sewing machines. They have reinforced shafts designed to penetrate the thickest materials without bending or breaking.
Can I sew leather with a denim needle? It’s not recommended. Denim needles have a piercing point that may tear leather rather than making a clean hole. Use a leather needle with its wedge-shaped cutting point for leather, vinyl, and suede.
Why does my machine skip stitches on thick fabric? Skipped stitches on thick fabric usually indicate a dull needle, wrong needle type, or needle that’s too small for the fabric weight. Switch to a fresh jeans needle in size 90/14 or larger and reduce your sewing speed.
Should I use a heavier thread for thick fabric? Yes, use thread weight that matches your fabric weight. For thick materials, use all-purpose polyester thread or heavy-duty thread (like Gutermann Extra Strong) with a topstitch needle that has a larger eye to accommodate it.
Can I sew through 8 layers of denim? Most home sewing machines struggle with 8 layers of denim. If you must sew this thickness, use a size 110/18 jeans needle, a walking foot, hand-walk through the layers, and consider whether an industrial machine would be more appropriate.
What causes a popping sound when sewing thick fabric? A popping sound usually means your needle is dull and catching on fabric fibers rather than piercing cleanly through them. Change to a fresh, sharp needle in the appropriate size and type for your fabric.
Do I need a special presser foot for thick seams? A walking foot is the most helpful presser foot for thick fabrics, but a hump jumper (Jean-a-ma-jig) is specifically designed to level the presser foot when crossing thick seam intersections and prevents needle breakage at those points.