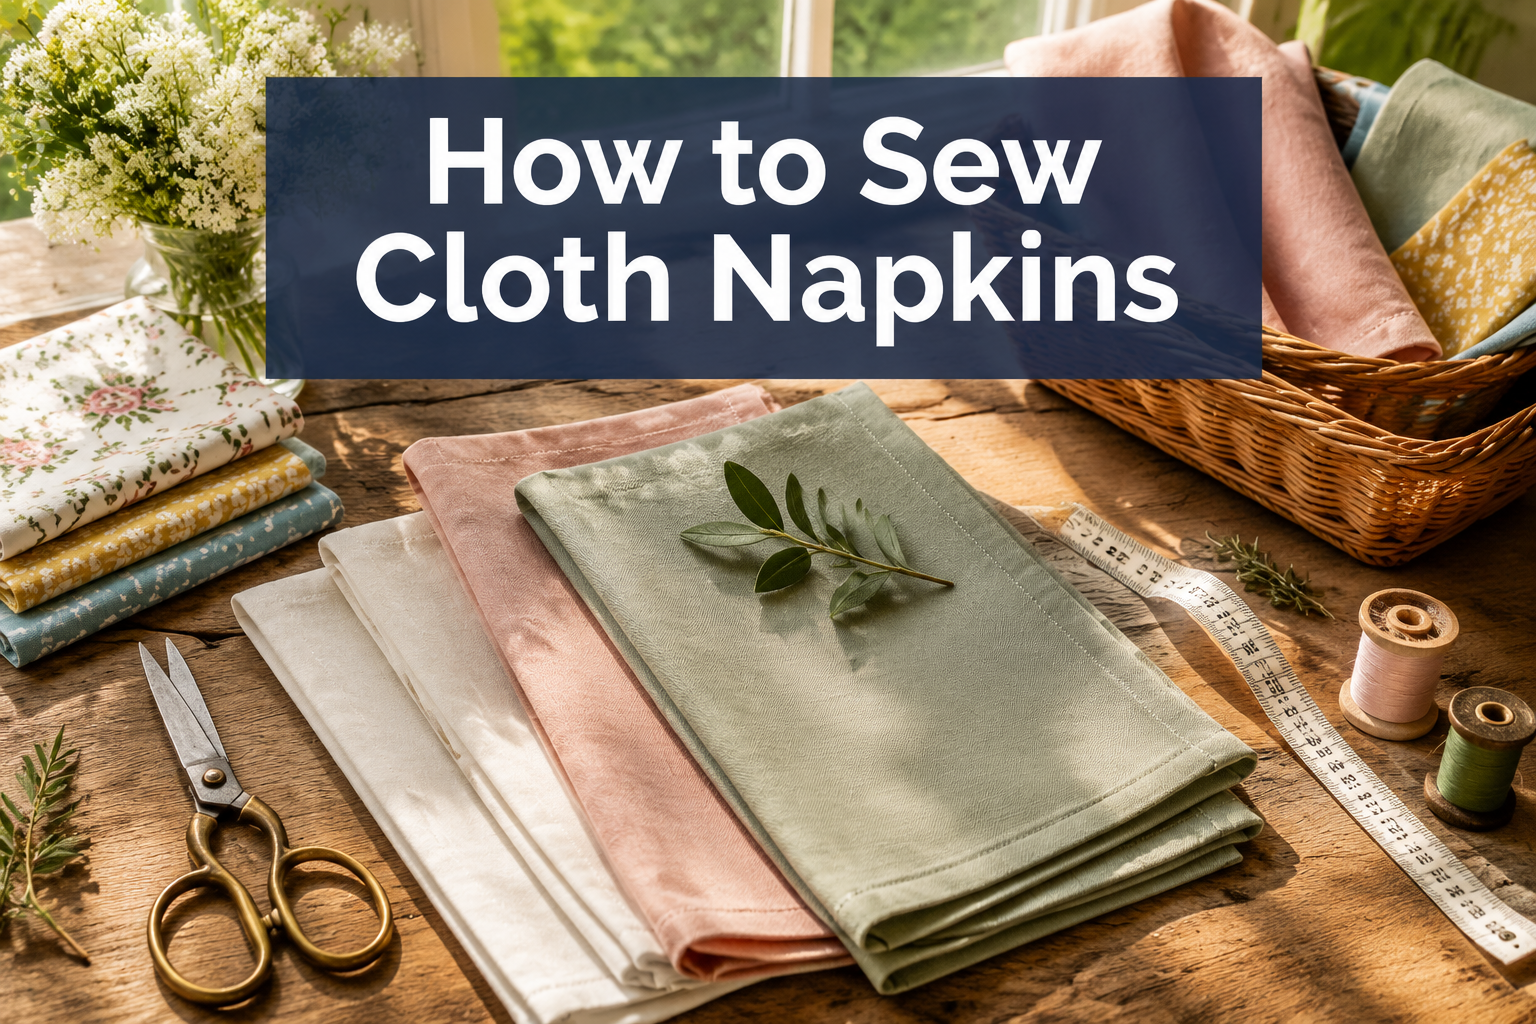
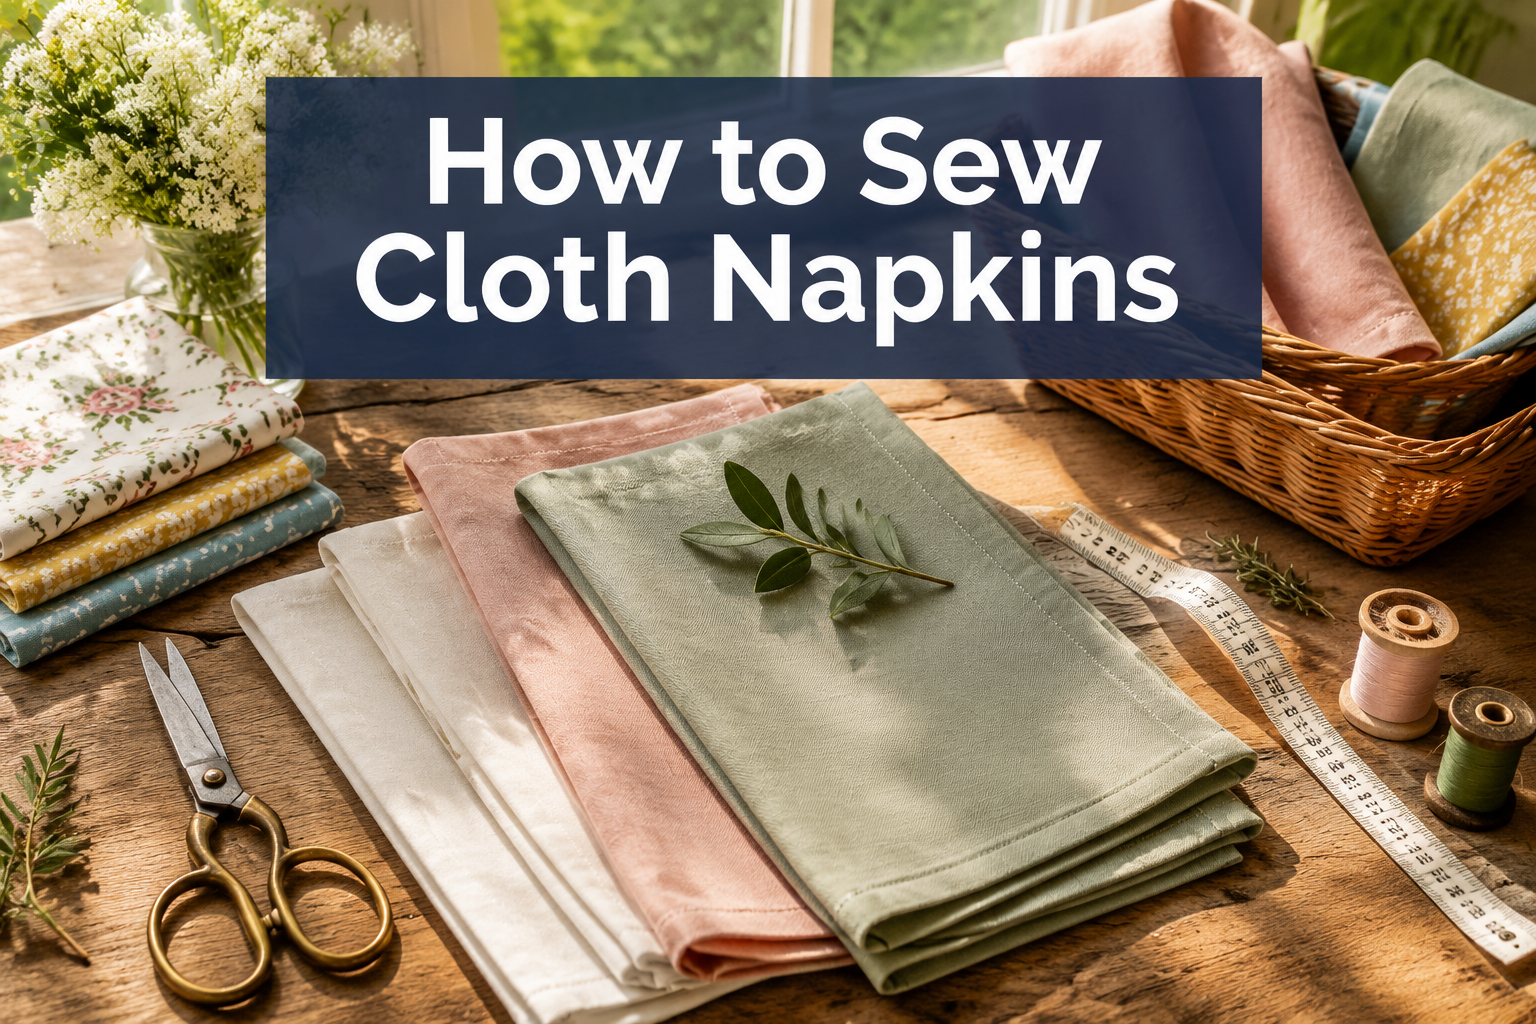
Sewing cloth napkins is one of the easiest and most rewarding beginner projects that delivers professional-looking results in under 15 minutes per napkin. You need only basic straight-stitch skills, minimal fabric (a half-yard makes four napkins), and your choice of a simple rolled hem or elegant mitered corners. This guide walks you through fabric selection, sizing, hemming techniques, and troubleshooting to help you create beautiful, reusable napkins that elevate any table setting.
Key Takeaways
- Beginners welcome: Cloth napkins require only straight stitching and are perfect for learning basic sewing skills
- Fabric choice matters: Cotton and linen are the best options for durability, absorbency, and easy care
- Standard sizing: Most homemade napkins measure 16×16 to 20×20 inches, with dinner napkins at 18×18 inches being most popular
- No serger needed: A regular sewing machine handles all napkin-making techniques beautifully
- Two main hem styles: Mitered corners create a tailored look; rolled hems offer a softer, quicker finish
- Cost-effective: Homemade cloth napkins cost $1-3 each versus $5-15 for store-bought versions
- Fabric efficiency: One yard of 44-45 inch wide fabric yields four 18×18 inch napkins with minimal waste
- Quick project: Each napkin takes 10-15 minutes once you’ve established your rhythm
- Common mistake: Bunching corners result from too much fabric in the fold, trim excess before stitching
- Eco-friendly investment: Cloth napkins pay for themselves after 10-20 uses compared to paper napkins
Can Beginners Sew Cloth Napkins?
Absolutely, cloth napkins are one of the best beginner sewing projects because they require only straight stitching, forgiving fabric, and no complex pattern pieces. If you can sew a straight line and turn a corner, you can make beautiful napkins.
The project teaches fundamental skills without overwhelming new sewers:
- Straight seams: All napkin edges are straight lines, perfect for practicing consistent seam allowances
- Corner techniques: You’ll learn to pivot at corners, a skill that transfers to countless other projects
- Pressing matters: Napkins demonstrate how proper ironing creates professional results
- Fabric handling: Working with square pieces helps you understand grain lines and fabric behavior
Choose this project if you’re new to sewing and want something practical that builds confidence. Most beginners complete their first napkin in 20-30 minutes, then speed up to 10-15 minutes per napkin as they develop a rhythm.
Common beginner mistake: Rushing the pressing steps. Taking time to press each fold crisply makes the final stitching much easier and creates sharper corners. For more foundational sewing skills, check out our beginner sewing guide.
What Is the Best Fabric for Cloth Napkins?
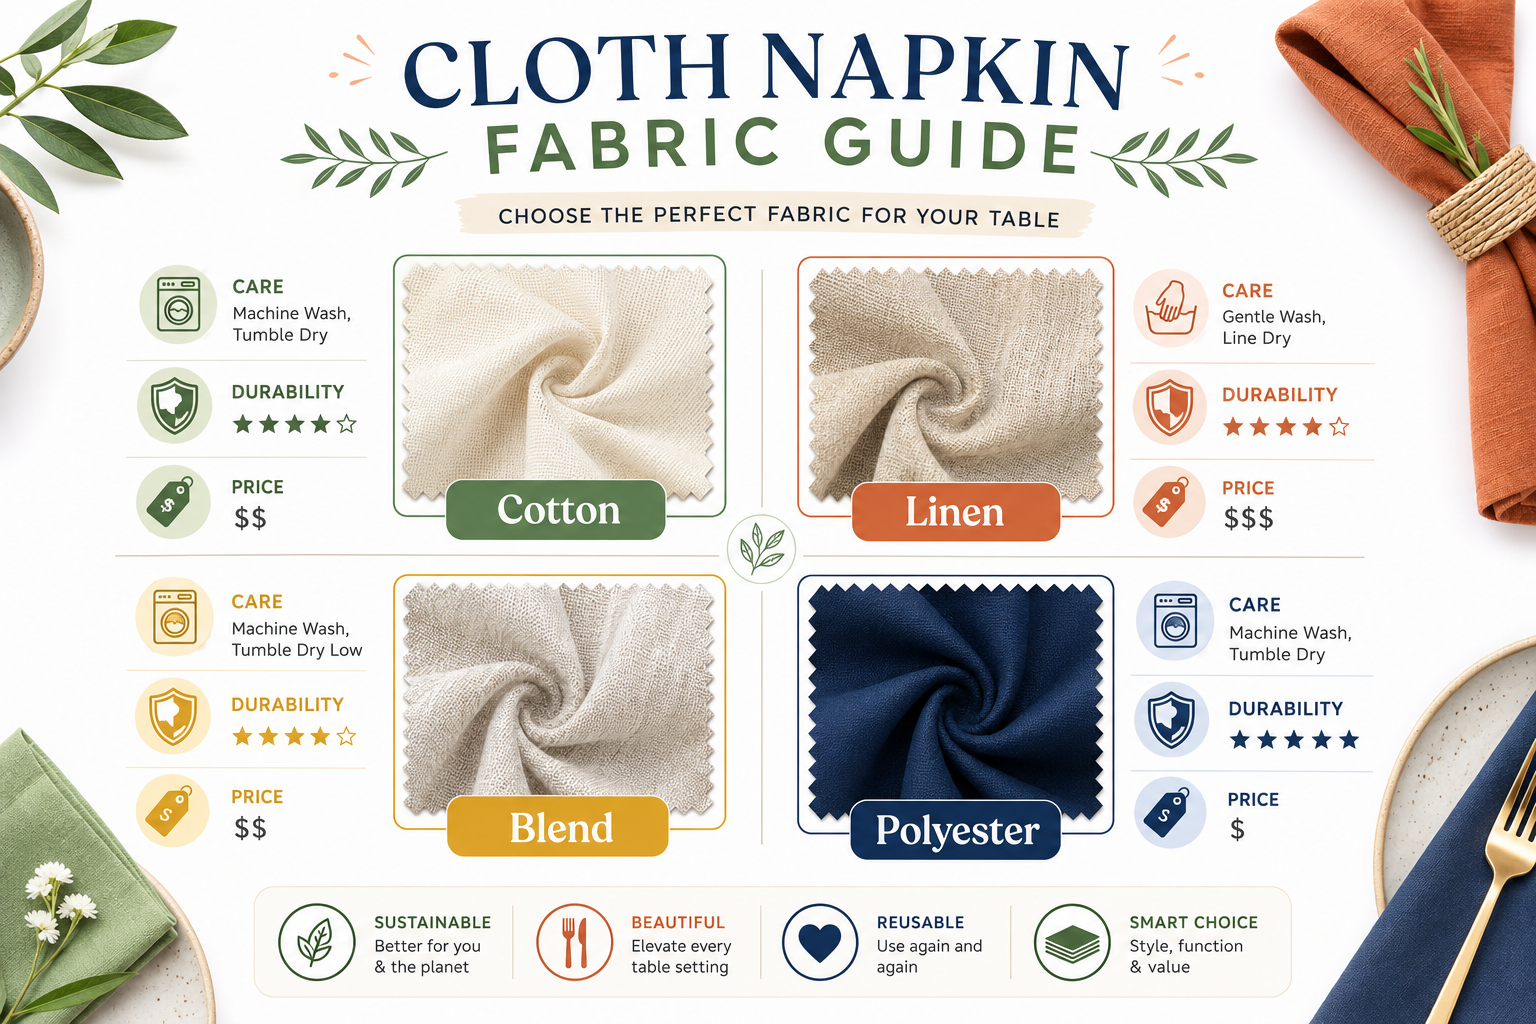
Cotton and linen are the top fabric choices for cloth napkins because they’re highly absorbent, durable through repeated washing, and become softer with age. Medium-weight cotton (quilting cotton or broadcloth) and linen offer the best balance of function and ease of sewing.
Fabric comparison:
- 100% cotton: Affordable ($8-12/yard), easy to sew, wide color selection, absorbs spills well, minimal shrinkage when pre-washed
- 100% linen: Premium feel ($15-25/yard), extremely durable, naturally antimicrobial, wrinkles easily (part of its charm), becomes softer with each wash
- Cotton-linen blend: Best of both worlds ($10-18/yard), less wrinkling than pure linen, good absorbency, easier to press
- Avoid: Polyester or poly-blend fabrics repel liquids rather than absorb them, making them poor napkins despite being wrinkle-resistant
Weight matters: Choose medium-weight fabrics (4-6 oz per square yard). Lightweight fabrics feel flimsy and don’t drape well; heavyweight fabrics create bulky hems and corners.
Pattern considerations: Solid colors and small-scale prints work best. Large prints may look awkward when cut into 18-inch squares. Consider how the pattern will look when the napkin is folded.
Pre-washing is mandatory: Wash and dry your fabric before cutting to prevent shrinkage after your napkins are finished. Cotton can shrink 3-5% on first wash. For more on proper fabric care, see our detailed guide.

Package Includes: You will receive a 63-inch wide and 2-yard (1.8m) long muslin fabric; the suitable size design provides plenty of material for your sewing and creative projects; Note: order QTY more than 1, receive several separate packs

✅ CONTENTS & SIZE: 100% cotton and 63" wide natural unbleached medium weight natural cotton muslin fabric. Order of multiple quantities will be shipped in continuous length.

[Large Size]: Each piece measures 59 inches(150cm) x 1 yard(36 inches/91.44cm), 280GSM, 10oz. meeting your different needs for DIY projects. Note: The fabric is only cut into 1 Yard by 59-Inch(150cm). When you buy more than one, you will get corresponding pieces which is 1 Yard by 59-Inch, not a continuous piece.
What Size Should Homemade Cloth Napkins Be?
Standard homemade cloth napkins measure 18×18 inches for dinner napkins, 16×16 inches for lunch napkins, and 20×20 inches for formal dining. The 18×18 inch size is the most versatile and popular choice for everyday use.
Size guide by use:
- Cocktail napkins: 10×10 to 12×12 inches (appetizers, drinks)
- Lunch napkins: 16×16 inches (casual meals, children)
- Dinner napkins: 18×18 inches (everyday dining, most versatile)
- Formal napkins: 20×20 to 22×22 inches (special occasions, lap coverage)
Cutting tip: Add 1 inch to your finished size for hem allowances. For 18×18 inch finished napkins, cut your fabric squares at 19×19 inches. This allows for a ½-inch double-fold hem on all sides.
Why 18×18 works best: This size provides adequate lap coverage, folds nicely for table presentation, and fits standard napkin rings. It’s large enough to be functional but not so large that it overwhelms smaller tables.
Fabric efficiency: The 18-inch size maximizes fabric use with minimal waste when working with standard 44-45 inch wide fabric. You can cut two napkins across the width with only 8-10 inches of selvage waste.
How Much Fabric Do I Need for Cloth Napkins?
You need approximately ½ yard of 44-45 inch wide fabric to make four 18×18 inch napkins, or 1 yard to make eight napkins. This calculation includes hem allowances and accounts for standard fabric width.
Fabric calculation formula:
- Finished napkin size + 1 inch (for hems) = cutting size
- Divide fabric width by cutting size = napkins per row
- Multiply cutting size by number of rows needed = total length
Example for 18×18 inch napkins:
- Cutting size: 19×19 inches
- Fabric width: 45 inches ÷ 19 inches = 2 napkins across
- For 4 napkins: 2 rows × 19 inches = 38 inches (1.06 yards)
- Purchase: ½ yard gives you 18 inches (2 napkins); 1¼ yards gives you 8 napkins
Practical shopping guide:
- 4 napkins: ½ yard (actual: 18 inches)
- 8 napkins: 1¼ yards
- 12 napkins: 2 yards
- 16 napkins (full set): 2½ yards
Waste consideration: You’ll have 6-8 inches of selvage waste per yard, plus small corner scraps. Save these for other projects like coasters or pot holders.
Pattern matching: If using directional prints or plaids, add 10-15% extra fabric to ensure pattern alignment across all napkins.
Where to Buy Fabric for Making Napkins
Local fabric stores, online retailers like Fabric.com and Mood Fabrics, and big-box craft stores (Joann, Hobby Lobby) all carry suitable napkin fabrics, with prices ranging from $8-25 per yard depending on fiber content and quality.
Best sources by priority:
Local fabric stores:
- Pros: Touch and see fabric quality, get cutting advice, support local business
- Cons: Limited selection, higher prices
- Best for: First-time napkin makers who want hands-on help
Online specialty retailers:
- Fabric.com, Mood Fabrics, Hawthorne Supply Co.
- Pros: Huge selection, competitive pricing, detailed specifications
- Cons: Can’t touch before buying, shipping costs
- Best for: Experienced sewers who know what they want
Big-box craft stores:
- Joann, Hobby Lobby, Michaels
- Pros: Frequent sales (40-60% off coupons), convenient locations
- Cons: Variable quality, overwhelming selection
- Best for: Budget-conscious makers; wait for sales
Thrift and repurpose options:
- Flat sheets, tablecloths, curtain panels
- Pros: Very affordable ($2-5 for enough fabric for 12+ napkins), already hemmed edges
- Cons: Limited colors, may show wear
- Best for: Practice napkins or rustic aesthetic
What to look for: Ask for quilting cotton, linen, or cotton-linen blends in medium weight. Avoid anything labeled “home dec” or “upholstery” (too heavy) or “voile” or “lawn” (too lightweight).

100% Good Cotton Fabric: Our cotton fabric is made by 100% premium cotton which has a medium-weight 5.2oz (145g/square meter) plain weave. Our cotton fabric in medium weight won’t shrink much after washing. It has great strength and durability, breathable and soft touch, which is perfect for any quilting, sewing and crafting projects, from toys and bags to home decoration.

100% Good Cotton Fabric: Our cotton fabric is made by 100% premium cotton which has a medium-weight 5.2oz (145g/square meter) plain weave. Our cotton fabric in medium weight won’t shrink much after washing. It has great strength and durability, breathable and soft touch, which is perfect for any quilting, sewing and crafting projects, from toys and bags to home decoration.

【Exquisite Quilt Cotton Balls】- Crafted from 100% cotton batting, our quilt cotton balls offer a natural softness and warmth that enhances the comfort of your quilts. The cotton is fluffy and resistant to tearing, making it ideal for quilting projects.
Do I Need a Serger to Make Cloth Napkins?
No, you don’t need a serger to make cloth napkins, a regular sewing machine with a straight stitch is all that’s required. Sergers can finish edges quickly but aren’t necessary because napkin hems are folded and stitched, which encloses raw edges completely.
Why a regular machine works perfectly:
- Double-fold hems: The standard napkin hem folds the raw edge under twice, eliminating fraying without edge finishing
- Straight stitch only: Napkins require only basic straight stitching, which every sewing machine can do
- No stretch fabric: Unlike knits, woven napkin fabrics don’t need the stretch accommodation a serger provides
When a serger helps (but isn’t required):
- Speed: A serger can finish edges in one pass before hemming, saving time on large batches
- Fraying prevention: Very loose-weave linens benefit from serged edges before hemming
- Professional look: Serged interior edges look tidy if you use a narrow hem
Machine settings for napkins:
- Stitch length: 2.5-3.0 mm (standard)
- Needle: Universal 80/12 or 90/14
- Thread: All-purpose cotton or polyester
- Presser foot: Standard or edge-stitch foot
If you’re experiencing tension issues or thread problems on your regular machine, address those first, napkins are a great diagnostic project for checking your machine’s basic performance.
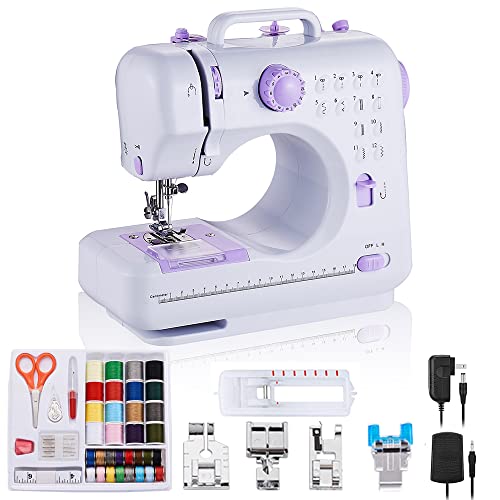
[Size and weight of sewing machine] Net weight of sewing machine: 2.4KG, size: 12.2*5.9*11.8 inches, suitable for household use, such as remodeling clothing, hand-made, sewing home decoration and other sewing needs.

【Magnetic Seam Guide with Scale】2024 New Upgraded Multifunctional polygonal hemmer guide, this sewing machine magnetic seam guide is equipped with clear markings for easy measurement and alignment of fabrics, ensuring consistent seam width and improving overall sewing accuracy.

27 Unique Built-in Stitches: The Brother XM2701 sewing machine includes 27 built-in stitches including decorative, blind hem, zigzag, and stretch stitches and an auto-size buttonhole
How to Hem Cloth Napkins Without Fraying
The double-fold hem is the most reliable method to prevent fraying on cloth napkins, fold the raw edge under ¼ inch, press, fold under another ¼ inch, press again, then stitch close to the inner fold. This completely encloses the raw edge inside two layers of fabric.
Step-by-step double-fold hem:
- First fold: Fold raw edge under ¼ inch, wrong sides together
- Press: Use a hot iron to set the crease firmly
- Second fold: Fold the same edge under another ¼ inch
- Press again: Create a crisp, flat hem
- Stitch: Sew 1/8 inch from the inner folded edge
- Repeat: Complete all four sides
Pressing is the secret: Each fold must be pressed before stitching. Trying to fold and sew simultaneously creates wobbly, uneven hems. Take the time to press, it’s faster in the long run.
Corner technique for double-fold hems:
- Overlap method: Hem two opposite sides completely, then hem the remaining two sides, folding the corners in as you go
- Result: Small triangular overlaps at corners (simple, sturdy, slightly bulky)
Alternative: Narrow rolled hem:
Use a rolled hem foot attachment that automatically folds the fabric as you sew. This creates a delicate 1/8-inch hem perfect for lightweight fabrics but requires practice to master corners.
Fraying prevention before hemming:
- Pre-wash fabric to remove loose fibers
- Cut with sharp scissors or rotary cutter for clean edges
- Handle fabric gently before hemming is complete
- If fabric frays excessively, run a line of stay-stitching 1/8 inch from the edge before hemming
For troubleshooting fabric bunching while hemming, check your presser foot pressure and feed dog settings.
Mitered Corners vs Rolled Hem for Napkins
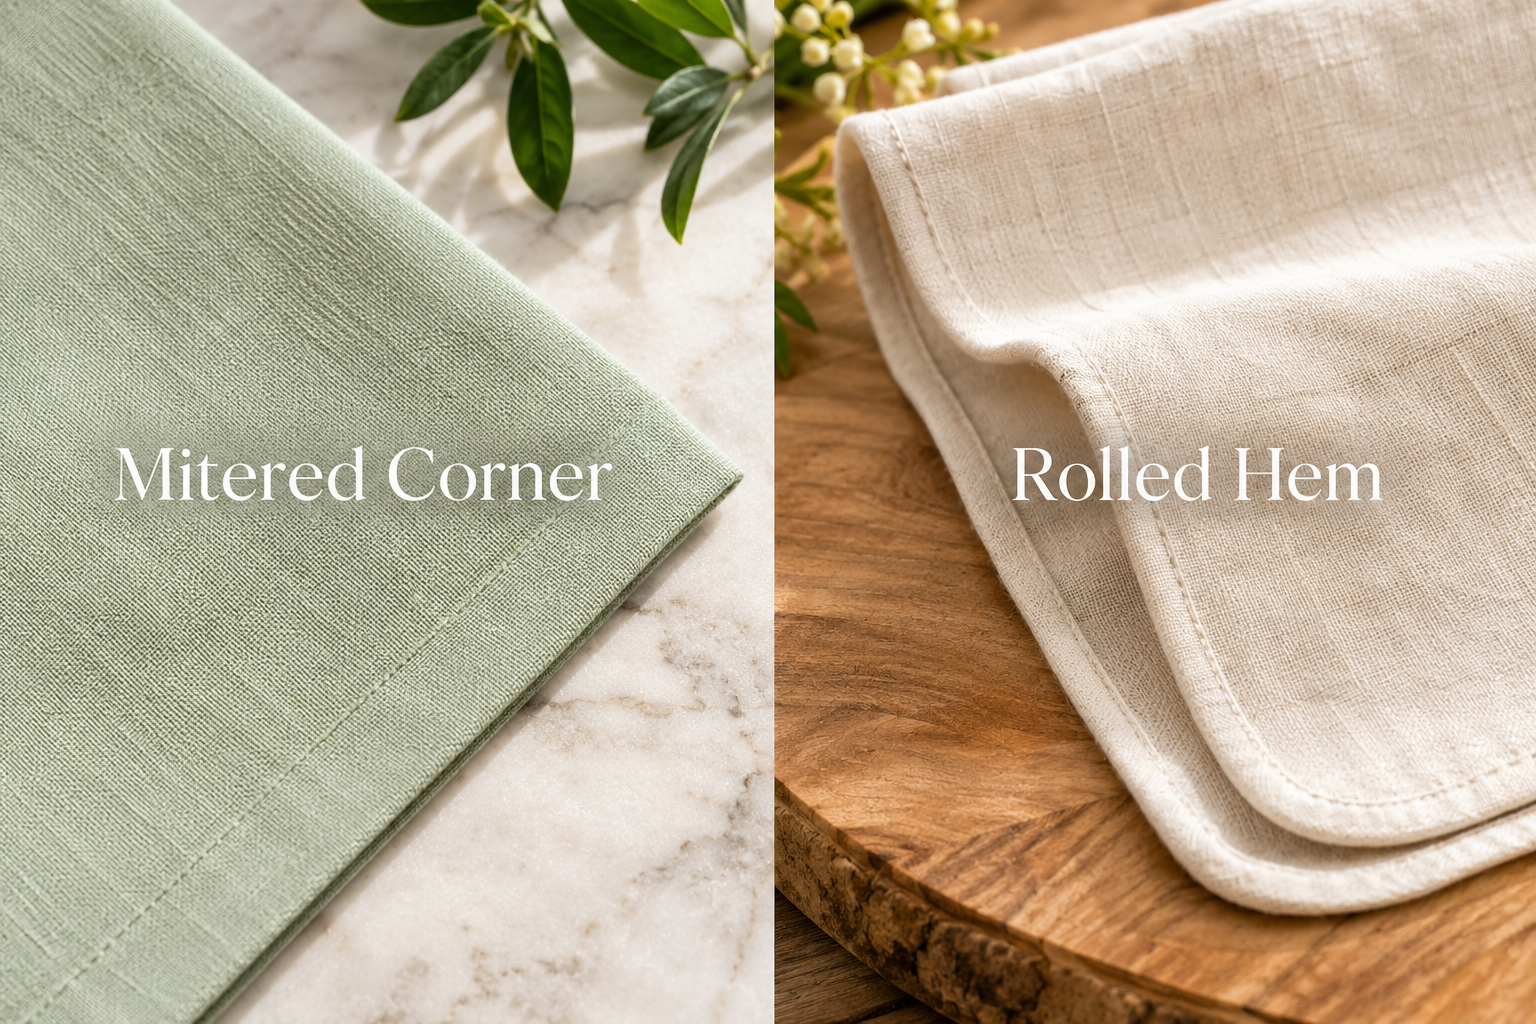
Mitered corners create a tailored, professional look with a single layer of fabric at each corner, while rolled hems offer a softer, more casual appearance with quicker execution but slightly bulkier corners. Choose mitered corners for formal napkins and rolled hems for everyday use.
Mitered corners:
Pros:
- Crisp, flat corners with no bulk
- Professional, tailored appearance
- Ideal for thicker fabrics like linen
- Corners lie flat when pressed
Cons:
- Takes longer (5-7 minutes per napkin)
- Requires precise measuring and folding
- More challenging for beginners
- Mistakes are harder to fix
Best for: Formal dining napkins, gifts, linen fabrics, when appearance is priority
Rolled hem:
Pros:
- Faster execution (3-5 minutes per napkin)
- Easier for beginners
- Delicate, soft edge
- Forgiving of small mistakes
Cons:
- Corners have slight bulk from overlapping
- Less formal appearance
- Requires rolled hem foot for best results
- Can be tricky on thick fabrics
Best for: Everyday napkins, lightweight cotton, large batches, casual dining
Hybrid option: Use a standard double-fold hem with overlapped corners, easier than mitered, neater than rolled. This is the most common choice for home sewers making their first napkins.
Skill level guide:
- Beginner: Double-fold with overlapped corners
- Intermediate: Rolled hem with practice
- Advanced: Mitered corners for polished results
Why Are My Cloth Napkin Corners Bunching Up?
Corner bunching happens when too much fabric is folded into the corner area, creating bulk that prevents the layers from lying flat. The solution is to trim excess fabric from the corner before folding or to use a mitered corner technique that distributes fabric evenly.
Common causes and fixes:
Too much fabric in the fold:
- Problem: Double-fold hems create four layers at corners
- Fix: Trim the corner at a 45-degree angle before folding, removing a small triangle of fabric
- How much to trim: Cut 1/8 inch from the corner point for ¼-inch hems
Incorrect folding sequence:
- Problem: Folding all sides before stitching traps fabric at corners
- Fix: Hem two opposite sides completely first, then hem the remaining sides, tucking corners as you go
Thick fabric:
- Problem: Linen and heavy cotton create unavoidable bulk with double-fold hems
- Fix: Use mitered corners or switch to a single-fold hem with serged edges
Insufficient pressing:
- Problem: Unpressed folds spring open, creating puckers
- Fix: Press each fold firmly with steam before stitching; press again after stitching
Troubleshooting checklist:
- Are you pressing each fold before moving to the next step?
- Is your fabric too thick for double-fold hems?
- Did you trim the corner excess before folding?
- Are you folding all sides at once instead of completing opposite sides first?
Prevention tip: Practice on scrap fabric first. Make a single corner using your chosen technique to identify problems before cutting into your good fabric. If you’re experiencing other stitch problems, address those separately.
How to Sew Cloth Napkins: Step-by-Step Instructions
Making cloth napkins involves cutting fabric squares, pressing double-fold hems on all sides, and stitching close to the inner fold. The entire process takes 10-15 minutes per napkin once you establish a rhythm.
Materials needed:
- Fabric (pre-washed and pressed)
- Rotary cutter and mat, or sharp scissors
- Ruler or quilting square
- Iron and ironing board
- Sewing machine with universal needle
- All-purpose thread matching fabric
- Pins or fabric clips (optional)
Step-by-step process:
1. Cut fabric squares
- Measure and cut 19×19 inch squares for 18×18 inch finished napkins
- Use a quilting ruler and rotary cutter for perfectly square corners
- Cut all napkins at once for efficiency
2. Press first fold
- Fold one edge under ¼ inch, wrong sides together
- Press firmly with a hot iron
- Repeat on all four sides
3. Press second fold
- Fold the same edge under another ¼ inch
- Press to create a crisp double-fold hem
- The raw edge is now enclosed
- Repeat on all four sides
4. Pin corners (optional)
- Pin the corner areas where hems overlap
- This prevents shifting during sewing
- Experienced sewers often skip this step
5. Stitch the hem
- Start in the middle of one side (not at a corner)
- Sew 1/8 inch from the inner folded edge
- At corners, stop with needle down, lift presser foot, pivot 90 degrees
- Continue around all four sides
- Overlap stitching by ½ inch where you started
6. Press finished napkin
- Give the completed napkin a final press
- Pay special attention to corners
- Press from the wrong side first, then the right side
Efficiency tips for multiple napkins:
- Cut all squares at once
- Press all first folds on all napkins before moving to second folds
- Set up an assembly line: press, pin, sew, press
- This batch method can produce 8 napkins in under 90 minutes
Quality check: Finished napkins should lie completely flat with no puckers, have even hem width on all sides, and feature neat corners without bulk.
How Long Does It Take to Sew One Cloth Napkin?
An experienced sewer can complete one cloth napkin in 10-15 minutes, while beginners typically need 20-30 minutes for their first few napkins. The pressing steps take the most time, accounting for about half the total project duration.
Time breakdown by step:
- Cutting: 2-3 minutes per napkin (faster if cutting multiple at once)
- Pressing first folds: 3-4 minutes (all four sides)
- Pressing second folds: 3-4 minutes (all four sides)
- Pinning (optional): 1-2 minutes
- Stitching: 2-3 minutes
- Final pressing: 1-2 minutes
- Total: 12-18 minutes per napkin
Speed increases with practice:
- First napkin: 25-30 minutes (learning the process)
- Napkins 2-4: 15-20 minutes (building confidence)
- Napkins 5+: 10-12 minutes (established rhythm)
- Experienced sewers: 8-10 minutes with efficient workflow
Batch production time:
Making multiple napkins together is much faster than making them one at a time:
- 4 napkins: 60-75 minutes (15-19 minutes each)
- 8 napkins: 100-120 minutes (12-15 minutes each)
- 12 napkins: 135-160 minutes (11-13 minutes each)
What slows you down:
- Imprecise cutting (fix: use rotary cutter and ruler)
- Insufficient pressing (fix: use steam and firm pressure)
- Thread breaks or tension issues (fix: check machine tension)
- Ripping out mistakes (fix: practice on scraps first)
Speed vs quality: Don’t rush your first napkins. Taking time to press properly and stitch accurately creates better results and actually saves time by avoiding do-overs.
Cloth Napkins vs Paper Napkins: Cost Comparison
Homemade cloth napkins cost $1-3 each to make and pay for themselves after 10-20 uses compared to paper napkins, which cost $0.05-0.15 per use. Over one year, a family using cloth napkins saves $75-150 compared to buying paper napkins.
Initial investment breakdown:
Homemade cloth napkins (set of 8):
- Fabric: $12-20 (1¼ yards at $10-16/yard)
- Thread: $3 (one spool makes 50+ napkins)
- Total: $15-23 ($1.90-2.90 per napkin)
- Lifespan: 3-5 years with regular use (500+ uses)
Store-bought cloth napkins (set of 8):
- Budget: $25-40 ($3-5 per napkin)
- Mid-range: $40-80 ($5-10 per napkin)
- Premium: $80-120+ ($10-15 per napkin)
Paper napkins:
- Budget pack: $0.03-0.05 per napkin
- Quality/printed: $0.08-0.15 per napkin
- Annual cost (family of 4, 3 meals/day): $130-165
Break-even analysis:
Homemade cloth napkins at $2.50 each vs. paper napkins at $0.10 each:
- Break-even point: 25 uses
- At 3 uses per day: breaks even in 8-9 days
- After one year: saves approximately $140
Hidden costs to consider:
Cloth napkins:
- Washing: $0.05-0.10 per load (minimal when washed with regular laundry)
- Electricity for ironing: $0.02-0.05 per napkin (if you iron)
- Water: negligible when added to existing loads
Paper napkins:
- Storage space for bulk purchases
- Environmental cost (not financial but worth noting)
- Frequent repurchasing trips
Best value scenario: Make your own napkins from sale fabric ($8-10/yard with coupon), wash with regular laundry, skip ironing for casual use. This maximizes savings and minimizes ongoing costs.
How to Wash Homemade Cloth Napkins
Wash cloth napkins in warm or hot water with regular detergent, treating stains promptly before washing. Cotton and linen napkins can be machine washed and dried, though line drying reduces wrinkles and extends fabric life.
Washing instructions by fabric type:
Cotton napkins:
- Temperature: Warm to hot water (140-160°F)
- Detergent: Regular or heavy-duty
- Cycle: Normal
- Drying: Tumble dry medium or line dry
- Ironing: Optional; use high heat with steam if desired
Linen napkins:
- Temperature: Warm water (120-140°F)
- Detergent: Gentle or regular
- Cycle: Normal or gentle
- Drying: Line dry preferred (reduces wrinkles)
- Ironing: Iron while slightly damp for easiest pressing
Cotton-linen blend:
- Follow linen instructions for best results
- Can tolerate slightly higher heat than pure linen
Stain treatment guide:
Food and grease:
- Scrape off solids immediately
- Apply dish soap directly to stain
- Rub gently, then rinse with cold water
- Wash as usual
Wine and juice:
- Blot (don’t rub) immediately
- Rinse with cold water from the back of the stain
- Apply stain remover or hydrogen peroxide
- Wash in hottest water safe for fabric
Lipstick and makeup:
- Apply rubbing alcohol or makeup remover
- Blot with clean cloth
- Wash with detergent
Washing frequency:
- After each use for dinner napkins
- Can reuse breakfast napkins 2-3 times if lightly soiled
- Wash full loads to maximize water efficiency
Storage after washing:
- Fold neatly and store in drawer or basket
- No need to iron for everyday use
- Press before special occasions
Longevity tips: Avoid chlorine bleach (weakens fibers), don’t over-dry (causes excessive wrinkling), and rotate napkins regularly so all get equal wear. For more detailed fabric care guidance, see our comprehensive guide.
Common Mistakes When Sewing Napkins
The most common napkin-sewing mistakes include skipping the pre-wash step (causing shrinkage after completion), insufficient pressing between steps (creating wobbly hems), and cutting fabric off-grain (resulting in twisted napkins that won’t lie flat).
Top mistakes and solutions:
1. Not pre-washing fabric
- Problem: Napkins shrink 3-5% after first wash, becoming too small
- Fix: Always wash, dry, and press fabric before cutting
- Why it matters: You can’t fix shrinkage after napkins are sewn
2. Cutting off-grain
- Problem: Napkins twist and don’t hang straight
- Fix: Align cuts with fabric grain (parallel to selvage)
- Test: Pull a thread to find true grain line
3. Skipping pressing steps
- Problem: Hems are uneven, corners bunch, stitching wanders
- Fix: Press every fold before stitching
- Time saved: None, you’ll spend longer fixing mistakes
4. Using dull scissors or rotary blade
- Problem: Ragged edges that fray excessively
- Fix: Use sharp tools; replace rotary blades regularly
- Result: Clean cuts that are easier to hem
5. Wrong thread tension
- Problem: Puckered seams or loose stitches
- Fix: Test on scrap fabric; adjust tension as needed
- Reference: See our guide on sewing machine tension
6. Starting/stopping at corners
- Problem: Visible thread tails, weak corners
- Fix: Start and stop in the middle of a side; overlap stitching ½ inch
7. Inconsistent hem width
- Problem: Unprofessional appearance, wavy edges
- Fix: Use a hem gauge or mark fold lines with fabric pen
- Practice: Consistency improves with repetition
8. Pulling fabric while sewing
- Problem: Stretched, wavy edges
- Fix: Guide fabric gently; let feed dogs do the work
- Check: Ensure presser foot pressure is correct
9. Wrong needle size
- Problem: Skipped stitches, fabric damage
- Fix: Use 80/12 for lightweight cotton, 90/14 for linen
- Learn more: Needle selection guide
Prevention strategy: Make one practice napkin from scrap fabric before cutting into your good material. This reveals technique issues without wasting expensive fabric.
Frequently Asked Questions
What’s the easiest hem for beginner napkin makers?
The double-fold hem with overlapped corners is easiest for beginners because it requires only straight stitching and basic pressing, with no complex corner techniques. Fold each edge under ¼ inch twice, press, and stitch, the corners naturally overlap without special folding.
Can I use a decorative stitch on cloth napkins?
Yes, decorative stitches work well on napkins, but use them sparingly as they add bulk and may pucker thin fabrics. A simple decorative stitch along the hem edge adds interest, but stick to straight stitches for the structural hem itself to ensure durability through repeated washing.
How do I prevent linen napkins from wrinkling so much?
Remove linen napkins from the dryer while slightly damp and press immediately with a hot iron and steam, or line dry and press while damp. The wrinkled look is part of linen’s natural character, embrace it for casual dining or press just before formal occasions.
Should I use matching or contrasting thread?
Matching thread creates an invisible, professional look and is the best choice for beginners. Contrasting thread makes a design statement but also highlights any uneven stitching, so use it only when you’re confident in your sewing accuracy.
Can I make napkins without a sewing machine?
Yes, you can hand-sew napkins using a running stitch or slip stitch for the hem, though each napkin will take 45-60 minutes instead of 10-15 minutes. Hand-sewn hems create a softer, more artisanal look and are perfect for special gift napkins.
What’s the best way to store cloth napkins?
Store folded napkins in a drawer, basket, or on a shelf where they’re easily accessible for daily use. Avoid storing in plastic bags (traps moisture and causes mildew) and keep them away from direct sunlight (fades colors). No need for special storage, treat them like dish towels.
How many napkins should I make for my family?
Make 12-16 napkins for a family of four to ensure you have enough between laundry days. This allows 3-4 napkins per person, accounting for multiple daily meals and a few extras for guests or when some are in the wash.
Can I mix fabric types in one set of napkins?
Yes, mixing fabrics creates visual interest, but ensure all fabrics have similar weight and care requirements so they wash and wear evenly. Mixing cotton prints with solid linen works well; avoid mixing delicate and heavy-duty fabrics in the same set.
Do cloth napkins need to match my tablecloth?
No, napkins don’t need to match your tablecloth, coordinating colors or complementary patterns often look more interesting than exact matches. Choose napkins that work with multiple tablecloths to maximize versatility.
What’s the difference between dinner and cocktail napkins besides size?
Cocktail napkins (10×10 to 12×12 inches) are smaller and often made from lighter-weight fabric or feature decorative elements like embroidery, while dinner napkins (18×18 inches) are larger, more substantial, and designed for lap use during full meals.
Can I add embroidery or monograms to napkins?
Yes, add embroidery or monograms before hemming the napkin, positioning the design 1-2 inches from one corner so it’s visible when the napkin is folded. Use tear-away stabilizer behind the fabric to prevent puckering during embroidery.
Why do my napkins twist after washing?
Napkins twist when cut off-grain (not parallel to the fabric’s lengthwise or crosswise threads). To fix, pull a thread across the fabric width before cutting to find the true grain line, then cut along this line. Already-twisted napkins can’t be fully corrected but will improve with repeated washing and pressing.
Conclusion
Sewing cloth napkins is a rewarding project that combines practicality with creativity, offering both beginners and experienced sewers a chance to create beautiful, functional items for their homes. With just basic straight-stitch skills, quality cotton or linen fabric, and attention to pressing, you can produce professional-looking napkins that elevate every meal while saving money and reducing waste.
Your next steps:
- Choose your fabric: Visit a local fabric store or browse online for medium-weight cotton or linen in colors that complement your dining space
- Start small: Make 4 napkins first to practice your technique before committing to a full set
- Practice on scraps: Test your hem technique on leftover fabric before cutting into your good material
- Set up efficiently: Gather all materials, rotary cutter, ruler, iron, thread, before starting to maintain momentum
- Embrace imperfection: Your first napkins may not be perfect, but they’ll still be functional and will improve your skills for the next set
The beauty of cloth napkins lies not just in their appearance but in their sustainability and the satisfaction of using something you made yourself. Whether you’re creating everyday napkins for family meals or elegant versions for special occasions, this simple project delivers impressive results that will serve you well for years to come.
Ready to expand your sewing skills? Check out our beginner sewing guide for more foundational projects, or explore our fabric techniques section for advanced finishing methods.