Quick Answer
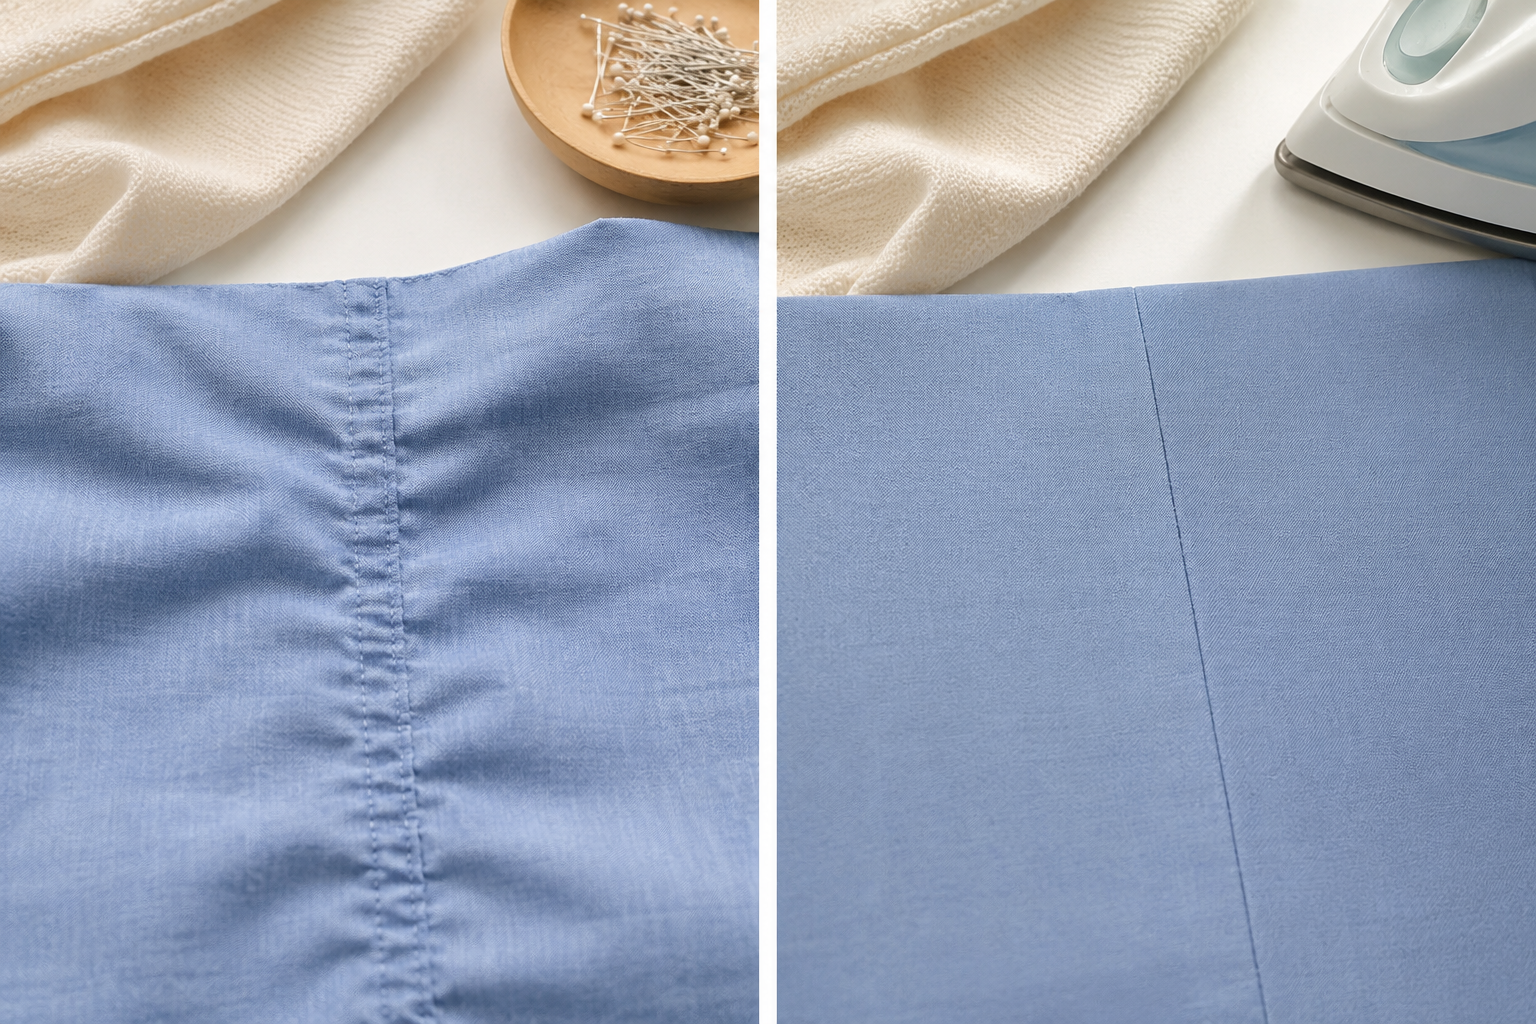
Pressing as you sew means using heat and steam to set each seam immediately after stitching, before moving to the next step. This technique matters more than stitching quality because even perfectly sewn seams will look amateurish if they’re wrinkled or puckered. Proper pressing creates crisp, flat seams that give garments a professional finish, while skipping this step results in visible imperfections that are nearly impossible to fix later.
Key Takeaways
- Pressing sets seams permanently using heat and vertical pressure, while ironing slides the iron back and forth across fabric
- Press every seam immediately after stitching for professional results; waiting until the end makes wrinkles permanent
- Temperature matters: cotton and linen tolerate high heat (400°F), while synthetics and silk need low settings (250-300°F)
- Steam is essential for natural fibers but can damage delicate fabrics like silk dupioni or leave water spots
- Specialized tools like pressing hams, tailor boards, and seam rolls help press curved seams and hard-to-reach areas
- Pressing seams open creates the flattest finish for most garments, while pressing to one side adds strength for stress points
- Common mistakes include using too much pressure, skipping pressing cloths, and moving the iron instead of lifting it
- Beginners benefit most from pressing because it compensates for uneven stitching and tension issues
- A basic steam iron is sufficient to start; you don’t need expensive equipment for excellent results
What Does Press As You Sew Mean in Sewing
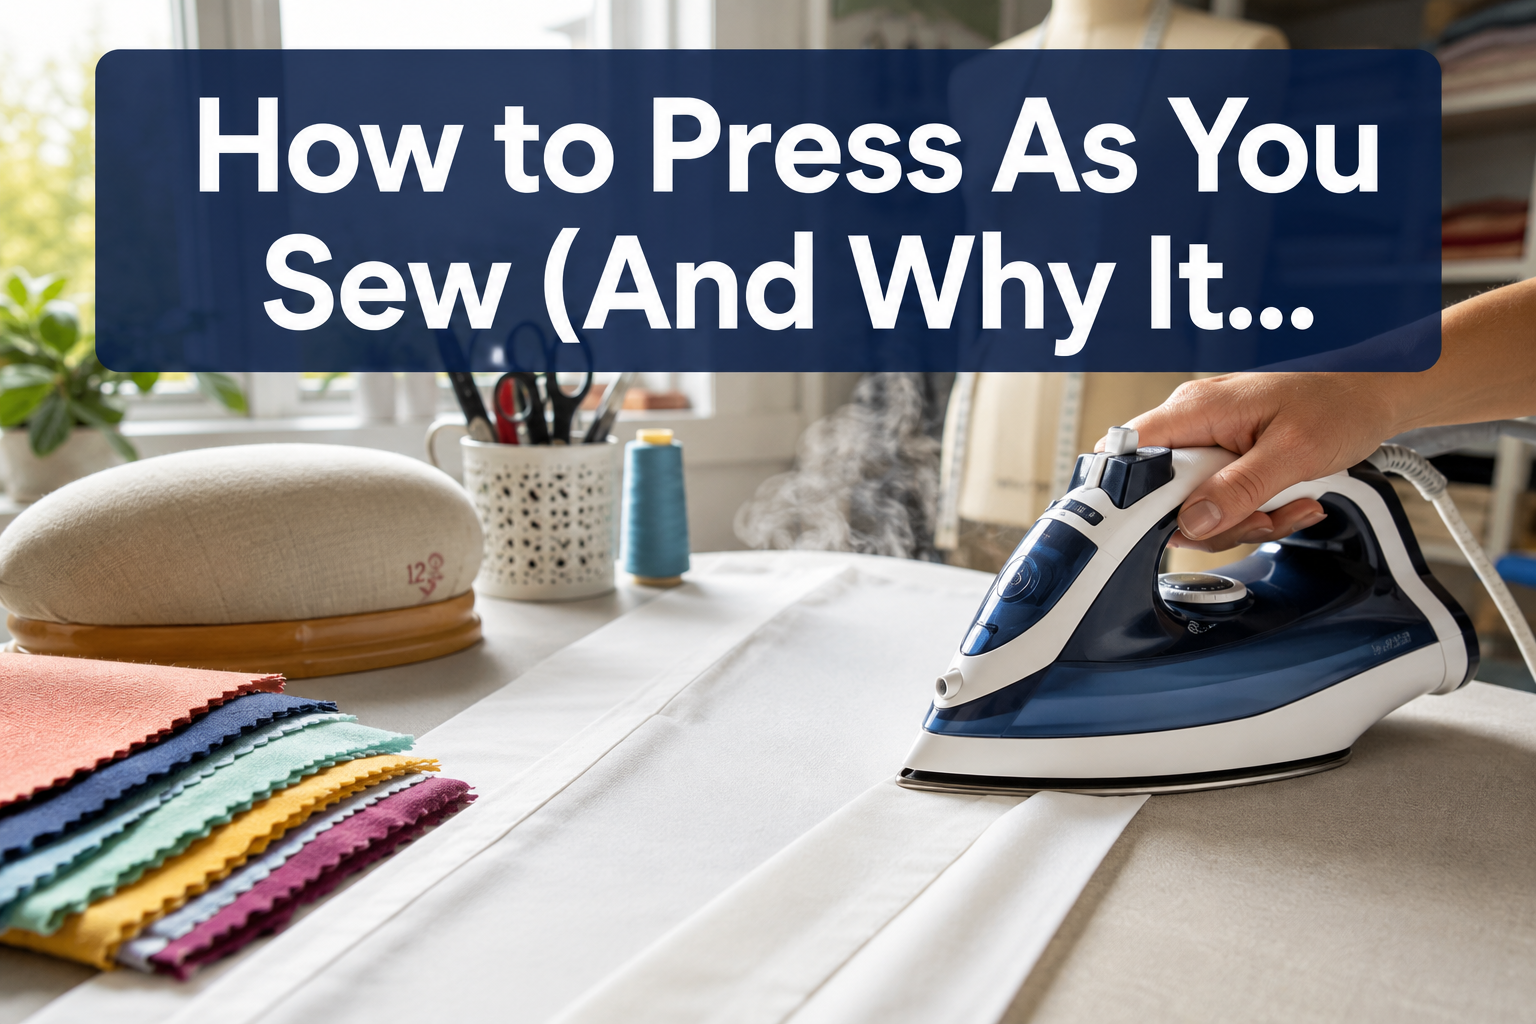
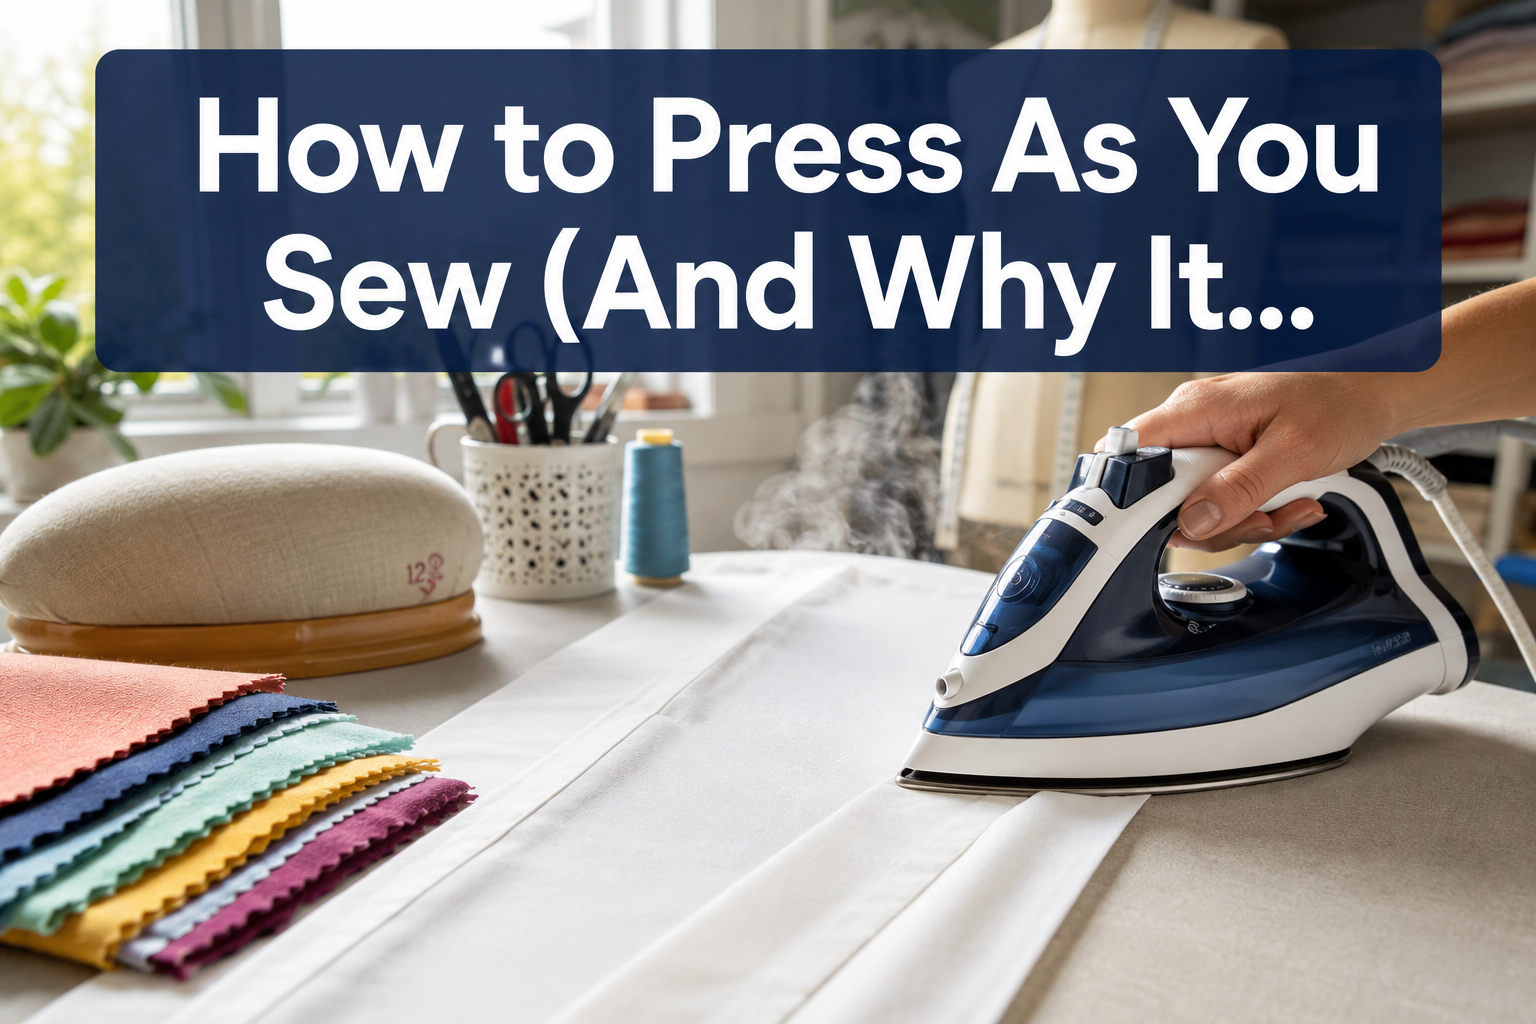
Pressing as you sew means applying heat and pressure to each seam immediately after stitching it, before continuing to the next construction step. This technique involves lifting and lowering the iron onto fabric rather than sliding it across the surface. The heat sets the stitches into the fabric fibers, while the weight of the iron flattens the seam allowances.
This approach differs from waiting until a project is finished to press everything at once. When you press as you go, each seam becomes the foundation for the next step. For example, after sewing a side seam, you press it open before attaching the waistband. This creates a flat, stable surface that makes the next step easier and more accurate.
Why the timing matters:
- Fresh seams are easier to manipulate before they’re crossed by other seams
- Heat sets thread tension while fabric is still warm from the needle
- Pressing before topstitching prevents lumps under the presser foot
- Each pressed seam provides accurate measurements for the next piece
The phrase “press as you sew” appears in nearly every professional sewing pattern because it’s the single technique that separates homemade-looking projects from professional ones. Even if your stitch quality is perfect, unpressed seams will reveal themselves as bumpy, puckered lines.
What’s the Difference Between Pressing and Ironing Fabric
Pressing uses an up-and-down motion with the iron, applying heat and weight to a specific area without moving the iron across the fabric. Ironing involves sliding the iron back and forth across fabric, which is what you do when removing wrinkles from a finished shirt. In sewing, pressing is the correct technique because it avoids stretching or distorting fabric, especially on bias edges or delicate materials.
Pressing technique:
- Lift the iron and place it down on the seam
- Hold for 3-5 seconds to let heat penetrate
- Lift straight up and move to the next section
- Never slide or push the iron
Ironing technique:
- Glide the iron continuously across fabric
- Used for removing wrinkles from finished items
- Can stretch fabric out of shape during construction
- Appropriate for pressing finished garments before wearing
The distinction matters most when working with knits, bias-cut pieces, or loosely woven fabrics. Sliding an iron across these materials can stretch them permanently, ruining the fit of your project. Pressing keeps everything stable and in its original shape.
When you press a seam, you’re also embedding the thread into the fabric weave. This makes the stitching less visible and creates a smoother surface. Ironing doesn’t achieve this effect because the constant motion prevents the heat from penetrating deeply enough.
Why Is Pressing More Important Than Stitching Quality
Pressing transforms acceptable stitching into professional-looking work, while even perfect stitches look amateurish without proper pressing. A seam with slightly uneven stitches that’s been pressed flat will look better than a perfectly straight seam that’s left wrinkled. This happens because the human eye notices texture and dimension before it registers tiny variations in stitch length.
Visual impact of pressing:
- Eliminates shadows created by raised seam allowances
- Creates sharp edges on collars, cuffs, and hems
- Makes topstitching lie flat against the fabric
- Removes the “homemade” puckered look
Professional sewists know that pressing can compensate for minor stitch problems like slight tension variations or wavering seam lines. The heat and pressure literally smooth out these imperfections. However, no amount of pressing can fix a seam that wasn’t pressed at the right time in the construction sequence.
Consider a collar: you can sew it with perfect 1/4-inch seam allowances and trim the curves precisely, but if you don’t press it flat before turning it right-side out, the collar will have a rounded, lumpy edge instead of a crisp point. The pressing step is what creates the sharp edge, not the stitching accuracy.
Common scenario: Two sewists make the same shirt pattern. One has a newer machine with perfect tension and uses backstitch correctly at every seam. The other has an older machine with slightly loose tension but presses every seam immediately. The second shirt will look more professional because pressing hides the tension issues while creating crisp, flat seams.
What Kind of Iron Do I Need for Pressing Seams While Sewing
A basic steam iron with adjustable temperature settings and a smooth soleplate is sufficient for pressing seams while sewing. You don’t need a professional gravity-feed iron or expensive equipment to achieve excellent results. The key features are reliable steam output, a pointed tip for reaching into corners, and a soleplate that glides smoothly without snagging fabric.
Essential iron features:
- Temperature dial with fabric-specific settings (synthetic, silk, cotton, linen)
- Steam function that produces consistent moisture
- Pointed tip for pressing into seam allowances and corners
- Smooth soleplate (ceramic or stainless steel work well)
- Comfortable weight (around 3-4 pounds provides good pressure without fatigue)
Nice-to-have features:
- Vertical steam for pressing finished garments on a hanger
- Auto-shutoff for safety
- Self-cleaning function to prevent mineral buildup
- Retractable cord
Many sewists successfully use irons in the $30-60 range. The difference between a budget iron and a $200 model is primarily durability and steam power, not the quality of pressing you can achieve. A mid-range iron from brands like Rowenta, Black+Decker, or Sunbeam will serve most home sewists well for years.
What to avoid: Irons with textured soleplates (designed for laundry) can leave imprints on delicate fabrics. Very lightweight travel irons don’t provide enough pressure for effective seam pressing. Irons without steam capability make it difficult to press natural fibers like cotton and linen.
If you’re deciding between spending money on a better iron or better pressing tools like a ham or board, invest in the tools first. A basic iron with good accessories produces better results than an expensive iron used on a towel-covered table.

ANTI-DRIP SMARTSTREAM TECHNOLOGY: Engineered to prevent dripping by maintaining water at the proper temperature needed to generate steam. Volts : 120V. Wattage : 1200W. Requires AC Power. Easy-Fill Translucent Water Tank.
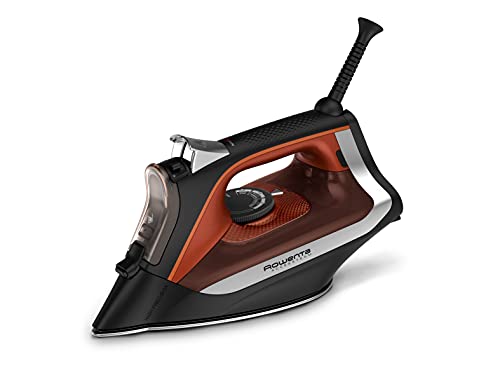
POWERFUL STEAM: Rowenta steam iron for clothes delivers a shot of steam of 180g/min to handle even the most stubborn creases

EVEN STEAM STAINLESS SOLEPLATE: Even steam distribution from heel to tip helps tame wrinkles anywhere on garments.
How to Press Seams Open vs Pressing Seams to One Side
Pressing seams open means separating the two seam allowances and pressing them flat in opposite directions, creating the flattest possible finish. Pressing seams to one side keeps both allowances together and presses them toward one side of the seam, which adds strength and is faster. The choice depends on the garment area, fabric weight, and whether the seam will be topstitched.
Press seams open when:
- Making garments where bulk matters (waistbands, collars, cuffs)
- Working with medium to heavyweight fabrics
- Creating the most professional finish on visible seams
- Preparing seams for topstitching on both sides
- Sewing princess seams or other fitted areas
Press seams to one side when:
- Sewing stress points that need extra strength (crotch seams, armholes)
- Working with very lightweight or sheer fabrics where open seams might show through
- Quilting (seams pressed to one side are stronger for quilts)
- Following pattern instructions for specific construction methods
- Sewing knits, where open seams can create gaps
How to press seams open:
- Place the sewn seam wrong-side up on the ironing board
- Use the iron’s tip to gently separate the seam allowances
- Press the seam flat from the wrong side first
- Flip to the right side and press again to remove any remaining wrinkles
- Use a pressing cloth on delicate fabrics
How to press seams to one side:
- Decide which direction based on pattern instructions or garment structure
- Press both seam allowances together toward the chosen side
- Press from the wrong side first, then the right side
- For topstitching, press toward the side that will be topstitched
Most garment sewing uses pressed-open seams for the cleanest finish. However, seam finishing methods like French seams or flat-felled seams require pressing to one side as part of their construction.
Do I Really Need to Press Every Seam or Can I Skip Some
You should press every structural seam immediately after sewing it, but you can skip pressing temporary basting stitches or seams that will be completely enclosed and invisible in the finished project. The rule is: if a seam affects the shape, fit, or appearance of the next construction step, it must be pressed. Skipping even one critical seam creates a ripple effect that makes subsequent steps harder and less accurate.
Always press these seams:
- Any seam that will be crossed by another seam
- Seams before adding topstitching or edge stitching
- Darts (press toward the center of the garment)
- Seams before attaching facings, waistbands, or collars
- Hems before final stitching
- Any seam visible on the outside of the finished garment
You can skip pressing:
- Basting stitches that will be removed
- Seams inside a fully lined garment that won’t be seen or felt
- Stay-stitching on edges that will be enclosed in a seam
The cost of skipping: When you skip pressing a seam, the next piece you attach will have to conform to the wrinkled, uneven surface. This creates puckering that becomes permanent once you sew over it. For example, if you skip pressing a shoulder seam before attaching the collar, the collar will have tiny pleats where it tried to accommodate the lumpy shoulder seam.
Beginners often skip pressing because it feels like it slows down the sewing process. In reality, pressing as you go is faster than trying to fix problems later. A seam that wasn’t pressed before being crossed by another seam is nearly impossible to press properly afterward without creating new wrinkles.
Time-saving approach: Set up your ironing board next to your sewing machine so you can press each seam without leaving your work area. This makes pressing feel like a natural part of the sewing rhythm rather than a separate chore.
Best Pressing Tools for Sewing Besides an Iron
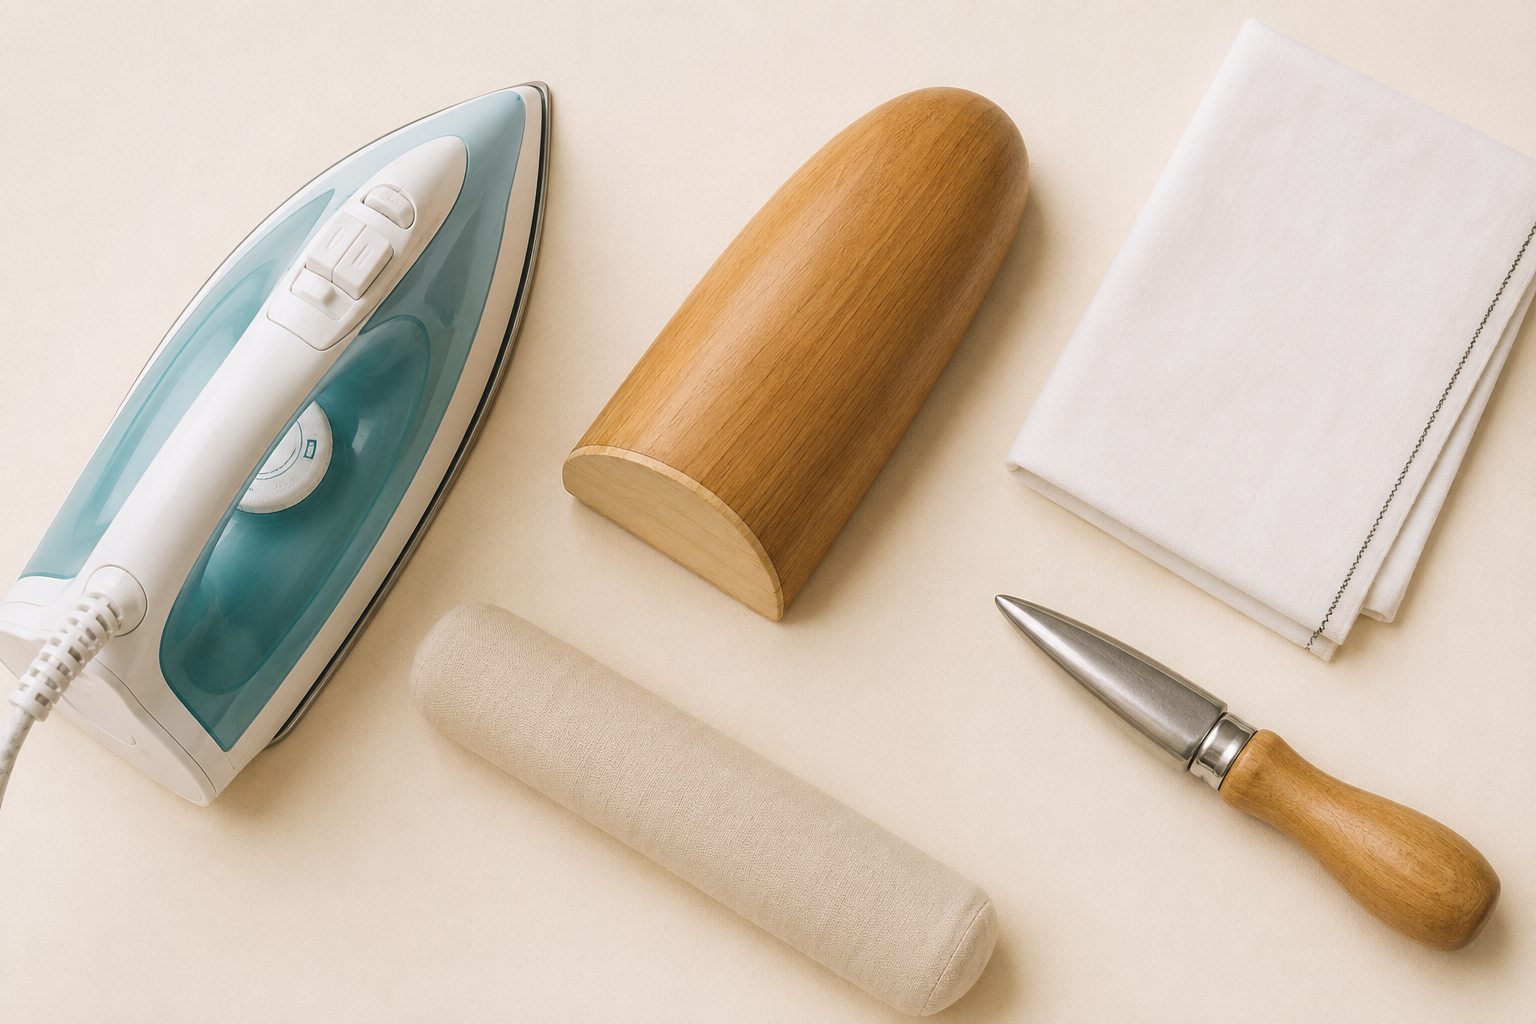
A tailor’s ham, pressing cloth, and seam roll are the three most valuable pressing tools beyond a basic iron, each solving specific problems that an iron alone cannot address. These tools help you press curved seams, protect delicate fabrics, and reach into narrow areas like sleeves and pant legs. While you can start sewing with just an iron, adding these tools dramatically improves your results.
Essential pressing tools:
Tailor’s Ham
- Firmly stuffed, ham-shaped cushion (usually one side cotton, one side wool)
- Used for pressing curved seams like darts, princess seams, and sleeve caps
- Provides a rounded surface that maintains the garment’s three-dimensional shape
- Cost: $15-30; can be DIY-ed by stuffing a ham-shaped fabric bag with sawdust
Pressing Cloth
- Lightweight fabric (muslin, organza, or specialized pressing cloth) placed between iron and fabric
- Prevents shine on dark fabrics and scorch marks on delicate materials
- Essential for wool, silk, and synthetic fabrics
- Cost: $5-10, or use a clean cotton dishtowel
Seam Roll
- Long, narrow, firmly stuffed tube
- Allows you to press seams inside sleeves, pant legs, and other tubular areas without creating creases on the opposite side
- Cost: $12-25
Point Presser/Clapper
- Wooden tool with a narrow edge for pressing seam allowances open
- The flat surface (clapper) is pressed onto hot seams to set sharp creases
- Particularly useful for collars, cuffs, and lapels
- Cost: $15-30
Sleeve Board
- Mini ironing board for pressing small or narrow areas
- Useful but not essential if you have a seam roll
- Cost: $20-40
Spray Bottle
- For adding moisture when pressing without steam
- Useful for stubborn wrinkles and when working with natural fibers
- Cost: $3-8
Start with a pressing cloth and tailor’s ham, then add other tools as your projects require them. Many sewists use a tightly rolled towel as a makeshift seam roll when starting out.
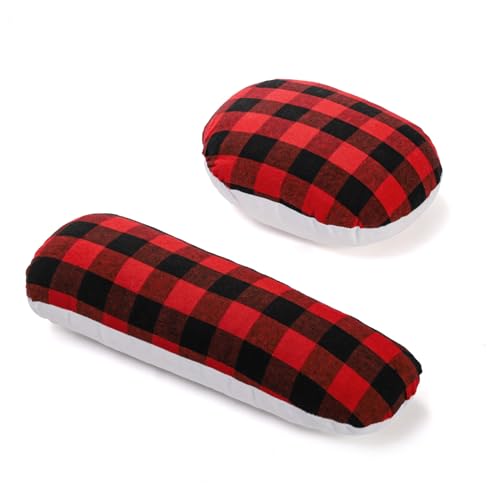
Package Details: You will receive a whole set, including tailor's sleeve roll (size: 11"L x 4.7"W x 2.7"H), and tailor's ham (size: 7.4"L x 6"W x 3"H).

Ironing Made Easy: Enjoy flawless clothes with our set of tailor ham and seam roll! Easy to use and practical, these pressing tools are a must-have in your kit, allowing you to press smaller curved seams with ease

Ironing Made Easy: Enjoy flawless clothes with our set of tailor ham and seam roll! Easy to use and practical, these pressing tools are a must-have in your kit, allowing you to press smaller curved seams with ease
Common Mistakes When Pressing Fabric While Sewing
The most common pressing mistake is using too much pressure and sliding the iron across fabric instead of lifting and placing it, which stretches fabric out of shape and creates new wrinkles. Other frequent errors include using the wrong temperature, skipping the pressing cloth, and pressing from the right side first, which can create shine or flatten textured fabrics.
Top pressing mistakes and fixes:
Sliding instead of pressing
- Problem: Distorts fabric, especially on bias edges and knits
- Fix: Lift the iron completely off the fabric between each press; never push or drag
Wrong temperature
- Problem: Too hot scorches or melts fabric; too cool doesn’t set seams
- Fix: Test on a scrap first; start with lower heat and increase if needed
Pressing from the right side first
- Problem: Creates shine on dark fabrics and flattens texture
- Fix: Always press from the wrong side first, then flip to the right side if needed
No pressing cloth on delicate fabrics
- Problem: Leaves iron-shaped shine marks or scorches fabric
- Fix: Use a pressing cloth on wool, silk, dark colors, and synthetics
Pressing over pins
- Problem: Creates permanent dents in fabric and scratches the iron’s soleplate
- Fix: Remove all pins before pressing; use clips in areas that need to be pressed
Not using enough steam
- Problem: Seams don’t flatten properly, especially on natural fibers
- Fix: Use steam liberally on cotton, linen, and wool; test on synthetics first
Pressing too soon after stitching
- Problem: Thread tension hasn’t settled, leading to puckering
- Fix: Wait 10-15 seconds after stitching before pressing to let thread cool
Creating new creases
- Problem: Pressing folds into fabric that shouldn’t be there
- Fix: Use a seam roll or sleeve board for tubular areas; be mindful of where the iron edges touch
The mistake that causes the most frustration is pressing seams in the wrong direction. Always check your pattern instructions before pressing, especially for seams that will be topstitched. Pressing the wrong way means unpicking stitches and starting over.
Can I Use Steam When Pressing Delicate Fabrics Like Silk
You can use steam on most silk fabrics, but avoid it on silk dupioni, raw silk, and any silk labeled “dry clean only” because steam can leave permanent water spots. For safe silks like charmeuse, crepe de chine, and habotai, use steam on a low temperature setting (250-300°F) with a pressing cloth to prevent water spots and heat damage.
Steam guidelines by fabric type:
Safe for steam:
- Cotton and linen (high heat, lots of steam)
- Wool (medium heat, steam with pressing cloth)
- Silk charmeuse, crepe, and habotai (low heat, light steam, pressing cloth)
- Rayon and modal (low-medium heat, light steam)
- Most stable knits (low-medium heat, light steam)
Avoid steam:
- Silk dupioni, shantung, and raw silk (water spots)
- Velvet and velour (flattens pile)
- Laminated or coated fabrics (heat damage)
- Leather and faux leather (water damage)
- Some synthetics like acetate (melting risk)
How to test: Press a scrap of your fabric with steam in an inconspicuous area. Wait for it to dry completely (water spots may not appear immediately). If the fabric looks unchanged, steam is safe for your project.
Alternative to steam for delicate fabrics:
- Use a dry iron on low heat
- Lightly mist the fabric with distilled water from a spray bottle
- Place a pressing cloth over the damp area
- Press with the dry iron
- Let the fabric cool and dry completely before handling
Distilled water prevents mineral deposits that can leave spots on delicate fabrics. This method gives you the benefits of moisture without the risk of steam damage.
For velvet and other pile fabrics, press from the wrong side over a thick towel or velvet board to avoid flattening the texture. Never use steam directly on these fabrics.
Pressing Ham vs Tailor Board: Which One Do I Need
A pressing ham is more versatile and should be your first purchase because it handles curved seams, darts, and sleeve caps that appear in most garment sewing projects. A tailor board (also called a pressing board or point presser) is specialized for pressing collar points, lapels, and seam allowances open, making it valuable for tailored jackets and shirts but not essential for beginners.
Pressing ham uses:
- Pressing darts to maintain their curved shape
- Shaping sleeve caps and set-in sleeves
- Pressing princess seams and other curved seams
- Creating shape in bust areas and hip curves
- Any time you need to press a curve without flattening it
Tailor board uses:
- Pressing collar points sharp and flat
- Opening seam allowances in hard-to-reach corners
- Pressing lapels and jacket fronts
- Creating crisp edges on cuffs and pocket flaps
- Using the clapper function to set sharp creases
Decision guide:
- Choose a ham first if you sew dresses, blouses, or any fitted garments with darts and curves
- Choose a tailor board first if you primarily sew shirts, jackets, or tailored items with lots of collar and cuff details
- Buy both if you sew a variety of garments and want professional results on all projects
Many sewists use a ham regularly but only reach for a tailor board on specific projects. The ham solves problems you encounter in almost every garment, while the tailor board is more specialized.
Budget alternative: A tightly rolled towel secured with rubber bands can substitute for a seam roll, and a wooden ruler can substitute for the point presser function of a tailor board. However, there’s no good substitute for a ham’s three-dimensional shape.

Perfect Size: This set includes tailor's ham (size 6.3"L x 6"W x 3"H), and tailor's seam roll (11"L x 4"W x 2.4"H), designed to fit sleeves, collars, curves, and other hard-to-reach areas, making pressing seams and small fabrics effortless.
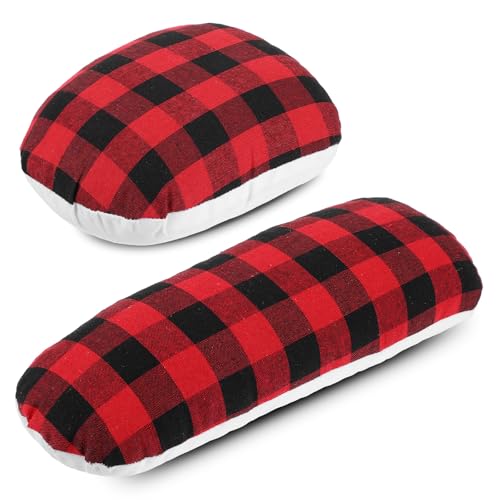
【Package Include】You will receive a tailor’s sleeve roll (11"L x 4.3"W x 2.9"H) and a tailor’s ham (7"L x 5.9"W x 3.1"H), These pressing tools /binding tool for quilting are designed for long seams, address the complete spectrum of garment pressing needs from home sewing to professional tailoring environments.
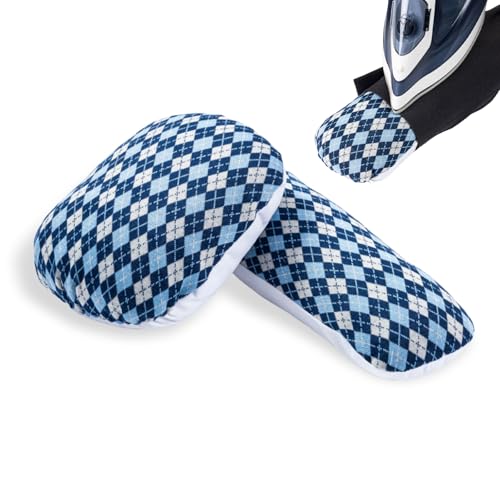
【Complete Set Contents】 You will receive a full set of tools, including a tailor's sleeve roll (Dimensions: 10.6″ L × 3.9″ W × 2.4″ H) and a tailor's pressing ham (Dimensions: 7.5″ L × 5.9″ W × 3.1″ H). Designed specifically for cuffs, collars, curves, and hard-to-reach areas, it perfectly adapts to various curved cutting parts, providing precise support whether for suit sleeves, shirt collars, or trouser hem seams.
How to Press Curved Seams and Darts Properly
Press curved seams and darts over a tailor’s ham to maintain their three-dimensional shape, using the iron’s tip to work in small sections from the wide end to the point. Never press darts flat on a regular ironing board because this removes the shaping that creates a proper fit. The ham’s curved surface supports the fabric’s intended shape while the heat sets it permanently.
How to press darts:
- Place the dart over the ham with the point extending beyond the ham’s edge
- Press from the wide end toward the point, using only the iron’s tip
- Press vertical darts (like bust darts) toward the center of the garment
- Press horizontal darts (like waist darts) downward
- Use a pressing cloth if working with delicate fabric
- Let the dart cool completely on the ham before moving it
How to press curved seams:
- Position the seam over the ham so the curve matches the ham’s shape
- Press the seam flat first (before opening or pressing to one side)
- Use the iron’s tip to gently open the seam allowances if pressing open
- Work in small sections, lifting and placing the iron
- Press from the wrong side first, then check the right side
- Let the fabric cool on the ham to set the shape
Common curved seam types:
- Princess seams: Press open over the ham to maintain the body’s curves
- Sleeve caps: Press the seam allowance toward the sleeve, using the ham to support the curve
- Necklines: Press over the ham’s narrow end to avoid flattening the curve
- Armholes: Use the ham to maintain the socket shape while pressing seam allowances
The key is matching the fabric’s curve to a similar curve on the ham. Don’t try to press a curved seam flat on a board, you’ll create puckers and lose the shaping that makes the garment fit properly.
Troubleshooting: If your dart has a bubble at the point, you pressed too hard or didn’t use the ham. This is difficult to fix, but you can try re-pressing with very light pressure and lots of steam, letting the fabric relax into its natural shape.
What Temperature Should I Press Different Fabric Types
Cotton and linen tolerate the highest heat (380-400°F or the “cotton” setting), while delicate synthetics and silk require low heat (250-300°F or the “silk/synthetic” setting). Wool needs medium-high heat (300-360°F) with steam and a pressing cloth, and most synthetic blends work best at medium heat (300-320°F) with caution. Always test on a scrap before pressing your actual project.
Fabric temperature guide:
| Fabric Type | Temperature | Steam | Pressing Cloth | Notes |
|---|---|---|---|---|
| Cotton | 380-400°F (High) | Yes, generous | Optional | Can handle high heat and moisture |
| Linen | 400-445°F (High) | Yes, generous | Optional | Highest heat tolerance; needs moisture |
| Wool | 300-360°F (Medium-high) | Yes, moderate | Required | Always use pressing cloth to prevent shine |
| Silk (most types) | 250-300°F (Low) | Light or none | Required | Test first; avoid water spots |
| Polyester | 250-300°F (Low) | Minimal | Recommended | Can melt at high heat |
| Nylon | 250-275°F (Low) | No | Required | Very heat-sensitive |
| Rayon | 300-330°F (Medium) | Yes, light | Recommended | Can water-spot; test first |
| Acetate | 250-290°F (Low) | No | Required | Melts easily; very delicate |
| Blends | Match lowest fiber | Depends | Recommended | Use settings for most delicate fiber |
How to test temperature:
- Cut a 4-inch square scrap of your fabric
- Start with low heat and no steam
- Press the scrap for 5 seconds
- Check for shine, melting, or discoloration
- Increase heat gradually until you find the right setting
- Test with steam separately if planning to use it
Signs the temperature is wrong:
- Too hot: Fabric becomes shiny, stiff, or shows brown scorch marks; synthetic fabrics may melt or become sticky
- Too cool: Wrinkles don’t disappear; seams don’t flatten; pressing takes excessive time
Most modern irons have fabric-specific settings (silk, wool, cotton, linen) that correspond to these temperature ranges. However, these settings can vary between iron brands, so testing is always safer than trusting the dial alone.
Special cases:
- Velvet: Press from wrong side only, over a thick towel, low heat, no pressure
- Sequined or beaded fabric: Press around embellishments with pressing cloth, low heat
- Interfacing: Follow interfacing instructions, usually medium heat with steam
Is Pressing As You Sew Necessary for Beginner Projects
Pressing as you sew is especially important for beginner projects because it compensates for uneven stitching, tension issues, and measurement errors that beginners commonly make. A well-pressed seam can hide slightly wobbly stitching lines, while unpressed seams make every small mistake more visible. Beginners who press consistently produce better-looking projects than experienced sewists who skip pressing.
Why beginners benefit most from pressing:
- Covers up uneven seam allowances by flattening the seam
- Makes the next step easier by creating a flat, stable surface to work on
- Helps fabric feed evenly through the machine when crossing seams
- Reduces frustration by making projects look more professional
- Teaches good habits that become automatic with practice
Beginner-friendly pressing routine:
- Sew a seam
- Immediately move to the ironing board (set up next to your machine)
- Press the seam flat as sewn (don’t open it yet)
- Press the seam open or to one side as the pattern directs
- Return to the machine for the next step
This routine takes about 30 seconds per seam but saves hours of frustration trying to fix problems later. Many beginners report that pressing was the single technique that most improved their sewing results.
Simple beginner projects where pressing matters most:
- Tote bags (pressed seams make corners crisp and professional)
- Pillowcases (pressed hems lie flat and look store-bought)
- Simple skirts (pressed waistbands and hems make the difference between homemade and handmade)
- Aprons (pressed straps and ties look polished)
Even on a basic pillowcase, the difference between pressed and unpressed seams is immediately visible. The pressed version looks like it came from a store, while the unpressed version looks obviously homemade.
Common beginner excuse: “I’ll press everything at the end.” This never works because seams that are crossed by other seams cannot be properly pressed afterward. The only way to get professional results is to press each seam before moving to the next construction step.
How to Fix Seams That Weren’t Pressed Before Topstitching
Seams that weren’t pressed before topstitching are difficult to fix perfectly, but you can improve them by carefully removing the topstitching, pressing the seam properly, and re-stitching. If removing stitches will damage the fabric, your best option is to press as well as possible from the wrong side with steam and a pressing cloth, accepting that the results won’t be as crisp as if you’d pressed correctly the first time.
Step-by-step fix:
Assess the damage
- Check if the topstitching can be removed without leaving visible holes
- Look for puckering or pleats caught in the topstitching
- Decide if re-doing is worth the time or if you can live with the imperfection
Remove topstitching carefully
- Use a seam ripper to cut every 3-4 stitches on one side
- Pull the thread from the other side
- Remove all thread bits with tweezers or a lint roller
- Be gentle to avoid stretching or tearing the fabric
Press the seam properly
- Press from the wrong side first with appropriate heat and steam
- Use a pressing cloth if needed
- Press the seam open or to the correct side
- Let the fabric cool completely
Re-stitch the topstitching
- Use the original stitch holes as a guide if they’re not too visible
- Sew slowly and carefully
- Consider using a slightly longer stitch length to avoid the old holes
If you can’t remove the topstitching:
- Press from the wrong side with lots of steam
- Use a point presser or the iron’s tip to work steam into the seam
- Place a damp pressing cloth over the area and press firmly
- Use a clapper to flatten the seam while it’s hot
- Accept that some puckering may remain
Prevention for next time:
- Set up your ironing board next to your sewing machine
- Make pressing part of your automatic sewing sequence
- Mark “PRESS” on your pattern instructions if they don’t already say it
- Never topstitch without pressing first, no exceptions
Some fabrics, particularly loosely woven ones, will show permanent needle holes after removing stitches. On these fabrics, it’s better to leave imperfect topstitching than to create visible damage trying to fix it.
When to start over: If the seam is on a highly visible area (like a collar or front placket) and the puckering is severe, it may be worth cutting a new piece and re-sewing the entire section. This is frustrating but produces better results than trying to salvage a badly puckered seam.
Frequently Asked Questions
Do I need to press seams if I’m using a serger?
Yes, serged seams still need pressing to lie flat and look professional. Press serged seams to one side (toward the garment body, away from the serged edge) using low to medium heat. The bulk of the serged edge makes pressing even more important than with regular seams.
Can I press seams with a hair straightener in a pinch?
A hair straightener works for very small areas like narrow straps or bias tape but isn’t suitable for regular seam pressing. It lacks the surface area, weight, and steam needed for effective pressing. Use it only as an emergency solution when traveling.
How long should I hold the iron on each section?
Hold the iron in place for 3-5 seconds per section, long enough for heat to penetrate the fabric layers. Very thick fabrics may need 7-10 seconds. If you’re using steam, wait until you see the steam penetrate before lifting the iron.
Should I press seams before or after trimming seam allowances?
Press seams flat as sewn first, then trim if needed, then press open or to one side. This sequence prevents accidentally cutting into the stitching line and makes it easier to see where to trim.
What’s the white residue on my fabric after pressing?
White residue is usually mineral deposits from hard water in your iron’s steam function. Use distilled water in your iron to prevent this. Remove existing residue by pressing with a vinegar-dampened pressing cloth, then pressing again with plain water.
Can I use a mini iron for sewing projects?
Mini craft irons work for small detail areas like doll clothes or narrow bias tape but lack the weight and surface area for regular seam pressing. They’re useful as a supplement to a full-size iron but not as a replacement.
How do I press seams on thick fabrics like denim or canvas?
Use high heat, lots of steam, and a clapper for thick fabrics. Press from the wrong side first, then use the wooden clapper immediately after lifting the iron to pound the seam flat while it’s hot. You may need to press each section multiple times.
Is it better to press seams open or to one side for quilting?
Quilting traditionally presses seams to one side (toward the darker fabric) because this creates stronger seams that won’t separate with use and washing. Pressed-open seams can create gaps in quilts over time.
What do I do if I accidentally create a shine mark on dark fabric?
Try pressing the shiny area from the wrong side with a steam burst and pressing cloth. For stubborn shine, lightly brush the area with a soft brush or fine-grit sandpaper. Prevention (always using a pressing cloth on dark fabrics) is easier than fixing shine.
Can I press seams while the fabric is still pinned?
Never press over pins, this creates permanent dents in fabric and scratches your iron’s soleplate. Remove pins before pressing, or use fabric clips in areas that need to stay aligned during pressing.
How do I press gathered seams without flattening the gathers?
Press only the seam allowance, not the gathered area. Place the seam over a seam roll or the edge of your ironing board, and use the iron’s tip to press just the seam allowance toward the ungathered side. Don’t press the gathers themselves.
Should I let fabric cool before handling it after pressing?
Yes, let pressed areas cool for at least 30 seconds before handling. Fabric is moldable when hot and can stretch or distort if moved too soon. This is especially important for bias edges and shaped areas like darts.
Conclusion
Learning how to press as you sew transforms your sewing from obviously homemade to professionally finished. The technique matters more than stitching quality because even perfect seams look amateurish without proper pressing, while well-pressed seams can hide minor stitching imperfections. By pressing each seam immediately after stitching, using the correct temperature, appropriate steam, and proper tools, you create crisp, flat seams that make every subsequent construction step easier and more accurate.
Your next steps:
- Set up your ironing board next to your sewing machine for easy access
- Invest in a basic steam iron and pressing cloth if you don’t have them
- Add a tailor’s ham to your toolkit for pressing curved seams and darts
- Practice the lift-and-press motion instead of sliding the iron
- Make pressing part of your automatic sewing sequence: stitch, press, next step
Start with your next project, no matter how simple. Press every seam before moving to the next construction step, and you’ll immediately see the difference in your finished work. The habit feels slow at first but quickly becomes automatic, and the professional results make it worth every extra minute at the ironing board.
For more essential sewing techniques, explore our guides on presser feet and feed dogs to understand how your machine works.