


Quick Answer
Threading a serger doesn’t have to be frustrating. The key is following the correct sequence (upper looper, lower looper, then needles), using the color-coded guides on your machine, and keeping steady tension on each thread as you guide it through. With the right approach and a few practice rounds, most sewers can thread a 4-thread serger in under five minutes.
Key Takeaways
- Follow the numbered sequence on your machine’s threading diagram religiously, skipping steps causes 90% of threading problems
- Thread loopers before needles always, as this prevents tangling and makes the process significantly easier
- Keep tension on threads while threading to prevent them from slipping out of guides and tension discs
- Use quality thread designed for sergers, cheap thread breaks constantly and creates frustration
- Practice on a stationary machine first; don’t try to thread while the machine is running or plugged in
- Take photos of your correctly threaded machine as a reference for next time
- Tweezers are your friend for guiding thread through tight spots and loopers
- Most sergers take 3-5 practice sessions before threading becomes second nature
What Is a Serger and How Is It Different From a Regular Sewing Machine?
A serger (also called an overlock machine) is a specialized sewing machine that trims fabric edges while simultaneously encasing them in thread, creating professional-looking seams that won’t fray. Unlike a regular sewing machine that uses one or two threads, a serger uses 3-5 threads working together to create stretchy, durable seams.
Key differences between sergers and regular sewing machines:
- Thread count: Sergers use 3-5 threads simultaneously; regular machines use 1-2
- Cutting blade: Sergers have a built-in knife that trims fabric as you sew
- Stitch formation: Sergers create overlock stitches that wrap around fabric edges
- Speed: Sergers sew much faster (1,300-1,700 stitches per minute vs. 800-1,000)
- Seam stretch: Serger seams stretch with knit fabrics; regular straight stitches don’t
- Purpose: Sergers finish edges and seams; regular machines do construction sewing, topstitching, and decorative work
Regular sewing machines create stitches by interlocking an upper thread with a bobbin thread. Sergers use loopers (curved metal arms) instead of bobbins, which pass threads around each other and the fabric edge. This fundamental difference in stitch formation is exactly why threading a serger feels so different, and initially more complicated, than threading a regular sewing machine.
Choose a serger if: You sew knits, activewear, or garments regularly and want professional-looking seam finishes. Choose a regular machine if you’re doing quilting, home décor, or woven-fabric projects where edge finishing isn’t critical.
Why Is Threading a Serger So Difficult Compared to Normal Sewing Machines?
Threading a serger feels harder because you’re managing 3-5 separate thread paths simultaneously, each following a different route through tension discs, guides, and loopers before converging at the needle plate. The loopers move in opposite directions and must be threaded in a specific sequence, or the threads tangle immediately.
What makes serger threading challenging:
- Multiple thread paths: Each thread follows a unique route with 8-12 threading points
- Looper access: Lower loopers are often hidden under the machine, requiring tweezers or a threading hook
- Precise sequence: Threading out of order causes threads to tangle or break
- Tension sensitivity: Each thread needs different tension settings that interact with each other
- No visual confirmation: Unlike a sewing machine where you can see the bobbin thread, looper threads work underneath
- Tight spaces: Threading eyes and guides are smaller and closer together than on regular machines
The upper looper and lower looper must pass each other without tangling, which only works if they’re threaded correctly. If you thread the needles first (a natural instinct from regular sewing), those threads get in the way of the looper threads and create a mess.
Common mistake: Trying to thread a serger like a sewing machine by starting at the needle. Always start with the upper looper, then lower looper, then right needle, then left needle (on 4-thread models).
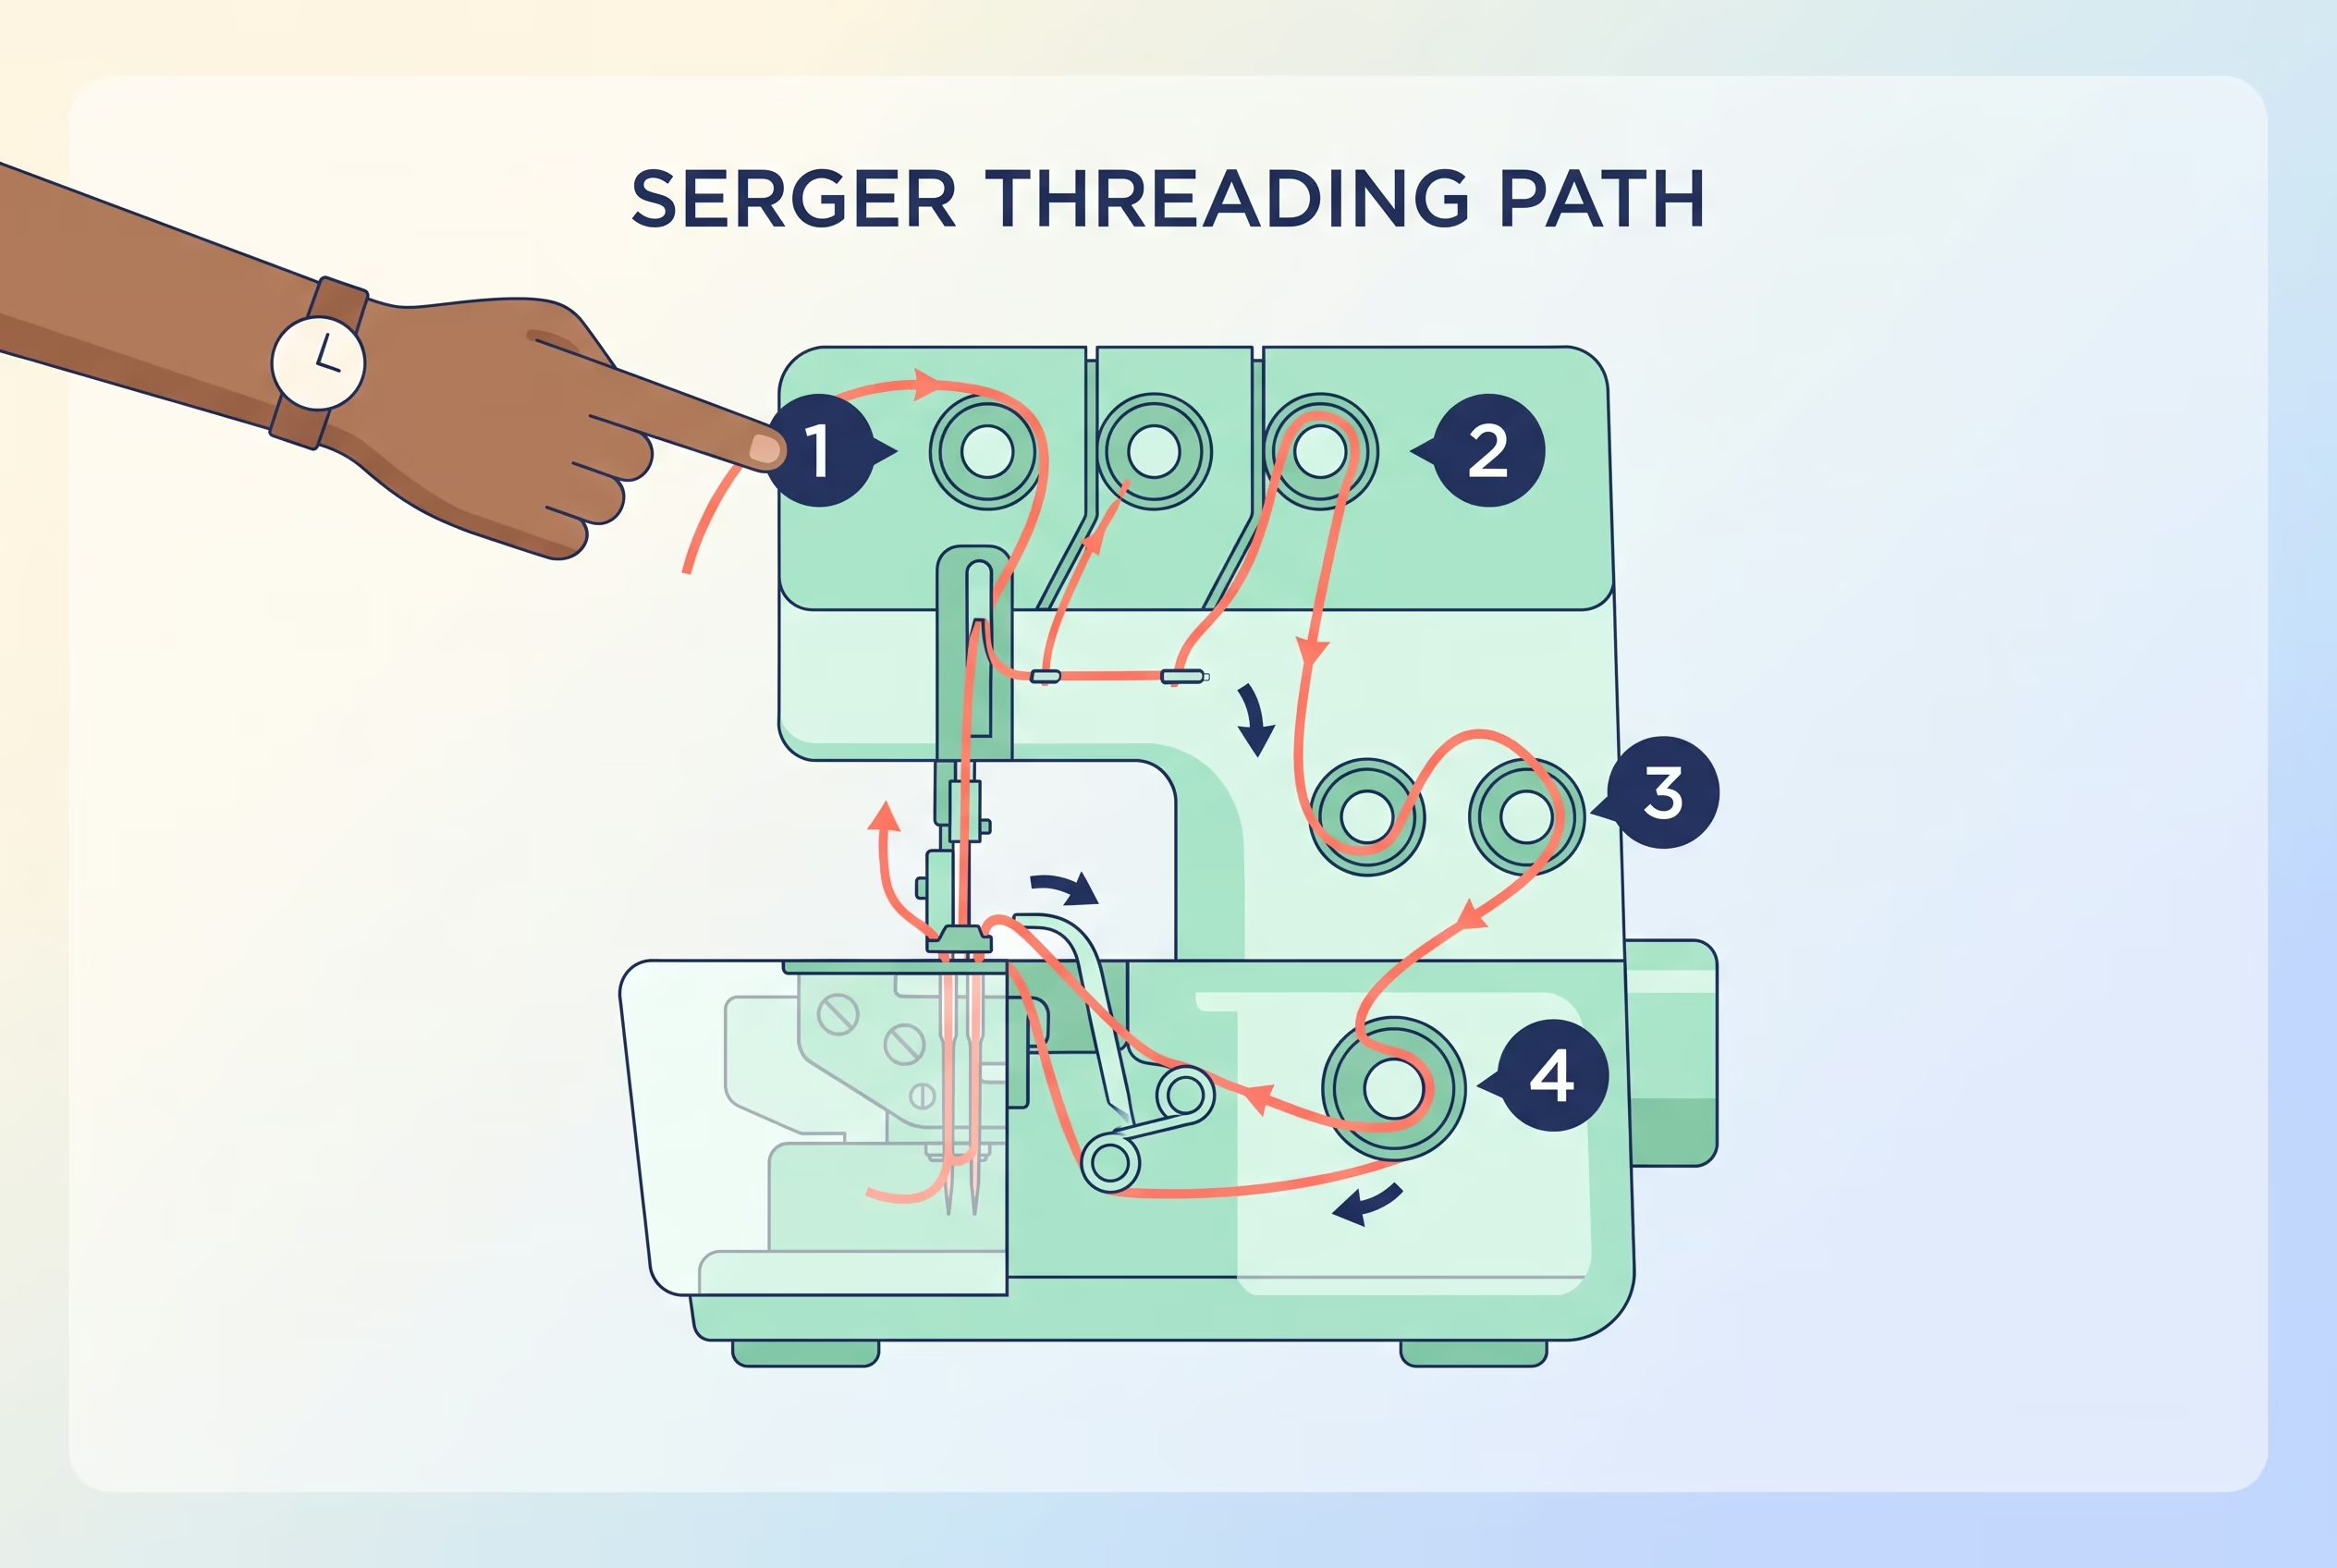
Most sergers include a threading diagram on the machine body or inside the front cover. These color-coded paths are your roadmap, follow them exactly, and threading becomes a predictable routine rather than a guessing game.
How Much Does a Serger Cost for Home Use?
Entry-level sergers for home use cost between $200-400, mid-range models run $400-800, and professional-grade home sergers range from $800-2,000. The price difference reflects features like automatic threading, differential feed quality, stitch variety, and build durability.
Serger price ranges and what you get:
| Price Range | Features | Best For |
|---|---|---|
| $200-400 | 3/4-thread capability, basic differential feed, manual threading | Beginners, occasional use, trying serging before investing more |
| $400-800 | 4/5-thread options, better differential feed, color-coded threading, lay-in tension | Regular sewers, garment makers, small business startups |
| $800-2,000 | Automatic threading, advanced stitch options, superior build quality, quiet operation | Serious hobbyists, professional seamstresses, daily use |
Budget-friendly models like the Singer 14CG754 ($250-300) and Brother 1034D ($250-350) are popular starter sergers that handle basic overlocking well. Mid-range favorites include the Juki MO654DE ($400-500) and Baby Lock Imagine ($600-700), which offer easier threading and more consistent stitch quality.
What affects the price:
- Automatic threading systems add $200-400 to the base price but save significant frustration
- Differential feed range (the ratio that prevents fabric stretching or puckering) improves in higher-priced models
- Build quality and metal internal parts versus plastic affect longevity and stitch consistency
- Jet-air threading (available on $1,000+ models) uses air to blow thread through loopers automatically
For most home sewers who make garments regularly, a $400-600 serger offers the best balance of features and ease of use. If you’re just starting out and unsure whether you’ll use a serger often, a $250-300 model lets you learn without a major investment.

ACCESSIBLE OPEN THREADING & EASY SETUP: Say goodbye to the biggest challenge of using a serger sewing machine—complex threading! The open threading area allows you to easily access the loopers or quickly troubleshoot without dismantling anything. Combined with a visual alignment guide, beginners can set up this versatile serger overlock machine with 2/3/4 thread capability in minutes and get straight to sewing.

Threading a needle or looper cannot be made simpler.
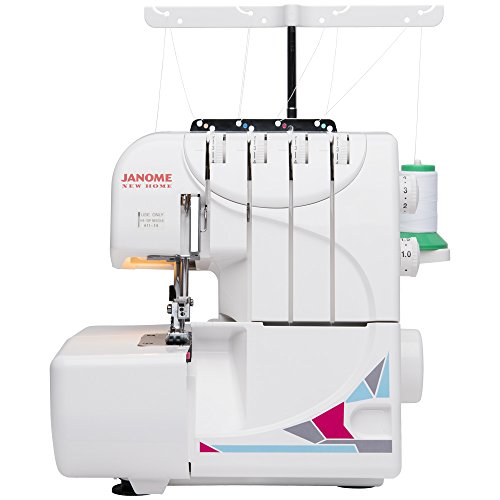
Janome MOD-Serger Overlock with 3 and 4 Thread Options
Easiest Serger Models for Beginners to Thread
The Baby Lock Imagine, Juki MO654DE, and Brother 1034DX are consistently rated as the easiest sergers for beginners to thread, thanks to color-coded threading paths, lay-in tension systems, and clear threading diagrams. The Baby Lock Imagine offers jet-air threading that automatically threads the lower looper with the push of a button.
Top beginner-friendly sergers ranked by threading ease:
1. Baby Lock Imagine ($600-700)
- Jet-air threading for lower looper (eliminates the hardest step)
- Color-coded threading paths with numbered sequence
- Lay-in tension system (no threading through tension discs)
- Clear threading diagram inside front cover
2. Juki MO654DE ($400-500)
- Color-coded threading with large, easy-to-see guides
- Lay-in tension for all threads
- Threading diagram printed on machine body
- Excellent manual with step-by-step photos
3. Brother 1034DX ($300-400)
- Color-coded threading system
- Instructional DVD included
- Lower looper threader tool included
- Clear numbered threading path
4. Singer 14CG754 ($250-300)
- Color-coded threading guides
- Detailed threading diagram on machine
- Budget-friendly entry point
- Good manual with illustrations
What makes a serger easy to thread:
- Color-coded paths: Each thread (usually white, red, blue, green) follows guides marked with matching colors
- Lay-in tension: Threads sit in grooves rather than threading through discs
- Numbered sequence: Clear 1-2-3-4 markings show exactly which order to follow
- Accessible loopers: Lower looper positioned where you can see and reach it
- Threading tools included: Tweezers or wire threaders for tight spots
The Baby Lock Imagine’s jet-air threading is genuinely game-changing for beginners, you simply place the thread near the lower looper opening, press a button, and air suction pulls it through. This eliminates the most frustrating part of serger threading and is worth the extra cost if threading anxiety is holding you back.
Avoid if you’re a beginner: Older sergers without color-coding, industrial models designed for speed over ease, and ultra-budget machines under $200 that often have poor threading diagrams and inconsistent tension systems.
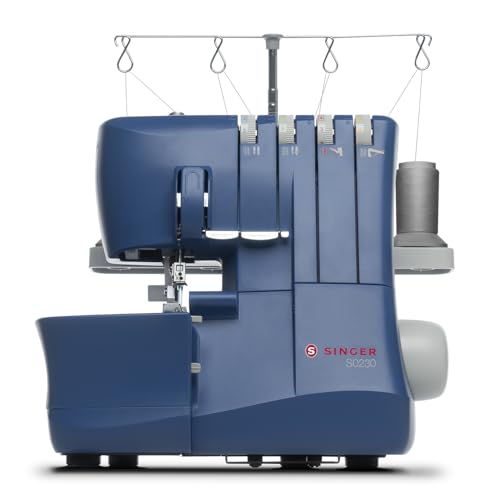
✅ 2/3/4 THREAD SERGING & COLOR-CODED THREADING: Use 2, 3, or 4 threads for a variety of stitch combinations including seams, rolled hems, and decorative edges. The color-coded threading system makes setup simple, quick, and beginner-friendly while ensuring accurate threading every time.

METAL FRAME: The Brother 1034D is a durable serger made with a high-quality metal frame and interior components. Underlooper Threader-Yes

2-3-4 THREAD STITCH CAPABILITY FOR VERSATILE SEWING: The SINGER S14-78 offers 2, 3, and 4 thread stitch capability, providing a wide range of options for creating professional seams, seam finishes, decorative edges, rolled hems, and more. Whether you're sewing garments or home décor, this serger gives you the versatility to tackle any project with precision and durability
Step-by-Step Serger Threading Guide
Threading a serger correctly requires following a specific sequence: upper looper first, then lower looper, then right needle, and finally left needle (on 4-thread models). This order prevents thread tangling and ensures all threads can move freely through their paths.
Before you start:
- Turn off and unplug your machine for safety
- Gather 4 thread cones (or 3 for a 3-thread setup)
- Have tweezers or a threading hook handy
- Locate your machine’s threading diagram
- Raise the presser foot to release tension discs
Complete threading sequence for a 4-thread serger:
Step 1: Thread the Upper Looper (usually yellow or red path)
- Place thread on the far-right thread spool pin
- Guide thread through the upper thread guide
- Bring thread down and through the upper tension dial (or lay in the groove)
- Follow the path to the upper looper threading guide
- Thread through the upper looper eye from right to left
- Pull 6-8 inches of thread through and let it hang
Step 2: Thread the Lower Looper (usually green path)
- Place thread on the second-from-right spool pin
- Follow the threading path through its tension system
- Guide thread down to the lower looper area (often underneath)
- Use tweezers to thread through the lower looper eye from left to right
- Pull 6-8 inches through and let it hang
- This is the hardest step, take your time and use good lighting
Step 3: Thread the Right Needle (usually blue path)
- Place thread on the second-from-left spool pin
- Follow the threading path through guides and tension
- Thread through the needle bar thread guide
- Thread the right needle from front to back
- Pull 6-8 inches through
Step 4: Thread the Left Needle (usually white or pink path)
- Place thread on the far-left spool pin
- Follow its threading path through guides and tension
- Thread through the needle bar thread guide
- Thread the left needle from front to back
- Pull 6-8 inches through
Step 5: Chain Off to Test
- Lower the presser foot
- Hold all thread tails together behind the needles
- Turn the handwheel toward you 2-3 full rotations
- You should see a thread chain forming
- If threads tangle or don’t form a chain, recheck your threading sequence
Pro tips for easier threading:
- Keep tension on each thread as you guide it through the path, this prevents it from slipping out
- Thread with the presser foot UP so tension discs are released
- Use a headlamp or clip-on light to see the lower looper clearly
- Take a photo of your correctly threaded machine as a reference
- Practice threading 3-4 times in a row to build muscle memory
If your serger has lay-in tension (grooves instead of discs), simply lay the thread in the groove rather than threading through a disc. This modern feature, found on models like the Juki MO654DE, cuts threading time significantly.
Common threading mistake: Forgetting to raise the presser foot before threading. When the foot is down, tension discs are engaged and threads won’t seat properly, causing thread tension problems later.
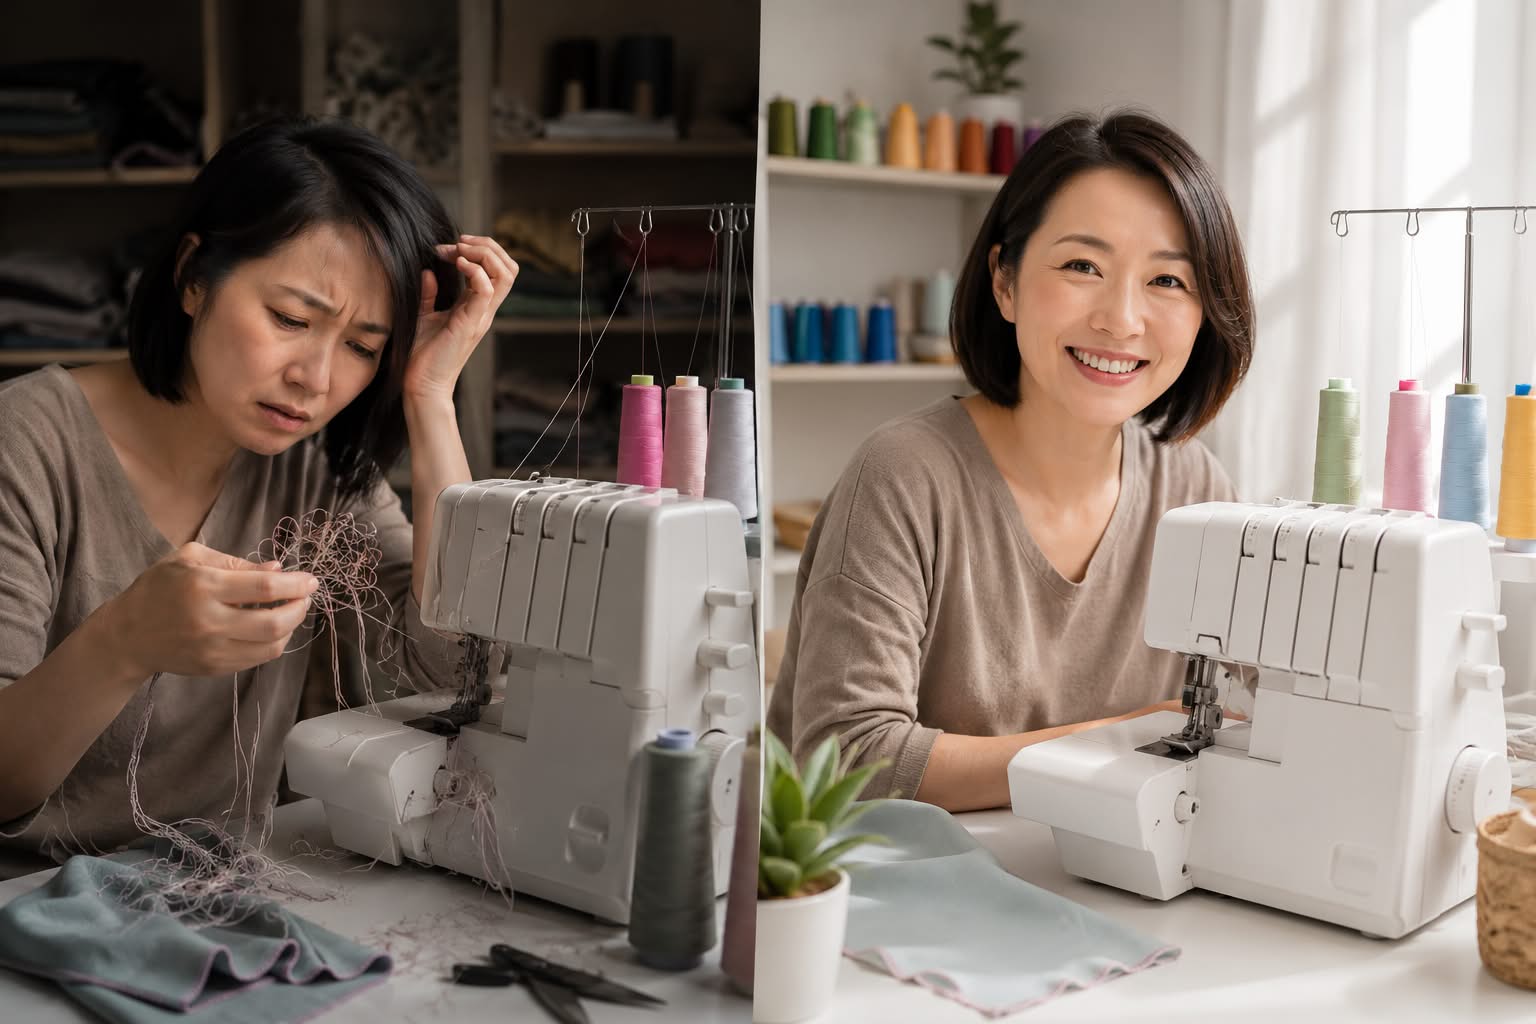
My Serger Thread Keeps Breaking, What Am I Doing Wrong?
Thread breaking on a serger usually means you’re using low-quality thread, have incorrect tension settings, or haven’t threaded the path completely. Sergers run at high speeds (1,300+ stitches per minute) and create significant thread stress, so any weak point in the thread or threading path causes breaks.
Top causes of thread breaking and fixes:
1. Wrong thread type
- Problem: Using all-purpose cotton or cheap thread that can’t handle serger speed
- Fix: Switch to polyester serger thread or high-quality cone thread designed for overlocking
- Serger thread is finer and stronger than regular sewing thread
2. Incomplete threading path
- Problem: Thread skipped a guide or didn’t fully seat in a tension disc
- Fix: Completely unthread and rethread that spool, checking every single guide point
- Even one missed guide causes uneven tension and breaks
3. Tension too tight
- Problem: Tension dial set too high for the thread weight
- Fix: Lower tension gradually (try reducing by 1-2 numbers) and test
- Upper looper tension is often the culprit, start there
4. Old or damaged thread
- Problem: Thread has been sitting for years and has become brittle
- Fix: Replace with fresh thread; old thread breaks constantly regardless of settings
- Thread has a shelf life of about 3-5 years
5. Burr on the needle or looper
- Problem: A tiny rough spot on the needle eye or looper catches and cuts thread
- Fix: Replace the needle; run your finger along the looper to check for rough spots
- This is common after hitting a pin
6. Threading with presser foot down
- Problem: Threads didn’t seat properly in tension discs
- Fix: Raise presser foot, unthread, and rethread all spools correctly
Quick diagnostic test:
- Unthread the breaking thread completely
- Hold the thread spool and pull thread through your fingers, does it feel rough or catch?
- Rethread carefully, checking every guide with good lighting
- Test on scrap fabric at a slower speed
- If it still breaks, replace the needle and try a different thread brand
For more detailed troubleshooting on thread issues, see our guide on why thread keeps breaking.
Thread quality matters: Invest in good serger thread from brands like Maxi-Lock, Gutermann, or Mettler. A $3 cone of quality thread will save you hours of frustration compared to $1 bargain thread that breaks every few inches. Check out our article on thread quality for more guidance.
Do I Really Need a Serger or Can I Just Use My Regular Machine?
You don’t absolutely need a serger, you can finish seams on a regular sewing machine using zigzag stitches, overcast stitches, or French seams. However, a serger produces professional-looking seam finishes 3-4 times faster, creates stretchier seams for knits, and trims fabric edges simultaneously, making it invaluable if you sew garments regularly.
When a regular sewing machine is enough:
- You primarily sew quilts, home décor, or woven fabrics
- You make 1-2 garments per year
- Your projects don’t require stretchy seams
- You’re working with fabrics that don’t fray easily
- Budget is tight and you’re just starting to sew
When a serger becomes worth the investment:
- You sew knit fabrics (t-shirts, leggings, activewear) regularly
- You make garments for yourself or others frequently
- You want store-bought quality seam finishes
- You’re starting a small sewing business
- You value time efficiency (serging is much faster)
What you can do on a regular machine instead:
- Zigzag stitch: Set to medium width and length, stitch along raw edges
- Overcast stitch: Many machines have a dedicated overcast stitch that mimics serging
- Mock flat-fell seam: Enclose raw edges for a clean finish
- French seam: Enclose raw edges inside the seam (works for lightweight fabrics)
- Pinking shears: Cut edges with pinking shears to minimize fraying
What a serger does better:
- Creates stretchy seams that move with knit fabrics
- Trims, stitches, and finishes in one pass
- Produces consistent, professional-looking edges
- Works 3-4 times faster than zigzag finishing
- Creates rolled hems for delicate fabrics
- Handles thick layers and seam bulk better
The honest assessment: If you’re sewing more than one garment per month, especially with knits, a serger pays for itself in time saved and quality improvement within a year. If you’re a casual sewist who mostly works with wovens or does craft projects, stick with your regular machine and use alternative finishing methods.
Many sewers find that owning both machines is ideal, use the regular machine for construction and topstitching, then finish seams on the serger. They complement each other rather than one replacing the other.
Serger vs Overlock Machine, What’s the Difference?
There is no difference, “serger” and “overlock machine” are two names for the same machine. “Serger” is the term commonly used in North America, while “overlock” is preferred in Europe, Australia, and most other parts of the world. Both refer to a machine that creates overlock stitches to finish fabric edges.
Why two names exist:
- Regional preference: North American sewing culture adopted “serger” (possibly from “surge” or as a brand name that became generic)
- Technical term: “Overlock” describes what the machine actually does, locks thread over the fabric edge
- Marketing: Some brands use one term or the other for branding purposes
They’re the same machine if they:
- Use 3-5 threads simultaneously
- Have loopers instead of a bobbin
- Include a cutting blade
- Create stitches that wrap around fabric edges
- Finish seams and prevent fraying
Slight terminology variations:
- Overlocker: British/Australian term, same as serger
- Merrow machine: Industrial overlock machines (Merrow is a brand name)
- Safety stitch machine: Industrial serger with additional straight-stitch capability
- Coverstitch machine: Different machine that creates parallel rows of stitching (not the same as a serger, though some combo machines do both)
When shopping for a machine, searching for both “serger” and “overlock” will show you the same category of machines. Don’t worry about which term to use, manufacturers and retailers understand both, and product listings often include both terms for search purposes.
One exception: Some high-end machines are “serger/coverstitch combos” that can do both overlock stitches and coverstitch hemming. These are more versatile but also more complex to thread and adjust. For beginners learning how to thread a serger without crying, start with a dedicated serger rather than a combo machine.
Common Mistakes When Threading a Serger for the First Time
The most common first-time threading mistakes are threading needles before loopers, missing threading guides, and not keeping tension on threads while threading. These errors cause thread tangling, poor stitch formation, and the frustration that gives serger threading its intimidating reputation.
Top 10 beginner threading mistakes:
1. Threading in the wrong order
- Mistake: Starting with needles instead of loopers
- Why it fails: Needle threads get in the way of looper threads and tangle
- Fix: Always thread upper looper → lower looper → right needle → left needle
2. Threading with presser foot down
- Mistake: Forgetting to raise the presser foot before threading
- Why it fails: Tension discs stay engaged and threads don’t seat properly
- Fix: Always raise presser foot first; lower it only after all threads are in place
3. Skipping threading guides
- Mistake: Missing one of the small thread guides along the path
- Why it fails: Creates uneven tension and causes loops, skipped stitches, or breaks
- Fix: Follow the threading diagram exactly, checking each guide point
4. Not keeping tension on thread
- Mistake: Letting thread go slack while threading
- Why it fails: Thread slips out of guides and tension discs
- Fix: Keep gentle tension on the thread spool as you guide it through the path
5. Using the wrong thread type
- Mistake: Threading with all-purpose sewing thread or heavy upholstery thread
- Why it fails: Wrong thread weight causes tension problems and poor stitch formation
- Fix: Use polyester serger thread or quality cone thread designed for overlocking
6. Threading the lower looper incorrectly
- Mistake: Threading from right to left instead of left to right (or vice versa, depending on model)
- Why it fails: Loopers must pass each other in specific directions or they tangle
- Fix: Check your manual, most lower loopers thread left to right
7. Not pulling enough thread through
- Mistake: Leaving only 2-3 inches of thread tail
- Why it fails: Thread pulls out when you start sewing
- Fix: Pull 6-8 inches of thread through each needle and looper
8. Forgetting to thread through the needle bar guide
- Mistake: Going straight from tension to needle, skipping the guide above the needles
- Why it fails: Thread doesn’t have proper path to needle and causes skipped stitches
- Fix: Always thread through the final guide just above the needle bar
9. Trying to thread in poor lighting
- Mistake: Threading in dim light where you can’t see the lower looper clearly
- Why it fails: You miss the looper eye or thread through the wrong opening
- Fix: Use a headlamp, clip-on light, or move to bright natural light
10. Not testing with a chain-off
- Mistake: Assuming threading is correct without testing
- Why it fails: You don’t discover threading errors until you’re mid-project
- Fix: Always chain off 4-5 inches after threading to verify all threads are working together
The biggest mindset mistake: Expecting to thread perfectly on the first try. Even experienced sewers occasionally misthread a serger. The difference is they know to systematically check each thread path rather than getting frustrated. Threading a serger is a skill that improves dramatically with practice, your fifth time will be exponentially easier than your first.
For additional help with threading issues, check out our comprehensive guide on sewing machine threading.
Which Serger Has Automatic Threading or the Easiest Threading System?
The Baby Lock Imagine, Baby Lock Enlighten, and Janome AT2000D feature the easiest threading systems, with jet-air threading that automatically threads the lower looper using air suction. For budget-friendly easy threading, the Juki MO654DE and Brother 1034DX offer color-coded lay-in tension systems that significantly simplify the process.
Sergers with automatic or semi-automatic threading:
Baby Lock Imagine ($600-700)
- Jet-air threading: Automatically threads lower looper with button press
- Lay-in tension: No threading through tension discs
- Color-coded paths: Clear visual guides for remaining threads
- Best for: Beginners who want minimal threading frustration
Baby Lock Enlighten ($800-1,000)
- Jet-air threading: For lower looper
- Automatic needle threading: Built-in needle threader
- Lay-in tension: All threads
- Best for: Sewers who want maximum convenience and have the budget
Janome AT2000D ($1,200-1,500)
- Automatic air threading: For both loopers
- One-touch tension: Automatic tension adjustment
- Best for: Professional sewers or serious hobbyists who serge daily
Best easy-threading systems without air threading:
Juki MO654DE ($400-500)
- Lay-in tension: Threads sit in grooves, not threaded through discs
- Color-coded system: Clear threading path
- Excellent manual: Step-by-step photos
- Best value: Easiest threading in the mid-price range
Brother 1034DX ($300-400)
- Color-coded threading: Clear visual guides
- Lower looper threader tool: Included wire tool helps with hardest step
- Instructional DVD: Visual learning aid
- Best budget option: Easiest threading under $400
What makes these systems easier:
- Jet-air threading: You place thread near the looper opening and press a button; air suction pulls it through automatically (eliminates the hardest step)
- Lay-in tension: Threads rest in grooves rather than threading through discs (saves 30-40% of threading time)
- Color-coded paths: Each thread follows a colored line matching the spool pin color (reduces errors)
- Automatic needle threaders: Built-in threader pushes thread through needle eye (like on modern sewing machines)
Is automatic threading worth the extra cost? If you’re intimidated by threading or have vision or dexterity challenges, absolutely yes. The Baby Lock Imagine’s jet-air threading eliminates the most frustrating part of serger threading and is worth the $200-300 premium over basic models. If budget is tight, the Juki MO654DE’s lay-in tension system offers significant ease improvement at a mid-range price.
What automatic threading doesn’t do: Even with jet-air threading, you still need to thread the upper looper and needles manually. Automatic systems typically handle only the lower looper (the hardest part) or add automatic needle threading. You’ll still follow a threading sequence, but the most difficult steps are automated.

HEAVY DUTY METAL FRAME FOR DURABILITY: Built with a heavy-duty metal frame, this serger provides the strength and stability needed for consistent, skip-free stitching, even when working on thicker fabrics. The sturdy frame holds the machine in place during operation, reducing vibrations and ensuring smooth, precise stitches with every use. Designed for longevity, this durable metal construction is built to withstand heavy use, making it a reliable choice for all your sewing needs.

✅ PROFESSIONAL SPEED & POWER: Experience up to 1,300 stitches per minute with a 20% higher-wattage motor, delivering enhanced piercing power for thick fabrics. Achieve fast, precise results on all projects — from denim and canvas to delicate sheers.

Air Technology: Thread the AIR1800 with a blast of air. With threading ports that are connected to the end of each looper by tubes, at the press of a button, a gust of air sends the threads through the looper, so, it's a breeze to change thread colors.
How Long Does It Take to Learn to Thread a Serger Properly?
Most sewers can thread a serger competently within 3-5 practice sessions, with each session taking 15-20 minutes. After 8-10 threading experiences, the process typically takes 5-7 minutes. Experienced serger users can thread their machines in 2-3 minutes once the sequence becomes muscle memory.
Typical learning timeline:
First attempt (30-45 minutes)
- Reading the manual and locating threading diagram
- Identifying each thread path and guide
- Threading slowly with frequent reference to instructions
- Likely need to rethread at least once due to mistakes
Attempts 2-3 (20-30 minutes each)
- Still referencing diagram frequently
- Starting to remember the sequence
- Fewer mistakes but still checking each step
Attempts 4-6 (10-15 minutes each)
- Threading mostly from memory
- Occasional reference to diagram for confirmation
- Confidence building
Attempts 7-10 (5-10 minutes each)
- Threading confidently without diagram
- Muscle memory developing
- Can troubleshoot minor mistakes quickly
After 10+ times (3-5 minutes)
- Threading is routine
- Can do it while chatting or listening to music
- Quickly identify and fix threading errors
Factors that speed up learning:
- Practice sessions close together: Threading 3 times in one week builds memory better than once per month
- Same machine: Switching between serger models resets the learning curve
- Good lighting: Seeing clearly prevents mistakes that slow learning
- Quality thread: Fewer breaks mean less rethreading and faster skill building
- Photo reference: Taking pictures of your correctly threaded machine helps visual learning
Factors that slow learning:
- Long gaps between uses: Threading monthly means relearning each time
- Poor manual: Unclear diagrams make learning harder
- Frustration: Getting upset and rushing causes more mistakes
- Skipping steps: Trying to take shortcuts before mastering the basics
Realistic expectation: If you’re new to sergers, plan to spend 30-45 minutes on your first threading session with the manual open. Don’t try to start a project the same day, just practice threading, chain off, unthread, and thread again 2-3 times. This focused practice builds confidence faster than struggling through threading while trying to complete a project.
By your third or fourth project, threading will feel routine rather than intimidating. The key is accepting that the learning curve is normal and giving yourself permission to practice without pressure.
Serger Thread Tension Problems After Threading
Thread tension issues after threading usually indicate incomplete threading (skipped a guide), incorrect threading sequence, or tension dials set wrong for your fabric and thread combination. Balanced tension creates a stitch where threads interlock at the fabric edge; unbalanced tension shows loops on the top or bottom surface.
How to diagnose tension problems:
Loops on the top surface (fabric right side)
- Cause: Upper looper tension too loose or lower looper tension too tight
- Fix: Tighten upper looper tension by 1-2 numbers OR loosen lower looper tension
Loops on the bottom surface (fabric wrong side)
- Cause: Lower looper tension too loose or upper looper tension too tight
- Fix: Tighten lower looper tension OR loosen upper looper tension
Needle thread pulling to one side
- Cause: Needle tension too tight or looper tensions unbalanced
- Fix: Loosen needle tension; check that both loopers are threaded correctly
Fabric puckering or gathering
- Cause: All tensions too tight or differential feed set wrong
- Fix: Loosen all tensions by 1-2 numbers; adjust differential feed to 1.0 (neutral)
Thread breaking repeatedly
- Cause: Tension too tight, incomplete threading, or wrong thread type
- Fix: See the thread breaking section above; rethread completely
Systematic tension troubleshooting process:
Verify threading first: 90% of “tension problems” are actually threading errors
- Unthread and rethread all spools with presser foot UP
- Check every single guide point
- Ensure threads are seated in tension discs/grooves
Start with factory settings: Most sergers have recommended starting tensions
- Upper looper: 3-4
- Lower looper: 3-4
- Right needle: 3-4
- Left needle: 3-4
Test on scrap fabric: Use the same fabric as your project
- Serge 6-8 inches
- Examine both sides of the fabric
- Look for loops, puckering, or thread showing on the wrong side
Adjust one tension at a time: Change only one dial, test again
- Make small adjustments (1 number at a time)
- Test after each change
- Note what improves or worsens
Check thread quality: Poor thread causes inconsistent tension
- Replace old or cheap thread
- Use same brand/weight on all spools for consistent results
Quick tension reference chart:
| Problem | Likely Cause | Adjustment |
|---|---|---|
| Loops on top | Upper looper too loose | Tighten upper looper +1 or +2 |
| Loops on bottom | Lower looper too loose | Tighten lower looper +1 or +2 |
| Fabric puckering | All tensions too tight | Loosen all tensions -1 or -2 |
| Seam too loose | All tensions too loose | Tighten all tensions +1 |
| Thread breaking | One tension too tight | Loosen that thread’s tension -2 |
For more detailed guidance on tension issues, see our article on sewing machine tension explained.
Pro tip: Once you achieve perfect tension for a fabric type, write down all four tension settings in a notebook with a fabric swatch stapled next to it. This reference saves time when you return to that fabric later.
Is a 3-Thread or 4-Thread Serger Easier to Thread?
A 3-thread serger is easier to thread because you’re managing one fewer thread path, which means fewer guides, tension discs, and potential error points. However, 4-thread sergers are more versatile and only slightly more complex to thread once you understand the sequence.
3-thread serger threading:
- Threads: Upper looper, lower looper, one needle
- Threading time: 3-5 minutes for experienced users
- Complexity: Simpler with fewer paths to manage
- Best for: Finishing edges, rolled hems, lightweight seams
- Limitation: Less seam strength than 4-thread
4-thread serger threading:
- Threads: Upper looper, lower looper, two needles
- Threading time: 5-7 minutes for experienced users
- Complexity: One additional thread path (left needle)
- Best for: Stronger seams, garment construction, knits
- Advantage: Can switch between 3-thread and 4-thread by removing one needle
Threading difficulty comparison:
The actual threading process is nearly identical, you follow the same sequence (loopers first, then needles). The 4-thread version simply adds one more needle thread at the end. If you can thread a 3-thread serger, adding the fourth thread takes about 30 seconds once you know the path.
Most versatile option: A 4-thread serger that can convert to 3-thread by removing the left needle and not threading that spool. This gives you both options in one machine. You’ll use 4-thread for most garment seams and 3-thread for edge finishing or rolled hems.
Choose 3-thread if:
- You primarily finish edges on woven fabrics
- You want the absolute simplest threading
- You’re on a tight budget (3-thread models are sometimes cheaper)
Choose 4-thread if:
- You sew garments with knit fabrics
- You want stronger, more durable seams
- You want the option to switch between 3-thread and 4-thread
5-thread sergers: Some advanced models offer 5-thread capability (4-thread overlock plus a safety chain stitch). These are significantly more complex to thread and adjust. Unless you’re sewing professionally or doing industrial-style construction, a 4-thread serger offers the best balance of versatility and manageable threading.
Reality check: The difference in threading difficulty between 3-thread and 4-thread is minimal once you’ve practiced a few times. Don’t choose a less versatile machine just to avoid threading one additional spool, the extra 30 seconds is worth having the stronger seam option.
Best Serger Threading Tutorial Videos for Visual Learners
The best serger threading tutorials come from Professor Pincushion, Made to Sew, and individual machine manufacturer channels like Baby Lock and Juki. These videos show the threading process in real-time with close-up camera angles that make it easy to see exactly where each thread goes.
Top recommended video tutorial sources:
Professor Pincushion (YouTube)
- Detailed threading tutorials for specific serger models
- Close-up camera work showing each threading point
- Slow, clear explanations with on-screen text
- Covers troubleshooting common mistakes
Made to Sew (YouTube)
- Beginner-friendly serger tutorials
- Threading basics and tension adjustment
- Real-time demonstrations with multiple camera angles
Baby Lock Official Channel
- Model-specific threading videos
- Professional production quality
- Shows jet-air threading feature in action
Juki Official Channel
- Threading tutorials for Juki serger models
- Clear step-by-step process
- Includes maintenance tips
Brother Sewing Official
- Threading guides for Brother serger models
- Beginner-focused explanations
- Includes DVD content available online
What makes a good threading tutorial video:
- Close-up camera angles: You need to see the threading path clearly, not a wide shot of the whole machine
- Slow pace: The instructor threads at a pace you can follow, not rushing through steps
- Multiple angles: Shows the same threading point from different perspectives
- On-screen text: Labels threading points and sequence numbers
- Troubleshooting section: Addresses common mistakes and how to fix them
- Model-specific: Generic tutorials are less helpful than videos for your exact machine
How to use video tutorials effectively:
- Watch completely first: Don’t try to thread while watching the first time, just observe the full process
- Take notes: Write down the sequence and any tips mentioned
- Watch again with your machine: Pause frequently and thread along with the video
- Rewind as needed: Don’t feel bad about rewatching sections multiple times
- Practice without the video: After threading with the video 2-3 times, try it independently
Finding videos for your specific model:
- Search: “[Your serger brand and model] threading tutorial”
- Example: “Brother 1034D threading tutorial” or “Juki MO654DE how to thread”
- Check the manufacturer’s website, many have video libraries
- Look for videos uploaded within the last 3-5 years for best quality
Supplement videos with your manual: Videos are excellent for visual learning, but your machine’s manual has the official threading diagram specific to your model. Use both resources together, watch the video for technique and reference the manual for your exact threading path.
If you’re struggling with a particular step (usually the lower looper), search specifically for that: “how to thread lower looper on serger” will show you multiple techniques and tools that make that step easier.
Conclusion
Learning how to thread a serger without crying is absolutely achievable with the right approach, patience, and practice. The key is understanding that threading a serger follows a specific, logical sequence, upper looper, lower looper, right needle, left needle, and that most threading problems stem from skipping steps or threading in the wrong order rather than any inherent difficulty.
Your action plan for serger threading success:
Invest in a beginner-friendly model with color-coded threading if you’re buying new (Juki MO654DE, Brother 1034DX, or Baby Lock Imagine are excellent choices)
Set aside dedicated practice time for your first 3-4 threading sessions, don’t try to learn while rushing to finish a project
Use quality thread designed for sergers to eliminate thread-breaking frustration
Follow your machine’s threading diagram exactly and resist the urge to skip steps or take shortcuts
Keep the presser foot raised while threading so tension discs release properly
Thread with good lighting and use tweezers or a threading hook for the lower looper
Take photos of your correctly threaded machine as a quick reference
Practice the sequence 3-5 times in close succession to build muscle memory
Watch model-specific video tutorials to see the process in action
Be patient with yourself,threading gets exponentially easier after the first few attempts
Remember that even experienced sewers occasionally misthread a serger. The difference is they know how to systematically troubleshoot rather than getting frustrated. Threading a serger is a skill that improves dramatically with practice, and by your fifth or sixth project, you’ll wonder why it ever seemed intimidating.
The professional-quality seam finishes, time savings, and garment construction capabilities a serger provides are absolutely worth the initial learning curve. Once threading becomes routine, you’ll find yourself reaching for your serger constantly and wondering how you ever sewed without one.
Ready to master more sewing machine skills? Check out our guides on thread tension problems and why stitches are loose on one side to troubleshoot common issues.
Frequently Asked Questions
How often do I need to rethread my serger? You only need to rethread when changing thread colors, when thread runs out, or if you experience threading errors. Once correctly threaded, a serger stays threaded between projects, just turn it off and cover it. Many sewers go weeks between rethreading.
Can I thread a serger with regular sewing thread? You can, but it’s not recommended. Regular all-purpose thread is thicker and weaker than serger thread, causing tension problems and frequent breaks. Serger thread (polyester cone thread) is specifically designed for the high speeds and stress of overlocking.
What’s the hardest part of threading a serger? The lower looper is consistently the most challenging part because it’s often positioned underneath the machine where it’s hard to see and reach. Using tweezers, good lighting, and a threading hook makes this step much easier.
Do I need to thread all four threads even if I’m only using a 3-thread stitch? No. For 3-thread stitches, remove the left needle and don’t thread that spool. Thread only the upper looper, lower looper, and right needle. The machine will work fine with one needle position empty.
Why does my serger keep unthreading itself? This usually means you didn’t keep tension on the threads while threading, threads aren’t fully seated in tension discs, or you threaded with the presser foot down. Rethread with the presser foot raised and keep gentle tension on each thread as you guide it through the path.
Can I leave my serger threaded between projects? Yes, absolutely. Once correctly threaded, leave your serger threaded and simply cover it or put it away. There’s no need to unthread between uses. Just chain off a few inches before stopping so threads don’t pull out.
How do I know if I threaded my serger correctly? After threading, lower the presser foot, hold all thread tails together, and turn the handwheel 2-3 full rotations. If threads form a neat chain without tangling, your threading is correct. If threads tangle or don’t form a chain, recheck your threading sequence.
What tools help with serger threading? Tweezers or a threading hook are essential for the lower looper. A headlamp or clip-on light helps you see clearly. Some sewers use a magnifying glass for threading needle eyes. Most sergers include a threading tool in the accessory kit.
Is it normal to take 30 minutes to thread a serger the first time? Completely normal. First-time threading often takes 30-45 minutes as you learn the paths and sequence. By your third or fourth time, you’ll be down to 10-15 minutes, and eventually 3-5 minutes once it becomes routine.
Should I thread my serger with the power on or off? Always thread with the power OFF and the machine unplugged for safety. You don’t need power to thread, and having it off prevents accidental foot pedal presses that could cause injury while your hands are near the needles.
What tension settings should I start with on a newly threaded serger? Start with all tensions set to 3 or 4 (mid-range on most machines). This is the factory baseline. Test on scrap fabric and adjust from there based on your specific fabric and thread combination.
Can I thread a serger if I have poor eyesight? Yes, with accommodations. Use bright lighting (headlamp or clip-on light), a magnifying glass, and consider a serger with automatic threading features like the Baby Lock Imagine. Lay-in tension systems are also easier to see and use than traditional tension discs.


