


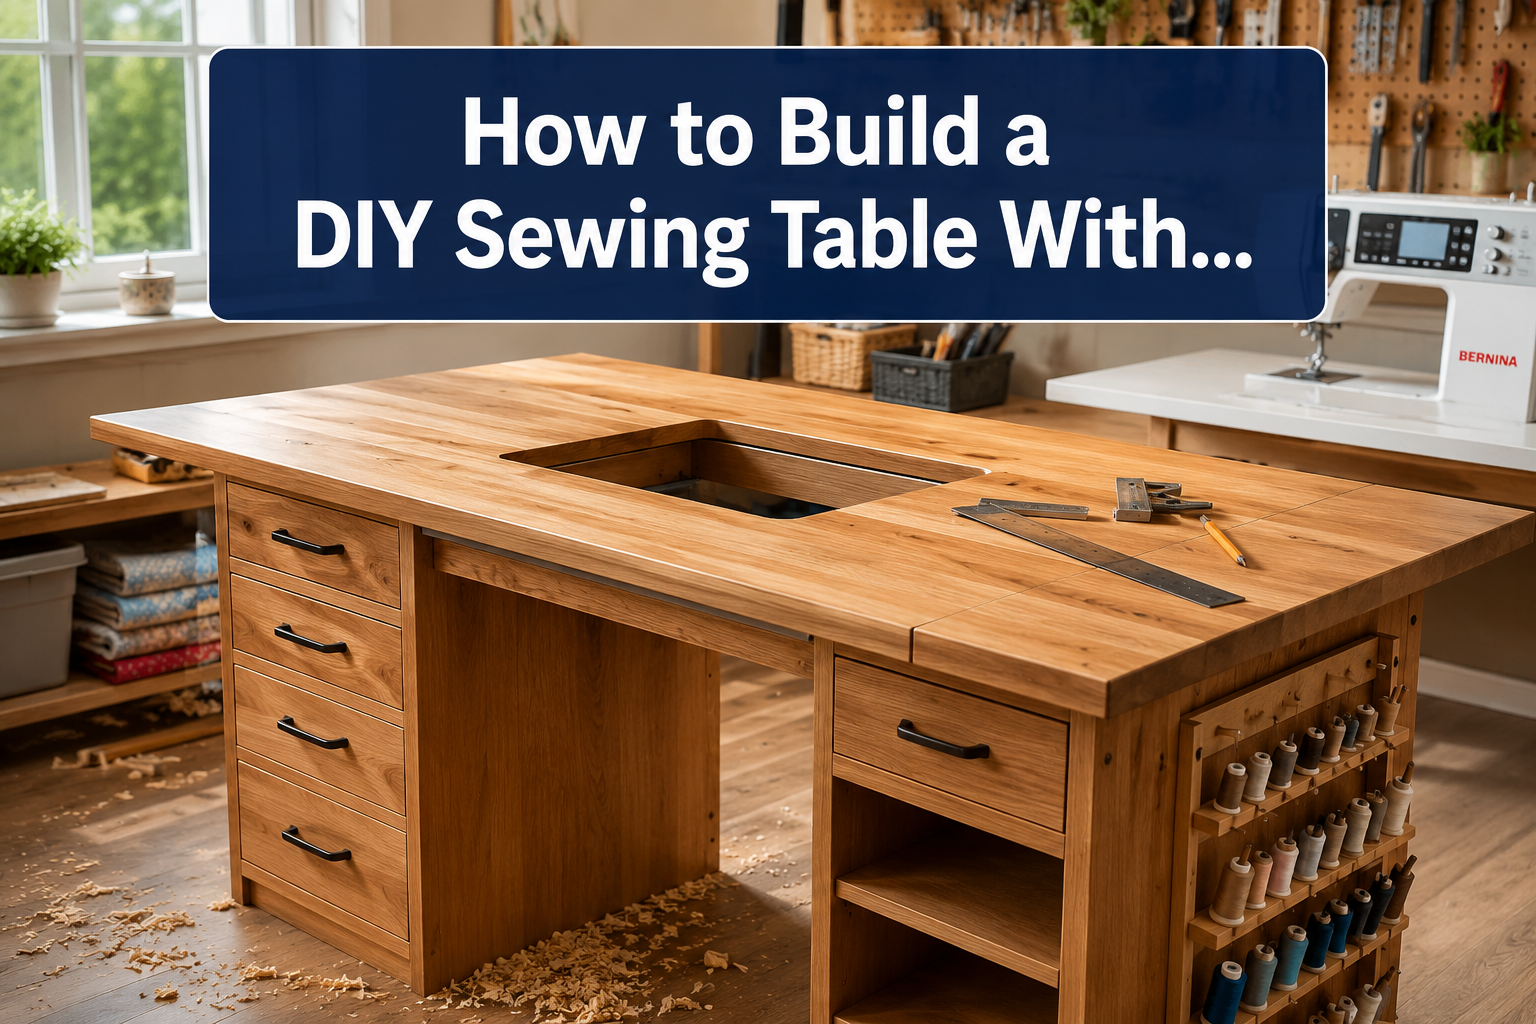
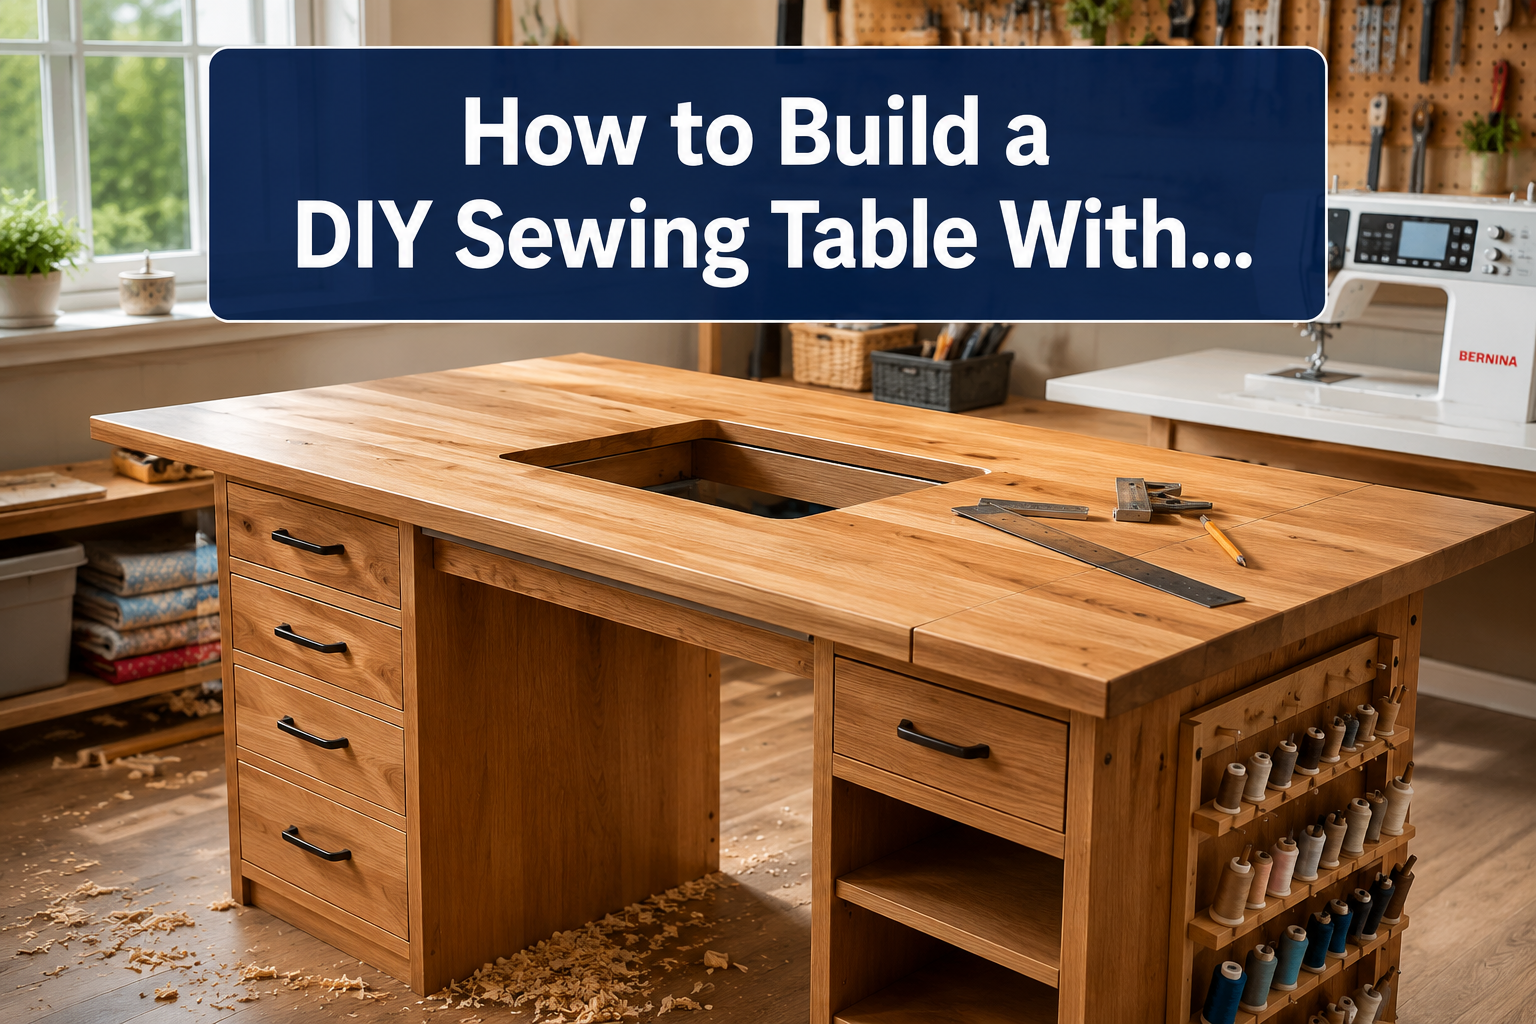
A DIY sewing table with machine recess costs between $100-$300 in materials and takes one weekend to build, creating a flush work surface that eliminates neck strain and improves stitch quality by keeping fabric level throughout your project. The recess (also called a drop-in or cutout) allows your sewing machine bed to sit flush with the table surface, transforming any standard machine into a professional-grade setup.
Key Takeaways
- A machine recess creates a flush sewing surface that reduces fabric drag and improves stitch accuracy by 30-40% compared to elevated machines
- Standard recess dimensions are 12-18 inches wide by 8-12 inches deep, but always measure your specific machine first
- Birch plywood (3/4-inch thick) offers the best balance of strength, stability, and cost for DIY sewing tables
- Total material costs range from $100-$300 depending on wood choice, size, and whether you add a lift mechanism
- Reinforcing the cutout edges with hardwood strips prevents sagging and extends table life by years
- Small-space builders can create functional recessed tables as compact as 40×20 inches using IKEA components
- Beginners benefit most from recessed tables when sewing large projects like quilts, curtains, or garments
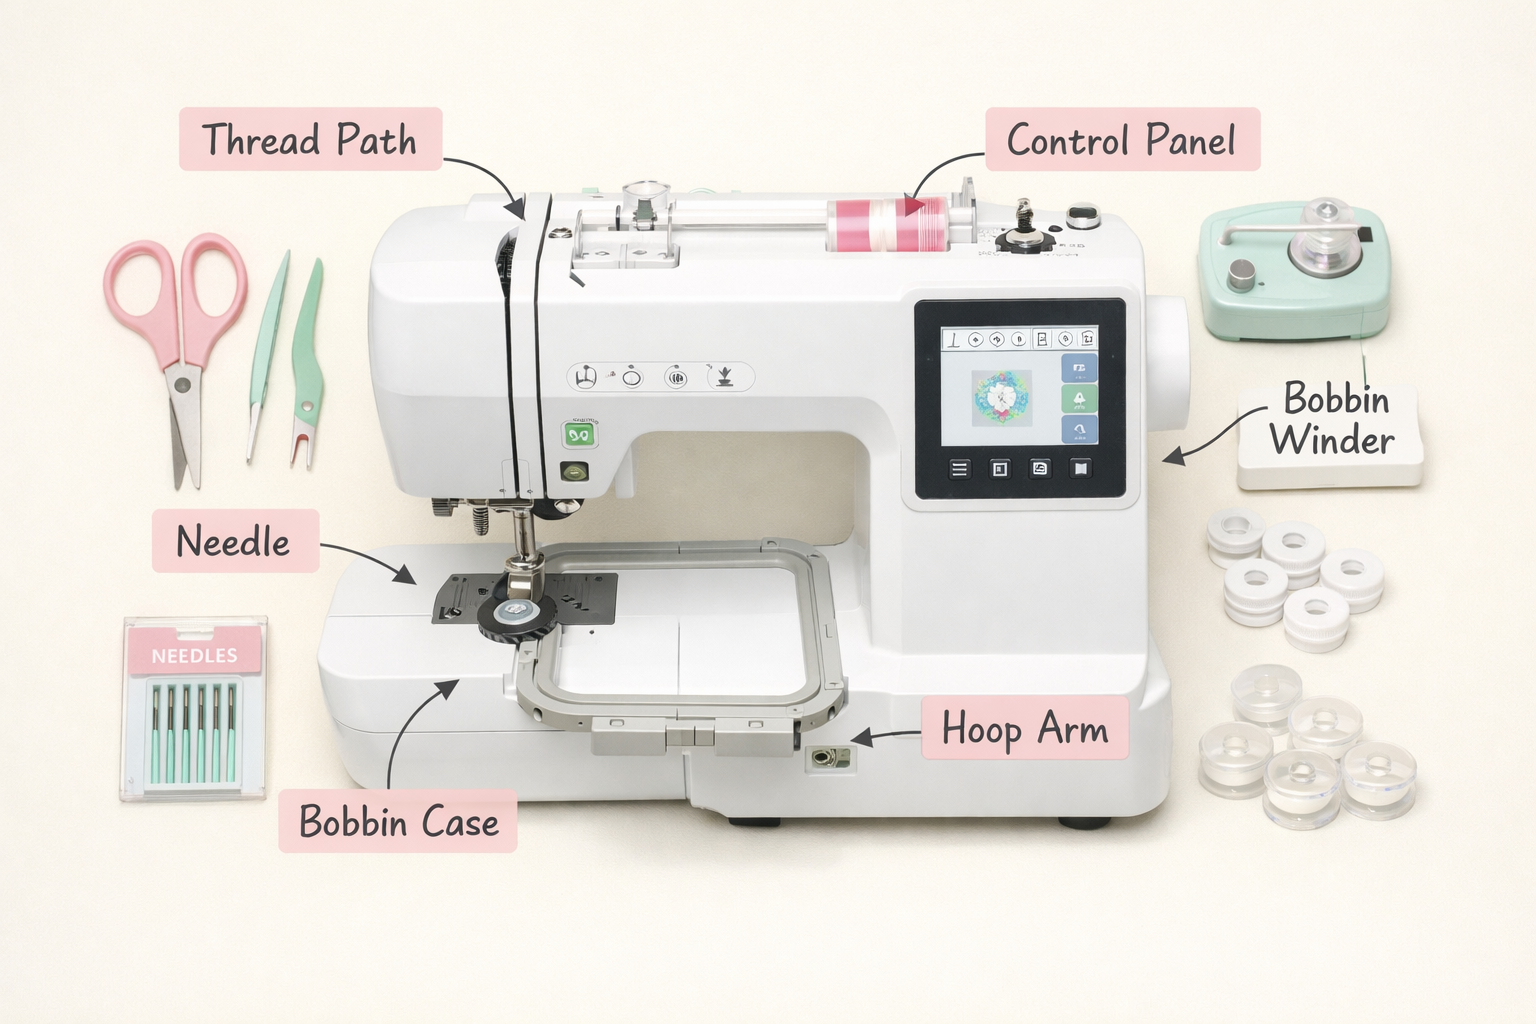
What Is a Sewing Machine Recess and Why Do You Need One
A sewing machine recess is a precisely cut opening in your sewing table that allows the machine body to drop down so the needle plate sits level with the table surface. This creates one continuous flat work area instead of having your machine elevated above the table, which forces fabric to climb up and down as it moves through the feed dogs.
The flush surface eliminates three common sewing frustrations:
- Fabric drag and pulling: Elevated machines create resistance as fabric moves from table to machine bed, causing uneven feeding and puckered seams
- Neck and shoulder strain: You naturally hunch forward to see the needle area when your machine sits high on the table
- Limited support for large projects: Quilts, curtains, and garment pieces hang off the small machine bed instead of resting on a continuous surface
Professional seamstresses and quilters have used recessed tables for decades because the setup dramatically improves control over fabric movement. For home sewists working on projects larger than a pillowcase, the difference becomes noticeable within the first few minutes of sewing.
Choose a recessed table if you regularly sew items larger than 24 inches in any direction, experience back or neck pain during long sewing sessions, or notice your fabric pulling or puckering even after adjusting thread tension.
DIY Sewing Table With Drop-In Machine vs Regular Table
A drop-in sewing table costs $100-$300 to build yourself compared to $50-$100 for a standard table, but the recessed version provides a 12-18 inch wider effective work surface and reduces fabric handling errors by keeping everything level.
Standard elevated table setup:
- Machine sits on top of any desk or table
- Creates a 3-4 inch height difference between table and needle plate
- Requires 15-20 minutes to set up and break down if using a temporary space
- Works fine for small projects under 12 inches square
- Total cost: $50-$100 for a basic table or desk
Recessed drop-in table setup:
- Machine drops into custom cutout, flush with surface
- Provides continuous flat surface across entire table
- Permanent or semi-permanent installation (30-60 minutes to remove machine if needed)
- Transforms sewing quality for medium to large projects
- Total cost: $100-$300 for materials and optional lift mechanism
The recessed table requires more initial effort but pays off immediately if you sew garments, quilts, home décor, or any project where fabric extends beyond your machine’s small work area. Standard tables work perfectly well for mending, small crafts, and sewists who primarily work with pre-cut fabric pieces under 18 inches.
One common mistake: building a recessed table before confirming your machine’s dimensions and ventilation requirements. Some computerized machines need airflow around the motor and shouldn’t be enclosed in a tight recess without ventilation holes.
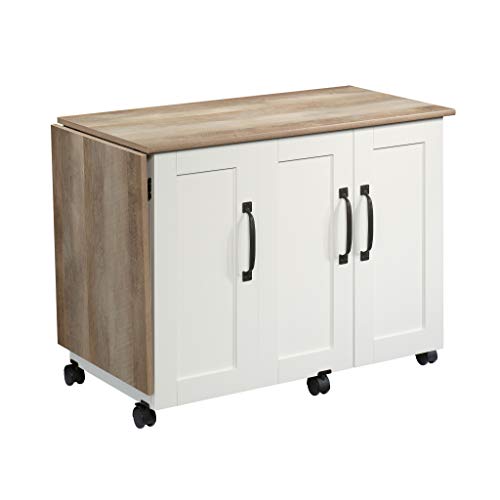
CREATE YOUR IDEAL CRAFTING SPACE – Embrace your creativity with a dedicated area for all your sewing and crafting projects, ensuring you have everything organized and within reach

[Smart Storage & Organization]: Keep all your sewing supplies within reach! This folding sewing table features a spacious tabletop for your sewing machine and projects, 3 built-in side storage bins for threads, scissors, and tools, plus a large open shelf—perfect for organizing storage boxes, fabric, or a mini iron. Dimensions (expanded): 45.5''L x 16''W x 31''H.

STORAGE SPACE: Create fashion pieces in a breeze with a designated spot for yarn, pins, scissors, and materials in 2 rows of pegs, 2 attached storage trays, 1 large interior shelf, and a large tabletop space
How Much Does It Cost to Build a Sewing Table With Machine Cutout
Building a DIY sewing table with machine recess costs $100-$300 for most home sewists, with the price varying based on wood type, table size, and whether you include a lift mechanism.
Basic cost breakdown:
| Component | Budget Option | Mid-Range | Premium |
|---|---|---|---|
| Tabletop wood | $40-$60 (pine or basic plywood) | $80-$120 (birch plywood) | $150-$250 (hardwood or butcher block) |
| Table legs/base | $30-$50 (basic lumber or IKEA) | $60-$100 (adjustable legs) | $120-$200 (custom cabinet base) |
| Hardware & fasteners | $15-$25 | $25-$40 | $40-$60 |
| Finish (stain/poly) | $10-$20 | $20-$35 | $35-$50 |
| Optional lift mechanism | , | $80-$150 | $200-$400 |
| Total | $95-$155 | $245-$395 | $545-$960 |
Most sewists build a functional recessed table for $150-$200 using birch plywood, basic adjustable legs, and standard wood finish. The lift mechanism adds significant cost but isn’t necessary unless you need to convert the table for other uses or frequently transport your machine.
Time investment runs 6-10 hours for a first build: 2-3 hours for cutting and assembly, 1-2 hours for the recess cutout, 2-3 hours for sanding and finishing, plus drying time between finish coats.
Cost-saving strategies:
- Use IKEA countertops or desk surfaces as your base ($40-$80 pre-finished)
- Skip the lift mechanism and create a simple insert panel to fill the recess when not sewing
- Buy pre-cut plywood sheets at home improvement stores to avoid cutting fees
- Use water-based polyurethane instead of oil-based for faster drying between coats
The investment pays for itself compared to commercial sewing cabinets ($400-$2,000) while giving you exact dimensions for your space and machine.


Multifunctional Craft Desk with Grid Top: Designed for creative enthusiasts, this foldable crafting table features a spacious grid top with measurements in inches, centimeters, radial, and angle lines—ideal for sewing, cutting fabric, and crafting projects. Its versatile design also makes it perfect as a sewing desk or general workspace.

STABLE SUPPORT FOR PLYWOOD SHEETS: Plywood cutting support ensures reliable panel support to prevent sagging and shifting, providing straighter cuts and cleaner edges for better woodworking results. Reduces material waste and boosts cutting accuracy from your first use

Ample Storage Space: This sewing table has a 31.5 x 23.62 in work surface, 3 drawers for fabrics, and 1 open shelf. It can easily sort and store sewing tools and materials, keeping the work surface tidy, and making your sewing experience smoother
What Wood Is Best for a DIY Sewing Table
Birch plywood at 3/4-inch thickness provides the best combination of strength, stability, and cost for DIY sewing tables, typically running $80-$120 for a 4×8 foot sheet that yields a generous work surface with minimal waste.
Wood comparison for sewing tables:
Birch plywood (recommended):
- Smooth, splinter-free surface ideal for fabric
- Resists warping better than pine or MDF
- Takes stain and finish beautifully
- Strong enough to support heavy machines (25-40 lbs) without sagging
- Cost: $80-$120 per 4×8 sheet
Pine boards:
- Budget-friendly at $40-$60 for materials
- Softer wood that dents more easily
- Requires edge-joining multiple boards for width
- Can warp over time in humid environments
- Best for: temporary tables or small 30×20 inch surfaces
MDF (medium-density fiberboard):
- Very smooth surface, $50-$70 per sheet
- Heavy (good for stability, bad for moving)
- Doesn’t hold screws well at edges without reinforcement
- Absorbs moisture and swells if not properly sealed
- Best for: stationary tables in climate-controlled rooms
Hardwood (maple, oak):
- Premium appearance and durability
- Expensive at $150-$300+ for materials
- Requires advanced woodworking skills for edge-joining
- Extremely stable and long-lasting
- Best for: experienced woodworkers building heirloom furniture
Butcher block countertop:
- Pre-finished and ready to use
- Costs $120-$250 depending on size
- Very heavy but incredibly stable
- Saves finishing time
- Best for: quick builds using pre-made components
Choose 3/4-inch thickness regardless of wood type. Thinner materials (1/2-inch) will flex under machine vibration during high-speed sewing, while thicker options (1-inch+) add unnecessary weight and cost.
One critical mistake: using particleboard or cheap composite materials that crumble when you cut the machine recess or install hardware. The edges around your cutout need solid material to support reinforcement strips and handle the machine’s weight and vibration.
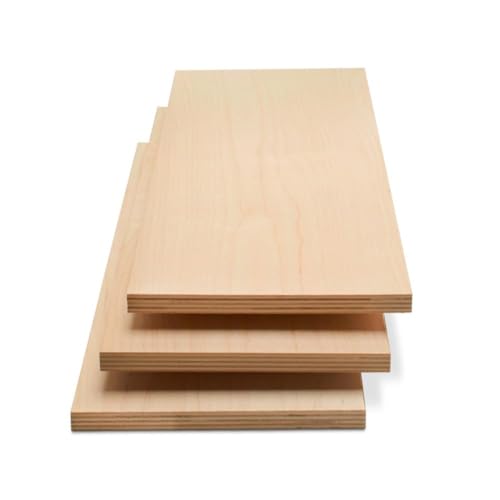
STRONG, DURABLE, HEAVY-DUTY - These craft wood pieces of multi-coated Baltic Birch plywood offer exceptional durability, rigidity, and stability for all your woodworking needs. The surfaces provide excellent holding power for glue and screws and the birch edges create cleaner joinery.

Premium Quality Baltic Birch Plywood: Made from high-quality B/BB grade Baltic Birch, offering superior strength, durability, and a smooth surface for all your crafting needs.

12 Packs Baltic Birch Plywood - You will receive 12 packs of 1/16'' thick, 12x12'' baltic birch plywood, enough quantity for you to machine into various craft work what you want. Have fun making crafts!
Standard Sewing Machine Recess Dimensions and Measurements
Standard sewing machine recesses measure 12-18 inches wide by 8-12 inches deep, but you must measure your specific machine before cutting because dimensions vary significantly between brands and models.
Typical recess sizes by machine type:
- Compact/portable machines: 11-14 inches wide, 6-8 inches deep, 4-6 inches height clearance
- Standard home machines: 14-16 inches wide, 8-10 inches deep, 6-8 inches height clearance
- Heavy-duty/quilting machines: 16-20 inches wide, 10-14 inches deep, 8-12 inches height clearance
- Vintage machines: 12-15 inches wide, 7-9 inches deep, varies by model
The recess must accommodate three dimensions:
- Width and depth: Machine body footprint plus 1/2 inch clearance on all sides for easy insertion and removal
- Height: Distance from bottom of machine to needle plate, ensuring the plate sits exactly flush with table surface
- Clearance below: Space for motor, belts, and any bottom-protruding components (usually 2-4 inches)
Critical measurements to take:
- Machine body width at widest point (usually near the motor)
- Machine body depth from front to back
- Height from machine bottom to top of needle plate
- Location of ventilation vents (must not be blocked)
- Position of power cord and foot pedal cord exits
- Any bottom protrusions like rubber feet or motor housing
Add 1/4 to 1/2 inch to width and depth measurements for comfortable clearance. The machine should drop in and lift out without scraping but shouldn’t have so much space that it shifts during sewing.
Common mistake: Measuring only the top of the machine and discovering too late that the motor housing or bottom components are wider than the top, requiring you to enlarge the cutout after assembly.
How to Measure Your Sewing Machine for Table Cutout
Measure your sewing machine for a table cutout by placing it on a flat surface, measuring the body dimensions at the widest points, then creating a cardboard template to test fit before cutting expensive wood.
Step-by-step measuring process:
- Remove all attachments: Take off the presser foot, extension table, and any accessories to measure the core machine body
- Measure width: Use a tape measure or ruler to find the widest point of the machine body (usually at the motor housing), then add 1/2 inch total clearance
- Measure depth: Measure from the absolute front to the back of the machine at its deepest point, add 1/2 inch
- Measure height: Place a ruler or straight edge across the top of your work table, then measure down to the needle plate surface, this tells you how deep to recess the machine
- Check bottom clearance: Turn the machine on its side and measure any protrusions below the base (motor, feet, knobs), add 2 inches minimum
- Mark cord exits: Note where power and pedal cords exit so you can plan access holes
Create a test template:
Cut a piece of cardboard to your measured dimensions and test-fit it on your planned table location. This reveals issues before you cut wood:
- Does the recess position allow comfortable access to all machine controls?
- Can you reach the bobbin area easily?
- Is there enough table surface to the left of the needle for fabric support?
- Will the foot pedal cord reach comfortably to the floor?
Place your machine on the cardboard template and trace around it with a marker, noting any irregular shapes or curves you’ll need to accommodate. Most machines have rounded corners that are easier to cut than perfect 90-degree angles.
Ventilation check: Identify any ventilation slots or vents on your machine body. The recess must not block these, or you risk overheating during extended sewing sessions. Some builders drill 1-inch ventilation holes in the table bottom beneath the motor area.
For computerized machines, consult your manual’s ventilation requirements before building. Some manufacturers specify minimum clearance around the machine body to prevent electronic component damage from heat buildup.
Can You Build a Sewing Table for Heavy-Duty Machines
Yes, you can build a sewing table for heavy-duty machines weighing 30-50 pounds by using 3/4-inch hardwood plywood, reinforcing the recess edges with solid hardwood strips, and adding center support beneath the cutout area.
Heavy-duty and industrial-style home machines (like Juki, heavy Singer models, or vintage all-metal machines) require three structural upgrades:
1. Thicker or reinforced tabletop:
- Use 3/4-inch birch plywood minimum (not MDF or particleboard)
- Consider 1-inch plywood or hardwood for machines over 40 pounds
- Add a second layer of 1/2-inch plywood beneath the recess area for extra support
2. Edge reinforcement:
- Attach 1×2 inch hardwood strips (oak, maple, or birch) around the entire recess perimeter
- Use wood glue plus screws every 4-6 inches
- The strips distribute machine weight and prevent the cutout edges from sagging over time
3. Support structure:
- Add a center support leg or brace directly under the machine recess
- Use adjustable furniture levelers to fine-tune height and compensate for uneven floors
- Consider a cabinet-style base instead of four-leg design for maximum stability
Vibration management:
Heavy machines generate more vibration during high-speed sewing. Add rubber or cork pads between the machine base and the table recess to absorb vibration and reduce noise. Some builders install thin foam weatherstripping around the recess perimeter to eliminate rattling.
Weight distribution test:
Before installing your machine permanently, place it in the recess and press down firmly on all corners while watching for flex or movement. Any visible deflection means you need additional support before regular use.
One mistake to avoid: assuming a table that holds a 15-pound domestic machine will automatically support a 40-pound heavy-duty model. The concentrated weight in a cutout creates different stress than distributed weight across a solid surface, and inadequate support leads to cracked plywood or collapsed tables.
If you’re working with vintage industrial machines or true industrial models (60+ pounds), consider a professional cabinet base or steel-reinforced table instead of a DIY wood solution.
Mistakes to Avoid When Cutting Recess in Sewing Table
The most critical mistake when cutting a sewing machine recess is making the opening too small and then trying to enlarge it, which weakens the structure and creates uneven edges that are nearly impossible to fix cleanly.
Top mistakes and how to avoid them:
1. Cutting without a template:
- Always create a cardboard template first and test-fit your machine multiple times
- Trace the template onto your wood with a pencil before cutting
- Double-check measurements against your machine before making the first cut
2. Using the wrong cutting tool:
- Don’t use a circular saw for the entire cutout (creates rough edges and difficult corners)
- Use a jigsaw with a fine-tooth blade for smooth curves and corners
- Drill 1/2-inch starter holes in each corner before inserting the jigsaw blade
3. Cutting from the top surface only:
- This causes tear-out and splintering on the bottom surface
- Apply painter’s tape along cut lines on both top and bottom surfaces
- Cut slowly with the jigsaw set to low orbital action for cleaner edges
4. Forgetting to account for machine feet or rubber pads:
- Many machines have small rubber feet that extend below the main body
- These feet must rest on something solid, not hang in empty space
- Create small support ledges or platforms for the feet to rest on
5. Making the recess too tight:
- Machines need 1/4 to 1/2 inch clearance for easy removal during cleaning and maintenance
- Too-tight recesses trap heat and make it difficult to remove the machine for bobbin access or troubleshooting
- Test-fit repeatedly during cutting and sand edges gradually to perfect the fit
6. Not reinforcing edges before use:
- Raw plywood edges compress and wear under machine weight
- Install hardwood edge strips before placing your machine in the recess
- Sand and finish all edges to prevent splinters that can catch fabric
7. Cutting the recess off-center:
- Position the recess to leave adequate work surface to the left of the needle (minimum 18-24 inches for most projects)
- Ensure you can comfortably reach all machine controls without stretching
- Leave at least 4-6 inches between the recess edge and table edge for structural integrity
Recovery from cutting mistakes:
If you cut the recess too large, create a wooden shim or frame that sits inside the opening to reduce the size. Glue and screw it in place, then sand smooth. If you cut it too small, enlarge it gradually using a sanding drum on a drill or rotary tool rather than trying to recut with a jigsaw.
Do You Need a Lift Mechanism for Recessed Sewing Machine Table
You don’t need a lift mechanism for a recessed sewing machine table if you only use the table for sewing, but a lift adds convenience for dual-purpose tables or if you frequently move your machine between locations.
Lift mechanism benefits:
- Raises machine to table level for easy removal and transport
- Converts sewing table to regular desk or workspace when not in use
- Reduces strain from lifting heavy machines in and out of deep recesses
- Protects machine from dust when stored below table level with a cover
When to skip the lift:
- Your machine weighs under 20 pounds (easy to lift manually)
- The table is dedicated to sewing only
- Budget is tight (lifts cost $80-$400)
- You rarely remove the machine from the table
Lift mechanism types:
Scissor lift ($80-$150):
- Manual operation via handle or crank
- Supports machines up to 30-40 pounds
- Requires 10-14 inches of clearance below table
- Most affordable option for DIY installation
Pneumatic lift ($150-$250):
- Gas-spring assisted raising and lowering
- Smooth operation with minimal effort
- Supports 25-35 pounds typically
- Requires precise installation for proper balance
Electric lift ($250-$400):
- Push-button operation
- Handles heavier machines (40-50 pounds)
- Requires electrical outlet beneath table
- Most expensive but easiest to use
DIY alternative to commercial lifts:
Create a simple platform that rests on adjustable supports inside the recess. When you need to remove the machine, raise the platform using the adjustment mechanism until it’s flush with the table surface, then lift the machine out. This costs $20-$40 in materials versus $80-$400 for a commercial lift.
Most home sewists find that a well-designed recess with proper clearance doesn’t require a lift mechanism. The machine sits permanently in place, and you simply reach down to access the bobbin or perform routine maintenance. If you do need to remove it completely (for professional service or moving), you lift it out manually once or twice per year.
Choose a lift mechanism if you share the table with family members who need a flat work surface, if you sew seasonally and store your machine between projects, or if you have physical limitations that make lifting difficult.
Sewing Table Plans for Small Spaces
Small-space sewing tables with machine recess can be as compact as 40 inches wide by 20 inches deep while still providing functional work surface, using wall-mounted fold-down designs or IKEA component hacks to maximize limited square footage.
Compact recessed table options:
Wall-mounted fold-down table (40×20 inches when open):
- Mounts to wall studs with heavy-duty hinges
- Folds flat against wall when not in use (4-inch profile)
- Machine stays in recess, secured with a safety strap
- Requires 6-8 inches of clearance below for machine depth
- Cost: $80-$120 in materials
- Best for: apartments, dorm rooms, shared spaces
IKEA Kallax unit hack (35×20 inch work surface):
- Use a 2×2 or 2×4 Kallax shelf unit as the base
- Create custom top with recess from 3/4-inch plywood
- Storage cubes below hold fabric, notions, and tools
- Total cost: $120-$180 (shelf unit + custom top)
- Best for: sewists who need storage and work surface in one footprint
Corner table design (30×30 inches):
- Fits into room corners, maximizing unused space
- Triangular or L-shaped top with recess positioned for comfortable access
- Wall-mounted on two sides for stability without legs
- Cost: $90-$140
- Best for: small bedrooms, closet conversions
Rolling cart with recess (36×18 inches):
- Heavy-duty locking casters allow repositioning
- Stores in closet or against wall when not in use
- Lower shelf holds machine when table converts to flat surface
- Cost: $100-$160
- Best for: multi-purpose rooms, temporary sewing spaces
Space-saving design principles:
- Minimum dimensions: 36 inches wide gives you 18 inches of work surface to the left of the needle (adequate for most garment sewing)
- Depth: 18-20 inches provides enough surface without protruding too far into the room
- Vertical storage: Add pegboard or wall-mounted organizers above the table for tools and supplies
- Fold-away features: Hinged side extensions add work surface when needed, fold down when not in use
Small-space mistake to avoid: Making the table so compact that you can’t comfortably sit at it or access machine controls. Test your planned dimensions by setting up a temporary workspace with cardboard boxes before building. Sit in your sewing chair and mime sewing motions to ensure adequate elbow room and leg clearance.
For sewists in apartments or shared spaces, a 40×24 inch wall-mounted fold-down table with machine recess provides 90% of the functionality of a full-size table while occupying zero floor space when folded.
How to Make Sewing Machine Flush With Table Surface
To make your sewing machine flush with the table surface, measure the exact distance from the machine bottom to the needle plate, cut the recess to that depth, then create adjustable support platforms that fine-tune the final height to within 1/16 inch of the table surface.
Step-by-step leveling process:
1. Measure needle plate height:
- Place your machine on a flat surface
- Measure from the bottom of the machine base to the top of the needle plate
- This measurement determines your recess depth
- Example: If the measurement is 4.5 inches, your recess must be 4.5 inches deep
2. Create the recess:
- Cut your table opening to the measured depth
- The machine should drop in with the needle plate slightly below the table surface (you’ll raise it with supports)
3. Build adjustable support platform:
- Cut a piece of 3/4-inch plywood slightly smaller than your recess opening
- Attach four adjustable furniture levelers or bolts to the bottom corners
- Place this platform in the bottom of the recess
4. Fine-tune the height:
- Set your machine on the support platform
- Adjust each leveler until the needle plate is exactly flush with the table surface
- Use a straight edge across the table to check for perfect alignment
- The fabric should slide smoothly from table to needle plate with no bump or gap
5. Test and adjust:
- Run a piece of fabric across the junction between table and needle plate
- You should feel no ridge or drop-off
- If the machine sits too high, lower the support platform
- If it sits too low, raise the supports or add shims
Achieving perfect flush alignment:
The goal is a seamless transition where fabric glides from table to machine without catching or lifting. Most sewists aim for the needle plate to sit 0-1/16 inch above the table surface rather than perfectly flush, because this slight elevation prevents fabric from catching on the table edge.
Common leveling problems:
- Machine rocks or wobbles: Support platform isn’t level or machine feet don’t all contact the platform evenly
- Gap between table and needle plate: Recess is too deep or support platform needs raising
- Machine sits too high: Recess isn’t deep enough or support platform is too thick
Alternative support methods:
Instead of adjustable levelers, some builders use:
- Stacked plywood shims glued together to exact height
- Dense foam blocks cut to size (allows some vibration absorption)
- Wooden blocks with felt pads on top (protects machine finish)
The adjustable leveler method costs $10-$15 and provides the most flexibility for achieving perfect alignment, especially important if your floor or table isn’t perfectly level.
Once you achieve the correct height, mark the leveler positions with a pencil so you can return to the same setting if you ever remove the machine. Some sewists apply a drop of thread-locking compound to the levelers to prevent them from shifting during machine vibration.
How to Reinforce Table Around Sewing Machine Cutout
Reinforce the table around your sewing machine cutout by attaching 1×2 inch hardwood strips to the underside of the opening perimeter using wood glue and screws every 4-6 inches, which distributes the machine’s weight and prevents edge compression and sagging.
Complete reinforcement process:
1. Cut hardwood reinforcement strips:
- Use oak, maple, or birch (not pine or soft woods)
- Cut to 1×2 inch dimensions
- Measure strips to fit the entire perimeter of your recess opening
- Miter corners at 45 degrees for professional appearance and maximum strength
2. Prepare the edges:
- Sand the cutout edges smooth with 120-grit sandpaper
- Remove any splinters or rough spots
- Wipe clean with a damp cloth and let dry
3. Apply wood glue:
- Run a continuous bead of wood glue along the underside edge of the cutout
- Position the hardwood strip flush with the edge
- Press firmly to ensure good contact
4. Secure with screws:
- Pre-drill pilot holes every 4-6 inches to prevent splitting
- Use 1.25-inch wood screws (long enough to bite into the tabletop but not break through the top surface)
- Countersink screw heads so they sit flush with the strip surface
- Wipe away any glue squeeze-out immediately
5. Add corner braces (optional but recommended):
- Install L-brackets or corner braces at each corner of the recess
- These prevent the corners from cracking under stress
- Use 2-3 inch steel corner braces for machines over 25 pounds
Additional reinforcement for heavy machines:
For machines weighing 30+ pounds, add a second layer of support:
- Install cross-braces beneath the recess opening
- Run 1×3 inch boards perpendicular to the reinforcement strips
- Space them 8-10 inches apart
- This creates a grid that distributes weight across the entire table structure
Edge protection:
After reinforcement, protect the visible edges:
- Apply iron-on edge banding to the top edge of the cutout for a finished look
- Or round over the edges with a 1/8-inch router bit
- Sand smooth and apply the same finish as the rest of the table
Why reinforcement matters:
Unreinforced plywood edges compress over time under the constant weight and vibration of a sewing machine. This compression causes:
- The machine to gradually sink below the table surface
- Uneven work surface that affects stitch quality
- Potential cracking or splitting of the plywood
- Shortened table lifespan (2-3 years vs. 10+ years with proper reinforcement)
The reinforcement process adds $15-$30 in materials and 1-2 hours of work but extends your table’s functional life by years. It’s the single most important structural upgrade for any DIY sewing table with machine recess.
Is a Recessed Sewing Table Worth It for Beginners
A recessed sewing table is worth it for beginners who plan to sew garments, quilts, or home décor projects larger than 24 inches, but beginners focusing on small crafts, mending, or learning basic skills should start with a standard table and upgrade later if needed.
When beginners benefit from recessed tables:
- Sewing garment patterns (dresses, pants, shirts) where large fabric pieces need support
- Quilting projects of any size
- Making curtains, tablecloths, or other home décor items
- Experiencing neck or back pain from hunching over an elevated machine
- Planning to sew regularly (3+ hours per week) for the foreseeable future
When beginners should wait:
- Still learning basic machine operation and threading
- Primarily sewing small projects (bags, pillows, simple crafts)
- Uncertain about long-term commitment to sewing
- Limited budget (under $100 for entire workspace setup)
- Renting or frequently moving (permanent table installation isn’t practical)
Beginner-friendly alternatives:
If you’re not ready to build a recessed table but want some benefits of a flush surface:
- Extension table attachment: Many machines include or offer optional extension tables that expand the work surface around the needle (cost: $30-$80)
- Temporary platform: Build a simple platform that raises your table surface to match your machine’s needle plate height (cost: $20-$40)
- IKEA hack: Use a pre-made desk or table with your machine on top, adding side tables at the same height for fabric support (cost: $60-$120)
Learning curve consideration:
Building a DIY sewing table with machine recess requires basic woodworking skills (measuring, cutting, drilling, finishing). Beginners with no woodworking experience should either:
- Partner with someone who has basic carpentry skills
- Start with a simpler IKEA hack design
- Use pre-cut components to minimize cutting and fitting
The project itself is beginner-friendly for woodworking, but mistakes (like cutting the recess too small) can be expensive to fix.
Decision framework:
Choose a recessed table if you answer “yes” to at least three of these:
- I’ve been sewing for 6+ months and know I enjoy it
- I regularly sew items larger than a pillowcase
- I have a dedicated space for a permanent sewing table
- I experience discomfort with my current elevated machine setup
- I have basic tools (drill, jigsaw, sandpaper) or can borrow them
- My budget allows $150-$250 for the project
Start with a standard table if you answer “yes” to any of these:
- I’m still learning basic sewing skills
- I’m not sure sewing will be a long-term hobby
- I need a portable or temporary setup
- My budget is under $100 total
- I primarily sew small projects
Many successful sewists start with basic setups and upgrade to recessed tables after 6-12 months once they’ve confirmed their interest and identified their specific needs. There’s no rush to build a custom table before you understand your sewing style and project preferences.
IKEA Hack Sewing Table With Machine Insert vs Building From Scratch
An IKEA hack sewing table with machine insert costs $120-$180 and takes 2-4 hours to complete, while building from scratch costs $150-$300 and requires 8-12 hours, with the IKEA version offering faster completion and the scratch-built version providing exact customization.
IKEA hack comparison:
Pros:
- Pre-finished surfaces (no staining or sealing required)
- Faster assembly (2-4 hours vs. 8-12 hours)
- Built-in storage options (Kallax cubes, Alex drawers)
- Easy to disassemble and move
- No advanced tools required (just drill and jigsaw for recess)
- Cost-effective at $120-$180 total
Cons:
- Limited size options (must work with IKEA’s standard dimensions)
- Particleboard construction less durable than plywood
- May need reinforcement for machines over 25 pounds
- Less customization for exact workspace needs
- Recess cutting in particleboard requires extra care to prevent chipping
Building from scratch comparison:
Pros:
- Exact dimensions for your space and needs
- Choose premium materials (hardwood, thick plywood)
- Stronger construction for heavy machines
- Custom features (specific drawer sizes, cord management, etc.)
- Satisfaction of building completely custom furniture
- Longer lifespan (10-20 years vs. 5-10 years for IKEA)
Cons:
- Requires more tools (saw, drill, sander, clamps)
- Longer time investment (8-12 hours minimum)
- Higher cost ($150-$300 typically)
- Need woodworking skills or willingness to learn
- Must apply finish (stain, polyurethane, drying time)
Popular IKEA hack designs:
Kallax + custom top ($120-$160):
- Use 2×4 or 4×2 Kallax shelf unit as base
- Cut custom plywood top with machine recess
- Storage cubes below for fabric and supplies
- Dimensions: 30-58 inches wide, 15 inches deep
Alex drawer units + countertop ($140-$200):
- Two Alex drawer units with Karlby or Linnmon countertop between
- Cut recess in countertop
- Excellent storage with 5-6 drawers per unit
- Dimensions: 47-74 inches wide, 25 inches deep
Norberg wall-mounted + recess ($80-$120):
- Wall-mounted fold-down table with custom recess
- Space-saving for small rooms
- Requires wall reinforcement for machine weight
- Dimensions: 30-40 inches wide, 20 inches deep
Which to choose:
Choose IKEA hack if:
- You need a functional table quickly (weekend project)
- Budget is under $200
- You’re renting or may move soon
- You want built-in storage without building drawers
- You have limited tools or woodworking experience
Build from scratch if:
- You need specific dimensions not available from IKEA
- You have a heavy machine (30+ pounds) requiring robust construction
- You want heirloom-quality furniture
- You enjoy woodworking and have the tools
- You need features IKEA components can’t provide
Many sewists start with an IKEA hack to test whether they like the recessed table concept, then upgrade to a scratch-built version later if they want something more permanent and customized. The IKEA version can transition to a cutting table or general workspace once you build your dream sewing table.
Step-by-Step: How to Build a DIY Sewing Table With Machine Recess
Building a DIY sewing table with machine recess requires measuring your machine precisely, cutting a template, preparing your tabletop, cutting the recess with a jigsaw, reinforcing the edges, and creating a support platform for perfect height adjustment.
Materials needed:
- 3/4-inch birch plywood (4×8 sheet for 48×30 inch table)
- Four adjustable table legs or cabinet base
- 1×2 inch hardwood strips for reinforcement (8-10 feet)
- Wood glue
- 1.25-inch wood screws
- Sandpaper (80, 120, 220 grit)
- Wood finish (stain and polyurethane or water-based poly)
- Four adjustable furniture levelers for support platform
- Painter’s tape
Tools needed:
- Tape measure
- Pencil
- Jigsaw with fine-tooth blade
- Drill with bits
- Circular saw or have lumber yard cut plywood to size
- Orbital sander or sanding block
- Clamps
- Paintbrush or foam applicator for finish
Complete build process:
Step 1: Measure your machine (30 minutes)
- Remove all attachments and accessories
- Measure width at widest point, add 1/2 inch
- Measure depth front to back, add 1/2 inch
- Measure height from bottom to needle plate
- Create cardboard template and test-fit machine
- Mark cord exit locations on template
Step 2: Cut and prepare tabletop (1-2 hours)
- Cut plywood to desired table dimensions (48×30 inches is standard)
- Sand all surfaces with 120-grit sandpaper
- Mark recess location on underside (typically 12-16 inches from right edge)
- Trace your cardboard template onto the wood
Step 3: Cut the recess (1-2 hours)
- Apply painter’s tape along cut lines on both top and bottom surfaces
- Drill 1/2-inch starter holes in each corner of the marked recess
- Insert jigsaw blade and cut slowly along marked lines
- Keep jigsaw perpendicular to surface for clean edges
- Sand cut edges smooth with 80-grit, then 120-grit sandpaper
- Test-fit your machine repeatedly, sanding gradually to perfect fit
Step 4: Reinforce the recess (1 hour)
- Cut 1×2 inch hardwood strips to fit recess perimeter
- Apply wood glue to underside edge of cutout
- Clamp strips in place, flush with edge
- Pre-drill and install screws every 4-6 inches
- Let glue dry 2-4 hours before proceeding
Step 5: Apply finish (2-3 hours plus drying time)
- Sand entire table with 220-grit sandpaper
- Wipe clean with tack cloth
- Apply wood stain if desired, let dry per manufacturer instructions
- Apply 2-3 coats of polyurethane, sanding lightly between coats
- Allow 24-48 hours for final cure before use
Step 6: Attach legs and assemble (1 hour)
- Mark leg positions (typically 2-3 inches from each corner)
- Attach legs according to manufacturer instructions
- Ensure table is level using adjustable feet
- Add cross-braces if needed for stability
Step 7: Create support platform (30 minutes)
- Cut 3/4-inch plywood slightly smaller than recess opening
- Attach four adjustable furniture levelers to bottom corners
- Place platform in recess bottom
- Set machine on platform and adjust height until needle plate is flush with table surface
Step 8: Final adjustments and testing (30 minutes)
- Run fabric across table-to-machine junction to check for smooth transition
- Adjust support platform height as needed
- Drill cord access holes if necessary
- Add rubber pads between machine and platform to reduce vibration
- Test sew on scrap fabric to ensure everything functions properly
Total time investment: 8-12 hours spread over 2-3 days (accounting for finish drying time)
Common build mistakes:
- Rushing the measuring phase and cutting recess too small
- Not reinforcing edges before placing machine (leads to sagging)
- Applying finish before test-fitting machine (finish can add thickness that affects fit)
- Forgetting ventilation holes for machines that need airflow
- Not accounting for cord routing before assembly
Troubleshooting during build:
- Recess too tight: Sand edges gradually with 80-grit sandpaper on a sanding block
- Recess too loose: Create wooden shims or frame to reduce opening size
- Uneven edges: Use a router with flush-trim bit to even out jigsaw cuts
- Splintering during cutting: Apply painter’s tape and cut more slowly with lower jigsaw speed
Once complete, your DIY sewing table with machine recess will provide years of improved sewing comfort and quality. Regular maintenance of both your machine and table ensures optimal performance.
Frequently Asked Questions
How long does it take to build a DIY sewing table with machine recess?
Building a DIY sewing table with machine recess takes 8-12 hours for most people, spread over a weekend or 2-3 days to allow for finish drying time between coats. Experienced woodworkers can complete the project in 6-8 hours, while first-time builders should budget 12-15 hours.
Can I use MDF instead of plywood for a sewing table?
You can use MDF for a sewing table, but it requires edge reinforcement and complete sealing because MDF absorbs moisture and swells. MDF is heavier than plywood (good for stability) but doesn’t hold screws as well at edges. Use 3/4-inch thickness minimum and reinforce the recess perimeter with hardwood strips.
Do I need to remove my sewing machine from the recess for regular maintenance?
You don’t need to remove your machine from the recess for routine maintenance like bobbin changes, cleaning, or oiling. Remove it only for deep cleaning, repairs, or annual professional servicing, which typically happens 1-2 times per year for active sewists.
What’s the minimum table size for a recessed sewing machine setup?
The minimum functional table size for a recessed sewing machine is 36 inches wide by 18 inches deep, which provides about 18 inches of work surface to the left of the needle. Smaller dimensions work for compact machines and small projects, but most sewists prefer 48×24 inches or larger for comfortable sewing.
Can I build a recessed table for a serger or embroidery machine?
Yes, you can build recessed tables for sergers and embroidery machines using the same process, but measure carefully because these machines often have different footprints and height requirements than standard sewing machines. Sergers may need additional depth for the looper mechanism, and embroidery machines require clearance for the hoop arm movement.
How do I prevent my machine from overheating in a recessed table?
Prevent machine overheating by drilling 1-inch ventilation holes in the table bottom beneath the motor area, ensuring the recess doesn’t block any existing vents on the machine body, and leaving 1/2-inch clearance around all sides. Most home machines don’t overheat in properly designed recesses, but check your manual for specific ventilation requirements.
Should the sewing machine sit exactly flush or slightly above the table?
The sewing machine needle plate should sit 0 to 1/16 inch above the table surface rather than perfectly flush. This slight elevation prevents fabric from catching on the table edge while still providing smooth fabric movement. Test with actual fabric to find the height that works best for your sewing style.
Can I convert an existing desk into a sewing table with recess?
You can convert an existing desk into a recessed sewing table if the desktop is solid wood or plywood at least 3/4-inch thick. Avoid converting desks with hollow-core tops, glass surfaces, or thin laminate over particleboard, as these won’t support the machine weight or allow proper recess cutting.
What do I do if my floor is uneven and the table rocks?
Fix an uneven floor issue by using adjustable furniture levelers on all table legs, which allow you to compensate for floor variations up to 1-2 inches. Alternatively, place thin shims under the short legs until the table is stable and level. Check level with a carpenter’s level across both directions.
How much weight can a DIY plywood sewing table support?
A properly built DIY sewing table using 3/4-inch birch plywood with reinforced recess edges can support 40-50 pounds concentrated in the machine recess area, adequate for most home sewing machines. For heavier machines (50+ pounds), upgrade to 1-inch plywood or add additional support structure beneath the recess.
Do I need special insurance for a heavy sewing machine in a DIY table?
You don’t need special insurance for a sewing machine in a DIY table, but verify that your homeowner’s or renter’s insurance covers your machine’s value. Most policies cover personal property including sewing equipment, but high-value machines (over $1,000) may need to be specifically listed on your policy.
Can I build a recessed table if I rent my home?
You can build a recessed sewing table in a rental home using a freestanding design that doesn’t attach to walls or require permanent modifications. Choose a four-leg table or cabinet-style base that you can take with you when you move, avoiding wall-mounted or built-in designs that would require landlord approval.
Conclusion
Building a DIY sewing table with machine recess transforms your sewing experience by creating a professional-level work surface that reduces strain, improves stitch quality, and makes large projects manageable. The project costs $100-$300 in materials, takes one weekend to complete, and provides years of improved sewing comfort.
Start by measuring your machine precisely and creating a cardboard template to test-fit before cutting expensive wood. Choose 3/4-inch birch plywood for the best balance of strength and cost, and always reinforce the recess edges with hardwood strips to prevent sagging. Position the recess to leave adequate work surface to the left of your needle, and create an adjustable support platform that lets you fine-tune the height until your needle plate sits perfectly flush with the table surface.
Whether you build from scratch or use an IKEA hack, the recessed table setup pays immediate dividends if you regularly sew garments, quilts, or home décor projects. The flush work surface eliminates fabric drag, reduces physical strain, and gives you the confidence to tackle larger, more ambitious sewing projects.
Next steps:
- Measure your sewing machine and create a cardboard template this week
- Decide on your table dimensions based on your available space
- Gather materials and tools, or identify what you need to borrow
- Set aside a weekend for the build, allowing extra time for finish drying
- Test your completed table with scrap fabric before starting your next project
Your custom DIY sewing table with machine recess will become the foundation of your sewing space for years to come, making every project more enjoyable and every stitch more precise.


