


Quick Answer
A walking foot is a specialized sewing machine presser foot with its own set of feed dogs on top that work in sync with the machine’s bottom feed dogs to move multiple fabric layers evenly through the machine. You should use it whenever you’re working with thick layers, slippery fabrics, or materials that tend to shift during sewing, especially for quilting, sewing vinyl or leather, matching stripes or plaids, and working with knits or velour. It prevents the top layer from bunching or shifting ahead of the bottom layer, which is a common problem with regular presser feet.
Key Takeaways
- A walking foot has feed dogs on both top and bottom that grip fabric layers simultaneously, preventing shifting and puckering that happens with standard presser feet
- Essential for quilting projects where you’re sewing through three layers (top, batting, backing) and need even feeding to avoid tucks and pleats
- Works on most sewing machines but requires a compatible attachment, check your machine’s shank type (low, high, or slant) before purchasing
- Costs typically range from $25-$80 for aftermarket versions and $50-$150 for brand-specific models like Brother or Janome
- Can be used for regular sewing but adds bulk and weight, so most sewers switch back to standard feet for lightweight single-layer projects
- Dual feed systems are built-in alternatives found on some machines like Pfaff, offering similar benefits without attaching an external foot
- Common issues include skipped stitches usually caused by incorrect needle size, tension problems, or improper foot attachment
- Not just for thick fabrics,also excellent for slippery materials like satin, silk, and rayon that slide against each other
- Beginners benefit from walking feet when tackling their first quilts or challenging fabrics, though it’s not necessary for basic seam sewing
- Proper installation matters,the walking foot’s arm must fit around the needle bar screw to synchronize with the machine’s timing
What Is a Walking Foot on a Sewing Machine?
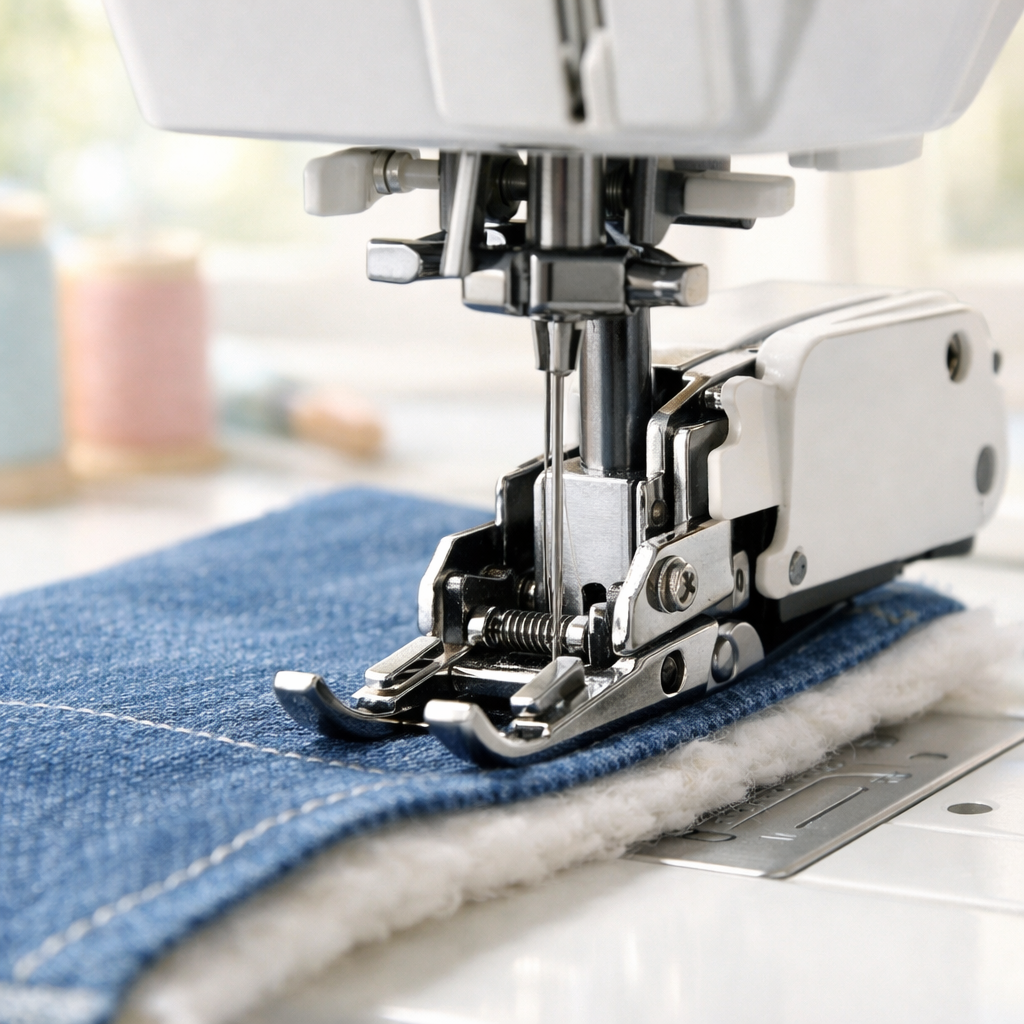
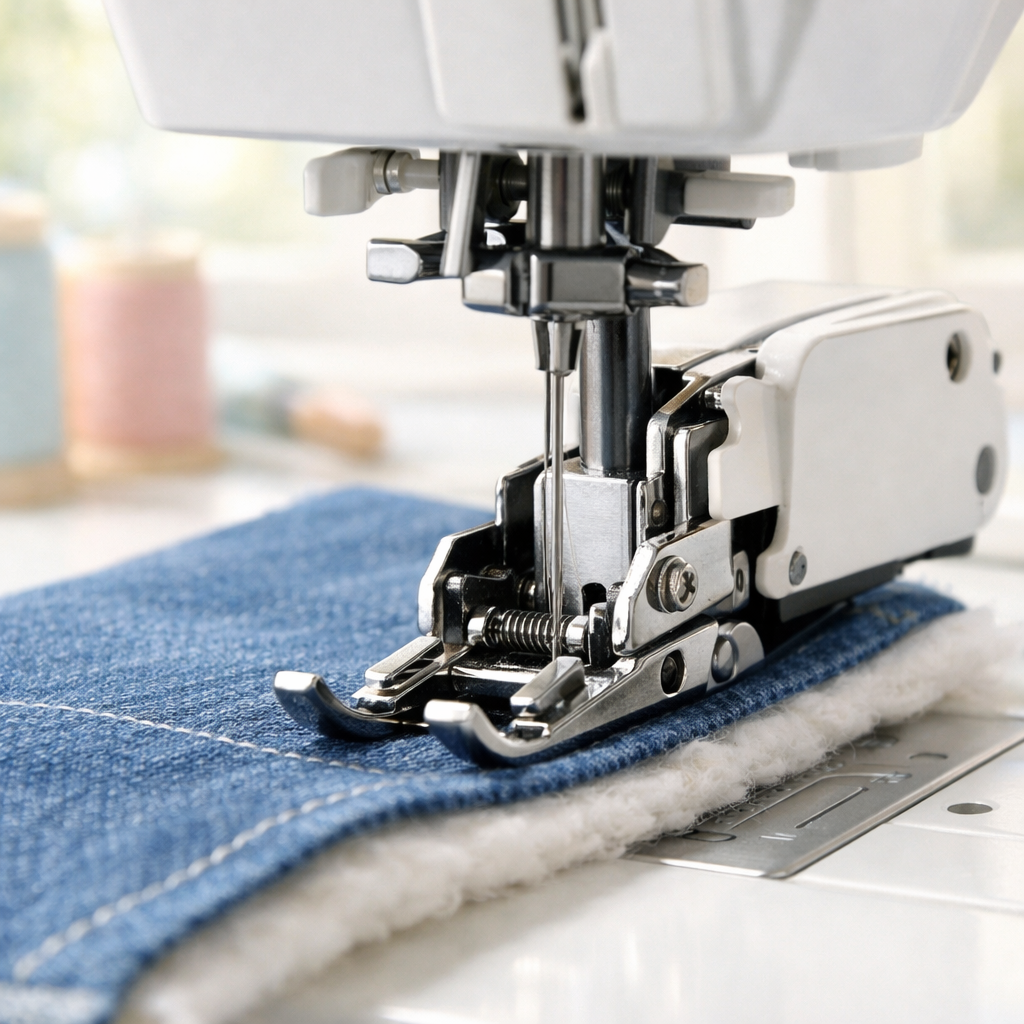
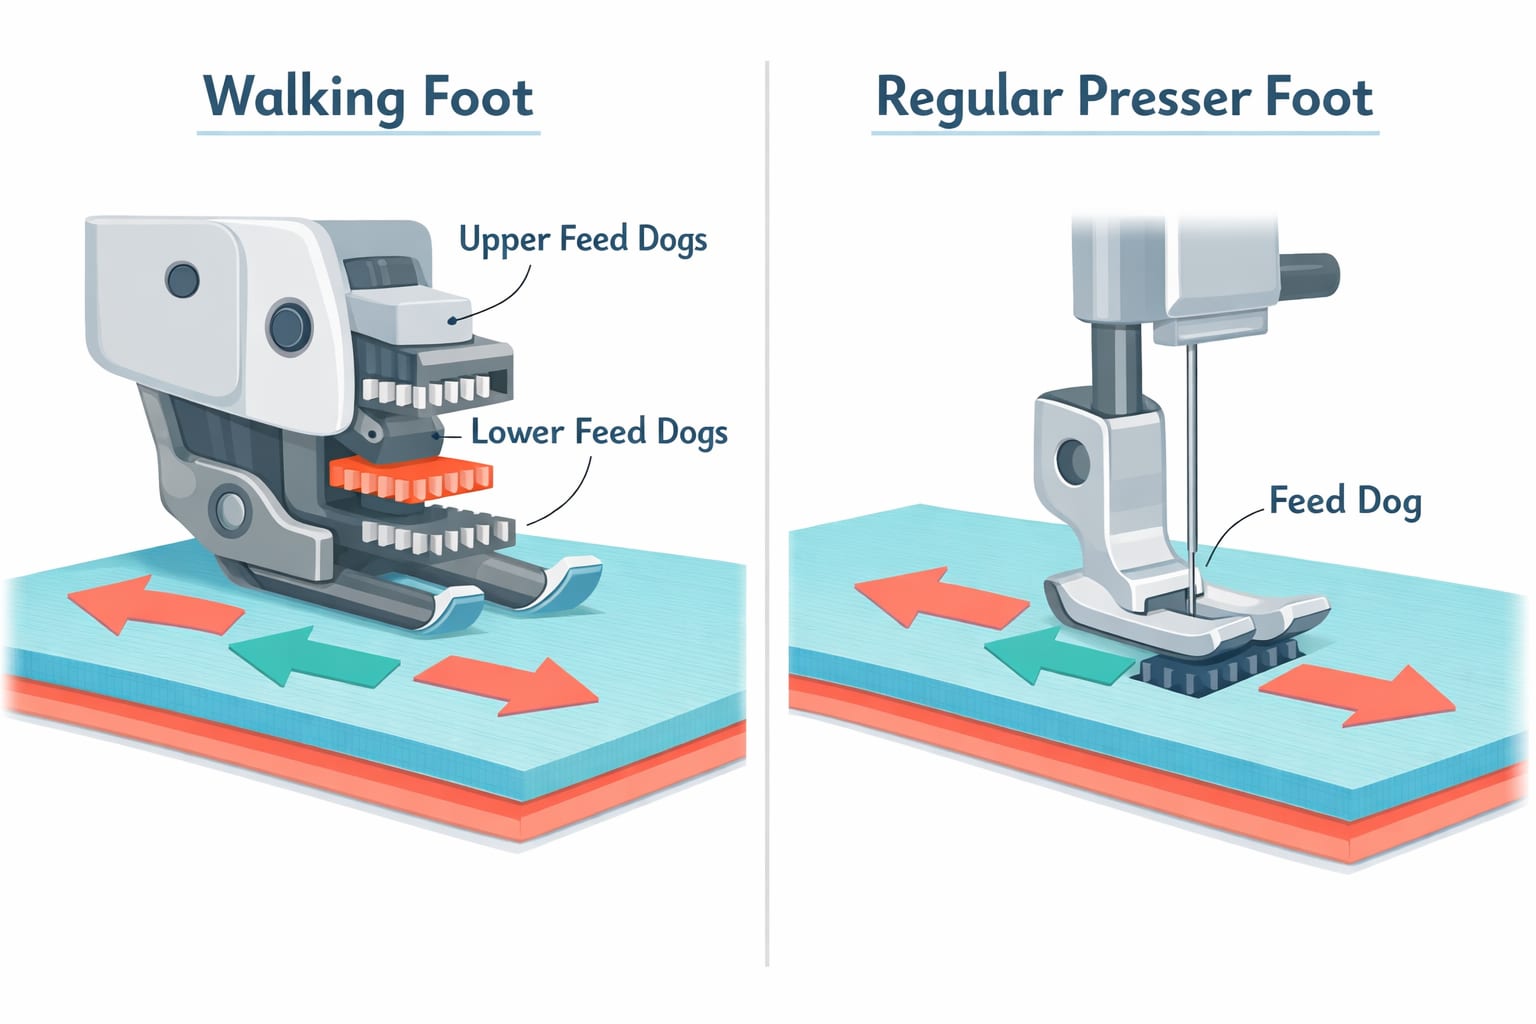
A walking foot (also called an even-feed foot or dual-feed foot) is a presser foot attachment that features its own set of feed dogs on top of the fabric. Unlike a regular presser foot that simply holds fabric down while the machine’s bottom feed dogs do all the work of moving material forward, a walking foot actively grips and moves the top layer of fabric at the same rate as the bottom layer.
The walking foot attaches to your sewing machine with a forked arm that wraps around the needle bar. As the needle bar moves up and down during stitching, it activates the walking foot’s mechanism, causing the top feed dogs to move in perfect synchronization with the bottom feed dogs built into your machine.
Key components of a walking foot include:
- Top feed dogs (usually 2-3 sets of metal teeth)
- A guide arm or fork that connects to the needle bar
- An adjustable guide bar for maintaining consistent seam allowances
- A clear or open toe for better visibility (on some models)
- A quilting bar attachment slot (on many versions)
The result is even feeding from both top and bottom, which eliminates the fabric shifting, bunching, and layer misalignment that plague sewers working with challenging materials.
How Does a Walking Foot Work Compared to a Regular Presser Foot?
A regular presser foot relies entirely on the sewing machine’s bottom feed dogs to move fabric through the machine. The presser foot itself just applies downward pressure to hold the fabric against those feed dogs. This works fine for single layers of lightweight to medium-weight fabric, but creates problems when you’re working with multiple layers or slippery materials.
Here’s what happens with a standard foot: The bottom feed dogs grip the bottom layer of fabric and pull it forward. The top layer, however, is only held in place by the presser foot’s pressure. As the bottom layer moves forward, friction between the layers causes the top layer to lag behind or bunch up. The thicker your project or the more layers you have, the worse this problem becomes.
A walking foot solves this by:
- Gripping the top layer with its own feed dogs that move in sync with the bottom feed dogs
- Applying equal forward motion to all layers simultaneously
- Reducing friction between layers because both are being actively moved rather than dragged
- Maintaining consistent stitch length across all layers
The walking foot’s arm connects to your machine’s needle bar, so every time the needle goes up and down, it mechanically drives the top feed dogs forward. This creates a “walking” motion where the foot literally steps forward with each stitch, pulling the top fabric layer along with it.
Choose a regular presser foot when:
- Sewing single layers of woven cotton or similar fabrics
- Working on lightweight projects like garment seams
- You need maximum visibility and maneuverability
- Speed and quick fabric changes are priorities
Choose a walking foot when:
- Sewing multiple thick layers together
- Working with slippery or stretchy fabrics
- Matching patterns, stripes, or plaids across seams
- Quilting or topstitching through batting

Open toe for decorative stitching: The open toe design allows space for dense decorative stitches to glide easily under the foot, for more consistent stitching

Enhanced Compatibility: This walking foot attachment is compatible with Brother sewing machines, as well as part Singer and Janome models, making it a versatile addition to your crafting tool kit

SMOOTH FABRIC FEEDING: The SINGER Even Feed Walking Presser Foot ensures even fabric feeding for professional results, especially on thick or layered fabrics. Perfect for sewing challenging materials like velvet, denim, and quilts without shifting.
When Should You Use a Walking Foot vs Regular Foot?
Use a walking foot whenever you’re dealing with fabric combinations that tend to shift, slip, or feed unevenly through your machine. The walking foot excels in situations where a regular presser foot would create puckering, misaligned seams, or uneven stitch lengths.
Specific situations that call for a walking foot:
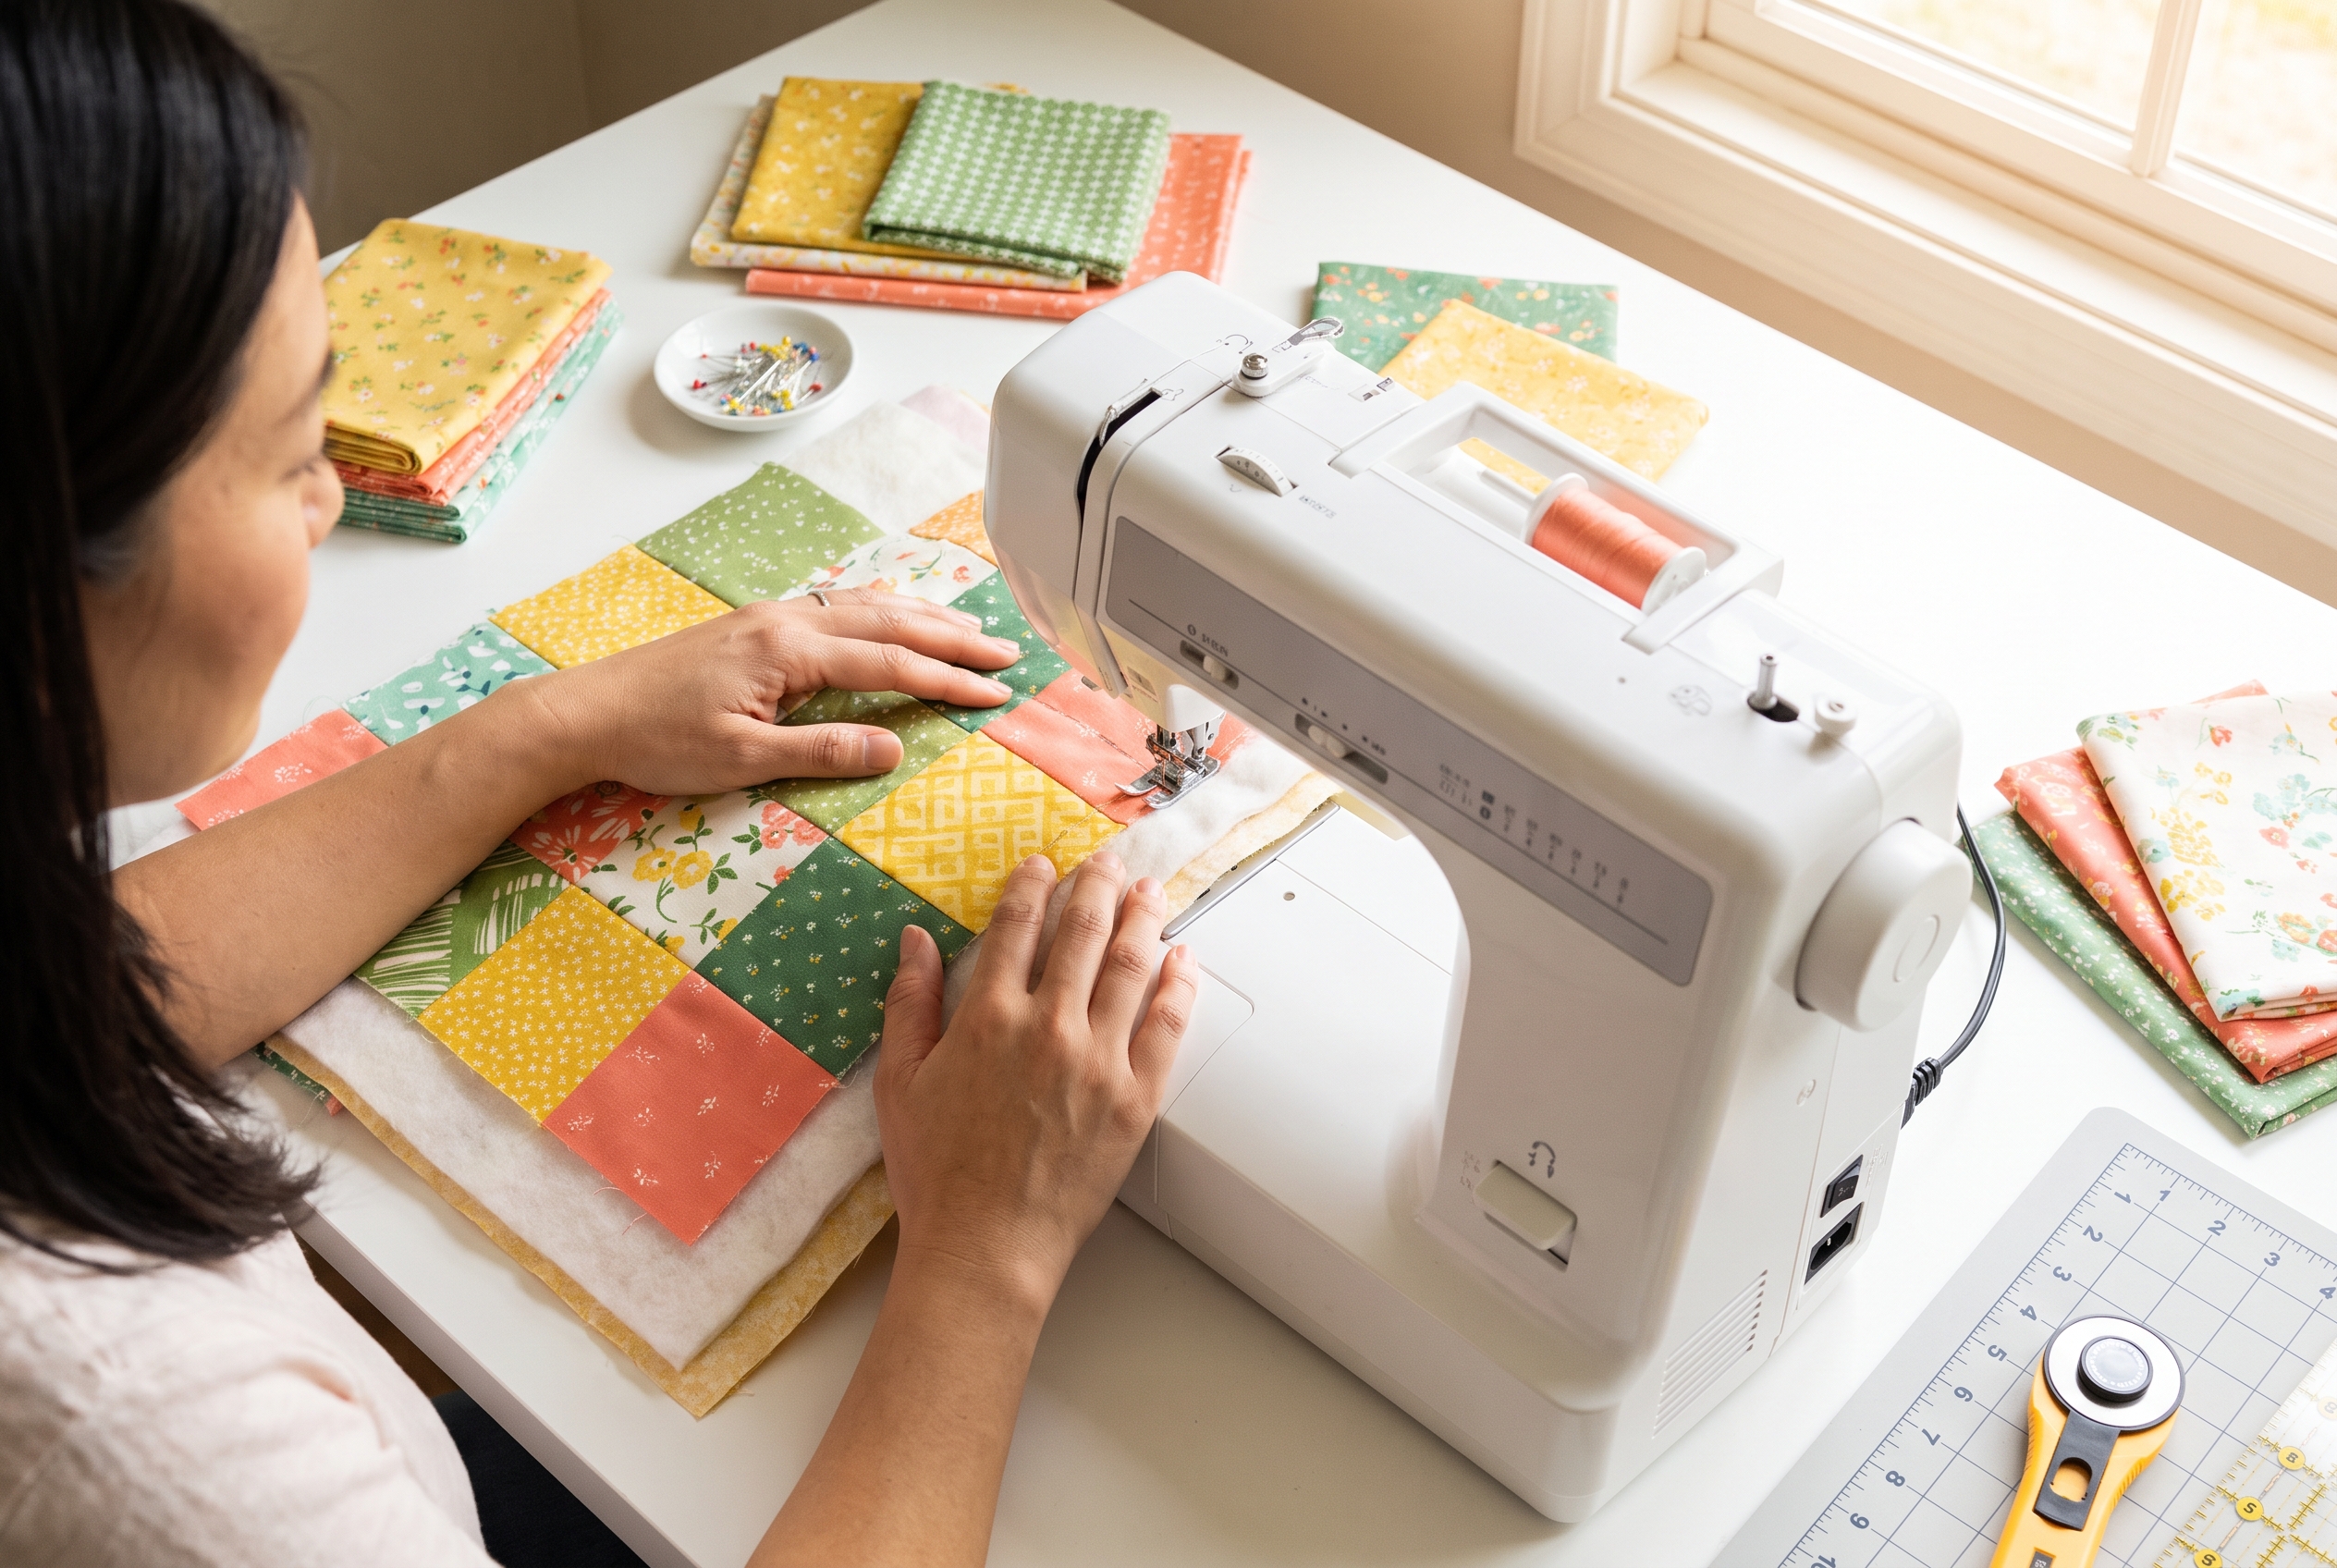
Quilting projects, When you’re sewing through a quilt sandwich (top fabric, batting, and backing), the three layers have different textures and thicknesses. A walking foot keeps all three layers moving together, preventing the dreaded tucks and pleats that appear on the backing when using a regular foot.
Thick or bulky fabrics, Materials like denim, canvas, upholstery fabric, or multiple layers of heavy material benefit from the walking foot’s even feeding. The top feed dogs help push thick layers through without the machine straining or creating uneven stitches.
Slippery fabrics, Satin, silk, rayon, polyester lining materials, and other slippery fabrics slide against each other easily. The walking foot grips both layers, preventing the top layer from racing ahead of the bottom.
Napped or pile fabrics, Velvet, velour, corduroy, fleece, and faux fur have directional texture that creates friction. These fabrics tend to creep when sewn with a regular foot. A walking foot manages the pile and keeps layers aligned.
Pattern matching, When you need to match stripes, plaids, or prints across a seam, a walking foot keeps the layers from shifting so your patterns stay aligned from start to finish.
Topstitching, Visible topstitching on jeans, jackets, bags, or home décor items looks more professional when stitches are perfectly even. A walking foot maintains consistent stitch length and prevents fabric from bunching under the needle.
Leather and vinyl, These materials stick to regular presser feet and feed unevenly. A walking foot (often with a Teflon sole) helps these materials glide through smoothly.
Stick with a regular presser foot for:
- Basic seam sewing on lightweight wovens
- Single-layer hemming on cotton or linen
- Delicate fabrics where the walking foot’s weight might cause issues
- Projects requiring frequent pivoting or tight curves (the walking foot’s bulk makes sharp turns difficult)

O(∩_∩)O Enhances Functionality:This walking foot attachment set is compatible with Brother sewing machines, as well as part Singer 、Janome models, making it a versatile addition to your crafting tool kit.
Do You Need a Walking Foot for Quilting?
Yes, a walking foot is essential for machine quilting, especially for straight-line quilting and quilting in the ditch. While you can technically quilt without one, you’ll fight fabric shifting, puckering, and pleats on the backing with every seam. Most quilters consider a walking foot one of their most important tools.
Why quilting demands a walking foot:
Quilt sandwiches consist of three distinct layers, a pieced or whole-cloth top, a middle batting layer (which can be thick and lofty), and a backing fabric. Each layer has different properties. The top might be cotton piecing, the batting could be polyester or cotton with loft, and the backing is often a single piece of fabric. When you try to sew through all three with a regular presser foot, the bottom feed dogs grab the backing and pull it through faster than the top layers can follow. The result is excess backing fabric that bunches into tucks and pleats.
Types of quilting where a walking foot is necessary:
- Straight-line quilting, Parallel lines, grid patterns, or geometric designs
- Quilting in the ditch, Stitching along seam lines to secure layers
- Channel quilting, Evenly spaced lines across the quilt
- Binding attachment, Sewing binding to the quilt edge requires even feeding through all layers plus the binding strip
When you might not need a walking foot for quilting:
- Free-motion quilting, This technique uses a darning foot or free-motion foot instead, with feed dogs dropped so you can move the fabric freely in any direction
- Small quilted projects, Mug rugs, coasters, or other tiny projects with minimal layers might work fine with a regular foot, though a walking foot still helps
Many quilters use a walking foot for the structural quilting (securing the layers and creating the main design) and switch to a free-motion foot for decorative stippling or detailed motifs.
Walking Foot Price Range for Brother Sewing Machines
Walking feet for Brother sewing machines typically cost between $25 and $80 for generic aftermarket versions, while Brother’s official walking foot (part number SA140) retails for around $50-$70 depending on the retailer. The price varies based on whether you’re buying a brand-specific foot or a universal model, and whether it includes extra features like adjustable guides or quilting bars.
Price breakdown by type:
Generic/Universal walking feet ($25-$40), These fit multiple brands including Brother machines with low-shank attachment systems. They work well for basic walking foot functions but may not fit as precisely as brand-specific models. Quality varies by manufacturer.
Mid-range aftermarket walking feet ($40-$60), Better-quality generic feet with features like adjustable seam guides, quilting bars, and clearer visibility. Brands like YEQIN, Dreamstitch, and Cutex make popular models in this range.
Brother official walking foot ($50-$70), Brother’s SA140 walking foot is designed specifically for Brother machines and guarantees proper fit and function. It includes a quilting guide bar and works with most Brother domestic machines that use a low-shank system.
Premium walking feet ($70-$150), High-end models from brands like Janome, Bernina, or specialized quilting foot manufacturers. These often feature open-toe designs for better visibility, adjustable pressure settings, or compatibility with specific high-end machine models.
Before buying, verify:
- Shank type, Brother domestic machines typically use low-shank feet, but some models vary. Check your manual or measure from the bottom of the presser foot holder to the needle plate (low shank = 1/2 inch).
- Attachment style, Most Brother machines use a snap-on foot system, but some older models use screw-on feet.
- Machine compatibility, Some computerized Brother machines have specific foot requirements. Check your model number against the foot’s compatibility list.
Where to buy:
- Amazon and eBay offer the widest selection of generic and aftermarket options
- Brother’s official website and authorized dealers carry genuine Brother parts
- Fabric and sewing stores like Joann’s often stock both generic and brand-specific walking feet
- Specialty quilting shops typically carry higher-end options
A $30-$40 generic walking foot will serve most sewers well for quilting and general use. Invest in the official Brother foot if you want guaranteed compatibility and customer support, or if you’re working on heirloom projects where precision matters most.
Why Is My Walking Foot Not Feeding Fabric Evenly?
When your walking foot isn’t feeding fabric evenly, the most common causes are improper installation (the fork arm isn’t correctly positioned around the needle bar), incorrect presser foot pressure, using the wrong needle size for your fabric, or tension issues. Less commonly, the walking foot mechanism itself may be damaged or incompatible with your machine.
Troubleshooting steps for uneven feeding:
Check the installation, The walking foot’s forked arm must fit securely around the needle bar screw (the screw that holds the needle in place). If this arm is positioned incorrectly, sitting too high, too low, or not engaged with the needle bar at all, the walking foot won’t synchronize with your machine’s timing. Remove the foot and reinstall it, making sure the fork wraps around the needle bar screw before tightening the foot in place.
Adjust presser foot pressure, If your machine has adjustable presser foot pressure, the walking foot may need more pressure than a regular foot to grip thick layers effectively. Increase the pressure setting and test. Conversely, delicate fabrics might need less pressure to prevent distortion.
Use the correct needle, A dull, bent, or incorrectly sized needle causes skipped stitches and uneven feeding. Match your needle to your fabric: size 90/14 or 100/16 for thick layers and quilting, 70/10 or 80/12 for lightweight fabrics. Replace needles regularly, they dull faster than you think.
Check your thread tension, Tension that’s too tight can cause fabric to pucker and feed unevenly. Test your tension on scrap fabric with the same number of layers as your project. Both top and bottom stitches should look balanced.
Reduce sewing speed, Walking feet work best at moderate speeds. Sewing too fast, especially through thick layers, can cause the mechanism to skip or feed unevenly. Slow down and let the foot do its work.
Clean and oil your machine, Lint buildup under the throat plate or around the feed dogs interferes with fabric feeding. Remove the throat plate, clean out lint with a brush, and oil your machine according to the manual.
Verify compatibility, Not all walking feet fit all machines. If you bought a generic foot, double-check that it’s compatible with your machine’s shank type and attachment system. Some machines require brand-specific walking feet.
Common mistakes that cause feeding problems:
- Forgetting to lower the presser foot lever before sewing (the walking foot won’t engage properly)
- Using thread that’s too thick for the needle size
- Sewing through too many layers for your machine’s capability
- Not securing the walking foot’s arm around the needle bar screw
- Using a walking foot on extremely lightweight fabric where it’s too heavy
If you’ve checked all these factors and the walking foot still feeds unevenly, the foot itself may be defective or damaged. The internal mechanism can wear out or break, especially on cheaper generic models. Try borrowing a different walking foot to test, or contact the manufacturer if it’s under warranty.
Can You Use a Walking Foot for Regular Sewing?
Yes, you can use a walking foot for regular sewing, and it won’t damage your fabric or machine. However, most sewers find it unnecessary for basic single-layer seams because the walking foot adds bulk and weight, reduces visibility, and makes tight curves and pivoting more difficult. It’s like using a sledgehammer to tap in a finishing nail, it works, but a lighter tool is more appropriate.
When using a walking foot for regular sewing makes sense:
- You’re sewing slippery fabrics like rayon or polyester that tend to shift even in single layers
- You’re topstitching and want perfectly even, professional-looking stitches
- You’re working with knits or stretchy fabrics that benefit from even feeding
- You’re too lazy to switch feet (we’ve all been there) and your project doesn’t require precision maneuvering
Drawbacks of using a walking foot for everyday sewing:
Reduced visibility, Walking feet are bulkier than standard presser feet, making it harder to see exactly where your needle is entering the fabric. This matters when you’re sewing precise seams, following marked lines, or working on detailed projects.
Difficult curves and corners, The walking foot’s size and the way it grips fabric make pivoting around corners and sewing curves more challenging. You can’t easily lift the foot slightly to reposition fabric mid-seam the way you can with a regular foot.
Added weight, The walking foot’s mechanism makes it heavier than a standard foot. On delicate or lightweight fabrics, this extra weight can cause distortion or leave impressions.
Slower sewing, Walking feet work best at moderate speeds. If you’re chain-piecing or sewing long straight seams on lightweight fabric, a regular foot lets you sew faster.
Overkill for simple tasks, For basic seams on quilting cotton, linen, or other well-behaved fabrics, a regular presser foot does the job perfectly well with less fuss.
Best practice: Keep your walking foot installed when you’re working on a project that requires it (quilting, thick layers, slippery fabrics), but switch back to a regular presser foot for standard seam sewing. Most sewers develop a feel for when the walking foot is worth the trade-offs and when a simpler foot is the better choice.
Best Alternatives to a Walking Foot for Thick Fabrics
If you don’t have a walking foot or your machine isn’t compatible with one, several alternatives can help you sew thick fabrics more successfully. The best substitute depends on your specific project and what’s causing the feeding problem.
Dual-feed or integrated even-feed systems, Some sewing machines (most notably Pfaff) have built-in dual-feed systems that work like a walking foot but are integrated into the machine. These systems can be engaged or disengaged with a lever or button. If you’re shopping for a new machine and frequently work with thick or challenging fabrics, a built-in dual-feed system is the gold standard. Machines with this feature include Pfaff Creative and Performance series, and some Janome models with their “AcuFeed” system.
Teflon or non-stick presser feet, These feet have a coating that helps fabric glide smoothly without sticking. They’re particularly useful for leather, vinyl, and other sticky materials. While they don’t provide the even feeding of a walking foot, they reduce friction and help thick layers move through more easily.
Roller feet, A roller foot has small wheels or rollers on the bottom instead of a flat sole. The rollers help fabric move forward smoothly, especially on sticky materials like leather or vinyl. Roller feet don’t provide the top-and-bottom feeding of a walking foot, but they’re helpful for single layers of difficult materials.
Hand-basting or pinning, Low-tech but effective: baste your layers together with long hand stitches or use lots of pins (or safety pins for quilts) to prevent shifting. This doesn’t solve the feeding problem, but it keeps layers aligned so that even if the top layer wants to shift, it’s held in place. Remove pins as you sew to avoid hitting them with the needle.
Spray basting, For quilting projects, temporary spray adhesive (like 505 Spray or Sulky KK 2000) holds the three layers together without pins. This prevents shifting during quilting, though you’ll still get better results with a walking foot for the actual stitching.
Tissue paper or tear-away stabilizer, Place tissue paper or tear-away stabilizer on top of or between sticky fabric layers. Sew through the paper, then tear it away afterward. This reduces friction and helps fabric feed more evenly. This technique works well for leather, vinyl, and very thick fabrics.
Adjust presser foot pressure, If your machine has adjustable presser foot pressure, reduce it when sewing thick fabrics. Less pressure means less friction between the presser foot and fabric, which can help layers feed more evenly. Test on scraps first.
Longer stitch length, Increasing your stitch length (to 3.0-3.5mm or longer) helps thick fabrics feed through more easily. Longer stitches mean fewer times the feed dogs have to grip and move the fabric, reducing the chance of shifting.
None of these alternatives fully replaces a walking foot’s even feeding capability, but they can help you complete projects when a walking foot isn’t available. For serious quilters or sewers who frequently work with challenging fabrics, investing in a walking foot (typically $25-$70) is worthwhile.
Is a Walking Foot Necessary for Beginners?
A walking foot is not necessary for beginners who are learning basic sewing skills on simple projects, but it becomes essential as soon as you tackle your first quilt, work with thick fabrics, or try to match patterns across seams. Many beginners buy a walking foot after struggling with their first quilting project and wishing they’d had one from the start.
When beginners should prioritize getting a walking foot:
You’re learning to quilt, If your goal is to make quilts, buy a walking foot early. The frustration of dealing with puckered backing fabric and misaligned layers will discourage you faster than almost any other quilting challenge. A walking foot eliminates this problem and lets you focus on learning quilting techniques rather than fighting your machine.
You’re sewing with challenging fabrics, If your first projects include velvet, satin, knits, or multiple layers of denim, a walking foot will make your learning experience much more positive. Beginners already have enough to think about without adding fabric-feeding problems to the mix.
You’re making bags, home décor, or other thick projects, These projects often involve multiple layers of fabric, interfacing, and sometimes batting. A walking foot helps beginners achieve professional results without the experience to compensate for feeding issues.
When beginners can wait on a walking foot:
You’re starting with basic garment sewing, If you’re learning on simple cotton garments, pillowcases, or other single-layer projects with well-behaved fabrics, a walking foot isn’t necessary. Master the basics first, then add specialized tools as your projects demand them.
Budget is tight, If you’re investing in a sewing machine and basic supplies, prioritize good scissors, quality thread, and a variety of needles before buying a walking foot. You can always add the walking foot later when you need it.
You’re not sure you’ll stick with sewing, If you’re testing whether sewing is a hobby you’ll enjoy, start with the basics. Once you’re committed and ready to expand your skills, invest in specialty feet.
Benefits of a walking foot for beginners:
- Reduces frustration on challenging projects, making learning more enjoyable
- Produces better results with less experience, building confidence
- Prevents bad habits like pulling or pushing fabric to compensate for feeding issues
- Opens up project possibilities earlier in your sewing journey
The verdict: If you know you want to quilt or work with thick/slippery fabrics, buy a walking foot early, it’s a relatively inexpensive tool ($25-$70) that dramatically improves results. If you’re starting with basic cotton sewing, wait until you need it. Most sewers acquire a walking foot within their first year as their projects become more ambitious.
Walking Foot vs Dual Feed: Which Is Better?
A built-in dual-feed system is generally better than an attachable walking foot because it’s more convenient (engage it with a lever rather than changing feet), provides more consistent feeding, and doesn’t add bulk above the needle. However, dual-feed systems are only available on certain machine brands and models, while walking feet can be added to most machines for $25-$150.
How dual-feed systems work:
Dual-feed (also called integrated even feed or built-in walking foot) is a mechanism built into the sewing machine that can be engaged or disengaged as needed. When activated, it works like a walking foot, feeding fabric from both top and bottom simultaneously. Pfaff pioneered this technology with their IDT (Integrated Dual Feed) system, and other brands like Janome (AcuFeed) and Baby Lock have developed similar features.
Advantages of built-in dual feed:
- Convenience, Flip a lever or press a button to engage; no need to remove and attach different feet
- Works with all presser feet, You can use dual feed with a zipper foot, buttonhole foot, or any other presser foot, not just a dedicated walking foot
- Better visibility, No bulky walking foot mechanism above the needle blocking your view
- More consistent feeding, Built-in systems are engineered specifically for the machine, often providing smoother, more reliable feeding than aftermarket walking feet
- No compatibility concerns, The system is designed for your machine, so there’s no question about whether it will fit or work properly
Advantages of attachable walking feet:
- Cost, Adding a walking foot to your existing machine costs $25-$150, while buying a machine with built-in dual feed typically adds $200-$500+ to the machine price
- Availability, Most sewing machines can accommodate a walking foot attachment, while dual-feed systems are limited to specific brands and models
- Upgrade option, You can add a walking foot to a machine you already own rather than buying a new machine
Disadvantages of dual-feed systems:
- Higher machine cost, Machines with built-in dual feed are typically mid-range to high-end models
- Limited brand options, Pfaff is the most well-known for this feature; other brands have it on select models only
- Can’t be added later, If your machine doesn’t have it built in, you can’t add it (unlike a walking foot)
Disadvantages of walking feet:
- Inconvenient to switch, Changing feet interrupts your workflow
- Reduced visibility, The bulky mechanism above the needle makes it harder to see your stitching line
- Compatibility issues, Generic walking feet may not fit perfectly or work smoothly on all machines
- Can’t use with other specialty feet, You can’t combine a walking foot with a zipper foot, for example
Which should you choose?
Buy a machine with built-in dual feed if:
- You’re shopping for a new machine and frequently work with quilts, thick fabrics, or challenging materials
- You want maximum convenience and are willing to pay more for it
- You like Pfaff machines (they have the most refined dual-feed system)
Buy a walking foot attachment if:
- You already own a sewing machine and want to add even-feed capability
- You’re on a budget and can’t justify a new machine
- You only occasionally need even feeding and don’t mind switching feet
For most sewers, a walking foot attachment provides excellent value and solves the same problems as a built-in system. If you’re buying a new machine and can afford the upgrade, built-in dual feed is more convenient and versatile.
Common Mistakes When Using a Walking Foot
The most common mistakes when using a walking foot are failing to properly attach the fork arm around the needle bar (which prevents the foot from synchronizing with the machine), sewing too fast through thick layers, and forgetting to adjust presser foot pressure for different fabric thicknesses. These errors lead to skipped stitches, uneven feeding, and frustration.
Top mistakes and how to avoid them:
Incorrect installation, The walking foot’s fork or arm must wrap around the needle bar screw (the screw that holds your needle in place). If you attach the foot without positioning this arm correctly, the walking foot won’t move in sync with your machine. It will just sit there like a very bulky regular presser foot. Always check that the arm is properly engaged before you start sewing.
Sewing too fast, Walking feet have mechanical parts that need to move with each stitch. Sewing at high speed, especially through thick layers, can cause the mechanism to skip or fail to feed properly. Slow down to a moderate pace and let the walking foot do its job. This is especially important when quilting through multiple thick layers.
Wrong needle size, Using a needle that’s too small for your fabric thickness causes skipped stitches and can break the needle. Match your needle to your project: 90/14 or 100/16 for quilting and thick fabrics, 80/12 for medium-weight materials. Replace needles regularly, a dull needle causes the same problems as the wrong size.
Not adjusting presser foot pressure, Different fabric thicknesses require different amounts of pressure. If your machine has adjustable presser foot pressure, increase it for thick layers (so the feed dogs grip better) and decrease it for delicate fabrics (to prevent distortion). Test on scraps before starting your project.
Forgetting to lower the presser foot lever, This sounds obvious, but it’s easy to forget, especially if you’re used to machines that automatically lower the foot. If the presser foot lever isn’t down, the walking foot won’t engage properly and fabric won’t feed.
Using the wrong thread, Thread that’s too thick for your needle size or too thin for your fabric can cause tension problems and uneven feeding. Use all-purpose thread for most projects, and match thread weight to fabric weight for best results.
Trying to sew tight curves, Walking feet are designed for straight lines and gentle curves. Trying to sew tight curves or pivot sharply around corners doesn’t work well because the foot grips the fabric and resists repositioning. For curves, either use a regular presser foot or stop frequently with the needle down, lift the walking foot slightly, pivot a tiny bit, and continue.
Not cleaning the foot, Lint and thread bits accumulate in the walking foot’s mechanism, especially if you’re quilting or working with flannel or fleece. Clean the foot regularly by removing it and brushing out debris. A dirty walking foot doesn’t move smoothly.
Pulling or pushing fabric, The walking foot is designed to feed fabric automatically. Pulling or pushing interferes with the even feeding and can cause skipped stitches or broken needles. Guide the fabric gently but let the foot do the work.
Using the wrong walking foot for your machine, Generic walking feet don’t fit all machines. Check your machine’s shank type (low, high, or slant) and attachment style before buying. A poorly fitting walking foot won’t work properly and can damage your machine.
Expecting miracles on extremely thick layers, Walking feet help with thick fabrics, but they can’t overcome your machine’s limitations. If you’re trying to sew through more layers than your machine can handle, even a walking foot won’t help. Know your machine’s capabilities and work within them.
Can You Use a Walking Foot on Knit Fabrics?
Yes, you can use a walking foot on knit fabrics, and it’s often helpful for preventing stretching and wavy seams, especially on heavier knits like sweatshirt fleece, ponte, or double knit. The walking foot’s even feeding keeps both layers moving at the same rate, which reduces the stretching that happens when the bottom layer is pulled through faster than the top layer.
When a walking foot helps with knits:
Heavy or stable knits, Ponte, scuba knit, double knit, sweatshirt fleece, and other substantial knits benefit from a walking foot’s even feeding. These fabrics have enough body that the walking foot’s weight isn’t a problem, and the even feeding prevents wavy seams.
Matching stripes or patterns, If you’re sewing striped knit fabric and need the stripes to match across the seam, a walking foot keeps the layers aligned so your stripes stay matched from top to bottom.
Topstitching knits, When you’re topstitching necklines, hems, or decorative details on knit garments, a walking foot helps create even, professional-looking stitches without stretching the fabric.
Sewing knits to wovens, If you’re attaching a knit fabric to a woven fabric (like adding a knit waistband to woven pants), a walking foot helps manage the different stretch properties and keeps the layers aligned.
When a regular presser foot or specialty knit foot is better:
Lightweight, stretchy knits, Jersey, interlock, and other lightweight knits often work better with a regular presser foot or a ballpoint/stretch needle and a walking foot. The walking foot’s weight can distort very stretchy fabrics.
Sewing with a serger, If you’re using a serger for knit seams (which many sewers prefer), you won’t use a walking foot at all. Sergers have their own feeding systems that handle knits well.
Gathering or easing, If you need to gather or ease knit fabric, a walking foot works against you because it prevents the differential feeding that creates gathers.
Tips for using a walking foot on knits:
- Use a ballpoint or stretch needle to avoid damaging the knit fibers
- Use a longer stitch length (3.0-3.5mm) to allow the fabric to stretch
- Reduce presser foot pressure if your machine allows it
- Don’t pull or stretch the fabric as you sew, let the walking foot feed it naturally
- Test on scraps first to make sure the walking foot isn’t distorting your particular knit
The verdict: A walking foot is a useful tool for certain knit projects, particularly heavier knits and situations where you need to prevent stretching or match patterns. For lightweight, very stretchy knits, a regular presser foot with a stretch needle often works better.
Do All Sewing Machines Work with Walking Feet?
Most domestic sewing machines work with walking feet, but not all. The key factors are whether your machine has a low-shank, high-shank, or slant-shank attachment system, whether it has a free arm (most do), and whether the needle bar is accessible for the walking foot’s fork arm to attach. Industrial machines, some vintage machines, and certain specialized machines may not accommodate standard walking feet.
What determines walking foot compatibility:
Shank type, This is the most important factor. The shank is the part of the machine that holds the presser foot. Measure from the bottom of the presser foot holder to the needle plate:
- Low shank = 1/2 inch (most common on domestic machines; includes Brother, Singer, Janome, Babylock, Kenmore, and many others)
- High shank = 1 inch (found on some older machines and certain brands)
- Slant shank = angled attachment (found on vintage Singer machines from the 1950s-60s)
Most walking feet are designed for low-shank machines. If you have a high-shank or slant-shank machine, you’ll need a walking foot specifically designed for that shank type, which may be harder to find and more expensive.
Snap-on vs. screw-on feet, Most modern machines use snap-on presser feet, which click into a presser foot holder. Some older machines use screw-on feet that attach directly to the presser bar. Walking feet are available for both systems, but you need to buy the right type for your machine.
Needle bar accessibility, The walking foot’s fork arm must be able to wrap around the needle bar or needle bar screw. On most domestic machines this isn’t a problem, but some machines have covers or designs that block access to the needle bar, making walking foot attachment impossible.
Free arm, Walking feet work best on machines with a free arm (the narrow sewing surface you get when you remove the extension table). Flatbed machines or machines with very limited space around the needle can make walking foot use difficult or impossible.
Machines that typically DON’T work with standard walking feet:
- Industrial sewing machines (they often have proprietary walking foot systems)
- Some vintage machines with unusual shank types
- Machines with covered or inaccessible needle bars
- Some mini or portable machines with non-standard attachment systems
- Certain high-end computerized machines that require brand-specific feet
How to check compatibility:
- Check your sewing machine manual, it usually lists compatible accessories
- Measure your shank height to determine low, high, or slant
- Look at your presser foot attachment, snap-on or screw-on?
- Check whether the needle bar is accessible when you remove the presser foot
- Search for “[your machine brand and model] walking foot” to see what’s available
If your machine isn’t compatible with a walking foot:
- Look for a machine-specific walking foot from your machine’s manufacturer (often available even when generic feet don’t fit)
- Consider machines with built-in dual-feed systems if you’re shopping for a new machine
- Use alternative techniques like basting, spray adhesive, or Teflon feet
The verdict: Most modern domestic sewing machines (Brother, Singer, Janome, Babylock, Bernina, Pfaff, Husqvarna Viking, etc.) work with walking feet, especially if they have a low-shank attachment system. Check your machine’s specifications before buying to ensure compatibility.
Walking Foot Skipping Stitches: How to Fix
When your walking foot skips stitches, the most common causes are using the wrong needle size or type, incorrect threading or tension, improper walking foot installation, or sewing too fast through thick layers. Less commonly, a damaged needle, dirty machine, or incompatible walking foot can cause skipped stitches.
Step-by-step troubleshooting:
1. Check and replace your needle
- Use the correct needle size for your fabric (90/14 or 100/16 for quilting and thick fabrics)
- Make sure the needle isn’t bent, dull, or damaged
- Verify the needle is inserted correctly (flat side to the back on most machines)
- Replace the needle even if it looks fine, needles dull quickly and a dull needle is a top cause of skipped stitches
2. Verify walking foot installation
- Remove the walking foot and reinstall it, making sure the fork arm wraps correctly around the needle bar screw
- The arm must be engaged with the needle bar for the walking foot to synchronize with the machine
- Tighten the presser foot holder securely
3. Rethread your machine
- Remove thread from both top and bobbin
- Rethread the top thread, making sure it passes through every thread guide and the tension discs
- Check that the presser foot is UP when threading (tension discs only open when the foot is raised)
- Wind a fresh bobbin and insert it correctly
- Use quality thread, cheap thread causes more problems than it’s worth
4. Adjust thread tension
- Test your tension on scrap fabric with the same layers as your project
- If the top thread is visible on the bottom, loosen top tension
- If the bobbin thread is visible on top, tighten top tension
- Balanced tension prevents skipped stitches and puckering
5. Slow down
- Walking feet work best at moderate speeds
- Sewing too fast through thick layers can cause the mechanism to skip
- Let the walking foot feed the fabric at its own pace
6. Adjust presser foot pressure
- If your machine has adjustable pressure, increase it for thick layers so the feed dogs grip better
- Too little pressure can cause fabric to slip and stitches to skip
7. Clean your machine
- Remove the throat plate and clean out lint around the feed dogs and bobbin area
- Lint buildup interferes with timing and can cause skipped stitches
- Oil your machine according to the manual
8. Check fabric and layers
- Are you trying to sew through more layers than your machine can handle?
- Very thick seams (like where multiple seams intersect in quilting) may need to be sewn extra slowly or with a heavier-duty needle
- Consider using a jean-a-ma-jig or hump jumper to keep the presser foot level over thick seams
9. Verify walking foot compatibility
- If you’re using a generic walking foot, it may not be fully compatible with your machine
- Try a brand-specific walking foot if problems persist
- Some machines require specific walking foot models
10. Test without the walking foot
- Sew a test seam with a regular presser foot
- If skipped stitches continue, the problem is with your machine, needle, thread, or tension, not the walking foot
- If stitches are fine with a regular foot, the walking foot is the issue (installation, compatibility, or damage)
When to seek professional help:
If you’ve tried all these steps and your walking foot still skips stitches, the walking foot mechanism may be damaged, or your machine may have a timing issue that requires professional service. Take your machine and walking foot to a sewing machine repair shop for diagnosis.
Prevention tips:
- Replace needles every 8-10 hours of sewing or with each new project
- Use quality thread from reputable brands
- Clean and oil your machine regularly
- Don’t force thick layers through, if your machine struggles, the project may be too heavy for your machine’s capabilities
- Store your walking foot properly to prevent damage to the mechanism
Conclusion
A walking foot transforms challenging sewing projects from frustrating battles into smooth, professional results. Whether you’re quilting your first bed-size quilt, sewing through thick denim layers, or trying to keep slippery satin from shifting, the walking foot’s dual-feed mechanism keeps all layers moving together evenly. While it’s not necessary for basic cotton seams or everyday garment sewing, it becomes essential as soon as you tackle projects with multiple layers, thick fabrics, or materials that tend to slip.
Your next steps:
Assess your projects, If you’re planning to quilt, work with thick or slippery fabrics, or match patterns across seams, invest in a walking foot now. If you’re sticking to basic single-layer sewing, wait until you need it.
Check compatibility, Before buying, verify your machine’s shank type (low, high, or slant) and attachment style (snap-on or screw-on). Check your manual or measure to be sure.
Start with a budget-friendly option, A $30-$40 generic walking foot works well for most sewers. Upgrade to a brand-specific model if you need guaranteed compatibility or plan to use it heavily.
Practice installation, When your walking foot arrives, practice installing it several times on an unthreaded machine until you’re confident the fork arm is correctly positioned around the needle bar.
Test on scraps, Before starting your project, test the walking foot on scrap fabric with the same number of layers and thickness. Adjust tension, pressure, and stitch length as needed.
Maintain your equipment, Clean your walking foot regularly, replace needles frequently, and use quality thread. These simple habits prevent most walking foot problems.
The walking foot is one of those tools that seems like a luxury until you use it once, then it becomes indispensable. For the relatively small investment ($25-$70 for most machines), it opens up a world of projects that would otherwise be frustrating or impossible. Whether you’re a beginner quilter or an experienced sewer tackling challenging fabrics, a walking foot delivers professional results with less effort and frustration.


