


Quick Answer
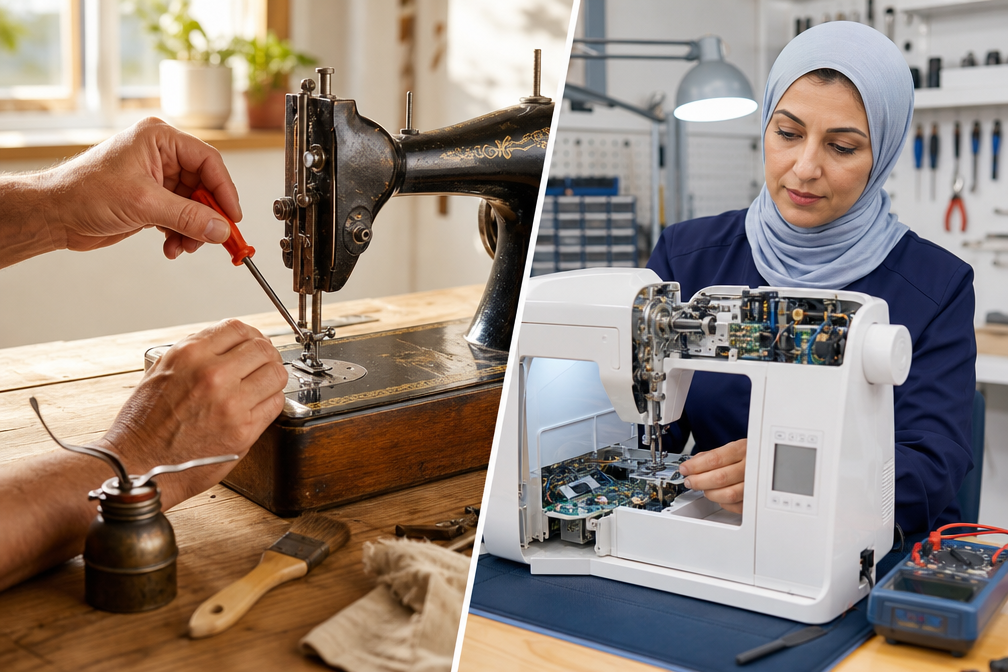
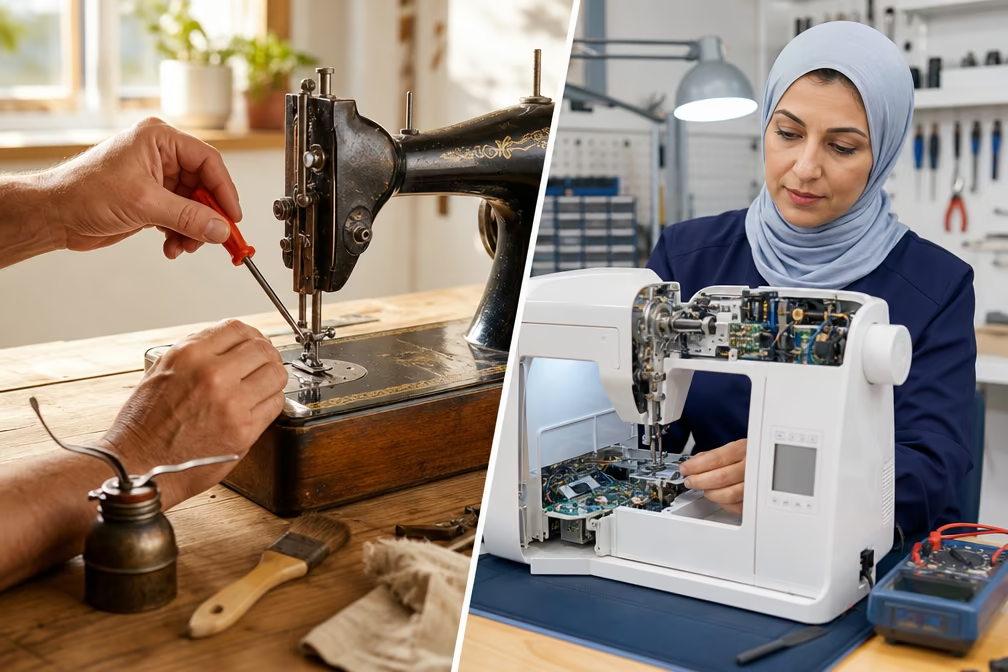
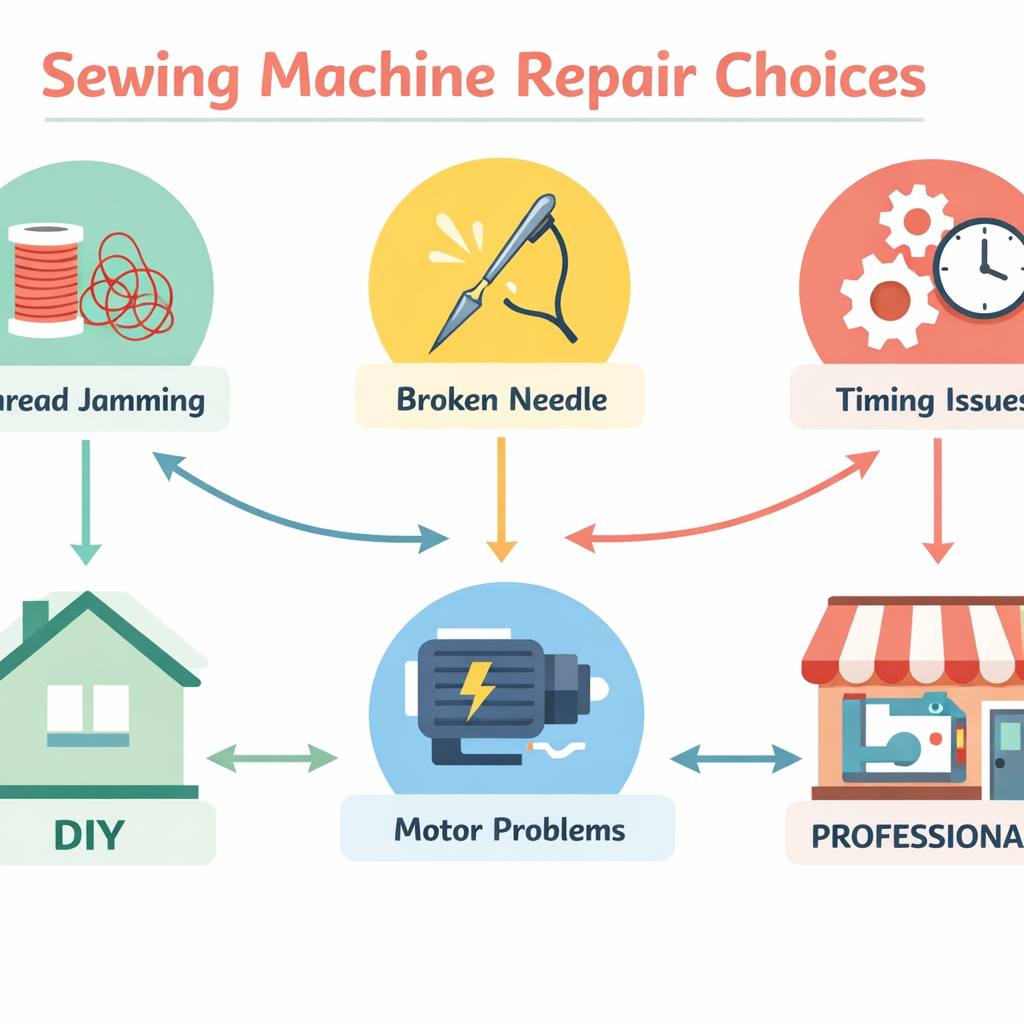
Sewing Machine Repair: DIY vs Professional depends on the complexity of the problem and your comfort level with mechanical tasks. Simple issues like threading problems, tension adjustments, and basic cleaning can be handled at home with minimal tools, while timing adjustments, motor replacements, and computerized system failures typically require professional expertise. Most sewers save money by learning basic maintenance and repairs themselves, reserving professional services for complex mechanical or electrical issues.
Key Takeaways
- Basic repairs like rethreading, tension adjustments, and cleaning can be done at home with a screwdriver set and your machine’s manual
- Professional repair costs typically range from $75-$150 for standard service, with complex repairs reaching $200-$300
- Warranty concerns matter, DIY repairs on machines under warranty can void coverage, especially if you open sealed components
- Timing issues are the most common repair that should go to a professional, as incorrect timing can damage your machine permanently
- Computerized machines require professional diagnosis for circuit board and software problems, but mechanical issues can still be DIY
- Tool investment for home repair is minimal, most fixes need only basic screwdrivers, tweezers, brushes, and sewing machine oil
- Repair vs replace decision depends on machine age and value, repairs costing more than 50% of replacement value usually aren’t worth it
- Finding good technicians requires checking certifications, reading reviews, and asking about brand-specific experience
- Common DIY mistakes include over-oiling, forcing stuck parts, and attempting timing adjustments without proper knowledge
What Are the Most Common Sewing Machine Problems You Can Fix Yourself?
Most sewing machine issues fall into a handful of categories that don’t require professional intervention. Thread tension problems, skipped stitches, jammed bobbin cases, and general maintenance account for roughly 70% of sewing machine complaints, and all can be resolved at home with basic tools and patience.
Here are the most common DIY-friendly problems:
- Thread bunching or bird’s nesting underneath fabric (usually a threading or tension issue)
- Skipped stitches caused by dull or incorrectly inserted needles
- Bobbin case jamming from lint buildup or incorrectly wound bobbins
- Uneven stitches resulting from improper tension settings
- Noisy operation due to lack of lubrication or lint accumulation
- Needle breaking from using the wrong needle type or bent needles
- Feed dogs not moving fabric because of lint or incorrect presser foot pressure
Choose DIY repair if you can clearly identify the problem, have access to your machine’s manual, and the issue doesn’t involve opening the machine’s main housing or adjusting internal gears. Most of these problems take 10-30 minutes to fix once you know what you’re looking for.
A common mistake is assuming a complex internal problem when the issue is actually simple. Before panicking, completely rethread your machine (both top and bobbin), change the needle, and clean out all visible lint. This three-step process solves about half of all reported sewing machine problems.
How Much Does Professional Sewing Machine Repair Cost on Average?
Professional sewing machine repair in 2026 typically costs between $75 and $150 for a standard service call that includes diagnosis, cleaning, and minor adjustments. More complex repairs involving part replacement or timing adjustments can range from $150 to $300, depending on your location and the machine’s complexity.
Typical repair cost breakdown:
| Service Type | Average Cost Range | Turnaround Time |
|---|---|---|
| Basic tune-up and cleaning | $75-$100 | 3-7 days |
| Tension adjustment (professional) | $50-$75 | Same day to 3 days |
| Timing adjustment | $100-$200 | 5-10 days |
| Motor replacement | $150-$250 | 7-14 days |
| Circuit board repair (computerized) | $200-$400 | 10-21 days |
| Complete overhaul (vintage machines) | $250-$500 | 14-30 days |
Geographic factors matter,urban areas with multiple repair shops tend to have competitive pricing, while rural areas with limited options may charge 20-30% more. Mobile repair services that come to your home typically add $25-$50 to the base service cost.
Many repair shops offer free or low-cost diagnostics (around $25-$40) that’s credited toward repair if you proceed. This is worth doing even if you’re considering DIY, as a professional diagnosis can save you from attempting a repair that’s beyond your skill level.
Budget tip: Some sewing machine dealers offer annual maintenance packages ($100-$150) that include cleaning, oiling, and minor adjustments, which can prevent costly repairs down the line.

Packing list: The sewing machine tool kit includes 1 curved nose tweezers, 1 double headed lint brush, 2 needle board screwdrivers, 4 flat head cross head screwdrivers, 2 seam rippers, 4 silicone brushes, 14 pieces in total; Different styles of screwdrivers and brushes, a sufficient number of tools are enough to meet your daily needs for cleaning and repairing your sewing machine

Packing list: The sewing machine tool kit includes 1 curved nose tweezers, 1 double headed lint brush, 1 needle board screwdrivers, 4 flat head cross head screwdrivers, 2 seam rippers, 12 silicone brushes, 21 pieces in total;For daily cleaning and maintenance of sewing machines.
When Should You Take Your Sewing Machine to a Professional Instead of Fixing It Yourself?
Take your sewing machine to a professional when the problem involves timing adjustments, internal gear mechanisms, motor issues, or computerized system failures. These repairs require specialized knowledge, diagnostic tools, and experience that most home sewers don’t have, and attempting them yourself can cause permanent damage that makes the machine unrepairable.
Clear indicators you need professional help:
- The hook timing is off (needle hits the bobbin case or hook)
- Motor runs but the needle doesn’t move or moves erratically
- Grinding or clicking sounds from inside the machine’s main housing
- Computerized display shows error codes you can’t resolve by rethreading
- Electrical smell or visible sparking from the foot pedal or motor
- Handwheel won’t turn or turns with significant resistance
- Parts are broken inside the machine that require disassembly to access
Choose professional repair if you’ve already tried basic troubleshooting (rethreading, cleaning, needle replacement) and the problem persists, or if your machine’s manual specifically warns against user adjustment of a particular component.
Timing issues deserve special attention. If your needle is hitting the bobbin case, hook, or throat plate, stop using the machine immediately. Continuing to sew with timing problems can bend the hook, damage the needle bar, or crack the bobbin case, turning a $100 repair into a $300 one.
A common mistake is attempting to adjust timing by trial and error. Timing requires precise positioning of the hook relative to the needle, measured in fractions of a millimeter. Without proper gauges and knowledge of your specific machine’s timing specifications, you’re likely to make things worse.

【Package includes】- 1 pcs curved nose tweezers, 1 pcs double-ended fluff brush, 1 pcs needle board screwdriver and 4 pcs screwdrivers, 7 pcs in total. Different styles of screwdrivers, a sufficient number of tools are sufficient for your daily cleaning and repair needs.
Simple techniques and projects for first-time sewers
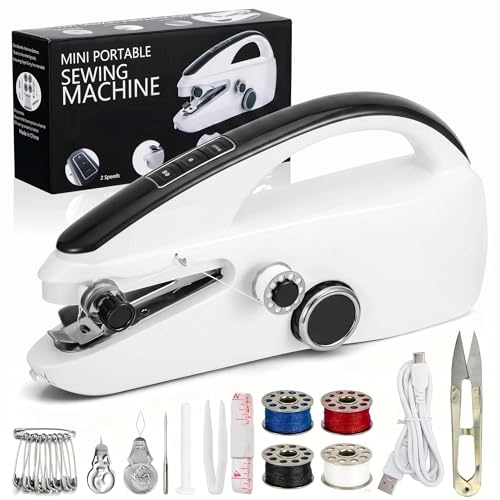
【STABLE AND EFFORT‑SAVING STITCHING PERFORMANCE】 Our handheld sewing machine delivers firm, consistent stitches for smoother operation and reduces weak or uneven seams. It works well across a wide range of fabrics from lightweight silk to thick denim for reliable results during daily mending and small DIY sewing projects
DIY Sewing Machine Repair vs Taking It to a Shop: Which Is Better?
DIY repair is better for routine maintenance and simple mechanical issues, saving you $75-$150 per service call and giving you immediate solutions when you’re mid-project. Professional repair is better for complex mechanical problems, timing issues, and when warranty coverage is a factor, ensuring the job is done correctly and preventing further damage from inexperienced attempts.
When DIY makes sense:
- You’re comfortable with basic mechanical tasks and following diagrams
- The problem is clearly identified in your manual’s troubleshooting section
- You have time to research and learn the repair process
- The machine is out of warranty or you’re willing to accept warranty risks
- Parts are readily available and inexpensive (under $30)
- You enjoy learning how your machine works
When professional repair makes sense:
- The problem isn’t clearly identifiable after basic troubleshooting
- Your machine is under warranty or extended service plan
- The repair involves timing, internal gears, or electrical components
- You need the machine back quickly and reliably for a deadline
- The machine has sentimental or monetary value (vintage or high-end models)
- You’ve already attempted DIY and made the problem worse
Cost-benefit analysis: If you sew regularly, learning basic maintenance and simple repairs can save you $200-$400 annually in service calls. However, one botched timing adjustment can cost $200-$300 to fix professionally, wiping out years of DIY savings.
The best approach for most sewers is a hybrid strategy: handle routine maintenance, cleaning, and simple adjustments yourself, while building a relationship with a trusted repair technician for complex issues. This gives you the cost savings and convenience of DIY for common problems while ensuring professional expertise when you need it.
What Tools Do You Need to Repair a Sewing Machine at Home?
Basic sewing machine repair requires only a small screwdriver set, tweezers, lint brush, and sewing machine oil,tools that cost $20-$40 total. These handle 90% of home repairs including cleaning, tension adjustments, bobbin case maintenance, and simple part replacements.
Essential DIY repair toolkit:
- Small screwdriver set with Phillips and flathead (precision sizes),$10-$15
- Tweezers or hemostats for removing thread jams and lint,$5-$8
- Lint brush or compressed air for cleaning,$3-$10
- Sewing machine oil (not 3-in-1 or WD-40),$5-$8
- Needle-nose pliers for removing stuck needles or parts,$8-$12
- Magnifying glass or headlamp for seeing small parts,$10-$15
- Your machine’s manual (download free PDFs if you’ve lost the original)
Optional but helpful tools:
- Seam ripper for removing thread from jammed areas,$3-$5
- Small flashlight for illuminating the bobbin area,$5-$10
- Cotton swabs for applying oil precisely,$2-$3
- Spare bobbins, needles, and belts for your specific machine,$15-$30
Choose your toolkit based on your machine type, mechanical machines need only basic tools, while computerized machines may require small hex keys for certain adjustments. Check your manual’s maintenance section to see what’s recommended.
A common mistake is using the wrong type of oil. Regular household oils like WD-40 or 3-in-1 oil contain additives that can gum up your machine over time. Only use oil specifically labeled for sewing machines, which is clear, odorless, and designed for high-speed moving parts.
Budget tip: Many sewing machine problems don’t require any tools at all, just rethreading, cleaning with a dry brush, or adjusting accessible dials. Start with zero-cost solutions before investing in tools.

Well Organized with Sturdy Storage Box All 30 tools are stored neatly in the reinforced box. Compact and portable, it prevents accessories from getting lost or messy for daily use.

Product Includes: The sewing machine tool kit includes 1 black curved nose tweezers, 1 double headed lint brush, 1 needle board screwdrivers, 4 flat head cross head screwdrivers, 2 seam rippers, 5 silicone brushes and 1 storage bag, 15 pieces in total. Different styles of screwdrivers and brushes, a sufficient number of tools are enough to meet your daily needs for cleaning and repairing your sewing machine, and the storage bag allows you to better store this set

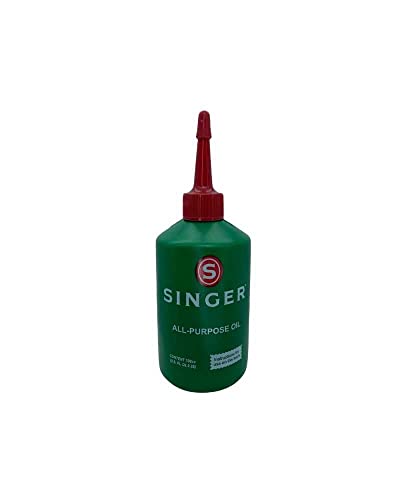
Clear Non Staining Oil: The crystal clear odorless formula makes this sewing machine oil the perfect lubricant for textile applications, completely solving slow stalls and buzzing on your machine, while also reducing friction and preventing rust! Makes using your sewing machine easier and more enjoyable.
How Do You Know If Your Sewing Machine Problem Is Too Complicated for DIY Repair?
A sewing machine problem is too complicated for DIY if it requires disassembling the main housing, adjusting internal timing mechanisms, or diagnosing electrical/computerized systems without error codes. If your troubleshooting leads you to parts you can’t see or access without removing major components, it’s time to call a professional.
Red flags that indicate professional help is needed:
- Your manual says “do not attempt user adjustment” for the affected area
- The repair requires removing the machine from its base or opening the main body
- You can’t find clear instructions or videos for your specific machine model
- The problem involves parts you can’t identify or locate
- You’ve already attempted a fix and the problem got worse
- Multiple symptoms are occurring simultaneously (compound problems)
- The machine is vintage or rare with limited documentation available
Use this decision rule: If you can access the problem area with only the bobbin case, throat plate, or side panel removed, it’s likely DIY-friendly. If you need to remove the faceplate, bottom panel, or any screws that aren’t clearly marked for user access, stop and consult a professional.
Computerized machines add complexity. While mechanical issues (threading, tension, cleaning) remain DIY-friendly, circuit board problems, sensor failures, and software glitches require diagnostic equipment that most home sewers don’t have. If your computerized machine shows persistent error codes after you’ve followed all manual troubleshooting steps, professional diagnosis is worth the cost.
A common mistake is continuing to use a malfunctioning machine “just to finish this one project.” Operating a machine with timing issues, strange noises, or intermittent problems can cause cascading damage that turns a simple repair into a major overhaul.
Can Fixing Your Sewing Machine Yourself Void the Warranty?
Yes, DIY repairs can void your sewing machine warranty if you open sealed components, remove warranty stickers, or damage parts during your repair attempt. Most manufacturer warranties explicitly state that unauthorized service voids coverage, though basic user maintenance like cleaning, oiling, and tension adjustment typically doesn’t affect warranty status.
What usually voids warranty:
- Removing the main housing or faceplate (often sealed with warranty stickers)
- Attempting timing adjustments or internal gear modifications
- Using non-manufacturer parts or accessories
- Damage caused by improper maintenance (wrong oil, excessive force)
- Opening computerized control panels or circuit board areas
- Any repair performed by non-authorized service centers
What typically doesn’t void warranty:
- Cleaning lint from accessible areas (bobbin case, feed dogs, throat plate)
- Changing needles and bobbins
- Adjusting tension dials and stitch settings
- Oiling points specifically marked in the user manual
- Replacing user-serviceable parts like presser feet or light bulbs
- Following all maintenance procedures in your owner’s manual
Check your warranty terms carefully,most sewing machine warranties last 1-5 years for mechanical parts and 1-2 years for electrical components. If your machine is still under warranty and experiencing problems, using authorized service is almost always the better choice, as repairs are typically free or low-cost.
For machines just outside warranty, ask the manufacturer about extended service plans or authorized repair options. Some brands offer discounted service for recently expired warranties, which can be cheaper than independent repair shops for complex issues.
Pro tip: Take photos before and after any DIY maintenance, and keep records of what you did. If a warranty claim arises later for an unrelated issue, you can demonstrate that your maintenance didn’t cause the problem.
What Sewing Machine Repairs Should Never Be Done at Home?
Timing adjustments, motor replacements, and circuit board repairs should never be attempted at home unless you have professional training and the proper tools. These repairs require precise measurements, specialized knowledge, and diagnostic equipment, and mistakes can render your machine permanently unusable or create safety hazards.
Never attempt these repairs yourself:
- Hook timing adjustments,requires precise positioning measured in fractions of millimeters; incorrect timing can damage the hook, needle bar, and bobbin case
- Motor replacement or internal motor repairs,involves electrical components that pose shock hazards and require proper grounding
- Circuit board or computer system repairs,needs diagnostic software and electronic testing equipment
- Gear replacement or adjustment,requires disassembling the main drive system and proper reassembly sequence
- Needle bar replacement,affects timing and requires complete recalibration
- Presser bar or feed dog mechanism replacement,involves multiple interconnected parts that must be aligned precisely
- Electrical wiring repairs,creates fire and shock hazards if done incorrectly
Why these are dangerous for DIY:
Timing is the most critical adjustment on any sewing machine. The hook must meet the needle at exactly the right moment to catch the thread loop. Being off by even one millimeter causes skipped stitches, thread breakage, or the needle hitting the hook. Professional technicians use timing gauges and follow manufacturer specifications measured to 0.1mm precision, something you can’t eyeball or approximate.
Motor and electrical repairs pose safety risks beyond just machine damage. Improper wiring can cause shorts, fires, or electrical shock. Even with the machine unplugged, capacitors in some motors can hold dangerous charges.
Choose professional repair if the problem involves any of these systems, even if you find online tutorials claiming it’s “easy.” The risk of permanent damage or safety hazards far outweighs the cost of professional service.
A common mistake is thinking that because you successfully repaired one sewing machine, you can repair all models. Each brand and model has unique timing specifications, gear configurations, and assembly sequences. What works on a Singer won’t necessarily work on a Brother or Janome.
How to Find a Good Sewing Machine Repair Technician Near You
Start by checking with your machine’s manufacturer for authorized service centers in your area, then verify the technician’s experience with your specific brand and model through reviews and direct questions. Authorized technicians have factory training and access to genuine parts, while experienced independent shops often offer faster service and lower prices.
Steps to find a reliable repair technician:
- Check manufacturer websites for authorized service center locators
- Ask at local fabric and sewing stores for technician recommendations
- Search online reviews on Google, Yelp, and sewing forums for local shops
- Join local sewing groups on Facebook or Meetup for personal referrals
- Call and ask specific questions about experience with your machine brand
- Request time and cost estimates before committing to service
Questions to ask potential repair technicians:
- How long have you been repairing sewing machines?
- Do you have experience with [your brand/model]?
- Are you an authorized service center for any brands?
- What’s your typical turnaround time for standard repairs?
- Do you provide written estimates before starting work?
- What warranty do you offer on repairs and parts?
- Do you have parts in stock or need to order them?
Red flags to watch for:
- Unwilling to provide estimates or explain the problem
- No physical shop location (only mobile service with no business address)
- Consistently negative reviews about lost machines or incomplete repairs
- Pressure to repair or replace when you’re seeking diagnosis only
- No warranty offered on repair work
- Vague answers about experience with your machine type
Choose authorized service if your machine is under warranty, is a high-end computerized model, or is a professional/industrial machine. Choose independent repair if you have a common domestic machine, need faster turnaround, or want to save 20-30% on service costs.
Many areas have mobile repair technicians who come to your home. This convenience typically costs $25-$50 extra but saves you the hassle of transporting your machine and allows you to see the repair process, which can be educational for future DIY maintenance.
Is It Worth Repairing an Old Sewing Machine or Should You Buy a New One?
Repair an old sewing machine if the repair cost is less than 50% of the machine’s replacement value and the machine meets your current sewing needs. Vintage all-metal machines and high-end models are almost always worth repairing, while basic plastic machines from the 1980s-1990s often cost more to fix than replace.
Repair makes sense when:
- The machine is all-metal construction (pre-1970s vintage)
- It’s a high-end brand (Bernina, Pfaff, Viking, high-end Singer or Brother)
- Repair cost is under $150 and replacement would cost $400+
- The machine has sentimental value (family heirloom)
- It has features you can’t find in modern machines at your budget
- Only minor repairs are needed (cleaning, tension, simple parts)
Replacement makes sense when:
- Repair costs exceed 50% of a comparable new machine’s price
- The machine is plastic construction from the 1980s-2000s
- Multiple major components need replacement (motor, gears, timing)
- Parts are no longer available for your model
- You’ve outgrown the machine’s capabilities
- It’s a basic entry-level model worth under $200 new
Value assessment guide:
| Machine Type | Typical Repair Threshold | Replacement Consideration |
|---|---|---|
| Vintage all-metal (pre-1970) | Worth repairing up to $300 | Rarely worth replacing |
| High-end computerized ($1000+) | Worth repairing up to $500 | Replace if 10+ years old with multiple issues |
| Mid-range mechanical ($300-$600) | Worth repairing up to $150 | Replace if repair exceeds $200 |
| Basic plastic machines ($100-$300) | Worth repairing up to $75 | Replace if any major component fails |
| Industrial machines | Worth repairing up to $800 | Rarely worth replacing |
Special consideration for vintage machines: A 1950s-1960s Singer Featherweight, 301, or 401 in good condition is worth $300-$600 and will outlast most modern machines. Even a $200 repair on these models makes economic sense because they’ll provide decades more service.
Conversely, a 1990s plastic-geared machine that originally cost $150 isn’t worth a $100 timing adjustment when you can buy a new machine with better features for $200-$300.
Pro tip: Get a professional diagnosis before deciding. Sometimes what seems like a major problem is actually a simple fix, and sometimes what seems minor indicates deeper issues. A $25-$40 diagnostic fee can save you from making the wrong decision.
Common Mistakes People Make When Trying to Repair Sewing Machines Themselves
The most common DIY sewing machine repair mistakes are over-oiling, forcing stuck parts, and attempting timing adjustments without proper knowledge. These errors can transform simple problems into expensive professional repairs or permanently damage machines that were otherwise fixable.
Top DIY repair mistakes to avoid:
- Over-oiling the machine,excess oil attracts lint, gums up mechanisms, and can stain fabric; most machines need only 1-2 drops per oil point
- Using the wrong type of oil,WD-40, 3-in-1 oil, and cooking oils damage sewing machines; only use sewing machine-specific oil
- Forcing stuck or tight parts,applying excessive force breaks plastic gears, bends metal components, and strips screws
- Losing or mixing up screws during disassembly,different screws go in different holes; take photos during disassembly and use a magnetic tray
- Attempting timing adjustments,this is the #1 way DIYers turn a fixable problem into an expensive professional repair
- Not consulting the manual first,many “problems” are actually incorrect settings or threading errors
- Continuing to sew when something’s wrong,operating a malfunctioning machine causes cascading damage
- Cleaning with compressed air too aggressively,blowing lint deeper into the machine where you can’t reach it
- Replacing parts without diagnosing the root cause,the new part fails because the underlying problem wasn’t fixed
- Following generic tutorials for specific machine problems,what works on one brand/model can damage another
Why these mistakes are costly:
Over-oiling seems helpful but creates a sticky residue that traps lint and dust, eventually seizing up moving parts. What starts as good maintenance becomes a problem requiring professional cleaning to remove the gummed-up oil and lint mixture.
Forcing stuck parts is particularly damaging on machines with plastic gears (common in machines from 1980-2010). A stuck handwheel usually indicates a thread jam or timing issue, forcing it strips plastic gear teeth, turning a $50 repair into a $200 gear replacement.
Prevention strategy: Before attempting any repair, watch multiple videos specific to your machine model, read your manual’s troubleshooting section completely, and start with the least invasive solution. Most problems have simple causes, exhaust those before moving to complex repairs.
How Long Does Professional Sewing Machine Repair Usually Take?
Professional sewing machine repair typically takes 3-10 business days for standard service, with simple adjustments sometimes completed same-day and complex repairs requiring 2-3 weeks. Turnaround time depends on the shop’s workload, parts availability, and repair complexity.
Typical repair timelines:
- Same-day service: Simple tension adjustments, cleaning, rethreading assistance (if shop isn’t busy)
- 3-5 business days: Standard tune-up, cleaning, minor adjustments, common part replacements
- 5-10 business days: Timing adjustments, motor service, less common part replacements
- 10-21 business days: Circuit board repairs, special-order parts, vintage machine restoration
- 3-6 weeks: Complete overhauls, rare part sourcing, machines requiring manufacturer service
Factors that affect turnaround time:
- Shop workload,busy seasons (September-November, January-February) mean longer waits
- Parts availability,common parts are in stock; special orders add 1-2 weeks
- Repair complexity,diagnosis may reveal additional problems once work begins
- Technician schedule,shops with one technician have longer waits than multi-tech operations
- Your machine’s age,vintage and discontinued models take longer due to parts sourcing
Choose expedited service if you have a deadline and the shop offers rush service (typically 50-100% surcharge). Most shops prioritize repairs in order received, but will accommodate urgent needs for an additional fee.
Many repair shops provide status updates via text or email, so you’re not left wondering. Ask about their communication policy when dropping off your machine.
Pro tip: Drop off your machine for repair during slow periods (mid-summer, late spring) for faster turnaround. Avoid the back-to-school rush in August-September and the pre-holiday season in October-November when shops are busiest.
Can You Repair a Computerized Sewing Machine Yourself or Does It Need a Professional?
You can repair the mechanical components of a computerized sewing machine yourself (threading, tension, cleaning, needle replacement), but electronic issues like circuit board failures, sensor problems, and software errors require professional diagnosis and repair. Computerized machines are hybrid systems, the sewing mechanics work like traditional machines, but the controls and features depend on electronics.
DIY-friendly repairs on computerized machines:
- Threading and tension adjustments
- Cleaning lint from bobbin area and feed dogs
- Replacing needles, bobbins, and presser feet
- Adjusting stitch settings through the control panel
- Basic troubleshooting following error code instructions in the manual
- Replacing light bulbs and external accessories
Professional-only repairs on computerized machines:
- Circuit board diagnosis and replacement
- Sensor calibration and replacement
- Software updates or reinstallation
- Touchscreen or button panel replacement
- Internal wiring issues
- Motor control board problems
- Persistent error codes that manual troubleshooting doesn’t resolve
The key difference: Computerized machines use circuit boards to control stitch patterns, tension, speed, and other features, but the actual sewing mechanism (needle, hook, feed dogs) operates mechanically just like traditional machines. If the problem is mechanical, DIY is possible. If it’s electronic, you need professional help.
Diagnostic approach for computerized machines:
- Note any error codes and look them up in your manual
- Perform all manual troubleshooting steps for that error code
- Try a complete power cycle (unplug for 30 seconds, plug back in)
- Check for software updates on the manufacturer’s website
- If error persists after following all manual steps, seek professional diagnosis
Common mistake: Assuming all problems with a computerized machine are electronic. In reality, most issues are still mechanical, threading errors, lint buildup, incorrect settings. Always try mechanical troubleshooting first before assuming you need electronic repair.
Some computerized machines have diagnostic modes accessible through button combinations that can help identify problems. Check your manual or manufacturer website for instructions specific to your model.
What Sewing Machine Brands Are Easiest to Repair at Home?
Mechanical Singer, Brother, and Janome machines are the easiest to repair at home because they have widely available parts, extensive online documentation, abundant video tutorials, and straightforward mechanical designs. Vintage all-metal Singers (pre-1970) are particularly DIY-friendly due to their simple, durable construction and massive user community.
Most DIY-friendly brands:
- Singer (mechanical models),huge parts availability, extensive documentation, large online community
- Brother (mechanical models),simple designs, good manuals, affordable replacement parts
- Janome (mechanical models),well-documented, logical construction, active user forums
- Vintage Singer (pre-1970),all-metal construction, simple mechanics, lifetime durability, massive knowledge base
- White (mechanical models),similar to Singer, good parts availability
More challenging for DIY:
- Bernina,high-quality but proprietary parts, complex engineering, expensive components
- Pfaff,sophisticated mechanisms, limited DIY documentation, professional-oriented
- Husqvarna Viking,complex computerized systems, specialized tools required
- Industrial machines (Juki, Consew),powerful but require professional knowledge for adjustments
- Vintage European machines,limited English documentation, harder to source parts
Why mechanical models are easier: They have fewer components, no circuit boards to diagnose, and problems are usually visible and mechanical. You can see thread jams, identify worn parts, and understand cause-and-effect relationships between adjustments and results.
Parts availability matters most,brands with large market share have better parts availability through multiple suppliers, keeping costs low and shipping times short. Obscure or discontinued brands may require expensive special-order parts or fabrication.
Choose based on your goals: If you want a machine that’s easy to maintain and repair yourself, buy a mechanical Brother or Janome in the $200-$400 range. If you want features and are comfortable with professional service for complex issues, higher-end computerized machines from any reputable brand work well.
Vintage Singer tip: Models like the 15-91, 201, 301, 401, and 500 series are legendary for DIY repairability. They’re all-metal, have simple timing systems, and benefit from 70+ years of accumulated user knowledge. Parts are readily available, and you can find repair tutorials for virtually any issue.
Frequently Asked Questions
How often should I have my sewing machine professionally serviced?
Have your sewing machine professionally serviced every 12-18 months if you sew regularly (several times per week), or every 2-3 years for occasional use. Professional service includes deep cleaning, lubrication of internal parts, timing checks, and tension calibration that go beyond routine home maintenance.
Can I use WD-40 or 3-in-1 oil on my sewing machine?
No, never use WD-40 or 3-in-1 oil on sewing machines. These products contain additives and solvents that attract dust, gum up mechanisms, and can damage plastic parts. Only use oil specifically labeled for sewing machines, which is clear, odorless, and designed for high-speed precision mechanisms.
What’s the most common reason sewing machines need professional repair?
Timing issues are the most common reason sewing machines need professional repair, usually caused by thread jams that force the handwheel, hitting something hard while sewing, or wear over time. Timing problems cause skipped stitches, thread breakage, or the needle hitting the bobbin case, and require professional adjustment.
Should I repair a sewing machine I inherited or buy a new one?
Repair an inherited sewing machine if it’s all-metal construction (pre-1970s) or a high-quality brand, as these machines often outlast modern equivalents and have sentimental value. Get a professional assessment first, many inherited machines need only cleaning and minor adjustments to work perfectly, costing $75-$150 versus $300-$600 for a comparable new machine.
How do I know if my sewing machine timing is off?
Your timing is off if the needle hits the bobbin case or hook, you hear clicking or scraping sounds from the bobbin area, stitches are skipped consistently, or thread breaks frequently despite correct threading and tension. Stop using the machine immediately and seek professional repair to prevent further damage.
Can I repair a sewing machine that’s been in storage for years?
Yes, machines stored for years often need only cleaning, fresh oil, and a new belt to work again. Start by manually turning the handwheel, if it turns smoothly, the machine likely just needs maintenance. If it’s seized or extremely stiff, professional service is safer than forcing it, which can break internal parts.
What does it mean when my sewing machine makes a grinding noise?
Grinding noises usually indicate lack of lubrication, lint buildup in the hook area, or worn gears. Stop using the machine, clean all accessible areas thoroughly, oil according to your manual, and test again. If grinding continues, seek professional service before the problem causes permanent gear damage.
How much does it cost to replace a sewing machine motor?
Motor replacement typically costs $150-$250 including parts and labor for domestic machines. Industrial machine motors cost $200-$400. Before replacing a motor, have a technician verify the motor is actually faulty, sometimes the problem is the foot pedal, wiring, or motor belt, which are much cheaper to fix.
Is it worth learning to repair sewing machines yourself?
Yes, learning basic sewing machine repair saves $200-$400 annually in service calls and gives you immediate solutions when problems arise mid-project. Focus on learning maintenance, cleaning, threading, and tension adjustment, skills that solve 70% of common problems, while leaving complex repairs to professionals.
What’s the difference between a tune-up and a repair?
A tune-up is preventive maintenance that includes cleaning, oiling, tension adjustment, and timing check on a functioning machine, typically costing $75-$100. A repair addresses a specific problem that prevents the machine from working properly and costs vary based on the issue, from $50 for simple fixes to $300+ for complex repairs.
Can I get parts for a 30-year-old sewing machine?
Parts availability for 30-year-old machines depends on the brand and model. Common brands like Singer, Brother, and Janome usually have parts available through specialty suppliers. Obscure brands or discontinued models may require used parts from donor machines or fabrication, which increases cost and difficulty.
Should I clean my sewing machine before taking it to a repair shop?
Basic cleaning helps but isn’t necessary, technicians expect dirty machines and cleaning is often part of the service. However, removing visible lint from the bobbin area and noting when the problem started helps technicians diagnose issues faster, potentially reducing your repair cost.
Conclusion
The choice between DIY and professional sewing machine repair isn’t all-or-nothing, the smartest approach combines both strategies based on the specific problem you’re facing. Handle routine maintenance, cleaning, threading issues, and simple adjustments yourself to save money and keep your machine running smoothly between professional services. Reserve professional repair for timing adjustments, motor problems, computerized system failures, and any issue that requires opening the main housing or involves parts you can’t identify.
Your next steps:
- Assess your current situation,identify whether your machine needs routine maintenance or actual repair
- Try basic troubleshooting first,rethread completely, change the needle, clean all accessible areas, and check your manual
- Invest in basic tools,a $30-$40 toolkit handles 90% of home maintenance needs
- Build a relationship with a repair technician,find a qualified professional before you need emergency service
- Learn your machine,spend time with your manual and understand how your specific model works
- Practice preventive maintenance,regular cleaning and oiling prevent most major repairs
Remember that your sewing machine is a tool that serves your creative projects. Whether you choose DIY or professional repair, the goal is the same: keeping your machine running reliably so you can focus on sewing rather than troubleshooting. Start with simple maintenance, learn as you go, and don’t hesitate to call in professional help when a problem exceeds your skill level. The money you save on DIY maintenance gives you budget for professional service when you really need it.


