


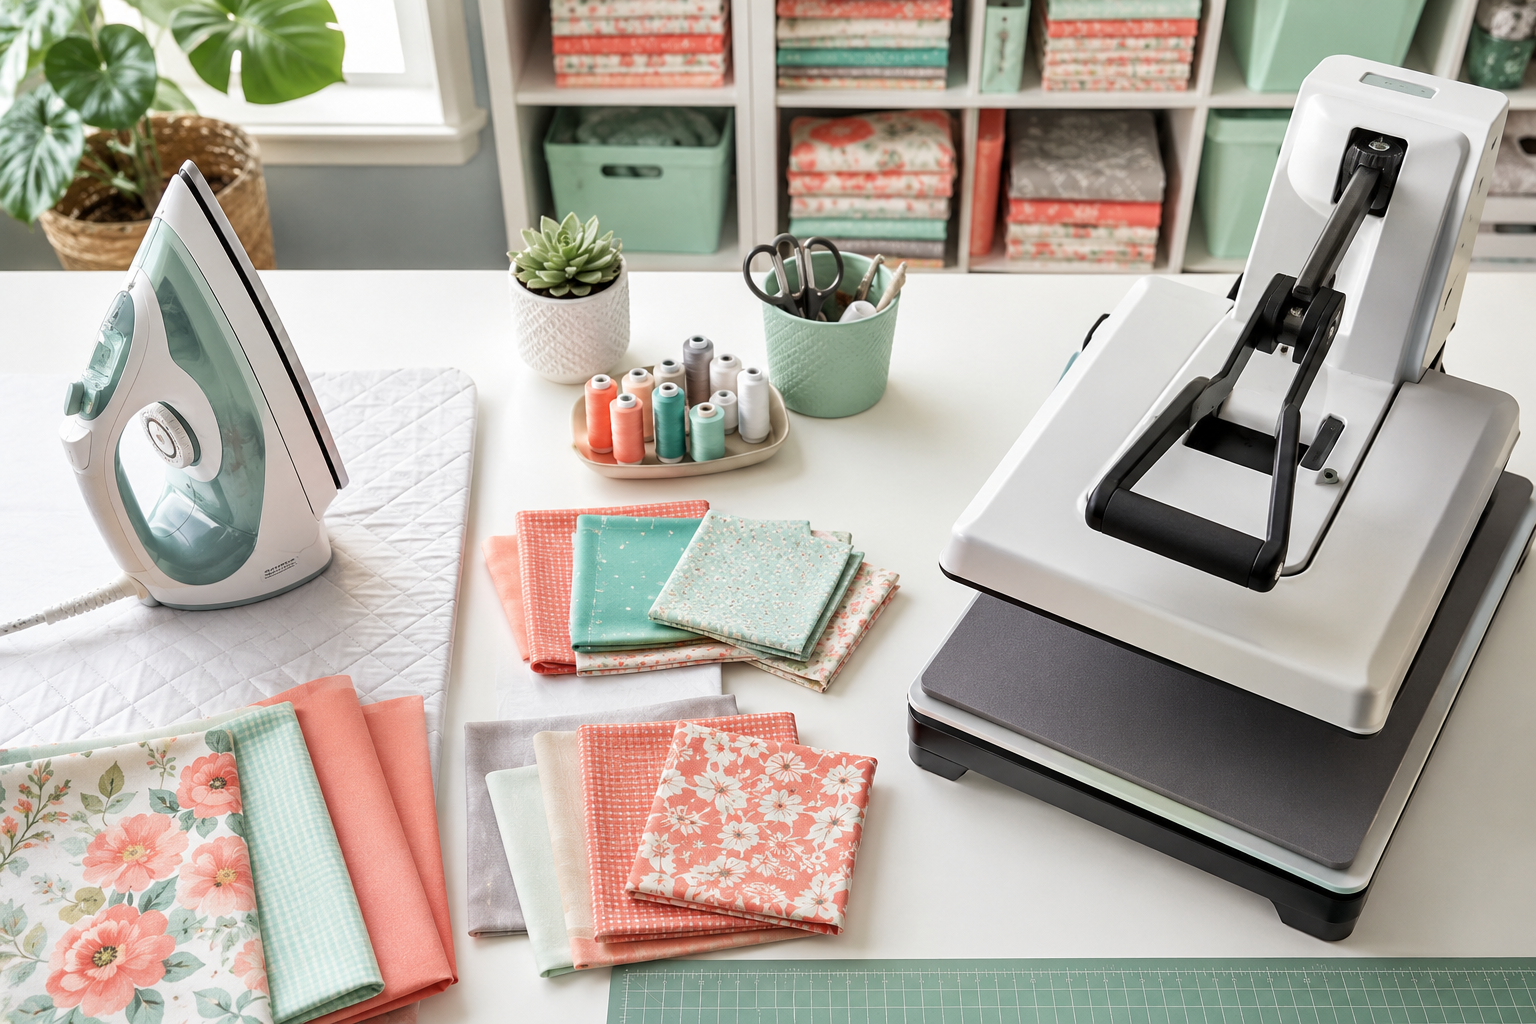
Quick Answer: Ironing involves moving a heated iron back and forth across fabric to smooth wrinkles, while pressing means lowering and lifting the iron (or press machine) without sliding to set seams, creases, or heat-transfer designs. Ironing removes wrinkles through motion; pressing shapes and sets fabric through stationary heat and pressure. Both techniques serve different purposes in sewing, and understanding when to use each method will dramatically improve your finished garment quality.
Key Takeaways
- Ironing uses a sliding motion to remove wrinkles from fabric, while pressing uses a lift-and-lower motion to set seams and shape garments without distorting fabric
- Pressing is essential for professional-looking sewing projects because it sets seams flat, creates crisp edges, and prevents fabric stretching that occurs with back-and-forth ironing
- Heat presses (machines) apply consistent pressure and temperature across large areas, making them ideal for quilting, interfacing, and heat-transfer projects
- Traditional irons cost $20-150, while garment presses range from $150-500, and commercial heat presses run $200-2,000 depending on size and features
- Most sewers need both tools: a regular iron for general fabric prep and detail work, plus pressing techniques (or a press machine) for seam finishing and specialized projects
- Wrong pressing technique can damage fabric through shine marks, flattened texture, or melted fibers, especially on synthetics, velvet, and delicate materials
- Professional tailors primarily use pressing motions with traditional irons rather than ironing, reserving sliding motions only for initial fabric preparation
What Is the Difference Between Ironing and Pressing Clothes?
Ironing and pressing differ fundamentally in motion and purpose. Ironing involves sliding a heated iron back and forth across fabric to remove wrinkles and smooth surfaces, similar to how you’d iron a dress shirt fresh from the dryer. Pressing means placing the iron down on fabric, applying pressure for a few seconds, then lifting it straight up and moving to the next section without any sliding motion.
The motion difference matters because sliding an iron can stretch fabric, especially on the bias (diagonal grain) or with knits. When you’re constructing a garment, stretched seams create puckering, wavy hems, and poor fit. Pressing keeps fabric stable while setting seams flat and creating sharp creases where you want them.
When to use each technique:
- Iron finished garments that need overall wrinkle removal, bed linens, tablecloths, and pre-washing fabric preparation
- Press during sewing construction after every seam, when applying interfacing, setting darts, creating pleats, and finishing hems
- Press delicate fabrics like silk, wool, and rayon that can easily stretch or develop shine marks from friction
Professional sewers follow the rule: press as you sew, iron when you’re done. Each seam should be pressed open or to one side immediately after stitching and before crossing it with another seam. This builds structure into the garment progressively rather than trying to fix everything at the end.
Do I Need Both an Iron and a Press for Sewing?
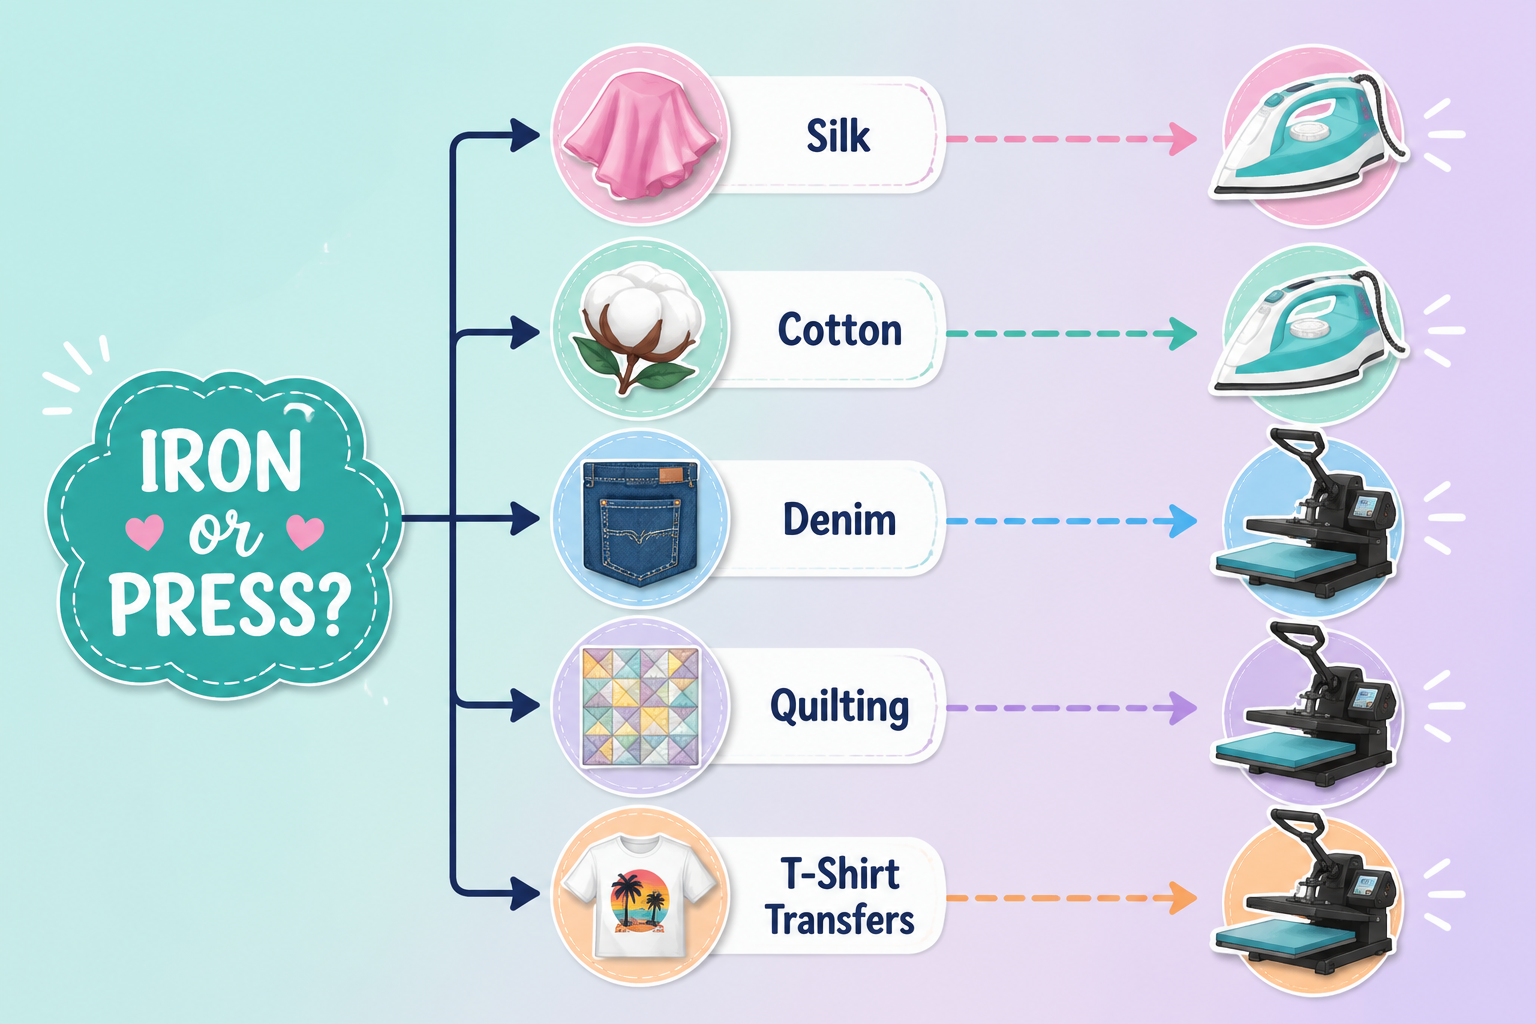
Most home sewers need a good steam iron and should learn proper pressing technique, but don’t necessarily need a separate press machine when starting out. A quality steam iron ($40-150) can handle both ironing and pressing motions, making it the versatile choice for beginners and intermediate sewers working on garments, quilts, and home décor projects.
You can accomplish professional pressing with a regular iron by:
- Using a lift-and-lower motion instead of sliding
- Applying firm downward pressure for 5-10 seconds per section
- Working in small sections and overlapping slightly
- Using a pressing cloth for delicate fabrics
- Keeping the iron soleplate clean to prevent transfer marks
Consider investing in a dedicated press machine ($150-500) if you:
- Quilt regularly and need to press large numbers of blocks quickly
- Sew professionally or run a small alterations business
- Work frequently with interfacing or fusible materials
- Create heat-transfer designs on t-shirts or bags
- Have limited hand strength or mobility issues that make holding a traditional iron difficult
A press machine provides consistent pressure across the entire heated surface, which produces more uniform results than hand-pressing with an iron. The clamshell or swing-away design also keeps your hands away from the heat, reducing fatigue during long sewing sessions.
For most sewers, master the pressing technique with your current iron before investing in specialized equipment. You’ll develop the skills to recognize when a press machine would genuinely save time versus being an expensive tool that sits unused. Check out our guide on sewing accessories to understand which tools deliver the best value for your specific projects.
Is a Heat Press Better Than a Regular Iron for T-Shirts?
For applying heat-transfer vinyl, sublimation prints, or iron-on designs to t-shirts, a heat press machine delivers significantly better results than a regular iron because it provides even pressure and consistent temperature across the entire design area. Regular irons have hot spots and cool spots on the soleplate, and it’s nearly impossible to apply uniform pressure by hand, which leads to peeling transfers and incomplete adhesion.
Heat press advantages for t-shirt projects:
- Temperature accuracy: Digital controls maintain exact heat (typically 350-400°F for HTV) without fluctuation
- Pressure consistency: 40-80 PSI of even pressure ensures complete contact between transfer and fabric
- Timer function: Built-in timers prevent under- or over-pressing that causes transfer failure
- Larger surface area: 15×15-inch or 16×20-inch platens handle full-chest designs in one press
When a regular iron works acceptably:
- Small designs under 4×4 inches where you can apply firm, even pressure
- Emergency repairs or single-item projects where investing in a press isn’t justified
- Testing design placement before committing to the final press
- Budget constraints (irons cost $30-100 vs. heat presses at $200-800)
If you’re creating t-shirts as gifts or occasional projects, a regular iron with careful technique can work. Press firmly for the full recommended time (usually 15-30 seconds), work in sections for larger designs, and use a hard, flat surface underneath. For anyone selling custom shirts, starting a small business, or making more than 5-10 shirts monthly, a heat press pays for itself in time saved and reduced material waste from failed transfers.

【Auto Heat Press & Free Hands】- HTVRONT auto heat press machine aims to take away the struggles of a regular heat press. After loading your project onto the shirt press machine, all you have to do is gently push the ironing board inside and press the "R" button to start. The heatpress will automatically press down and auto-adjusts to your project's thickness up to 1", and it auto releases once the timer goes down. Super easy to use and no more burned projects when you're away awhile
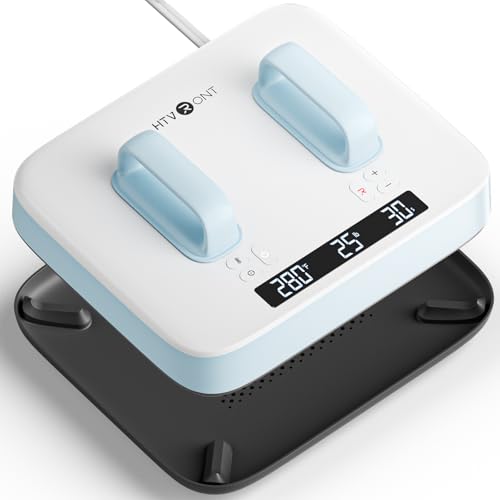
【Real-Time Display Ensures Accurate Pressure Control】Equipped with a built-in pressure sensor, HTVRONT heat press monitors and displays pressure data in real time. The clear digital screen shows pressure, time, and temperature, allowing you to make precise adjustments and ensuring consistent heat transfer and professional results across different materials with the heat press machine for t shirts every time

Stylish & Sleek Design for Diverse Settings : HTVRONT heat press machine retains its high-performance heat press capabilities while featuring a modern and stylish design. Its unique and smooth appearance makes it a great fit for both homes and creative studios. It also serves as an elegant and tasteful gift. If you encounter any issues during use our shirt press machine, our professional team is always at your service to ensure a satisfactory solution.
When Should You Press Instead of Iron?
Press instead of iron whenever you’re working on a garment during construction, setting permanent creases, or working with fabrics that can stretch, shine, or distort easily. The stationary heat and pressure of pressing shapes fabric intentionally, while the sliding motion of ironing is reserved for removing wrinkles from completed items.

Always press (never iron) in these situations:
- After sewing each seam: Press seams open or to one side before crossing with another seam to build structure correctly
- When applying interfacing: Pressing fuses interfacing evenly; ironing can create bubbles and incomplete bonding
- Setting darts and pleats: Pressing creates sharp, permanent folds; ironing can shift the fold line
- Working with wool: Wool is highly susceptible to stretching and developing shine from friction
- Sewing knits: Jersey, interlock, and rib knits stretch easily with back-and-forth motion
- Finishing bias-cut garments: Bias grain stretches dramatically when an iron slides across it
- Creating crisp edges: Collar points, cuffs, pocket flaps, and lapels need pressing to achieve professional sharpness
The pressing sequence for a typical seam:
- Sew the seam with your machine (learn proper technique in our stitch quality guide)
- Press the seam flat as sewn to set the stitches and relax the thread
- Open the seam allowances (or press to one side per pattern instructions)
- Press from the wrong side first to avoid creating shine on the fabric face
- Flip to the right side and press lightly to ensure a crisp finish
Common mistake: Many beginners skip the “press as sewn” step and go straight to pressing seams open. This causes puckering because the thread hasn’t relaxed into the fabric. Always press flat first, then press open or to the side.
Can I Use an Iron Instead of a Press for Quilting?
Yes, you can use a regular steam iron for quilting by employing proper pressing technique, though a dedicated quilting press saves significant time on large projects with hundreds of blocks. Most quilters start with a standard iron and upgrade to a press only after confirming they’ll maintain a regular quilting practice.
Using an iron effectively for quilting:
- Press seams to one side (typically toward the darker fabric) rather than open, which adds strength to quilt blocks
- Use a dry iron or turn off steam when pressing pieced blocks to prevent fabric distortion
- Press from the wrong side first to avoid creating pleats at seam intersections
- Lift and lower the iron in a true pressing motion rather than sliding, which can stretch bias edges in triangles and diamonds
- Work on a firm pressing surface (not a soft ironing board) to get crisp, flat seams
When quilters choose to invest in a press:
- Speed: A 16×20-inch press can handle an entire quilt block in one motion versus 4-6 presses with a standard iron
- Consistency: Even pressure across large areas creates uniformly flat blocks that fit together precisely
- Reduced fatigue: Quilting a king-size quilt might require pressing 200+ blocks; a press machine reduces hand and arm strain
- Better results with fusible batting: Press machines excel at fusing quilt layers together evenly
A quality steam iron ($50-100) serves quilters well for years, especially when combined with a large, firm pressing surface. Invest your budget in a good rotary cutter, ruler, and mat first, then consider a press machine once you’ve completed 3-5 quilts and confirmed the hobby has staying power. Our quilting basics guide covers essential tools and techniques for beginners.
How Much Does a Good Garment Press Cost Compared to an Iron?
Traditional steam irons range from $20-150, with excellent home-sewing models available in the $40-80 range, while garment press machines start around $150 for basic models and run up to $500-2,000 for commercial-grade equipment. The price difference reflects the mechanical complexity, heating surface area, and pressure systems in press machines.
Iron price ranges and what you get:
- $20-40: Basic models with limited steam, prone to leaking, adequate for light use
- $40-80: Quality home-sewing irons with good steam output, auto-shutoff, and durable soleplates (best value for most sewers)
- 80-150: Premium features like vertical steam, precision temperature control, and ceramic or titanium soleplates
- $150+: Professional gravity-feed irons with continuous steam for tailoring and alterations businesses
Garment press price ranges:
- $150-300: Home-use clamshell presses with 12×15 to 15×15-inch pressing surfaces, basic temperature controls
- $300-500: Larger pressing surfaces (16×20 inches), digital controls, better build quality for regular use
- $500-1,000: Semi-commercial models with higher pressure, faster heat-up, and more durable construction
- $1,000-2,000+: Commercial heat presses for production work, featuring pneumatic pressure, interchangeable platens, and industrial duty cycles
Cost-per-use calculation: If you sew 2-3 garments monthly, a $60 iron will serve you for 5+ years (cost: about $1 per month). If you quilt weekly or run a small sewing business, a $400 press used 50+ times monthly breaks even in under a year compared to the time saved versus hand-pressing.
For most home sewers, invest in the best iron your budget allows ($50-100 range) before considering a press machine. The skills you develop with proper pressing technique transfer directly to using a press machine if you upgrade later.

1. 【Industrial-Grade 15"x15" Clamshell Heat Press】 Designed for high-volume production, it easily handles full-size designs, perfect for T-shirts, uniforms, and promotional items. Delivers professional-quality transfers every time, meeting commercial-grade usage needs.
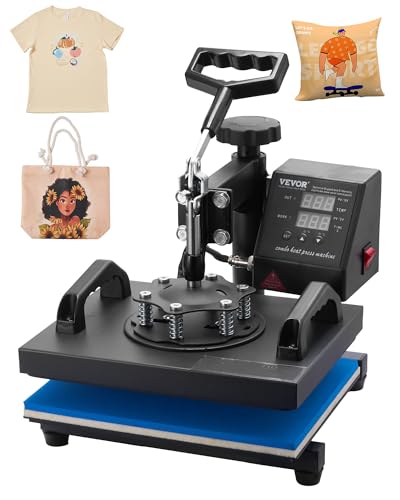
Pinnacle of Versatility: This power heat press from VEVOR provides a large surface to transfer onto flat items, ready to show your boundless ideas by transferring beautiful patterns onto your T-shirts, pillowcases, cell phone cases, and holiday ornaments. Come and create the most memorable gifts and DIY crafts for your beloved ones.
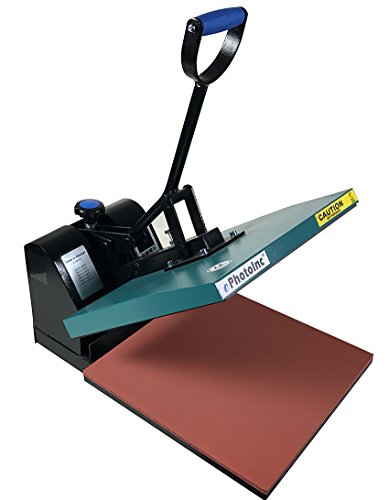
Brand New T shirt Transfer Heat Press Machine by ePhotoInc. Voltage:110V Power: 1400W Heat Press size: 15" x 15" **** BRAND NEW TEFLON SHEET IS INCLUDED ALSO ****
Pressing vs Ironing: Which Is Faster for Large Projects?
For large projects like quilts, curtains, or batch sewing multiple garments, pressing with a dedicated press machine is 3-5 times faster than using a traditional iron, though the speed advantage only matters if you’re working on projects regularly enough to justify the equipment investment and storage space.
Time comparison for common projects:
| Project | Hand-Pressing with Iron | Using Press Machine |
|---|---|---|
| Queen-size quilt (100 blocks) | 2.5-3 hours | 45-60 minutes |
| Men’s dress shirt | 8-12 minutes | 3-5 minutes |
| Pair of curtain panels | 15-20 minutes | 5-8 minutes |
| Batch of 10 tote bags | 40-50 minutes | 15-20 minutes |
Why press machines work faster:
- Larger surface area: A 16×20-inch platen covers 4-6 times the area of a standard iron soleplate
- Both sides heat simultaneously: Top and bottom platens heat fabric from both directions, cutting time in half
- No repositioning: Place the item, close the press, wait for the timer, done, no multiple passes needed
- Consistent results: No need to go back and fix areas that didn’t get enough pressure
When hand-pressing with an iron is actually faster:
- Small detail work like collar points, cuffs, or pocket flaps where precision matters more than speed
- Single garments or small projects where setup time for a press machine exceeds the pressing time
- Curved seams that need shaping over a tailor’s ham or sleeve roll
- Projects requiring steam and manipulation (like easing in sleeve caps)
Speed isn’t everything: A press machine sitting unused in your closet because you sew once a month is slower than the iron you keep on your sewing table. Evaluate your actual project frequency and types before prioritizing speed. Many productive sewers complete dozens of projects yearly using only a good iron and proper technique.
What Fabrics Should Never Be Pressed with a Heat Press?
Fabrics that melt, scorch easily, or have raised textures should never be pressed with a heat press machine set to standard temperatures (350-400°F), as the combination of high heat and pressure can permanently damage these materials. Heat presses work best on stable, heat-tolerant fabrics like cotton, cotton blends, and polyester designed for sublimation.
Fabrics to avoid or use extreme caution with:
- Velvet and velour: Pressure flattens the pile permanently, creating shiny, crushed areas that can’t be restored
- Sequined or beaded fabrics: Heat melts plastic sequins and adhesives; pressure crushes dimensional embellishments
- Nylon and low-melt polyester: Many synthetics melt at 300-350°F, below typical heat-press settings
- Faux leather and vinyl: These materials melt, stick to the press platen, and release toxic fumes when overheated
- Delicate sheers (organza, chiffon): High heat causes puckering, melting, and permanent distortion
- Foam-backed or rubberized fabrics: Foam melts and rubber degrades, creating a sticky mess on your press
- Heavily textured fabrics (seersucker, matelassé): Pressure flattens the dimensional texture that defines these fabrics
Safe alternatives for delicate fabrics:
- Use a regular iron with pressing cloth on low-to-medium heat settings
- Press from the wrong side only
- Use a needle board (for velvet) or thick terry towel underneath to preserve texture
- Test on scraps first with your actual heat and pressure settings
- Consider no-heat alternatives like finger-pressing or using a tailor’s clapper for crisp edges
Fabrics that work well with heat presses:
- 100% cotton and cotton/poly blends (50/50 or higher cotton content)
- Canvas and denim
- Polyester performance fabrics designed for sublimation
- Linen and linen blends
- Pre-shrunk, stable wovens
Common mistake: Assuming all polyester tolerates high heat. “Polyester” encompasses dozens of different fiber types with melting points ranging from 250°F to 480°F. Always test on scraps, start with lower temperatures (300-320°F), and increase gradually only if needed. If you’re troubleshooting fabric issues, our sewing troubleshooting guide offers solutions for common problems.
Do Tailors Use Irons or Presses?
Professional tailors primarily use traditional steam irons with pressing techniques rather than clamshell press machines, because tailoring requires precise control, shaping over curved surfaces, and the ability to work with steam and manipulation simultaneously. However, many tailoring shops do keep a press machine for specific tasks like fusing interfacing or pressing large flat areas.
Why tailors prefer traditional irons:
- Shaping capability: Tailors press over tailor’s hams, sleeve rolls, and pressing boards to create three-dimensional shapes that fit the body
- Steam control: Professional gravity-feed irons deliver continuous steam that can be directed precisely where needed
- Detail work: Setting collar points, lapel rolls, and pocket flaps requires the precision of an iron point
- Fabric manipulation: Techniques like shrinking, stretching, and easing require steam plus hand manipulation that press machines can’t provide
- Versatility: One iron handles every task from delicate silk blouses to heavy wool coats
When tailors use press machines:
- Fusing large pieces of interfacing to coat fronts or jacket panels
- Pressing trouser creases quickly and consistently
- Batch work like hemming multiple pairs of pants
- Setting pleats in skirts or drapery
Professional tailoring setup: A typical tailor’s pressing station includes a professional gravity-feed iron ($300-800), a sturdy pressing board at comfortable working height, a tailor’s ham, sleeve roll, seam roll, point presser, and clapper. This setup provides more versatility than any press machine for the detailed work tailoring requires.
The technique matters more than the tool: A skilled tailor with a $60 iron and proper pressing technique will achieve better results than a beginner with a $500 press machine. The lift-and-lower motion, appropriate temperature for each fabric, strategic use of steam, and pressing in the correct sequence create professional results.
If you’re interested in developing professional-level skills, focus on mastering pressing technique with your current iron before investing in specialized equipment. The fundamentals transfer across all tools and will serve you regardless of which equipment you eventually use.
Common Mistakes When Pressing Instead of Ironing
The most common pressing mistakes include using too much heat, pressing too long in one spot, skipping the pressing cloth on delicate fabrics, and pressing from the right side first, all of which can create shine marks, flatten texture, or even melt synthetic fibers. Understanding these errors helps you avoid permanently damaging your carefully sewn projects.
Top pressing mistakes and how to avoid them:
1. Sliding the iron even slightly
- The mistake: Letting the iron drift or slide while pressing, which stretches fabric
- The fix: Lift the iron completely off the fabric, move it to the next section, then lower it straight down
- Why it matters: Even small slides can stretch bias edges, distort knits, or create wavy seams
2. Using too high a temperature
- The mistake: Using cotton or linen settings on synthetic or delicate fabrics
- The fix: Start with low heat and increase gradually; test on scraps first
- Signs of damage: Shine marks, melted fibers, puckering, or fabric that feels stiff and brittle
3. Pressing from the right side without protection
- The mistake: Pressing directly on the fabric face, especially with dark or delicate materials
- The fix: Always press from the wrong side first, or use a pressing cloth (a piece of cotton muslin or a clean cotton dishtowel)
- Fabrics most at risk: Wool, silk, rayon, dark colors, and anything with a sheen
4. Holding the iron in one spot too long
- The mistake: Leaving the iron down for 20-30+ seconds, which can scorch or create shine
- The fix: Press for 5-10 seconds, lift, check results, and repeat if needed
- Exception: Fusing interfacing requires 10-15 seconds per section per manufacturer instructions
5. Pressing over pins
- The mistake: Leaving pins in seams while pressing, which creates small dents and can scratch the iron soleplate
- The fix: Remove all pins before pressing; use clips or pin perpendicular to seams if you must pin
- Damage: Permanent dents in fabric and scratches on your iron that transfer to future projects
6. Using too much steam on certain fabrics
- The mistake: Blasting steam on fabrics that water-spot or shrink (silk, rayon, some wools)
- The fix: Use a dry iron or very light steam; test on scraps first
- Alternative: Use a damp pressing cloth instead of direct steam
7. Pressing seams closed instead of open (when pattern specifies open)
- The mistake: Ignoring pattern instructions about seam finishing
- The fix: Read and follow pattern guidance; seams pressed open lie flatter and reduce bulk
- When it matters most: Curved seams, areas with multiple seam intersections, and thick fabrics
8. Skipping the “press as sewn” step
- The mistake: Immediately pressing seams open without first pressing them flat as sewn
- The fix: Always press seams flat first to set the stitches, then press open or to one side
- Result: Smoother seams without puckering or thread tension issues
Learning to recognize these mistakes early prevents frustration and wasted fabric. If you’re experiencing other sewing issues, check our guide on why stitches are loose on one side for troubleshooting help.
Is a Steam Press Worth It for Home Use?
A steam press is worth the investment ($200-500) for home sewers who quilt regularly, sew garments weekly, or have physical limitations that make holding a traditional iron difficult, but it’s not essential for occasional sewers or those just starting out. The decision depends on your project volume, available storage space, and whether the time savings justify the cost.
Steam press advantages for home sewers:
- Reduced physical strain: No need to hold and maneuver a heavy iron for extended periods
- Faster pressing: Large surface area covers more fabric per press cycle
- Consistent results: Even pressure and temperature across the entire surface
- Better for production sewing: Ideal if you sew for craft fairs, Etsy shops, or gifts in quantity
- Excellent for quilting: Handles quilt blocks, sashing, and borders efficiently
Reasons to skip a steam press:
- Storage requirements: Most presses need 2-3 feet of dedicated counter or table space
- Limited versatility: Can’t shape over curved surfaces or reach into tight areas like sleeves
- Learning curve: Requires practice to avoid over-pressing or creating unwanted creases
- Cost: $200-500 buys a lot of fabric, patterns, or other tools you might need more
- Overkill for occasional sewing: If you complete 1-2 projects monthly, a regular iron serves you better
Who benefits most from a steam press:
- Quilters working on multiple projects simultaneously
- Sewers with arthritis, carpal tunnel, or limited hand strength
- Home-based alterations or custom sewing businesses
- Sewers who batch-make items (tote bags, aprons, children’s clothes for sale)
- Anyone who finds pressing the most tedious part of sewing and would sew more if it were easier
Try before you buy: Many fabric stores, sewing guilds, and maker spaces have steam presses available for members to use. Test one for a few sessions before investing to confirm it matches your workflow and project types.
Alternative solution: Improve your current setup with a better iron ($60-100), a large firm pressing surface, and proper technique. This combination handles 95% of home sewing needs at a fraction of the cost and space requirements of a press machine.

HEATS IN 15 SECONDS FOR FAST RESULTS - This mini steam iron for clothes heats quickly to smooth shirts, seams, and quilt blocks. A compact travel iron, sewing iron, mini iron for quilting, and mini craft iron with precise control and portable convenience.

Ideal for home, craft, dorm and travel

Compact & Portable Mini Iron: Our mini iron offers a convenient and efficient solution for wrinkle-free clothes on the go. Lightweight and easy to pack, this travel iron combines the power of a full-sized clothes iron with the convenience of a small iron
Can You Damage Fabric by Using a Press Wrong?
Yes, incorrect press use can permanently damage fabric through melting, scorching, creating shine marks, flattening texture, or causing color changes, especially when using too much heat, excessive pressure, or pressing for too long. Unlike wrinkles that can be re-pressed, heat damage is usually irreversible.
Types of damage from incorrect pressing:
Heat damage:
- Melting: Synthetic fibers literally melt, creating stiff, shiny areas or holes
- Scorching: Brown or yellow marks from excessive heat, especially on natural fibers
- Shrinkage: Some fabrics (wool, rayon) shrink permanently when exposed to high heat
- Color change: Heat can alter dyes, especially in dark colors or hand-dyed fabrics
Pressure damage:
- Flattened texture: Crushing pile fabrics (velvet, corduroy), seersucker puckers, or quilted patterns
- Seam impressions: Pressing too hard creates visible ridges on the fabric face where seam allowances show through
- Stretched fabric: Excessive pressure on bias-cut or knit fabrics causes permanent distortion
Steam and moisture damage:
- Water spots: Visible marks on silk, rayon, and some synthetic fabrics
- Puckering: Too much steam can cause fabric to shrink unevenly
- Mildew: Pressing with steam then folding fabric before it’s completely dry
How to prevent press damage:
- Always test on scraps using your actual heat, pressure, and time settings before pressing your project
- Start with lower temperature and increase only if needed; you can always add more heat but can’t undo damage
- Use a pressing cloth on any fabric you’re uncertain about, a layer of cotton muslin protects delicate fabrics
- Follow fabric care labels as a baseline for heat tolerance
- Press from the wrong side first to check results before pressing the visible face
- Keep the press platen clean to prevent transfer of residue, starch, or fusible adhesive to your fabric
- Don’t over-press: 5-10 seconds is usually sufficient; longer doesn’t mean better
Fabrics requiring extra caution:
- Acetate (melts at low temperatures, around 350°F)
- Silk (water-spots easily, can scorch)
- Rayon (shrinks and water-spots)
- Velvet and velour (pile flattens permanently)
- Synthetic blends (melting point varies widely)
- Dark colors (show shine marks easily)
Recovery options for damaged fabric:
- Shine marks: Sometimes reversible by pressing from the wrong side with a damp cloth and vinegar solution (1:1 ratio)
- Flattened pile: Brush velvet gently with a soft brush and steam from the wrong side
- Scorching: Usually permanent; may need to cut around damaged areas or abandon the project
- Melting: Irreversible; fabric must be replaced
Prevention is always easier than repair. When in doubt, use lower heat, less pressure, and shorter pressing time. You can always press again if needed, but you can’t undo heat damage.
What Is the Motion Difference Between Ironing and Pressing?
Ironing uses a continuous back-and-forth gliding motion across fabric, while pressing uses a lift-and-lower motion where the iron is placed down, held stationary for several seconds, then lifted straight up before moving to the next section. This fundamental motion difference determines which technique to use for specific sewing tasks.
Ironing motion characteristics:
- Continuous contact: The iron stays in contact with fabric while moving
- Gliding: Smooth sliding motion across the fabric surface
- Coverage: Overlapping passes cover large areas quickly
- Purpose: Removes wrinkles through heat, weight, and motion
- Best for: Finished garments, bed linens, tablecloths, pre-washing fabric prep
Pressing motion characteristics:
- Intermittent contact: The iron lifts completely off the fabric between positions
- Stationary: No sliding or gliding while the iron is down
- Targeted: Precise placement on specific areas (seams, darts, edges)
- Purpose: Sets seams, creates creases, shapes fabric without distortion
- Best for: Seam finishing, applying interfacing, setting pleats, construction pressing
Why the motion difference matters:
When you slide an iron across fabric, friction between the soleplate and fabric can stretch the material, especially on bias grain or with knits. This stretching is fine when removing wrinkles from a finished shirt, but during garment construction, it distorts seam lines, creates wavy edges, and prevents pieces from fitting together accurately.
Pressing keeps fabric stationary under the iron, allowing heat and pressure to do the work without introducing stretch or distortion. The fabric maintains its original dimensions and grain line, which is essential for professional-looking results.
Technique demonstration:
Ironing technique:
- Place fabric on ironing board
- Set iron to appropriate temperature
- Starting at one end, place iron on fabric
- Glide iron smoothly across fabric in long strokes
- Overlap each pass slightly
- Continue until entire area is smooth
Pressing technique:
- Place fabric on firm pressing surface
- Set iron to appropriate temperature
- Lower iron onto specific area (seam, dart, edge)
- Apply firm downward pressure for 5-10 seconds
- Lift iron straight up (no sliding)
- Move to adjacent section and repeat
- Work in small sections until area is complete
Hybrid approach: Some situations benefit from combining both techniques. For example, you might press seams open during construction, then give the finished garment a light ironing to remove any handling wrinkles before wearing. The key is knowing which motion serves your current purpose.
Understanding this motion difference is one of the most important skills for improving your sewing results. If you’re working on developing your overall sewing technique, explore our resources on sewing for beginners to build a strong foundation.
Frequently Asked Questions
What’s the main difference between ironing and pressing?
Ironing uses a back-and-forth sliding motion to remove wrinkles from finished items, while pressing uses a lift-and-lower motion without sliding to set seams and shape fabric during garment construction. Pressing prevents fabric stretching and distortion that sliding can cause.
Can I press with a regular iron or do I need a press machine?
You can press effectively with a regular steam iron by using proper lift-and-lower technique. A press machine offers speed and consistency advantages but isn’t necessary for most home sewers. Master pressing technique with your current iron before investing in specialized equipment.
How long should I hold the iron when pressing?
Hold the iron in place for 5-10 seconds per section when pressing seams or general construction. When fusing interfacing, follow manufacturer instructions, typically 10-15 seconds per section. Longer isn’t better and can cause shine marks or scorching.
Do I need to press every seam while sewing?
Yes, pressing each seam immediately after sewing and before crossing it with another seam is essential for professional results. This builds structure into the garment progressively and prevents puckering, distortion, and fitting issues that are difficult to fix later.
What temperature should I use for pressing different fabrics?
Use low heat (250-300°F) for synthetics, silk, and delicate fabrics; medium heat (300-350°F) for wool, rayon, and blends; and high heat (350-400°F) for cotton and linen. Always test on scraps first and start with lower heat, increasing only if needed.
Should I use steam when pressing?
Steam helps set seams and remove wrinkles in most natural fibers like cotton, linen, and wool. Use dry heat or minimal steam for synthetics, silk, and rayon that can water-spot. Turn off steam when pressing pieced quilt blocks to prevent distortion.
Can I press from the right side of the fabric?
Press from the wrong side first to avoid creating shine marks, especially on dark colors, wool, and fabrics with sheen. After pressing from the wrong side, you can lightly press from the right side if needed, preferably using a pressing cloth for protection.
What’s a pressing cloth and when do I need one?
A pressing cloth is a piece of cotton muslin or a clean cotton dishtowel placed between the iron and fabric to prevent shine marks, scorching, and direct heat damage. Use one when pressing from the right side, working with delicate fabrics, or pressing dark colors.
Why do my seams look shiny after pressing?
Shine marks occur from too much heat, excessive pressure, or pressing from the right side without protection. Prevent them by pressing from the wrong side first, using a pressing cloth, and reducing heat. Some shine can be removed by pressing from the wrong side with a damp cloth.
Is pressing or ironing faster for large quilts?
A press machine is 3-5 times faster than hand-pressing with an iron for large quilts because of the larger surface area and even pressure. However, for occasional quilters, a regular iron with proper technique is more cost-effective than investing in a press machine.
What fabrics should never be pressed with high heat?
Avoid high heat on acetate, nylon, polyester blends, velvet, faux leather, vinyl, and delicate sheers. These materials can melt, flatten, or distort permanently. Always test on scraps and start with low heat, increasing gradually only if safe.
Do professional tailors use press machines or regular irons?
Professional tailors primarily use traditional steam irons with pressing technique because tailoring requires shaping over curved surfaces, precise detail work, and steam manipulation. Some shops keep a press machine for specific tasks like fusing interfacing or pressing trouser creases.
Conclusion
Understanding the difference between ironing and pressing transforms your sewing results from homemade-looking to professionally finished. Ironing removes wrinkles with a gliding motion on completed items, while pressing uses stationary heat and pressure to set seams and shape fabric during construction. The motion difference prevents stretching and distortion that compromise fit and appearance.
Most home sewers achieve excellent results with a quality steam iron ($40-100) and proper pressing technique, making it unnecessary to invest in a press machine until your project volume and types justify the expense. Focus on developing the fundamental skill of lift-and-lower pressing, working from the wrong side first, and using appropriate heat for each fabric type.
Take action on what you’ve learned:
- Practice the lift-and-lower pressing motion on scrap fabric until it becomes automatic
- Press every seam immediately after sewing, before crossing it with another seam
- Test heat settings on scraps before pressing your actual project
- Invest in a pressing cloth to protect delicate fabrics and prevent shine marks
- Start with lower heat and increase gradually, you can always add more heat but can’t undo damage
Whether you’re sewing garments, quilting, or creating home décor, mastering the difference between ironing and pressing elevates your work quality immediately. The few extra seconds spent pressing each seam properly save hours of frustration trying to fix distorted, puckered, or poorly fitting projects later.
Ready to improve other aspects of your sewing technique? Explore our comprehensive guides on sewing for beginners and fabric sewing to continue building your skills.


