


Quick Answer: To topstitch like ready-to-wear garments, use a longer stitch length (3.0-3.5mm), topstitching thread or doubled all-purpose thread, a size 90/14 or 100/16 needle, and maintain consistent seam allowance with an edge-stitching or topstitching foot. The key is even fabric feeding, proper tension adjustment, and marking your stitching line before you sew.
Key Takeaways
- Topstitching is decorative and functional stitching visible on the garment’s right side, typically 1/4 inch from edges or seams
- Use heavier thread (topstitching weight 30-40 or doubled all-purpose thread) for that bold, professional look
- Needle size matters: switch to 90/14 or 100/16 needles to accommodate thicker thread and prevent breakage
- Longer stitch length (3.0-3.5mm) creates the distinctive look of ready-to-wear garments
- Specialty presser feet like edge-stitching or topstitching feet help maintain consistent distance from edges
- Walking feet prevent wavy stitches on thick seams and multiple fabric layers
- Proper tension adjustment is critical, loosen top tension slightly when using heavier thread
- Mark your stitching line with chalk or washable marker before sewing for perfectly straight results
What Is Topstitching in Sewing?
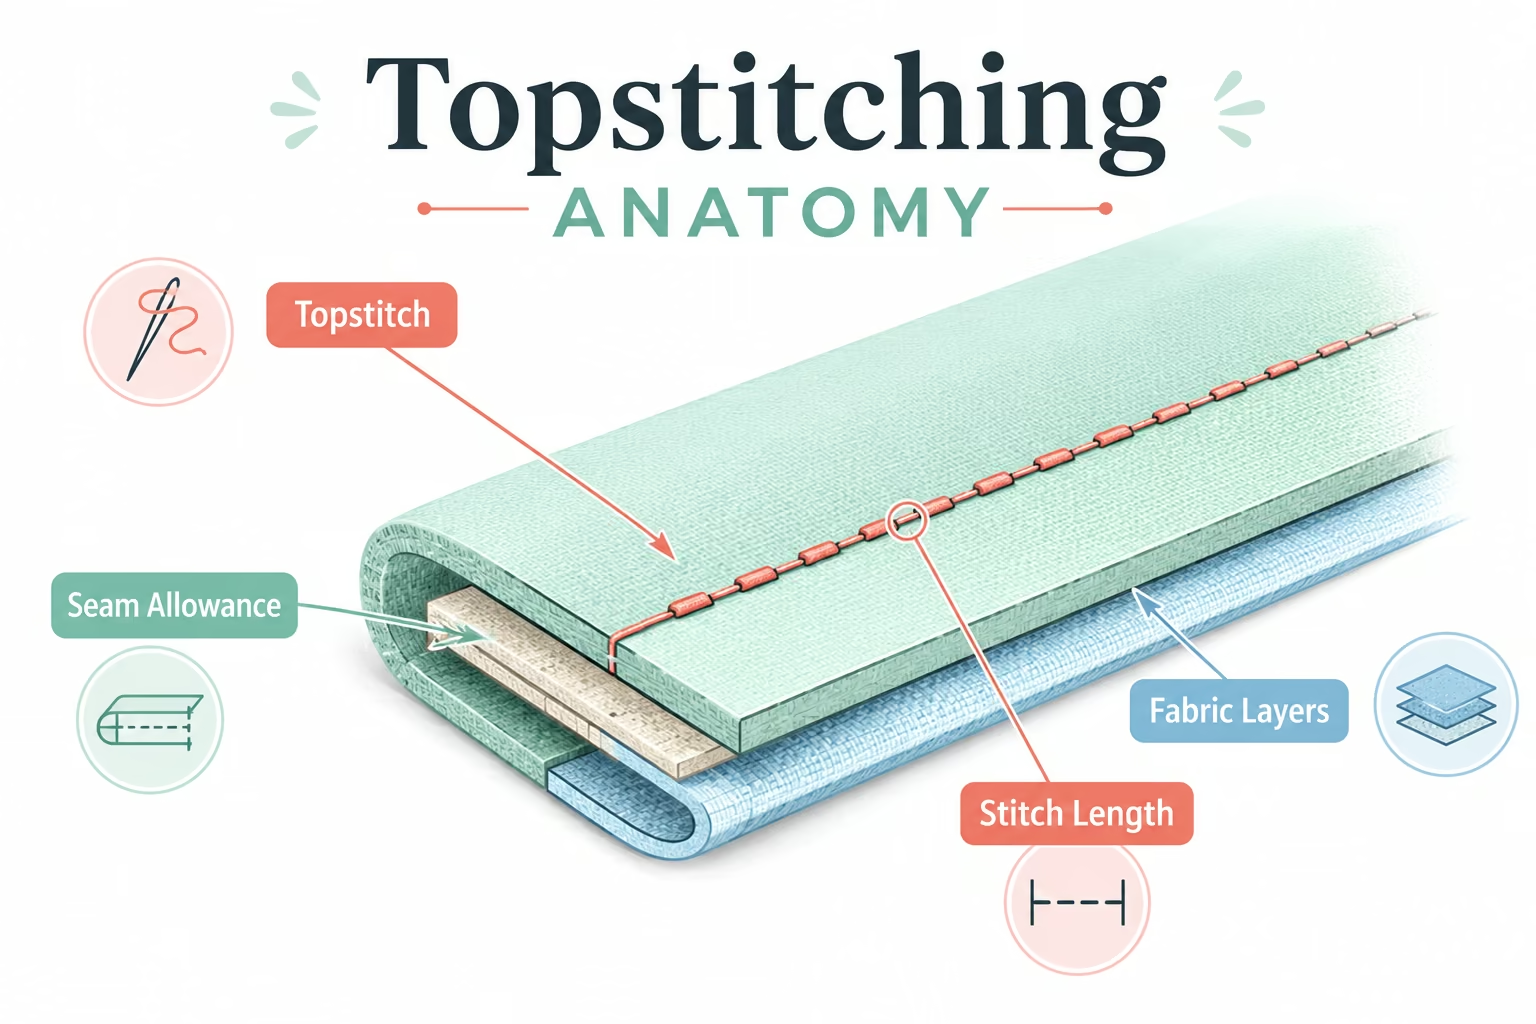
Topstitching is a line of stitching sewn on the right (visible) side of a garment, usually parallel to a seam, edge, or design line. Unlike construction stitching that holds fabric pieces together from the wrong side, topstitching serves both decorative and functional purposes, it adds visual interest, reinforces seams, and keeps seam allowances flat.
You’ll find topstitching on nearly every ready-to-wear garment: jeans have it along pockets and waistbands, jackets feature it on collars and lapels, and casual shirts display it on yokes and cuffs. The stitching is intentionally visible and often uses contrasting thread to create a design element.
When to use topstitching:
- To flatten and secure seam allowances on collars, cuffs, and waistbands
- To add decorative detail to pockets, yokes, and hems
- To reinforce stress points like pocket openings
- To create visual interest with contrasting thread colors
- To give garments a polished, professional finish
The hallmark of professional topstitching is consistency, every stitch should be the same length, and the line should run perfectly parallel to the edge or seam it follows.
What’s the Difference Between Topstitching and Regular Stitching?
Topstitching differs from regular construction stitching in visibility, thread weight, stitch length, and purpose. Regular stitching (typically 2.0-2.5mm stitch length with all-purpose thread) joins fabric pieces together and remains hidden inside seams. Topstitching uses longer stitches (3.0-3.5mm), heavier thread, and appears prominently on the garment’s right side.
Key differences:
| Feature | Regular Stitching | Topstitching |
|---|---|---|
| Visibility | Hidden in seams | Visible on right side |
| Stitch Length | 2.0-2.5mm | 3.0-3.5mm |
| Thread Weight | 50-60 weight | 30-40 weight or doubled |
| Needle Size | 70/10-80/12 | 90/14-100/16 |
| Purpose | Construction | Decorative + functional |
Regular stitching prioritizes strength and invisibility, while topstitching emphasizes visual impact and a professional finish. The longer stitch length of topstitching creates that distinctive ready-to-wear look, shorter stitches would appear too dense and lose the bold, graphic quality.
Common mistake: Using the same stitch length and thread for both construction and topstitching results in topstitching that looks timid and homemade rather than professional.
What Thread Weight Should You Use for Professional Topstitching?
For professional-looking topstitching, use topstitching thread in weight 30-40, or double up all-purpose thread (weight 50) through a single needle. Topstitching thread is thicker and creates bold, visible stitches that stand out like ready-to-wear garments. Standard all-purpose thread (weight 50-60) appears too thin and doesn’t provide the visual impact that defines quality topstitching.
Thread options for topstitching:
- Topstitching thread (weight 30-40): Specifically designed for visible stitching, available in polyester and cotton
- Buttonhole twist: Slightly heavier than topstitching thread, excellent for bold contrast
- Doubled all-purpose thread: Thread two spools of regular thread through a single needle for budget-friendly topstitching
- Jeans thread: Extra-strong polyester thread perfect for denim and heavy fabrics
When using topstitching thread or doubled thread, you’ll need to adjust your machine’s tension. Start by loosening the top tension by 1-2 numbers, the heavier thread requires more room to flow through the tension discs. Test on scrap fabric first, checking that stitches lock properly between fabric layers without puckering.
Choose topstitching thread if: you want maximum visual impact, are working on medium to heavyweight fabrics, or need contrasting color that really pops.
Choose doubled all-purpose thread if: you’re working on lightweight fabrics, want subtle topstitching, or don’t have topstitching thread on hand.
For more guidance on thread tension adjustments, check our detailed troubleshooting resources.

100% Long Staple Polyester

100% Long Staple Polyester
Whether hidden or highlighted as decorative stitching, SILK-FINISH COTTON 40 works perfectly when used for machine or hand quilting
What’s the Best Sewing Machine Needle for Topstitching?
The best needle for topstitching is a size 90/14 or 100/16 universal or topstitching needle, which accommodates heavier thread and penetrates multiple fabric layers without breaking. Topstitching needles feature a larger eye and deeper groove to prevent thread shredding, while the larger diameter (90 or 100) creates a hole big enough for thick thread to pass through cleanly.
Needle selection guide:
- Lightweight fabrics (cotton lawn, voile): 80/12 universal with doubled all-purpose thread
- Medium-weight fabrics (quilting cotton, linen): 90/14 topstitching or universal needle
- Heavyweight fabrics (denim, canvas, upholstery): 100/16 or 110/18 jeans or topstitching needle
- Multiple thick layers: 100/16 jeans needle for extra strength
Using a needle that’s too small causes thread breakage, skipped stitches, and frustration. The thread literally can’t fit through the eye or the hole the needle creates in the fabric. Conversely, using a needle that’s too large on delicate fabric leaves visible holes.
Pro tip: Schmetz topstitching needles have an extra-large eye (twice the size of a universal needle) and an extra-deep groove on the front, making them ideal for topstitching thread and preventing shredding.
Replace your needle after 6-8 hours of sewing or when starting a new project. Dull needles cause skipped stitches and thread breakage, which are especially noticeable in visible topstitching. For more details, see our guide on needle types and selection.
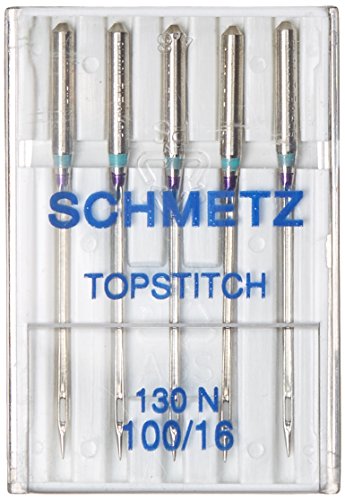
Topstitch machine needle


Medium Ball Point
How Do You Get Even Topstitching Like Store-Bought Clothes?
To achieve even topstitching like ready-to-wear garments, mark your stitching line before sewing, use an edge-stitching or topstitching foot for consistent seam allowance, sew slowly with steady speed, and keep your eyes on the guide rather than the needle. The secret is preparation and using the right tools to maintain a consistent distance from the edge.

Step-by-step for perfectly even topstitching:
- Mark your stitching line: Use a washable fabric marker, chalk, or hera marker to draw a guideline parallel to your edge or seam
- Choose the right presser foot: An edge-stitching foot has a guide blade that rides along the fabric edge, maintaining consistent distance
- Adjust stitch length: Set your machine to 3.0-3.5mm for that ready-to-wear look
- Test on scraps: Always test your thread, tension, and stitch length on fabric scraps first
- Sew slowly: Maintain a steady, moderate speed, rushing causes wobbles
- Watch the guide, not the needle: Keep your eyes on the edge of the presser foot or the marked line
- Support the fabric: Don’t pull or push, let the feed dogs do the work
Common distances for topstitching:
- 1/8 inch (3mm): Close edge-stitching on collars, cuffs, and binding
- 1/4 inch (6mm): Standard topstitching distance for most garments
- 3/8 inch (10mm): Decorative topstitching on jeans and casual wear
- Multiple rows: Space evenly using presser foot width as a guide
For perfectly straight lines on long seams, use painter’s tape on your machine bed as a guide, or invest in a magnetic seam guide. These tools keep fabric aligned without marking.
Edge case: When topstitching curves (like armholes or necklines), go even slower and pivot frequently with the needle down. Mark the curve clearly and use your hands to guide the fabric smoothly around the bend.
Why Does My Topstitching Look Wavy?
Wavy topstitching happens when fabric layers shift during sewing, tension is too tight, you’re pulling or pushing the fabric, or the feed dogs aren’t gripping all layers evenly. The most common culprit is uneven fabric feeding, the top layer moves faster than the bottom layer, creating ripples and waves in the stitching line.
Causes and solutions for wavy topstitching:
1. Uneven fabric feeding
- Solution: Use a walking foot (also called an even-feed foot) that feeds top and bottom layers at the same rate
- Especially important for slippery fabrics, thick seams, and multiple layers
2. Pulling or pushing fabric
- Solution: Let the feed dogs move the fabric naturally, your hands should only guide, not force
- Pulling creates stretched stitches that relax into waves after sewing
3. Tension too tight
- Solution: Loosen top tension by 1-2 numbers when using topstitching thread
- Tight tension puckers fabric and creates wavy seams
4. Presser foot pressure too high
- Solution: Reduce presser foot pressure on thick seams so fabric can move freely
- Too much pressure prevents even feeding
5. Fabric not properly pressed
- Solution: Press seams flat before topstitching, especially seam allowances
- Bulky, unpressed seams cause uneven thickness that leads to wavy stitching
If you’re experiencing stitch quality issues beyond just wavy lines, check your machine’s overall tension and timing.
Should You Use a Topstitching Foot or Regular Presser Foot?
A topstitching foot or edge-stitching foot produces more consistent results than a regular presser foot because it has built-in guides that maintain precise distance from edges or seams. While you can topstitch with a regular presser foot, specialty feet make the job easier and deliver professional results with less effort.
Presser foot options for topstitching:
Edge-stitching foot
- Features a center guide blade that rides along fabric edges
- Perfect for stitching 1/8 to 1/4 inch from edges
- Ideal for collars, cuffs, and binding
Topstitching foot
- Has a single groove underneath for thick thread
- Often includes adjustable guide for consistent seam allowance
- Best for decorative topstitching with heavy thread
Walking foot
- Feeds top and bottom fabric layers evenly
- Essential for thick seams, multiple layers, and slippery fabrics
- Prevents shifting and wavy stitches
Regular presser foot
- Works fine for simple topstitching if you’re careful
- Use the edge of the foot as a guide
- Requires more concentration to maintain consistency
Choose a specialty foot if: you’re topstitching long seams, want professional consistency, or work with challenging fabrics. The investment (usually $15-30) pays off in time saved and better results.
Stick with a regular foot if: you’re doing minimal topstitching, have excellent control, and don’t mind marking guidelines. For a complete overview of specialty feet, see what all those presser feet are for.
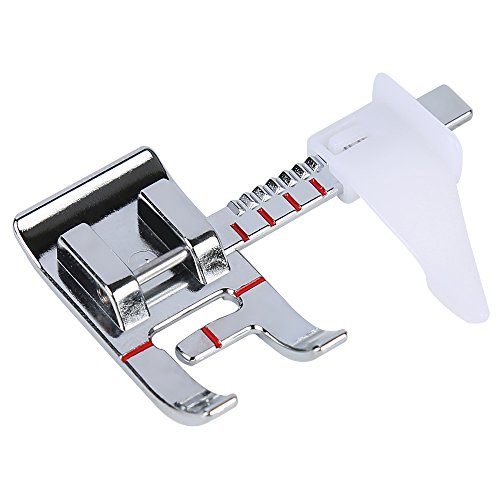
High Quality Premium Sewing Feet From Smart H.

✅ PRECISION GUIDED STITCHING: Achieve perfectly straight seams every time with the built-in adjustable guide. Designed to follow edges or existing stitch lines, this presser foot helps maintain consistent spacing, making it ideal for both beginners and experienced sewists.

Overcast and sew a seam at the same time, conceals fabric edges.
How Far From the Edge Should Topstitching Be?
Standard topstitching sits 1/4 inch (6mm) from the edge or seam, though distances range from 1/8 inch (3mm) for close edge-stitching to 3/8 inch (10mm) or more for decorative topstitching. The distance depends on the garment style, fabric weight, and desired visual impact, jeans typically feature 3/8 inch topstitching, while dress shirts use 1/8 inch edge-stitching.
Topstitching distance guidelines:
- 1/8 inch (3mm): Edge-stitching on collars, cuffs, waistbands, and binding, creates a crisp, tailored look
- 1/4 inch (6mm): Standard topstitching distance for most garments, versatile and professional
- 3/8 inch (10mm): Decorative topstitching on casual wear, jeans, and jackets, bold and visible
- 1/2 inch (12mm) or more: Statement topstitching for design impact, common on outerwear
How to measure consistently:
- Use the width of your presser foot as a guide (most are 1/4 inch wide)
- Align the fabric edge with markings on the needle plate
- Use an edge-stitching foot with adjustable guide
- Mark the line with chalk or washable marker before sewing
Multiple rows of topstitching: Space rows evenly using the previous row as a guide. For example, stitch the first row 1/4 inch from the edge, then stitch the second row 1/4 inch from the first row. The edge of your presser foot can ride along the previous stitching line.
Pro tip: On curved areas like necklines and armholes, maintain the same distance from the edge even as the curve changes direction. This requires careful pivoting and slower sewing speed.
Can You Topstitch With a Regular Sewing Machine?
Yes, you can topstitch with any regular sewing machine, no special equipment is required beyond a larger needle and heavier thread. Modern home sewing machines, including basic models, handle topstitching well as long as you use the correct needle size (90/14 or 100/16), adjust tension for thicker thread, and increase stitch length to 3.0-3.5mm.
What your regular sewing machine needs for topstitching:
- Ability to adjust stitch length (all machines have this)
- Adjustable tension dial (standard on all machines)
- Straight stitch capability (the most basic function)
- Ability to accommodate size 90-100 needles (universal compatibility)
Even vintage machines excel at topstitching, in fact, many sewers prefer older sewing machines for their strong motors and metal construction that handles thick layers easily.
When you might need a heavy-duty machine:
- Topstitching through 6+ layers of heavy denim
- Professional sewing with constant topstitching
- Upholstery or bag-making with extremely thick materials
For occasional garment sewing, your regular machine works perfectly. If you’re experiencing issues, they’re usually related to needle size, thread choice, or tension settings rather than machine capability. Check our sewing troubleshooting guide for common fixes.
Budget-friendly tip: Before investing in a heavy-duty machine, try these upgrades: quality topstitching needles, a walking foot, and proper thread. These accessories transform your existing machine’s topstitching performance.
What Should You Do When Topstitching Thread Keeps Breaking?
When topstitching thread keeps breaking, first switch to a larger needle (90/14 or 100/16), then loosen your top tension by 1-2 numbers, and ensure you’re using fresh, quality thread. Thread breakage during topstitching usually indicates the needle eye is too small for the thread thickness, tension is too tight, or the needle is dull or damaged.
Troubleshooting thread breakage:
1. Needle too small
- Topstitching thread won’t fit through a size 70 or 80 needle
- Switch to 90/14 or 100/16 topstitching needle with extra-large eye
- Check that thread passes smoothly through the needle eye
2. Tension too tight
- Heavy thread needs looser tension than all-purpose thread
- Reduce top tension by 1-2 numbers
- Test on scraps until stitches lock properly without breaking
3. Dull or damaged needle
- Replace needle after 6-8 hours of sewing
- Bent or burred needles shred thread
- Always start topstitching projects with a fresh needle
4. Poor quality or old thread
- Cheap thread breaks easily under tension
- Old thread becomes brittle and weak
- Invest in quality topstitching thread from reputable brands
5. Incorrect threading path
- Rethread the entire machine, including the bobbin
- Ensure thread passes through all guides and tension discs
- Check that thread isn’t caught on the spool or spool pin
6. Machine timing issues
- If thread breaks consistently at the same point in the stitch cycle, timing may be off
- This requires professional service, see our guide on when to service your machine
For more solutions to thread breaking problems, including bobbin-related issues, check our comprehensive troubleshooting resources.
How Do You Topstitch Thick Seams Without Skipped Stitches?
To topstitch thick seams without skipped stitches, use a size 100/16 jeans needle, reduce sewing speed, use a walking foot to feed layers evenly, and consider a hump jumper or folded fabric scrap to level the presser foot when transitioning onto thick seams. Skipped stitches on thick seams occur when the needle deflects or the presser foot tilts, preventing proper hook timing.
Solutions for thick seam topstitching:
1. Use the right needle
- Size 100/16 or 110/18 jeans needle for strength
- Sharp point penetrates multiple layers cleanly
- Replace needle frequently, thick seams dull needles quickly
2. Add a walking foot
- Feeds all layers evenly, preventing shifting
- Essential for topstitching over bulky seams
- Reduces pressure on feed dogs
3. Level the presser foot
- Use a hump jumper (also called a jean-a-ma-jig) behind the presser foot
- Or fold a fabric scrap to the same thickness as the seam
- Keeps presser foot level as it approaches and leaves the thick area
4. Slow down
- Thick seams require slower sewing speed
- Hand-walk the machine over extremely thick areas using the handwheel
- Rushing causes needle deflection and skipped stitches
5. Adjust presser foot pressure
- Reduce pressure slightly so fabric can move freely
- Too much pressure prevents feed dogs from gripping
6. Trim and grade seam allowances
- Before topstitching, trim seam allowances to reduce bulk
- Grade layers (cut each layer slightly different widths) to eliminate thick ridges
- Press seams open or to one side before topstitching
Edge case: When topstitching across intersecting seams (like waistbands meeting side seams), you may have 8+ layers. In this case, hand-walk the machine stitch by stitch using the handwheel, or use a hammer to flatten the seam intersection before sewing.
If you’re still experiencing skipped stitches after trying these solutions, your machine may need professional service.
Do You Need a Walking Foot for Topstitching?
You don’t always need a walking foot for topstitching, but it dramatically improves results on thick seams, multiple layers, slippery fabrics, and long straight seams by feeding top and bottom layers at the same rate. For simple topstitching on single-layer fabric or thin materials, a regular presser foot works fine. For professional results on challenging fabrics, a walking foot is essential.
When to use a walking foot for topstitching:
- Topstitching over bulky seams (waistbands, collars, cuffs)
- Multiple fabric layers (4+ layers)
- Slippery fabrics (satin, silk, rayon) that shift easily
- Long straight seams where consistency matters
- Knit fabrics that stretch during sewing
- Quilted or padded materials
When a regular foot is sufficient:
- Single-layer topstitching on stable fabrics
- Short topstitching sections
- Lightweight cotton or linen
- Edge-stitching on pressed seams
A walking foot (also called an even-feed foot) has its own set of feed dogs on top that work with the machine’s bottom feed dogs to move all fabric layers together. This prevents the top layer from creeping ahead of the bottom layer, which causes wavy, uneven topstitching.
Investment consideration: Walking feet cost $30-60 depending on your machine brand. If you sew regularly, especially garments with visible topstitching, it’s one of the most valuable accessories you can own. Many sewers consider it as essential as a zipper foot.
Alternative solution: If you don’t have a walking foot, use lots of pins perpendicular to the stitching line, or hand-baste the layers together before topstitching. These methods help prevent shifting, though they’re more time-consuming than using a walking foot.
What Are Common Mistakes When Topstitching Garments?
The most common topstitching mistakes are using thread and needles that are too small, inconsistent seam allowance, sewing too fast, skipping the test sample, and not pressing before topstitching. These errors create topstitching that looks homemade rather than professional, with uneven lines, thread breakage, and poor stitch quality.
Top topstitching mistakes and how to avoid them:
1. Wrong thread weight
- Mistake: Using regular all-purpose thread that’s too thin
- Fix: Use topstitching thread (weight 30-40) or double up all-purpose thread
2. Needle too small
- Mistake: Trying to topstitch with a size 70 or 80 needle
- Fix: Switch to 90/14 or 100/16 needle with larger eye
3. Not testing first
- Mistake: Topstitching directly on the garment without testing
- Fix: Always test on fabric scraps with the same number of layers
4. Inconsistent distance from edge
- Mistake: Eyeballing the seam allowance instead of using guides
- Fix: Use an edge-stitching foot, mark the line, or use presser foot edge as guide
5. Sewing too fast
- Mistake: Rushing through topstitching at high speed
- Fix: Slow down to maintain control and consistency
6. Not pressing first
- Mistake: Topstitching over unpressed, bulky seams
- Fix: Press all seams flat before topstitching
7. Wrong stitch length
- Mistake: Using regular stitch length (2.0-2.5mm) instead of longer stitches
- Fix: Increase stitch length to 3.0-3.5mm for that ready-to-wear look
8. Pulling or pushing fabric
- Mistake: Forcing fabric through the machine instead of guiding
- Fix: Let feed dogs do the work, hands should only guide direction
9. Forgetting to backstitch
- Mistake: Not securing thread ends on visible topstitching
- Fix: Backstitch 3-4 stitches at start and end, or pull threads to wrong side and tie off
10. Using old or cheap thread
- Mistake: Using bargain thread that breaks or looks fuzzy
- Fix: Invest in quality thread from reputable brands
For more guidance on avoiding common sewing problems, explore our troubleshooting resources.
How Should You Backstitch When Topstitching Visible Seams?
When topstitching visible seams, backstitch 3-4 stitches at the beginning and end to secure threads, or pull thread tails to the wrong side and tie them off for an invisible finish. The backstitching method is faster and works well for casual garments, while pulling threads through creates a cleaner look for tailored garments where even backstitching would be noticeable.
Method 1: Backstitching (quick and secure)
- Start topstitching 1/4 inch from the beginning point
- Backstitch 3-4 stitches to the starting point
- Continue topstitching forward to the end
- Backstitch 3-4 stitches at the end
- Trim thread tails close to fabric
Method 2: Pulling threads through (invisible finish)
- Start topstitching, leaving 4-6 inch thread tails at the beginning
- Topstitch to the end, leaving 4-6 inch thread tails
- Thread both tails (top and bobbin) through a hand-sewing needle
- Pull threads to the wrong side of the fabric
- Tie threads in a square knot
- Weave thread ends into seam allowance or apply a drop of seam sealant
- Trim excess thread
Method 3: Locking stitch (if your machine has it)
- Use your machine’s automatic locking stitch function
- Creates several tiny stitches in place to secure threads
- Less visible than backstitching but not as invisible as pulling threads through
Choose backstitching if: you’re sewing casual garments (jeans, jackets, sportswear) where visible backstitching is standard and expected.
Choose pulling threads through if: you’re sewing tailored garments (dress shirts, blazers) where you want topstitching to start and end invisibly.
For more details on backstitching techniques and when to use them, check our comprehensive guide.
FAQ
What is the difference between topstitching and edge stitching?
Edge stitching is topstitching sewn very close to an edge or seam (typically 1/8 inch or less), while topstitching is a broader term for any visible stitching on the right side of fabric, usually 1/4 inch or more from edges. Edge stitching is a specific type of topstitching.
Can you use regular thread for topstitching?
Yes, you can use regular all-purpose thread for topstitching by doubling it through a single needle, but dedicated topstitching thread (weight 30-40) creates bolder, more visible stitches that look more professional and match ready-to-wear garments better.
Why is my topstitching puckering the fabric?
Topstitching puckers when tension is too tight, you’re pulling the fabric while sewing, the stitch length is too short, or the fabric wasn’t properly pressed before topstitching. Loosen top tension, let feed dogs move fabric naturally, and increase stitch length to 3.0-3.5mm.
What color thread should you use for topstitching?
Use matching thread for subtle topstitching that blends in, or contrasting thread (often a shade darker than the fabric) for decorative topstitching that stands out. Jeans traditionally use gold or tan thread on blue denim for that classic ready-to-wear look.
How do you topstitch around curves?
Topstitch curves slowly with the needle down, pivoting frequently to follow the curve smoothly. Mark the stitching line clearly with chalk or washable marker, and use your hands to guide fabric gently around the curve without pulling or stretching.
Should you topstitch before or after hemming?
Topstitch after hemming when the topstitching is part of the hem finish (like jeans hems). Topstitch before hemming when the topstitching is on a seam or detail that will be covered or intersected by the hem. The order depends on the garment construction.
Can you topstitch knit fabrics?
Yes, you can topstitch knit fabrics using a ballpoint or stretch needle, slightly loosened tension, and a walking foot to prevent stretching. Use a longer stitch length (3.5-4.0mm) and don’t pull the fabric while sewing to maintain the knit’s stretch.
What is a topstitching needle and do you need one?
A topstitching needle has an extra-large eye and deeper groove to accommodate thick topstitching thread without shredding. You need one when using topstitching thread or buttonhole twist; for doubled all-purpose thread, a regular universal needle in size 90/14 works fine.
How do you remove topstitching without damaging fabric?
Use a seam ripper to carefully cut every 3-4 stitches on one side, then pull the thread from the other side. Work slowly to avoid tearing fabric. For dense topstitching, cut stitches more frequently and use tweezers to remove thread bits.
Why does my topstitching look different on each side?
Topstitching looks different on top and bottom when tension is unbalanced. The top thread should lock with the bobbin thread between fabric layers. Adjust top tension first (loosen for heavy thread), then adjust bobbin tension only if necessary.
Can you topstitch with a serger?
No, sergers cut fabric edges while stitching and aren’t designed for topstitching. Use a regular sewing machine for topstitching. However, you can use decorative serger stitching along raw edges as a design element, which is different from traditional topstitching.
How do you topstitch leather or vinyl?
Topstitch leather or vinyl with a leather needle (size 90-100), longer stitch length (3.5-4.0mm), and a Teflon or roller foot to prevent sticking. Never backstitch on leather, pull threads to the wrong side and tie off, as needle holes are permanent.
Conclusion
Learning how to topstitch like ready-to-wear transforms your handmade garments from homemade to professional. The key elements are simple: use heavier thread (topstitching weight or doubled all-purpose), switch to a larger needle (90/14 or 100/16), increase your stitch length to 3.0-3.5mm, and maintain consistent distance from edges using specialty presser feet or marked guidelines.
Remember that even topstitching requires practice. Start with straight seams on stable fabrics before tackling curves or thick seams. Always test your settings on scraps that match your project fabric and layer count. Invest in a few key tools, a walking foot, edge-stitching foot, and quality topstitching needles, that make professional results achievable on any regular sewing machine.
Your next steps:
- Gather supplies: topstitching thread, size 90-100 needles, and an edge-stitching or walking foot
- Practice on fabric scraps, testing different thread weights and stitch lengths
- Start with simple projects like tote bags or casual shirts before moving to complex garments
- Press everything thoroughly before topstitching, this single step improves results dramatically
- Slow down and focus on consistency rather than speed
With these techniques and tools, your topstitching will rival store-bought garments, giving your handmade wardrobe that polished, professional finish that makes people ask, “Where did you buy that?”
For more sewing tips and techniques to elevate your skills, explore our comprehensive guides and troubleshooting resources.


