Quick Answer
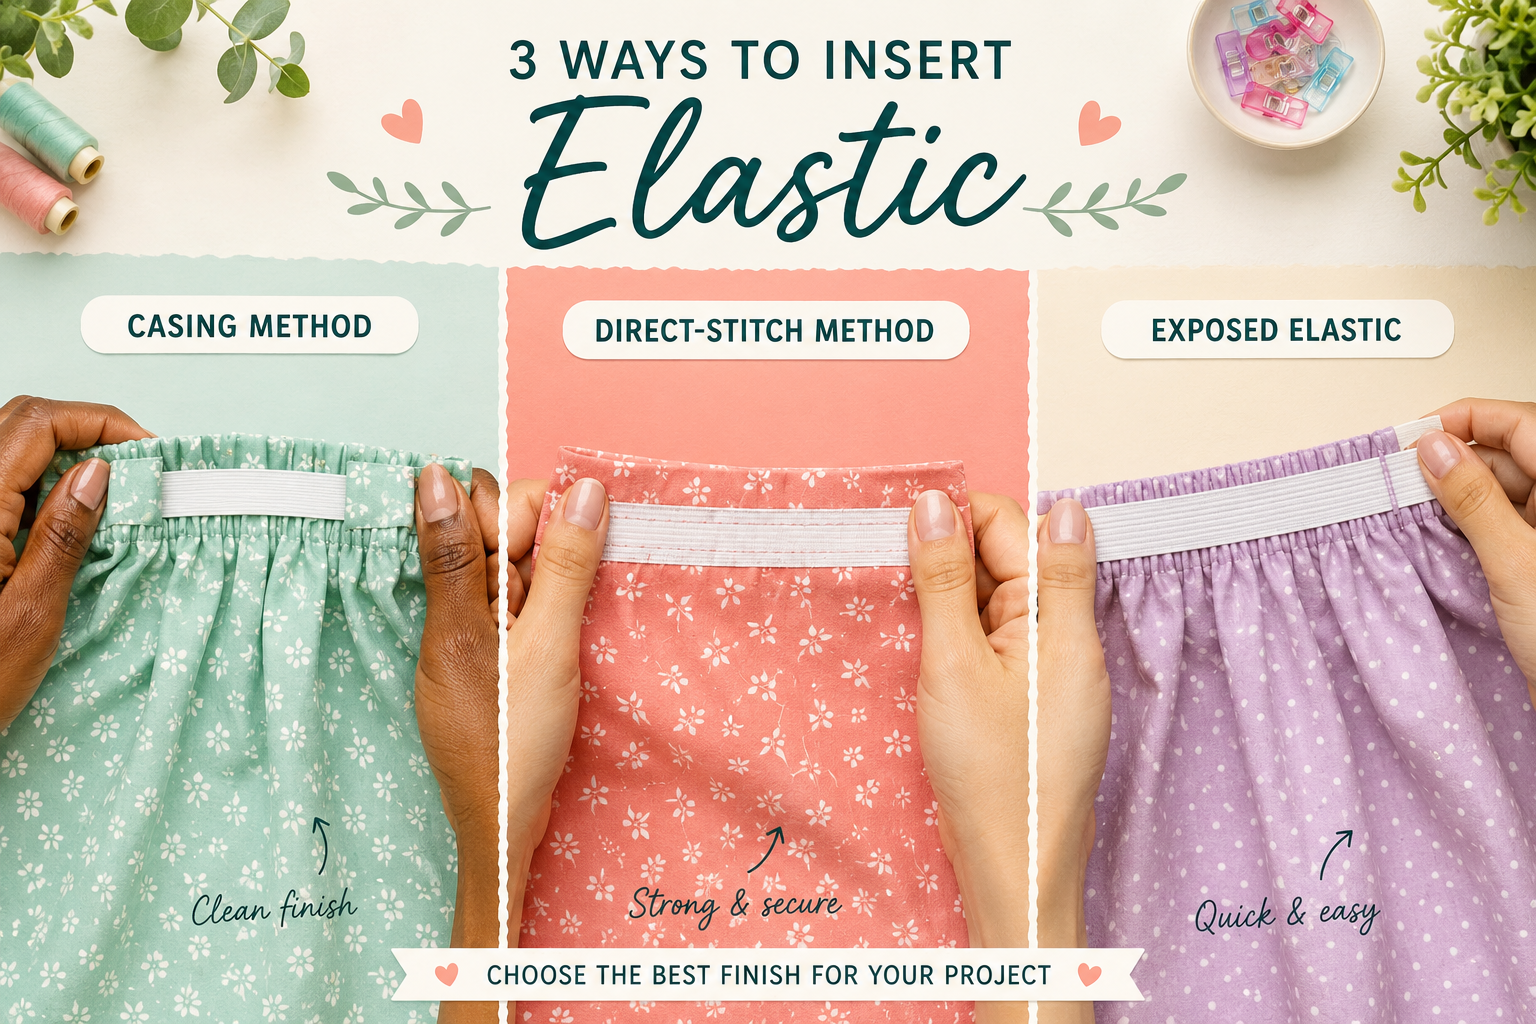
Sewing elastic into a waistband involves either threading elastic through a fabric casing (the most common method) or stitching it directly onto the fabric. For the casing method, fold your fabric to create a channel, leave a small opening, thread the elastic through using a safety pin, adjust to fit, then secure the ends. Most sewers need elastic that measures 75-80% of their waist measurement for comfortable stretch.
Key Takeaways
- Two main methods exist: casing method (elastic hidden inside fabric tunnel) and direct-stitch method (elastic sewn onto fabric surface)
- Elastic length formula: Measure your waist, multiply by 0.75-0.80, then add 1 inch for seam allowance
- Best elastic types: Braided elastic for casings, knit elastic for direct application, and woven elastic for no-roll waistbands
- Prevent twisting: Use a safety pin as an anchor at the entry point and mark the elastic with a line before threading
- Stitch selection matters: Zigzag or stretch stitches work best for sewing elastic directly; straight stitches for casings
- Hand-sewing is possible: You can insert elastic without a machine using a running stitch for the casing and whipstitch for securing ends
- Common mistakes: Using too much or too little elastic, failing to backstitch at stress points, and choosing the wrong elastic type for your fabric weight
What Is the Easiest Method for Sewing Elastic Into a Waistband?
The casing method is the easiest technique for beginners learning how to sew elastic into a waistband. This approach involves creating a fabric tunnel that completely encloses the elastic, requiring only basic straight stitching skills and minimal experience.
Here’s why the casing method wins for simplicity:
- Forgiving technique: Small stitching imperfections hide inside the casing
- No specialized feet needed: Works with your machine’s standard presser foot
- Adjustable fit: You can easily replace or adjust the elastic later without unpicking decorative stitches
- Professional finish: Creates a clean exterior with no visible elastic
Step-by-step casing method:
- Fold the raw edge of your waistband fabric down by ¼ inch and press
- Fold again by the width of your elastic plus ½ inch (for a 1-inch elastic, fold 1½ inches total)
- Pin the folded edge in place, leaving a 2-inch opening for threading
- Sew close to the inner folded edge, backstitching at the beginning and end for security
- Attach a safety pin to one end of your elastic and thread it through the casing
- Overlap the elastic ends by 1 inch, stitch together securely with a box stitch
- Close the opening with a straight stitch
Common mistake to avoid: Don’t sew across the opening before inserting your elastic. Many beginners accidentally close the entire casing, forcing them to unpick stitches.
Casing Method vs Direct Stitch Elastic: Which Is Better?
The casing method works best for lightweight to medium-weight fabrics and creates a gathered, comfortable waistband, while direct-stitch elastic suits athletic wear, swimwear, and projects where you want the elastic visible or need maximum stretch control.
Casing method advantages:
- Creates soft, gathered fabric that drapes naturally
- Elastic remains hidden for a polished look
- Easy to adjust or replace elastic without redoing the entire waistband
- Ideal for pajama pants, skirts, and casual wear
- Works well with delicate fabrics that might pucker under direct stitching
Direct-stitch method advantages:
- Provides precise stretch control across the entire waistband
- Eliminates bulk, making it perfect for fitted garments
- Faster construction with no threading required
- Creates a sporty, modern aesthetic
- Better for heavy fabrics that would create too much bulk with a casing
Choose the casing method if:
- You’re making children’s clothing (easier size adjustments)
- Your fabric is lightweight cotton, rayon, or linen
- You want a traditional gathered waistband
- You’re a beginner who wants room for error
Choose direct-stitch if:
- You’re sewing activewear, leggings, or swimsuits
- You need the elastic to stay exactly where you place it
- You’re working with knit fabrics
- You want a flat, non-gathered waistband
The casing method remains the go-to choice for most home sewers because it’s more forgiving and versatile across different fabric types.

【VERSATILE ELASTIC FOR SEWING & DIY CRAFTS】This 1/2 inch braided elastic band is ideal for sewing, clothing repairs, handmade accessories, and creative projects. Perfect for waistbands, skirts, shorts, sleeves, headbands, wigs, bags, masks, and seasonal DIY crafts.

Dritz elastic waistband soft 2x 2yd White

How Much Elastic Do I Need for a Waistband?
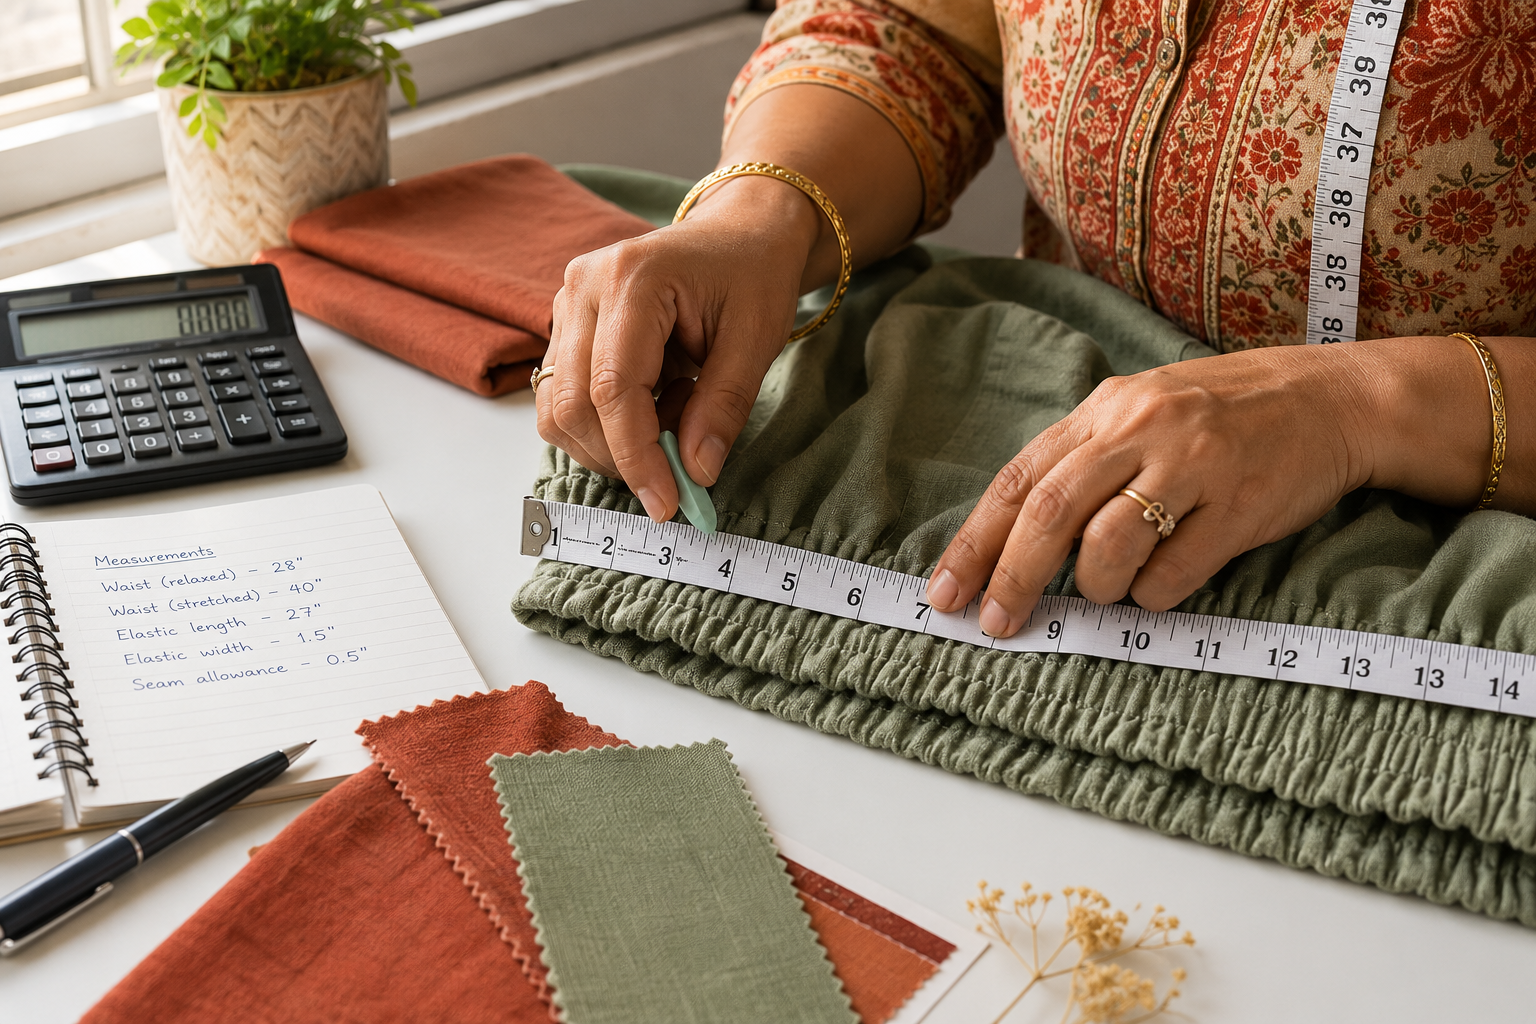
For a comfortable waistband, you need elastic that measures 75-80% of your actual waist measurement, plus 1 inch for seam allowance. A person with a 30-inch waist would cut elastic between 23.5 and 25 inches long (22.5-24 inches for stretch, plus 1 inch for overlap).
Calculation formula:
- Measure your waist where the garment will sit (natural waist, hip, or low-rise)
- Multiply that measurement by 0.75 for firm stretch or 0.80 for comfortable stretch
- Add 1 inch for seam allowance
- Round to the nearest half-inch
Example calculations:
| Waist Size | Firm Stretch (75%) | Comfortable Stretch (80%) | Final Cut Length |
|---|---|---|---|
| 28 inches | 21 inches | 22.4 inches | 22-23.4 inches + 1 inch |
| 32 inches | 24 inches | 25.6 inches | 25-26.6 inches + 1 inch |
| 36 inches | 27 inches | 28.8 inches | 28-29.8 inches + 1 inch |
Adjustment factors:
- Fabric weight: Heavier fabrics need slightly more elastic (use 80%) because they resist gathering more than lightweight materials
- Elastic width: Wider elastic (1½ inches or more) provides more support but feels firmer, so use the 80% ratio
- Garment type: Pajamas and loungewear work best at 80-85%, while fitted skirts need 75%
- Personal preference: Some people prefer a snugger fit; test with scrap fabric first
Pro tip: Before cutting your elastic, wrap it around your waist at the desired tightness and mark where it feels comfortable. This hands-on method accounts for your personal preference and the specific elastic’s stretch properties.
What Type of Elastic Is Best for Waistbands?
Braided elastic works best for enclosed casings because it remains soft and flexible, while knit elastic suits direct-stitch applications, and woven elastic (also called no-roll elastic) is ideal for wide waistbands that need to maintain their shape without twisting.
Braided elastic characteristics:
- Soft, comfortable texture against skin
- Narrows slightly when stretched
- Loses stretch if pierced by a needle (use only in casings, never stitch through it)
- Best for: Pajamas, children’s clothing, gathered skirts
- Width range: ¼ inch to 1 inch
Knit elastic characteristics:
- Maintains width when stretched
- Can be sewn through directly without losing stretch
- Slightly heavier than braided
- Best for: Activewear, swimwear, underwear, any direct-stitch application
- Width range: ½ inch to 2 inches
Woven elastic (no-roll) characteristics:
- Features lengthwise ribs that prevent rolling and twisting
- Firmest hold of the three types
- Excellent recovery (returns to original shape quickly)
- Best for: Wide waistbands, plus-size garments, pants that carry weight (cargo pockets)
- Width range: 1 inch to 3 inches
Specialty elastic options:
- Plush-back elastic: One soft side for comfort against skin; perfect for underwear
- Fold-over elastic (FOE): Decorative elastic that folds over raw edges; popular for baby clothes and athletic wear
- Clear elastic: Nearly invisible; used for stabilizing knit necklines and shoulders
Decision guide: Choose braided if you’re using the casing method and want maximum softness. Pick knit if you plan to stitch through the elastic. Select woven if your waistband is wider than 1 inch or if the garment will experience stress from pockets or movement.

It is a highly durable high Quality product

WIDE APPLICATIONS - This elastic is soft, comfortable and perfect for sewing crafting DIYs, the elastic band can be widely used for home decoration , belts, laces, necklines,hairbands, shorts, skirts, sleeves, tights, waistbands, headbands, laces, wigs, diaries, hats, bags, etc.

Braided elastic
How to Calculate Elastic Length for Waist
To calculate elastic length accurately, measure your body where the waistband will sit, multiply by 0.75-0.80 depending on desired snugness, add 1 inch for seam allowance, then test the measurement by wrapping the elastic around your body before cutting.
Detailed calculation steps:
Take accurate body measurements
- Use a flexible measuring tape
- Measure where the finished garment will sit (not necessarily your natural waist)
- Keep the tape snug but not tight
- Record the measurement in inches
Apply the stretch ratio
- For firm, supportive fit: Body measurement × 0.75
- For comfortable, everyday fit: Body measurement × 0.80
- For loose, relaxed fit: Body measurement × 0.85
Add seam allowance
- Add 1 inch for overlap and stitching
- For very wide elastic (2+ inches), add 1½ inches
Verify before cutting
- Wrap the elastic around your body at the calculated length
- Overlap the ends and check comfort
- Adjust if needed before cutting
Example for a 34-inch waist:
- Comfortable fit: 34 × 0.80 = 27.2 inches
- Add seam allowance: 27.2 + 1 = 28.2 inches
- Round to: 28 inches (final cut length)
Special considerations:
- Children’s clothing: Use 85% ratio and add an extra inch for growth
- Maternity wear: Use 90-95% ratio for comfort and expansion
- Athletic wear: Use 75% ratio for secure, stay-put fit
- Plus-size garments: Test the ratio on the actual person; body composition affects how elastic sits
Common mistake: Don’t measure the garment opening and cut elastic to match. The elastic should be significantly shorter than the fabric opening to create proper gathering and stretch.
Why Does My Elastic Twist Inside the Waistband?
Elastic twists inside a waistband when it’s too narrow for the casing width, when it lacks stabilization during threading, or when the elastic type is prone to rolling. Braided elastic twists more easily than woven no-roll elastic, and casings wider than 1½ times the elastic width increase twisting risk.
Primary causes of elastic twisting:
- Casing too wide: When the casing is more than ½ inch wider than the elastic, the elastic has room to flip
- No anchor point: Threading without securing the entry point allows the elastic to rotate freely
- Wrong elastic type: Braided elastic naturally wants to twist; woven elastic resists
- Uneven tension: Pulling too hard on one side during threading causes rotation
- Worn elastic: Old elastic loses its structure and twists more easily
Prevention techniques:
Match casing to elastic width
- Casing should be elastic width + ½ inch (no more)
- For 1-inch elastic, make a 1½-inch casing
- Tighter casings prevent movement
Use the safety pin anchor method
- Pin the elastic to the fabric at the casing opening before threading
- This prevents the starting end from twisting
- Remove the pin only after securing both ends
Mark the elastic
- Draw a line lengthwise down the elastic with a marker before threading
- Watch the line as you thread; if it rotates, you’ll see it immediately
- Stop and untwist before continuing
Choose no-roll elastic
- Woven elastic with lengthwise ribs physically resists twisting
- Worth the extra cost for wide waistbands
Stitch the elastic at key points (advanced)
- After threading, stitch through the casing and elastic at side seams
- This locks the elastic in place permanently
- Only works if you won’t need to adjust the elastic later
Fix for already-twisted elastic: If your elastic is already twisted inside a finished waistband, you’ll need to open the casing seam, remove the elastic, check for twists, and re-thread it. There’s no shortcut to fixing this issue without accessing the elastic directly.
How to Sew Elastic Directly Onto Fabric Without a Casing
To sew elastic directly onto fabric, divide both the elastic and fabric edge into quarters, pin at quarter marks, then stretch the elastic to match the fabric length while sewing with a zigzag or stretch stitch. This method works best with knit elastic on knit fabrics and creates a flat, professional waistband without bulk.
Step-by-step direct-stitch method:
Prepare your materials
- Cut elastic to 75-80% of waist measurement
- Finish the raw edge of your fabric (serge or zigzag)
- Choose knit elastic that can be sewn through
Mark quarter points
- Fold elastic in half, mark with pins at the fold (2 marks)
- Fold in half again, mark the new folds (4 marks total)
- Repeat with the fabric waistband edge
- This ensures even distribution of stretch
Pin elastic to fabric
- Place elastic on the wrong side of fabric, ¼ inch from the edge
- Match quarter-point pins on elastic to quarter-point pins on fabric
- The fabric will be longer than the elastic between pins
Sew with stretch
- Set your machine to zigzag stitch (width: 3-4mm, length: 2-3mm) or use a stretch stitch
- Start at a side seam or center back
- Backstitch to secure
- Stretch the elastic to match the fabric as you sew, keeping both edges aligned
- Let the machine feed naturally; don’t push or pull
Fold and topstitch
- Fold the elastic to the inside of the garment
- Press lightly (avoid high heat on elastic)
- Topstitch with a zigzag or twin needle along the bottom edge of the elastic
- Again, stretch as you sew
Stitch options for direct application:
- Zigzag stitch: Most versatile; allows stretch in all directions
- Three-step zigzag: Creates a wider, more flexible seam
- Stretch stitch: Looks like a lightning bolt; maximum stretch retention
- Twin needle: Creates professional parallel lines; requires special needle
Fabric compatibility: This method works best with knit fabrics (jersey, interlock, French terry) because they stretch with the elastic. Woven fabrics can work but will gather more dramatically and may pucker if the elastic is too firm.
Pro tip: Practice on scrap fabric first. The stretching-while-sewing technique takes coordination, and you’ll want to find the right balance of tension before working on your actual garment.

Premium Material: Made of polyester silk and Natural Latex Rubber, soft, comfortable and breathable, no harmful odor, safety in use

Premium Material: Made of polyester silk and Natural Latex Rubber, soft, comfortable and breathable, no harmful odor, safety in use

Premium Material: Made of polyester silk and Natural Latex Rubber, soft, comfortable and breathable, no harmful odor, safety in use
Can You Sew Elastic Into a Waistband Without a Sewing Machine?
Yes, you can sew elastic into a waistband by hand using a running stitch to create the casing and a whipstitch or box stitch to secure the elastic ends. Hand-sewing takes longer but produces results nearly identical to machine sewing, making it perfect for small repairs, travel projects, or when a machine isn’t available.
Hand-sewing the casing method:
Create the casing
- Fold and press the waistband as you would for machine sewing
- Pin the folded edge in place, leaving a 2-inch opening
- Thread a needle with strong thread (doubled for extra strength)
- Use a running stitch along the inner fold, keeping stitches small (⅛ inch) and even
- Backstitch every inch for security
Thread the elastic
- Attach a safety pin to one end of the elastic
- Thread through the casing just as you would with machine-sewn casings
- Keep the safety pin anchored at the opening to prevent twisting
Secure the elastic ends
- Overlap ends by 1 inch
- Use a box stitch pattern: sew around the perimeter of the overlap, then make an X across the middle
- Go through each stitch line 2-3 times for strength
- This is a stress point that needs reinforcement
Close the opening
- Use a ladder stitch (invisible) or running stitch to close the casing opening
- Backstitch at both ends
Hand-stitches for elastic:
- Running stitch: Basic in-and-out stitch; use for casings
- Backstitch: Stronger than running stitch; use for stress points
- Whipstitch: Over-edge stitch; good for joining elastic ends quickly
- Ladder stitch: Invisible stitch; perfect for closing the casing opening
Time expectations: Hand-sewing a waistband casing takes 30-45 minutes for a simple garment, compared to 5-10 minutes by machine. The trade-off is portability and the meditative quality of hand-sewing.
When hand-sewing makes sense:
- Repairing worn-out elastic in existing garments
- Small projects like doll clothes or baby items
- Travel sewing without access to a machine
- Quiet sewing during naptime or late evening
- Learning basic sewing skills before investing in a machine
Limitation: Hand-sewing the direct-stitch method is not practical because you can’t maintain even tension while stretching the elastic and stitching simultaneously. Stick to the casing method for hand-sewing projects.
What Stitch Should I Use for Sewing Elastic?
Use a straight stitch for sewing the casing that will hold elastic, but switch to a zigzag stitch, three-step zigzag, or dedicated stretch stitch when sewing directly through elastic or onto stretchy fabric. The straight stitch works for casings because it doesn’t need to stretch, while zigzag stitches accommodate the elastic’s movement without breaking.
Stitch guide by application:
For casings (elastic hidden inside):
- Straight stitch: Standard choice; set length to 2.5-3mm
- Sew the casing channel with a straight stitch because this seam doesn’t need to stretch
- The elastic inside provides all the stretch needed
- Use quality thread to prevent breakage at stress points
For direct-stitch elastic (sewing through elastic):
- Zigzag stitch: Width 3-4mm, length 2-3mm; most versatile option
- Three-step zigzag: Creates a wider, more flexible seam; excellent for waistbands
- Stretch stitch: Looks like a lightning bolt; provides maximum stretch without breaking
- Twin needle: Creates two parallel straight lines with a zigzag underneath; professional finish
Stitch comparison table:
| Stitch Type | Best For | Stretch Capacity | Appearance |
|---|---|---|---|
| Straight | Casings only | None | Clean single line |
| Zigzag | Direct elastic, knits | High | Visible zigzag |
| 3-step zigzag | Wide elastic, activewear | Very high | Wide zigzag |
| Stretch stitch | Maximum stretch needs | Highest | Lightning bolt |
| Twin needle | Topstitching | Moderate | Professional parallel lines |
Machine settings for elastic:
- Tension: Slightly lower than normal (3-4 on most machines) to prevent puckering
- Presser foot pressure: Reduce if your machine allows; helps fabric feed smoothly
- Stitch length: 2.5-3mm for most applications
- Needle: Use a ballpoint or stretch needle for knit fabrics; universal for wovens
Common stitching mistakes:
- Using straight stitch on elastic that will be stretched (the thread will break)
- Setting zigzag too narrow (doesn’t allow enough stretch)
- Forgetting to backstitch at the beginning and end (elastic pulls out at stress points)
- Sewing too fast while stretching (causes uneven gathering)
If you’re unsure which stitch to use, test on scrap fabric with a piece of elastic. Sew a few inches, then stretch the seam firmly. The right stitch will stretch without breaking or puckering.
How to Fix Bunched Up Elastic in Waistband
To fix bunched elastic, open the casing seam at the opening, pull out the elastic completely, check for twists or damage, cut new elastic if needed, then re-thread it through the casing with proper tension and secure the ends. If the elastic itself is fine, the bunching usually results from incorrect elastic length or uneven distribution.
Diagnosis steps:
Identify the cause
- Is the elastic twisted inside the casing?
- Is the elastic too long or too short?
- Has the elastic lost its stretch (worn out)?
- Are the elastic ends improperly secured?
Check elastic condition
- Remove the elastic from the casing
- Stretch it fully; it should return to original length quickly
- Look for thin spots, breaks, or permanent stretching
- If it doesn’t snap back, replace it
Repair methods by cause:
For twisted elastic:
- Open the casing, remove elastic
- Re-thread using the safety pin anchor method
- Mark the elastic with a line to monitor twisting
- Secure ends and close the casing
For incorrect length:
- Too long: Remove elastic, measure correctly (75-80% of waist), cut to size, re-thread
- Too short: Replace with properly measured elastic; there’s no way to stretch elastic permanently longer
For worn-out elastic:
- Replace entirely; old elastic can’t be restored
- Use the old elastic as a measurement guide
- Choose the same or better quality elastic
For uneven distribution:
- Remove elastic from casing
- Mark quarter points on both elastic and fabric
- Re-thread, matching quarter points
- Stitch through the casing and elastic at side seams to lock position (optional)
Prevention for future projects:
- Always test elastic length before sewing the casing closed
- Use quality elastic from reputable brands
- Store elastic flat, not stretched, to maintain its properties
- Consider stitching elastic to fabric at key points (side seams) to prevent shifting
Quick fix without removing elastic: If the bunching is minor and caused by uneven distribution, try this: Put the garment on, adjust the elastic manually to distribute evenly, then stitch through the casing and elastic at the side seams. This locks the elastic in place and prevents future bunching, though it makes the elastic non-replaceable.
Is This Method Good for Beginners or Do I Need Experience?
The casing method for sewing elastic into a waistband is excellent for beginners because it requires only basic straight stitching skills, uses standard machine feet, and forgives minor mistakes. If you can sew a straight line and thread a safety pin, you can successfully complete this technique on your first attempt.
Beginner-friendly aspects:
- Simple stitching: Only straight stitches required for the casing
- Forgiving: Small imperfections hide inside the casing
- No special equipment: Works with any basic sewing machine and standard presser foot
- Adjustable: You can fix mistakes by removing and re-threading the elastic
- Low-stakes practice: Start with pajama pants or simple skirts before moving to fitted garments
Skill prerequisites:
- Ability to sew a straight seam
- Understanding of how to backstitch for security
- Basic knowledge of your sewing machine’s tension and stitch length settings
- Comfort with measuring and cutting accurately
Learning curve by method:
- Casing method: Beginner-friendly; 1-2 practice attempts to master
- Direct-stitch method: Intermediate; requires coordination to stretch while sewing
- Hand-sewing: Beginner-friendly but time-intensive; good for learning fundamentals
First project recommendations:
- Pajama pants: Simple, forgiving, and immediately useful
- Elastic-waist skirt: Requires minimal fitting and uses lightweight fabric
- Drawstring bag: Small project to practice the technique without garment fitting
- Baby bloomers: Quick project with instant gratification
Common beginner concerns addressed:
“What if I sew the casing closed by mistake?” Use a seam ripper to carefully remove stitches. This happens to everyone at least once. Mark your opening with contrasting pins as a visual reminder.
“How do I know if my elastic is the right length?” Test before cutting. Wrap the elastic around your waist at the desired tightness, mark it, then add 1 inch for seam allowance.
“My stitches look uneven.” For casings, uneven stitches don’t affect function. Focus on keeping the seam straight and secure. Aesthetic improvement comes with practice.
“Do I need an expensive machine?” No. Any machine that sews a straight stitch will work for the casing method. Even vintage machines handle this technique beautifully.
When to seek help: If your machine is jamming frequently, producing loose stitches, or if you’re struggling with basic threading, address those issues first before tackling elastic insertion.
Common Mistakes When Inserting Elastic Into Waistband
The most common mistakes include cutting elastic too long or too short, failing to secure the elastic at the entry point (causing twisting), using the wrong elastic type for the application, and forgetting to backstitch at stress points. These errors lead to uncomfortable fit, twisted elastic, or elastic that pulls out during wear.
Top mistakes and solutions:
1. Incorrect elastic length
- Mistake: Measuring the fabric opening and cutting elastic to match
- Why it fails: Elastic should be 75-80% of body measurement, not fabric measurement
- Solution: Always measure your body, apply the ratio, then test by wrapping around your waist
2. Sewing the casing completely closed
- Mistake: Stitching across the entire casing without leaving an opening
- Why it fails: No way to insert elastic without unpicking stitches
- Solution: Mark your opening with contrasting pins before you start sewing
3. Not anchoring the elastic
- Mistake: Threading elastic without securing the starting end
- Why it fails: The elastic twists inside the casing or gets pulled completely through
- Solution: Pin the elastic to the fabric at the opening, or pin a large safety pin across the elastic end
4. Using braided elastic for direct-stitch
- Mistake: Sewing through braided elastic with a straight stitch
- Why it fails: Braided elastic loses stretch when pierced by needles
- Solution: Use knit elastic for any direct-stitch application; save braided elastic for casings only
5. Forgetting to backstitch
- Mistake: Starting and ending seams without backstitching
- Why it fails: Elastic creates constant tension; unbackstitched seams pull apart
- Solution: Backstitch 3-4 stitches at every seam start and end
6. Making the casing too wide
- Mistake: Creating a casing much wider than the elastic
- Why it fails: Elastic has room to twist and flip inside the casing
- Solution: Casing should be elastic width + ½ inch maximum
7. Overlapping elastic ends incorrectly
- Mistake: Overlapping only ¼ inch or not stitching securely
- Why it fails: The join pulls apart under stress
- Solution: Overlap 1 inch minimum, stitch in a box pattern with an X through the middle
8. Using worn-out or cheap elastic
- Mistake: Reusing old elastic or buying the cheapest option
- Why it fails: Poor elastic loses stretch quickly, causing sagging waistbands
- Solution: Invest in quality elastic from fabric stores; it lasts significantly longer
9. Stretching the casing while sewing
- Mistake: Pulling the fabric while stitching the casing
- Why it fails: Creates a wavy, puckered casing that won’t lie flat
- Solution: Let the machine feed the fabric naturally; guide, don’t pull
10. Wrong needle type
- Mistake: Using a sharp/universal needle on knit fabrics with elastic
- Why it fails: Sharp needles can snag or create runs in knit fabric
- Solution: Use a ballpoint or stretch needle for knits; universal for wovens
Prevention checklist: Before you start any elastic waistband project, verify:
- ✓ Elastic length tested by wrapping around body
- ✓ Correct elastic type for your method (braided for casing, knit for direct-stitch)
- ✓ Casing opening marked clearly
- ✓ Safety pin ready for threading
- ✓ Machine set to correct stitch type
- ✓ Needle appropriate for fabric type
Do I Need Special Thread or Needle for Sewing Elastic?
You don’t need special thread for sewing elastic into a casing, but you should use a ballpoint or stretch needle when sewing knit fabrics with elastic, and consider using polyester thread for its slight stretch and durability. For basic woven fabric casings, standard all-purpose thread and a universal needle work perfectly.
Thread selection guide:
For casings (elastic hidden):
- All-purpose polyester thread: Best choice; slight stretch, strong, colorfast
- Cotton thread: Works but has no stretch; fine for casings since the casing itself doesn’t stretch
- Thread weight: 50-weight for most applications
- Color: Match to fabric, not elastic (elastic is hidden)
For direct-stitch elastic:
- Polyester thread: Preferred; has slight give to accommodate stretch
- Woolly nylon thread (in bobbin): Creates soft, stretchy seams; popular for activewear
- Avoid cotton thread: No stretch; will break when elastic is stretched repeatedly
Needle selection guide:
| Fabric Type | Needle Type | Needle Size | Why |
|---|---|---|---|
| Woven cotton, linen | Universal | 80/12 or 90/14 | Standard sharp point |
| Knit jersey, interlock | Ballpoint | 80/12 or 90/14 | Rounded tip slides between fibers |
| Heavy knit, fleece | Stretch | 90/14 | Specially designed for high-stretch fabrics |
| Lightweight woven | Universal | 70/10 | Finer needle for delicate fabric |
Why needle type matters: Sharp needles can create runs or snags in knit fabrics because they pierce the fibers rather than sliding between them. Ballpoint and stretch needles have rounded tips that push fibers aside, preventing damage.
When to change your needle: Replace your needle after 8-10 hours of sewing or when starting a new project. Dull needles cause skipped stitches, thread breakage, and fabric damage, all problems that become more noticeable when sewing elastic.
Special equipment you might want (but don’t need):
- Walking foot: Helps feed multiple layers evenly when sewing through elastic and fabric; useful but not essential
- Twin needle: Creates professional parallel topstitching on elastic waistbands; decorative upgrade
- Elastic guide foot: Specialized foot that feeds elastic evenly; only necessary for production sewing
Budget-friendly approach: Start with what you have. If you’re using the casing method on woven fabric, your standard universal needle and all-purpose thread will work fine. Upgrade to specialized needles and thread only when you move to knit fabrics or direct-stitch applications.
How to Add Elastic to Pants That Are Too Big
To add elastic to pants that are too big, create a casing by folding the existing waistband inward, stitch close to the bottom fold leaving an opening, thread elastic through at 75-80% of your waist measurement, secure the ends, and close the opening. This technique works for pants with excess fabric in the waist and transforms loose-fitting pants into comfortable, fitted garments.
Step-by-step for adding elastic to existing pants:
Assess the waistband
- Try on the pants and determine how much they need to be taken in
- Check if there’s enough fabric depth to create a casing (need at least 1½ inches)
- Decide if you’ll add elastic to the entire waistband or just the back portion
Prepare the waistband
- Turn pants inside out
- If there’s a waistband facing, you may be able to use the existing structure
- If not, fold the top edge down to create a casing (elastic width + ½ inch)
- Press the fold firmly
Create the casing
- Pin the folded edge in place around the entire waistband
- Leave a 2-inch opening at the center back
- Stitch close to the inner fold using a straight stitch
- Backstitch at the opening edges
Calculate and cut elastic
- Measure your waist where the pants will sit
- Multiply by 0.75-0.80 for comfortable fit
- Add 1 inch for seam allowance
- Cut elastic to this length
Thread and secure
- Attach safety pin to elastic end
- Thread through casing
- Try on pants to test fit before securing
- Adjust elastic length if needed
- Overlap ends by 1 inch and stitch securely
- Close the opening
Partial elastic option (back only):
If you want elastic only in the back of the waistband (common for jeans or dress pants):
- Mark the side seams on your pants
- Create a casing only across the back, from side seam to side seam
- Cut elastic to measure 75% of half your waist measurement, plus 1 inch
- Thread elastic through back casing only
- Secure elastic ends at the side seams by stitching through all layers
This method maintains the flat front appearance while adding stretch and comfort in the back.
Alternative: Elastic buttonhole method
For pants with belt loops:
- Cut elastic to comfortable waist measurement
- Thread elastic through belt loops
- Overlap ends and stitch together
- Tuck the join inside a belt loop
- This adds adjustability without altering the pants permanently
When this method works best:
- Thrifted or vintage pants that are slightly too large
- Pants that fit in the hips but are loose in the waist
- Children’s pants that need to last through a growth spurt
- Maternity pants adaptation for postpartum wear
When to choose a different alteration: If pants are more than 4 inches too large in the waist, adding elastic will create excessive gathering that looks bulky. In that case, taking in the side seams or center back seam is a better solution.
FAQ
How long does elastic last in a waistband? Quality elastic typically lasts 2-5 years with regular wear and washing, depending on elastic type and care. Woven elastic lasts longest, while braided elastic degrades faster. Heat from dryers accelerates deterioration, so air-drying extends elastic life.
Can I use regular thread to sew elastic? Yes, regular all-purpose polyester thread works for sewing elastic casings and even for direct-stitch applications. Polyester thread has slight stretch and durability that accommodates elastic movement better than cotton thread.
What width elastic should I use for pants? Use ¾-inch to 1-inch elastic for lightweight pants and children’s clothing, 1-inch to 1½-inch elastic for adult pants and skirts, and 1½-inch to 2-inch elastic for plus-size garments or pants that need extra support.
Why does my elastic bunch up on one side? Elastic bunches when it’s unevenly distributed in the casing, when the elastic is too long, or when it’s twisted. Remove the elastic, mark quarter points on both elastic and fabric, then re-thread matching these points for even distribution.
Can I sew through elastic with a straight stitch? Only sew through knit elastic with a zigzag or stretch stitch, never a straight stitch. Straight stitches break when the elastic stretches. Braided elastic should never be sewn through at all, as needle holes destroy its stretch.
How do I prevent elastic from rolling in the waistband? Use woven no-roll elastic instead of braided elastic, ensure your casing isn’t too wide (should be elastic width + ½ inch maximum), and consider stitching through the casing and elastic at side seams to lock it in place.
Can I replace elastic without unpicking the entire waistband? Yes, if you left an opening in the casing or can open the seam at one point. Thread new elastic through using a safety pin, remove the old elastic as you go, then secure the new elastic ends and close the opening.
What’s the difference between elastic for waistbands and elastic for other uses? Waistband elastic is typically wider (¾-inch to 2-inch), firmer, and often features no-roll properties. Other elastic types include narrow elastic for sleeves, plush-back elastic for underwear, and clear elastic for stabilizing seams.
Do I need to prewash elastic before using it? No, elastic doesn’t require prewashing and may actually lose some stretch if washed before use. However, always prewash your fabric before adding elastic to prevent differential shrinkage that could cause puckering.
How tight should elastic feel when I first put it on? Elastic should feel snug but comfortable when first worn. It will relax slightly with wear and washing. If you can easily slide the garment on and off without unfastening, and it stays in place during movement, the tension is correct.
Can I use elastic on all fabric types? Elastic works on most fabrics, but the method varies. Use the casing method for woven fabrics (cotton, linen, lightweight denim) and either casing or direct-stitch for knits (jersey, interlock, French terry). Very heavy or very delicate fabrics may require special consideration.
What do I do if my sewing machine won’t feed the elastic? Reduce presser foot pressure if your machine allows it, use a walking foot to help feed layers evenly, or place tissue paper under the elastic while sewing (tear away afterward). Also check that you’re using the correct needle type for your fabric.
Conclusion
Learning how to sew elastic into a waistband opens up a world of comfortable, custom-fitted garments that you can create and repair with confidence. Whether you choose the beginner-friendly casing method or advance to direct-stitch techniques, the fundamental principles remain the same: measure accurately, choose the right elastic type for your project, and secure all stress points with proper stitching.
Start with a simple project like pajama pants or an elastic-waist skirt to build your skills. Remember to cut your elastic to 75-80% of your body measurement, use a safety pin to prevent twisting during threading, and always test the fit before securing the elastic permanently. These small steps prevent the most common mistakes and ensure professional results.
As you gain experience, experiment with different elastic types, try the direct-stitch method for activewear, or add elastic to existing garments that need adjustment. The techniques covered in this guide work for everything from children’s clothing to plus-size garments, making elastic insertion one of the most versatile skills in your sewing toolkit.
Your next steps:
- Gather your materials: fabric, appropriate elastic, thread, and a safety pin
- Practice the casing method on a scrap fabric sample before starting your project
- Measure carefully and test your elastic length before cutting
- Start with a simple, forgiving project to build confidence
- Keep notes on what elastic lengths work best for your body for future reference
With these techniques mastered, you’ll never struggle with ill-fitting waistbands again. Happy sewing!