


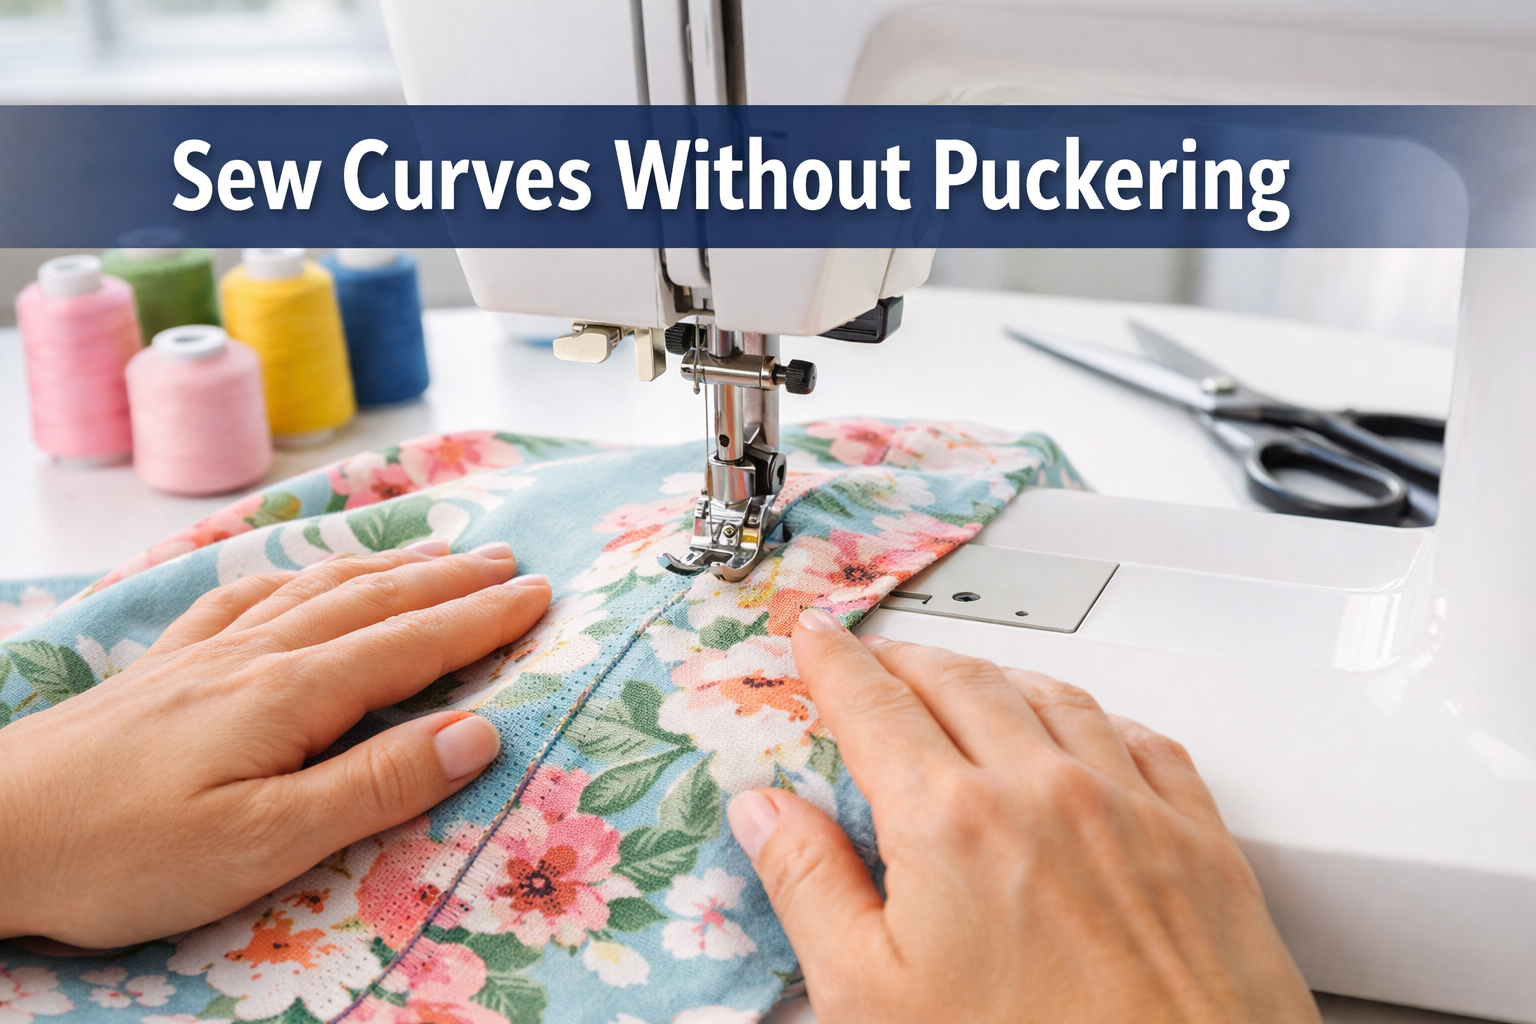
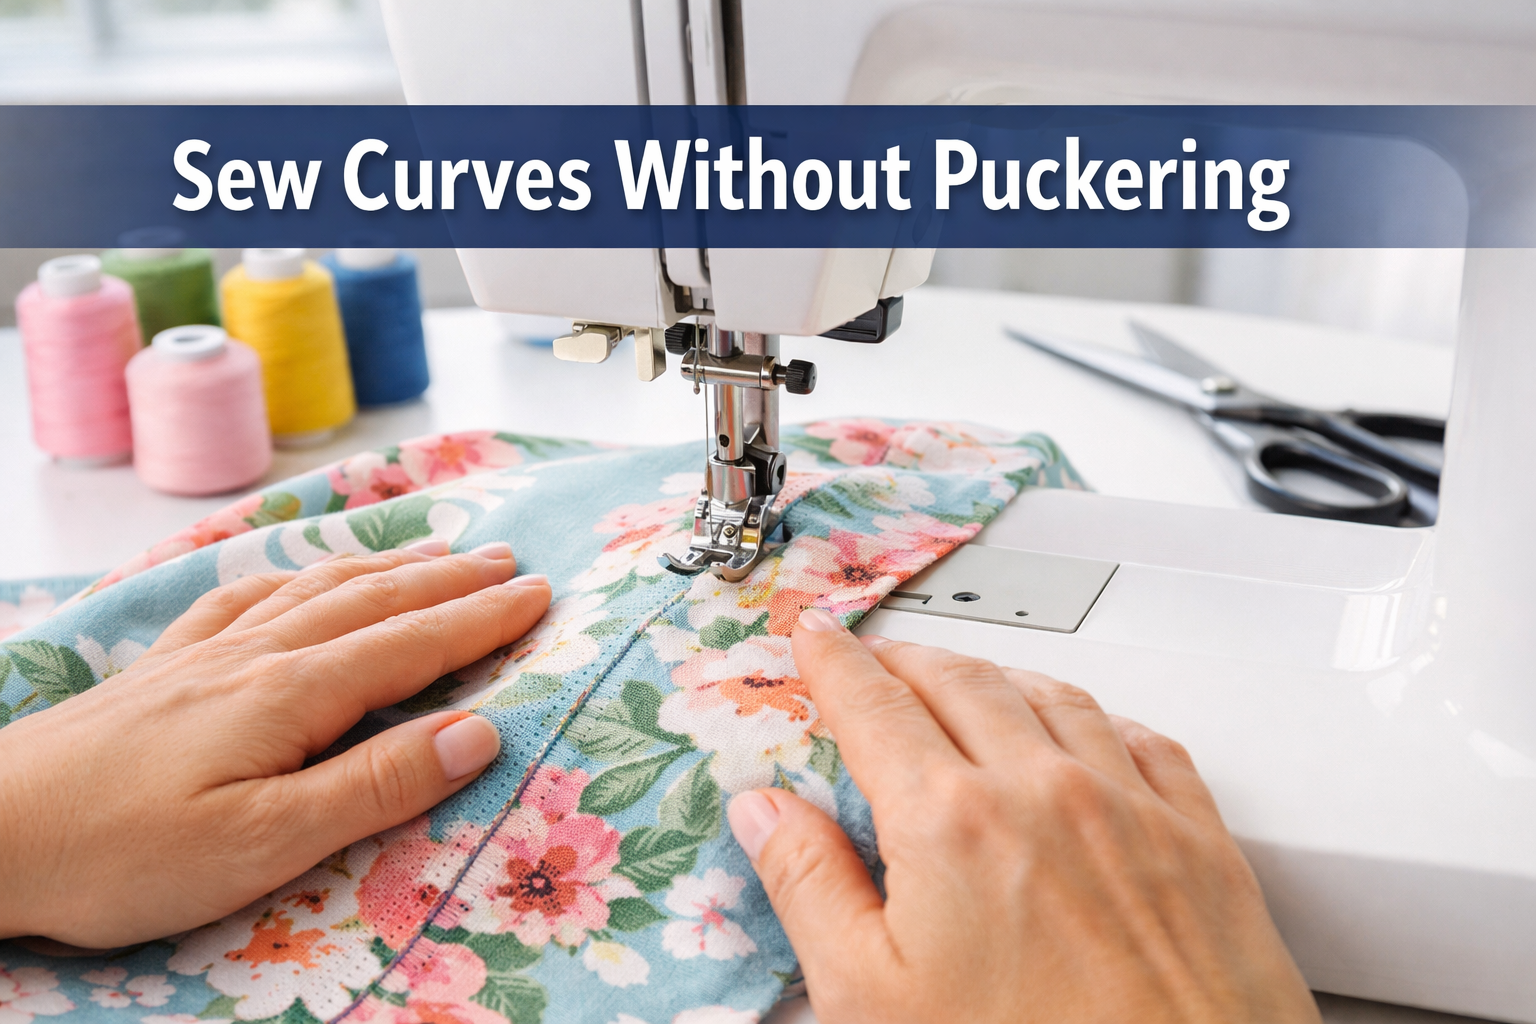
Curved seams separate confident sewists from frustrated beginners. To sew curves without puckering, you need the right stitch length (2.0-2.5mm for most fabrics), proper tension settings, strategic clipping after stitching, and careful pressing with a tailor’s ham. The fabric must glide smoothly under the presser foot without stretching or bunching, which requires both technique and the right tools.
Key Takeaways
- Stitch length matters: Use 2.0-2.5mm for curved seams; shorter stitches create more flexibility and reduce puckering
- Clip curves after sewing: Clip into seam allowances every ½ inch on concave curves, notch convex curves to remove bulk
- Stay stitching prevents distortion: Stitch ⅛ inch from the edge before sewing curves on bias-cut or stretchy fabrics
- Tension adjustments are critical: Slightly looser upper tension (reduce by 0.5-1.0) helps fabric feed smoothly on curves
- Press with proper tools: Use a tailor’s ham or rolled towel to press curved seams without flattening the shape
- Pins vs clips: Fabric clips work better for curves because they don’t distort the fabric or create bumps under the presser foot
- Walking foot helps: A walking foot feeds top and bottom layers evenly, preventing the top layer from stretching on curves
- Go slow: Sewing curves at half speed gives you better control and prevents the fabric from shifting
What Causes Puckering When Sewing Curves
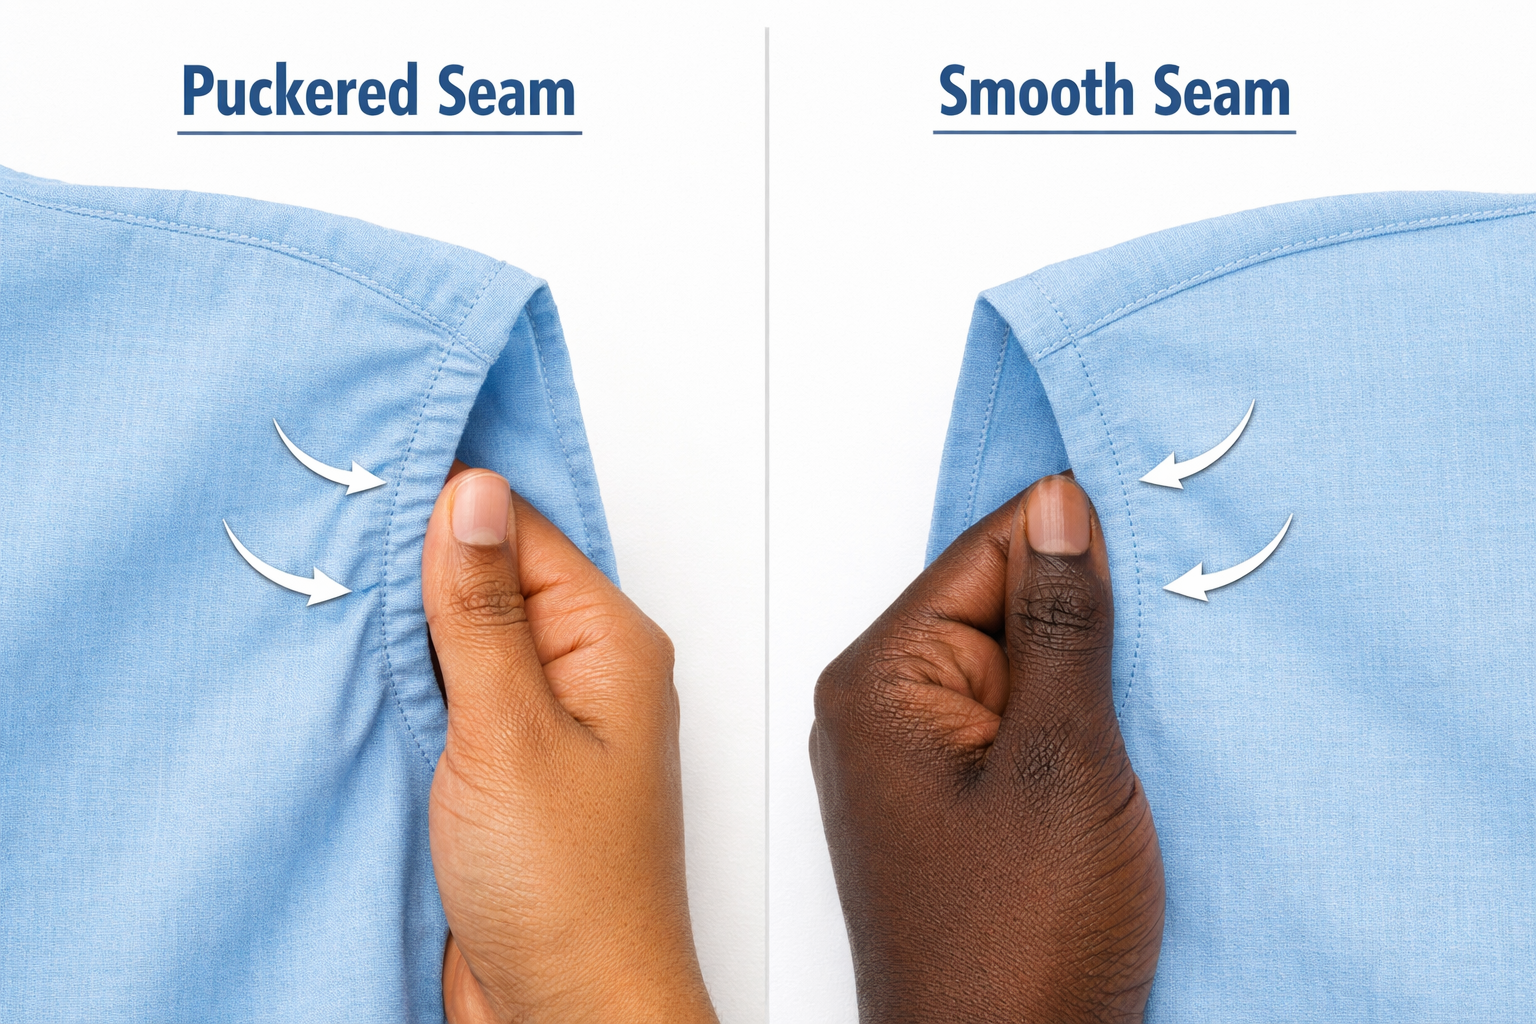
Puckering on curved seams happens when the fabric layers don’t feed through the machine at the same rate, when tension is too tight, or when the fabric stretches as you sew. The curved shape naturally creates more stress on the fabric than straight seams, making these issues more visible.
Common causes of puckering on curves:
- Uneven feeding: The feed dogs pull the bottom layer faster than the top layer moves, causing the top fabric to bunch up
- Excessive tension: Too-tight upper thread tension pulls the fabric into waves along the seam line
- Stretching while sewing: Pulling or pushing the fabric as it goes under the needle distorts the curve and creates ripples
- Wrong stitch length: Stitches that are too long (3.0mm+) don’t have enough flexibility to follow the curve smoothly
- Dull or wrong needle: A damaged needle can snag fabric fibers and create tiny pulls that accumulate into puckering
- Fabric bias stretch: Curves often fall on the bias grain, which stretches easily and distorts if not handled carefully
The fabric type also matters. Lightweight fabrics like chiffon and silk pucker more easily than stable cotton or denim because they have less body to resist distortion. For detailed guidance on adjusting your machine’s tension, check out our sewing machine tension guide.
Best Stitch Length for Sewing Curved Seams
The ideal stitch length for curved seams is 2.0-2.5mm for most medium-weight fabrics like cotton, linen, and lightweight denim. This shorter length creates more stitches per inch, which gives the seam more flexibility to follow the curve without pulling the fabric into puckers.
Stitch length by fabric weight:
- Lightweight fabrics (chiffon, voile, silk): 1.8-2.0mm
- Medium-weight fabrics (quilting cotton, linen, chambray): 2.0-2.5mm
- Heavy fabrics (denim, canvas, upholstery): 2.5-3.0mm
- Knits and stretchy fabrics: 2.5-3.0mm with a slight zigzag or stretch stitch
Shorter stitches also make it easier to clip and notch the seam allowance after sewing because the clips won’t weaken the seam as much. If you’re sewing a very tight curve like a collar or neckline, go even shorter (1.8-2.0mm) for maximum flexibility.
Test first: Always sew a sample curve on scrap fabric before starting your project. Check for puckering, thread tension, and whether the curve lies flat when pressed.

2X STRONGER STEEL — Constructed with reinforced, thick shafts that withstand the resistance of dense, heavy fabrics without bending or breaking, staying sharp longer for consistent, skip-free stitching through any material from start to finish.

Set of 10 regular point machine needles in assorted sizes

4X LONGER LIFE WITH TITANIUM COATING — Titanium-coated needles are super strong and last up to 4 times longer than regular sewing machine needles, delivering exceptional durability and value for high-volume sewing projects
How to Clip Curves After Sewing
Clipping curved seams after stitching releases tension in the seam allowance so the fabric can lie flat when turned right side out. For concave curves (curves that bend inward, like necklines and armholes), clip small perpendicular cuts into the seam allowance every ½ inch, stopping about ⅛ inch from the stitching line.
Step-by-step clipping technique:
- Concave curves (inward curves): Use sharp fabric scissors to make small clips perpendicular to the seam, spaced ½ inch apart. Clip closer together (every ¼ inch) on tighter curves.
- Convex curves (outward curves): Cut small triangular notches out of the seam allowance instead of clipping straight in. This removes bulk and prevents the seam from bunching when turned.
- Stop before the stitches: Always leave at least ⅛ inch between your clip and the stitch line. Cutting too close weakens the seam and can cause it to split.
- Grade the seam allowance: On thick fabrics, trim one seam allowance slightly narrower than the other (one at ¼ inch, one at ⅜ inch) to reduce bulk before clipping.
Common mistake: Clipping too few times leaves the seam stiff and puckered. If the fabric doesn’t lie completely flat after pressing, add more clips. The goal is to release all tension without weakening the seam.
For projects with multiple curved seams like princess seams or armholes, clip immediately after sewing each seam while the fabric is still flat. This makes it easier to see where clips are needed.
Do I Need a Special Presser Foot for Sewing Curves
You don’t need a special presser foot for most curved seams, but a walking foot or even-feed foot makes sewing curves significantly easier by feeding the top and bottom fabric layers at the same rate. This prevents the top layer from stretching or shifting, which is the main cause of puckering on curves.
Presser foot options for curves:
- Standard presser foot: Works fine for gentle curves on stable fabrics like quilting cotton. Keep the fabric flat and guide it gently without pulling.
- Walking foot: Best for slippery fabrics (satin, silk), thick fabrics (denim, canvas), or any time the layers tend to shift. The walking foot has its own set of feed dogs that grip the top layer.
- Open-toe presser foot: Gives you better visibility of the seam line, which helps when sewing tight curves like collars or princess seams.
- ¼-inch foot: Useful for maintaining consistent seam allowances on curved piecing in quilts.
If you’re sewing armholes, necklines, or princess seams and notice the top fabric bunching up even with correct tension, a walking foot will solve the problem. Learn more about different presser foot types in our presser foot guide.
When to skip the walking foot: On very tight curves (collar points, small circles), a walking foot can be too bulky and make it harder to pivot the fabric. Use your standard foot and sew slowly for better control.

Universal Compatibility: This walking foot attachment is designed to fit Brother, Singer, Janome, and all low shank sewing machine models. Whether you own a Brother walking foot sewing machine or a Singer walking foot sewing machine, this accessory ensures seamless integration and enhanced stitching performance
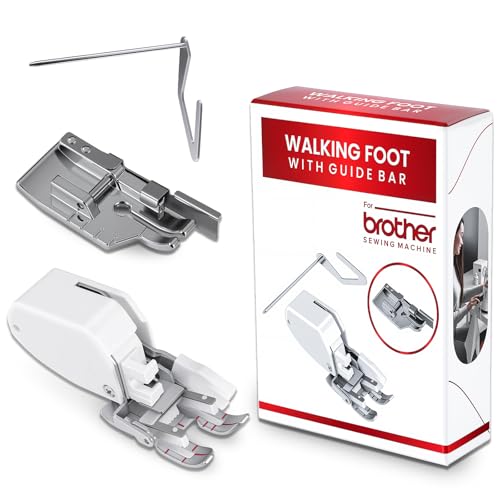
【UNIVERSAL LOW SHANK FIT】 Engineered to seamlessly fit Brother, Singer, Janome, Kenmore, and all low-shank sewing machines. Upgrade your domestic machine into a high-performance stitching powerhouse instantly without any extra adapters

SMOOTH FABRIC FEEDING: The SINGER Even Feed Walking Presser Foot ensures even fabric feeding for professional results, especially on thick or layered fabrics. Perfect for sewing challenging materials like velvet, denim, and quilts without shifting.
Sewing Curves vs Straight Seams: What’s the Difference
Curved seams require slower sewing speed, more frequent fabric adjustments, and different pressing techniques compared to straight seams. The main difference is that curves create tension in the seam allowance because the inner edge is shorter than the outer edge, which causes puckering if not handled correctly.
Key differences:
| Aspect | Straight Seams | Curved Seams |
|---|---|---|
| Stitch length | 2.5-3.0mm | 2.0-2.5mm (shorter for flexibility) |
| Sewing speed | Full speed | Half speed for control |
| Fabric handling | Minimal guidance needed | Constant gentle steering required |
| Seam finishing | Press flat with iron | Must clip/notch, press over curved surface |
| Tension | Standard setting | Often needs slight reduction |
| Pinning | Pins perpendicular to seam | Clips or pins parallel to edge |
Why curves are harder: The fabric must bend in two directions at once (along the seam line and perpendicular to it), which creates stress. Straight seams only bend in one direction, so the fabric naturally lies flat.
When sewing curves, you need to guide the fabric smoothly without pulling or pushing. Let the feed dogs do the work while you gently steer the fabric to follow the curve. Pulling stretches the fabric and creates puckers; pushing causes the layers to shift.
How to Sew Armholes Without Puckering
Armholes are one of the trickiest curves because they combine a tight concave curve with bias-cut fabric that stretches easily. To sew armholes without puckering, always stay stitch the armhole edge before sewing, use a 2.0mm stitch length, and sew with the garment body (not the sleeve) on top so you can see and control the curve.
Step-by-step armhole technique:
- Stay stitch first: Sew a line of stitching ⅛ inch from the raw edge of the armhole, through a single layer, before cutting out the garment. This stabilizes the bias edge and prevents stretching.
- Pin or clip carefully: Match the shoulder seam, underarm seam, and any notches first. Then add clips every 1-2 inches around the curve, easing the sleeve cap to fit the armhole without stretching either piece.
- Sew with the body on top: Place the garment body (not the sleeve) facing up as you sew. This lets you see the armhole curve and control the fabric better.
- Use a shorter stitch: Set your machine to 2.0mm for the armhole seam. This creates more flexibility and makes clipping easier.
- Clip the seam allowance: After sewing, clip into the concave curve of the armhole every ½ inch, stopping ⅛ inch from the stitches.
- Press over a ham: Use a tailor’s ham or rolled towel to press the seam allowance toward the sleeve. Never press an armhole flat on an ironing board, it will distort the shape.
Common mistake: Stretching the armhole or sleeve cap while sewing. Both pieces should lie flat and relaxed as they go under the presser foot. If you notice puckering, rip out the seam and try again with less tension on the fabric.
If your machine has adjustable presser foot pressure, reduce it slightly for armholes. This prevents the feed dogs from gripping too hard and stretching the fabric.

Why Does My Fabric Bunch Up on Curves
Fabric bunches up on curves when the top and bottom layers feed through the machine at different speeds, when you pull or push the fabric, or when the presser foot pressure is too high. The feed dogs naturally pull the bottom layer faster, and on curves this difference becomes more noticeable because the fabric is constantly changing direction.
Solutions for fabric bunching:
- Reduce presser foot pressure: If your machine has this adjustment, lower the pressure by one or two settings. This lets the fabric glide more easily without the feed dogs gripping too hard.
- Use a walking foot: The walking foot feeds both layers evenly, which eliminates the speed difference that causes bunching. This is especially helpful on slippery or stretchy fabrics.
- Check your tension: Too-tight upper tension pulls the fabric and creates bunching. Reduce the tension by 0.5-1.0 and test on scrap fabric. For more help, see our guide on fixing tension problems.
- Don’t pull the fabric: Let the feed dogs move the fabric at their own pace. Your hands should only guide the direction, not pull or push.
- Slow down: Sewing curves at half speed gives you better control and reduces the chance of the fabric shifting or bunching.
Fabric type matters: Lightweight fabrics (chiffon, silk, rayon) bunch more easily than stable cottons. For slippery fabrics, place tissue paper under the fabric as you sew, then tear it away afterward. This gives the feed dogs something to grip without distorting the fabric.
If bunching happens consistently in the same spot (like the deepest part of a curve), the fabric may be stretching on the bias. Stay stitching before sewing the seam will prevent this.
Should I Use Pins or Clips for Curved Seams
Fabric clips work better than pins for curved seams because they hold the fabric without distorting the curve or creating bumps under the presser foot. Clips sit on the edge of the fabric and are easy to remove as you sew, while pins can shift the layers or catch on the presser foot, causing puckering.
Pins vs clips comparison:
- Fabric clips: Hold the fabric flat without piercing it, easy to remove while sewing, don’t create bumps, work well on thick or slippery fabrics. Best for curves.
- Pins: Can distort the fabric if placed perpendicular to the edge, create small bumps that the presser foot must go over, may shift as you sew. Better for straight seams.
How to use clips on curves:
- Match key points first (notches, seam intersections, center points)
- Place clips every 1-2 inches around the curve, closer together on tight curves
- Clip through both layers at the very edge of the seam allowance
- Remove each clip just before it reaches the presser foot
- Don’t clip so tightly that you stretch the fabric
When pins work better: On very gentle curves in stable fabric (like quilt blocks), pins placed parallel to the seam line work fine. Just make sure to remove them before they reach the needle, sewing over pins can break your needle or damage your machine.
If you don’t have fabric clips, you can pin parallel to the seam line (with the pin heads toward the raw edge) so the pins lie flat under the presser foot. Remove them as you sew.
How to Press Curved Seams Flat
Curved seams must be pressed over a curved surface like a tailor’s ham, rolled towel, or pressing mitt to maintain their shape. Pressing a curved seam flat on an ironing board will distort the curve and create puckering because you’re forcing a three-dimensional shape into a two-dimensional surface.
Step-by-step pressing technique:
- Press the seam closed first: Before opening the seam allowance, press the stitching line as sewn. This sets the stitches and smooths out any thread tension.
- Clip or notch the seam allowance: Make your clips or notches before pressing open. This releases tension so the fabric can lie flat.
- Use a curved surface: Place the curved seam over a tailor’s ham, rolled towel, or the curved end of your ironing board. The curve of the pressing surface should match the curve of your seam.
- Press the seam open: Use the tip of your iron to press the seam allowance open, working from the inside of the garment. Use steam for natural fibers.
- Press from the right side: Flip the garment right side out and press again over the curved surface to smooth the seam and remove any remaining puckers.
Pressing tools for curves:
- Tailor’s ham: A firm, ham-shaped cushion with different curves for pressing armholes, princess seams, darts, and collars. Essential for garment sewing.
- Rolled towel: Roll a bath towel tightly and secure with rubber bands. Works as a makeshift ham for gentle curves.
- Pressing mitt: A padded mitt that fits over your hand or the end of a sleeve board. Good for small curves like collar edges.
- Seam roll: A long, narrow cushion for pressing seams open without creating creases on the right side of the fabric.
Common mistake: Using too much pressure with the iron. On curves, use a light touch and let the steam do the work. Pressing too hard can flatten the curve and create shine on the fabric.
Walking Foot vs Regular Foot for Curves
A walking foot feeds the top and bottom fabric layers at the same rate, which prevents the top layer from stretching or shifting on curves. A regular presser foot only relies on the feed dogs underneath, so the top layer can bunch up or stretch, especially on slippery, thick, or stretchy fabrics.
When to use a walking foot for curves:
- Sewing slippery fabrics (satin, silk, rayon) where the layers slide against each other
- Thick fabrics (denim, canvas, multiple layers) where the bulk makes it hard for the top layer to feed smoothly
- Stretchy fabrics (knits, jersey) that can distort easily
- Long, gentle curves (princess seams, side seams with shaping) where consistent feeding is critical
- Any time you notice the top layer bunching up even with correct tension
When a regular foot works fine:
- Stable, medium-weight fabrics (quilting cotton, linen) on gentle curves
- Very tight curves (collar points, small circles) where the walking foot is too bulky to maneuver
- Short curved seams where you can control the fabric easily by hand
How to use a walking foot on curves: Attach the walking foot according to your machine’s instructions (most clip onto the presser foot bar and engage with the needle bar). Set your stitch length to 2.0-2.5mm and sew slowly, guiding the fabric gently around the curve. The walking foot will grip both layers and feed them evenly, eliminating puckering caused by uneven feeding.
For more information on different presser feet and their uses, see our complete presser foot guide.

【Clear View for Detailed Stitching】See exactly where your needle goes. The open toe design gives you a full view for intricate decorative stitches and free-motion quilting, making detailed work easier and more accurate

Enhanced Compatibility: This walking foot attachment is compatible with Brother sewing machines, as well as part Singer and Janome models, making it a versatile addition to your crafting tool kit

O(∩_∩)O Enhances Functionality:This walking foot attachment set is compatible with Brother sewing machines, as well as part Singer 、Janome models, making it a versatile addition to your crafting tool kit.
Common Mistakes When Sewing Princess Seams
Princess seams are long, gently curved seams that run from the shoulder or armhole to the hem, creating a fitted shape without darts. The most common mistakes are stretching the fabric while sewing, failing to stay stitch before cutting, and not pressing over a curved surface.
Top princess seam mistakes:
- Skipping stay stitching: Princess seams often fall on the bias, which stretches easily. Stay stitch ⅛ inch from the edge of each piece before sewing them together.
- Stretching while sewing: Pulling or pushing the fabric as you sew distorts the curve. Let the feed dogs move the fabric and only guide the direction gently.
- Wrong pinning technique: Pinning perpendicular to the seam creates bumps and distorts the curve. Use fabric clips or pin parallel to the edge instead.
- Not easing the curves together: One side of a princess seam is usually slightly longer than the other. You need to ease the longer side to fit the shorter side without creating gathers.
- Pressing flat: Princess seams must be pressed over a tailor’s ham to maintain the body’s curves. Pressing flat on an ironing board flattens the shaping.
- Clipping too close: Princess seams need clips every ½-1 inch on the concave curves, but cutting too close to the stitching weakens the seam. Leave at least ⅛ inch.
How to ease princess seams: Pin or clip the seam at the top, bottom, and any notches first. Then add clips every 1-2 inches, gently stretching the shorter side or easing the longer side to make them match. The fabric should lie flat without any gathers or puckers. Sew slowly and stop frequently to adjust the fabric.
Fabric choice matters: Princess seams work best in fabrics with some body (cotton, linen, wool) that hold their shape. Very drapey fabrics (rayon, jersey) are harder to control and may require interfacing along the seam line.
How to Sew Tight Curves on Collars Without Distortion
Tight curves like collar points and rounded collar edges require a very short stitch length (1.8-2.0mm), careful pivoting, and precise trimming of the seam allowance to eliminate bulk. The key is to sew slowly and stop with the needle down to pivot the fabric frequently, keeping the curve smooth.
Step-by-step technique for collar curves:
- Use a short stitch length: Set your machine to 1.8-2.0mm. Shorter stitches create more flexibility and make the curve smoother when turned right side out.
- Mark the seam line: Use a fabric marker or tailor’s chalk to draw the seam line on the fabric. This gives you a clear guide to follow.
- Sew slowly: Reduce your sewing speed to half or less. Stop every few stitches with the needle down, lift the presser foot, and pivot the fabric slightly to follow the curve.
- Trim the seam allowance: After sewing, trim the seam allowance to ⅛ inch on tight curves. This reduces bulk and helps the curve lie flat.
- Clip the concave curves: Make small clips every ¼ inch on inward curves, stopping just before the stitching line.
- Notch the convex curves: Cut small triangular notches out of the seam allowance on outward curves to remove bulk.
- Grade the seam allowance: Trim the under collar seam allowance slightly narrower than the upper collar to reduce bulk at the edge.
- Turn carefully: Use a point turner or chopstick to gently push out the curve from the inside. Don’t use anything sharp that could poke through the fabric.
- Press over a curved surface: Press the collar over a tailor’s ham or the curved edge of your ironing board to set the shape.
Common mistake: Sewing too fast and creating a jagged curve instead of a smooth one. Tight curves require patience and frequent pivoting. If the curve looks bumpy after turning, the stitches were too far apart or you didn’t pivot enough.
Interfacing helps: Fuse interfacing to the under collar before sewing. This adds stability and prevents the fabric from stretching on the bias as you sew the curve.
Is Stay Stitching Necessary Before Sewing Curves
Stay stitching is necessary before sewing curves that fall on the bias grain or in stretchy fabrics because it stabilizes the edge and prevents distortion. Bias-cut fabric stretches easily, and handling it during construction can pull it out of shape, creating wavy, puckered seams that are impossible to fix later.
When to stay stitch:
- Necklines: Almost always on the bias and prone to stretching
- Armholes: Usually bias-cut and handled frequently during construction
- Princess seams: Often cut on the bias for better draping
- Curved yokes: Any curved edge that will be sewn to another piece
- Stretchy fabrics: Knits, jersey, and loosely woven fabrics benefit from stay stitching even on straight grain
How to stay stitch:
- Stitch through a single layer: Stay stitching is done before sewing pieces together, through one layer only
- Sew ⅛ inch from the edge: Place the stitching line just inside the seam allowance (⅛ inch from the raw edge)
- Use a regular stitch length: 2.5mm works fine for stay stitching
- Don’t stretch as you sew: Let the fabric feed naturally without pulling or pushing
- Stitch in the direction of the grain: For necklines, stitch from the shoulder toward the center front/back to prevent stretching
When you can skip stay stitching: On stable, straight-grain curves in firmly woven fabrics (like quilting cotton cut on the straight grain), stay stitching isn’t necessary. The fabric won’t stretch or distort during handling.
Stay stitching takes an extra few minutes but saves hours of frustration trying to fix puckered, wavy seams later. It’s especially important for garment sewing where fit and drape matter.
Best Thread Tension Setting for Curved Seams
The best thread tension for curved seams is slightly looser than the standard setting, typically 0.5 to 1.0 lower than you’d use for straight seams. Looser tension allows the fabric to feed more smoothly around curves without the thread pulling the fabric into puckers.
How to adjust tension for curves:
- Start with your normal tension: Most machines default to 4.0-4.5 for medium-weight fabrics
- Reduce by 0.5-1.0: Lower the upper thread tension to 3.5-4.0 for curves
- Test on scrap fabric: Sew a curved seam on two layers of your project fabric and check for puckering
- Check the stitches: Properly balanced stitches should look the same on both sides, with no loops or puckering
- Adjust as needed: If the fabric still puckers, lower the tension slightly more. If you see loops on the underside, the tension is too loose.
Signs your tension is wrong:
- Too tight: Fabric puckers along the seam line, stitches look pulled, seam doesn’t lie flat
- Too loose: Loops of thread visible on the underside, stitches look sloppy, seam is weak
- Unbalanced: Stitches look different on top and bottom, one thread pulls to one side
For detailed guidance on testing and adjusting tension, check our comprehensive tension guide.
Other tension factors: Thread quality, needle size, and fabric weight all affect tension. Old or cheap thread breaks easily and may require different tension settings. A dull or wrong-size needle can also cause tension problems that look like puckering.
Bobbin tension: In most cases, you should only adjust the upper thread tension. Bobbin tension is factory-set and rarely needs adjustment. If you’ve tried everything else and still have problems, consult your machine’s manual or a professional for bobbin tension adjustment.
FAQ
What stitch length should I use for curved seams?
Use 2.0-2.5mm for most medium-weight fabrics on curved seams. This shorter length creates more flexibility and reduces puckering compared to the 2.5-3.0mm used for straight seams. For very tight curves like collars, go even shorter (1.8-2.0mm).
Do I need to clip all curved seams?
Yes, clip concave curves (inward curves like necklines and armholes) and notch convex curves (outward curves) to release tension in the seam allowance. Without clipping, the seam will pucker and won’t lie flat when turned right side out.
Can I sew curves without a walking foot?
Yes, you can sew curves with a regular presser foot on stable, medium-weight fabrics. A walking foot helps prevent puckering on slippery, thick, or stretchy fabrics by feeding both layers evenly, but it’s not required for all curved seams.
Why does my fabric stretch when I sew curves?
Fabric stretches on curves when you pull or push it as you sew, when the curve falls on the bias grain, or when presser foot pressure is too high. Stay stitch bias edges before sewing and let the feed dogs move the fabric without pulling.
How do I press curved seams without flattening them?
Press curved seams over a tailor’s ham, rolled towel, or pressing mitt to maintain the three-dimensional shape. Pressing curves flat on an ironing board distorts the shape and creates puckering.
Should I reduce my sewing speed for curves?
Yes, sew curves at half speed or slower for better control. Slower sewing lets you guide the fabric smoothly around the curve and stop frequently to adjust the fabric position without creating puckers.
What causes thread bunching under fabric on curves?
Thread bunching (bird’s nesting) on curves is usually caused by incorrect threading, wrong bobbin insertion, or tension problems. Check that the upper thread is properly seated in the tension discs and the bobbin is inserted correctly. For more help, see our thread bunching troubleshooting guide.
Can I use pins instead of clips for curved seams?
You can use pins on gentle curves in stable fabric, but fabric clips work better because they don’t distort the curve or create bumps under the presser foot. If using pins, place them parallel to the seam line and remove them before they reach the needle.
How close should I clip to the stitching line?
Clip to within ⅛ inch of the stitching line on curved seams. Clipping closer weakens the seam and may cause it to split. On very tight curves, you can clip slightly closer (⅟₁₆ inch) but never cut into the stitches.
Do I need to stay stitch before sewing curves?
Stay stitch curves that fall on the bias grain (like necklines and armholes) or in stretchy fabrics to prevent distortion. Sew a line of stitching ⅛ inch from the edge through a single layer before cutting out the garment piece.
What’s the difference between clipping and notching curves?
Clipping means cutting straight into the seam allowance on concave (inward) curves to release tension. Notching means cutting small triangular wedges out of the seam allowance on convex (outward) curves to remove bulk. Both techniques help curved seams lie flat.
Why do my princess seams pucker even with correct tension?
Princess seams pucker when the fabric stretches during sewing, when you skip stay stitching, or when you don’t ease the two sides together properly. Stay stitch both edges before sewing, use fabric clips to ease the curves together, and sew slowly without pulling the fabric.
Conclusion
Sewing curves without puckering comes down to mastering a few key techniques: using a shorter stitch length (2.0-2.5mm), adjusting your tension slightly lower, clipping or notching the seam allowance after sewing, and pressing over a curved surface. Stay stitching bias-cut curves before construction prevents stretching, and using fabric clips instead of pins keeps the layers aligned without distortion.
Your next steps:
- Test your settings: Sew a practice curve on scrap fabric using your project materials. Adjust stitch length and tension until the seam lies flat without puckering.
- Gather the right tools: Invest in a tailor’s ham for pressing curves and a set of fabric clips for pinning. If you sew curves frequently, consider adding a walking foot to your collection.
- Practice on simple curves first: Start with gentle curves like side seams or quilt blocks before tackling challenging curves like armholes or princess seams.
- Slow down: Sewing curves at half speed gives you better control and produces smoother results than rushing at full speed.
For more help with common sewing machine issues, explore our guides on tension problems, presser feet, and fabric feeding issues. With practice and the right techniques, you’ll sew smooth, professional-looking curves every time.


