


Sharp corners are the hallmark of professional sewing, but most sewers struggle with rounded, bulky, or puckered results. The secret lies in three key steps: using the correct stitch length (2.0-2.5mm for woven fabrics), trimming the seam allowance to 1/8 inch at the corner point, and turning the fabric right-side-out with a blunt tool rather than sharp scissors or pins.
Key Takeaways
- Stitch length matters: Use 2.0-2.5mm stitches for woven fabrics to create corners that hold their shape without puckering
- Trim strategically: Cut seam allowances to 1/8 inch at corner points, angling your scissors at 45 degrees to remove bulk
- Clip, don’t notch: Clipping means cutting into the seam allowance on inside corners; notching removes wedges on outside corners
- Turn with care: Use a blunt point turner, chopstick, or knitting needle to push corners out, never use scissors that can poke holes
- Backstitch is essential: Reinforce corners with 3-4 backstitches to prevent seams from pulling apart when turned
- Thick fabrics need extra attention: Trim seam allowances even closer (to 1/16 inch) and grade layers to different widths
- Sergers can’t do sharp corners: The cutting blade and multi-thread formation make precise 90-degree corners impossible on a serger
What Causes Rounded Corners When Sewing
Rounded corners happen when excess fabric bunches inside the seam allowance after turning the project right-side-out. The fabric layers stack up at the corner point, creating bulk that prevents the corner from forming a crisp angle. This is especially common when sewers skip trimming or leave too much seam allowance intact.
Three main culprits create rounded corners:
- Untrimmed seam allowances that force too much fabric into a small space
- Stitch length that’s too long (above 3.0mm), which creates gaps that allow fabric to shift
- Pulling or stretching the fabric while sewing around the corner, distorting the grain
The corner point is where multiple fabric layers converge, so even a standard 5/8-inch seam allowance becomes four layers thick (two from each fabric piece). Without trimming, those layers can’t fold neatly into a sharp point.
Common mistake: Many sewers trim their seam allowances but forget to clip diagonally across the very tip of the corner. That tiny triangle of fabric at the point is what causes the rounded look.
How to Trim Seam Allowance at Corners
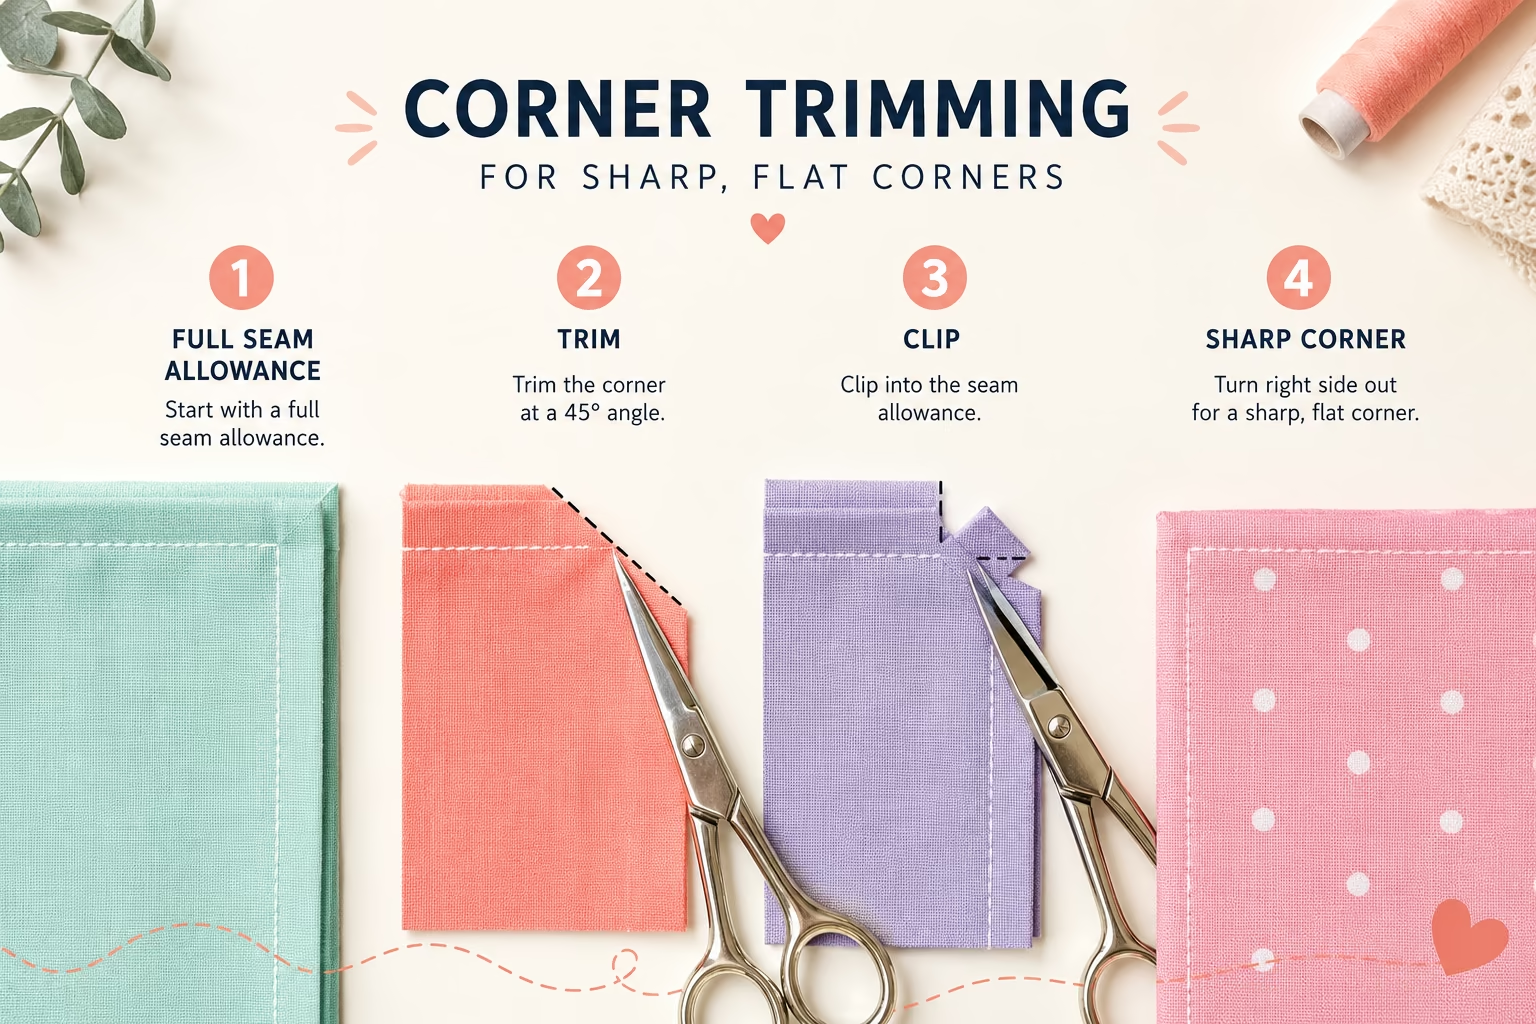
Trim the seam allowance at corners to 1/8 inch from the stitching line, cutting at a 45-degree angle across the corner point to remove the bulk that causes rounding. Make your cut as close to the stitching as possible without cutting through the thread, aim for leaving just 2-3 fabric threads between your cut edge and the seam.
Step-by-step trimming process:
- Sew your corner completely, backstitching 3-4 stitches past the pivot point
- Remove the fabric from the machine and lay it flat
- Trim both seam allowances along the straight edges to about 1/4 inch
- Cut diagonally across the corner point at a 45-degree angle, leaving 1/8 inch from the stitching
- If working with thick fabric, trim one seam allowance slightly narrower than the other (grading)
Choose this approach if: You’re working with medium to heavyweight fabrics like denim, canvas, or home décor weight cotton. Lighter fabrics like quilting cotton can often get away with slightly wider seam allowances (3/16 inch).
The 45-degree angle is critical because it removes the maximum amount of bulk while maintaining enough fabric to prevent fraying. A straight cut across the corner leaves too much material on the sides, while cutting too close to the stitching risks weakening the seam when you turn it right-side-out.
For more guidance on working with different fabric weights, check out our fabric techniques guide.
Difference Between Clipping and Notching Corners in Sewing
Clipping means making small cuts perpendicular to the stitching line on inside (concave) corners to allow the seam allowance to spread and lie flat. Notching means cutting small triangular wedges out of the seam allowance on outside (convex) corners or curves to reduce bulk. Both techniques prevent puckering and help corners turn crisply, but they’re used in opposite situations.
When to clip:
- Inside corners (like the neckline of a collar or the inner angle of an L-shaped piece)
- Curved seams that need to expand when turned (like armholes)
- Clip perpendicular to the stitching, stopping 1-2 threads away from the seam line
When to notch:
- Outside corners (like the points of a collar or the outer edges of a pillow)
- Curved seams that need to compress when turned (like rounded pillow edges)
- Cut small V-shaped wedges, removing about 1/4 inch of fabric
The key difference: clipping allows fabric to spread apart, while notching removes excess so fabric can compress. Using the wrong technique creates the opposite problem, clipping an outside corner leaves bulk, while notching an inside corner can cause the seam to pull apart.
Edge case: On very sharp inside corners (less than 90 degrees), you may need to make two or three clips radiating from the corner point to fully release the tension.

Multifunctional Tool: This versatile sewing aid, often called a “Purple Thang,” feeds fabric evenly under the presser foot and features a curved end to hold fabric in place, making tricky sewing tasks smoother and more precise

2-in-1 Design: This 2-in-1 point turner sewing tool combines a corner turning function and a seam creasing function in one compact tool. It helps you create sharp corners, smooth curves, and crisp seams without needing extra pressing tools, making it an essential accessory for all sewing projects.

MULTIFUNCTIONAL: This versatile tool, often called a "purple thang," not only helps feed fabric evenly under your sewing machine foot but also features a curved end to hold down fabric as you sew, it makes handling and completing your projects easier
Best Stitch Length for Sharp Corners
Use a stitch length of 2.0 to 2.5mm for sewing sharp corners in woven fabrics, which creates enough thread density to hold the corner securely without creating stiffness that prevents crisp turning. For knit fabrics, increase to 2.5-3.0mm to allow for stretch. Stitches that are too long (above 3.0mm) create gaps where fabric can shift, while stitches that are too short (below 1.5mm) are difficult to turn and can perforate the fabric.
Stitch length by fabric type:
| Fabric Type | Recommended Stitch Length | Why |
|---|---|---|
| Quilting cotton | 2.0-2.5mm | Balanced strength and flexibility |
| Denim/canvas | 2.5-3.0mm | Accommodates thickness without breaking needles |
| Silk/lightweight | 1.8-2.0mm | Prevents puckering on delicate fabrics |
| Knits | 2.5-3.0mm | Allows stretch without popping stitches |
Pro tip: Shorten your stitch length by 0.5mm for about 1 inch on either side of the corner. This reinforces the pivot point without making the entire seam stiff. Return to your regular stitch length after passing the corner.
The reason stitch length matters so much at corners is mechanical: when you pivot the fabric 90 degrees, the stitches on the inside of the corner compress while the stitches on the outside stretch. Shorter stitches distribute this stress more evenly, preventing the seam from pulling apart when you turn the corner right-side-out.
For troubleshooting other stitch quality issues, visit our stitch quality guide.
Do I Need to Backstitch at Corners When Sewing
Yes, backstitch 3-4 stitches immediately after pivoting at a corner to lock the seam and prevent it from unraveling when you trim the seam allowance close to the stitching. The corner point experiences the most stress when you turn the fabric right-side-out and push the point into shape, so those few backstitches are essential insurance against seam failure.
Proper corner backstitching technique:
- Sew to the corner point (usually 5/8 inch or your chosen seam allowance from both edges)
- Stop with the needle down in the fabric
- Lift the presser foot and pivot the fabric 90 degrees
- Lower the presser foot and sew 3-4 stitches forward
- Press the backstitch button and sew backward 3-4 stitches
- Sew forward again, continuing your seam
Common mistake: Backstitching before the pivot instead of after. This reinforces the wrong section of the seam. The stress point is the stitches immediately after the turn, not before it.
Alternative for delicate fabrics: If backstitching creates too much bulk on sheer or lightweight fabrics, reduce your stitch length to 1.5mm for about 1/2 inch after the corner instead. The shorter stitches provide reinforcement without the bulk of backstitching.
Some sewers prefer to tie off threads manually at corners by pulling the top and bobbin threads to the wrong side and knotting them. This works well for projects that will be handled gently, but backstitching is faster and more secure for items that will be washed frequently or experience stress (like bags, napkins, or children’s clothing).
How to Turn Corners Right Side Out Without Poking Holes

Turn corners right-side-out using a blunt point turner, chopstick, or knitting needle inserted gently into the corner while supporting the fabric from the outside with your other hand. Never use scissors, seam rippers, or pins, which can pierce through the fabric or stitching and create permanent holes. The key is to push gradually from the inside while pulling gently from the outside to coax the corner into shape.
Safe tools for turning corners:
- Point turner (best option): Wooden or plastic tool with a rounded tip designed specifically for this task
- Chopstick: Blunt end works perfectly; sand any rough spots first
- Knitting needle: Use the non-pointed end
- Crochet hook: Handle end (not the hook)
- Wooden skewer: Blunt the point with sandpaper first
Step-by-step turning process:
- Turn the project mostly right-side-out, leaving the corner still tucked inside
- Insert your tool into the corner from the inside, aiming for the very point
- Push gently while using your fingers on the outside to guide the fabric
- Stop pushing as soon as you feel resistance, forcing it can break stitches
- Use your fingers to pinch and pull the corner from the outside to finish shaping
- Press with an iron while the corner is still warm to set the shape
Choose a chopstick if: You’re working with medium-weight fabrics and don’t want to invest in specialized tools. Choose a point turner if you sew corners frequently, the ergonomic design prevents hand fatigue.
The reason blunt tools work better than sharp ones is simple physics: a blunt tip distributes pressure across several fabric threads, while a sharp point concentrates force on a single thread, which can break through. Think of it like the difference between poking fabric with your finger versus poking it with a needle.
What Tool to Use for Pushing Out Fabric Corners
A wooden or plastic point turner is the best tool for pushing out fabric corners because its blunt, slightly rounded tip pushes fabric threads aside rather than piercing through them. Point turners typically cost $3-8 and last for years, making them a worthwhile investment for anyone who sews projects with corners regularly. Alternative household tools include chopsticks, wooden spoon handles, or the non-pointed end of knitting needles.
Point turner features to look for:
- Blunt, rounded tip (not sharp or angular)
- Smooth surface (no splinters or rough edges that can snag fabric)
- Comfortable grip (you’ll be applying pressure)
- Multiple tip sizes (some have a narrow end for tight corners and a wider end for larger projects)
Avoid these tools:
- ❌ Scissors (sharp points pierce fabric)
- ❌ Seam rippers (designed to cut, not push)
- ❌ Pins (create permanent holes)
- ❌ Pencils (graphite can mark fabric; sharp tip can pierce)
- ❌ Pens (ink can transfer to fabric)
DIY alternative: Sand the pointed end of a wooden chopstick or dowel until it’s rounded and smooth. Test it on scrap fabric first to ensure it doesn’t snag or leave marks.
Many sewers keep multiple turning tools in different sizes. A narrow tool (3-4mm diameter) works best for small corners on collars or cuffs, while a wider tool (8-10mm) is better for large projects like pillow covers or tote bags where you need to push more fabric.
For more tips on essential sewing tools and techniques, explore our sewing for beginners resources.

Ergonomic Design: The Quilted Bear Wooden Point Turner is ergonomically designed for optimal grip, making it an essential addition to your sewing accessories and supplies. Its comfortable handle ensures seamless use.

Dual-Function Tool: This innovative point turner features a pointed end for intricate detail work and a rounded end for smoothing and pressing, making it perfect for a wide range of crafting projects, from fabric to scrapbooking. It is compatible with the Hera Clover Point 2 Point Turner

Dual Tip Design: this wooden point turner has a pointed end for reaching tight corners and a rounded end for smoothing seams the tip resists puncturing fabric
Mitered Corners vs Regular Sewn Corners
Mitered corners are created by folding fabric at 45-degree angles to form a clean diagonal seam at the corner, commonly used for hems, borders, and binding. Regular sewn corners are formed by stitching two pieces of fabric together at a 90-degree angle, then trimming and turning. Mitered corners eliminate bulk and create a professional finish on single-layer items like napkins or quilt borders, while regular sewn corners are used when joining two separate fabric pieces like pillow fronts and backs.
When to use mitered corners:
- Napkin hems
- Tablecloth borders
- Quilt binding
- Picture frame borders
- Any project where a single piece of fabric turns a corner
When to use regular sewn corners:
- Pillows and cushion covers
- Bags and pouches
- Garment construction (collars, cuffs, facings)
- Box-shaped projects
- Any project joining two separate pieces
Key difference: Mitered corners involve folding and pressing a single layer of fabric, while regular sewn corners involve stitching two layers together. Mitered corners show a diagonal seam line on the finished project; regular sewn corners show no visible seam when turned right-side-out.
Mitered corner quick method:
- Press hem allowance on both edges meeting at the corner
- Unfold and fold the corner diagonally where the pressed lines intersect
- Stitch along the diagonal fold
- Trim excess fabric and turn
Mitered corners take more time to construct but create less bulk, making them ideal for projects that need to lie flat. Regular sewn corners are faster and stronger, making them better for items that will be stuffed or experience stress.
Why Are My Sewn Corners Still Bulky After Trimming
Corners remain bulky after trimming when the seam allowances aren’t graded (cut to different widths) or when the corner point itself isn’t trimmed close enough to the stitching. Even after trimming to 1/4 inch, four layers of fabric at the corner create noticeable bulk. The solution is to trim the seam allowances to different widths, cut one to 1/8 inch and the other to 3/16 inch, so the layers nest inside each other rather than stacking directly on top of each other.
Grading technique for bulky corners:
- Trim the seam allowance that will be closest to the outside of the project to 1/4 inch
- Trim the seam allowance that will be against the inside to 1/8 inch
- Cut diagonally across the corner point, removing as much fabric as possible without cutting the stitching
- On very thick fabrics, trim even closer, as little as 1/16 inch from the stitching
Additional bulk-reduction strategies:
- Press before turning: Press the seam allowances open at the corner before turning right-side-out
- Use a lighter-weight fabric: Consider using a lighter lining fabric if the project allows
- Reduce seam allowance: Use a 3/8-inch or 1/2-inch seam allowance instead of 5/8 inch for the entire project
- Trim in stages: Make your first trim at 1/4 inch, turn the corner partially, then trim closer if still bulky
Fabric-specific considerations: Heavyweight fabrics like canvas, denim, upholstery fabric, and fleece need aggressive trimming. Don’t be afraid to trim to 1/16 inch on these materials, the tight stitch length (2.0-2.5mm) will hold the seam securely even with minimal seam allowance remaining.
Edge case: If you’re working with fabric that frays easily (like linen or loose-weave cotton), apply a thin line of fray check or clear nail polish to the trimmed edges before turning. This allows you to trim closer without risking the seam unraveling.
For related finishing techniques, see our guide on seam finishing.
How Close to Cut Seam Allowance on Corners
Cut seam allowances on corners to 1/8 inch (3mm) from the stitching line for most woven fabrics, leaving just 2-3 fabric threads between your scissors and the seam. For heavyweight or non-fraying fabrics like felt, fleece, or tightly-woven canvas, you can trim as close as 1/16 inch (1.5mm). For fabrics that fray easily, stay at 3/16 inch (5mm) to maintain seam integrity.
Trimming distance by fabric type:
- Quilting cotton: 1/8 inch (safe standard)
- Denim/canvas: 1/16 inch (these fabrics don’t fray easily)
- Linen: 3/16 inch (frays readily)
- Fleece/felt: 1/16 inch (no fraying)
- Silk/rayon: 3/16 inch (delicate and prone to fraying)
- Home décor weight: 1/8 inch (good balance)
How to judge the right distance: Look at your stitching after sewing. If you used a 2.0-2.5mm stitch length, you should see about 10-12 stitches per inch. You want to leave at least 2-3 stitches’ worth of fabric beyond your cut edge. This provides enough material to prevent the stitching from pulling through when you turn and manipulate the corner.
Test method: Practice on scrap fabric first. Sew a corner, trim it at your planned distance, then turn it right-side-out. If the stitching holds and the corner is sharp, your trimming distance is correct. If the stitching pulls out or looks stressed, you’ve trimmed too close. If the corner is still bulky, trim closer on your next attempt.
Common mistake: Cutting the same distance all the way around the corner. The very tip of the corner needs the most aggressive trimming (closest to the stitching), while the areas 1-2 inches away from the corner can be left slightly wider. This graduated trimming reduces bulk where it matters most while maintaining strength along the straight seams.
Can You Sew Sharp Corners With a Serger
No, you cannot sew sharp 90-degree corners with a serger because the machine’s cutting blade trims fabric ahead of the needles and the stitch formation requires continuous fabric feeding. Sergers are designed for finishing edges and sewing seams in one pass, but they cannot pivot at corners without leaving gaps or cutting into the project. For projects requiring sharp corners, sew the corners on a regular sewing machine first, then serge the straight edges if desired.
Why sergers can’t do corners:
- The cutting blade removes fabric before the needles reach it, making it impossible to pivot without cutting into your project
- The stitch formation requires all loopers and needles to engage simultaneously, which can’t happen at a 90-degree pivot
- The differential feed system is designed for continuous straight or curved sewing, not sharp angles
Workaround for serged projects with corners:
- Sew all corners on a regular sewing machine using a straight stitch
- Backstitch to secure the corners
- Serge the straight edges between corners, stopping 2-3 inches before each corner
- Secure the serger thread tails by threading them through a needle and weaving them back into the seam
Alternative approach: Use a serger for the entire seam but accept rounded corners. This works for casual projects like T-shirts or knit garments where precise corners aren’t critical. Simply slow down as you approach the corner and guide the fabric in a gentle curve rather than a sharp angle.
Choose a regular sewing machine if: Your project requires sharp corners (pillows, bags, collars, cuffs, napkins, quilts). Choose a serger if you’re working with knits or want fast seam finishing on straight edges.
For more on choosing the right machine for your projects, check out our Juki vs Janome comparison.

27 Unique Built-in Stitches: The Brother XM2701 sewing machine includes 27 built-in stitches including decorative, blind hem, zigzag, and stretch stitches and an auto-size buttonhole
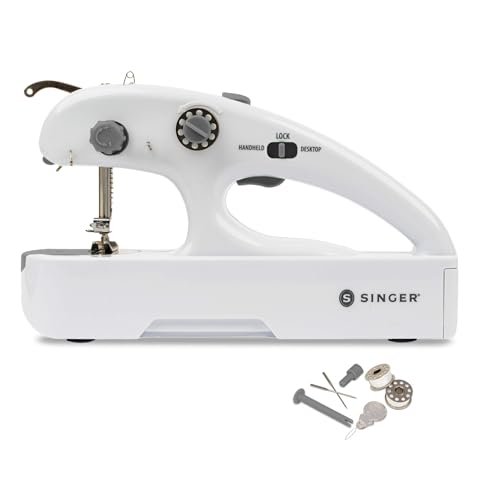
Ready-to-Sew Kit: Start stitching right out of the box with the SINGER Stitch Quick+ value bundle, featuring the Stitch Quick+ Portable Mending Machine and a 39-piece sewing accessory kit including thread, bobbins, machine needles, needle threader, and seam ripper, that can be neatly stored in the included drawstring bag
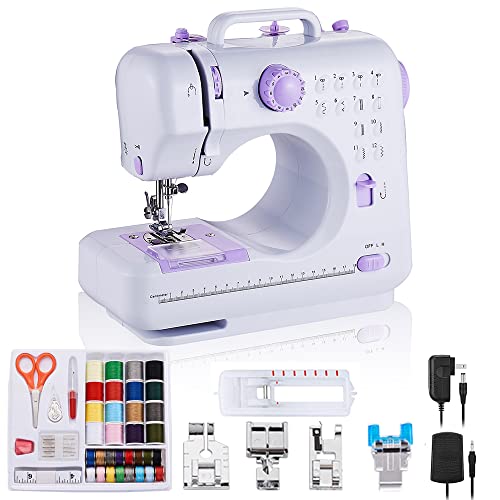
[Size and weight of sewing machine] Net weight of sewing machine: 2.4KG, size: 12.2*5.9*11.8 inches, suitable for household use, such as remodeling clothing, hand-made, sewing home decoration and other sewing needs.
How to Sew 90 Degree Corners on Napkins
Sew 90-degree corners on napkins by folding and pressing a double-fold hem on all four sides, then creating mitered corners where the hems meet. Press each edge under 1/4 inch, then under another 1/4 inch. Unfold the corners, fold the corner point diagonally where the pressed lines intersect, then refold the hems. This creates a clean diagonal seam at each corner with no visible raw edges.
Step-by-step napkin corner technique:
- Cut fabric: Cut napkin fabric to desired finished size plus 1 inch (for 1/2-inch total hem allowance on all sides)
- First press: Press all four edges under 1/4 inch, wrong sides together
- Second press: Press all four edges under another 1/4 inch, creating a double-fold hem
- Unfold corners: Open the fabric completely at each corner
- Fold corner diagonally: Fold the corner point diagonally so the two innermost pressed lines meet exactly
- Stitch diagonal: Sew along the diagonal fold from the outer corner to where the pressed lines meet
- Trim corner: Trim the corner point to 1/8 inch from the stitching
- Turn and press: Turn the corner right-side-out, push the point out gently, and press flat
- Refold hems: Refold the double-fold hems on all sides
- Topstitch: Edgestitch close to the inner folded edge all around the napkin
Pro tip: Use a 2.0mm stitch length for napkin hems. The shorter stitches create a more refined look appropriate for table linens and hold up better through repeated washing.
Pressing is critical: Well-pressed creases are the foundation of sharp mitered corners. Use steam and press firmly to create crisp fold lines that guide your stitching. If your iron doesn’t produce enough steam, use a spray bottle to dampen the fabric before pressing.
Fabric choice: Linen, cotton, and linen-cotton blends work best for napkins because they press crisply and hold creases well. Avoid fabrics with stretch or loose weaves, which make it difficult to achieve sharp corners.
For more on working with different fabric types, visit our fabric techniques page.
Common Mistakes When Sewing Corner Seams
The most common mistakes when sewing corner seams include failing to backstitch after pivoting, trimming seam allowances before testing the corner, using stitch lengths that are too long, and forcing sharp tools through the fabric when turning. These errors result in corners that pull apart, appear rounded, or develop holes. Avoiding these mistakes requires slowing down at corners, reinforcing stitches properly, and using the right tools for turning.
Top 10 corner sewing mistakes:
- Not backstitching after the pivot: Causes seams to unravel when trimmed
- Trimming before testing: Once cut, you can’t add fabric back
- Using scissors to turn corners: Creates holes and weakens fabric
- Skipping the diagonal corner trim: Leaves bulk that prevents sharp points
- Pulling fabric while pivoting: Distorts the corner angle
- Using too-long stitch length: Creates gaps where fabric shifts
- Cutting too close on fraying fabrics: Seam pulls apart when turned
- Not pressing before turning: Makes it harder to achieve crisp corners
- Pivoting with the needle up: Fabric can shift, misaligning the seam
- Rushing the turning process: Forcing corners damages stitching
How to avoid these mistakes:
- Practice on scraps: Sew several practice corners before starting your project
- Mark your pivot point: Use a fabric marker or pin to mark exactly where to stop and pivot
- Slow down: Reduce your machine speed as you approach corners
- Check your work: After sewing but before trimming, turn the corner partially to test the angle
- Invest in proper tools: A $5 point turner prevents countless hours of frustration
Edge case: On very small corners (like doll clothes or miniature projects), the standard 5/8-inch seam allowance is too wide. Use a 1/4-inch seam allowance for projects smaller than 6 inches square, and trim to just 1/16 inch at corners.
If you’re experiencing other sewing issues, our sewing troubleshooting guide covers common problems and solutions.
Do Thick Fabrics Need Different Corner Technique
Yes, thick fabrics like denim, canvas, upholstery fabric, and fleece require more aggressive seam allowance trimming, grading to different widths, and sometimes a longer stitch length to prevent bulk and achieve sharp corners. Trim thick fabric corners to 1/16 inch from the stitching, grade the layers so they nest rather than stack, and consider using a 3.0mm stitch length to accommodate the fabric thickness without breaking needles.
Thick fabric corner modifications:
Trimming approach:
- Trim outer seam allowance to 3/16 inch
- Trim inner seam allowance to 1/16 inch
- Cut diagonally across the corner point as close as possible to stitching
- Consider trimming in stages: rough trim, turn partially, then trim closer if needed
Stitch adjustments:
- Increase stitch length to 2.5-3.0mm to prevent needle breakage
- Use a heavy-duty needle (size 100/16 or 110/18)
- Reduce sewing speed to give the machine time to penetrate thick layers
- Consider using a walking foot to feed layers evenly
Pressing technique:
- Press seam allowances open before turning (this distributes bulk)
- Use a tailor’s clapper (wooden pressing tool) to flatten seams
- Press from both sides: wrong side first, then right side
- Use plenty of steam or a damp pressing cloth
Alternative construction:
- Use a smaller seam allowance (3/8 inch instead of 5/8 inch) for the entire project
- Interface only one layer if both fabrics are thick
- Consider topstitching corners after turning to flatten and define them
Fabric-specific tips:
- Denim: Trim to 1/16 inch; denim doesn’t fray, so aggressive trimming is safe
- Canvas: Grade layers and press thoroughly; canvas holds creases well
- Upholstery fabric: Often has a backing that adds bulk; trim backing separately from face fabric
- Fleece: Doesn’t fray, so trim very close; avoid pressing with high heat (melts synthetic fleece)
Common mistake: Using the same technique for thick fabrics as for quilting cotton. Thick fabrics need customized approaches, what works for a cotton pillowcase won’t work for a denim tote bag.
For more on working with different needle types and sizes, see our needle size guide.
FAQ
How do you get perfect corners when sewing? Perfect corners require three elements: a 2.0-2.5mm stitch length, trimming the seam allowance to 1/8 inch at the corner point with a diagonal cut, and turning the corner right-side-out with a blunt tool like a point turner or chopstick. Backstitch 3-4 stitches after pivoting to secure the corner.
Should you backstitch at corners? Yes, always backstitch 3-4 stitches immediately after pivoting at a corner. The corner experiences maximum stress when turned right-side-out, and backstitching prevents the seam from pulling apart. Backstitch after the pivot, not before, to reinforce the correct section.
What’s the best tool for turning corners? A wooden or plastic point turner with a blunt, rounded tip is the best tool for turning corners. Alternative household tools include chopsticks, the non-pointed end of knitting needles, or wooden spoon handles. Never use scissors, pins, or seam rippers, which can pierce the fabric.
How close should you trim corners? Trim corners to 1/8 inch (3mm) from the stitching for most woven fabrics. For heavyweight or non-fraying fabrics, trim as close as 1/16 inch. For fabrics that fray easily, stay at 3/16 inch. Always cut diagonally across the corner point at a 45-degree angle.
Can you sew corners with a serger? No, sergers cannot sew sharp 90-degree corners because the cutting blade and continuous stitch formation make pivoting impossible. Sew corners on a regular sewing machine, then serge the straight edges if desired. Sergers work only for rounded corners on casual projects.
Why are my corners still rounded after trimming? Corners remain rounded when the seam allowances aren’t trimmed close enough at the corner point or when the layers aren’t graded to different widths. Trim the very tip of the corner diagonally to 1/8 inch, and cut the two seam allowances to different widths so they nest rather than stack.
What stitch length is best for corners? Use a 2.0-2.5mm stitch length for corners in woven fabrics. This creates enough thread density to hold the corner securely without creating stiffness. For thick fabrics, increase to 2.5-3.0mm. Stitches longer than 3.0mm create gaps where fabric can shift.
How do you sew mitered corners on napkins? Press each edge under 1/4 inch twice to create a double-fold hem. Unfold the corners, fold the corner point diagonally where the pressed lines intersect, and stitch along the diagonal fold. Trim the corner, turn right-side-out, refold the hems, and topstitch around the napkin.
Do you clip or notch outside corners? Notch outside corners by cutting small triangular wedges from the seam allowance to reduce bulk. Clipping (cutting perpendicular to the stitching) is used for inside corners to allow the seam allowance to spread. Using the wrong technique creates the opposite problem.
How do you reduce bulk in thick fabric corners? Reduce bulk by grading the seam allowances to different widths (one at 1/8 inch, one at 3/16 inch), trimming the corner point to 1/16 inch, and pressing the seam allowances open before turning. Use a smaller seam allowance (3/8 inch) for the entire project if possible.
What causes puckering at corners? Puckering at corners is caused by pulling or stretching the fabric while pivoting, using thread tension that’s too tight, or using a stitch length that’s too short (below 1.5mm). Slow down at corners, check your tension settings, and use a 2.0-2.5mm stitch length.
Should you press corners before turning? Yes, pressing seam allowances open at corners before turning right-side-out helps distribute bulk and makes it easier to achieve sharp points. Press from the wrong side first, then turn and press again from the right side to set the corner shape.
Conclusion
Sharp corners transform homemade projects from amateur to professional-looking. The technique comes down to three non-negotiable steps: using the right stitch length (2.0-2.5mm for most fabrics), trimming seam allowances aggressively at the corner point (to 1/8 inch or closer), and turning corners with a blunt tool rather than sharp implements. Master these fundamentals, and every corner you sew will turn out crisp and clean.
Your next steps:
- Practice on scraps: Sew 5-10 practice corners using fabric similar to your project before starting
- Gather the right tools: Invest in a point turner ($3-8) and sharp fabric scissors
- Test your trimming: Sew a corner, trim it, turn it, and assess, adjust your trimming distance based on results
- Start with simple projects: Napkins, pillowcases, and simple tote bags are excellent for practicing corner techniques
- Document what works: Keep notes on trimming distances and techniques that work for different fabrics in your collection
Remember that different fabrics require different approaches. What works perfectly for quilting cotton may not work for denim or silk. Build your corner-sewing skills gradually, testing techniques on scraps before committing to your final project. With practice, sewing sharp corners will become second nature, and you’ll wonder why they ever seemed difficult.
For more foundational sewing techniques and troubleshooting help, explore our beginner sewing tips and fabric techniques guides.


