Quick Answer: Oiling a sewing machine involves applying a few drops of specialized sewing machine oil to metal-on-metal contact points like the bobbin case, hook race, needle bar, and presser bar after cleaning away lint and dust. Most mechanical machines need oiling every 8-10 hours of sewing time, while many modern computerized machines are self-lubricating and require minimal or no manual oiling.
Key Takeaways
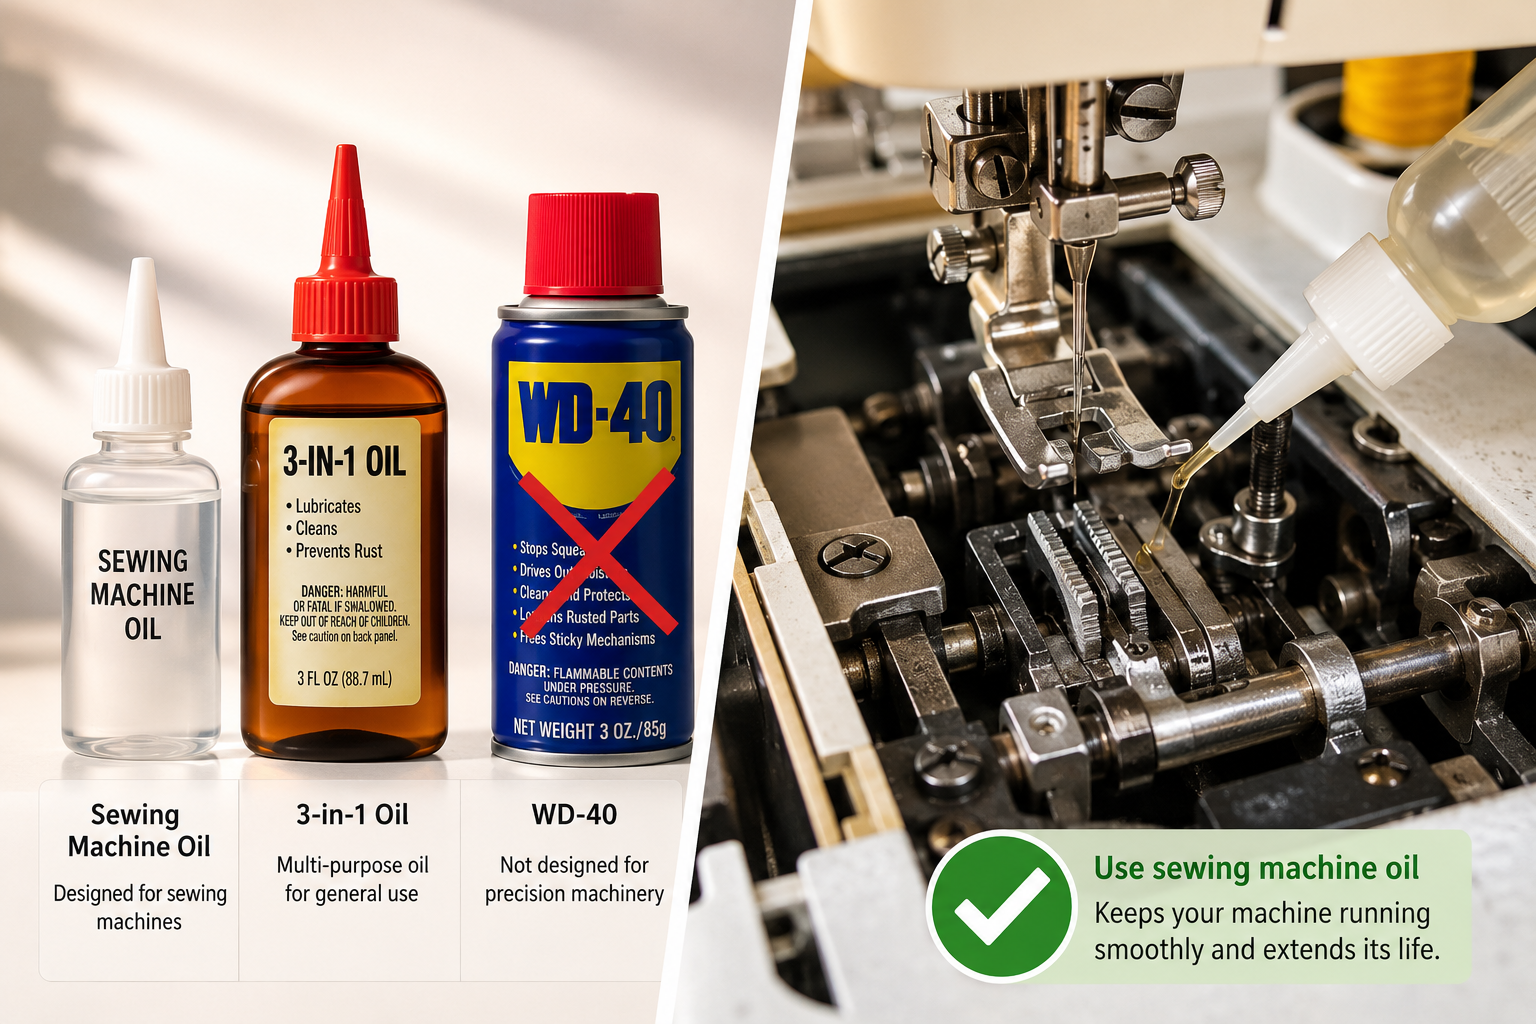
- Use only sewing machine oil, never WD-40, 3-in-1 oil, or cooking oils, which can gum up mechanisms
- Oil every 8-10 hours of sewing time for mechanical machines, or monthly if you sew frequently
- Target metal-on-metal contact points in the bobbin area, hook race, needle bar, and presser bar mechanism
- Clean before oiling, lint and dust mixed with oil create sticky buildup that damages parts
- Computerized machines often don't need oiling, check your manual as many have sealed, self-lubricating systems
- Signs you need to oil: squeaking sounds, stiff handwheel, skipped stitches, or sluggish performance
- Two drops per point is enough, over-oiling attracts dust and can stain fabric
- Run the machine after oiling on scrap fabric to distribute oil and absorb excess

What Kind of Oil Do You Use for a Sewing Machine
Sewing machine oil is a clear, highly refined mineral oil specifically formulated to lubricate the fast-moving metal parts in sewing machines without leaving residue or gumming up over time. This specialized oil has a very low viscosity, allowing it to penetrate tight spaces and coat moving parts with a thin protective film.
Why specialized oil matters:
- No additives or detergents that can damage plastic gears or rubber belts
- Won't evaporate quickly like lighter oils, providing long-lasting lubrication
- Crystal clear so it won't stain fabric if a tiny amount transfers to your project
- Prevents rust on metal components while reducing friction
You can find sewing machine oil at fabric stores, sewing machine dealers, and online retailers. Popular brands include Singer, Dritz, Zoom Spout, and Liberty Oil. A small 4-ounce bottle typically costs between $5-10 and lasts for years since you only use a few drops at a time.
Choose oil with a precision applicator tip, the long, narrow spout lets you target specific points without over-applying or making a mess.
Can I Use WD-40 on My Sewing Machine Instead of Sewing Machine Oil
No, never use WD-40 on your sewing machine. WD-40 is a solvent and water-displacement spray, not a lubricant, and it will eventually evaporate and leave behind a sticky residue that attracts lint and can freeze up your machine's moving parts.
Why WD-40 damages sewing machines:
- It's a degreaser that strips away existing lubrication rather than adding it
- Evaporates quickly, leaving parts dry and vulnerable to wear
- Contains additives that can deteriorate plastic gears and rubber components
- Attracts dust and lint as it breaks down, creating gummy buildup
The same warning applies to other household oils. 3-in-1 oil contains detergents and is too thick for sewing machine mechanisms. Cooking oils (vegetable, olive, coconut) will turn rancid, create sticky buildup, and can permanently damage your machine. Motor oil is far too heavy and will gum up delicate parts.
Stick with oil labeled specifically for sewing machines. If you're in a pinch and absolutely need to sew before you can get proper oil, a single drop of mineral oil (the kind sold as a laxative at pharmacies) is a safer temporary substitute than any of the alternatives above, though it's not ideal for long-term use.
Where Do You Put Oil on a Sewing Machine
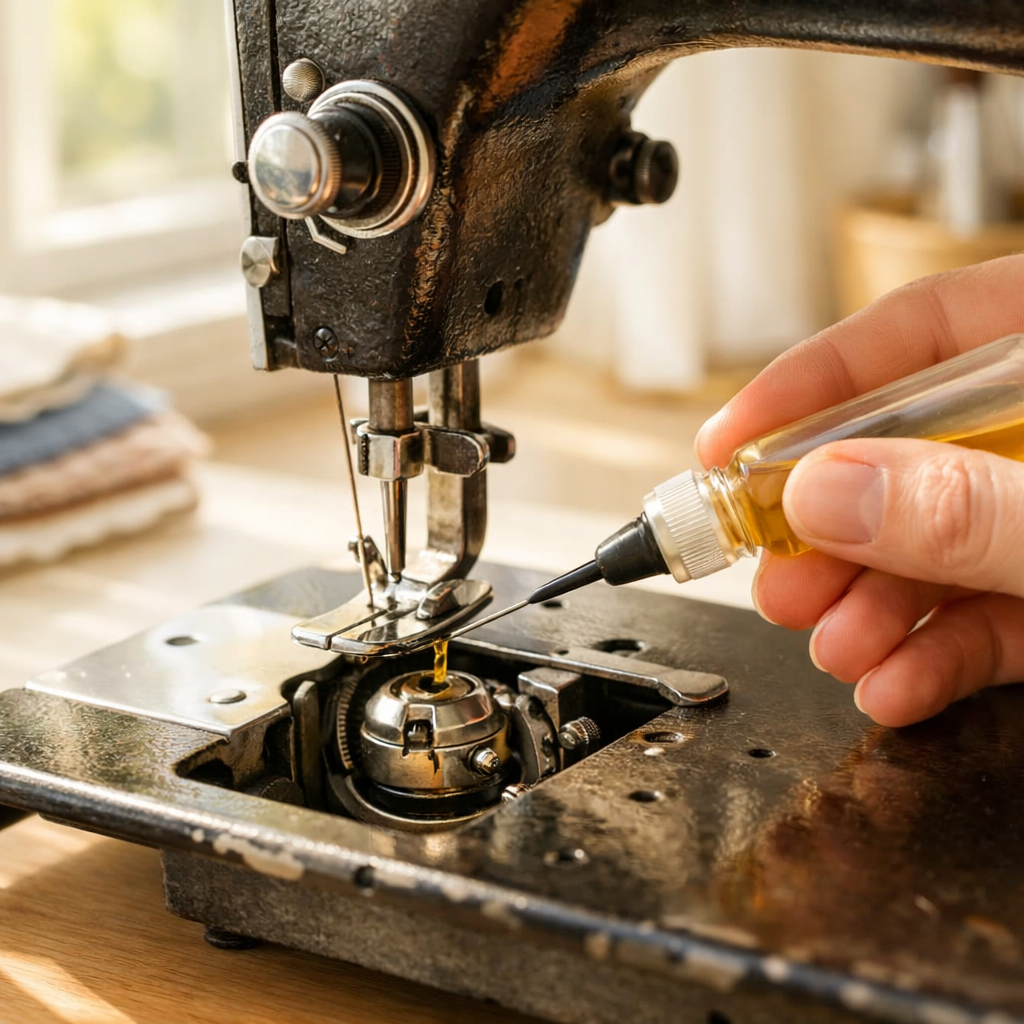
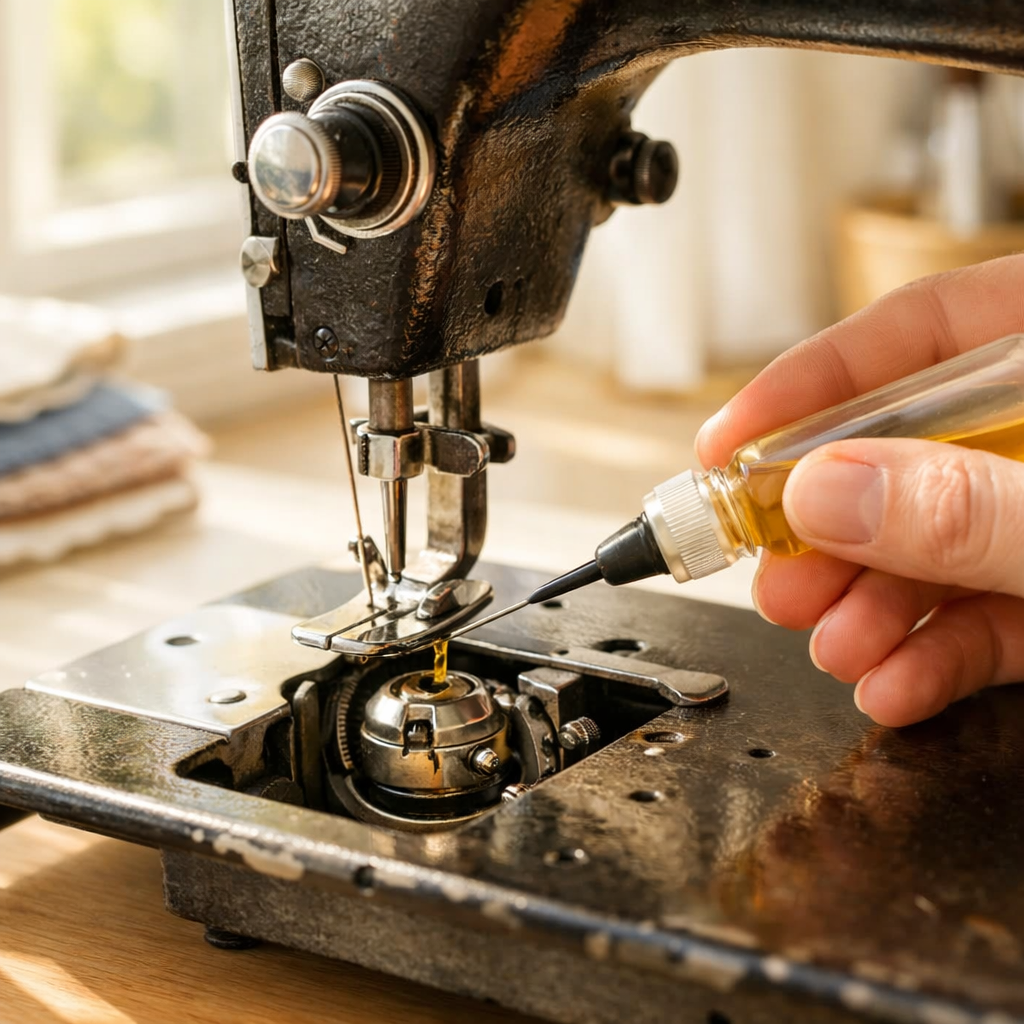
Apply oil to metal-on-metal contact points where parts move against each other, focusing primarily on the bobbin area, hook race, needle bar, and presser bar mechanism. These high-friction zones need regular lubrication to prevent wear and ensure smooth operation.
Primary oiling points (found on most mechanical machines):
- Bobbin case area, remove the bobbin case and apply 1-2 drops where the hook race (the circular track) rotates
- Hook race track, the metal ring that the hook travels around as it forms stitches
- Needle bar, the vertical shaft that moves the needle up and down (oil where it enters the machine body)
- Presser bar, the mechanism that raises and lowers the presser foot
- Feed dog mechanism, gears and levers under the throat plate that move the feed dogs
How to locate oiling points:
Your machine's manual will have a diagram showing exact oiling locations. If you've lost your manual, search "[your machine brand and model] manual PDF" online, most manufacturers provide free downloads. Look for any point where you can see metal parts moving against each other when you turn the handwheel.
General rule: If you can see a metal shaft moving in a metal housing, it probably needs a drop of oil. Apply oil sparingly, one or two drops per location is sufficient. After oiling, manually turn the handwheel several complete rotations to distribute the oil, then run the machine at medium speed on scrap fabric for a minute to work the oil into all the moving parts and absorb any excess.
How to Clean a Sewing Machine Before Oiling
Remove all lint, dust, and thread fragments from the bobbin area, feed dogs, and tension discs before applying oil, because oiling over debris creates a sticky paste that can jam mechanisms and damage parts. Cleaning first ensures the oil can reach metal surfaces and do its job properly.
Step-by-step cleaning process:
- Unplug the machine for safety
- Remove the needle, presser foot, and throat plate to access the feed dogs and bobbin area
- Take out the bobbin case and set it aside
- Use a small brush (a clean mascara wand, dedicated machine brush, or soft paintbrush) to sweep lint from the bobbin case area, hook race, and feed dogs
- Blow out remaining dust with canned air or a small handheld vacuum on low power (hold it an inch away to avoid damaging parts)
- Wipe visible surfaces with a soft, lint-free cloth, slightly dampened with rubbing alcohol if there's sticky residue
- Clean the tension discs by raising the presser foot and running dental floss or a folded piece of muslin between them
How often to clean: Clean the bobbin area every time you change a bobbin or finish a project, and do a deeper clean (including removing the throat plate) every 8-10 hours of sewing time or whenever you notice lint buildup.
Common mistake: Using compressed air too close to the machine can blow lint deeper into mechanisms. Hold the can at least 2-3 inches away and use short bursts rather than continuous spray.
How Often Should I Oil My Sewing Machine
Oil mechanical sewing machines every 8-10 hours of actual sewing time, which translates to roughly once a month for regular sewers or after completing 2-3 large projects. If you sew infrequently (less than once a month), oil your machine every 3-4 months to prevent parts from drying out.
Factors that affect oiling frequency:
- Sewing intensity, quilting and heavy-duty sewing generate more friction than occasional garment repairs
- Fabric type, fleece, flannel, and other lint-producing materials require more frequent cleaning and oiling
- Machine age, vintage machines often need more frequent lubrication than newer models
- Environment, dusty or humid conditions may require more frequent maintenance
Create a simple tracking system: Keep a small notebook near your machine and jot down the date each time you oil it. Some sewers track hours by noting when they start and finish projects. Others use a simpler rule: oil after every three full bobbins of thread.
Signs you've waited too long between oiling:
- Squeaking or grinding sounds during operation
- Stiff or hard-to-turn handwheel
- Skipped stitches or uneven stitch formation
- Sluggish needle movement
- Increased vibration or noise
If you notice any of these symptoms, clean and oil your machine immediately. Running a dry machine causes accelerated wear on metal parts and can lead to expensive repairs.
Do All Sewing Machines Need to Be Oiled
Not all sewing machines require manual oiling. Many modern computerized and electronic machines have sealed, self-lubricating systems that never need oil, while most mechanical and vintage machines require regular oiling to function properly.
Machines that typically need regular oiling:
- Mechanical machines (fully manual or with basic electric motors)
- Vintage machines from any era
- Industrial sewing machines
- Most machines manufactured before 2000
Machines that often don't need oiling:
- Computerized machines with sealed bearings
- Many machines with plastic internal gears
- Sergers and overlock machines with self-lubricating systems (though some models still require it)
- Machines explicitly labeled "maintenance-free" or "self-lubricating" in their manuals
How to know for sure: Check your owner's manual, it will explicitly state whether your machine needs oiling and where to apply it. If the manual says "no oiling required" or "self-lubricating," don't add oil. Adding oil to a machine designed to run dry can attract dust and cause problems.
Special case, Brother machines: Many Brother sewing machines manufactured after 2010 have self-lubricating systems and should not be oiled unless the manual specifically instructs you to do so. Adding oil to these machines can void your warranty.
Do Computerized Sewing Machines Need Oiling
Most computerized sewing machines manufactured after 2010 have self-lubricating systems with sealed bearings that don't require manual oiling, though some models still have specific points that need occasional lubrication. Always consult your specific machine's manual before applying oil.
Why newer machines often don't need oil:
- Sealed bearings are pre-lubricated at the factory and designed to last the machine's lifetime
- Plastic gears in some mechanisms don't require lubrication and can be damaged by oil
- Synthetic lubricants applied during manufacturing last much longer than traditional oil
- Computer components can be damaged if oil migrates into electronic areas
When computerized machines DO need oil:
Some computerized machines still have metal-on-metal contact points in the bobbin area or needle bar that require occasional oiling. Your manual will specify these locations and recommend a maintenance schedule. If your computerized machine needs oiling, it's typically less frequent than mechanical machines, perhaps every 20-30 hours of sewing time.
If you've lost your manual: Contact the manufacturer's customer service or search their website for your model number. Never assume a computerized machine needs oil without confirmation, as adding unnecessary oil can create problems.
What Happens If You Don't Oil Your Sewing Machine
Running a sewing machine that requires oiling without proper lubrication causes increased friction between metal parts, leading to excessive wear, overheating, loud operation, poor stitch quality, and eventually mechanical failure that requires professional repair or part replacement.
Progressive damage from lack of oiling:
Early stage (after a few months):
- Squeaking or clicking sounds
- Slightly stiff handwheel
- Minor increase in operating noise
Mid-stage (after 6-12 months):
- Skipped stitches and tension problems
- Difficulty penetrating thick fabrics
- Noticeably harder to turn handwheel
- Machine running hot during use
Advanced stage (after 1-2 years):
- Grinding or scraping sounds
- Frozen or seized parts
- Broken needles from uneven movement
- Complete mechanical failure requiring professional service
The cost of neglect: A $10 bottle of sewing machine oil and 10 minutes of maintenance every month can prevent a $150-300 repair bill. Metal parts grinding against each other without lubrication create microscopic grooves and flat spots that eventually prevent smooth operation.
Good news: If you catch the problem early (at the squeaking stage), cleaning and oiling will usually restore full function. Even machines that have been neglected for years can often be revived with thorough cleaning, proper oiling, and a few test runs.
How to Oil a Brother Sewing Machine
Most Brother sewing machines manufactured after 2010 are self-lubricating and should not be oiled unless your specific model's manual instructs otherwise, as these machines have sealed mechanisms that can be damaged by adding oil. For older Brother mechanical models that do require oiling, focus on the bobbin case area and hook race.
For self-lubricating Brother machines:
- Check your manual first, it will explicitly state "no oiling required" if your machine is self-lubricating
- Focus on cleaning instead, remove lint from the bobbin area, feed dogs, and tension discs regularly
- Don't add oil even if you hear slight noise, this is normal for these machines
For older Brother machines that require oiling:
- Remove the bobbin case and clean the area thoroughly
- Apply 1-2 drops of sewing machine oil to the hook race (the circular track)
- Oil the needle bar where it enters the machine body
- Replace the bobbin case and run the machine on scrap fabric
Common Brother models and their oiling needs:
- CS6000i, XM2701, XR3774, self-lubricating, no oil needed
- LS-2125, VX-1120, require regular oiling
- Vintage Brother machines (pre-2000), require regular oiling
If you're unsure about your specific model, visit the Brother support website and enter your model number to download the manual, or contact Brother customer service. Adding oil to a self-lubricating machine can void your warranty and create maintenance problems.

Liberty Oil comes in a 4-fluid-oz bottle with a stainless steel needle tip dispenser. Because it is premium quality 100% clear non-staning oil it easily outperforms all other oils on the market.

KEEPS MACHINES RUNNING SMOOTH - Crystal-clear, non-staining light oil (ISO VG-10) made from highly refined mineral oil; odorless, resists gumming; quiets hook/bobbin, shafts & bearings.
How to Oil a Singer Sewing Machine
Singer sewing machines vary widely in their oiling requirements depending on the model and age, with vintage and mechanical Singers requiring regular oiling at multiple points while some newer electronic models are self-lubricating. The classic Singer oiling points include the bobbin case, hook race, needle bar, presser bar, and the mechanisms visible when you open the front or side panel.
For mechanical Singer machines (most models before 2000):
- Clean the machine thoroughly before oiling
- Remove the bobbin case and apply 1-2 drops of oil to the hook race
- Oil the needle bar where it moves up and down
- Apply oil to the presser bar mechanism
- Open the front or side panel (if your model has one) and oil visible moving parts
- Check the manual for additional points, some Singers have 10-15 oiling locations
Popular Singer models and oiling needs:
- Vintage Featherweights (221, 222), require regular oiling at multiple points
- Heavy Duty 4423, 4452, require periodic oiling (check manual for specific points)
- Quantum Stylist 9985, self-lubricating, minimal oiling needed
- Simple 3232, requires basic oiling of bobbin area
Special note for vintage Singers: Machines from the 1950s-1970s often have oil holes marked with red felt circles or small metal caps. These are access points for oiling internal mechanisms. Remove the caps, add one drop of oil, and replace the caps.
How much oil: Vintage Singers can handle slightly more oil than modern machines, but still use restraint, 2-3 drops per location maximum. After oiling, run the machine for several minutes to distribute the oil throughout the mechanisms.

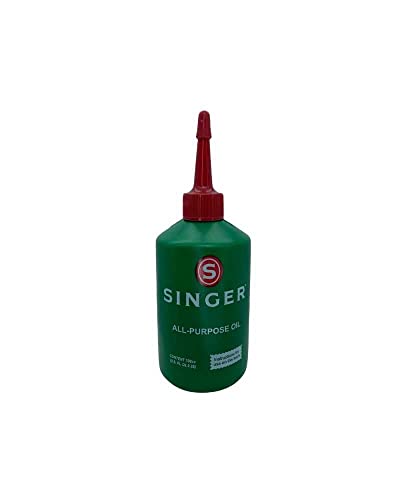
All-purpose solution for sewists of all levels, this universal sewing machine oil simplifies maintenance so you can focus solely on your creative projects.

Since 1894 this versatile multi-purpose drip oil has been a trusted tool used by professional tradesmen and do-it-yourselfers

✅Clear & Residue‑Free: Made with ISO VG‑10 light machine oil, this premium sewing machine oil is crystal clear, won’t stain fabric, and leaves no residue. Helps reduce sticking and annoying humming noise, keeping the needle bar, bobbin area and bearings smooth and like new for longer.
Signs Your Sewing Machine Needs Oiling
A sewing machine that needs oiling will produce squeaking or clicking sounds during operation, have a stiff or resistant handwheel, create uneven or skipped stitches, or feel sluggish when running. These symptoms indicate increased friction between metal parts that need lubrication.
Audio signs:
- Squeaking, high-pitched sound when the machine runs
- Clicking or ticking, rhythmic sounds that weren't present before
- Grinding, rough, scraping sounds (urgent, oil immediately)
- Louder operation, general increase in noise level
Mechanical signs:
- Stiff handwheel, requires more force to turn than usual
- Resistance, feels like the machine is working harder
- Vibration, increased shaking during operation
- Heat, machine body feels warmer than normal after use
Stitch quality signs:
- Skipped stitches, gaps in the stitch line
- Uneven stitches, inconsistent length or tension
- Thread breaking, more frequent than usual
- Difficulty with thick fabrics, struggles with materials it previously handled easily
Timing matters: Don't wait until you hear grinding sounds. Squeaking is your early warning system. As soon as you notice any change in how your machine sounds or feels, clean and oil it. Catching the problem early prevents damage and keeps your machine running smoothly for decades.
Can You Over Oil a Sewing Machine
Yes, over-oiling a sewing machine causes excess oil to attract lint and dust, creating sticky buildup that can gum up mechanisms, and may result in oil stains on fabric if the excess transfers to your projects. One or two drops per oiling point is sufficient, more oil doesn't provide better lubrication.
Problems caused by over-oiling:
- Lint magnet, excess oil on surfaces attracts and holds dust and thread fragments
- Sticky buildup, oil mixed with lint creates a paste that can jam moving parts
- Fabric stains, oil can transfer from the bobbin area or needle bar to your sewing projects
- Dripping, excess oil can pool in the bobbin case or drip onto your work surface
- Wasted product, more oil doesn't mean better protection
How to fix over-oiling:
- Wipe away visible excess oil with a lint-free cloth
- Run the machine at medium speed on scrap fabric for 2-3 minutes
- Change to fresh scrap fabric and run for another minute
- Check the scrap for oil spots, continue until fabric stays clean
- Clean the bobbin area if you see oil pooling there
The right amount: When you apply oil, you should see a small bead form at the point of contact. That's enough. The oil will spread as the parts move. If oil is dripping, running down surfaces, or pooling anywhere, you've used too much.
Prevention tip: Use a precision oiler with a needle-point tip rather than a bottle with a wide opening. The narrow applicator gives you much better control and makes it nearly impossible to over-apply.
Sewing Machine Oil vs 3 in 1 Oil
Sewing machine oil is a clear, highly refined mineral oil with no additives, while 3-in-1 oil contains detergents and rust inhibitors that can damage sewing machine parts over time. Sewing machine oil is thinner, doesn't evaporate as quickly, and won't leave residue that attracts lint.
Key differences:
| Feature | Sewing Machine Oil | 3-in-1 Oil |
|---|---|---|
| Viscosity | Very thin, penetrates easily | Thicker, may not reach tight spaces |
| Additives | None, pure mineral oil | Contains detergents and rust inhibitors |
| Residue | Leaves no buildup | Can leave sticky residue over time |
| Color | Crystal clear | Slightly amber or yellow |
| Fabric safety | Won't stain fabric | May stain if it transfers to fabric |
| Cost | $5-10 for 4 oz | $4-8 for 4 oz |
Why 3-in-1 oil is problematic for sewing machines:
The detergents in 3-in-1 oil are designed for general household use (door hinges, tools, bicycles) where parts don't move as quickly or precisely as sewing machine mechanisms. These additives can:
- Deteriorate plastic gears and rubber belts
- Leave residue that attracts lint
- Gum up delicate timing mechanisms
- Cause inconsistent lubrication
Bottom line: The small price difference between 3-in-1 oil and proper sewing machine oil isn't worth the risk. A bottle of sewing machine oil lasts for years and ensures your machine gets the right lubrication without potential damage.
Where to Buy Sewing Machine Oil Near Me
Purchase sewing machine oil at fabric and craft stores (Joann, Michaels, Hobby Lobby), sewing machine dealers, big-box retailers with sewing departments (Walmart, Target), and online through Amazon, sewing supply websites, or directly from machine manufacturers. A 4-ounce bottle costs between $5-10 and lasts for years.
Local shopping options:
- Fabric stores, Joann Fabrics, local quilt shops, and sewing centers always stock sewing machine oil
- Craft stores, Michaels and Hobby Lobby carry it in their sewing sections
- Sewing machine dealers, authorized Singer, Brother, Janome dealers sell brand-specific and generic oils
- Big-box stores, Walmart and Target stock basic sewing supplies including oil
- Hardware stores, some carry sewing machine oil in the lubricants section
Online options:
- Amazon, widest selection, often with same-day or next-day delivery
- Manufacturer websites, Singer, Brother, and other brands sell their own formulations
- Specialty sewing sites, Wawak, Nancy's Notions, and similar retailers
- eBay, good for bulk purchases or vintage oil bottles
What to look for: Choose oil with a precision applicator tip (long, narrow spout) for easy application. Popular brands include Singer, Dritz, Zoom Spout, Liberty Oil, and Lily White. Generic sewing machine oil works just as well as brand-name versions, they're all highly refined mineral oil.
In a pinch: If you need to sew immediately and can't get to a store, pure mineral oil (USP grade, sold as a laxative at pharmacies) is a safe temporary substitute. It's not ideal for long-term use but won't damage your machine like WD-40 or other inappropriate oils.

Precision Oiler for Sewing and Quilting Machines: Perfect for precise oiling of the bobbin race and machine components.

Material: Iron, plastic. Suitable for domestic, industrial sewing machines , bicycles, household appliances, power tools, tool refueling.

For precision oiling in tight and hard to reach places and machines
FAQ
How do I know if my sewing machine needs oil?
Your machine needs oil if it squeaks, has a stiff handwheel, produces uneven stitches, or sounds louder than usual. Most mechanical machines need oiling every 8-10 hours of sewing time, while many computerized machines are self-lubricating and don't require manual oiling.
Can I use olive oil or vegetable oil on my sewing machine?
Never use cooking oils on your sewing machine. Olive oil, vegetable oil, and other food-grade oils will turn rancid, create sticky buildup, attract lint, and can permanently damage your machine's mechanisms. Only use oil specifically labeled for sewing machines.
How many drops of oil should I use?
Use 1-2 drops per oiling point. More oil doesn't provide better lubrication and can attract dust or stain fabric. After applying oil, turn the handwheel several times and run the machine on scrap fabric to distribute the oil evenly.
What if I accidentally used WD-40 on my sewing machine?
Clean the affected areas immediately with rubbing alcohol on a lint-free cloth to remove as much WD-40 as possible, then apply proper sewing machine oil. If the machine was running with WD-40, take it to a professional for thorough cleaning to prevent long-term damage.
Do I need to oil my machine if I rarely use it?
Yes, machines that sit unused for months can develop dry, stiff parts. Oil your machine every 3-4 months even if you're not sewing regularly to keep parts lubricated and prevent rust. Run it for a few minutes after oiling to distribute the oil.
Can I oil my serger the same way as my sewing machine?
Some sergers require oiling while others are self-lubricating. Check your serger's manual for specific instructions, as the oiling points and frequency differ from regular sewing machines. Never assume a serger needs oil without confirming in the manual.
Should I oil my machine before or after cleaning it?
Always clean before oiling. Applying oil over lint and dust creates a sticky paste that can jam mechanisms. Remove all debris first, then apply oil to clean metal surfaces so it can properly lubricate moving parts.
How long does sewing machine oil last?
Properly stored sewing machine oil lasts indefinitely. Keep the bottle tightly capped and store it at room temperature away from direct sunlight. If the oil becomes cloudy or develops sediment, replace it, though this rarely happens with quality oil.
Is synthetic sewing machine oil better than mineral oil?
Both work well for most machines. Synthetic oil may last slightly longer between applications and performs better in extreme temperatures, but standard mineral-based sewing machine oil is perfectly adequate for home sewing machines and costs less.
What should I do if oil gets on my fabric?
Treat oil stains immediately with dish soap or a degreaser before washing. Blot (don't rub) the stain, apply soap directly to the spot, let it sit for 10 minutes, then wash in the hottest water safe for the fabric. Don't put the item in the dryer until the stain is completely gone.
Can I use gun oil or clipper oil on my sewing machine?
While these oils are similar to sewing machine oil, they may contain additives not suitable for sewing machines. Stick with oil specifically labeled for sewing machines to avoid potential problems with plastic parts or fabric staining.
How do I oil a vintage treadle sewing machine?
Vintage treadle machines typically have multiple oil holes marked with red felt or metal caps. Remove the caps, apply 2-3 drops of oil to each hole, replace the caps, and operate the treadle for several minutes to distribute oil throughout the mechanisms. These machines can handle slightly more oil than modern machines.
Conclusion
Regular oiling keeps your sewing machine running smoothly, prevents costly repairs, and extends its lifespan by decades. The process takes just 10 minutes every month or so, requires only a small bottle of specialized oil, and makes an enormous difference in how your machine performs.
Your action plan:
- Check your manual to confirm whether your machine needs oiling and locate the specific oiling points
- Purchase proper sewing machine oil, never substitute with WD-40, 3-in-1 oil, or household products
- Clean thoroughly before oiling to remove lint and dust that can mix with oil and create problems
- Apply 1-2 drops per point, focus on the bobbin area, hook race, needle bar, and presser bar
- Run the machine on scrap fabric after oiling to distribute the oil and absorb any excess
- Set a reminder to oil every 8-10 hours of sewing time or monthly if you sew frequently
The squeaking, stiff, or sluggish machine you've been struggling with can often be completely restored with proper cleaning and oiling. Start with this basic maintenance today, and your machine will reward you with smooth, quiet operation and beautiful stitches for years to come. Whether you're working on a vintage Singer from your grandmother's attic or a modern Brother from last year, taking care of the moving parts ensures your machine is always ready when inspiration strikes.