


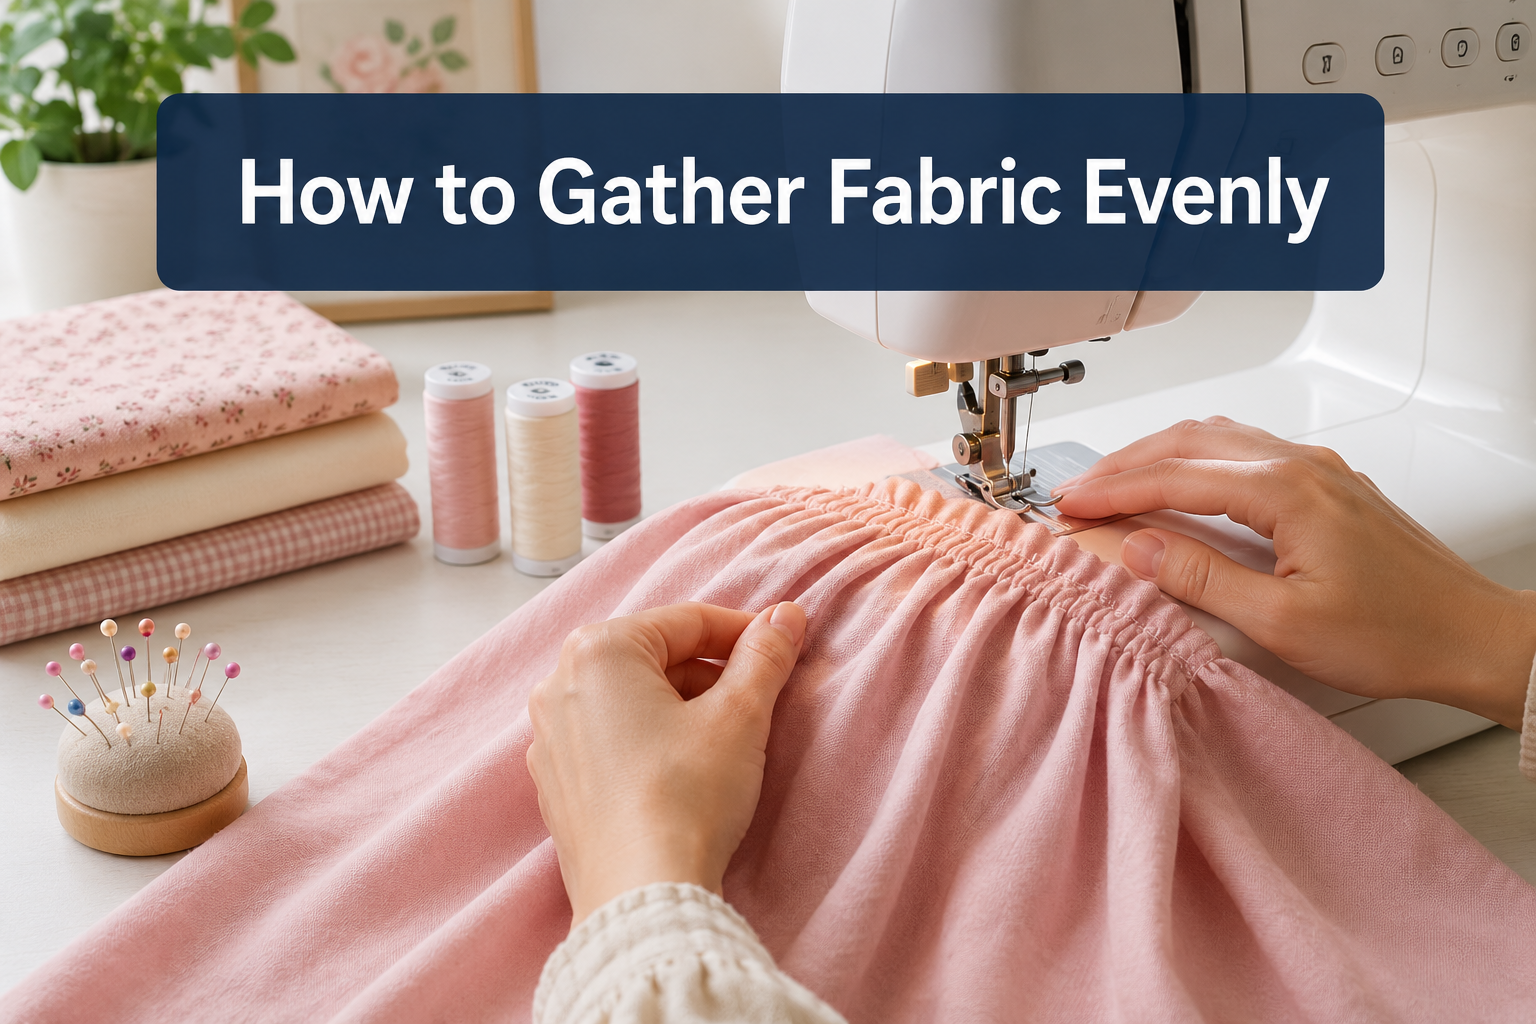
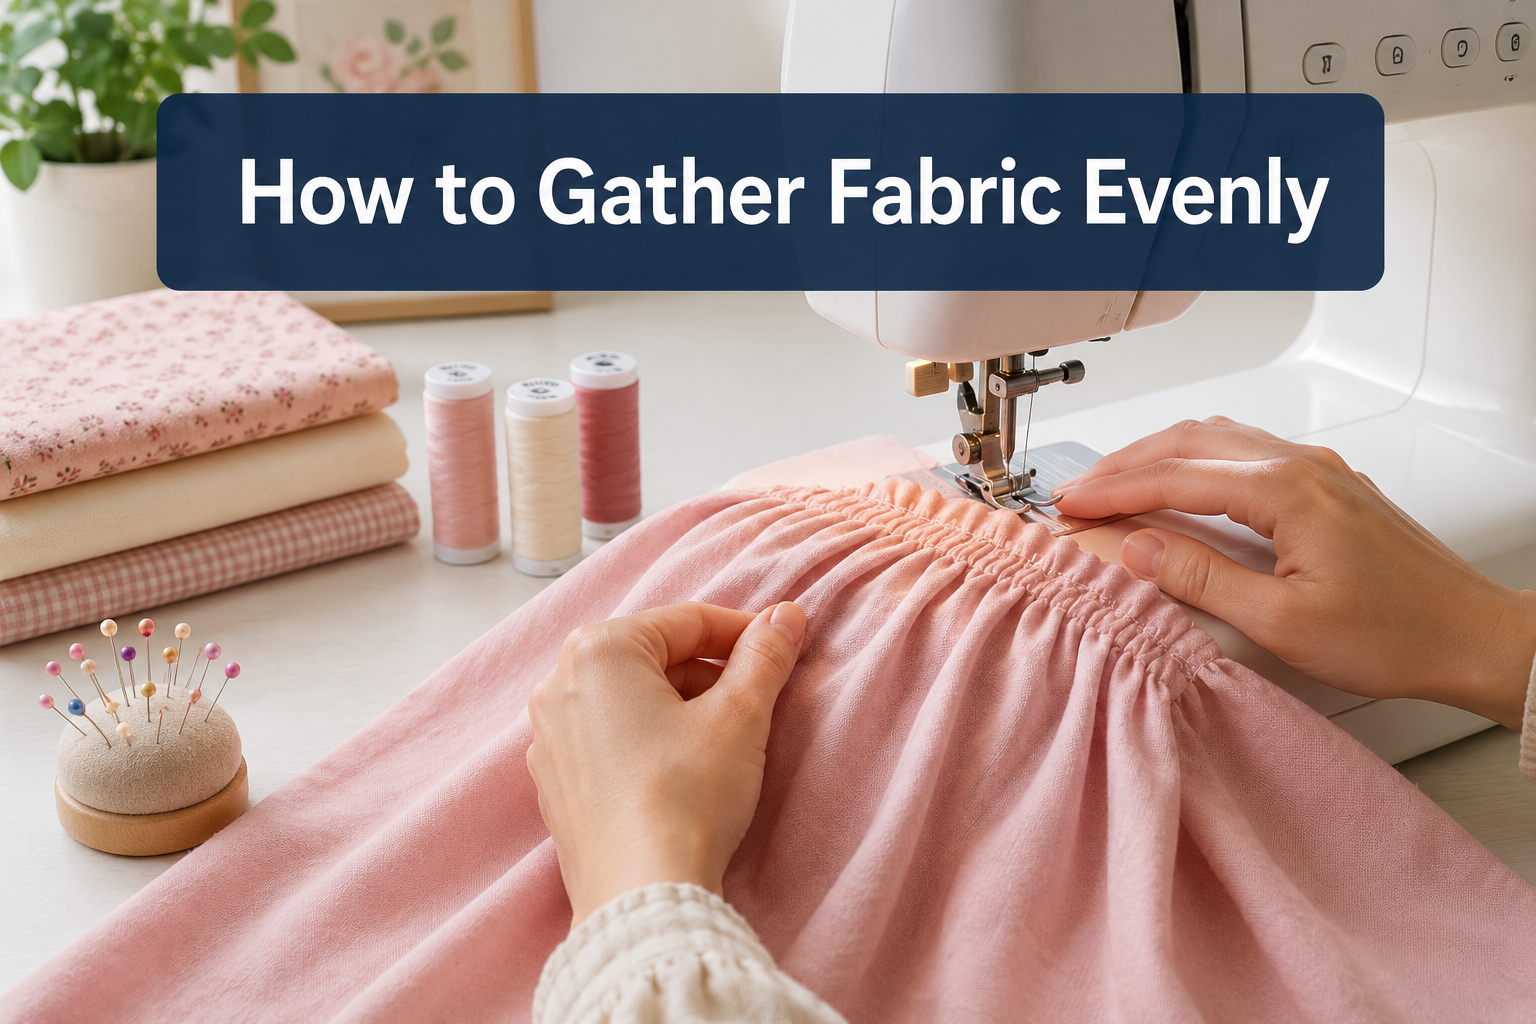
Gathering fabric evenly requires the right stitch length (typically 4-5mm), consistent tension, and a methodical approach to distributing fullness. Whether you’re using a basting stitch, gathering foot, or hand-sewing method, the key is to pull threads gradually and anchor your gathers at regular intervals to prevent bunching. Most uneven gathers result from pulling too quickly or using thread that’s too weak for the fabric weight.
Key Takeaways
- Stitch length matters most: Use 4-5mm for machine gathering and leave long thread tails (at least 6 inches) for easy pulling
- Two rows are better than one: Parallel basting stitches 1/4 inch apart distribute tension evenly and prevent thread breakage
- Pull from both ends: Work from each side toward the center to avoid twisting and ensure balanced gathers
- Pin as you go: Anchor gathers every 2-3 inches to lock in even distribution before final stitching
- Fabric ratio rule: Plan for 2:1 or 3:1 fullness (2-3 inches of fabric gathers to 1 inch) depending on desired volume
- Gathering feet save time: They create automatic ruffles but offer less control than manual basting for precise projects
- Thick fabrics need adjustments: Denim and canvas require longer stitches (5-6mm) and stronger thread to prevent breakage
- Test first: Always practice on fabric scraps to dial in the right tension and stitch length for your specific material
What Does Gathering Fabric Mean in Sewing?
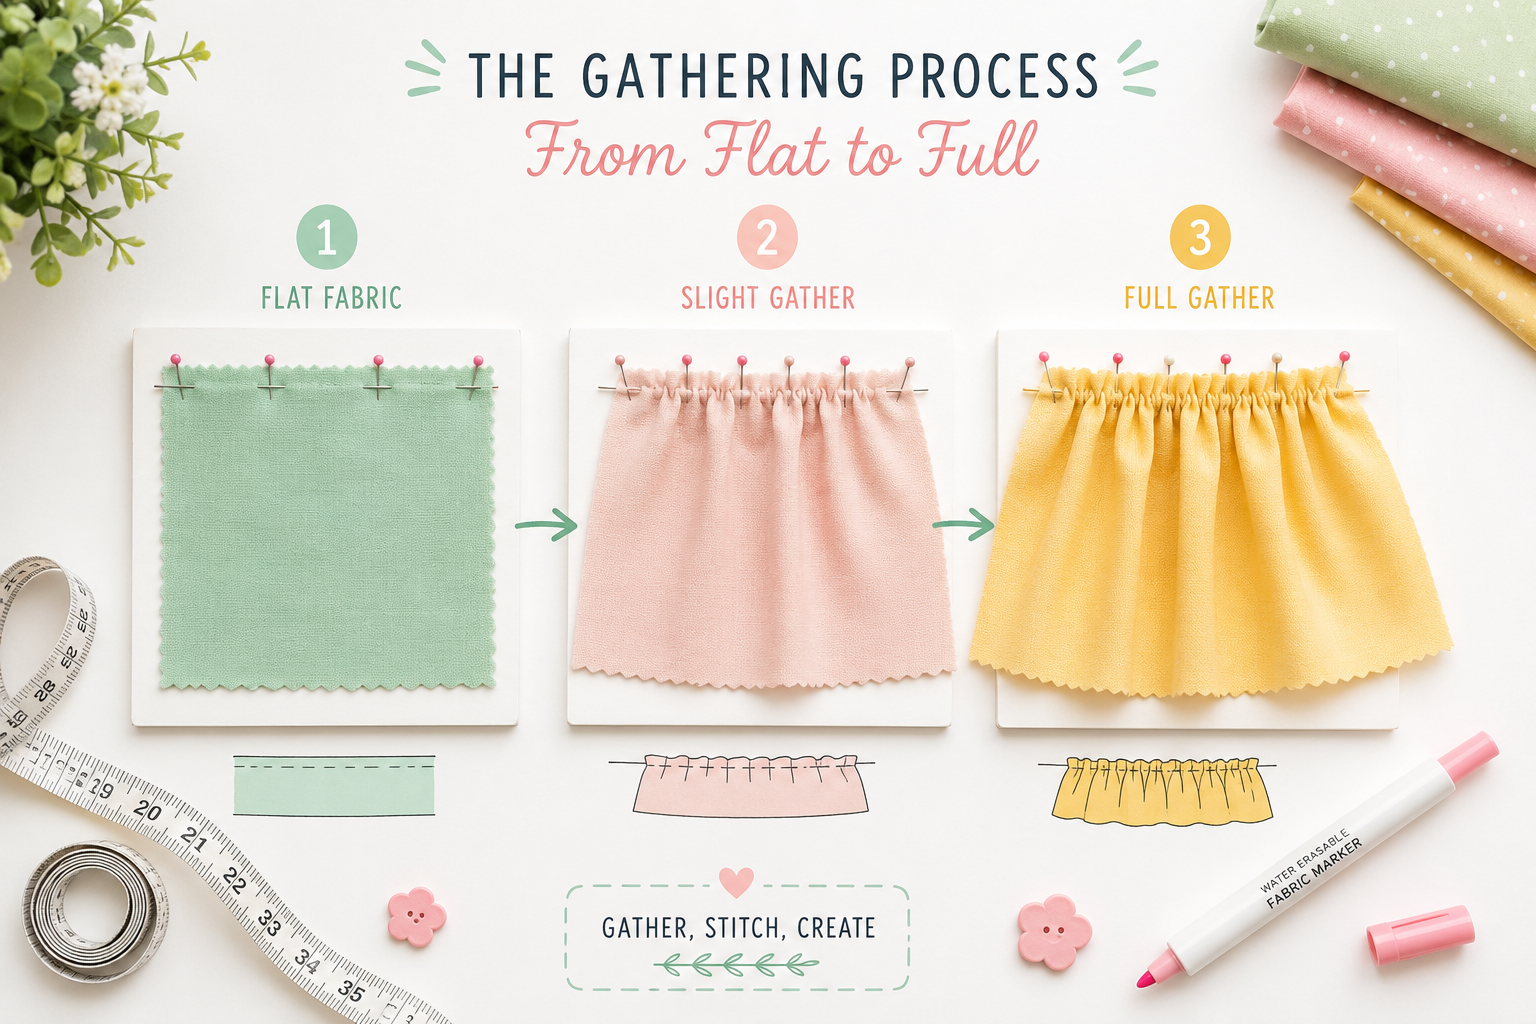
Gathering fabric is a technique that creates controlled fullness by pulling threads to compress fabric along a seam line, forming soft ruffles or pleats. This method adds volume and decorative texture to garments like skirts, sleeves, and curtains without cutting or pleating the fabric manually.
The process works by sewing one or two rows of long, loose stitches through the fabric, then pulling the bobbin or needle threads to scrunch the material into evenly spaced folds. The gathered edge is then sewn to a flat piece of fabric (like attaching a ruffled skirt to a waistband).
Common uses for gathering include:
- Attaching full skirts to fitted waistbands
- Creating puffed sleeves on blouses and dresses
- Adding ruffles to curtains, pillows, and home décor
- Making tiered dresses and peasant tops
- Constructing smocked bodices and elastic casings
The technique differs from pleating because gathers are random and soft, while pleats are precise, structured folds. Gathering is faster and more forgiving for beginners, making it one of the first decorative techniques taught in sewing for beginners classes.
How to Gather Fabric for Beginners Step by Step
Start by setting your machine to the longest straight stitch (4-5mm) and slightly loosening the upper thread tension to make pulling easier. Sew two parallel rows of basting stitches within the seam allowance, leaving 6-inch thread tails at both ends, then gently pull the bobbin threads from each side while sliding the fabric toward the center until it matches your target measurement.
Detailed gathering process:
- Prepare your fabric: Mark the section to be gathered with pins or fabric chalk, typically within the 5/8-inch seam allowance
- Adjust machine settings: Set stitch length to 4-5mm and reduce upper tension by one number (if your machine is set to 4, try 3)
- Sew first basting row: Stitch 1/4 inch from the raw edge, leaving long thread tails and do not backstitch at the start or end
- Sew second row: Add a parallel line 1/4 inch below the first (1/2 inch from edge) with the same settings
- Pin the ends: Secure thread tails by wrapping them around pins in a figure-eight to prevent pulling through
- Pull gradually: Hold the fabric with one hand and gently pull both bobbin threads together from one end, sliding fabric along the threads
- Work from both sides: Pull from the opposite end to distribute gathers evenly and prevent twisting
- Measure and adjust: Stop when gathered fabric matches the flat piece it will attach to, then distribute fullness evenly by hand
- Pin and secure: Pin gathered edge to flat fabric at regular intervals, then stitch with a normal stitch length (2.5mm) between the two basting rows
- Remove basting: Carefully pull out the visible gathering stitches after the permanent seam is sewn
Common beginner mistake: Pulling too hard or too fast causes thread to break, especially on long sections. Work in 6-8 inch segments and anchor with pins before moving to the next section.
For more guidance on fabric techniques, explore our comprehensive sewing tutorials.

Transparent thread will blend with any fabric
![Selric [1500 Yards/Coated/No Unravel /22 Colors Available] Heavy Duty Bonded Nylon Threads #69 T70 Size 210D/3 for Upholstery, Leather and Other Heavy Fabric (Black)](https://m.media-amazon.com/images/I/41iTBMHEeOL._SL500_.jpg)

What Stitch Length for Gathering Fabric?
Use a stitch length of 4-5mm for most lightweight to medium-weight fabrics when gathering. This creates loose stitches that slide easily along the thread without breaking, while still providing enough grip to hold the gathers in place.
Stitch length guide by fabric weight:
| Fabric Type | Recommended Stitch Length | Notes |
|---|---|---|
| Lightweight (chiffon, voile, lawn) | 4mm | Shorter stitches prevent puckering |
| Medium-weight (cotton, linen, poplin) | 4-5mm | Standard gathering length |
| Heavy-weight (denim, canvas, upholstery) | 5-6mm | Longer stitches reduce thread stress |
| Knit fabrics | 4mm with stretch stitch | Use ballpoint needle to prevent snags |
The stitch length directly affects how easily you can pull the gathers and how much control you have over the final result. Stitches shorter than 3.5mm are too tight to slide smoothly and often break when pulled. Stitches longer than 6mm may create uneven gaps and look sloppy in the final seam.
Tension adjustment tip: Loosen your upper thread tension by 1-2 numbers when gathering. This makes the stitches easier to pull and reduces the risk of thread breakage. Just remember to return tension to normal before sewing the final seam.
If you’re experiencing thread breaking issues during gathering, check your needle condition and thread quality first.

√GREAT VALUE 30PCS HAND SEWING NEEDLES IN 6 SIZES: JekiiNova Hand Sewing Needles, contains 30 sewing needles in 6 lengths, 8x 1-1/5", 8x 1-2/5", 8x 1-3/5", 3x 1-4/5", 2x 2", 1x 1-4/5" embroidery needle, with these quality needles for sewing in different lengths, you can be comfortable in all scenarios, whether you want to do sewing or repairing, you can always find the right one in this amazing needle box. With the 2 free needle threader, you will no longer be anxious about threading needles.

SIZE:Needle 6 inch Long,3.0mm Diameter.

[PACKAGE] Our sewing upholstery needle set has 10 pieces big eye needles in 2 different thickness. There are 10cm/15cm/20cm/25cm/30cm in diameter 3mm. And there are 7.5cm/10cm/12.5cm/15cm/17.5cm in diameter 1.6mm.
How to Calculate Fabric Ratio for Gathering
Plan for a 2:1 ratio (2 inches of fabric gathers to 1 inch of finished edge) for light to moderate fullness, or 3:1 for dramatic, voluminous ruffles. Multiply your finished measurement by the ratio to determine how much fabric you need before gathering.
Calculation examples:
- Skirt waistband (moderate fullness): If your waistband measures 28 inches, cut the skirt fabric 56 inches wide (28 × 2 = 56) for a 2:1 ratio
- Ruffle sleeve (dramatic fullness): For a 10-inch armhole, cut sleeve fabric 30 inches wide (10 × 3 = 30) for a 3:1 ratio
- Curtain header (light fullness): For a 60-inch window, use 90-120 inches of fabric (60 × 1.5 to 2) for subtle gathers
Factors that affect ratio choice:
- Fabric weight: Heavier fabrics look bulky beyond 2:1; lightweight fabrics can handle 3:1 or more
- Project type: Formal garments use less fullness (1.5:1 to 2:1); costume pieces and home décor can go up to 4:1
- Seam placement: Gathers at waistlines need less fullness than decorative ruffles to avoid adding bulk
- Personal preference: Test-gather a sample to see if you prefer subtle or dramatic volume
Pro tip: Always add 1-2 inches extra to your calculation for seam allowances and adjustment room. It’s easier to gather slightly more fabric than to add length if you cut too short.
For projects involving knit fabric sewing, reduce the ratio to 1.5:1 since knits naturally stretch and add volume.

How to Gather Fabric by Hand Without a Machine
Hand-gathering uses a simple running stitch with strong thread, pulling the fabric along the thread to create gathers. This method works well for small projects, delicate fabrics, or when you don’t have access to a sewing machine.
Hand-gathering technique:
- Thread your needle: Use a long, sturdy thread (at least 24 inches) and knot one end securely
- Mark your stitching line: Draw a light chalk line 1/4 inch from the fabric edge as a guide
- Sew running stitches: Insert the needle in and out of the fabric in small, even stitches (about 1/4 inch long and 1/4 inch apart)
- Keep stitches consistent: Uniform stitch size creates even gathers; irregular stitches cause bunching
- Leave thread tail: Don’t knot the end, leave at least 6 inches of thread for pulling
- Add a second row: Sew a parallel line 1/4 inch below the first for better control
- Pull gently: Hold the fabric with one hand and pull the thread with the other, sliding fabric along the thread
- Distribute evenly: Use your fingers to spread gathers uniformly along the entire length
- Secure with pins: Pin gathered fabric to the flat piece before hand-sewing the final seam
Best thread choices for hand-gathering:
- Buttonhole or carpet thread: Extra-strong for heavy fabrics and long gathering sections
- Doubled all-purpose thread: Run thread through the needle twice for added strength
- Dental floss (unwaxed): Surprisingly effective for gathering curtains and home décor projects
Hand-gathering takes longer than machine methods but offers maximum control for delicate work like smocking, heirloom sewing, and vintage reproduction garments. It’s also quieter and more portable for sewing on the go.
Gathering Foot vs Regular Presser Foot: Which Is Better?
A gathering foot automatically creates ruffles as you sew, making it faster for long sections and repetitive projects, but it offers less control over gather density compared to the manual basting stitch method with a regular presser foot. Choose a gathering foot for speed and convenience; use basting stitches when you need precise, adjustable fullness.
Gathering foot advantages:
- Creates gathers in one pass without pulling threads
- Consistent ruffle density throughout the project
- Can simultaneously gather one fabric layer while attaching it to a flat layer
- Ideal for home décor projects like curtains and bedskirts
- Saves time on large-volume sewing (costumes, craft fairs)
Gathering foot limitations:
- Fixed gather ratio (usually 1.5:1 to 2:1) with limited adjustment
- Doesn’t work well on thick or stiff fabrics
- Requires specific presser foot purchase (not included with most machines)
- Less control over gather distribution and spacing
- Difficult to match exact measurements for fitted garments
Regular presser foot with basting stitches advantages:
- Complete control over gather density and distribution
- Works with any fabric weight and type
- Easy to adjust gathers after sewing by pulling more or less
- No additional equipment needed beyond your standard machine
- Better for precise garment construction (waistbands, sleeves)
When to choose each method:
- Use a gathering foot for: Curtain ruffles, pillow trim, costume skirts, craft projects, decorative edges where exact measurement isn’t critical
- Use basting stitches for: Garment waistbands, fitted sleeves, precise yoke attachments, thick fabrics, projects requiring specific gather ratios
If you’re new to gathering, start with the basting stitch method using your regular presser foot. It teaches you the fundamentals and works for 95% of projects. Invest in a gathering foot later if you find yourself doing repetitive gathering work.
For more information on presser foot options, check our presser foot guide.

The Gathering Foot is used to form soft gathers in fabric.

Best used with light to medium-weight fabrics.

Made in Taiwan High Quality Premium Sewing Presser Feet From DreamStitch.
Why Is My Gathered Fabric Bunching Unevenly?
Uneven bunching happens when you pull gathering threads too quickly, use inconsistent tension, or fail to distribute fullness regularly along the length of the fabric. The most common cause is pulling all the gathers from one end only, which creates tight bunching near the pull point and loose fabric at the opposite end.
Top causes and fixes for uneven gathers:
1. Pulling from one end only
- Problem: Creates dense gathers on one side and loose fabric on the other
- Fix: Always pull from both ends, working toward the center, and anchor with pins every 2-3 inches
2. Thread breaking mid-pull
- Problem: Causes sudden bunching and loss of control over gather distribution
- Fix: Use stronger thread, longer stitch length (5mm), and pull more gradually; for long sections, divide into segments
3. Inconsistent stitch length
- Problem: Irregular stitches create random bunching instead of even gathers
- Fix: Check that your machine maintains consistent stitch length; clean feed dogs if fabric feeds unevenly
4. Fabric not sliding freely
- Problem: Friction prevents smooth gathering, causing clumps
- Fix: Loosen upper tension, use a longer stitch, and gently slide fabric along threads with your fingers as you pull
5. Skipping the second row of stitching
- Problem: Single-row gathers twist and bunch because tension isn’t distributed
- Fix: Always use two parallel rows of basting stitches 1/4 inch apart
6. Not pinning as you gather
- Problem: Gathers shift and bunch unevenly when you move the fabric
- Fix: Pin gathered fabric to the flat piece every 2-3 inches as you work, locking in even distribution
If you’re experiencing fabric bunching issues beyond gathering, it may indicate a broader machine tension or feed problem.
How to Fix Uneven Gathers After Sewing
If gathers are already sewn but look uneven, you can often redistribute them by carefully removing the permanent stitching, adjusting the basting threads, and re-sewing. For minor unevenness, strategic pressing with steam can help blend the gathers without complete removal.
Repair methods by severity:
Minor unevenness (small clumps or gaps):
- Use a steam iron on the gathered seam, gently pulling and smoothing with your fingers
- Press from the wrong side to avoid flattening the gathers completely
- Pin any problem areas and add a few hand stitches to secure adjusted gathers
Moderate problems (visible bunching in sections):
- Use a seam ripper to carefully remove the permanent stitching (not the basting stitches)
- Gently pull or release the basting threads to redistribute fullness
- Pin the gathered edge to the flat piece again, spacing gathers evenly
- Re-sew the seam with a normal stitch length
Severe issues (thread broken, gathers completely uneven):
- Remove all stitching including basting threads
- Press the fabric flat to remove gather marks
- Start the gathering process over from the beginning with fresh basting stitches
- This time, work more slowly and pin every 2 inches as you gather
Prevention for next time:
- Measure gathered sections against the flat piece frequently as you work
- Mark the flat piece into quarters with pins, then match gathered piece quarters to ensure even distribution
- Don’t rush the pulling process, slow and steady prevents most problems
- Test your technique on scrap fabric first, especially with new or difficult materials
For persistent issues with thread bunching under fabric, check your bobbin tension and threading path.
Can You Gather Thick Fabric Like Denim?
Yes, you can gather thick fabrics like denim, canvas, and upholstery material, but you need to adjust your technique by using a longer stitch length (5-6mm), heavy-duty thread, and a larger needle (size 16 or 18). Thick fabrics also require a lower gather ratio (1.5:1 or 2:1 maximum) to avoid excessive bulk.
Adjustments for heavy fabric gathering:
Needle and thread:
- Use a size 16/100 or 18/110 denim needle to penetrate thick layers without breaking
- Switch to heavy-duty or topstitching thread for both needle and bobbin
- Consider using buttonhole thread in the bobbin for extra pulling strength
Machine settings:
- Set stitch length to 5-6mm (longer than standard gathering)
- Increase presser foot pressure if your machine allows it
- Slow down your sewing speed to ensure consistent stitch formation
Technique modifications:
- Gather in shorter sections (12-18 inches maximum) to reduce thread stress
- Use three rows of basting stitches instead of two for better tension distribution
- Pull very gradually and anchor with pins every 1-2 inches
- Consider gathering over a cord (zigzag over heavy thread without catching it, then pull the cord) for extra strength
Fabric-specific tips:
- Denim: Pre-wash to soften; gather on the bias when possible for easier manipulation
- Canvas: Use a 2:1 ratio maximum; more fullness creates uncomfortable bulk
- Upholstery fabric: Test on scraps first; some coated fabrics don’t gather well
- Corduroy: Gather against the nap direction for smoother results
When thick fabric gathering doesn’t work:
Some heavy fabrics are too stiff to gather attractively. If your test sample looks bulky or the thread keeps breaking despite adjustments, consider these alternatives:
- Box pleats or knife pleats for structured fullness
- Elastic casing for functional gathering without visible stitching
- Gores or panels to add width without gathering
For more guidance on working with challenging materials, see our resources on fabric sewing techniques.
Elastic Thread vs Basting Stitch for Gathering
Elastic thread (also called shirring elastic) creates stretchy, smocked gathers by winding it onto the bobbin and sewing with regular thread on top, while basting stitch gathering produces fixed, non-stretchy ruffles. Choose elastic thread for fitted bodices and cuffs that need to stretch; use basting stitches for decorative ruffles and seams that attach to flat fabric.
Elastic thread gathering (shirring):
How it works:
- Hand-wind elastic thread onto the bobbin with slight tension
- Use regular thread in the needle
- Sew multiple parallel rows (usually 3-8 rows, 1/4 to 1/2 inch apart)
- Fabric automatically gathers as you sew and contracts further when removed from the machine
Best uses:
- Smocked bodices on sundresses and peasant tops
- Stretchy cuffs on sleeves and pant legs
- Fitted waistbands without zippers or closures
- Children’s clothing that needs to stretch for growth
- Swimsuit and activewear details
Advantages:
- Creates stretchy, comfortable fit
- No need to pull threads or adjust gathers
- Fabric expands and contracts with body movement
- Professional-looking smocking effect
Limitations:
- Requires practice to get even tension
- Doesn’t work for attaching gathered fabric to flat pieces
- Can be difficult to control gather density
- Elastic thread degrades over time and with washing
Basting stitch gathering:
Best uses:
- Attaching full skirts to waistbands
- Sleeve caps and puffed sleeves
- Ruffles on pillows, curtains, and home décor
- Any project where gathers need to stay fixed
- Garments requiring precise measurements
Advantages:
- Complete control over gather amount and placement
- Gathers stay exactly as sewn
- Works with any fabric weight
- Easy to adjust before final stitching
Limitations:
- No stretch or give in the finished garment
- Takes more time than elastic thread
- Requires pulling and adjusting threads manually
Decision guide:
- Choose elastic thread if: You want stretchy, comfortable gathers that move with the body, and you’re working on bodices, cuffs, or waistbands that don’t attach to other pieces
- Choose basting stitch if: You need to attach gathered fabric to flat pieces, want non-stretchy decorative ruffles, or need precise control over gather distribution
Is Gathering Fabric Hard for New Sewers?
Gathering fabric is not inherently difficult for beginners, but it does require patience and practice to achieve consistently even results. Most new sewers master basic gathering within 2-3 practice attempts, making it one of the more accessible decorative techniques compared to pleating, smocking, or piping.
Why gathering is beginner-friendly:
- Uses basic straight stitches you already know
- Requires no special equipment beyond a standard sewing machine
- Mistakes are easy to fix by removing stitches and trying again
- Provides immediate visual feedback so you can see what’s working
- Builds fundamental skills like tension control and seam matching
Common beginner challenges:
- Impatience: Pulling threads too quickly causes breakage and uneven bunching
- Skipping steps: Forgetting the second row of basting or not pinning as you go
- Wrong settings: Using too short a stitch length or too tight tension
- Fear of mistakes: Hesitating to pull threads firmly enough to create gathers
Learning curve timeline:
- First attempt: Expect some unevenness and possibly broken threads as you learn how much tension to use
- Second attempt: Noticeable improvement in gather distribution and confidence
- Third attempt: Consistent, even gathers that look professional
- After 5-6 projects: Gathering becomes quick and intuitive
Tips for beginner success:
- Start with lightweight cotton (quilting cotton or lawn) for easiest handling
- Practice on straight seams before attempting curved areas like sleeve caps
- Use contrasting thread for basting stitches so they’re easy to see and remove
- Watch your fabric feed to ensure consistent stitch length throughout
- Measure frequently as you gather to catch problems early
Gathering is actually an excellent technique for beginners because it teaches important skills like tension adjustment, seam matching, and patience that apply to many other sewing projects. Don’t be discouraged if your first attempt isn’t perfect, even experienced sewers sometimes need to adjust and redistribute gathers.
For more beginner sewing tips, explore our comprehensive guides.
Common Mistakes When Gathering Fabric
The most frequent gathering mistakes include using too short a stitch length, pulling threads from only one end, forgetting to secure thread tails, and sewing the final seam before distributing gathers evenly. Each of these errors creates uneven, bunched, or broken gathers that require time-consuming fixes.
Top 10 gathering mistakes and solutions:
1. Backstitching at the start and end
- Why it’s wrong: Locks threads in place so you can’t pull them
- Fix: Leave long thread tails and never backstitch on basting rows
2. Using normal stitch length (2.5mm)
- Why it’s wrong: Stitches too tight to slide easily; thread breaks when pulled
- Fix: Always use 4-5mm stitch length for gathering
3. Pulling only the needle thread
- Why it’s wrong: Creates uneven tension and often breaks
- Fix: Pull both bobbin threads together from each end
4. Gathering without a second row
- Why it’s wrong: Single row twists and creates uneven bunching
- Fix: Always sew two parallel rows 1/4 inch apart
5. Not pinning as you gather
- Why it’s wrong: Gathers shift and bunch when you move the fabric
- Fix: Pin every 2-3 inches as you work to lock in distribution
6. Pulling too fast
- Why it’s wrong: Causes thread breakage and loss of control
- Fix: Pull gradually and slide fabric along threads with your fingers
7. Forgetting to measure
- Why it’s wrong: Gathers end up too tight or too loose for the flat piece
- Fix: Measure gathered section frequently against the piece it will attach to
8. Using weak thread
- Why it’s wrong: Breaks easily, especially on long sections or thick fabric
- Fix: Use all-purpose or heavy-duty thread, not cheap or old thread
9. Sewing final seam before checking distribution
- Why it’s wrong: Locks in uneven gathers that are hard to fix
- Fix: Pin gathered piece to flat piece, check from both sides, adjust before sewing
10. Not testing on scraps first
- Why it’s wrong: Wastes time and fabric when technique doesn’t work on your material
- Fix: Always test gather ratio, stitch length, and tension on fabric scraps
Prevention checklist:
Before you start gathering, verify:
- ✓ Stitch length set to 4-5mm
- ✓ Upper tension loosened by 1-2 numbers
- ✓ Thread tails at least 6 inches long
- ✓ Two parallel rows planned 1/4 inch apart
- ✓ Pins ready to anchor gathers as you work
- ✓ Fabric ratio calculated for your project
- ✓ Test sample completed and approved
How to Gather Long Fabric Sections Without Breaking Thread
For sections longer than 24 inches, divide the fabric into manageable segments of 18-24 inches each, sew separate basting rows for each segment, and gather each section individually before joining them. This prevents thread breakage and gives you better control over gather distribution across the entire length.
Technique for long sections:
1. Mark segments:
- Divide your fabric into 18-24 inch sections using pins or chalk
- Mark both the gathered piece and the flat piece it will attach to
- Ensure segments align (if gathered piece has 4 sections, flat piece should too)
2. Sew segmented basting rows:
- Start and stop basting stitches at each segment mark
- Leave 6-inch thread tails at every start and stop point
- Don’t sew continuously across segment boundaries
3. Gather each segment separately:
- Pull threads for the first segment only, gathering to match its corresponding flat section
- Pin the gathered segment to the flat piece
- Move to the next segment and repeat
- Work across the entire length section by section
4. Blend segment transitions:
- Pay special attention to gather distribution at segment boundaries
- Adjust gathers to create smooth transitions between sections
- Pin extra carefully at transition points
Alternative method: Gathering over a cord:
For very long sections (curtains, bedskirts, stage costumes), gathering over a cord provides extra strength:
- Cut a piece of strong cord or dental floss slightly longer than your fabric
- Set your machine to a wide zigzag stitch (4-5mm wide)
- Position the cord along your stitching line
- Zigzag over the cord without catching it in the stitches (cord should slide freely underneath)
- Sew a second row parallel to the first
- Pull the cords from both ends to gather the fabric
- The cord bears the tension instead of thread, preventing breakage
Thread strength tips:
- Use topstitching thread or buttonhole thread for extra strength
- Check that your thread isn’t old or brittle (old thread breaks easily)
- Wind a fresh bobbin specifically for gathering (don’t use a partially empty bobbin)
- Slow down your sewing speed to ensure consistent stitch formation
When to use a gathering foot instead:
If you’re gathering sections longer than 6 feet and don’t need precise measurements (curtains, dust ruffles, costume skirts), a gathering foot may be more efficient than basting stitches. The foot creates continuous gathers without any risk of thread breakage.
For troubleshooting fabric feeding issues that might affect long gathering sections, check your feed dogs and presser foot pressure.
Do I Need Special Thread to Gather Fabric?
You don’t need special thread for basic gathering on lightweight to medium-weight fabrics, standard all-purpose polyester thread works well. However, heavy-duty thread or topstitching thread provides extra strength for thick fabrics, long sections, or projects where thread breakage is a concern.
Thread recommendations by project:
All-purpose polyester thread:
- Best for: Cotton, linen, lightweight denim, most woven fabrics
- Advantages: Readily available, affordable, works in any machine
- Limitations: May break on very long sections or thick fabrics
Heavy-duty or topstitching thread:
- Best for: Canvas, upholstery fabric, heavy denim, sections longer than 36 inches
- Advantages: Extra strength prevents breakage, handles more tension
- Limitations: Slightly more expensive, may require larger needle (size 16)
Buttonhole or carpet thread:
- Best for: Hand-gathering, extremely thick fabrics, very long curtain sections
- Advantages: Maximum strength, ideal for pulling heavy gathers
- Limitations: Too thick for some machine bobbins, best used by hand
Elastic thread (shirring elastic):
- Best for: Smocked bodices, stretchy cuffs, fitted waistbands
- Advantages: Creates stretchy gathers automatically
- Limitations: Only works wound on bobbin, not for attaching gathered to flat pieces
Thread to avoid:
- Old thread: Becomes brittle and breaks easily regardless of type
- Cheap thread: Often weak and inconsistent, causes frequent breakage
- Cotton thread: Less strong than polyester; save it for hand-basting only
- Metallic or specialty threads: Too weak and slippery for gathering
Bobbin thread considerations:
For gathering, you’ll pull the bobbin threads, so bobbin thread quality matters more than usual. Wind a fresh bobbin with the same thread you’re using in the needle, or use a slightly heavier thread in the bobbin for extra pulling strength.
Testing thread strength:
Before gathering your project fabric, test your thread choice:
- Sew basting rows on a scrap of the same fabric
- Try pulling the threads to gather
- If thread breaks easily, switch to a heavier thread
- If gathers form smoothly without breakage, your thread choice is good
Most gathering problems blamed on thread are actually caused by stitch length that’s too short or tension that’s too tight. Adjust those settings before buying special thread.
Frequently Asked Questions
Can you gather fabric with a straight stitch?
Yes, gathering uses a straight stitch set to the longest length (4-5mm) with slightly loosened tension. You sew two parallel rows, then pull the bobbin threads to create gathers. This is the standard gathering method for most sewing machines.
How do you keep gathers from shifting while sewing the final seam?
Pin the gathered fabric to the flat piece every 2-3 inches before sewing, distributing fullness evenly between pins. Sew slowly with the gathered side up so you can watch for shifting, and use your fingers to guide fabric evenly under the presser foot.
What’s the difference between gathering and ruching?
Gathering compresses fabric along a seam line by pulling threads, creating soft folds that attach to another piece. Ruching gathers fabric in the middle (not at an edge) by sewing through the center and pulling, creating decorative texture on a single fabric layer.
Can you gather fabric after it’s been cut?
Yes, you can gather fabric pieces after cutting, and this is actually the standard approach. Cut your fabric to the calculated length (2-3 times the finished measurement), then sew basting stitches within the seam allowance and gather before attaching to the flat piece.
Why does my gathering thread keep breaking?
Thread breaks when you pull too hard, use too short a stitch length (under 4mm), have tension set too tight, or work with sections longer than 24 inches without dividing them. Use longer stitches, looser tension, and gather in shorter segments to prevent breakage.
How do you gather stretchy or knit fabric?
Use a ballpoint needle, set stitch length to 4mm, and don’t stretch the fabric as you sew. Gather knits with a 1.5:1 or 2:1 ratio maximum since they naturally have stretch. Consider using elastic thread for knit bodices and cuffs instead of traditional gathering.
Can you use a gathering foot on thick fabric?
Gathering feet work best on lightweight to medium-weight fabrics. For thick materials like denim or canvas, the traditional basting stitch method gives you better control and prevents the foot from jamming. Save the gathering foot for cotton, voile, and similar weights.
How do you calculate how much fabric you need for gathering?
Multiply your finished measurement by your desired fullness ratio. For moderate gathers, use 2:1 (a 30-inch waistband needs 60 inches of fabric). For dramatic ruffles, use 3:1 (30 inches becomes 90 inches). Always add 2 inches extra for seam allowances.
What tension setting should you use for gathering?
Loosen your upper thread tension by 1-2 numbers from your normal setting (if you usually sew at 4, try 3 or 2.5). This makes the stitches easier to pull without breaking. Remember to return tension to normal before sewing the final seam.
Can you gather fabric in both directions?
You can only gather fabric along the grain (lengthwise or crosswise), not on the bias. Gathering works by compressing straight threads; bias-cut fabric stretches instead of gathering. If you need gathered bias, cut the fabric on-grain and then position it at an angle.
How do you remove gathering stitches after sewing?
After sewing the final seam between your two basting rows, gently pull out the visible gathering threads from the right side of the fabric. Use tweezers or a seam ripper to grab thread ends, then pull slowly to avoid disturbing the permanent stitching.
Do you need to finish seams after gathering?
Yes, finish the seam allowance after attaching gathered fabric to prevent fraying. Use a zigzag stitch, serger, or pinking shears on the raw edges. Press the seam allowance toward the flat (ungathered) side to reduce bulk and create a cleaner finish.
Conclusion
Gathering fabric evenly comes down to using the right stitch length, working methodically, and distributing fullness gradually as you pull. The two-row basting method with 4-5mm stitches gives you maximum control for most projects, while gathering feet and elastic thread offer faster alternatives for specific applications.
Your next steps to perfect gathering:
- Practice on scraps first: Test your stitch length, tension, and gather ratio on fabric scraps before starting your actual project
- Start with easy fabrics: Master gathering on quilting cotton or lightweight linen before attempting thick or slippery materials
- Work in segments: Divide long sections into 18-24 inch segments to prevent thread breakage and maintain control
- Pin frequently: Anchor gathers every 2-3 inches as you work to lock in even distribution
- Measure as you go: Check gathered sections against the flat piece frequently to catch problems early
Remember that even experienced sewers sometimes need to adjust and redistribute gathers. The beauty of this technique is that it’s completely reversible until you sew the final seam. Take your time, pull threads gradually, and don’t hesitate to remove basting stitches and try again if the distribution isn’t quite right.
With practice, gathering becomes an intuitive skill that opens up countless design possibilities for garments and home décor projects. The soft, romantic fullness of gathered fabric adds dimension and visual interest that flat seams simply can’t match.
For more sewing techniques and troubleshooting guides, explore our collection of fabric techniques and beginner sewing problems resources.


