Quick Answer: Adjusting bobbin tension safely requires turning the small screw on your bobbin case in tiny quarter-turn increments (clockwise to tighten, counterclockwise to loosen) while testing stitches between each adjustment. Most tension problems stem from the top thread, so only adjust bobbin tension after confirming the top thread is properly threaded and tensioned, and always mark your bobbin case’s original position before making changes.
Key Takeaways
- Bobbin tension adjustments should be your last resort, 90% of tension issues come from incorrect top threading or needle problems
- Turn the tension screw in quarter-turn increments only, small adjustments prevent over-tightening and potential damage
- Always test on scrap fabric between adjustments to see the actual stitch results before continuing
- Mark the original screw position with a marker or take a photo so you can return to factory settings if needed
- The “righty-tighty, lefty-loosey” rule applies, clockwise tightens, counterclockwise loosens bobbin tension
- Different thread weights and fabrics may require minor tension tweaks but your machine’s default setting works for most projects
- Never force the screw, if it feels stuck or stripped, stop immediately and consult a technician
- Keep your bobbin case clean, lint buildup causes more tension problems than actual tension settings
What Is Bobbin Tension and Why Does It Matter
Bobbin tension refers to the resistance applied to the bobbin thread as it feeds through your sewing machine’s bobbin case. This tension works together with your top thread tension to create balanced, even stitches where the two threads lock together in the middle of your fabric layers.
When bobbin tension is correct, your stitches look identical on both sides of the fabric (or intentionally different for decorative techniques). The thread lock point sits exactly between the fabric layers, creating strong seams that won’t pull apart. Proper bobbin tension prevents thread breakage, skipped stitches, puckered fabric, and those frustrating loops on the underside of your work.
Most modern sewing machines come with bobbin tension pre-set at the factory, calibrated to work with standard weight threads (40-50 weight) on medium-weight fabrics like quilting cotton. This default setting handles about 80% of typical sewing projects without any adjustment needed.
The bobbin tension mechanism itself is surprisingly simple, a small screw on the bobbin case (or built into drop-in bobbin systems) presses a spring-loaded metal plate against the thread path. Tightening the screw increases pressure on the thread, making it harder to pull through. Loosening reduces that pressure.
How Do I Know If My Bobbin Tension Is Too Tight or Too Loose
Visual inspection of your stitches tells you everything. If bobbin thread shows on the top side of your fabric or if you see tight puckers along the seam line, your bobbin tension is likely too tight. If you see loops of top thread on the underside or the fabric layers don’t pull together properly, your bobbin tension is probably too loose.
Here’s a quick diagnostic checklist:
Signs of too-tight bobbin tension:
- Bobbin thread pulls through to the top surface
- Fabric puckers or tunnels along the seam
- Thread breaks frequently while sewing
- Seam feels stiff or rope-like when you bend it
Signs of too-loose bobbin tension:
- Loops of top thread appear on the bottom
- Stitches look loose and sloppy on the underside
- Seams pull apart easily with minimal stress
- You can see gaps between stitches
The drop test provides a simple mechanical check: Hold your threaded bobbin case by the thread tail and let it dangle. A properly tensioned bobbin case should drop slowly and smoothly when you give the thread a gentle bounce, about 2-3 inches before stopping. If it drops like a rock, tension is too loose. If it barely moves, tension is too tight.
Before blaming bobbin tension, always rule out these common culprits first:
- Incorrect top threading (missed a guide or threaded with presser foot down)
- Wrong needle size or damaged needle
- Top tension dial set incorrectly
- Lint buildup in the bobbin area
- Thread quality issues or mismatched thread weights
Can Adjusting Bobbin Tension Damage My Sewing Machine
Adjusting bobbin tension correctly will not damage your sewing machine, but aggressive or careless adjustments can strip the tiny tension screw, crack the bobbin case, or bend the tension spring. The screw threads are small and delicate, they’re designed for precision adjustments, not forceful turning.
The biggest risk comes from over-tightening. When you crank the screw too far clockwise, you can:
- Strip the screw threads, making future adjustments impossible
- Crack plastic bobbin cases (common in drop-in systems)
- Permanently deform the tension spring
- Create thread grooves in the metal that cause uneven tension
These repairs typically cost $30-80 for a replacement bobbin case, or $100-200 if the tension assembly is built into the machine body.
Safe adjustment practices prevent damage:
- Use the correct size screwdriver (usually a small flathead or specialized tool)
- Turn in quarter-turn increments only
- Stop immediately if you feel resistance
- Never adjust while the machine is threaded and running
- Keep track of how many turns you’ve made
Most manufacturers design bobbin cases with a safe adjustment range of about 1-1.5 full rotations in either direction from the factory setting. Beyond that range, you risk mechanical problems.
When to absolutely avoid adjusting: If your machine is under warranty, check the terms first, some manufacturers void warranties if users adjust bobbin tension. If you’re working with a vintage machine or one with a built-in bobbin case you can’t remove, consider professional service instead.
Bobbin Tension vs Top Thread Tension: What’s the Difference
Top thread tension and bobbin tension work as a pair, but they’re adjusted differently and serve distinct purposes. Top thread tension is your primary adjustment tool, it’s designed for frequent changes and controls the thread feeding from your spool through the tension discs. Bobbin tension is a set-it-and-forget-it baseline that rarely needs changing once properly calibrated.
Here’s how they differ:
| Aspect | Top Thread Tension | Bobbin Tension |
|---|---|---|
| Adjustment frequency | Changed regularly for different fabrics/threads | Rarely adjusted after initial setup |
| Control location | Dial or slider on machine front | Small screw on bobbin case |
| Adjustment range | Wide range (0-9 or higher) | Narrow range (1-1.5 rotations max) |
| User-friendly | Designed for easy changes | Requires tools and precision |
| Affects | How tightly top thread is pulled | How easily bobbin thread releases |
The relationship between them: Think of tension like a tug-of-war. When both sides pull with equal force, the knot (where threads lock) sits in the middle of the fabric. If top tension is too loose, the bobbin thread wins and pulls to the top surface. If top tension is too tight, it yanks the bobbin thread up through the fabric.
Why top tension gets adjusted more often: Different fabrics and thread types require different amounts of pull. Thick denim needs more top tension than delicate silk. Heavy topstitching thread needs less tension than fine embroidery thread. Your top tension dial makes these adjustments quick and reversible.
Why bobbin tension stays constant: The bobbin thread’s job is simpler, it just needs to feed consistently. The factory setting works for most standard threads because the bobbin case doesn’t deal with the same variety of materials that the top thread encounters.
Should I Adjust Bobbin Tension or Top Tension First
Always adjust top tension first. In fact, you should exhaust every other troubleshooting option before touching bobbin tension at all. Professional sewists and technicians estimate that 90-95% of tension problems resolve by adjusting the top thread system, not the bobbin.
Follow this troubleshooting sequence:
1. Rethread the entire top thread path (with presser foot up)
- Remove thread completely and start fresh
- Check every thread guide and tension disc
- Make sure thread seats properly in the take-up lever
2. Check and adjust the top tension dial
- Start at the middle setting (usually 4-5)
- Test on scrap fabric
- Adjust up or down in single-number increments
3. Inspect mechanical components
- Replace the needle (bent or dull needles cause 30% of tension issues)
- Clean lint from bobbin area and feed dogs
- Verify you’re using the correct needle size for your thread and fabric
4. Verify thread and bobbin setup
- Confirm thread weight matches on top and bottom
- Check that bobbin is wound evenly and correctly inserted
- Try a fresh bobbin, old thread can cause problems
5. Test with different thread
- Cheap or old thread breaks down and causes inconsistent tension
- Try quality thread to rule out thread defects
Only after all these steps fail should you consider adjusting bobbin tension. If you skip straight to bobbin adjustment, you might “fix” a symptom while the real problem remains, leading to more issues down the road.
The exception: If you’re intentionally using specialty techniques like bobbin work (thick decorative thread in the bobbin) or if you’ve just replaced your bobbin case, then bobbin tension adjustment is appropriate and expected.
How to Adjust Bobbin Tension Safely: Step-by-Step Process
Adjusting bobbin tension safely requires patience, precision, and proper documentation of your starting point. The entire process should take 15-20 minutes including multiple test stitches, rushing leads to mistakes.
What you’ll need:
- Small flathead screwdriver (or your machine’s specialized tool)
- Permanent marker or phone camera
- Scrap fabric identical to your project
- Matching thread (top and bobbin)
- Notepad to record adjustments
Step 1: Document the starting position Before touching anything, mark the current screw position. Use a permanent marker to draw a line from the screw slot across the bobbin case, or take a clear close-up photo. This reference point lets you return to factory settings if adjustments go wrong.
Step 2: Remove and inspect the bobbin case Take out the bobbin case (for front-loading machines) or access the tension screw (for drop-in bobbins). Clean any lint or thread fragments from the tension area, debris causes more problems than actual tension settings.
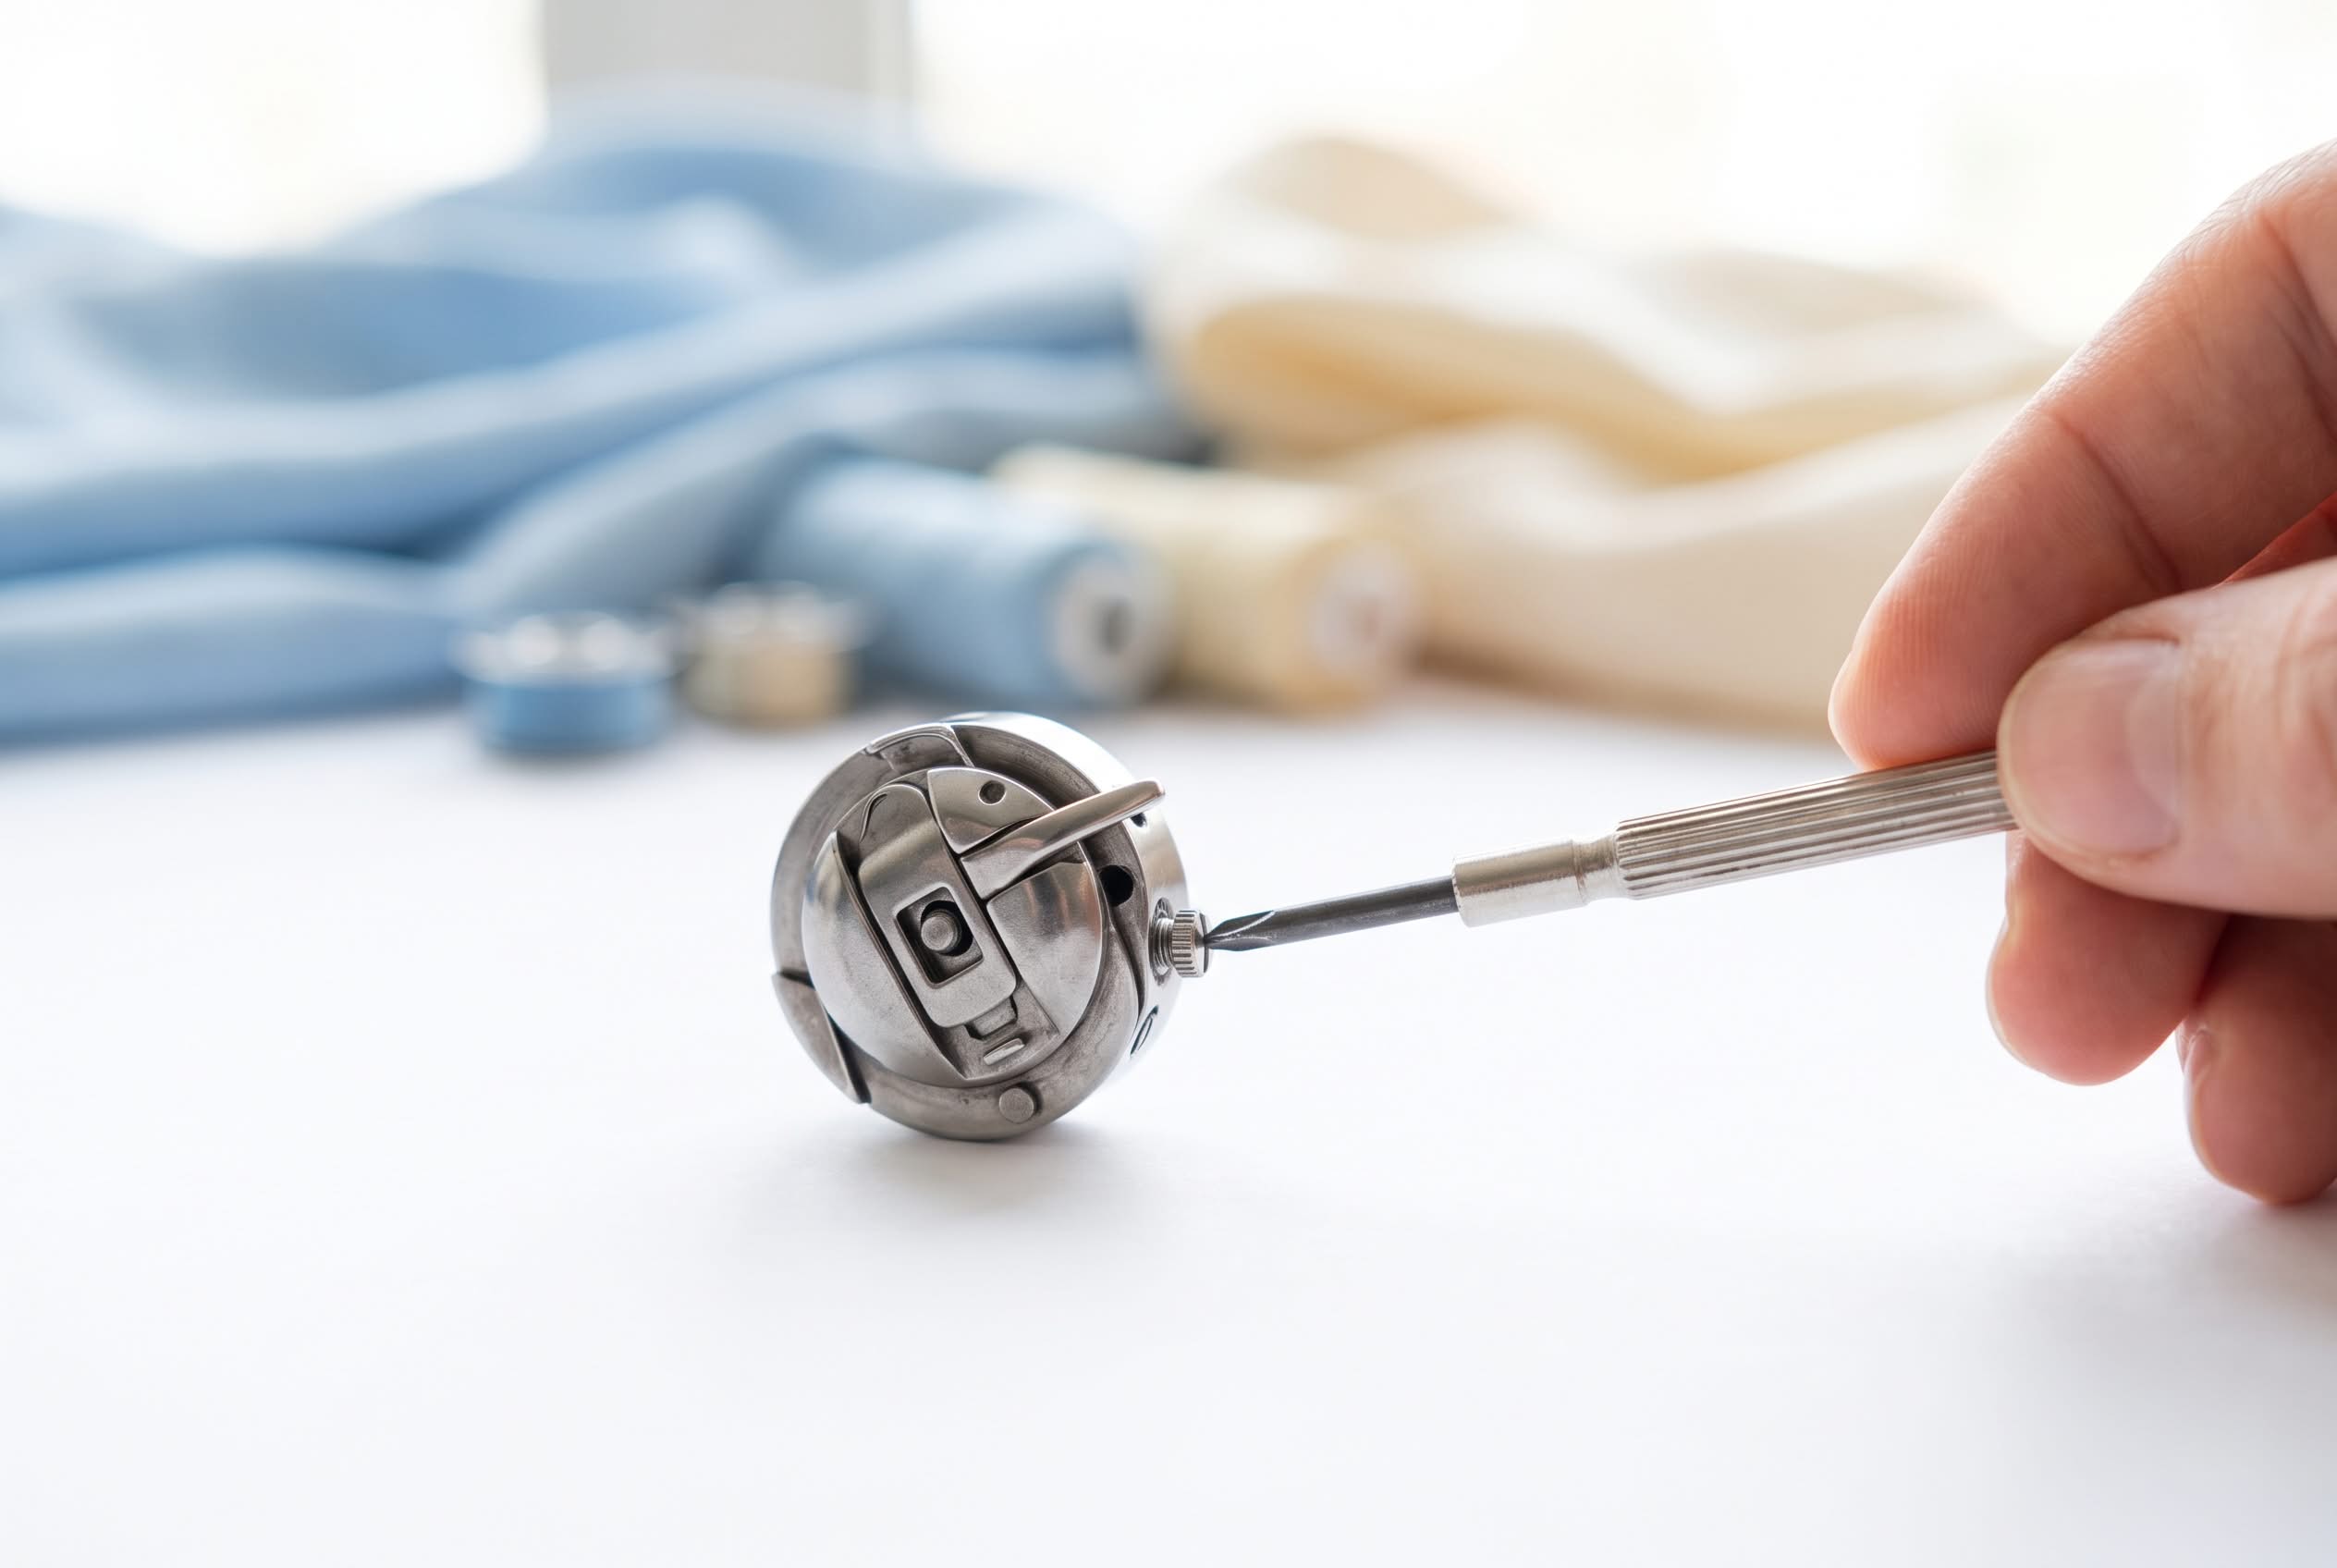
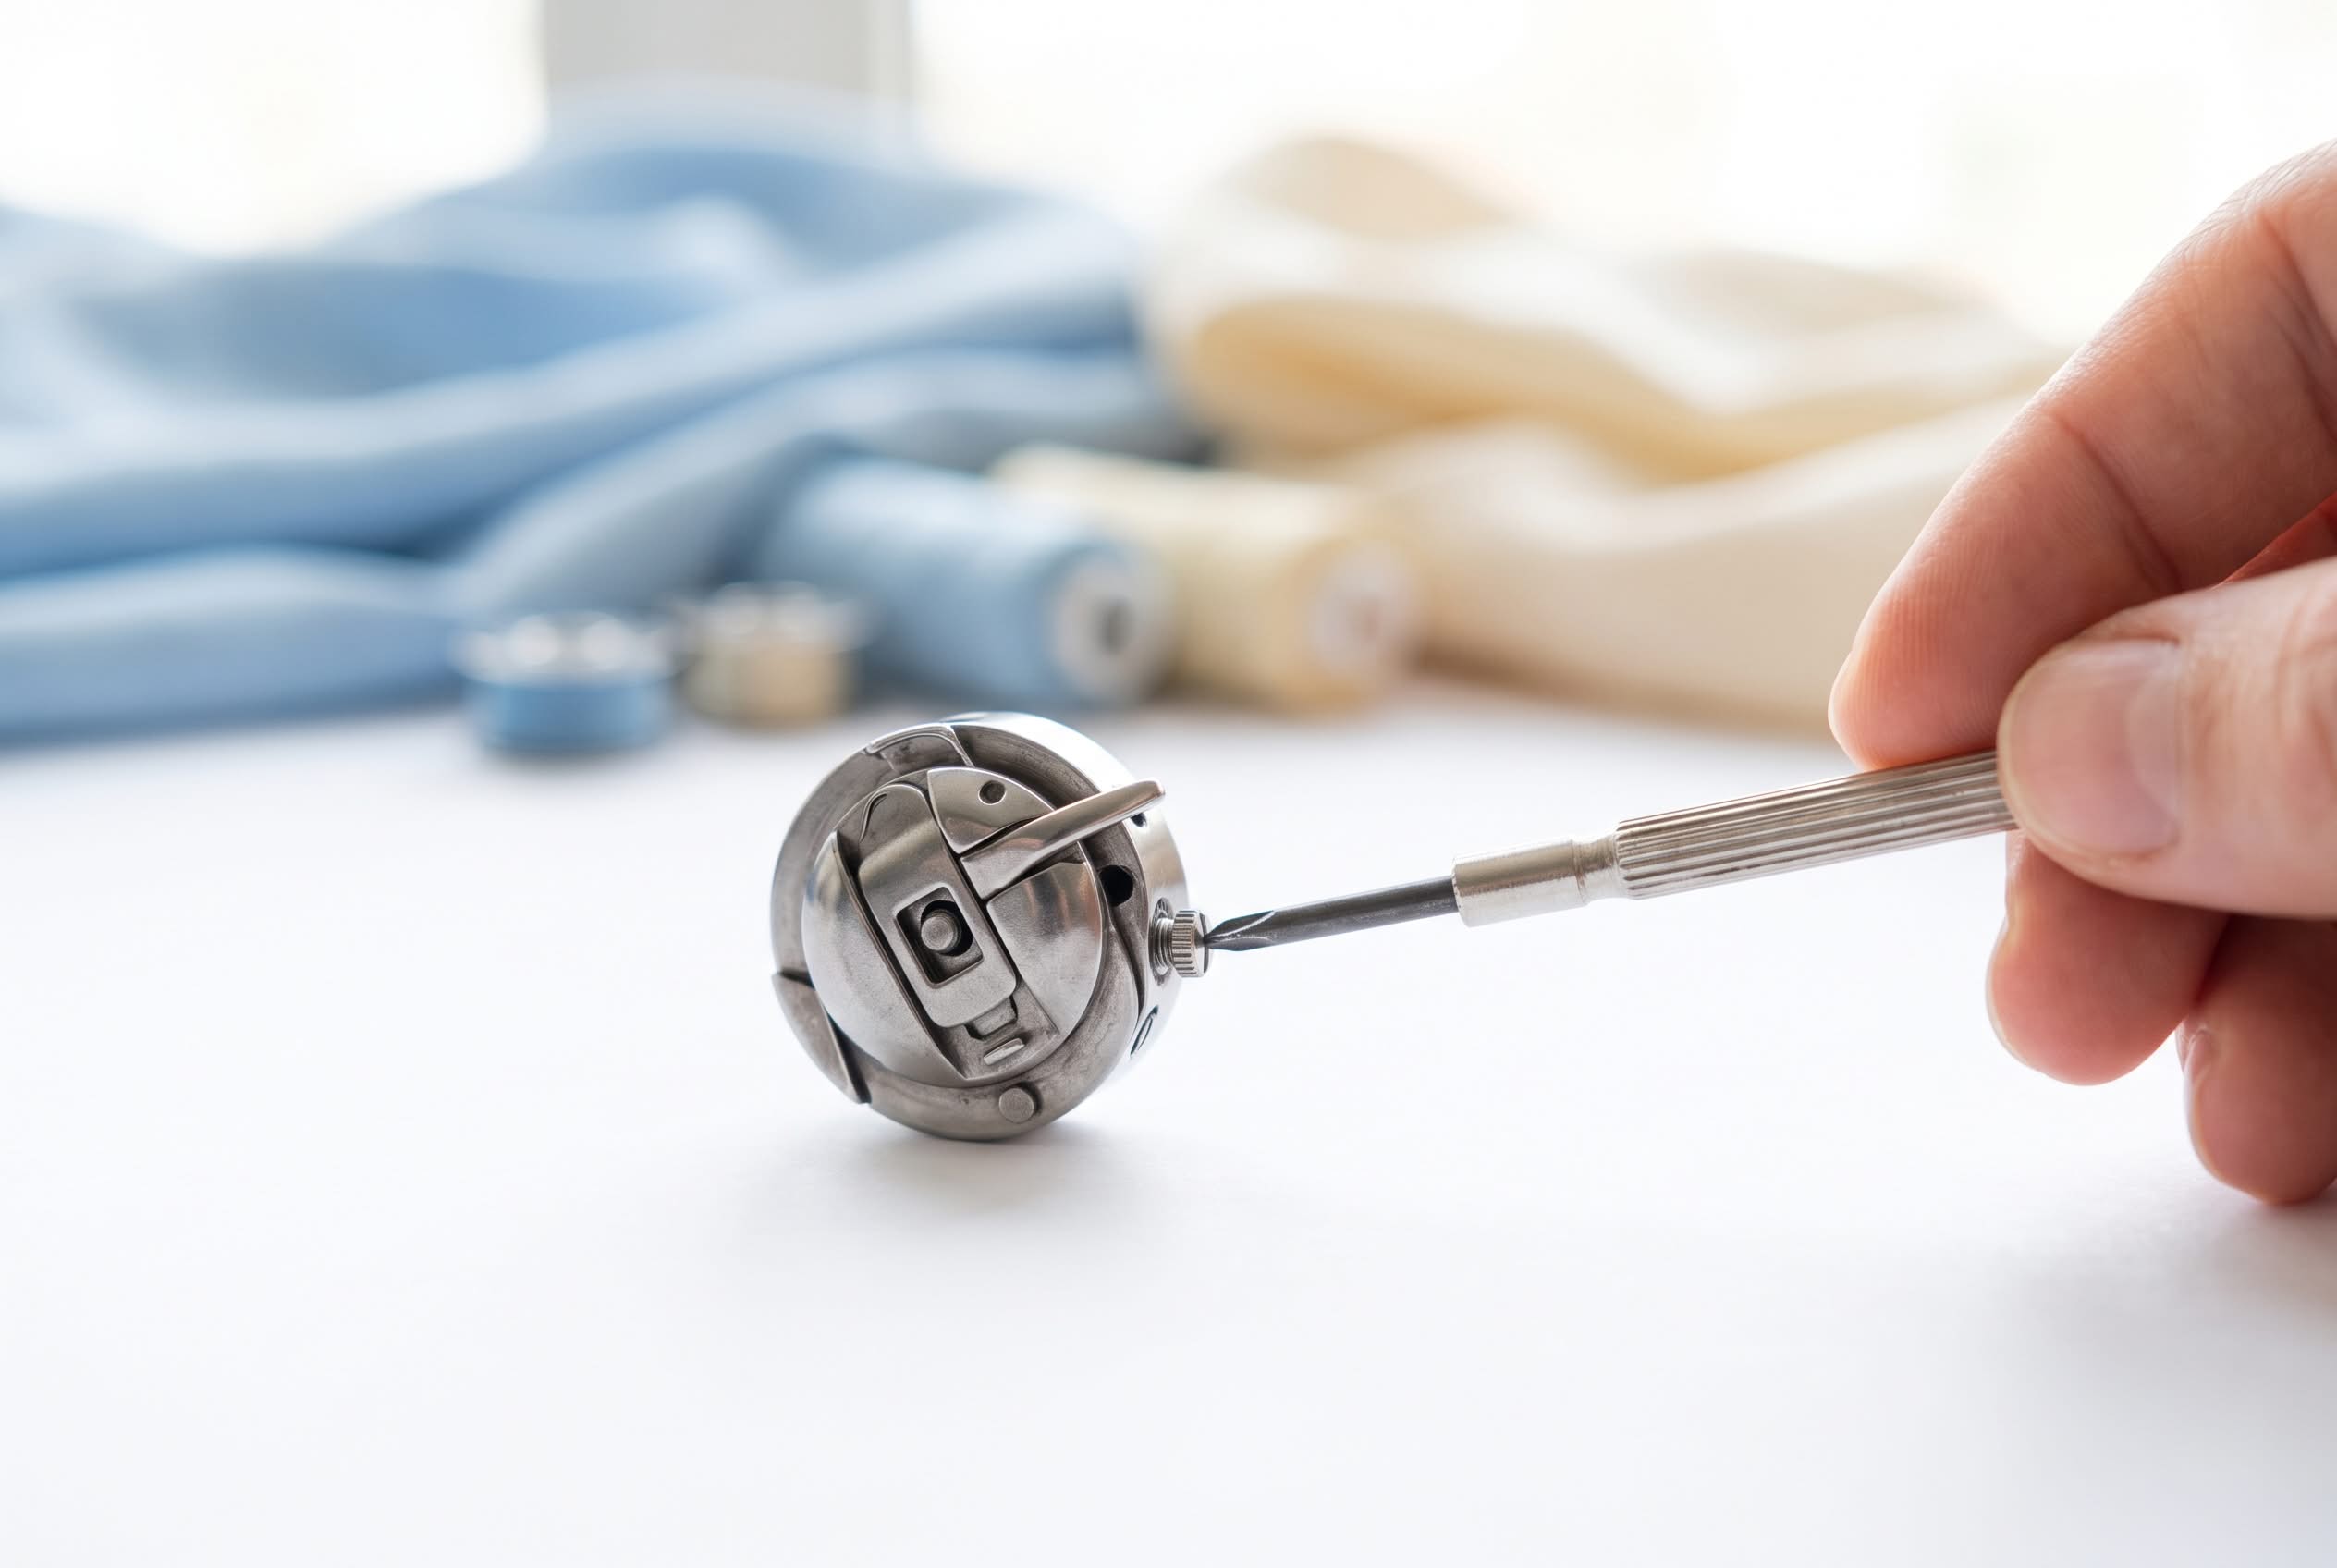
Step 3: Identify the tension screw The tension screw is usually a small flathead screw on the side of the bobbin case, near where the thread exits. Some machines have two screws, the tension screw is typically the smaller one. Check your manual if you’re unsure.
Step 4: Make a quarter-turn adjustment
- To tighten (if bobbin thread shows on top): Turn clockwise ¼ turn
- To loosen (if top thread loops on bottom): Turn counterclockwise ¼ turn
Use gentle, steady pressure. If the screw feels stuck, stop and apply a tiny drop of sewing machine oil, wait 5 minutes, then try again.
Step 5: Reassemble and test Put the bobbin case back in the machine, thread both top and bobbin threads, and sew a 4-inch test seam on scrap fabric. Use the same fabric, thread, and stitch settings as your actual project.
Step 6: Evaluate the test stitches Examine both sides of the fabric. Look for balanced stitches where threads lock in the middle. Gently pull the seam, it should hold firmly without puckering.
Step 7: Repeat if necessary If stitches aren’t perfect, make another quarter-turn in the same direction and test again. Never make more than 1.5 full rotations total from your starting point.
Step 8: Record the final setting Write down how many quarter-turns you made and in which direction. This information helps if you need to adjust again later or return to the original setting.
Common mistake to avoid: Making multiple turns before testing. Each quarter-turn creates a noticeable change, if you turn too far, you’ll overshoot the correct setting and waste time backtracking.

Packing: 5 pcs, material: stainless steel.

4" Flat Magnetic Tip Screwdriver.

The package contains: we have prepared 1 piece of tweezers, 4 pieces of screw drivers and 1 piece of double head lint brush for you, with a total of 6 pieces, different styles of screwdrivers and adequate quantity can meet your repair requirements in daily life
How Much Should I Turn the Bobbin Tension Screw
Quarter-turn increments are the gold standard, about 90 degrees of rotation per adjustment. This small amount creates a noticeable but controlled change in tension, giving you precision without overshooting the correct setting.
To visualize a quarter-turn: If the screwdriver slot starts pointing at 12 o’clock, turn it to 3 o’clock (clockwise to tighten) or 9 o’clock (counterclockwise to loosen). That’s it. Test. Then decide if you need another quarter-turn.
Why such small adjustments matter:
- The tension spring is delicate and responds dramatically to small changes
- A half-turn can take you from too loose to too tight, skipping the sweet spot
- Small increments let you pinpoint the exact setting for your specific thread and fabric combination
Maximum safe adjustment range: Most bobbin cases can safely adjust about 1 to 1.5 full rotations (4-6 quarter-turns) in either direction from the factory setting. Beyond that, you risk:
- Stripping the screw threads
- Compressing the spring beyond its designed range
- Creating tension so extreme that thread breaks or won’t feed
If you’ve made 6 quarter-turns and still have problems, stop adjusting bobbin tension. The issue lies elsewhere, likely top tension, threading, or mechanical problems. Adding more turns won’t solve non-tension issues.
Special case, new bobbin case: If you’ve installed a replacement bobbin case, it might need more substantial initial adjustment to match your machine. Start with the quarter-turn method, but don’t be surprised if you need 2-3 full rotations to reach the right tension. Just work slowly and test frequently.
The “bounce test” for fine-tuning: After each adjustment, hold the threaded bobbin case by the thread and bounce it gently. The case should drop 2-3 inches smoothly. If it drops more, tighten slightly. If it barely moves, loosen slightly. This mechanical test complements your stitch tests.
What Happens If I Turn the Bobbin Screw the Wrong Way
Turning the bobbin screw the wrong direction simply makes your existing problem worse, it won’t cause immediate damage, but it wastes time and can lead to frustration. If you tighten when you should loosen (or vice versa), your test stitches will look even more unbalanced than before, clearly signaling you need to reverse direction.
Clockwise (righty-tighty) increases tension:
- Makes it harder for bobbin thread to pull through
- Use this when bobbin thread appears on the top surface
- Use this when stitches look too loose on the bottom
Counterclockwise (lefty-loosey) decreases tension:
- Makes it easier for bobbin thread to release
- Use this when top thread loops appear on the bottom
- Use this when fabric puckers from too-tight bobbin thread
What actually happens mechanically: The screw presses against a spring-loaded plate. Turning clockwise pushes the plate tighter against the thread path, creating more friction. Turning counterclockwise releases that pressure, reducing friction. The thread doesn’t know which way you turned, it only feels more or less resistance.
If you’ve lost track of which way you turned:
- Look at your starting-position mark or photo
- Count how many quarter-turns you’ve made
- Return to the original position
- Start over with a fresh test, turning the correct direction
The real danger isn’t direction, it’s distance. Whether you turn right or left, going too far causes problems. Over-tightening (too many clockwise turns) can strip threads or crack the bobbin case. Over-loosening (too many counterclockwise turns) can make the screw fall out completely (though most designs prevent this).
If the screw falls out: Don’t panic. The screw, spring, and tension plate usually stay together as an assembly. Carefully reassemble them in the correct order (check your manual for the exact configuration) and start your adjustment process over from the factory setting.
Do I Need to Adjust Bobbin Tension for Different Fabrics
For most fabric changes, no, adjust your top tension instead. Bobbin tension should remain constant while you use the top tension dial to compensate for different fabric weights, thicknesses, and textures. This approach keeps your machine’s baseline stable and makes troubleshooting easier.
When fabric changes DO require bobbin adjustment:
- Extreme weight differences: Switching from sheer organza to heavy canvas might need a minor bobbin tweak (usually just ¼ turn)
- Specialty techniques: Free-motion quilting through thick batting, or sewing multiple layers of leather
- Decorative work: Intentionally loose bobbin tension for bobbin work or thread painting
When to stick with top tension only:
- Moving between quilting cotton and linen
- Sewing knits versus wovens
- Working with different denim weights
- Switching between home dec fabrics
The practical approach: Set your bobbin tension once for standard 40-50 weight thread on medium-weight fabric. Mark this as your baseline. For 95% of projects, adjust only the top tension dial as you change fabrics. Your machine’s top tension system is designed for frequent changes, use it.
Thread weight matters more than fabric: If you switch from 50-weight piecing thread to 12-weight topstitching thread, you’ll likely need to adjust bobbin tension because the thread diameter changes significantly. But moving from cotton to polyester thread of the same weight? Top tension adjustment handles it.
Keep a tension journal: Note which fabric and thread combinations required bobbin adjustment. Over time, you’ll develop a reference guide for your specific machine and sewing style. Most sewists find they use 2-3 bobbin tension settings total: standard, slightly loose for thick threads, and slightly tight for fine threads.

Please pay attention to the product you want£¡£¡£¡

TENSION GAUGE: The Towa Bobbin Tension Gauge is a must-have tool that helps measure thread bobbin tension

A BOBBIN CASE TENSION GAUGE for the SMALL BOBBIN CASES "L" Style for the Embroidery Machines and other Industrial Sewing Machines.
Common Mistakes When Adjusting Bobbin Tension
Mistake #1: Adjusting bobbin tension first The most common error is reaching for the bobbin case before checking everything else. Always rethread the top thread, check the needle, clean the machine, and adjust top tension before touching bobbin tension. This mistake wastes time and can create new problems.
Mistake #2: Making large adjustments Turning the screw a full rotation or more in one go overshoots the correct setting. You’ll swing from too tight to too loose, missing the sweet spot entirely. Stick to quarter-turns with testing between each adjustment.
Mistake #3: Adjusting while threaded and running Never turn the tension screw while thread is pulled through the bobbin case or while the machine is sewing. This can damage the tension spring, create thread grooves in the metal, or give you false readings about the actual tension.
Mistake #4: Forgetting to mark the starting position Without a reference point, you can’t return to factory settings if adjustments go wrong. Always mark or photograph the original screw position before making any changes.
Mistake #5: Using the wrong screwdriver A screwdriver that’s too large can strip the screw head. One that’s too small can slip and scratch the bobbin case. Use the tool that came with your machine, or find a precision screwdriver that fits perfectly.
Mistake #6: Adjusting a dirty bobbin case Lint, thread fragments, and oil buildup in the tension area cause inconsistent thread flow that mimics tension problems. Clean thoroughly before adjusting, you might discover tension was fine all along.
Mistake #7: Testing on the wrong fabric Testing on scrap fabric that’s different from your project gives misleading results. Always test on identical fabric with the same thread, needle, and stitch settings you’ll use for the actual sewing.
Mistake #8: Adjusting for cheap thread Low-quality thread has inconsistent diameter and weak fibers that break or fray regardless of tension settings. If you’re using bargain thread, try quality thread first before blaming tension.
Mistake #9: Ignoring the needle A bent, dull, or wrong-size needle causes tension-like symptoms (skipped stitches, loops, puckering) that won’t improve with tension adjustment. Replace the needle as part of your troubleshooting routine.
Mistake #10: Not recording adjustments Failing to write down how many turns you made and in which direction means you’re working blind. Keep notes so you can reverse unsuccessful adjustments or replicate successful ones.
How to Test If Bobbin Tension Is Correct After Adjusting
The stitch test is your primary verification method. Sew a 4-inch straight stitch on scrap fabric identical to your project, using the same thread, needle, and settings. Examine both sides of the fabric, stitches should look balanced and even, with no loops, puckers, or visible bobbin thread on the top surface.
Visual inspection checklist:
- Top side: Should show only top thread in a smooth, even line
- Bottom side: Should show mostly bobbin thread with tiny dots of top thread peeking through
- Seam integrity: Gently pull the fabric apart, stitches should hold firmly without breaking
- Fabric appearance: No puckering, tunneling, or distortion along the seam line
The scratch test: Run your fingernail across the stitches on both sides. They should feel smooth and flat, not raised or bumpy. Raised stitches indicate tension imbalance.
The mechanical drop test: Remove the bobbin case and thread it. Hold it by the thread tail and let it dangle. Give the thread a gentle bounce:
- Correct tension: Case drops 2-3 inches smoothly, then stops
- Too tight: Case barely moves or doesn’t drop at all
- Too loose: Case drops quickly, more than 4-5 inches
The seam stress test: Sew a 6-inch seam, then pull the fabric firmly in opposite directions (not hard enough to tear, but with real force). The stitches should hold without breaking. If thread snaps, tension is too tight. If stitches pull out, tension is too loose.
Compare to a known-good sample: If you have a previous project with perfect stitches, place your test sample next to it. The stitches should look identical in size, spacing, and appearance on both sides.
Test multiple stitch types: Try a straight stitch, zigzag, and any decorative stitches you plan to use. Tension that works for straight stitching might need fine-tuning for wider zigzags or complex patterns.
When test results are ambiguous: If you can’t tell whether tension is correct, it probably is. Perfect tension often looks “invisible”, you notice stitches only when something’s wrong. If the seam holds, the fabric lies flat, and both sides look reasonably neat, you’re good to go.
When Should You Never Adjust Bobbin Tension
Never adjust bobbin tension if your machine is under warranty and the terms prohibit user adjustments. Many manufacturers void warranties if owners modify factory settings, especially on computerized or high-end machines. Check your warranty documentation first.
Don’t adjust if you’re using a borrowed or rented machine. Return it in the condition you received it. If you need different tension, adjust the top thread dial instead, that’s designed for user changes and easily reversible.
Avoid adjusting on vintage or antique machines unless you’re experienced. Older bobbin cases may have worn springs, corroded screws, or delicate mechanisms that can break easily. These machines often need professional restoration, not DIY tension tweaks.
Skip bobbin adjustment if you haven’t cleaned the machine recently. Lint buildup causes 40-50% of tension problems. Clean the bobbin area, feed dogs, and thread path thoroughly before assuming tension needs adjustment.
Don’t adjust for a single bad seam or project. If tension was fine yesterday and seems off today, the problem is likely temporary, wrong threading, a bad needle, or thread issues. Adjust bobbin tension only when problems persist across multiple projects.
Never adjust when you’re frustrated or rushed. Bobbin tension adjustment requires patience and precision. Making changes when you’re annoyed leads to over-adjustment, stripped screws, and more problems. Take a break and return when you’re calm.
Avoid adjustment if you’re not confident about the diagnosis. If you’re not sure whether the problem is actually bobbin tension (versus top tension, needle issues, or threading errors), don’t guess. Work through systematic troubleshooting or consult a technician.
Don’t adjust built-in bobbin systems without professional guidance. Some modern machines have bobbin tension mechanisms integrated into the machine body, not on a removable bobbin case. These systems require special tools and knowledge, DIY adjustment can cause expensive damage.
Skip it if the screw feels stuck or damaged. A screw that won’t turn smoothly might be corroded, cross-threaded, or stripped. Forcing it will make things worse. A replacement bobbin case costs $15-40; a broken tension assembly costs much more.
Can I Reset Bobbin Tension to Factory Settings
Yes, you can reset bobbin tension to factory settings if you marked the original position before adjusting. Simply turn the tension screw back to your marked starting point, counting the same number of quarter-turns in the opposite direction. This returns the tension to the manufacturer’s calibrated setting.
If you didn’t mark the starting position:
- Check your manual, some manufacturers list the factory setting as a specific number of turns from fully tight or fully loose
- Buy a new bobbin case, replacement cases come pre-set to factory tension (cost: $15-40 for most machines)
- Use the drop test, adjust until the threaded bobbin case drops 2-3 inches smoothly when bounced gently
- Visit a dealer, technicians can reset tension to factory specs in minutes, often for free or minimal cost
The “start from zero” method:
- Very gently turn the screw counterclockwise until you feel it stop (don’t force it)
- Turn clockwise exactly 1.5 full rotations
- Test and fine-tune from there
This method works for many machines, but verify with your manual first, some models use different baseline settings.
Why factory settings matter: The manufacturer calibrated your bobbin tension to work with standard threads and fabrics. This setting serves as a reliable baseline. If you’ve made multiple adjustments and lost track, returning to factory settings gives you a known starting point for fresh troubleshooting.
When factory settings aren’t optimal: Some machines leave the factory with slightly loose bobbin tension to prevent thread breakage during shipping and initial setup. After a few months of use, a minor tightening (¼ turn clockwise) might improve stitch quality. This is normal and doesn’t mean the factory setting was wrong.
Document your preferred setting: Once you find the perfect tension for your typical projects, mark that position separately from the factory setting. You might discover that “factory plus ¼ turn” works best for your sewing style and thread choices.
Alternative Fixes for Thread Tension Problems Without Adjusting Bobbin
Most tension problems resolve without touching the bobbin case. These alternative fixes address the root causes of tension issues and should always be your first approach.
Top thread tension dial adjustment: The easiest and most effective fix. Increase the number (tighten) if you see loops on the bottom. Decrease (loosen) if bobbin thread shows on top. Make single-number changes and test between adjustments.
Complete rethreading: Remove all thread and rethread from scratch with the presser foot UP (this opens the tension discs). Miss one thread guide and you’ll have tension problems no amount of adjustment can fix. Follow your manual’s threading diagram exactly.
Needle replacement: Replace the needle every 8-10 hours of sewing or after each project. Bent or dull needles cause skipped stitches and loops that look like tension problems but aren’t. Use the correct needle type and size for your fabric.
Thorough cleaning: Remove the needle plate, bobbin case, and feed dogs. Use a small brush to remove all lint, thread fragments, and dust. Lint buildup in the tension area causes inconsistent thread flow. Clean your machine after every 4-6 hours of sewing.
Thread quality upgrade: Switch from cheap thread to quality brands like Gutermann, Aurifil, or Mettler. Bargain thread has inconsistent diameter, weak fibers, and excessive lint, all causing tension-like symptoms. Quality thread costs more but prevents frustration.
Bobbin rewinding: Unevenly wound bobbins cause tension fluctuations. Wind a fresh bobbin at medium speed, ensuring thread distributes evenly. Don’t overfill, leave about 1/8 inch space at the top of the bobbin.
Presser foot pressure adjustment: If your machine has adjustable presser foot pressure, try increasing it for thick fabrics or decreasing it for delicate materials. Wrong pressure affects how fabric feeds, which impacts stitch formation.
Thread path lubrication: Put a tiny drop of sewing machine oil on the bobbin case thread path (where thread slides through). Wipe off excess. This reduces friction that can mimic tension problems. Oil every 8-10 hours of sewing.
Thread weight matching: Use the same weight thread in the bobbin and on top (both 50-weight, or both 40-weight). Mismatched weights create natural imbalance that looks like tension problems but isn’t.
Stitch length adjustment: Very short stitch lengths (under 1.5mm) can cause thread buildup and tension-like issues. Try increasing to 2.5mm for standard seams. Longer stitches reduce thread congestion.
Fabric stabilization: Add stabilizer or interfacing to stretchy or delicate fabrics. Fabric that stretches or shifts during sewing creates uneven stitches that look like tension problems. Stabilization prevents fabric distortion.
How to Adjust Bobbin Tension on Brother Sewing Machines
Brother machines come in two main bobbin configurations: front-loading oscillating hook systems (older models and some mechanical machines) and drop-in rotary hook systems (most modern computerized models). The adjustment process differs slightly between them.
For Brother front-loading bobbin cases:
- Remove the bobbin case by pulling the latch
- Locate the small flathead screw on the side of the case (usually brass or silver)
- Mark the starting position with a marker or photo
- Turn clockwise ¼ turn to tighten, counterclockwise to loosen
- Reinsert the case and test on scrap fabric
- Repeat in ¼-turn increments until stitches balance
For Brother drop-in bobbin systems: Many Brother drop-in systems have non-adjustable bobbin tension by design. The tension is built into the bobbin area and set at the factory. If you have tension problems with these machines:
- Adjust only the top tension dial (this solves 95% of issues)
- Ensure the bobbin is inserted correctly (thread pulls counterclockwise)
- Clean the bobbin area thoroughly
- Verify you’re using Brother-branded or high-quality bobbins (cheap bobbins cause problems)
Some Brother drop-in models DO have an adjustable screw under the needle plate or near the bobbin area. Check your specific model’s manual, if it shows a tension adjustment screw, follow the same quarter-turn method as front-loading cases.
Brother-specific tips:
- Brother machines are sensitive to bobbin quality, use Class 15 metal bobbins or Brother-branded plastic bobbins
- The automatic needle threader can affect top tension if misaligned, check that it’s working correctly
- Brother’s “Easy Set Bobbin” system requires the thread to pull counterclockwise; incorrect insertion mimics tension problems
Model-specific considerations:
- Brother CS6000i, XM2701, XR3774: Drop-in bobbins, typically non-adjustable
- Brother PQ1500SL, ST371HD: Front-loading cases with adjustable tension screws
- Brother Innov-ís series: Drop-in systems; check manual for specific model
When Brother tension won’t adjust: If you’ve tried everything and tension remains problematic, the bobbin case or tension assembly might be worn. Brother replacement bobbin cases cost $12-25 and install in seconds. Sometimes a fresh case solves persistent problems.

Wide Compatibility for Brother & Babylock Machines:This bobbin case is designed to directly replace part #XC3152221 and fits a wide range of popular Brother models—including CE1100PRW, CS6000I, CE2000, CE5000, PE770, SE400, SE700,SE600,SQ9185, and many more—as well as Babylock models such as BL80B Jubilant, Sofia BL137A, Grace BL40A, Rachel BL50A, and Ellure Plus BLR2. Refer to the full list in the description for additional compatible machines.

What you get: the package includes 4 pieces sewing machine bobbin case, you can change and replace according to your own interest, or share with others
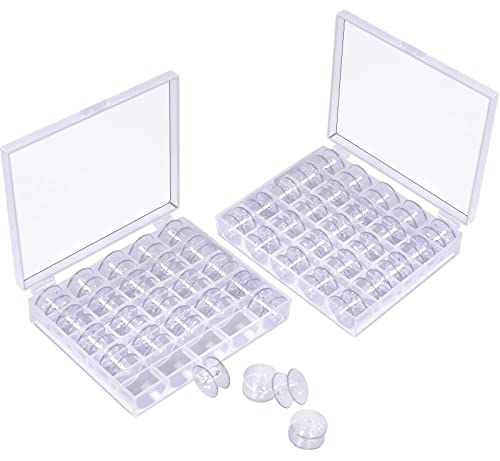
MULTI-QUANTITY: The bobbins for brother sewing machine package includes 50 transparent plastic bobbins, two transparent storage sewing bobbins case, great sewing machine accessories.
Frequently Asked Questions
How often should I adjust bobbin tension? Most sewists never need to adjust bobbin tension after the initial factory setting. Adjust only when changing thread weights significantly (from 50-weight to 12-weight, for example) or when troubleshooting persistent tension problems that don’t resolve with top tension changes.
Can I use a different bobbin case for different threads? Yes, many sewists keep multiple bobbin cases set to different tensions, one for standard thread, one for heavy topstitching thread, and one for fine embroidery thread. Mark each case clearly and swap them as needed. Replacement cases cost $15-40.
What if my bobbin tension screw is stripped? A stripped screw means the threads are damaged and won’t hold adjustment. You’ll need a replacement bobbin case. Don’t try to force the screw or use glue, it won’t work and may damage the machine. Order a new case from your machine’s manufacturer or a sewing supply retailer.
Is it normal for bobbin tension to change over time? Slight changes can occur as the tension spring ages or as microscopic thread grooves form in the metal. If your machine is more than 5 years old and tension has gradually shifted, a small adjustment (¼ turn) is normal. Sudden changes indicate a problem like lint buildup or a damaged bobbin case.
Do I need special tools to adjust bobbin tension? Most machines require only a small flathead screwdriver. Some brands (like Bernina) include a specialized tool. Use a precision screwdriver that fits the screw slot perfectly, hardware store screwdrivers are often too large and can strip the tiny screw.
Can I adjust bobbin tension on a serger? Sergers have different tension systems than regular sewing machines. Most sergers use loopers instead of bobbins, and tension adjustments happen via dials or knobs on the machine front. Check your serger manual, “bobbin tension” doesn’t apply to most serger models.
Why does my bobbin tension seem different with different thread brands? Thread diameter, coating, and fiber content vary between brands even at the same weight designation. Polyester thread behaves differently than cotton. High-quality threads have more consistent diameter, requiring less tension adjustment. Cheap threads vary within a single spool, causing inconsistent tension.
Should bobbin tension be tighter or looser than top tension? Neither, they should be balanced. The goal is for both threads to pull with equal force so they lock in the middle of the fabric. The top tension dial has a wider range because it adjusts more frequently, but the actual pulling force should be equivalent.
Can I adjust bobbin tension on a vintage Singer machine? Yes, vintage Singer machines (like the 15-91, 201, or 401) have adjustable bobbin cases with the same basic screw mechanism as modern machines. The screws may be more delicate due to age, so use extra care and make tiny adjustments. Consider professional service for valuable antique machines.
What’s the difference between bobbin tension and bobbin case tension? These terms mean the same thing, the resistance applied to thread as it passes through the bobbin case. “Bobbin tension” is shorthand for “bobbin case tension adjustment.”
How do I know if I need a new bobbin case? Replace your bobbin case if: the tension screw is stripped, the case is cracked or bent, thread grooves are visible in the metal, the spring is damaged, or tension won’t hold after adjustment. Cases wear out after years of use, replacement is normal maintenance.
Can automatic tension systems eliminate the need for bobbin adjustment? Machines with automatic tension (like some Bernina or Janome models) adjust top tension electronically but still rely on fixed bobbin tension. You may still need to adjust bobbin tension for specialty threads or techniques, though less frequently than on manual machines.
Conclusion
Learning how to adjust bobbin tension safely empowers you to handle one of sewing’s most misunderstood challenges. Remember that bobbin tension adjustment should always be your last resort, not your first response to stitch problems. Start by rethreading your machine, checking your needle, cleaning the bobbin area, and adjusting top tension, these steps resolve the vast majority of tension issues without ever touching the bobbin case.
When bobbin adjustment is truly necessary, work in careful quarter-turn increments, test between each change, and always mark your starting position. The tiny screw on your bobbin case is delicate and designed for precision, not force. Patience and systematic testing will get you to perfect stitches faster than aggressive turning.
Your next steps:
- Clean your machine thoroughly before assuming you have a tension problem
- Mark your current bobbin tension setting right now, before you need to adjust it
- Keep a tension journal noting which thread and fabric combinations work with your current settings
- Invest in quality thread, it prevents more tension problems than any adjustment can fix
- Practice the drop test so you can quickly verify bobbin tension mechanically
With these techniques in your sewing toolkit, you’ll approach tension problems with confidence instead of frustration. Perfect stitches are within reach, and now you know exactly how to achieve them safely.