


Quick Answer
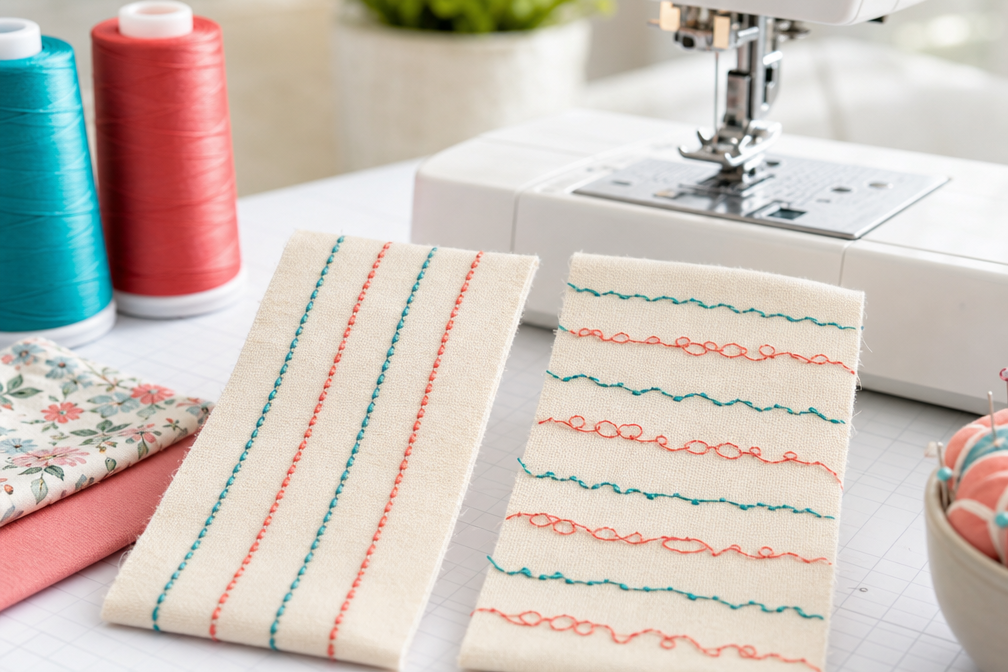
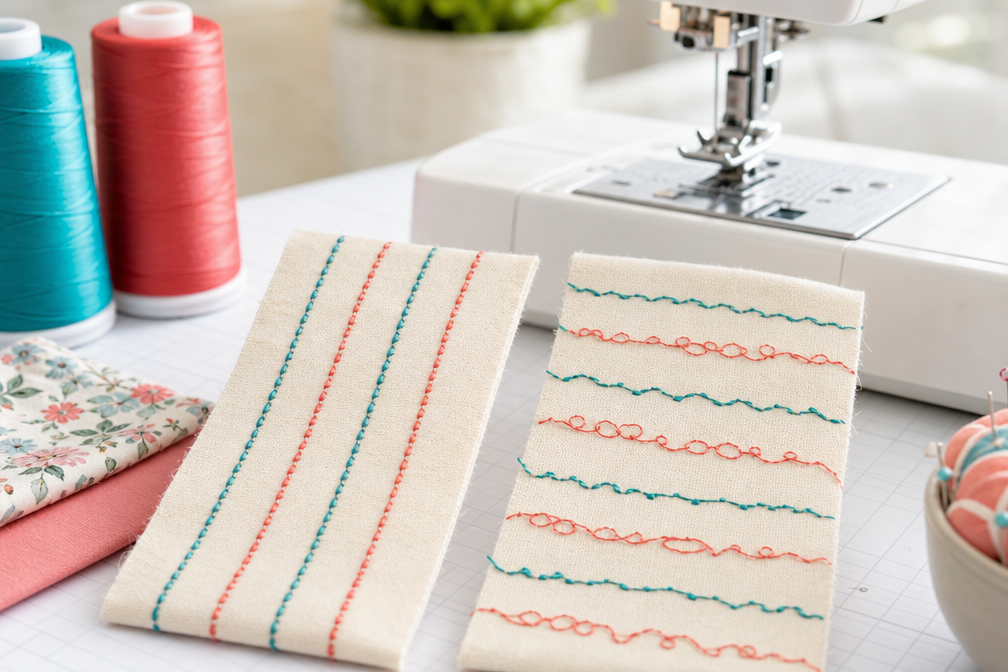
Sewing machine tension controls how tightly the upper and bobbin threads interlock within the fabric layers. When tension is balanced correctly, the thread lock sits in the middle of the fabric and stitches look identical on both sides. Test strips, small fabric samples sewn with contrasting thread colors, reveal tension problems instantly and help you dial in perfect settings before starting your actual project.
Key Takeaways
- Balanced tension creates stitches where threads lock in the center of the fabric, with identical appearance on both top and bottom
- Test strips use contrasting thread colors (bright top thread, different bobbin color) to make tension problems visible immediately
- Top thread showing on bottom means upper tension is too loose or bobbin tension is too tight
- Bobbin thread showing on top indicates upper tension is too tight or bobbin tension is too loose
- Adjust upper tension first,most machines have a numbered dial (3-5 is typical), and 90% of tension fixes happen here
- Bobbin tension should only be adjusted when upper tension adjustments don’t solve the problem
- Different fabrics require different tension,lightweight fabrics need lower tension, heavy fabrics need higher tension
- Thread weight matters,thicker thread needs looser tension, fine thread needs tighter tension
- Make test strips on the same fabric and thread you’ll use for your project for accurate results
- Common mistakes include adjusting bobbin tension first, skipping test strips, or using different fabric for testing
What Is Sewing Machine Tension and Why Does It Matter
Sewing machine tension is the amount of resistance applied to both the upper thread and bobbin thread as they pass through your machine to create a stitch. The upper thread travels through tension discs or a tension assembly, while the bobbin thread has its own tension spring in the bobbin case. When these two threads meet, they should lock together in the middle of your fabric layers, creating a balanced stitch.
Proper tension matters because it directly affects stitch quality, seam strength, and the finished appearance of your project. Unbalanced tension creates visible problems:
- Puckered seams that won’t lay flat
- Loose stitches that can pull apart easily
- Thread loops on the top or bottom of fabric
- Uneven stitch appearance that looks unprofessional
- Thread breakage during sewing
For garment sewers, poor tension can ruin the drape and fit of clothing. For quilters, it affects how blocks lay flat and whether seams hold up to use and washing. For home décor projects, visible tension problems make curtains, pillows, and upholstery look homemade in a bad way.
The good news? Once you understand how to read tension problems and make adjustments, you can fix most issues in under five minutes.
How Do I Know If My Sewing Machine Tension Is Wrong
Your sewing machine tension is wrong when stitches don’t look identical on both sides of the fabric, when you see loops or thread from one side showing on the other, or when fabric puckers along the seam line. These symptoms appear immediately when you sew, making tension problems easy to spot if you know what to look for.
Visual signs of tension problems:
- Loops on the bottom surface mean upper tension is too loose
- Loops on the top surface mean upper tension is too tight
- One thread color visible on the wrong side indicates imbalance
- Puckered fabric along the seam suggests tension is too tight on one or both threads
- Loose, sloppy stitches that pull apart easily mean overall tension is too loose
- Thread breaking frequently often indicates tension is too tight
Physical signs while sewing:
- Fabric doesn’t feed smoothly through the machine
- You hear clicking or popping sounds from the tension assembly
- Thread shreds or breaks repeatedly
- Bobbin thread pulls up through the fabric
- Seams pull apart with minimal pressure
The fastest way to diagnose tension problems is to sew a test strip using two highly contrasting thread colors, one in the needle and a completely different color in the bobbin. This makes it instantly obvious which thread is showing where it shouldn’t.
What Should a Tension Test Strip Look Like
A perfect tension test strip shows identical stitches on both the top and bottom of the fabric, with no thread color from one side visible on the other side. The stitches should lay flat against the fabric without puckering, and when you hold the strip up to light, the thread lock (where the two threads meet) should sit exactly in the middle of the fabric layers.
Characteristics of balanced tension:
- Top side: Only the upper thread color is visible in smooth, even stitches
- Bottom side: Only the bobbin thread color is visible in smooth, even stitches
- No puckering: Fabric lays completely flat with no gathering along the seam
- Even stitch length: All stitches are the same size with consistent spacing
- Strong seam: When you pull gently on both sides, the seam holds firm without thread showing through
What problems look like on test strips:
| Problem | What You See | Which Thread Shows Where |
|---|---|---|
| Upper tension too loose | Loops on bottom, top thread visible on underside | Top thread color shows on bottom |
| Upper tension too tight | Loops on top, bobbin thread visible on top side | Bobbin thread color shows on top |
| Both tensions too tight | Fabric puckers, stitches pull fabric into ridges | Both sides may look “okay” but fabric distorts |
| Both tensions too loose | Loose, sloppy stitches on both sides | Threads don’t lock properly, seam is weak |
Pro tip: Make your test strip at least 6 inches long with a straight stitch. This gives you enough length to see patterns and consistency. Sew slowly and don’t pull or guide the fabric, let the feed dogs do the work.
Upper Thread Tension vs Bobbin Tension: What’s the Difference
Upper thread tension is controlled by a numbered dial or digital setting on the front or top of your sewing machine and affects only the thread coming from the spool through the needle. Bobbin tension is controlled by a small screw on the bobbin case and affects only the thread coming from the bobbin. Most tension adjustments should happen on the upper tension dial because bobbin tension is factory-set and rarely needs changing.
Upper thread tension system:
- Location: Tension dial numbered 0-9 (most machines) or digital display
- How it works: Thread passes between two metal discs that squeeze together when you increase the number
- Adjustment frequency: Change this for different fabrics, thread weights, and projects
- Typical range: 3-5 for most general sewing, 2-3 for lightweight fabrics, 5-7 for heavy fabrics
Bobbin tension system:
- Location: Small screw on the side of the bobbin case (front-loading) or on the bobbin housing (top-loading)
- How it works: A spring presses against the thread as it unwinds from the bobbin
- Adjustment frequency: Rarely, only when upper tension adjustments don’t fix the problem
- Factory setting: Pre-calibrated for standard thread and shouldn’t need frequent changes
The 90/10 rule: About 90% of tension problems are fixed by adjusting upper tension only. Only 10% of cases require bobbin tension adjustment. Always start with upper tension and only touch bobbin tension as a last resort.
When to adjust which tension:
- Adjust upper tension when switching fabrics, thread weights, or when test strips show imbalance
- Adjust bobbin tension only when you’ve tried all upper tension settings and problems persist, or when using specialty threads (metallic, heavy topstitching thread)
How to Adjust Tension on a Brother Sewing Machine

On Brother sewing machines, the tension dial is typically located on the front of the machine above the needle area, marked with numbers from 0 to 9, with 4 being the standard setting. To adjust tension, turn the dial to a higher number to tighten (if bobbin thread shows on top) or to a lower number to loosen (if top thread shows on bottom), making changes in small increments of 0.5 to 1 number at a time.
Step-by-step adjustment process:
- Thread your machine completely with contrasting thread colors (bright color on top, different color in bobbin)
- Set tension to 4 (the standard starting point for Brother machines)
- Sew a test strip on your project fabric using a straight stitch
- Examine both sides of the test strip in good light
- Identify the problem:
- If bobbin thread shows on top → increase the number (turn dial right/clockwise)
- If top thread shows on bottom → decrease the number (turn dial left/counterclockwise)
- Adjust by 0.5 to 1 increment and sew another test strip
- Repeat until both sides show only their own thread color
Brother-specific tips:
- Computerized Brother models may have an automatic tension setting, switch to manual mode for adjustments
- The tension release lever must be up (in sewing position) when adjusting, if it’s down, tension discs are open and adjustments won’t work
- Brother’s numbered system is straightforward: higher numbers = tighter tension, lower numbers = looser tension
- Don’t skip past 2 or 7 without testing, extreme settings usually indicate a different problem (threading error, wrong needle, damaged bobbin case)
Common Brother tension mistakes:
- Adjusting tension with the presser foot up (tension discs are open, so changes don’t register)
- Making large jumps (going from 4 to 7 in one step) instead of small increments
- Forgetting to rethread after adjusting (sometimes tension issues are actually threading issues)

Industrial Sewing Machine Tension Spring, Check, WILL FIT, BROTHER, JUKI + MORE


METAL FRAME: The Brother 1034D is a durable serger made with a high-quality metal frame and interior components. Underlooper Threader-Yes
Why Is My Top Thread Showing on the Bottom of Fabric
Top thread showing on the bottom of fabric means your upper tension is too loose or your bobbin tension is too tight, allowing the upper thread to pull through to the underside instead of locking in the middle of the fabric layers. This is one of the most common tension problems and usually requires increasing the upper tension dial number.
Primary causes:
- Upper tension set too low for the fabric weight or thread type
- Tension discs not engaged because presser foot wasn’t up when threading
- Thread not properly seated in the tension assembly
- Bobbin tension too tight (less common, but possible)
- Wrong needle size for the thread weight being used
Quick fixes to try first:
- Rethread the upper thread with the presser foot UP so tension discs open, then lower the foot before sewing
- Increase the tension dial by 1-2 numbers and test again
- Check the thread path to ensure thread is caught in all guides and fully seated in tension discs
- Verify presser foot pressure is appropriate for your fabric thickness
When to check bobbin tension instead:
If you’ve increased upper tension to 7 or higher and top thread still shows on the bottom, your bobbin tension might be too tight. Test this by holding your bobbin case by the thread, it should drop slowly and smoothly. If it doesn’t drop at all or drops in jerky movements, bobbin tension needs adjustment.
Fabric-specific considerations:
- Lightweight fabrics (chiffon, organza, silk) naturally need lower tension, but if top thread shows through, increase by 0.5 increments
- Stretchy fabrics (knits, jersey) may show this problem if you’re pulling the fabric while sewing, let the feed dogs do the work
- Multiple layers (quilting, bag making) may need higher tension than you’d use for a single layer
Tension Too Tight vs Too Loose: How to Tell the Difference
Tension that’s too tight causes fabric to pucker along the seam line, creates a stiff seam that doesn’t drape naturally, and may cause thread to break frequently. Tension that’s too loose creates loops of thread on the fabric surface, produces weak seams that pull apart easily, and shows thread from one side visible on the other side.
Too tight symptoms:
- Fabric puckers and gathers along the seam, won’t lay flat
- Seam feels stiff and doesn’t have natural drape
- Thread breaks repeatedly during sewing
- Stitches pull fabric into ridges or tunnels
- Both thread colors may look “okay” on their respective sides, but fabric distorts
- Seam is difficult to rip out because threads are compressed
Too loose symptoms:
- Loops appear on top or bottom of fabric
- Thread from one side is clearly visible on the other side
- Seam pulls apart easily with minimal pressure
- Stitches look sloppy and uneven
- Thread nests or bunches up under the fabric
- Seam is easy to rip out because threads aren’t locked properly
Quick diagnostic test:
Hold your sewn test strip up to a light source. With balanced tension, you should see the thread lock (where threads meet) sitting exactly in the middle of the fabric thickness. If the lock is closer to the top surface, upper tension is too tight. If it’s closer to the bottom surface, upper tension is too loose.
Both tensions wrong:
Sometimes both upper and bobbin tension are off in the same direction. If you’ve adjusted upper tension through the full range and nothing improves, check your bobbin tension. The bobbin case should drop slowly when held by the thread, if it drops like a rock, tension is too loose; if it doesn’t drop at all, it’s too tight.
Do I Need to Adjust Tension for Different Fabrics
Yes, different fabrics require different tension settings because fabric weight, thickness, and weave structure affect how threads lock together. Lightweight fabrics like silk or chiffon need lower tension (2-3 on most machines) to prevent puckering, while heavy fabrics like denim or canvas need higher tension (5-7) to create strong seams that hold multiple thick layers together.
Fabric-based tension guidelines:
- Sheer/lightweight fabrics (chiffon, organza, voile): Tension 2-3, use fine thread and small needle
- Light to medium fabrics (cotton quilting fabric, linen, chambray): Tension 3-4, standard thread and needle
- Medium to heavy fabrics (denim, canvas, upholstery): Tension 5-6, heavier thread and larger needle
- Very heavy fabrics (multiple denim layers, leather, vinyl): Tension 6-7, topstitching thread and appropriate needle
- Knit fabrics (jersey, interlock, rib knit): Tension 3-4, use stretch needle and don’t pull fabric while sewing
Why fabric matters:
Thick fabrics create more space between the top and bottom surfaces where threads need to lock. Higher tension ensures threads pull tight enough to meet in the middle of that thicker space. Thin fabrics have almost no space between surfaces, so threads lock with minimal tension, too much tension compresses the thin fabric and causes puckering.
Thread weight also affects tension:
- Fine thread (60wt, 80wt) needs lower tension because it’s delicate
- Standard thread (40wt, 50wt) works with medium tension settings
- Heavy thread (30wt, 12wt topstitching) needs lower tension to accommodate thickness
Pro tip: Always make a test strip on a scrap of your actual project fabric before starting. Fabric from the same bolt can behave differently than your test fabric if it’s a different weight or weave.

2X STRONGER STEEL — Constructed with reinforced, thick shafts that withstand the resistance of dense, heavy fabrics without bending or breaking, staying sharp longer for consistent, skip-free stitching through any material from start to finish.

[Leather Needles for Hand Sewing]: The leather sewing needle set includes 9pcs needles of various sizes and shapes. Each type needle has a unique purpose, which are suitable for various sewing or maintenance projects to meet your different sewing and repair needs.

THICK WAXED THREAD: sturdy upholstery thread, 0.55mm thick and 22 yards per spool. Made from high-quality 100% polyester, ensuring excellent durability
How to Make a Sewing Machine Tension Test Strip
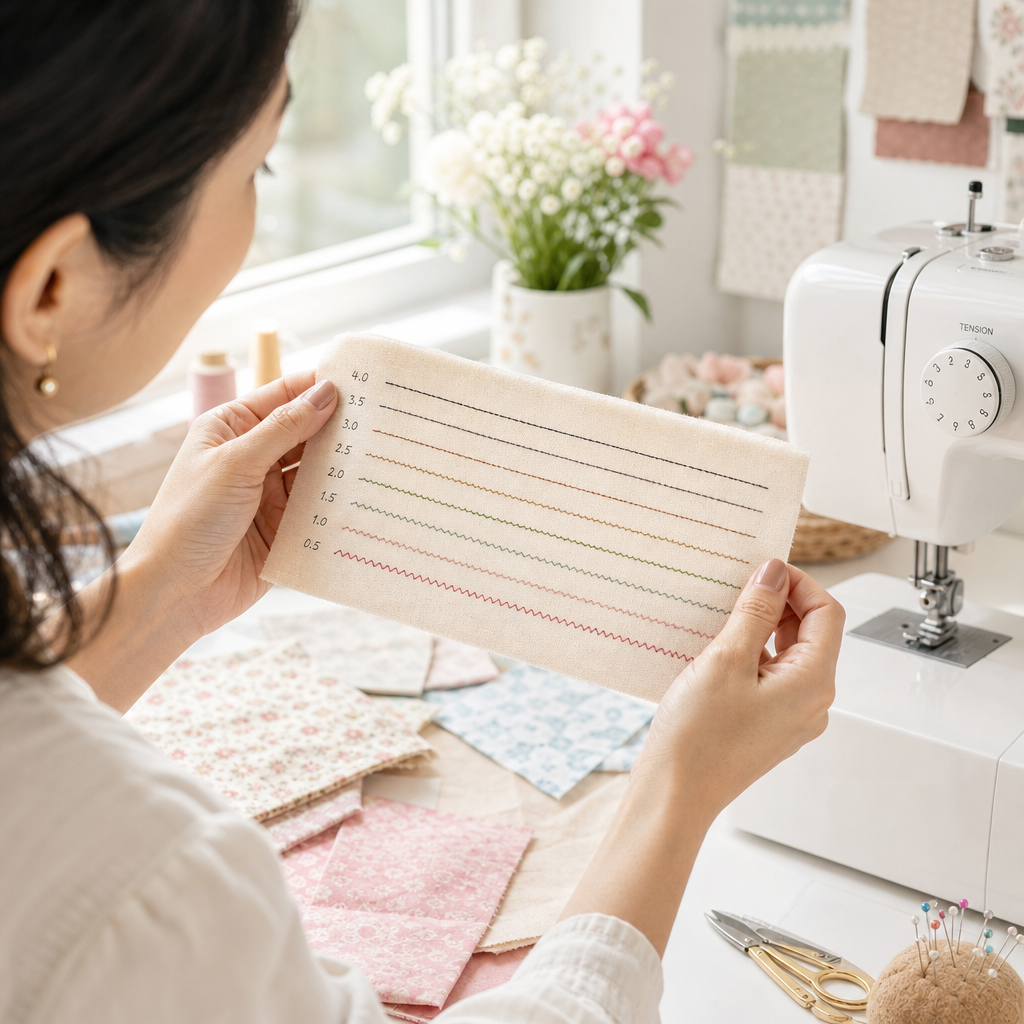
To make a tension test strip, cut a piece of your project fabric about 6 inches long by 3 inches wide, thread your machine with a bright contrasting color on top and a completely different color in the bobbin, then sew a straight line down the center of the fabric strip at your normal sewing speed. The contrasting colors make it immediately obvious which thread is showing where it shouldn’t.
Materials needed:
- Fabric scrap from your actual project (same weight, weave, and fiber content)
- Two contrasting thread colors (example: bright pink on top, bright blue in bobbin)
- Your normal needle for the project
- Good lighting to examine results
Step-by-step process:
- Cut fabric to 6″ × 3″ (or larger, more length gives better data)
- Thread the machine with contrasting colors, making sure to thread with presser foot UP
- Set stitch length to 2.5-3.0 (standard straight stitch)
- Set tension to your machine’s standard setting (usually 4)
- Sew straight down the center of the fabric strip without pulling or guiding
- Examine both sides in good light
- Adjust tension based on what you see
- Sew another test strip after each adjustment until perfect
What to look for:
- Top side: Should show only the top thread color in smooth, even stitches
- Bottom side: Should show only the bobbin thread color in smooth, even stitches
- Fabric: Should lay completely flat with no puckering
- Thread lock: When held to light, threads should meet in the middle of fabric thickness
Advanced testing:
For critical projects, make multiple test strips:
- One with a straight stitch
- One with a zigzag stitch (tension affects zigzag differently)
- One on a single layer of fabric
- One on the same number of layers you’ll use in the project
Common test strip mistakes:
- Using different fabric than your project (results won’t transfer)
- Using similar thread colors that don’t show problems clearly
- Making strips too short to see patterns
- Pulling or guiding the fabric instead of letting feed dogs work
- Not testing after every tension adjustment

Complete Sewing Kit-The travel sewing kit contains all the necessary tools that are required for performing basic repairs-a scissor, threads (18 colors), 30 sewing needles, shirt buttons, seam ripper, needle threader tools and a foldable tape measure.

[ Valuable and portable sewing kit ] -High quality threads in 42 rainbow colors sewing thread(40yards/spool)with 9 sewing needls and 2 needle threaders to get you started on any stitching projects and allow you to find the perfect matching color for the mend

Mini sewing kit with all the essentials for basic sewing and repairs; suitable for novice and expert sewers alike
When Should I Adjust Bobbin Tension Instead of Top Tension
Adjust bobbin tension only when you’ve tried the full range of upper tension settings (from 2 to 7) and problems persist, or when using specialty threads like metallic, heavy topstitching, or woolly nylon that require non-standard bobbin tension. For 90% of normal sewing with standard thread, you should never need to touch bobbin tension.
Signs you might need to adjust bobbin tension:
- Upper tension at 7+ still shows top thread on bottom
- Upper tension at 2 or lower still shows bobbin thread on top
- You’re using heavy decorative thread in the needle that’s much thicker than bobbin thread
- You’re doing bobbin work (decorative thread in bobbin, sewing from the wrong side)
- Bobbin case drop test shows extreme results (drops like a rock or doesn’t drop at all)
How to test bobbin tension:
Hold the threaded bobbin case by the thread tail. The case should drop slowly and smoothly about 2-3 inches, then stop. Give the thread a gentle jerk, the case should drop another inch or two. This indicates proper tension.
- Drops fast and doesn’t stop: Tension too loose
- Doesn’t drop at all: Tension too tight
- Drops smoothly 2-3 inches: Tension is correct
How to adjust bobbin tension:
For front-loading bobbin cases:
- Locate the small screw on the side of the bobbin case (NOT the larger screw in the center)
- Turn clockwise (righty-tighty) in tiny increments to tighten, counterclockwise to loosen
- Make adjustments of 1/4 turn or less at a time
- Test with the drop test after each adjustment
For top-loading/drop-in bobbins:
Some machines have a small screw on the bobbin housing that adjusts tension. Others have no user-adjustable bobbin tension, you may need professional service.
Important warnings:
- Mark the original position of the screw with a marker or take a photo before adjusting
- Make tiny adjustments,1/4 turn can make a big difference
- Consider buying a second bobbin case for specialty threads so you don’t mess with your standard tension
- When in doubt, take it to a professional,incorrect bobbin tension adjustment can cause expensive damage
Common Mistakes When Fixing Sewing Machine Tension
The most common tension-fixing mistake is adjusting bobbin tension first instead of exhausting all upper tension options, followed by not rethreading the machine completely before making adjustments. Many apparent tension problems are actually threading errors, wrong needle size, or damaged needles rather than true tension issues.
Top mistakes sewers make:
- Adjusting bobbin tension first instead of trying the full range of upper tension settings
- Not rethreading completely with presser foot up to engage tension discs
- Using the wrong needle size for thread weight (causes tension-like symptoms)
- Skipping test strips and adjusting based on the actual project
- Making large tension jumps (going from 4 to 8) instead of small increments
- Using old or damaged needles that create irregular stitches
- Pulling or guiding fabric while sewing instead of letting feed dogs work
- Testing on different fabric than the actual project
- Not checking thread quality,old, cheap, or damaged thread causes problems
- Forgetting to lower presser foot before sewing (tension discs stay open)
Hidden causes of “tension” problems:
- Bent or dull needle: Creates irregular stitches that look like tension issues
- Wrong needle type: Universal needle on knits, or ballpoint on wovens
- Lint buildup in bobbin area or tension assembly
- Incorrectly wound bobbin: Thread wound unevenly or too loose
- Wrong bobbin type: Using generic bobbins instead of brand-specific
- Thread caught on spool: Thread snagging on spool notch or rough edges
- Presser foot pressure wrong: Too light or too heavy for fabric
Troubleshooting checklist before adjusting tension:
- Rethread upper thread completely with presser foot UP
- Remove and reinsert bobbin, checking thread direction
- Install a fresh, correct-size needle
- Clean lint from bobbin area and tension assembly
- Verify you’re using the correct bobbin for your machine
- Check that thread moves freely from spool
- Confirm presser foot is down before sewing
- Test on actual project fabric with contrasting thread colors
When to seek professional help:
If you’ve tried all adjustments, rethreaded multiple times, changed needles, and cleaned the machine, but problems persist, your machine may need professional service. Tension assemblies can wear out, springs can weaken, and timing can drift, all issues that require a technician.
Why Does My Tension Look Fine on Test But Bad on Project
Tension can look perfect on a test strip but fail on your actual project when the test fabric doesn’t match your project fabric in weight, weave, or fiber content, or when you’re sewing different numbers of layers, curves, or seam types that affect how threads lock together. Always test on the exact same fabric and construction method you’ll use in the project.
Common test-to-project mismatches:
- Different fabric weight: Testing on medium cotton but project uses lightweight silk
- Different layer count: Testing on single layer but project has multiple layers
- Different seam types: Testing straight seams but project has curves, corners, or topstitching
- Different thread: Testing with old thread but using new thread for project
- Different speed: Testing slowly but sewing project at high speed
- Different technique: Testing without pins but project uses pins that affect fabric feed
Why layers matter:
Two layers of fabric create more thickness between top and bottom surfaces where threads lock. If you test on one layer but sew two layers, you may need to increase tension slightly. Three or more layers (quilting, bag making) often need even higher tension.
Why curves and corners matter:
Sewing curves and corners changes how fabric feeds through the machine. The fabric may stretch slightly on curves or bunch at corners, affecting tension. If your project has lots of curves, test on a curved seam, not just a straight line.
Solution: Match your test conditions exactly:
- Use fabric from your actual project (cut a small piece from seam allowance)
- Test with the same number of layers you’ll sew
- Include curves or corners if your project has them
- Use the same thread you’ll use for the project
- Sew at the same speed you’ll use
- Test with pins if you’ll pin your project
Speed-related tension changes:
Some machines’ tension behaves differently at high speed versus low speed. If you test slowly but sew fast, tension may appear different. Try to maintain consistent speed between testing and actual sewing.
Thread quality matters:
Old thread, cheap thread, or thread that’s been stored in sunlight can become brittle or weak. If you test with one thread but sew with another, results may differ. Always test with the exact thread you’ll use.
Best Thread Weight for Testing Sewing Machine Tension
The best thread weight for testing sewing machine tension is 40wt or 50wt polyester or cotton thread in highly contrasting colors, because these are standard weights that work for most general sewing and the contrasting colors make tension problems immediately visible. Use the same thread weight for testing that you plan to use for your actual project.
Standard thread weights:
- 60wt-80wt: Very fine thread for delicate fabrics, heirloom sewing, machine embroidery
- 50wt: Standard weight for general sewing, quilting, garments
- 40wt: Slightly heavier standard thread, common for quilting and general construction
- 30wt: Heavy thread for topstitching, decorative stitching
- 12wt: Very heavy thread for bold topstitching, jeans, crafts
Why 40wt or 50wt is ideal for testing:
These weights are thick enough to see clearly but fine enough to work on most fabrics. They’re what most sewers use for everyday projects, so testing with them gives results that transfer to real-world sewing.
Color contrast is critical:
Use colors that are as different as possible, bright pink and bright blue, yellow and purple, or white and black. Avoid similar colors (light blue and navy) or low-contrast combinations (beige and tan) because they make it hard to see which thread is showing where.
Match thread weight to project:
If your project uses specialty thread, test with that thread:
- Metallic thread: Test with metallic in needle, standard in bobbin
- Heavy topstitching thread: Test with topstitching thread in needle, standard in bobbin
- Invisible thread: Test with invisible in needle, standard in bobbin (though you may need to use a visible thread for testing, then switch)
Thread fiber matters less than weight:
Polyester, cotton, and poly-cotton blends all work fine for testing. The weight (thickness) affects tension more than the fiber content. However, some specialty fibers behave differently:
- Metallic thread is stiffer and may need lower tension
- Rayon thread is slippery and may need slightly higher tension
- Woolly nylon is stretchy and needs different tension than standard thread
Pro tip: Keep a set of bright contrasting thread spools specifically for tension testing. This way you don’t have to change thread colors on your project, just swap in the test threads, make your test strips, adjust tension, then swap back to project colors.
Is It Normal to Adjust Tension for Every Project
Yes, it’s completely normal to adjust tension for different projects because fabric weight, thread type, and construction methods all affect how threads lock together. Professional sewers and quilters routinely change tension settings multiple times per day depending on what they’re working on, and always make test strips before starting a new project with different materials.
When tension adjustments are necessary:
- Switching fabric weights (going from quilting cotton to denim)
- Changing thread types (standard to metallic, or 50wt to 30wt)
- Different construction methods (single layer to multiple layers)
- Specialty techniques (topstitching, edge stitching, decorative stitching)
- Different stitch types (straight stitch to zigzag or decorative stitches)
When you might not need to adjust:
- Same fabric and thread as your last project
- Similar weight fabrics (two different quilting cottons of similar weight)
- Continuing the same project after a break
Typical tension ranges by project type:
- Quilting with cotton: Usually 3.5-4.5
- Garment sewing with wovens: Usually 3-5 depending on weight
- Knit garments: Usually 3-4 with stretch needle
- Home décor with heavy fabrics: Usually 5-6
- Delicate fabrics: Usually 2-3
Building tension intuition:
As you gain experience, you’ll develop a sense for where to start tension for different projects. You might know that your machine likes 3.5 for quilting cotton and 5.5 for denim. But even experienced sewers make test strips to confirm, it takes 30 seconds and prevents hours of seam ripping.
Keep a tension log:
Many sewers keep a small notebook with their machine listing:
- Fabric type and weight
- Thread brand and weight
- Needle size and type
- Tension setting that worked
- Any special notes
This reference makes it easy to return to successful settings for similar projects.
Machine-to-machine variation:
Tension settings aren’t universal across machines. A “4” on one machine may equal a “5” on another brand. If you sew on multiple machines, each needs its own tension testing and adjustments.
Frequently Asked Questions
What tension should my sewing machine be on?
Most sewing machines should be set to 4 or 5 for standard sewing with medium-weight fabric and 50wt thread. However, the correct tension depends on your specific fabric, thread, and machine, always make a test strip to confirm rather than relying on a single number.
Can I damage my sewing machine by adjusting tension?
No, adjusting the upper tension dial cannot damage your machine, it’s designed for frequent adjustment. However, incorrectly adjusting bobbin tension by over-tightening the screw can damage the bobbin case spring, so only adjust bobbin tension as a last resort and in tiny increments.
Why does my bobbin thread keep breaking?
Bobbin thread breaks when bobbin tension is too tight, the bobbin is wound incorrectly or unevenly, lint has built up in the bobbin case, or you’re using the wrong bobbin type for your machine. Clean the bobbin area thoroughly and check that you’re using the correct bobbin before adjusting tension.
How do I know if my bobbin tension is too tight?
Hold your threaded bobbin case by the thread, if it doesn’t drop at all or drops in jerky movements, bobbin tension is too tight. With correct tension, the case should drop smoothly 2-3 inches, stop, then drop another inch when you jerk the thread gently.
Should I adjust tension for thick seams?
Yes, thick seams with multiple fabric layers usually need slightly higher tension (increase by 0.5-1) to ensure threads lock properly in the middle of the thicker fabric stack. Always test on the same number of layers you’ll sew in your project.
Can old thread cause tension problems?
Yes, old thread becomes brittle, weak, and may have uneven thickness that causes inconsistent tension. Thread stored in sunlight, heat, or humidity degrades faster. If thread is more than 2-3 years old or looks fuzzy and weak, replace it before troubleshooting tension.
Why is my tension perfect on straight stitches but wrong on zigzag?
Zigzag and decorative stitches often need slightly lower tension than straight stitches because the thread travels a longer path as it moves side to side. Reduce tension by 0.5-1 when switching from straight to zigzag stitches.
Do I need to adjust tension when using a walking foot?
Sometimes, a walking foot changes how fabric feeds through the machine and may require slight tension adjustment, usually 0.5 higher. Make a test strip with the walking foot attached to check.
What does it mean when both threads show on both sides?
When both thread colors appear on both sides of the fabric, tension is extremely unbalanced or you have a threading error. Rethread the entire machine with the presser foot up, check that thread is properly seated in all guides, and verify the bobbin is inserted correctly.
Can needle size affect tension?
Yes, using the wrong needle size creates holes that are too large or too small for the thread, which affects how threads lock. Match needle size to thread weight: 70/10 or 80/12 for fine thread, 90/14 for standard thread, 100/16 or 110/18 for heavy thread.
Why does tension change after I clean my machine?
Cleaning can remove lint from tension discs or bobbin area, which actually improves tension consistency. If tension seems different after cleaning, it’s because the machine is now working correctly, adjust to the new baseline and make test strips.
Should tension be different for topstitching?
Yes, topstitching often needs slightly lower tension (reduce by 0.5-1) especially if using heavy topstitching thread, to prevent puckering and allow the decorative stitch to sit nicely on the fabric surface without pulling tight.
Conclusion
Sewing machine tension explained with test strips is the foundation of professional-looking sewing results. Balanced tension creates stitches where threads lock in the middle of fabric layers, with identical appearance on both sides and no puckering or thread showing through. The simple practice of making test strips with contrasting thread colors before every project saves hours of frustration and seam ripping.
Your action plan for perfect tension:
- Always make test strips on your actual project fabric with contrasting thread colors
- Start with upper tension adjustments,90% of problems are solved here
- Make small changes of 0.5-1 increment at a time
- Rethread completely with presser foot up before troubleshooting
- Match your test conditions to your project (same fabric, layers, thread)
- Keep a tension log to build your reference library
- Only adjust bobbin tension as a last resort after exhausting upper tension options
Remember that adjusting tension for different fabrics and threads is completely normal and expected. Professional sewers change tension settings multiple times per day. The 30 seconds spent making a test strip prevents hours of fixing mistakes later.
Start your next project by cutting a 6-inch fabric scrap, threading contrasting colors, and sewing a test strip. Examine both sides in good light, adjust as needed, and test again until perfect. This simple habit transforms your sewing quality immediately and builds the confidence to tackle any fabric or technique.


