Quick Answer: Change your sewing machine needle after every 6-8 hours of active sewing time, or after completing one large project like a quilt or garment. Hand sewing needles should be replaced when they show visible signs of wear like roughness, bending, or difficulty penetrating fabric. For best results, switch needles between different fabric types and weights to prevent damage to both your fabric and machine.
Key Takeaways
- Replace sewing machine needles every 6-8 hours of sewing or after each major project
- Hand sewing needles last longer but should be changed when they feel rough or snag fabric
- Dull needles cause skipped stitches, fabric puckering, thread breakage, and can damage your machine
- Different fabrics require different needle types and wear them out at different rates
- Quilting needles need more frequent changes due to multiple fabric layers and batting
- Professional seamstresses change needles daily or even multiple times per day
- A bent or damaged needle can break your machine’s timing and cost hundreds in repairs
- Expensive needles don’t necessarily last longer, but they often perform better while sharp
- Never reuse a needle after it’s been removed, even if it looks fine
- Keep a needle log to track hours and fabric types for optimal replacement timing
What Happens If You Use a Dull Sewing Needle Too Long
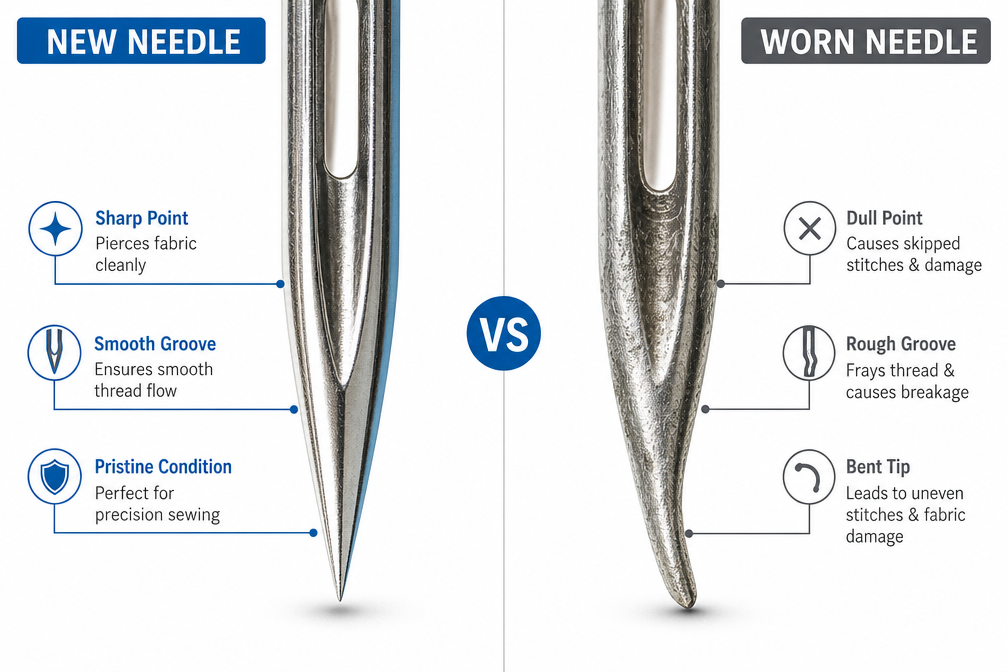
Using a dull needle beyond its lifespan creates a cascade of sewing problems that get progressively worse. The needle stops piercing fabric cleanly and instead pushes through with force, causing visible holes, puckered seams, and damaged fabric fibers that can’t be repaired.
Immediate fabric damage includes:
- Pulled threads and snags in delicate fabrics like silk, satin, or jersey knits
- Enlarged holes that weaken seam integrity and create visible damage
- Puckered seams that won’t press flat, even with steam
- Skipped stitches that leave gaps in your seam line
- Thread shredding and breakage from increased friction
Machine damage risks:
A dull needle forces your sewing machine to work harder, putting stress on the motor, timing mechanism, and feed dogs. The needle can deflect as it tries to penetrate fabric, hitting the throat plate or bobbin case and causing burrs or chips. These metal fragments can then scratch your machine’s internal components.
The worst-case scenario involves a needle breaking inside the machine and damaging the hook timing. This repair typically costs $150-300 and requires a professional technician. For machines with computerized components, a broken needle can also damage sensors or circuit boards.
Thread and tension problems:
Dull needles create excessive friction against thread, causing it to fray and break. The rough needle surface acts like sandpaper on your thread, weakening it before it even enters the fabric. This leads to constant rethreading, frustration, and wasted time troubleshooting tension issues that aren’t actually tension-related.
How to Tell When a Needle Needs to Be Replaced
Your needle will give you clear signals when it’s time for a change, even if you haven’t tracked the hours. Learning to recognize these signs prevents damage and saves you from frustrating sewing sessions.
Visual inspection checklist:
- Bent tip: Hold the needle at eye level against a white background. Even a slight bend means immediate replacement.
- Dull or rounded point: A sharp needle has a distinct point. If it looks rounded or flattened, it’s done.
- Rough surface: Run your finger gently along the needle shaft. Any roughness, burrs, or sticky residue means replace it.
- Discoloration: Dark spots or blue/purple heat marks indicate metal fatigue from friction.
Performance indicators:
The needle will tell you through your sewing results. Replace immediately if you notice:
- Popping or thumping sounds as the needle enters fabric
- Skipped stitches, especially on knit fabrics
- Thread breaking repeatedly with proper tension settings
- Fabric puckering along seam lines
- Difficulty starting stitches or needle hesitation
- Pulled threads or snags on the fabric surface
The fabric test:
Take a scrap of the fabric you’re sewing and make a test seam. Examine both sides closely. If you see any holes larger than the thread, visible damage to the fabric weave, or irregular stitch formation, change the needle before continuing your project.
The sound test:
A sharp needle makes a clean, quiet “tick” sound as it penetrates fabric. A dull needle creates a louder “thump” or “pop” because it’s forcing its way through rather than cutting cleanly. Trust your ears.

PREMIUM QUALITY MATERIAL: Made of top quality high-strength steel, sharp smooth, sturdy and durable, not easy to bend, and long service life.

Universal needles are for most weights of woven fabrics

2X STRONGER STEEL — Constructed with reinforced, thick shafts that withstand the resistance of dense, heavy fabrics without bending or breaking, staying sharp longer for consistent, skip-free stitching through any material from start to finish.
Difference Between Sewing Machine Needle and Hand Sewing Needle Lifespan
Sewing machine needles wear out much faster than hand sewing needles because they penetrate fabric at high speed (up to 1,000 stitches per minute) and generate significant heat from friction. Hand sewing needles last considerably longer since they work at human speed and don’t experience the same thermal stress.
Sewing machine needle lifespan:
- 6-8 hours of active sewing time
- One large project (quilt, dress, jacket)
- 2-3 smaller projects (pillows, bags, simple garments)
- Immediately after sewing through thick or abrasive materials
Hand sewing needle lifespan:
- Several months of regular use for general sewing
- Multiple projects without replacement if properly cared for
- Until visible signs of wear appear (roughness, bending, difficulty penetrating)
- Longer for embroidery and beading needles used on soft fabrics
Why the difference matters:
Machine needles hit fabric at speeds that create friction heat, causing the metal to fatigue faster. The repeated impact against the throat plate and bobbin mechanism also contributes to wear. Hand needles work at room temperature and experience gentler forces, so the metal maintains its integrity longer.
However, hand sewing needles are more prone to bending from improper storage or dropping. A bent hand needle is just as useless as a dull one. Store them in a needle book or magnetic holder to prevent damage.
Cost considerations:
Because machine needles need frequent replacement, buy them in bulk packs of 10-25 needles. This brings the per-needle cost down to 50 cents or less. Hand sewing needles can be purchased in smaller quantities since they last longer, but a variety pack with different sizes and types offers the best value.

Pack of 10 Genuine Singer Sewing Machine Needles


These purple tip needles by Janome effectively prevent skipped stitches when sewing and embroidering on heavy fabrics, including knits, quilting multiple layers, and also for sewing across the hem
How Many Hours of Sewing Before Changing Needle
The standard recommendation is 6-8 hours of active sewing time before changing your machine needle, but this varies significantly based on what you’re sewing and how you’re using your machine.
Fabric type affects needle life:
- Lightweight fabrics (silk, chiffon, lawn): 8-10 hours
- Medium-weight fabrics (quilting cotton, linen, chambray): 6-8 hours
- Heavy fabrics (denim, canvas, upholstery): 4-6 hours
- Abrasive fabrics (laminated cotton, vinyl, faux leather): 2-4 hours
- Fabrics with embellishments (sequins, beads): 1-2 hours or per project
Project-based replacement schedule:
Many sewists find it easier to change needles by project rather than tracking hours:
- Start every quilt with a fresh needle
- Change needles between garment pieces (after cutting but before assembly)
- Replace after hemming jeans or heavy items
- Use a new needle for each special occasion garment
- Change immediately after sewing through pins (yes, it happens)
Professional timing:
Professional seamstresses and alterations specialists often change needles daily or even multiple times per day. When you’re sewing 6-8 hours daily, that needle accumulates serious wear. Production sewers working on the same fabric type all day might stretch to two days, but custom sewers working with varied fabrics change more frequently.
Tracking methods:
Keep a small notebook by your machine or use a phone app to log:
- Date of needle change
- Needle type and size
- Projects completed with that needle
- Approximate hours used
- Fabric types sewn
This data helps you identify patterns and optimize your replacement schedule. You might discover that you can safely extend needle life on certain projects or need to change more frequently with others.

Do You Need to Change Needles Between Different Fabric Types
Yes, changing needles between different fabric types is essential for achieving professional results and preventing damage to both your fabric and machine. Different fabrics require different needle points, sizes, and designs to penetrate cleanly without causing harm.
When to definitely change:
- Moving from woven to knit fabrics (or vice versa)
- Switching from lightweight to heavyweight fabrics
- Changing from natural to synthetic fibers
- Moving from standard fabrics to specialty materials (leather, vinyl, laminated)
- Going from everyday sewing to delicate or expensive fabrics
Needle type matching guide:
| Fabric Type | Needle Type | Why It Matters |
|---|---|---|
| Knits, jersey, spandex | Ballpoint or stretch | Rounded tip slides between fibers instead of piercing them |
| Woven cotton, linen | Universal or sharp | Clean piercing for tight weaves |
| Denim, canvas, upholstery | Denim or heavy-duty | Reinforced shaft prevents bending and breaking |
| Silk, chiffon, voile | Microtex/sharp | Fine point prevents snags and pulls |
| Leather, vinyl, suede | Leather | Cutting point and special coating prevent sticking |
| Multiple layers, quilting | Quilting | Tapered point penetrates layers without shifting |
Size matters too:
Even within the same fabric category, needle size should match fabric weight. A size 70/10 needle works for lightweight cotton, but you need an 80/12 or 90/14 for quilting cotton, and a 100/16 or 110/18 for denim or canvas.
Using the wrong size creates problems. Too small and the needle bends or breaks. Too large and you get visible holes in your fabric.
The cost-benefit calculation:
Needles cost 50 cents to $2 each. Fabric costs $10-30 per yard or more. Spending a dollar to protect a $50 fabric investment is obvious math. Plus, using the right needle means better stitch quality, less frustration, and faster sewing since you’re not stopping to fix problems.
Common mistake to avoid:
Don’t assume a universal needle works for everything. While universal needles handle many fabrics adequately, they’re a compromise. For best results on specialty fabrics, use the specialty needle designed for that material.

[Leather Needles for Hand Sewing]: The leather sewing needle set includes 9pcs needles of various sizes and shapes. Each type needle has a unique purpose, which are suitable for various sewing or maintenance projects to meet your different sewing and repair needs.
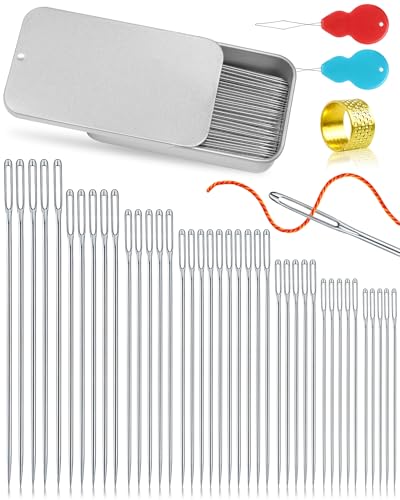
【Material】Our large eye pointed stitching needles are made of high quality stainless steel, with sharp needles, smooth surface, durable and not easy to bend, not easy to rust, corrosion resistant, the resistance through the cloth is small, it is easier to slip through.

30PCS Universal Sewing Machine Needles - Sizes 90/14 100/16 110/18 Heavy Duty Sewing Machine Needle for Thick Fabric Including Canvas Leather Embroidery Jeans
Can a Dull Needle Damage My Sewing Machine
A dull needle can absolutely damage your sewing machine, sometimes causing repairs that cost more than the machine itself. The damage happens gradually through increased stress on components and suddenly when a needle breaks or deflects.
Timing mechanism damage:
Your machine’s timing synchronizes the needle and bobbin hook so they meet at precisely the right moment to form a stitch. A dull needle can deflect as it tries to force through fabric, causing it to hit the hook. This throws off the timing, resulting in skipped stitches, thread nests, or complete failure to form stitches.
Timing repairs require a professional technician and typically cost $150-300. Some machines need complete hook assembly replacement, which can run $200-400 including labor.
Throat plate and bobbin case damage:
When a dull needle deflects, it often strikes the throat plate (the metal plate under your presser foot) or the bobbin case. This creates burrs, scratches, or chips in the metal. These rough spots then snag your thread on every stitch, causing constant thread breakage and tension problems.
Replacing a throat plate costs $20-60 depending on your machine. Bobbin cases run $15-40. But the real cost is the diagnostic time to identify the problem and the frustration of dealing with mysterious thread issues.
Motor and drive system stress:
A dull needle forces your machine’s motor to work harder to push the needle through fabric. Over time, this extra load can cause premature motor wear, belt stretching, or gear damage. While this damage accumulates slowly, it shortens your machine’s lifespan.
Computerized machines are especially vulnerable because increased motor load can affect the computer’s ability to regulate stitch formation and speed control.
Feed dog and presser foot wear:
When a dull needle struggles to penetrate fabric, the fabric doesn’t move smoothly under the presser foot. This causes the feed dogs to work harder and can lead to uneven fabric feeding, which then causes more needle deflection. It’s a vicious cycle that accelerates wear on multiple components.
Prevention is cheap:
A pack of 10 needles costs $5-15. A machine repair costs $100-400. The math is simple. Change your needles regularly and save yourself expensive repairs and downtime.
Signs Your Sewing Machine Needle Is Bent or Damaged
A bent or damaged needle creates immediate problems and should be replaced before you sew another stitch. Even a slight bend that’s barely visible can cause serious issues.
Visual inspection technique:
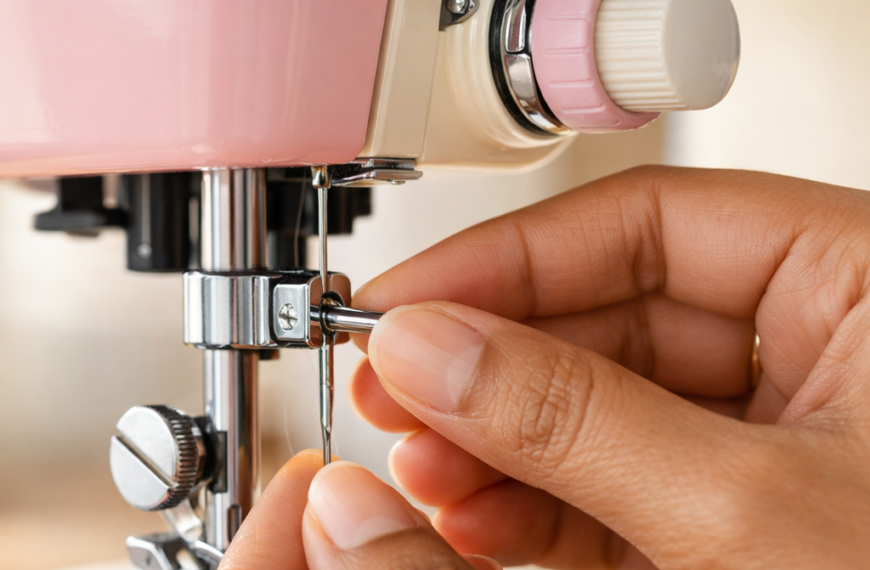
Remove the needle from your machine and hold it at eye level against a white background or piece of paper. Roll it slowly between your fingers while looking at the shaft. Any deviation from perfectly straight means the needle is bent.
Also check:
- The point should be sharp and centered, not angled to one side
- The shaft should be smooth with no rough spots or discoloration
- The eye should be clean and undamaged
- The flat side of the shank should be truly flat
Audible clues:
- Clicking or ticking: Louder than normal needle sound indicates the needle is hitting something
- Scraping: Metal-on-metal sound means the needle is striking the throat plate or hook
- Popping: The needle is forcing through fabric instead of cutting cleanly
- Rattling: The needle may be loose in the clamp or bent enough to vibrate
Stitch quality indicators:
- Skipped stitches, especially consistently on one side
- Uneven stitch length or formation
- Thread breaking on the top thread specifically
- Holes or pulls in fabric along the stitch line
- Puckering on one side of the seam only
Fabric damage patterns:
A bent needle often creates a distinctive pattern of damage. Look for:
- Pulled threads in a consistent pattern (every 3rd stitch, for example)
- Holes that are elongated rather than round
- Damage on only one side of the fabric
- Snags that appear in a regular rhythm
The paper test:
Take a piece of paper and slowly hand-turn your machine to lower the needle through the paper. If the needle creates a clean round hole, it’s straight. If the hole is elongated or torn, the needle is bent or dull.
When damage happens:
Needles bend or break from:
- Sewing over pins (the number one cause)
- Hitting metal zippers, snaps, or buttons
- Improper installation (not pushed fully up into the clamp)
- Using the wrong needle size for thick fabric
- Pulling fabric while sewing instead of letting the feed dogs move it
- Machine timing issues that cause the needle to hit the hook
How Often to Change Needles for Quilting vs Regular Sewing
Quilting requires more frequent needle changes than regular sewing because you’re penetrating multiple layers of fabric plus batting, which accelerates needle wear. Change quilting needles every 4-6 hours of active sewing or after each quilt top, whichever comes first.
Why quilting is harder on needles:
- Multiple fabric layers (top, batting, backing) create more friction
- Batting fibers are abrasive and dull the needle point quickly
- Repeated penetration through thick layers causes heat buildup
- Pins used for basting increase the chance of hitting metal
- Long sewing sessions mean accumulated wear happens faster
Quilting needle replacement schedule:
- Piecing: Change needle after completing the quilt top (6-8 hours typically)
- Quilting: Start with a fresh needle when you begin quilting the layers
- Binding: Consider a new needle for binding if you’ve just finished quilting
- Large quilts: Change needle halfway through quilting if it takes more than 6 hours
Regular sewing schedule:
For standard garment sewing, home decor, or craft projects:
- Change every 6-8 hours of sewing
- Replace after 2-3 medium projects
- New needle for each special garment or expensive fabric
- Immediate change after sewing heavy or abrasive materials
Needle type considerations:
Quilters often use specialized quilting needles with a tapered point designed to penetrate multiple layers without shifting them. These needles are designed for the task but still wear out quickly due to the demanding work.
Regular sewing uses universal, sharp, or ballpoint needles depending on fabric type. These may last slightly longer because you’re typically sewing fewer layers.
Cost management for quilters:
Since quilters go through needles faster, buying in bulk makes sense. A pack of 25 quilting needles costs $10-15, bringing the per-needle cost down to 40-60 cents. This is a small price to pay for smooth quilting without skipped stitches or thread breaks.
Professional quilter practices:
Longarm quilters who work on machines all day change needles daily or even multiple times per day. They’re sewing 6-8 hours straight through thick quilt sandwiches, so needle wear accumulates rapidly. Many keep detailed logs of needle changes correlated with specific quilts to optimize their replacement schedule.
Is It Okay to Reuse Needles After Washing Fabric
No, you should not reuse a needle after removing it from your machine, even if you’re just washing fabric between sewing sessions. Once a needle is removed, it’s difficult to reinstall at exactly the same angle and position, and the needle has already accumulated wear from previous use.
Why reusing removed needles is problematic:
When you remove a needle, you lose track of how many hours it’s been used and what fabrics it’s sewn through. That needle might look fine but could be on its last hour of useful life. Starting a new project with a worn needle sets you up for problems.
Additionally, needles can develop microscopic burrs or bends that aren’t visible but affect performance. Once removed, these issues become harder to detect during reinstallation.
The washing fabric scenario:
If you’re pre-washing fabric before sewing (which is good practice), there’s no need to remove your needle. Leave it in the machine. If you’re concerned about the machine being idle, simply turn it off and cover it.
If you’ve already started a project, washed a piece, and want to continue, evaluate whether the needle has enough life left based on hours used, not whether it looks okay.
Proper needle management:
- Keep a needle in your machine at all times (prevents dust and thread from entering the needle bar)
- Mark the date on your machine or in a notebook when you install a new needle
- Track hours or projects completed with that needle
- When you finish a project, decide whether to change the needle based on usage, not whether you’re taking a break
The exception:
If you’re switching between projects that require different needle types (moving from knits to wovens, for example), you’ll need to remove the needle. In this case, you can save the removed needle in a labeled container with the date and hours used, but only if it has minimal wear. Most sewists find it’s not worth the mental overhead and just start fresh.
Cost perspective:
Needles cost 50 cents to $1 each. The time spent tracking partially used needles, the risk of using a worn needle on a new project, and the potential for fabric damage or machine problems make reusing removed needles a false economy. Fresh needles provide peace of mind and better results.
What Size Needle Should I Use for Denim and Does It Wear Out Faster
Use a size 90/14, 100/16, or 110/18 denim needle for sewing denim, with the size depending on the denim weight. Yes, denim wears out needles significantly faster than lighter fabrics because it’s dense, tightly woven, and often contains abrasive finishes or sizing.
Denim needle sizing guide:
- Lightweight denim (chambray, thin shirt-weight): 80/12 or 90/14 universal or denim needle
- Medium denim (standard jeans weight): 90/14 or 100/16 denim needle
- Heavyweight denim (raw denim, selvedge, work wear): 100/16 or 110/18 denim needle
- Multiple layers (hemming jeans, topstitching): 110/18 denim needle
Why denim needles are different:
Denim needles have a reinforced shaft that resists bending and a sharp point that penetrates tight weaves. The eye is also slightly larger to accommodate heavier thread. These features help the needle survive the demanding work of sewing thick, tough fabric.
Accelerated wear factors:
Denim wears out needles in 4-6 hours instead of the standard 6-8 hours because:
- Dense weave creates more friction and heat
- Fabric thickness requires more force to penetrate
- Sizing and finishes are abrasive to the needle surface
- Multiple layers (like hemming) compound the stress
- Topstitching with heavy thread increases friction
Signs your denim needle is done:
- Popping sound as the needle enters fabric
- Skipped stitches, especially on thick seams
- Difficulty penetrating multiple layers
- Thread breaking despite proper tension
- Visible holes or pulled threads in the denim
Project-based replacement:
Many sewists change needles by project when working with denim:
- Fresh needle for each pair of jeans
- New needle after hemming 2-3 pairs of jeans
- Replace immediately if you hit a metal rivet or button
- Change after topstitching a full garment
Thread pairing:
When sewing denim, use heavy-duty thread (like Gutermann Extra Strong or Coats & Clark Heavy Duty) paired with your denim needle. The combination of proper needle and thread prevents most common denim sewing problems.
Cost consideration:
Denim needles cost slightly more than universal needles ($1-1.50 each vs. 50-75 cents), but they’re essential for success with heavy fabrics. Trying to sew denim with a universal needle leads to broken needles, damaged fabric, and frustration. The specialized needle pays for itself in the first project.
Do Expensive Needles Last Longer Than Cheap Ones
Expensive needles don’t necessarily last longer than budget needles, but they often perform better while they’re sharp and may maintain their sharpness slightly longer. The main difference is in manufacturing precision, coating quality, and consistency rather than total lifespan.
Price ranges and what you get:
- Budget needles ($3-5 for 10): Basic needles from generic brands, adequate for most sewing
- Mid-range needles ($6-10 for 10): Schmetz, Organ, Klasse – consistent quality and sizing
- Premium needles ($10-15 for 10): Specialty needles with advanced coatings or features
What premium needles offer:
- Better coatings: Titanium or chrome coatings reduce friction and heat buildup
- Tighter tolerances: More precise sizing and point geometry
- Consistency: Every needle in the pack performs identically
- Specialty features: Anti-glue coatings for sticky fabrics, extra-sharp points for dense weaves
- Quality control: Lower defect rates, fewer bent or damaged needles in the pack
Lifespan reality:
All needles wear out at roughly the same rate based on use. A premium needle might last 7-9 hours instead of 6-8 hours, but the difference isn’t dramatic. The real benefit is in stitch quality and reduced problems during those hours.
Premium needles are less likely to:
- Skip stitches on difficult fabrics
- Break thread due to rough eye finishing
- Bend when penetrating thick layers
- Create pulled threads or fabric damage
When premium needles are worth it:
- Sewing expensive or delicate fabrics where any damage is costly
- Working with problem fabrics (sticky, coated, or very fine materials)
- Professional sewing where consistency and reliability matter
- Specialty applications (metallic thread, dense embroidery, leather)
When budget needles are fine:
- Learning to sew and practicing techniques
- Everyday projects with standard cotton fabrics
- Projects where perfect stitch quality isn’t critical
- Situations where you’ll change needles frequently anyway
The Schmetz standard:
Schmetz needles are the gold standard for most sewists. They’re mid-priced but offer excellent consistency and performance. Most sewing machine manufacturers recommend Schmetz needles, and many machines are timed using Schmetz needles as the reference.
Smart buying strategy:
Buy mid-range needles (Schmetz, Organ) in bulk for everyday sewing. Keep a few premium specialty needles on hand for challenging projects. Skip the cheapest needles unless you’re just practicing or making test samples.
Common Mistakes People Make with Sewing Machine Needle Maintenance
The most common mistake is simply forgetting to change needles regularly, but several other errors cause problems that sewists often attribute to tension, thread, or machine issues when the real culprit is needle maintenance.
Top needle maintenance mistakes:
1. Not tracking needle usage
Most sewists have no idea how long the current needle has been in their machine. Without tracking, you can’t make informed decisions about when to change it. Solution: Write the installation date on a sticky note on your machine or keep a simple log.
2. Using the wrong needle type for the fabric
Trying to sew knits with a sharp needle or wovens with a ballpoint creates problems that no amount of tension adjustment will fix. Keep a variety of needle types on hand and match them to your fabric.
3. Reinstalling used needles
Saving partially used needles and trying to track their remaining life creates more problems than it solves. Needles are cheap enough to use fresh for each project.
4. Not checking needle orientation
Needles have a flat side on the shank that must face the correct direction (usually toward the back). Installing a needle backward causes skipped stitches and timing issues. Always check that the flat side is oriented correctly.
5. Not pushing the needle fully up into the clamp
A needle that’s not seated all the way up in the needle clamp sits too low, which throws off timing and can cause the needle to hit the hook or throat plate. Always push the needle up as far as it will go before tightening the clamp.
6. Over-tightening or under-tightening the needle clamp
Too loose and the needle slips or falls out. Too tight and you can damage the needle shank or clamp screw. Tighten firmly but not with excessive force.
7. Sewing over pins
This is the fastest way to bend or break a needle. Even if the needle doesn’t break immediately, hitting a pin damages the point and shortens needle life. Remove pins before they reach the needle or use a magnetic pin cushion to grab them at the last second.
8. Ignoring warning signs
Continuing to sew when you hear unusual sounds, see skipped stitches, or notice fabric damage compounds the problem. Stop immediately and check the needle when issues appear.
9. Storing needles improperly
Loose needles in a drawer get bent and damaged. Store them in their original case or a needle organizer. Label partially used needles if you must save them, but better to start fresh.
10. Buying needles without checking compatibility
Most home machines use standard 130/705H needles, but some machines (especially older or industrial models) require different shank styles. Check your manual before buying needles in bulk.
Prevention checklist:
- Install a fresh needle at the start of each project
- Keep a variety pack of needle types and sizes on hand
- Track installation date and usage hours
- Inspect needles visually before installing
- Replace immediately when problems appear
- Store needles properly in labeled containers
- Never sew over pins
- Check needle orientation during installation
How Often Do Professional Seamstresses Change Their Needles
Professional seamstresses change needles much more frequently than home sewists, typically daily or even multiple times per day depending on their workload and the types of projects they’re handling. This frequent replacement is essential for maintaining the quality standards clients expect and protecting expensive fabrics.
Professional replacement schedules:
Alterations specialists: Change needles 1-2 times per day when working full 8-hour shifts. They work with varied fabrics and can’t risk damaging a client’s expensive garment with a dull needle.
Custom dressmakers: Fresh needle for each garment, sometimes changing between construction and finishing. When working with silk, lace, or other delicate fabrics, they may use a needle for just that one project.
Production sewers: Daily changes when working on the same fabric type all day. More frequent changes when switching between fabric types or weights.
Quilters (longarm): Change needles every 4-6 hours of quilting, sometimes more often when working with dense batting or multiple layers. Some change needles between quilts regardless of hours.
Bridal and formalwear: Fresh needle for every gown, no exceptions. The cost of damaging a $2,000-5,000 dress far exceeds the cost of a new needle.
Why professionals change so often:
- Client expectations: Professional work must be flawless
- Expensive materials: One pulled thread or snag can ruin a project
- Efficiency: A sharp needle sews faster with fewer problems
- Machine protection: Professional machines are expensive investments
- Reputation: Quality issues damage business reputation and lead to lost clients
- Time is money: Stopping to troubleshoot needle-related problems wastes billable hours
Cost management:
Professionals buy needles in bulk packs of 50-100, bringing the per-needle cost down to 30-50 cents. At that price, changing needles frequently is cheap insurance against expensive mistakes.
Many professionals also keep detailed records of needle changes, correlating them with specific projects and fabrics. This data helps them optimize their replacement schedule and identify patterns.
Home sewist takeaway:
While you don’t need to match professional replacement frequency, their practices reveal an important truth: needles are consumables, not durable goods. When in doubt, change it out. The cost of a new needle is trivial compared to the cost of damaged fabric, machine repairs, or wasted time.
If professionals who sew 40+ hours per week change needles daily, home sewists sewing 5-10 hours per week should change needles every 1-2 weeks of active sewing, or at the start of each new project.
Frequently Asked Questions
How do I know what size needle is currently in my machine?
Check the flat side of the needle shank where the size is stamped (like 80/12 or 90/14). If it’s worn off, remove the needle and compare it to a new needle of known size, or simply replace it with a fresh needle in the appropriate size for your current project.
Can I sharpen a dull sewing machine needle?
No, sewing machine needles cannot be effectively sharpened. The point geometry is precisely manufactured and any attempt to sharpen it will alter the shape and make it perform worse. Needles are inexpensive consumables designed to be replaced, not sharpened.
Why does my needle keep breaking?
Needles break from using the wrong size for the fabric (too small), hitting pins or metal objects, improper installation, pulling fabric while sewing, or machine timing issues. Check that you’re using the correct needle size, remove pins before they reach the needle, and let the feed dogs move the fabric.
How should I dispose of used needles?
Place used needles in a sharps container, empty prescription bottle, or small metal tin. Tape the container shut when full and label it “sharps” before disposing in household trash. Never throw loose needles in the trash where they can injure sanitation workers.
Do I need different needles for topstitching?
Topstitching needles have a larger eye and deeper groove to accommodate heavier thread. While you can topstitch with a regular needle one size larger than normal, a dedicated topstitching needle (size 90/14 or 100/16) produces better results with fewer thread breaks.
Can a bent needle damage my fabric?
Yes, a bent needle creates pulled threads, snags, and irregular holes in fabric. It can also cause skipped stitches and uneven seam lines. Always replace a bent needle immediately before sewing on your project fabric.
Why do I get skipped stitches with a new needle?
Skipped stitches with a new needle usually mean you’re using the wrong needle type (sharp needle on knits, for example), the needle isn’t fully inserted, or there’s a machine timing issue. Check that you’re using the correct needle type for your fabric and that it’s properly installed.
Should I change my needle when switching thread types?
Not necessarily, but if you’re switching to metallic, heavy-duty, or specialty thread, consider using a needle designed for that thread type. Metallic thread works best with metallic needles that have a larger eye and special coating. Heavy thread needs a topstitching or denim needle.
How long can a needle sit in my machine between projects?
A needle can sit in your machine indefinitely between projects, but the usage hours still count toward its lifespan. If a needle has 6 hours on it and you take a month off from sewing, it still has 6 hours of wear when you return. Track usage, not calendar time.
What’s the difference between 80/12 and 12/80 needle markings?
These are the same needle. The first number is the European sizing (80) and the second is the American sizing (12). Needle packages show both: 80/12 means size 80 in European or size 12 in American. The larger the number, the thicker the needle.
Can I use hand sewing needles in my sewing machine?
No, hand sewing needles have a completely different design and cannot be used in sewing machines. Sewing machine needles have a flat shank, specific length, and groove design that hand needles lack. Using the wrong needle type will damage your machine.
Why does my thread keep breaking even with a new needle?
Thread breakage with a new needle indicates wrong needle size (too small), incorrect needle type, poor quality thread, improper threading, or tension issues. Check that your needle size matches your fabric weight and that you’re using good quality thread properly threaded through all guides.
Conclusion
Changing your sewing machine needle every 6-8 hours of active sewing or after each major project is one of the simplest ways to improve your sewing results and protect your machine. While it might seem like an unnecessary expense, needles cost less than a dollar each and prevent problems that cost far more in damaged fabric, machine repairs, and wasted time.
The key is developing a system that works for you. Whether you track hours in a notebook, change needles at the start of each project, or set a reminder to check your needle weekly, consistency matters more than the specific method.
Your action plan:
- Install a fresh needle in your machine right now if you can’t remember when you last changed it
- Buy a variety pack of needles in multiple types and sizes so you always have the right needle on hand
- Choose a tracking method (notebook, sticky note, phone reminder) and commit to using it
- Inspect your needle visually before starting each project
- Replace immediately when you notice any performance issues
- Keep a sharps container near your machine for safe disposal
Remember that professional seamstresses change needles daily because they understand that needle quality directly affects work quality. While home sewists don’t need to match that frequency, adopting a more proactive approach to needle changes will transform your sewing experience. You’ll spend less time troubleshooting mysterious problems and more time enjoying the creative process.
The next time you sit down to sew, ask yourself: “When did I last change this needle?” If you can’t answer confidently, it’s time for a fresh one.