


Quick Answer
Setting up a new sewing machine out of the box takes 20-45 minutes and involves unpacking components, threading the upper thread and bobbin, adjusting tension settings, and running test stitches on scrap fabric. Most modern machines arrive ready to use after basic threading, though some models may need light oiling before first use. Beginners can complete setup independently by following the instruction manual, though having an experienced sewer nearby can speed up troubleshooting.
Key Takeaways
- Unpack carefully and verify all parts against the manual’s checklist before discarding packaging
- Threading takes practice but becomes second nature after 2-3 attempts with your specific model
- Start with medium tension (usually 4-5 on a 0-9 scale) and adjust based on test stitches
- Most machines don’t need oiling before first use unless specified in the manual
- Test on scrap fabric before starting any project to confirm proper stitch formation
- Common first-time mistakes include incorrect bobbin insertion, skipped threading guides, and wrong needle installation
- Setup typically takes 20-45 minutes for beginners, 10-15 minutes for experienced sewers
- Professional setup isn’t necessary for most home machines, but warranty registration is important
What Parts Come with a New Sewing Machine
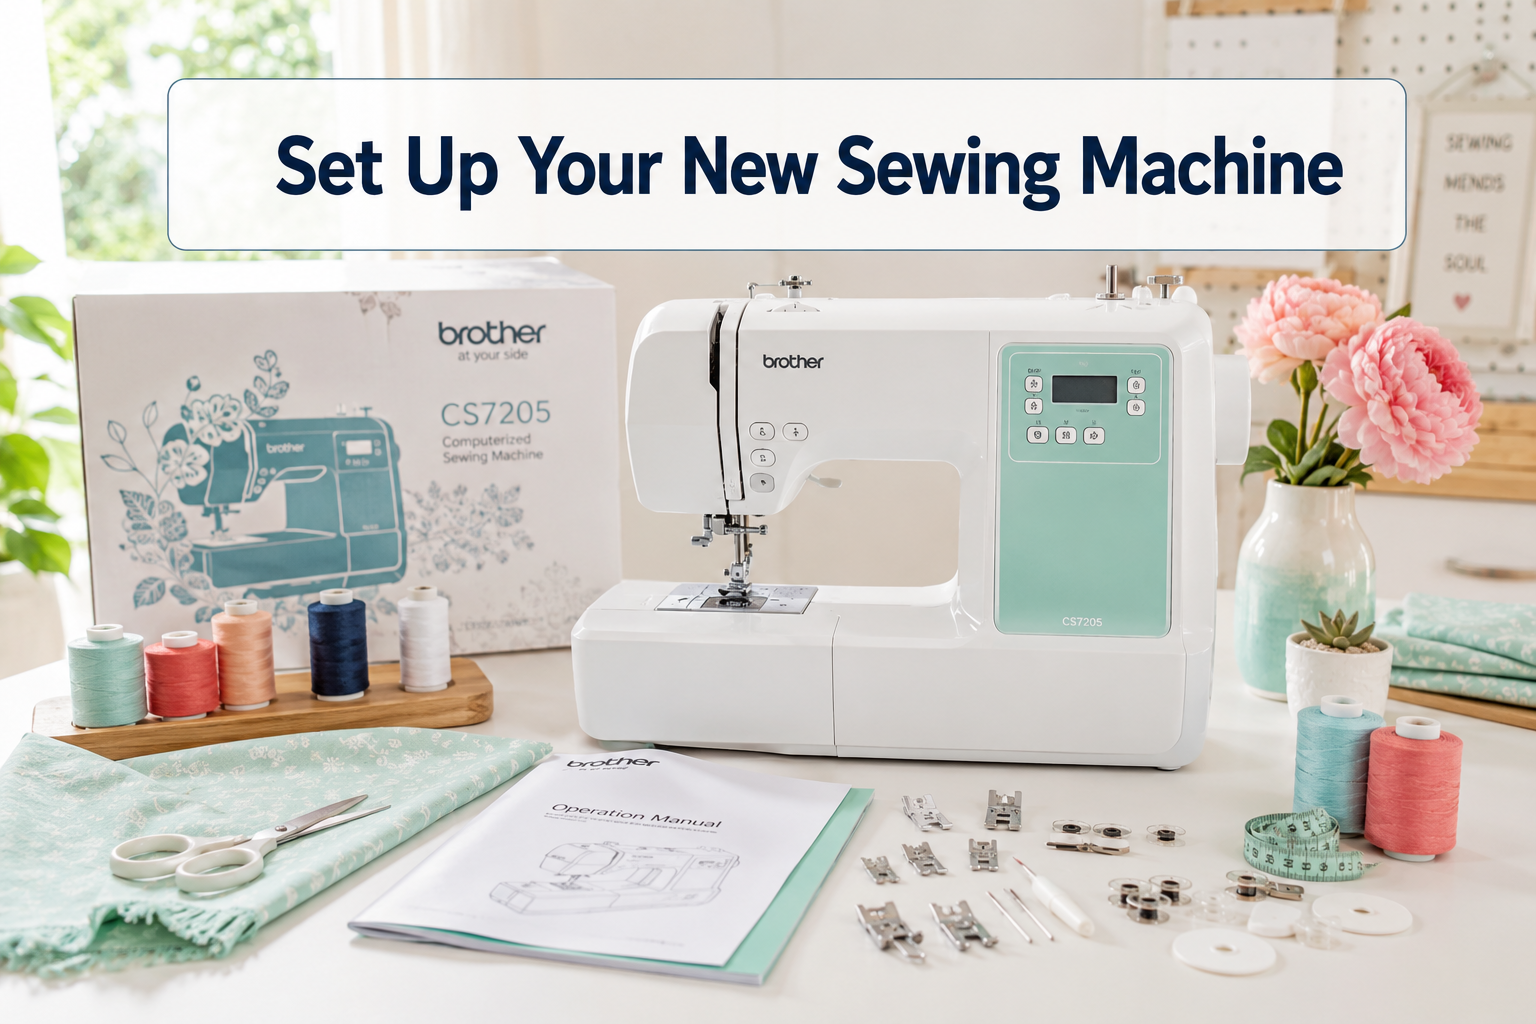
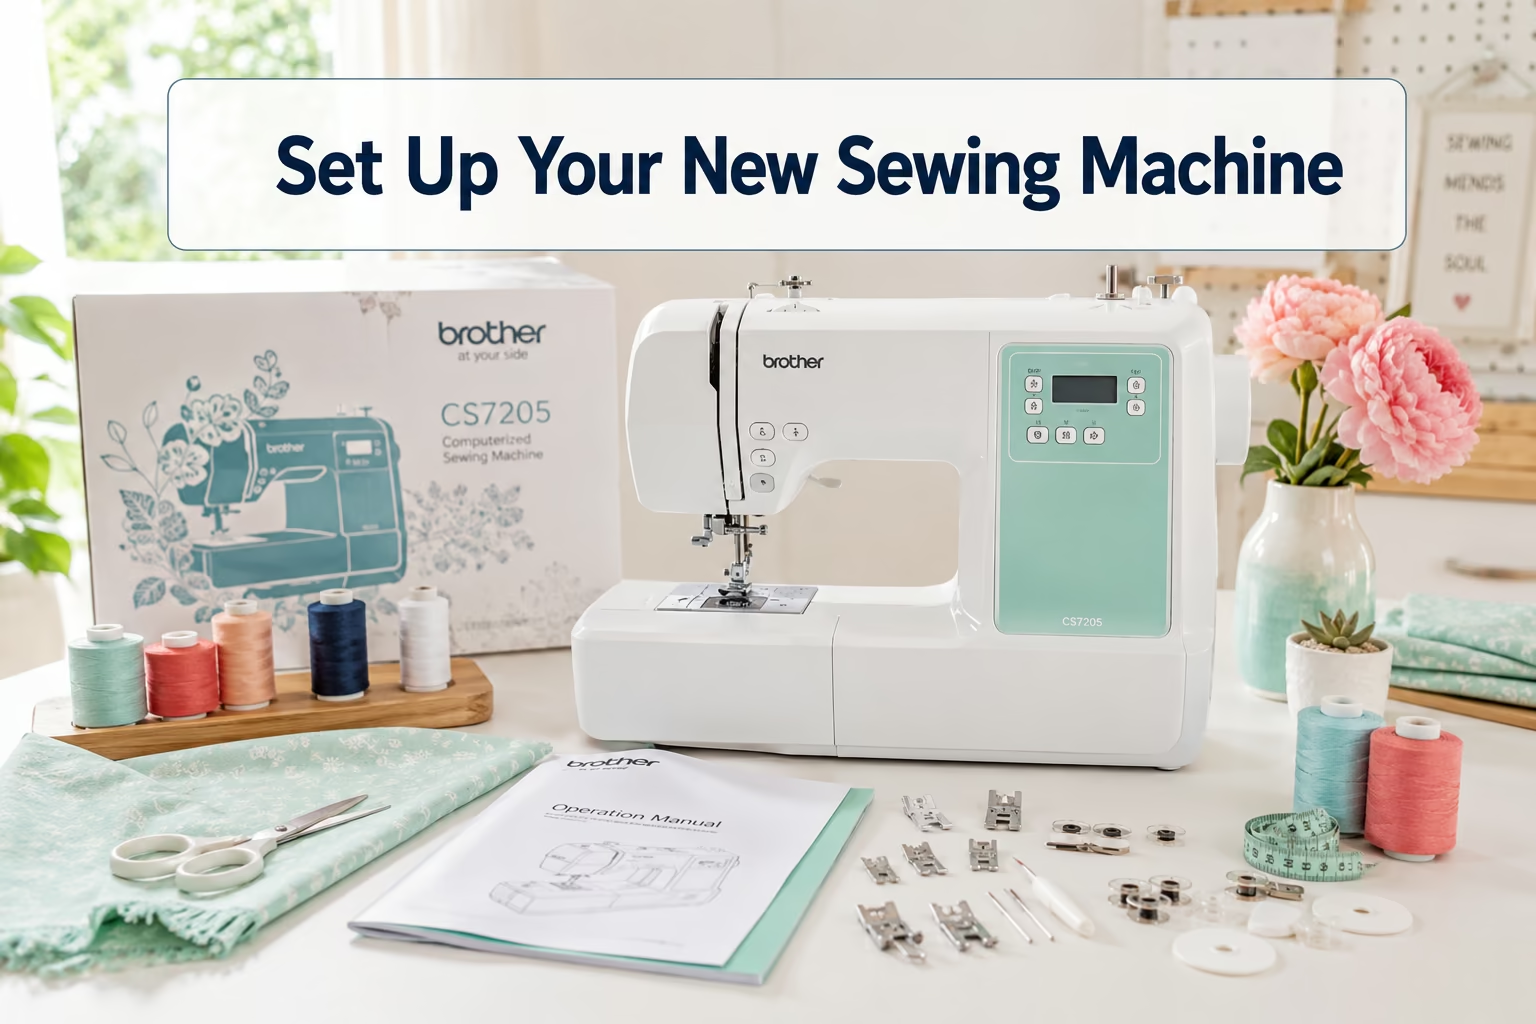
A new sewing machine typically includes the machine body, power cord and foot pedal, 3-8 presser feet, 4-6 bobbins (some pre-wound), an instruction manual, a quick-start guide, needle pack, seam ripper, lint brush, small screwdriver, and sometimes a soft cover or hard case. Higher-end models may also include specialty feet, extra needle plates, and sewing machine oil.
Standard components in most boxes:
- Machine body with attached standard presser foot
- Power cord and foot pedal (sometimes packed separately)
- Accessory box or tray containing small parts
- Presser feet set (zigzag, zipper, buttonhole, blind hem are common)
- Bobbin case and bobbins (check if top-loading or front-loading)
- Needle assortment (usually universal 80/12 and 90/14)
- Basic tools (seam ripper, lint brush, small screwdriver, tweezers)
- Documentation (instruction manual, quick-start card, warranty registration)
- Thread spool caps in various sizes
- Edge guide or seam guide attachment
Before throwing away any packaging, lay out all components and check them against the parts list in your manual. Missing pieces should be reported to the retailer or manufacturer immediately, as most companies will ship replacements at no charge within the first 30 days.
Pro tip: Take a photo of all components laid out before putting them away. This visual reference helps when you need to find a specific foot or attachment later.

【Multifunctional presser feet 42pcs kit】It contains 42 different presser foot as overcast foot, zipper foot, overlock foot, quilting foot, and button foot, apply for leather, embroidery, zipper, buttons, beads, a special craft, small gadgets, handicrafts, sewing, quilt making, curtain making, and other basic sewing needs.

50 Piece Presser Foot Set:This versatile presser foot set covers all your basic sewing needs with 48 different presser feet (for most sewing needles), plus we've included 2 tools to make your hand sewing easier

Plastic case, makes it portable, simple and practical.
Is a Sewing Machine Ready to Use Out of the Box
Most modern sewing machines are mechanically ready to use out of the box but require threading, bobbin winding, and tension adjustment before you can sew. The machine has been factory-tested, but shipping bolts or protective packaging may need removal, and you’ll need to install the needle, thread both upper and lower threads, and verify settings match your fabric type.
What’s already done:
- Machine timing and mechanical adjustments are factory-set
- Basic presser foot is usually pre-installed
- Feed dogs are in the correct position
- Stitch length and width are at default settings
What you must do before sewing:
- Remove all protective packaging, tape, and shipping materials
- Check for and remove any shipping bolts (computerized machines sometimes have these)
- Install a needle if one isn’t already in place
- Wind and insert a bobbin
- Thread the upper thread path
- Select a straight stitch and medium stitch length
- Test on scrap fabric
Some vintage-style or mechanical machines arrive with light oil already applied to moving parts, while others ship dry and need oiling before first use. Always check your specific model’s manual for pre-use requirements.
Common mistake: Assuming the machine is fully ready because it powers on. Threading is always required, and skipping the test-stitch phase leads to frustration on your first real project.
How to Set Up a New Sewing Machine Out of the Box: Step-by-Step Process
Setting up a new sewing machine requires a systematic approach starting with workspace preparation, followed by unpacking, threading, and testing. Complete each step in order to avoid backtracking and ensure proper function from the first stitch.

Regular Point & Durable Design:Features a sharp regular point that penetrates fabrics smoothly,ensuring even stitches and avoiding skipped stitches or fabric damage.The needles are made of high-quality material with a sturdy shaft,wear-resistant and durable,not easy to bend or break even when sewing heavy-duty materials.The bright color coating not only enhances visibility but also adds a layer of protection against wear.

Ample Quantity:The 30pcs heavy duty sewing machine needles,including 10pcs Size 90/14 for thin and thick fabrics,10pcs Size 100/16 for thick fabric,10pcs Size 110/18 for thickened fabrics,meeting diverse sewing needs.

Pack of 10 Genuine Singer Sewing Machine Needles
Step 1: Prepare Your Workspace
Choose a sturdy table or desk with good lighting and enough space for the machine plus 18-24 inches to the right for fabric. The surface should be at a comfortable height where your elbows bend at roughly 90 degrees when your hands rest on the machine.
Workspace checklist:
- Stable, level surface that won’t wobble
- Adequate lighting (overhead plus task light if possible)
- Power outlet within reach without stretching cords
- Chair at proper height for comfortable posture
- Clear space to the right and behind the needle for fabric movement
Step 2: Unpack and Inspect
Remove the machine carefully from its box, supporting the base rather than pulling on any plastic parts. Remove all protective foam, cardboard inserts, and tape. Check the manual’s parts list and verify everything is present.
Place the machine on your workspace and locate the power cord and foot pedal. Don’t plug in yet, complete the mechanical setup first.
Step 3: Install or Verify the Needle
Check if a needle is already installed. If not, or if you’re unsure of its condition, install a fresh universal needle (size 80/12 or 90/14 works for most cotton fabrics). The flat side of the needle shank faces the back on most machines, with the groove facing front.
Insert the needle as far up into the needle clamp as it will go, then tighten the needle screw firmly. A loose needle causes skipped stitches and can damage your machine. For detailed guidance, see our complete guide to inserting a sewing machine needle.
Step 4: Wind a Bobbin
Place a spool of thread on the spool pin and follow your manual’s bobbin-winding diagram. Most machines have a bobbin winder on top of the machine with a specific thread path.
Basic bobbin winding steps:
- Place empty bobbin on the bobbin winder spindle
- Thread from spool through bobbin-winding tension disc
- Wrap thread around bobbin a few times manually
- Push bobbin winder to the right (or engage it per your model)
- Press foot pedal gently, bobbin will fill automatically
- Machine stops when bobbin is full (or you disengage the winder)
Leave about 4 inches of tail thread when you remove the filled bobbin. Wind at least two bobbins so you have a backup ready.
Step 5: Insert the Bobbin
Bobbin insertion varies by machine type. Top-loading (drop-in) bobbins sit in a clear case under a slide plate on the machine bed. Front-loading bobbins go into a removable case that clicks into the front or side of the machine.
For top-loading bobbins:
- Open the slide plate or bobbin cover
- Place bobbin in the case so thread unwinds in the correct direction (usually counterclockwise)
- Pull thread through the slot or notch in the bobbin case
- Leave 4-6 inches of tail thread extending toward the back of the machine
- Close the cover
For front-loading bobbins:
- Remove the bobbin case from the machine
- Hold the case with the tension spring on top
- Insert bobbin so thread unwinds counterclockwise when you pull it
- Thread through the slot in the case under the tension spring
- Leave 4-6 inches of tail
- Insert the entire case back into the machine until it clicks
Check your manual for the exact direction, incorrect bobbin threading is the number one cause of tension problems and jamming in new machines.
Step 6: Thread the Upper Thread
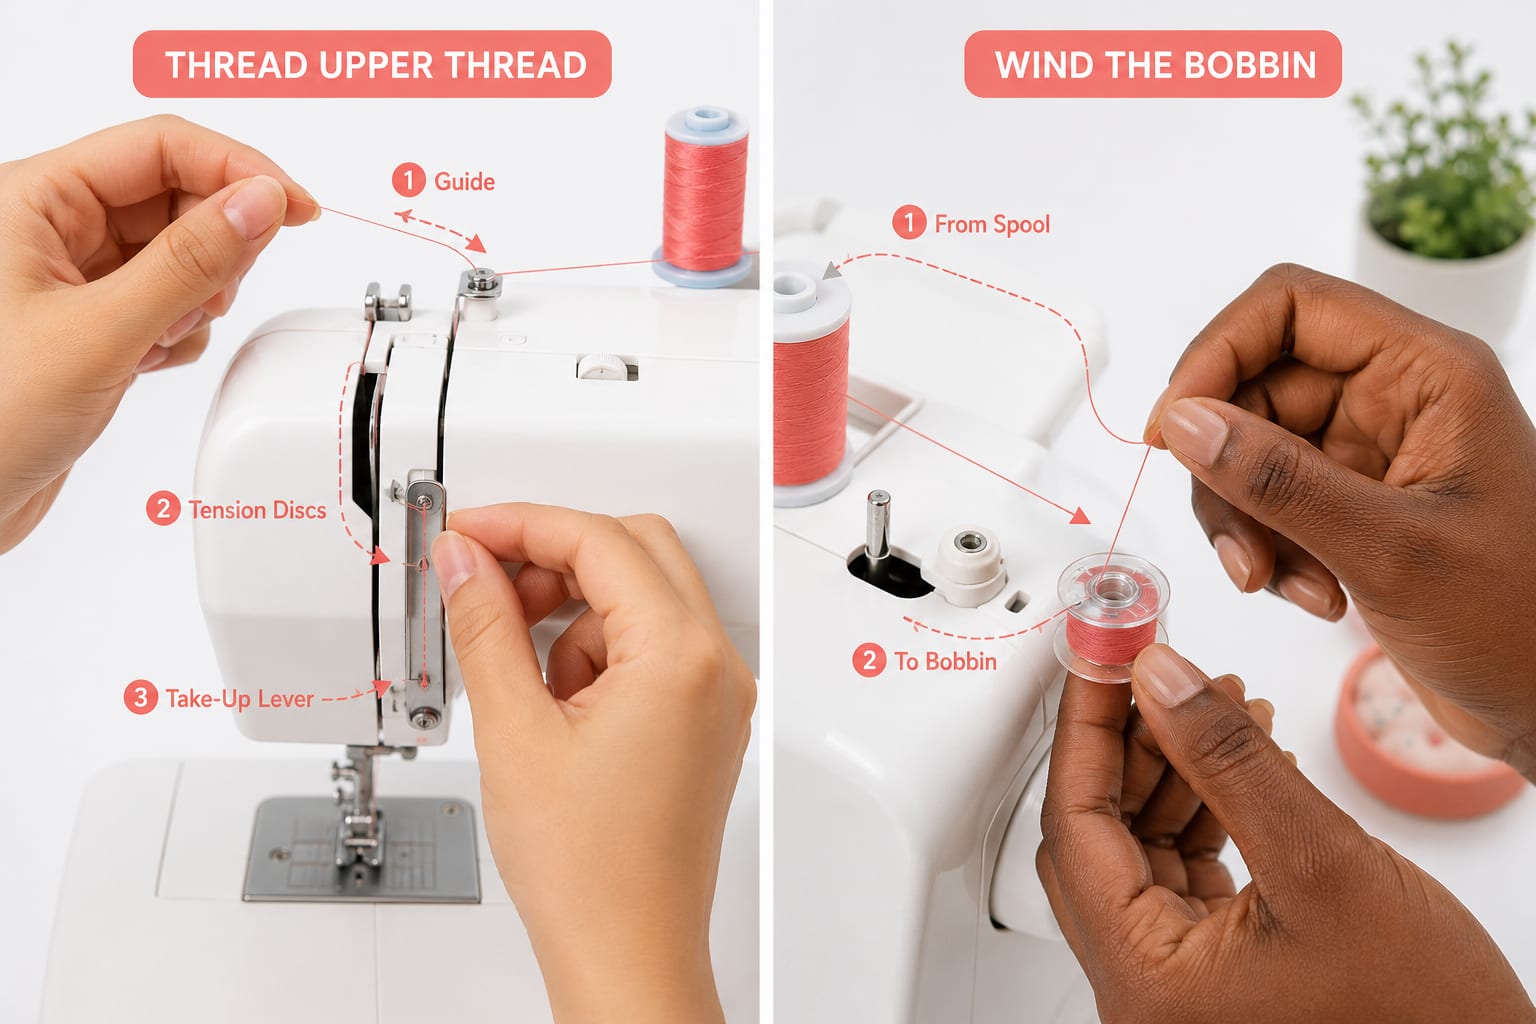
Upper threading follows a specific path from the spool pin through various guides, the tension assembly, the take-up lever, and down to the needle. Missing even one guide causes poor stitch quality.
Standard upper threading path:
- Place thread spool on the spool pin (use the correct size spool cap)
- Pull thread to the first guide (usually top-left of machine)
- Thread down through the tension assembly (between the tension discs)
- Thread up through the take-up lever (the metal arm that moves up and down)
- Thread down through remaining guides toward the needle
- Thread the needle from front to back (or side to side, depending on model)
- Pull 4-6 inches of thread through the needle
Critical rule: Always thread with the presser foot UP. This opens the tension discs so thread seats properly between them. Threading with the foot down causes loose, loopy stitches.
For brand-specific threading instructions, check our detailed guide on how to thread a sewing machine.
Step 7: Bring Up the Bobbin Thread
Hold the upper thread tail with your left hand. Turn the handwheel toward you (counterclockwise when facing the wheel) one full rotation. The needle will go down and come back up, catching the bobbin thread and pulling it up through the needle plate.
Pull gently on the upper thread, the bobbin thread should come up in a loop. Use scissors or a seam ripper to pull both threads toward the back of the machine, leaving 4-6 inches of tail.
Step 8: Run Test Stitches
Place two layers of scrap fabric (cotton works well) under the presser foot. Lower the presser foot lever. Select a straight stitch with medium length (2.5-3.0mm). Hold both thread tails toward the back for the first few stitches to prevent thread nests.
Press the foot pedal gently and sew a line of stitches. Check both sides of the fabric:
- Good stitches: Threads interlock between fabric layers, stitches look identical on top and bottom
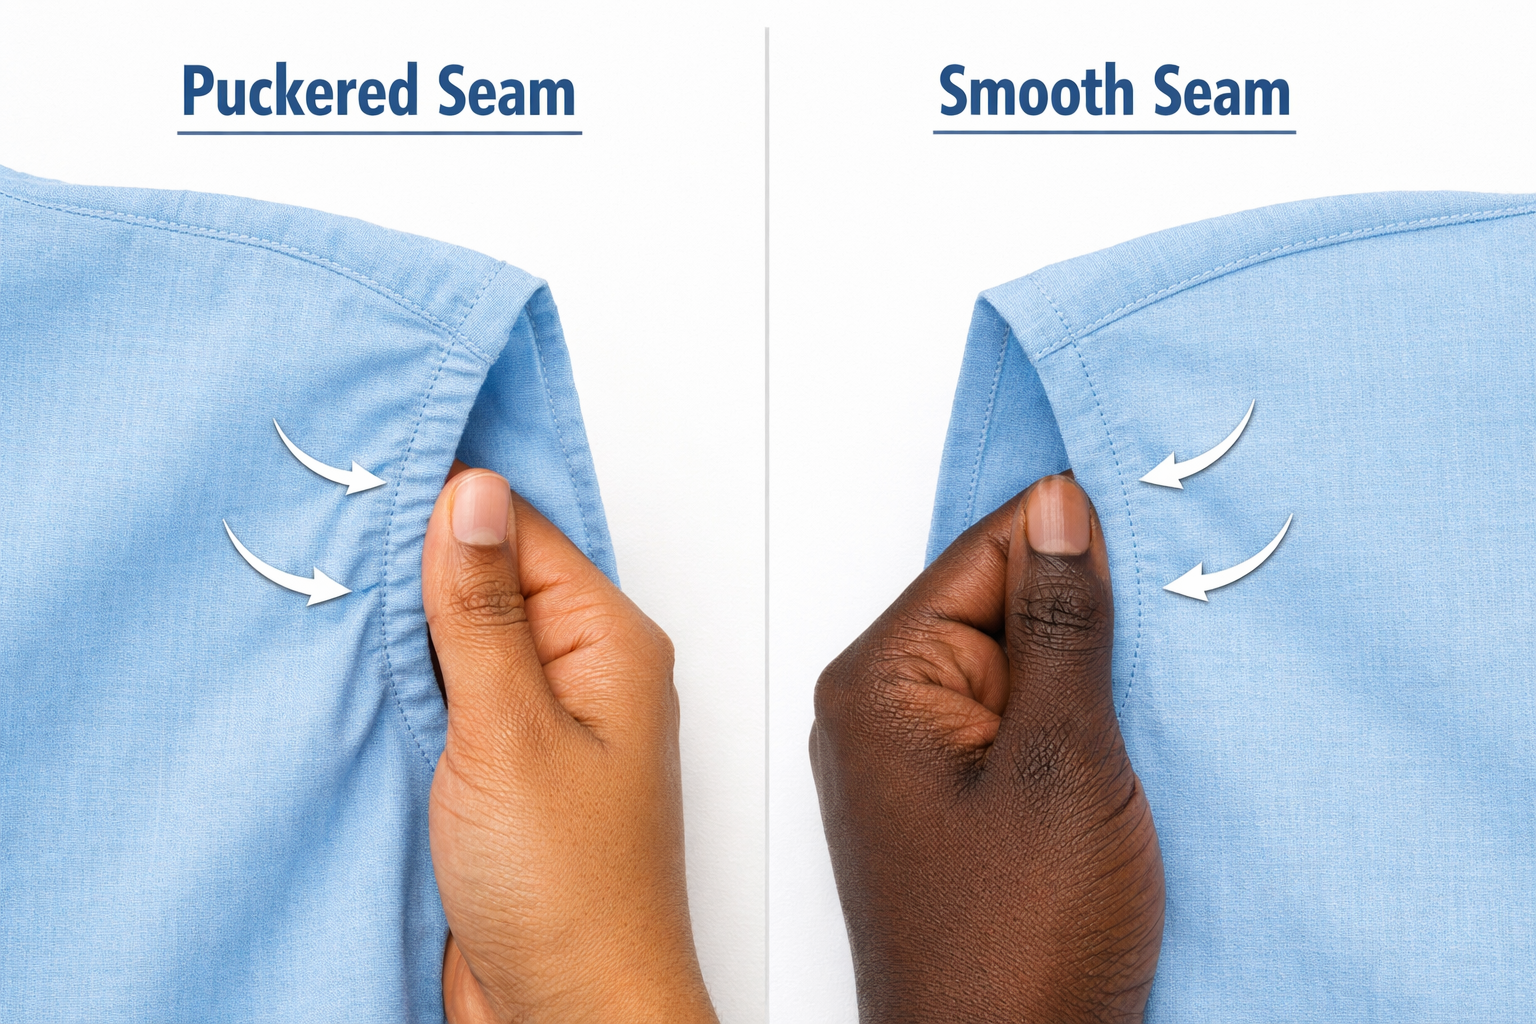
- Top thread too tight: Bottom thread pulls to the top surface
- Top thread too loose: Top thread loops on the bottom surface
- Skipped stitches: Needle may be dull, inserted incorrectly, or wrong type for fabric
If stitches look good, congratulations, your machine is set up correctly. If not, see the troubleshooting section below.
How to Thread a Sewing Machine for Beginners
Threading a sewing machine becomes intuitive after a few repetitions, but the first attempt can feel overwhelming because each machine has 8-12 threading points that must be followed in sequence. The key is to work slowly, use good lighting, and refer to the threading diagram in your manual or on the machine itself (many models have numbered guides printed on the body).
Threading tips for first-timers:
- Use contrasting thread for your first practice threading (white thread on a dark machine or vice versa) so you can see the path clearly
- Thread with presser foot UP to open the tension discs
- Follow numbers or arrows printed on the machine body
- Don’t skip the take-up lever,this is the most commonly missed step
- Pull thread firmly through each guide to ensure it’s seated
- Check from multiple angles to verify thread is in each guide, not just near it
The take-up lever mistake: This metal arm moves up and down while sewing. Thread must pass through the eye or hook at the top of its travel. If you thread when the take-up lever is at the bottom of its cycle, you might miss it entirely. Turn the handwheel to raise the take-up lever to its highest point before threading through it.
Tension disc seating: The tension assembly (usually two metal discs that squeeze the thread) only works if thread sits between the discs. Threading with the presser foot down keeps the discs closed, and thread slides past them instead of between them. This causes loose, loopy stitches that no amount of tension adjustment will fix.
If you’re struggling, try threading in bright daylight or use a flashlight. Many sewers also find it helpful to watch a video specific to their machine model, search “[your machine model] threading” on YouTube for visual guidance.

Material: This needle piercer is made of sturdy plastic and metal, which can safely secure your needle for smooth insertion and removal.

1*Jack quick needle threader,2*Jack Seam Rippers, features a precision guide and a high-definition magnifying lens. Automatic threader ends eye strain and makes threading needles quick and easy for everyone, even in low light.
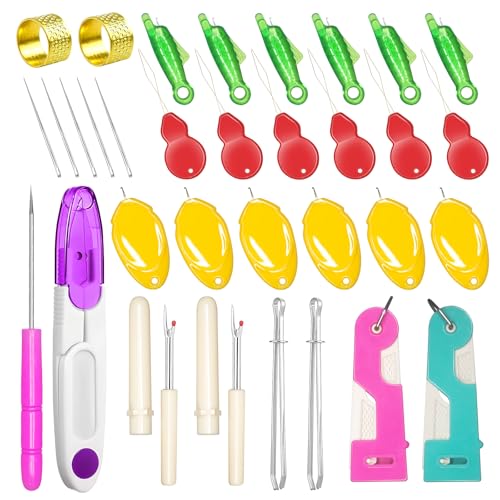
【Complete Sewing Tools Kit】 The sewing accessories includes 2 automatic needle threaders, 6 fish mouth sewing machine needle threaders, 6 gourd shaped sewing needle threaders, 6 thumb shaped simple needle threaders, 2 stitch remover tools, 1 thread snips, 2 drawstring threader tools, 1 awl tool, 2 thimbles, 5 sewing needles. Enough quantity and tool types to meet your long-term sewing and crafting work needs
How to Wind a Bobbin on a New Sewing Machine
Winding a bobbin on a new sewing machine involves placing an empty bobbin on the bobbin winder spindle, routing thread from the spool through the bobbin winding tension disc, wrapping thread around the bobbin a few times by hand, engaging the winder, and pressing the foot pedal until the bobbin is full. Most machines have an automatic stop when the bobbin reaches capacity.
Bobbin winding process:
- Locate the bobbin winder (usually top-right of machine, near the handwheel)
- Place empty bobbin on the winder spindle
- Thread from spool through the bobbin-winding tension disc (separate from the main tension)
- Wrap thread around the empty bobbin 4-5 times clockwise by hand
- Engage the winder by pushing the spindle to the right or flipping a switch
- Hold thread tail for the first few winds, then let go or trim it
- Press foot pedal at medium speed
- Machine stops automatically when bobbin is full (or you disengage manually)
- Trim thread and remove the full bobbin
Common bobbin winding mistakes:
- Not engaging the winder: The handwheel must disengage from the needle mechanism when the bobbin winder is active. If the needle moves while winding, you haven’t engaged the winder properly.
- Skipping the tension disc: Thread must pass through the small tension disc near the bobbin winder. Without this, thread winds unevenly and loosely.
- Overfilling: An overfilled bobbin doesn’t fit properly in the bobbin case and causes tension problems. Stop when the bobbin reaches the rim.
- Winding too fast: High speed can cause thread to wind unevenly or break. Use medium pressure on the foot pedal.
How many bobbins to wind: Wind at least 2-3 bobbins in your primary thread color before starting a project. Running out of bobbin thread mid-seam is frustrating, and having backups ready keeps your workflow smooth.
Do I Need to Oil My Sewing Machine Before First Use
Most modern home sewing machines do not require oiling before first use because they come pre-lubricated from the factory or use self-lubricating components. However, some mechanical models and all vintage-style machines need a few drops of sewing machine oil on specific points before the first sewing session. Always check your instruction manual’s “before first use” section for model-specific requirements.
Machines that typically need pre-use oiling:
- Vintage or vintage-style mechanical machines
- Heavy-duty straight-stitch machines
- Some industrial-style home models
- Machines that have been in storage for months
Machines that don’t need pre-use oiling:
- Most computerized machines with enclosed mechanisms
- Machines with sealed, self-lubricating parts
- Models that explicitly state “no oiling required” in the manual
If your manual says to oil before first use:
- Use only sewing machine oil (clear, odorless, lightweight)
- Apply 1-2 drops to each point marked in the manual’s oiling diagram
- Run the machine at medium speed for 30 seconds without fabric
- Wipe away any excess oil with a lint-free cloth
- Sew on scrap fabric to absorb any remaining oil before starting a project
Never use: WD-40, 3-in-1 oil, vegetable oil, or any household lubricant. These products are too thick, leave residue, or turn gummy over time, damaging your machine.
For ongoing maintenance schedules, see our guide on how often to service a sewing machine.
What Tension Setting Should I Start With on a New Machine
Start with a tension setting of 4 or 5 on a 0-9 scale (or the middle setting if your machine uses a different range), which is the factory default for most machines and works well for medium-weight cotton fabric with all-purpose polyester thread. Proper tension creates stitches where the upper and lower threads interlock exactly between the two fabric layers, with identical appearance on both sides.
How to test tension:
- Thread your machine with contrasting thread colors (different colors for upper and bobbin)
- Set tension to 4 or 5 (middle setting)
- Sew a line of straight stitches on two layers of cotton fabric
- Examine both sides of the fabric
What you’ll see:
- Perfect tension: Stitches look the same on both sides, threads meet between layers
- Upper tension too tight: Bobbin thread pulls to the top surface
- Upper tension too loose: Upper thread loops on the bottom surface
- Both threads loose: Presser foot pressure may be wrong, or you threaded with the foot down
Adjusting tension:
- If bobbin thread shows on top, lower the upper tension number (turn dial toward lower numbers)
- If upper thread shows on bottom, raise the upper tension number (turn dial toward higher numbers)
- Make small adjustments (1/4 to 1/2 number at a time) and test again
Important: Adjust only the upper tension dial. The bobbin tension is factory-set and rarely needs adjustment. If you’ve tried multiple upper tension settings and stitches still look wrong, the problem is usually incorrect threading (especially threading with the presser foot down) rather than tension.
For a deeper understanding of tension mechanics, read our complete guide to sewing machine tension.
Sewing Machine Setup vs Taking It to a Shop
Setting up a new home sewing machine yourself takes 20-45 minutes and costs nothing beyond your time, while taking it to a shop for professional setup costs $30-75 and may not be necessary unless you’ve purchased a complex machine or feel uncomfortable following technical instructions. Most beginners can successfully set up modern machines using the instruction manual, but professional setup makes sense for high-end computerized models, vintage machines, or if you’re experiencing problems you can’t diagnose.
When to set up yourself:
- You’ve purchased a new machine from a major brand (Singer, Brother, Janome, etc.)
- The instruction manual is clear and includes diagrams
- You’re comfortable following step-by-step technical instructions
- The machine is a basic mechanical or entry-level computerized model
- You have time to troubleshoot if something doesn’t work immediately
When to consider professional setup:
- You’ve purchased a high-end machine ($800+) with complex features
- The machine is vintage or used and may need adjustment
- You’re physically unable to lift or manipulate the machine safely
- The manual is missing or in a language you don’t read fluently
- You’ve attempted setup but can’t get proper stitches after troubleshooting
- The machine will be used for business and you need it working perfectly immediately
What professional setup includes:
- Unpacking and inspection of all components
- Threading and tension adjustment
- Test stitching on multiple fabric types
- Demonstration of basic features and maintenance
- Answering questions about your specific model
- Sometimes a brief sewing lesson
Cost comparison:
- DIY setup: $0 (20-45 minutes of your time)
- Shop setup: $30-75 depending on location and machine complexity
- In-home setup: $75-150 (some dealers offer this for high-end purchases)
The middle ground: Many sewing machine dealers offer free setup classes when you purchase from them. You bring your new machine to the shop, and an instructor walks you through setup alongside other new owners. This gives you professional guidance while teaching you to do it yourself.
If you’re comparing new machines, check our sewing machine comparison guide to understand which models are most beginner-friendly.
Why Is My Brand New Sewing Machine Not Stitching Properly
A brand new sewing machine that’s not stitching properly usually has one of four issues: incorrect threading (especially threading with the presser foot down), improper bobbin insertion, wrong needle installation, or the presser foot isn’t lowered. These setup errors account for roughly 90% of new-machine problems and are easily fixed once identified.
Troubleshooting checklist:
Problem: Loose, loopy stitches on the bottom
- Cause: Upper thread not seated in tension discs
- Fix: Raise presser foot, remove thread, re-thread with foot UP
- Test: Pull upper thread, you should feel resistance from tension
Problem: Thread bunching under fabric (bird’s nest)
- Cause: Bobbin inserted incorrectly or upper thread not through take-up lever
- Fix: Remove bobbin, check threading direction, re-insert. Re-thread upper thread completely
- Prevention: Follow manual’s bobbin diagram exactly
Problem: Skipped stitches
- Cause: Needle inserted incorrectly, needle bent or dull, or wrong needle type
- Fix: Remove needle, check flat side orientation, install fresh needle
- Note: Universal needles work for most cotton; specialty fabrics need specialty needles
Problem: Machine won’t sew at all
- Cause: Presser foot is up, bobbin winder is still engaged, or machine isn’t threaded
- Fix: Lower presser foot lever, disengage bobbin winder, verify threading
Problem: Fabric won’t feed through
- Cause: Presser foot up, feed dogs lowered, or stitch length set to zero
- Fix: Lower presser foot, raise feed dogs (check manual), set stitch length to 2.5mm
Problem: Thread keeps breaking
- Cause: Thread caught on spool, tension too tight, or needle eye is rough
- Fix: Check thread unwinds freely, lower tension, replace needle
If you’ve checked all these items and the machine still won’t sew properly, contact the retailer or manufacturer. New machines are occasionally defective, and most companies will replace them within 30 days or send a technician to diagnose the problem.
For ongoing stitch problems, see our guides on why machines skip stitches and jamming issues.
Common Mistakes When Setting Up a Sewing Machine for the First Time
First-time sewing machine setup mistakes include threading with the presser foot down (causing tension problems), inserting the bobbin in the wrong direction (causing jams), missing the take-up lever when threading (causing loops), installing the needle incorrectly (causing skipped stitches), and forgetting to lower the presser foot before sewing (preventing fabric from feeding). These errors are universal among beginners but easy to avoid once you know what to watch for.
The top 10 setup mistakes:
Threading with presser foot down
- Why it matters: Tension discs stay closed, thread doesn’t seat properly
- Result: Loose, loopy stitches that can’t be fixed by adjusting tension
- Fix: Always raise presser foot before threading
Missing the take-up lever
- Why it matters: This lever controls thread flow during stitching
- Result: Thread bunches, breaks, or creates loops
- Fix: Turn handwheel to raise take-up lever to highest point, verify thread passes through it
Bobbin inserted backward
- Why it matters: Thread must unwind in the correct direction for proper tension
- Result: Jams, thread nests, poor stitch quality
- Fix: Check manual diagram, most bobbins unwind counterclockwise
Needle installed with flat side facing wrong direction
- Why it matters: Needle must align with the hook mechanism
- Result: Skipped stitches, no stitches at all
- Fix: Flat side usually faces back; push needle up as far as it goes before tightening
Not bringing up bobbin thread before sewing
- Why it matters: Prevents thread tangles on first stitches
- Result: Thread nest under fabric on first seam
- Fix: Turn handwheel one rotation while holding upper thread, pull up bobbin thread
Forgetting to lower presser foot
- Why it matters: Presser foot pressure is needed to engage feed dogs
- Result: Fabric won’t move, stitches form in one spot
- Fix: Lower presser foot lever before pressing pedal
Using wrong spool cap size
- Why it matters: Thread must unwind smoothly without catching
- Result: Uneven tension, thread breaks
- Fix: Use small cap for small spools, large cap for large spools
Skipping the test stitch phase
- Why it matters: Problems are easier to fix before you start a project
- Result: Ruined fabric, frustration
- Fix: Always test on scrap fabric first
Not consulting the manual
- Why it matters: Every machine has unique features and threading paths
- Result: Incorrect setup, missed features
- Fix: Keep manual nearby, reference it frequently
Pulling fabric through instead of letting feed dogs do the work
- Why it matters: Feed dogs control fabric movement and stitch quality
- Result: Broken needles, skipped stitches, uneven seams
- Fix: Guide fabric gently, let the machine pull it through
Pro tip: Take photos of your correctly threaded machine from multiple angles. When you need to re-thread later, these photos serve as a quick reference guide specific to your model.
Do Beginners Need Help Setting Up Their First Sewing Machine
Most beginners can successfully set up their first sewing machine independently using the instruction manual, but having an experienced sewer available for the first setup reduces frustration and cuts setup time by 50-70%. The mechanical process isn’t complex, but threading paths and bobbin insertion can be confusing when you’ve never seen them before, and an experienced person can quickly identify common mistakes that might take a beginner an hour to troubleshoot.
Advantages of solo setup:
- You learn your machine thoroughly from the start
- You build confidence in troubleshooting
- You can work at your own pace without feeling rushed
- You develop problem-solving skills you’ll need later
Advantages of guided setup:
- Faster initial setup (10-15 minutes vs 30-60 minutes)
- Immediate feedback on mistakes
- Learn tips and tricks not in the manual
- Build confidence through successful first stitches
- Ask questions as they arise
Best approach for most beginners:
- Read the manual first before opening the machine
- Attempt setup yourself following the step-by-step instructions
- Take photos of each step for reference
- Call for help if you’re stuck after 15-20 minutes of troubleshooting
- Join a beginner class at a local shop or online for ongoing support
Free resources for help:
- YouTube videos for your specific machine model
- Online sewing forums (Reddit’s r/sewing, PatternReview forums)
- Facebook groups for your machine brand
- Manufacturer’s customer service phone line
- Local library sewing classes
When professional help is worth it:
- You’ve never seen a sewing machine threaded before
- You have a learning disability that makes technical diagrams difficult
- You’re setting up a vintage machine without a manual
- You’ve attempted setup multiple times and can’t get proper stitches
- You’re teaching a child and want to ensure safe, correct operation
Remember that every experienced sewer struggled with their first setup. The confusion you feel is normal and temporary. By your third or fourth threading, the process will feel automatic.
How Long Does It Take to Set Up a New Sewing Machine
Setting up a new sewing machine takes 20-45 minutes for beginners following the instruction manual carefully, 10-15 minutes for experienced sewers, and 5-10 minutes for professionals. Time varies based on machine complexity (mechanical machines are faster than computerized models), whether you’ve set up a machine before, and how much troubleshooting is needed to achieve proper stitches.
Time breakdown by experience level:
- Complete beginner: 30-60 minutes (including reading manual and troubleshooting)
- Beginner with guidance: 15-25 minutes
- Intermediate sewer: 15-20 minutes
- Experienced sewer: 10-15 minutes
- Professional: 5-10 minutes
Time breakdown by task:
- Unpacking and inspection: 5-10 minutes
- Reading relevant manual sections: 10-15 minutes (first time)
- Installing needle: 1-2 minutes
- Winding bobbin: 2-3 minutes
- Inserting bobbin: 1-3 minutes
- Threading upper thread: 3-5 minutes (first time), 1-2 minutes (with practice)
- Test stitching and adjustment: 5-10 minutes
Factors that add time:
- Missing or unclear manual (add 15-30 minutes for online research)
- Incorrect threading requiring re-do (add 10-15 minutes)
- Tension adjustment and troubleshooting (add 10-20 minutes)
- Computerized features requiring programming (add 10-30 minutes)
- Organizing and storing accessories (add 5-10 minutes)
Factors that save time:
- Clear, illustrated manual with step-by-step photos
- Color-coded threading guides printed on machine body
- Previous experience with any sewing machine
- Watching a setup video for your model before starting
- Having an experienced sewer available for questions
Realistic first-time timeline:
Plan for 45-60 minutes of uninterrupted time for your first setup. This allows you to work carefully without rushing, read the manual thoroughly, and troubleshoot any issues. Your second setup (when you need to re-thread or set up after moving the machine) will take less than half that time.
Speed isn’t the goal: Taking extra time on your first setup to understand each step thoroughly will save you hours of frustration later. Rushing through setup and missing a threading guide or installing the bobbin incorrectly leads to poor stitches and confusion about what’s wrong.
What to Do If Bobbin Thread Keeps Jamming on New Machine
If bobbin thread keeps jamming on a new machine, remove the bobbin and re-insert it in the correct direction (thread should unwind counterclockwise in most machines), verify the bobbin is wound evenly without loose spots, check that you’re using the correct bobbin type for your machine, and ensure the upper thread is properly seated in the tension discs by re-threading with the presser foot up. Bobbin jamming in new machines is almost always a setup error rather than a mechanical defect.
Step-by-step jamming diagnosis:
Step 1: Remove everything and start fresh
- Turn off machine and remove fabric
- Cut threads and remove bobbin
- Remove bobbin case if applicable
- Clean out any thread bits or lint with a brush
Step 2: Check the bobbin itself
- Verify it’s the correct bobbin for your machine (wrong bobbins cause 30% of jamming issues)
- Check that thread is wound evenly, not loose or lumpy
- Ensure thread isn’t caught under the bobbin or wrapped around the spindle
- Re-wind if the bobbin looks uneven
Step 3: Re-insert bobbin correctly
- Check manual diagram for correct thread direction
- Most bobbins unwind counterclockwise when you pull the thread
- Thread must pass through the tension slot or under the tension spring
- Leave 4-6 inches of tail thread
- Bobbin should sit flat in the case, not tilted
Step 4: Re-thread upper thread completely
- Raise presser foot before threading
- Follow every guide in the threading path
- Verify thread passes through take-up lever
- Check thread is between tension discs (pull thread, you should feel resistance)
- Thread needle from correct direction
Step 5: Bring up bobbin thread properly
- Hold upper thread tail
- Turn handwheel one full rotation
- Pull gently on upper thread to bring up bobbin thread
- Pull both threads toward the back, leaving 4-6 inches
Step 6: Test with proper technique
- Place two layers of cotton fabric under presser foot
- Lower presser foot
- Hold thread tails toward back for first 3-4 stitches
- Sew slowly at first
If jamming continues:
- Check needle is installed correctly (flat side back, pushed all the way up)
- Verify needle isn’t bent or dull (replace with fresh needle)
- Ensure you’re not pulling or pushing fabric (let feed dogs do the work)
- Check that bobbin case (if removable) is fully clicked into place
- Verify feed dogs are raised and not set to darning/embroidery position
When to seek help:
If you’ve followed all these steps and jamming continues, contact the retailer or manufacturer. Occasionally a new machine has a defective bobbin case or timing issue that requires professional adjustment. Most manufacturers will send a technician or replace the machine if it’s defective within the first 30 days.
For more jamming solutions, see our comprehensive guide to sewing machine jamming.
Best First Project to Test New Sewing Machine Setup
The best first project to test a new sewing machine setup is a simple fabric coaster or pot holder using two layers of cotton quilting fabric, which allows you to practice straight stitching, turning corners, backstitching, and basic seam finishing without the pressure of creating something complex. This project takes 15-20 minutes, uses minimal fabric, and immediately shows whether your tension, threading, and basic settings are correct.
Why coasters make the perfect test project:
- Simple geometry: Straight lines and 90-degree corners only
- Forgiving fabric: Cotton quilting fabric is easy to sew and shows stitch quality clearly
- Quick completion: Finish in 15-20 minutes
- Useful result: You’ll actually use what you make
- Tests key skills: Straight stitching, corners, backstitching, trimming
- Low stakes: Mistakes don’t matter on a practice piece
Coaster test project instructions:
- Cut two 5-inch squares of cotton fabric
- Place right sides together, pin if desired
- Set machine to straight stitch, 2.5mm length
- Lower presser foot
- Backstitch 3-4 stitches at the start
- Sew around all four sides, leaving a 2-inch opening on one side
- Backstitch at the end
- Trim corners at 45-degree angle
- Turn right side out through opening
- Press flat with iron
- Topstitch around all edges, closing the opening
What this project tests:
- Straight stitch quality and consistency
- Tension balance (check both sides of fabric)
- Corner pivoting technique
- Backstitch function
- Thread strength and needle performance
- Your comfort with basic machine operation
Other good first projects:
- Fabric bookmark: Even simpler than a coaster, just two rectangles sewn together
- Simple tote bag: Tests longer seams and bag construction basics
- Pillowcase: Larger project but still beginner-friendly
- Cloth napkins: Practice hemming and straight stitching
Projects to avoid as your first test:
- Garments with curves, darts, or zippers
- Stretchy knit fabrics (require special techniques)
- Very thick fabrics like denim or canvas (need needle and tension adjustments)
- Projects with buttonholes (save this for after you’re comfortable with basics)
- Anything with a deadline or high emotional value
After your test project:
Once you’ve completed a simple test project successfully, you’ll have confidence that your machine is set up correctly. You’ll also have a baseline for what good stitches look like, making it easier to identify problems if they arise later.
Save your test piece as a reference. When you change thread, fabric type, or settings later, you can compare new stitches to your original test to see if adjustments are needed.
Frequently Asked Questions
Should I wash fabric before testing my new sewing machine?
No, you don’t need to prewash fabric for initial machine testing. Use any clean cotton scrap fabric you have on hand for test stitches. However, always prewash fabric before starting an actual project to prevent shrinkage and color bleeding in the finished item.
Can I use any thread for my first setup?
Use all-purpose polyester thread in medium weight for your first setup and testing. This thread works well with most fabrics and is what machine tension is typically calibrated for. Avoid specialty threads (metallic, invisible, heavy-duty) until you’re comfortable with basic operation.
Do I need to register my sewing machine warranty?
Yes, register your warranty within 30 days of purchase. Most manufacturers require registration for warranty service, and some offer extended coverage if you register promptly. Keep your receipt and warranty card in a safe place with your manual.
How do I know if my bobbin is the right type?
Check your manual for the correct bobbin class (Class 15, Class 66, etc.). Using the wrong bobbin type causes tension problems and jamming. If you’re unsure, take one of the bobbins that came with your machine to a sewing shop for identification.
Can I leave my sewing machine threaded between uses?
Yes, you can leave your machine threaded between sewing sessions. However, raise the presser foot to release tension on the thread and discs. For storage longer than a few weeks, remove thread to prevent tension spring fatigue and dust accumulation.
Why does my machine make a loud noise when I first turn it on?
Some computerized machines run a brief self-diagnostic when powered on, which can sound loud. This is normal. However, grinding, clicking, or rattling during sewing indicates a problem, check that you’ve removed all packing materials and that the bobbin is inserted correctly.
Should I use the same thread in the bobbin and on top?
For most projects, yes, using the same thread color and type in both bobbin and upper thread gives the best results. However, some techniques (like quilting) intentionally use different colors. For testing and learning, use contrasting colors so you can see how tension affects each thread.
How tight should I tighten the needle screw?
Tighten the needle screw firmly with your fingers or the small screwdriver that came with your machine. The needle shouldn’t wiggle at all. However, don’t over-tighten with excessive force, which can strip the screw or crack the needle clamp.
What do I do if my instruction manual is missing?
Search for your machine’s model number plus “manual PDF” online. Most manufacturers offer free manual downloads on their websites. If you can’t find it, contact the manufacturer’s customer service, they’ll often email a PDF or mail a printed copy for free or a small fee.
Can I sew without the foot pedal?
Some computerized machines have a start/stop button that lets you sew without the foot pedal, controlling speed with a slider. Check your manual to see if your model has this feature. Mechanical machines require the foot pedal to operate.
How do I know what stitch length to use?
Start with 2.5mm for most medium-weight cotton fabrics. Use shorter stitches (1.5-2mm) for lightweight fabrics and curves, longer stitches (3-4mm) for heavy fabrics and basting. Your manual should include a stitch length guide for different fabric types.
Should I cover my machine when not in use?
Yes, cover your machine with the included dust cover or a cloth to protect it from dust, pet hair, and accidental spills. Dust accumulation in the bobbin area and tension assembly causes problems over time. If your machine didn’t come with a cover, a pillowcase works well.
Conclusion
Setting up a new sewing machine out of the box is a straightforward process that becomes second nature after the first attempt. By following the systematic steps outlined in this guide, unpacking carefully, threading correctly with the presser foot up, inserting the bobbin in the right direction, and testing on scrap fabric, you’ll have your machine ready to sew in 20-45 minutes.
Remember that the most common setup problems stem from threading with the presser foot down, missing the take-up lever, or inserting the bobbin backward. These mistakes are easy to fix once you know what to look for. Take your time with the initial setup, refer to your manual frequently, and don’t hesitate to re-thread if stitches don’t look right.
Your next steps:
- Complete your setup following the step-by-step process in this guide
- Sew a test project like a simple coaster to verify everything works correctly
- Keep your manual handy for reference as you learn your machine’s features
- Practice basic techniques on scrap fabric before starting projects
- Join a sewing community online or locally for ongoing support and inspiration
With your machine properly set up, you’re ready to start your sewing journey. Every expert sewer started exactly where you are now, and the skills you build from this first setup will serve you throughout your creative life. For ongoing guidance, explore our resources on sewing for beginners and basic sewing techniques.


