


Quick Answer
Yes, you can absolutely teach yourself to sew. Most successful sewists today learned independently using free online tutorials, YouTube videos, and practice projects. With a basic sewing machine, essential supplies (costing $50-150 to start), and consistent practice over 3-6 months, beginners can master fundamental skills like straight stitching, hemming, and simple garment construction without formal instruction.
Key Takeaways
- Self-teaching is highly effective: 70% of modern sewists learn primarily through online resources rather than formal classes
- Timeline: Expect 3-6 months of regular practice to become comfortable with basic techniques
- Startup cost: $50-150 for essential supplies including a beginner machine, thread, scissors, and fabric
- No age limit: People successfully teach themselves to sew from age 8 to 80+
- Machine optional: Hand-sewing skills can be learned first, though a machine accelerates progress
- Free resources work: YouTube tutorials and sewing blogs provide comprehensive instruction at no cost
- Common mistakes are fixable: Thread bunching, skipped stitches, and tension issues resolve with troubleshooting
- Start simple: Pillowcases, tote bags, and elastic-waist skirts make ideal first projects
What Are the Basic Sewing Skills Beginners Need to Learn First?
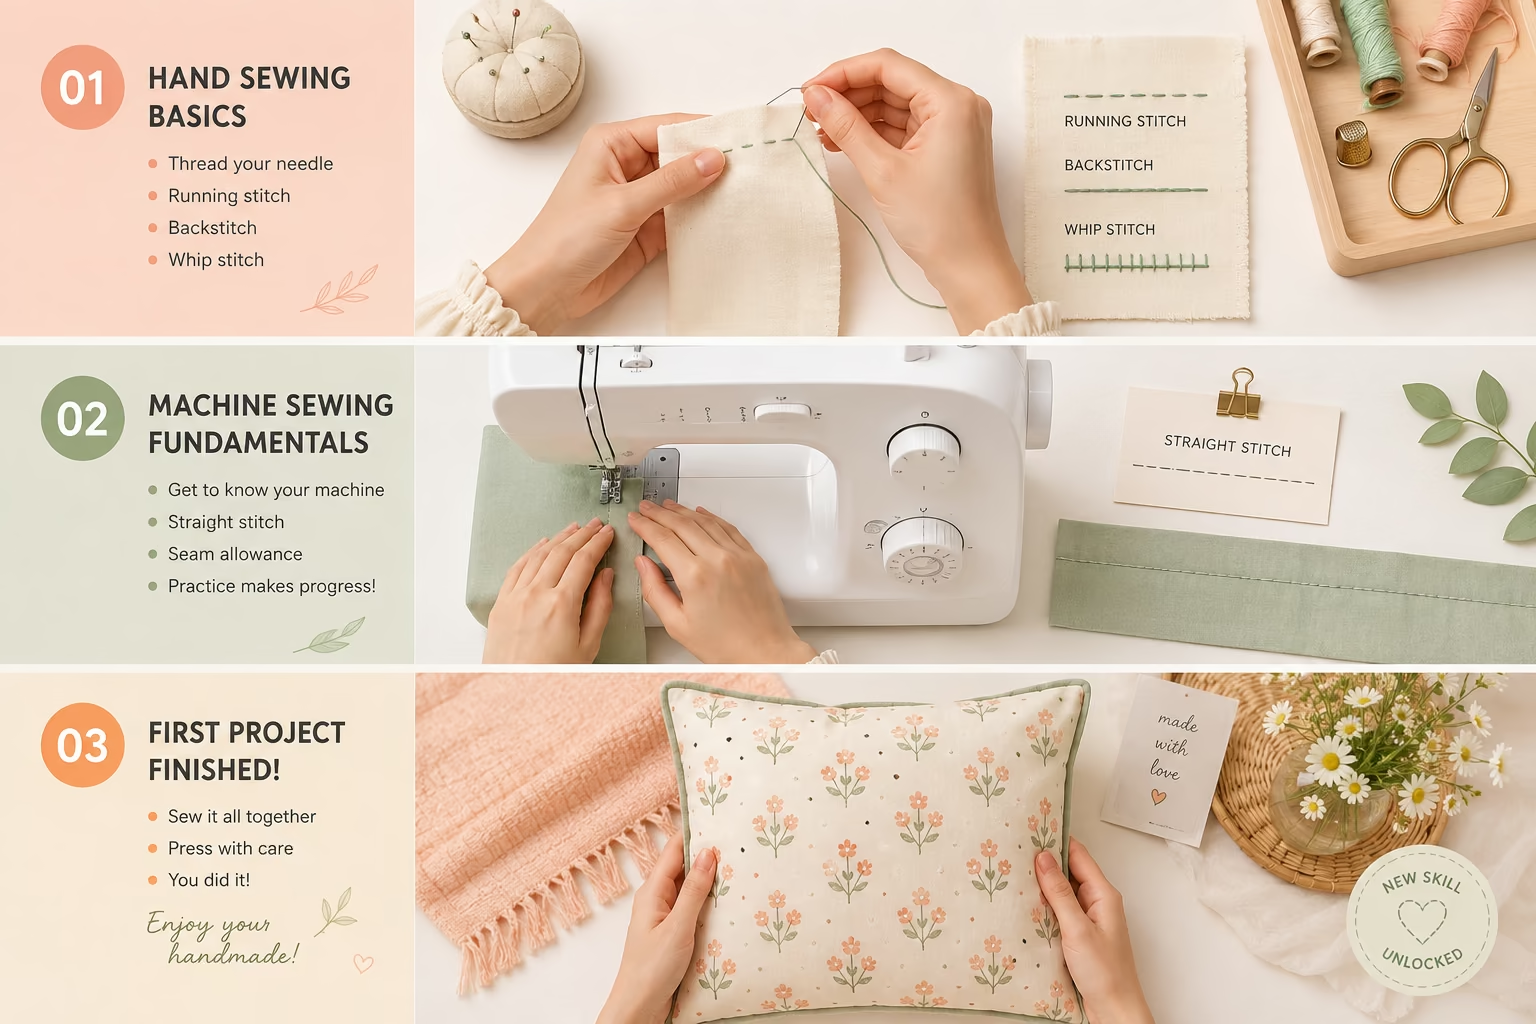
The essential foundation skills for self-taught sewists include threading a machine, sewing straight seams, understanding seam allowances, and basic hand-stitching. These core techniques form the building blocks for every sewing project.
Start with these fundamental skills in order:
Hand-Sewing Basics (Week 1-2)
- Threading a needle and tying knots
- Running stitch and backstitch
- Hemming by hand
- Sewing on buttons
Machine Fundamentals (Week 2-4)
- Threading the machine (both top thread and bobbin)
- Adjusting thread tension
- Sewing straight lines at consistent seam allowances (typically 5/8 inch for garments, 1/4 inch for quilting)
- Pivoting corners and curves
- Backstitching to secure seams
Fabric Handling (Week 4-6)
- Cutting fabric accurately with proper grain alignment
- Pinning and basting
- Pressing seams open or to one side
- Understanding fabric types and their behavior
Common mistake: Beginners often skip hand-sewing practice and jump straight to the machine. This creates problems because hand-basting and finishing techniques remain essential even for machine sewists. Spend at least a few hours practicing hand stitches before moving to powered equipment.
Choose straight-stitch projects first. Avoid patterns requiring buttonholes, zippers, or curved seams until you’ve mastered basic straight seams with consistent seam allowances.
How Long Does It Take to Teach Yourself to Sew?
Most self-taught beginners achieve basic competency in 3-6 months with regular practice (3-5 hours per week). You can complete simple projects like pillowcases or tote bags within your first month, while fitted garments typically require 6-12 months of skill development.
Realistic Timeline Breakdown:
- Week 1-2: Hand-sewing basics, machine threading, first straight seams
- Month 1: Complete first simple project (pillowcase, simple tote)
- Months 2-3: Master tension adjustment, corners, topstitching, simple garment (elastic-waist skirt)
- Months 4-6: Tackle zippers, buttonholes, basic fitting adjustments
- Months 6-12: Sew fitted garments, work with challenging fabrics (knits, silk)
- Year 2+: Develop personal style, tackle advanced techniques (tailoring, couture methods)
Practice frequency matters more than total time. Sewing 30 minutes daily produces faster progress than one 3-hour session weekly because muscle memory and problem-solving skills develop through repetition.
Edge case: If you’re learning specific techniques rather than comprehensive sewing (for example, just hemming pants or making simple repairs), you can achieve functional competency in 2-4 weeks of focused practice on those specific skills.
Best Sewing Machine for Self-Taught Beginners
Self-taught beginners need machines with intuitive threading, adjustable stitch length and width, and reliable straight and zigzag stitches. The best beginner machines cost $150-300 and include Brother CS6000i, Singer Heavy Duty 4452, and Janome 2212.
Essential Features for Self-Teaching:
- Clear threading diagrams printed on the machine body
- Automatic needle threader (saves frustration)
- Drop-in bobbin (easier than front-loading)
- Adjustable presser foot pressure (helps with different fabric weights)
- Free arm (for sewing cuffs and sleeves)
- At least 10 built-in stitches (straight, zigzag, blind hem, buttonhole)
Top Recommendations for 2026:
| Machine | Price Range | Best For | Key Advantage |
|---|---|---|---|
| Brother CS6000i | $150-180 | All-around beginners | 60 stitches, excellent manual |
| Singer Heavy Duty 4452 | $200-250 | Thick fabrics, durability | Metal frame, powerful motor |
| Janome 2212 | $180-220 | Simplicity, reliability | Mechanical (no computer issues) |
| Brother XM2701 | $100-130 | Tight budgets | Lightweight, basic features |
Choose a mechanical machine over computerized for your first machine. Mechanical machines have fewer failure points and teach you to understand tension and stitch formation better. You can upgrade to computerized features once you understand the fundamentals.
Common mistake: Buying a $50 mini machine or toy-grade machine. These create more problems than they solve, poor tension, skipped stitches, and weak motors make learning nearly impossible. Save an extra month if needed to afford a quality beginner machine in the $150+ range.
For detailed guidance on selecting your first machine, visit our Best Sewing Machine for Beginners guide.

37 UNIQUE BUILT-IN STITCHES: The XM3700 lightweight sewing machine features 37 unique built-in stitches, and a one-step auto-size buttonhole

27 Unique Built-in Stitches: The Brother XM2701 sewing machine includes 27 built-in stitches including decorative, blind hem, zigzag, and stretch stitches and an auto-size buttonhole

Effortless Beginner-Friendly Sewing – Jumpstart your creative journey with a tailoring machine designed for first timers. The Cat Fancy simplifies every step from threading to stitch selection, letting you focus on bringing your projects to life.
Free Online Sewing Tutorials vs Paid Sewing Classes: Which Is Better?
Free online tutorials work exceptionally well for self-motivated learners who can troubleshoot independently, while paid classes provide structured curriculum and immediate feedback. For most beginners in 2026, starting with free resources and adding paid instruction for specific challenges offers the best value.
Free Online Resources (Pros):
- Learn at your own pace and schedule
- Pause and rewatch difficult sections
- Access thousands of project tutorials
- Zero cost barrier to entry
- Diverse teaching styles (find instructors who match your learning preference)
Free Online Resources (Cons):
- No personalized feedback on your technique
- Must self-diagnose problems
- Can feel overwhelming with too many options
- Quality varies dramatically between creators
Paid Classes (Pros):
- Structured curriculum with logical skill progression
- Instructor can spot and correct technique problems immediately
- Built-in accountability and deadlines
- Community of fellow learners
- Often includes patterns and materials
Paid Classes (Cons):
- $150-500 for multi-week courses
- Fixed schedule (less flexibility)
- May move too fast or too slow for your pace
- Limited to instructor’s teaching style
Decision rule: Start with free YouTube tutorials and sewing blogs for your first 2-3 months. If you hit persistent problems (tension issues, fit problems, specific techniques), invest in a targeted paid class or one-on-one session ($30-75) to address that specific challenge. This hybrid approach costs $50-150 total versus $300-500 for comprehensive classes.
Best free resources for 2026: Professor Pincushion (YouTube), Evelyn Wood (basics), Tilly and the Buttons (garment sewing), and Melly Sews (home décor projects).

𝑩𝒊𝒓𝒕𝒉𝒅𝒂𝒚 𝑮𝒊𝒇𝒕𝒔 𝑰𝒅𝒆𝒂𝒔: This sewing kit is terrific gifts for people who travel frequently, mother, grandmother, backpacker, adults, kids and teen girls! The emergency kit is also suitable for both men and women, beginners and professionals alike, and it is definitely something that everyone needs in their life

✅Newly Upgraded Sewing Kit- Including more than 200pcs sewing accessories in this sewing set -43XL sewing thread ( Extra Black & White threads,5 rainbown threads ,and the length has been upgraded from 120 yards to 150 yards),2 Professional scissors,1 seam ripper ,1 pin cushion,1 tape mesure,30 needles,30 buttons etc.

The most XL spools of thread in sewing kit: This sewing kit contains 38 high quality XL thread spools. The beautiful vibrant colors are ideal for your daily needs. 43 inches excellent assorted threads of more longer threads,thick threads, not easy to break, reliable for it!
Common Mistakes When Learning to Sew by Yourself
The most common self-teaching mistakes include skipping tension adjustments, using dull needles, ignoring fabric grain, and attempting complex projects too early. These errors cause frustration but are easily corrected once identified.
Top 10 Beginner Mistakes:
Not changing needles regularly: Dull needles cause skipped stitches, puckering, and fabric damage. Change your needle every 8-10 hours of sewing or when starting a new project.
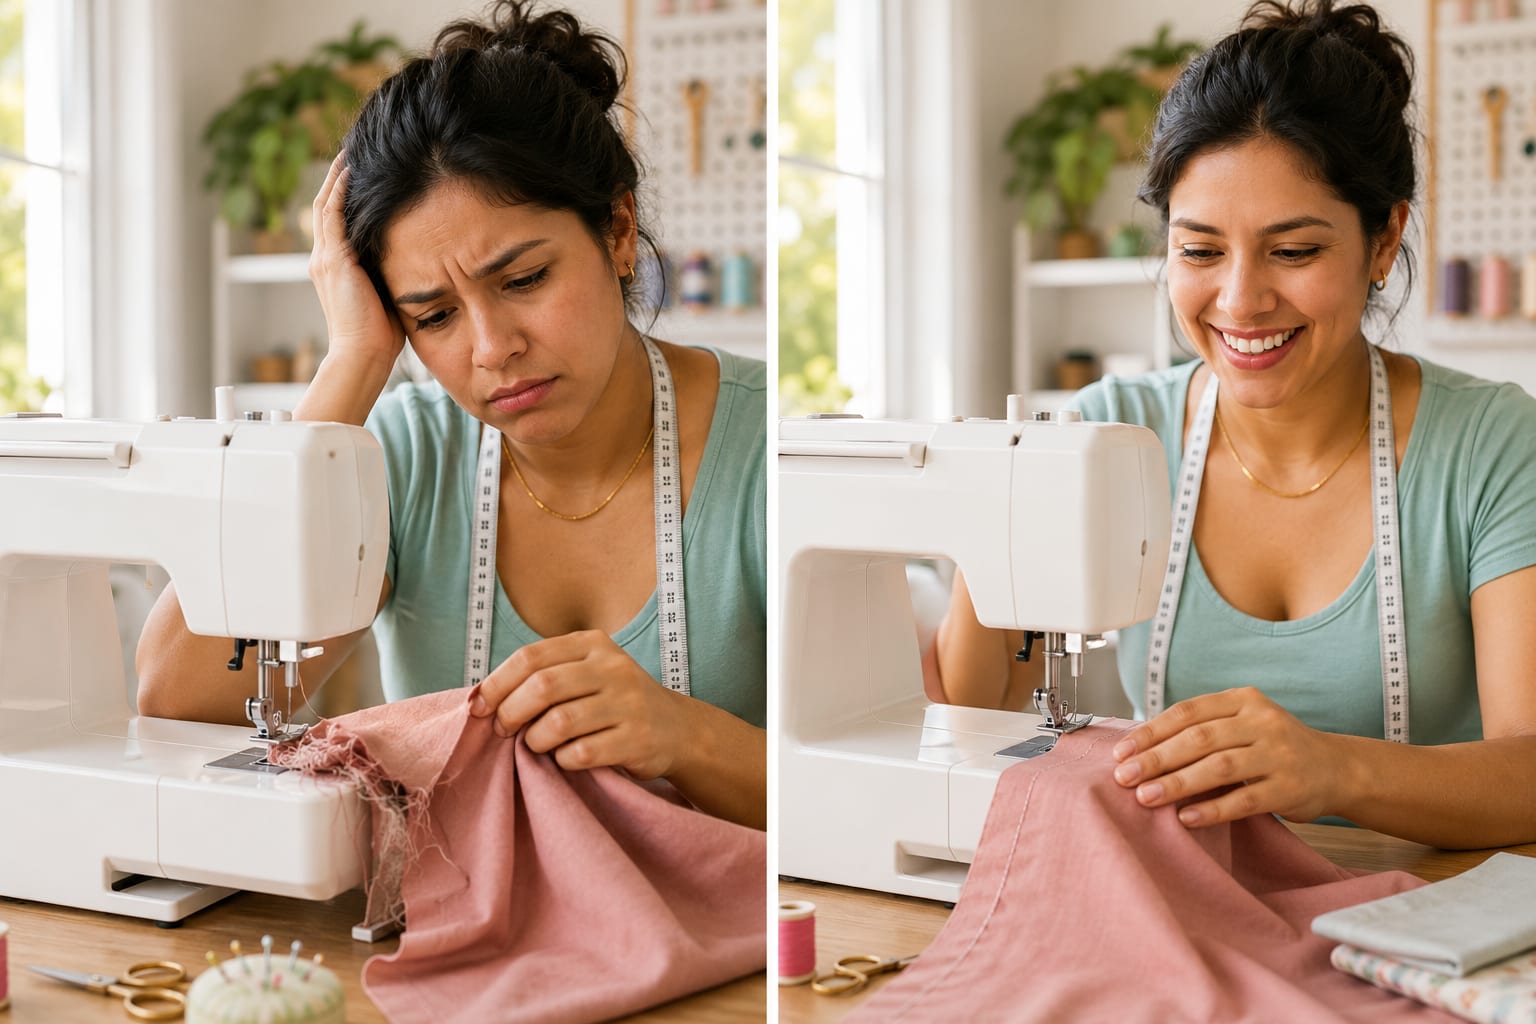
Ignoring thread tension: Loops on top or bottom indicate tension problems. Learn to adjust both upper and lower tension rather than fighting your machine.
Skipping fabric prep: Prewash fabric to prevent shrinkage and press before cutting. Wrinkled fabric creates inaccurate cuts.
Cutting against the grain: Fabric grain affects drape and stretch. Always identify grainline before cutting pattern pieces.
Not reading pattern instructions completely: Skim the entire instruction sheet before starting. Many steps require preparation or specific order.
Using wrong needle for fabric: Universal needles work for woven cotton, but knits need ballpoint needles and leather needs sharp wedge needles.
Sewing too fast: Speed causes mistakes. Slow, controlled stitching produces better results, especially when learning.
Skipping pins or basting: Proper pinning prevents fabric shifting. Pin perpendicular to seam line every 2-3 inches.
Not pressing as you go: Pressing seams after each step creates professional results. Trying to press everything at the end doesn’t work.
Choosing inappropriate first projects: Avoid fitted garments, slippery fabrics (silk, satin), and stretchy knits for your first 5-10 projects.
Quick fix for the most frustrating problem: If your thread keeps bunching up, rethread both top and bobbin completely, check that the presser foot is down when starting, and verify the bobbin is inserted correctly. This solves 80% of thread bunching issues.
Can You Learn to Sew Without a Sewing Machine?
Yes, you can learn foundational sewing skills entirely by hand, and many traditional techniques require hand-sewing regardless of machine ownership. Hand-sewing teaches stitch formation, tension control, and fabric behavior, knowledge that transfers directly to machine sewing.
Skills You Can Master by Hand:
- Hemming pants, skirts, and curtains
- Mending tears and holes
- Sewing on buttons and snaps
- Creating simple gathered skirts
- Quilting (traditional hand-quilting)
- Embroidery and decorative stitching
- Attaching patches and appliqués
Hand-Sewing Advantages:
- Zero equipment cost (needle and thread under $5)
- Portable, sew anywhere
- Quiet (no machine noise)
- Better understanding of stitch mechanics
- Essential for finishing work even with a machine
Hand-Sewing Limitations:
- Much slower (10-20x longer than machine sewing)
- Physically tiring for long seams
- Difficult to achieve perfectly straight, even stitches
- Not practical for large projects (curtains, quilts, multiple garments)
Decision rule: If you’re unsure whether sewing will become a long-term hobby, start with hand-sewing for 2-4 weeks. Complete a few hand-sewn projects (hemmed napkins, simple drawstring bag, mended clothing). If you enjoy it and want to tackle larger projects, invest in a machine. If hand-sewing meets your needs (repairs and small projects), you may never need a machine.
Hybrid approach: Many experienced sewists use machines for long seams and construction, then finish with hand-sewing for hems, closures, and details. Learning both skills creates the most versatile skill set.
What Supplies Do I Need to Start Teaching Myself to Sew?
Essential beginner supplies cost $50-150 and include fabric shears, thread, pins, measuring tools, a seam ripper, and fabric. If using a machine, add $150-250 for a quality beginner model.
Absolute Essentials (Hand or Machine):
Cutting Tools ($15-30)
- 8-inch fabric shears (Gingher or Fiskars)
- Small thread snips or embroidery scissors
- Rotary cutter and mat (optional but helpful)
Measuring & Marking ($10-15)
- Measuring tape (60-inch)
- Clear quilting ruler (6×24 inches)
- Fabric marking pens or tailor’s chalk
- Seam gauge
Pins & Needles ($8-12)
- Glass-head straight pins (won’t melt when pressed)
- Hand-sewing needles (variety pack)
- Machine needles if using a machine (universal size 80/12 and 90/14)
Thread ($10-15)
- All-purpose polyester thread in white, black, and 2-3 neutral colors
- Avoid cheap thread, it breaks and sheds lint
Notions ($5-10)
- Seam ripper (you’ll use this constantly)
- Thimble (protects fingers during hand-sewing)
- Safety pins
Fabric ($15-30 for first projects)
- 2-3 yards of quilting cotton (easiest fabric for beginners)
- Avoid knits, silk, and slippery fabrics initially
Optional But Helpful ($20-40)
- Iron and ironing board (pressing is crucial)
- Point turner (for crisp corners)
- Fabric weights (alternative to pins when cutting)
- Pincushion
Total startup cost: $50-80 without machine, $200-330 with beginner machine.
Money-saving tips: Buy fabric from discount stores (Walmart, Joann with coupons) for practice projects. Thrift stores often sell quality fabric shears and notions. Avoid buying specialty feet and attachments until you know you need them.
Common mistake: Buying too many supplies before understanding what you’ll actually use. Start with the essentials list above, then add tools as specific projects require them.

Complete Sewing Kit-The travel sewing kit contains all the necessary tools that are required for performing basic repairs-a scissor, threads (18 colors), 30 sewing needles, shirt buttons, seam ripper, needle threader tools and a foldable tape measure.

Size: 10-1/4" L x 7-1/2" W x 6" H

All In One DIY SEWING KIT - This Travel Sewing Kit contains all the sewing tools you need,including 38 high quality XL thread spools,needles, buttons, pins, hook, thimbles, pencil, threader, buttons, sewing pins, scissors, magnifier, measuring tape etc.With this repair sewing kit, no worry about rips, tears, holes, unraveled hems, missing buttons and other emergency clothes repairs.A best professional sewing set.
Is It Hard to Teach Yourself to Sew or Do You Need an Instructor?
Self-teaching sewing is moderately challenging but entirely achievable for most people. The main difficulties are diagnosing machine problems, understanding pattern instructions, and maintaining motivation through frustrating learning curves, all manageable with online resources and persistence.
Self-Teaching Advantages:
- Learn exactly what interests you (skip irrelevant techniques)
- Progress at your own pace
- No class fees or schedule constraints
- Access to unlimited online resources
- Build strong problem-solving skills
Self-Teaching Challenges:
- No immediate feedback on technique errors
- Must research solutions to problems independently
- Easy to develop bad habits without correction
- Can feel isolated without sewing community
- Overwhelming number of online resources (decision paralysis)
When Self-Teaching Works Best:
- You’re comfortable with independent learning
- You can tolerate trial-and-error without frustration
- You have 3-5 hours weekly for practice
- You’re good at following written or video instructions
- You enjoy researching and troubleshooting
When an Instructor Helps:
- You learn better with hands-on demonstration
- You get discouraged easily by setbacks
- You have persistent machine problems you can’t diagnose
- You want structured curriculum and accountability
- You value social learning and community
Hybrid solution: Teach yourself basics using free resources, then take a single in-person or virtual class ($30-75) when you hit a specific roadblock. Many fabric stores offer free beginner classes with machine purchase, providing just enough guidance to get started.
Reality check: Thousands of people successfully teach themselves to sew every year using only YouTube and practice. If you can follow a recipe, assemble furniture, or learn a musical instrument independently, you can teach yourself to sew.
Best Beginner Sewing Projects to Practice On
The best first projects use simple rectangles, straight seams, and forgiving fabrics like quilting cotton. Start with pillowcases, tote bags, and elastic-waist skirts before progressing to fitted garments.
Perfect First Projects (In Order):
Project 1: Pillowcase (2-3 hours)
- Single straight seam
- Teaches measuring, cutting, and basic construction
- Immediate useful result
- Impossible to mess up badly
Project 2: Simple Tote Bag (3-4 hours)
- Straight seams and handles
- Introduces topstitching
- Reinforces seam finishing
- Practical everyday item
Project 3: Napkins or Placemats (4-6 hours for set of 4)
- Practice hemming and mitered corners
- Repetition builds consistency
- Low-stress (mistakes don’t matter)
Project 4: Elastic-Waist Skirt (4-6 hours)
- First garment project
- Simple construction (rectangle + elastic)
- Introduces casings and gathering
- Wearable result builds confidence
Project 5: Pajama Pants (5-8 hours)
- Introduces crotch seams and inseams
- Still relatively simple construction
- Comfortable, forgiving fit
- Practical wardrobe addition
Project 6: Simple Zipper Pouch (3-4 hours)
- First zipper installation
- Small scale (less intimidating)
- Teaches lining techniques
Avoid These as First Projects:
- Fitted shirts or dresses (require fitting knowledge)
- Anything with buttonholes (complex technique)
- Knit fabrics (require different techniques and needles)
- Jeans or structured pants (too many steps)
- Quilts (too large and time-consuming for first project)
Progression rule: Complete at least 3-5 simple projects before attempting your first fitted garment. Each project should introduce one new technique while reinforcing previous skills.
For more project ideas and sewing techniques, explore our beginner-friendly tutorials.
How Much Does It Cost to Learn Sewing at Home?
Learning to sew at home costs $200-400 for the first year, including a beginner sewing machine ($150-250), essential supplies ($50-80), and fabric for 5-10 practice projects ($50-100). Ongoing costs average $20-50 monthly for fabric and notions.
Detailed First-Year Budget:
Initial Equipment ($200-330)
- Beginner sewing machine: $150-250
- Fabric shears and scissors: $15-30
- Measuring tools: $10-15
- Pins, needles, thread: $15-25
- Seam ripper and notions: $5-10
- Iron (if you don’t own one): $15-30
First 10 Projects ($50-100)
- Fabric for practice projects: $3-8 per yard
- Patterns (optional, many free online): $0-30
- Zippers, elastic, buttons as needed: $10-20
Optional Learning Resources ($0-150)
- Free YouTube tutorials: $0
- Sewing books: $15-30
- Online course or class: $30-100
- Subscription to pattern service: $10-20/month
Total First Year: $250-580 depending on choices
Ongoing Costs (Year 2+)
- Fabric: $20-50/month (varies by project ambition)
- Thread and notions: $5-10/month
- Needle replacements: $5-10 every few months
- Machine maintenance: $50-75 annually (optional professional servicing)
Money-saving strategies:
- Use thrift store sheets and curtains for practice fabric ($2-5 per project)
- Join fabric swap groups online
- Shop sales at fabric stores (Joann regularly offers 50-60% off coupons)
- Start with free patterns and tutorials before buying premium patterns
- Buy thread in bulk or on sale
Cost comparison: Self-teaching at home costs $250-400 first year versus $500-1,200 for formal sewing classes plus equipment. Home learning provides better value for budget-conscious beginners.
Why Is My Thread Bunching Up When I Sew?
Thread bunching (also called bird’s nesting) happens when the upper thread isn’t properly caught by the bobbin thread, usually caused by incorrect threading, improper bobbin insertion, or sewing with the presser foot up. This is the most common beginner problem and is almost always fixable in under 5 minutes.
Immediate Fixes (Try in This Order):
Rethread the entire machine with presser foot UP (this releases tension discs)
- Remove thread completely
- Thread from spool to needle with foot raised
- Lower presser foot before sewing
Check bobbin insertion
- Remove bobbin and reinsert following manual diagram
- Ensure bobbin thread pulls smoothly with slight tension
- Verify bobbin is wound evenly (lumpy bobbins cause problems)
Verify presser foot is down when starting to sew
- Machine won’t form stitches properly with foot up
- This causes 30% of bunching complaints
Check needle installation
- Needle must be inserted fully and facing correct direction
- Flat side typically faces back (check your manual)
- Bent or dull needle causes thread problems
Adjust upper thread tension
- If bunching appears on bottom, upper tension is too loose
- Increase tension by 1-2 numbers and test
Less Common Causes:
- Wrong needle size for thread weight
- Lint buildup in bobbin case (clean regularly)
- Damaged needle plate or bobbin case
- Thread caught on spool or spool cap
Prevention: Always raise presser foot when threading, hold thread tails when starting a seam, and clean your bobbin case weekly.
For comprehensive troubleshooting, see our guide on why sewing machines jam.
Am I Too Old to Teach Myself How to Sew?
No age is too old to learn sewing. People successfully teach themselves to sew from childhood through their 80s and beyond. The learning curve is similar across age groups, though older learners often bring better patience and problem-solving skills to the process.
Age-Specific Considerations:
Children (Ages 8-12)
- Can learn basic hand-sewing and simple machine projects
- Need close supervision with machines and sharp tools
- Benefit from shorter practice sessions (20-30 minutes)
- Excellent fine motor skill development
Teens and Young Adults (13-25)
- Often learn fastest due to digital literacy (YouTube tutorials)
- May lack patience for slow, methodical practice
- Motivated by fashion and customization projects
Adults (26-55)
- Balance learning speed with life responsibilities
- Strong motivation (practical skills, creative outlet, cost savings)
- May struggle with perfectionism (need to accept learning mistakes)
Older Adults (55+)
- Bring patience and attention to detail
- May need reading glasses for threading and detail work
- Excellent retention of techniques once learned
- Often have more time for consistent practice
Physical Considerations (Any Age):
- Arthritis: Use needle threaders, ergonomic scissors, and take frequent breaks
- Vision: Good lighting and magnification help with detail work
- Mobility: Seated sewing accommodates most mobility limitations
- Hand strength: Start with hand-sewing to build strength gradually
Success factors matter more than age: Patience, willingness to make mistakes, and consistent practice determine success far more than age. A motivated 70-year-old often progresses faster than an impatient 25-year-old.
Inspiration: Many successful sewing bloggers and pattern designers started learning in their 50s, 60s, and 70s. The sewing community welcomes learners of all ages.
Self-Taught Sewing vs Taking a Class: Pros and Cons
Self-taught sewing offers flexibility and cost savings ($200-400 first year) while classes provide structure and immediate feedback ($500-1,200 first year). Most successful sewists combine both approaches, starting with self-teaching and adding targeted classes for specific challenges.
Self-Taught Sewing
Pros:
- Learn at your own pace and schedule
- Cost-effective ($200-400 vs $500-1,200)
- Choose projects that interest you
- Access unlimited free online resources
- Develop strong independent problem-solving
- No commute or fixed class times
Cons:
- No personalized feedback on technique
- Must diagnose problems independently
- Can develop bad habits without correction
- Potential isolation (no sewing community)
- Overwhelming resource options
- Requires self-motivation and discipline
Taking Sewing Classes
Pros:
- Structured curriculum with logical progression
- Immediate correction of technique errors
- Built-in accountability and deadlines
- Hands-on help with machine problems
- Social learning and community
- Access to classroom machines and tools
Cons:
- Higher cost ($300-500 for multi-week course)
- Fixed schedule (less flexibility)
- May progress too fast or slow for your pace
- Limited to instructor’s teaching style and preferences
- Requires commute and time commitment
- May cover techniques you don’t need
Hybrid Approach (Best Value):
- Start with free YouTube tutorials and online resources (Months 1-3)
- Join online sewing communities for support and troubleshooting
- Take a single targeted class when you hit a specific challenge (fitting, zippers, etc.)
- Attend occasional workshops for advanced techniques
- Total cost: $250-450 first year
Decision rule: Choose self-teaching if you’re self-motivated, comfortable with independent learning, and have limited budget or schedule flexibility. Choose classes if you need structure, get discouraged easily, or highly value social learning. Most sewists benefit from starting self-taught and adding classes selectively.
What Should I Sew First as a Complete Beginner?
Complete beginners should sew a simple pillowcase as their first project. It requires only straight seams, uses forgiving fabric (quilting cotton), takes 2-3 hours, and produces an immediately useful result while teaching fundamental skills like measuring, cutting, and seam finishing.
Why a Pillowcase Is the Perfect First Project:
- Single straight seam: Minimal complexity
- Rectangle construction: No curves or corners to navigate
- Quick completion: Finished in one sitting (builds confidence)
- Forgiving fabric: Quilting cotton is easy to handle
- Practical result: You’ll actually use what you make
- Low stakes: Mistakes don’t matter much
- Teaches essentials: Measuring, cutting, pinning, sewing, pressing
Simple Pillowcase Instructions:
- Cut fabric: One piece 27″ x 40″ (standard pillow)
- Fold in half (right sides together) to create 27″ x 20″ rectangle
- Pin along long edge and short edge (leaving one short end open)
- Sew 1/2″ seam along pinned edges
- Finish seam edges with zigzag or pinking shears
- Hem open edge: fold 1/4″ then 1″ and stitch
- Turn right side out and press
- Insert pillow
After Your First Pillowcase:
Project 2: Simple tote bag (introduces handles and topstitching) Project 3: Set of napkins (practice hemming and corners) Project 4: Elastic-waist skirt (first garment)
Alternative first projects if you don’t need pillowcases:
- Drawstring bag
- Table runner
- Simple apron (rectangle with ties)
Avoid as first projects: Anything with zippers, buttonholes, fitted seams, or challenging fabrics. Master straight seams on simple projects before adding complexity.
Motivation tip: Choose a fabric you genuinely like for your first project. You’ll be more motivated to finish and more proud of the result, even if the construction isn’t perfect.
Conclusion
Teaching yourself to sew is not only possible but increasingly common in 2026, with thousands of successful self-taught sewists learning through online resources and dedicated practice. The journey from complete beginner to confident sewist typically takes 3-6 months of regular practice, costs $200-400 for equipment and supplies, and requires no special talent, just patience, persistence, and willingness to learn from mistakes.
Start with essential supplies (quality scissors, basic thread, measuring tools, and a beginner-friendly sewing machine in the $150-250 range), then tackle simple projects like pillowcases and tote bags that build fundamental skills without overwhelming complexity. Use free YouTube tutorials and sewing blogs for instruction, troubleshoot common problems like thread tension issues systematically, and join online sewing communities for support and motivation.
Your Next Steps:
- This week: Gather essential supplies or order a beginner sewing machine
- Week 1: Practice hand-sewing basics (threading, knotting, running stitch)
- Week 2: Learn to thread your machine and sew straight practice seams
- Week 3-4: Complete your first pillowcase project
- Month 2: Tackle a simple tote bag and elastic-waist skirt
- Months 3-6: Progress to fitted garments and new techniques (zippers, buttonholes)
Remember that every expert sewist started exactly where you are now, with zero skills and plenty of questions. The difference between those who succeed and those who give up isn’t talent or natural ability; it’s simply consistent practice and willingness to work through frustrating moments. Your first projects won’t be perfect, and that’s completely normal. Focus on progress, not perfection, and you’ll be amazed at what you can create within a few months.
For ongoing support, explore our beginner sewing tips and troubleshooting guides to help you navigate common challenges as you develop your skills.
Frequently Asked Questions
How much does a beginner sewing machine cost? Quality beginner sewing machines cost $150-250. Models like the Brother CS6000i ($150-180) and Singer Heavy Duty 4452 ($200-250) offer reliable performance for learning. Avoid machines under $100, which typically have poor tension and weak motors that make learning frustrating.
Can I learn to sew in a month? You can learn basic skills and complete simple projects (pillowcases, tote bags) within a month of regular practice. However, achieving broader competency with various techniques and fabrics typically requires 3-6 months of consistent practice at 3-5 hours weekly.
Do I need to know how to hand-sew before using a machine? No, but spending 1-2 weeks learning basic hand-stitches helps you understand stitch formation and tension, which transfers to machine sewing. Hand-sewing skills also remain essential for finishing work, even when you primarily use a machine.
What fabric is easiest for beginners? Quilting cotton (100% cotton, medium weight) is the easiest beginner fabric. It doesn’t stretch, fray minimally, presses well, and sews predictably. Avoid knits, silk, satin, and very thin or thick fabrics until you’ve mastered basics on quilting cotton.
How do I fix bunched thread under my fabric? Rethread your entire machine with the presser foot UP, check that your bobbin is inserted correctly, and ensure the presser foot is DOWN when you start sewing. This fixes 90% of thread bunching problems. If issues persist, check for lint in the bobbin case and verify you’re using the correct needle size.
Is 50 too old to learn to sew? No, many people successfully learn to sew in their 50s, 60s, 70s, and beyond. Age doesn’t affect your ability to learn sewing skills. Older learners often bring better patience and attention to detail, which can actually accelerate learning compared to younger, more impatient beginners.
What’s the hardest part of teaching yourself to sew? Diagnosing machine problems independently is the most challenging aspect of self-teaching. Without an instructor to immediately identify issues like tension problems or incorrect threading, beginners must research solutions and troubleshoot systematically, which can be frustrating but builds valuable problem-solving skills.
Should I buy patterns or use free ones? Start with free patterns and tutorials for your first 5-10 projects. Once you understand basic construction and know what styles you enjoy making, invest in paid patterns ($10-20) that offer better instructions, fit, and design. Free patterns work perfectly well for learning fundamentals.
How often should I practice sewing? Practice 3-5 hours weekly, ideally in shorter sessions (30-60 minutes) several times per week rather than one long session. Frequent practice builds muscle memory and problem-solving skills faster than infrequent marathon sessions. Even 20-30 minutes daily produces excellent progress.
Can I sew clothes without knowing how to fit them? Yes, start with loose-fitting garments that don’t require precise fitting: elastic-waist skirts, pajama pants, oversized shirts, and kimono-style jackets. These forgiving styles let you practice garment construction before learning fitting adjustments, which are more advanced skills requiring 6-12 months of experience.
What’s the best YouTube channel for learning to sew? Professor Pincushion offers excellent beginner tutorials with clear instruction. Other top channels include Evelyn Wood (comprehensive basics), Tilly and the Buttons (garment sewing), and Melly Sews (home décor). Try several instructors to find teaching styles that match your learning preferences.
Do I need an expensive machine to learn properly? No, a $150-250 beginner machine teaches skills just as effectively as a $1,000+ machine. Expensive machines offer convenience features (automatic thread cutting, more stitch options) but don’t improve learning outcomes. Invest in quality fabric and good instruction rather than an expensive machine when starting out.


